Fast Crochet Patterns

  • Home
  • Contact
  • Patterns
    • Amigurumi
    • Granny Square
    • Flowers
    • Baby
    • Dress
    • Bags
    • Cardigan
    • Accessories
menu icon
go to homepage
  • Home
  • Contact
  • Patterns
    • Amigurumi
    • Granny Square
    • Flowers
    • Baby
    • Dress
    • Bags
    • Cardigan
    • Accessories
search icon
Homepage link
  • Home
  • Contact
  • Patterns
    • Amigurumi
    • Granny Square
    • Flowers
    • Baby
    • Dress
    • Bags
    • Cardigan
    • Accessories
×

Cozy Crochet Bear Pattern for Beginners to Cherish

August 17, 2026 by Publisher Leave a Comment

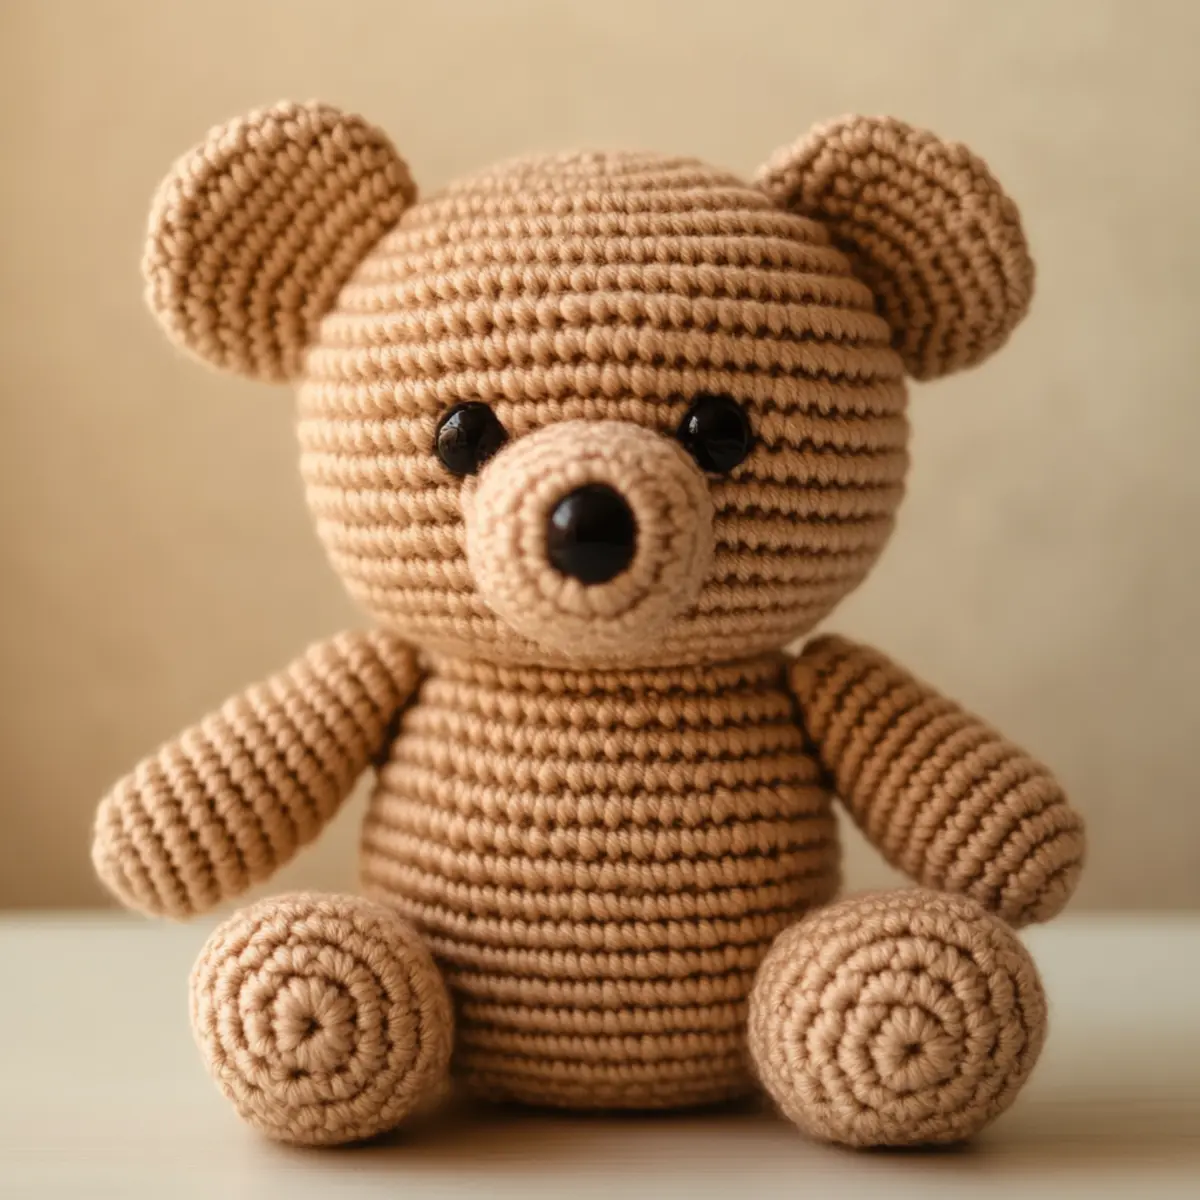
While browsing through my yarn stash recently, I stumbled upon some light brown yarn that instantly sparked a delightful idea—a cozy crochet bear pattern! This pattern, perfect for beginners, offers a delightful journey into the world of amigurumi. Not only is it a fantastic stash-buster, but it also allows you to craft a personalized toy that will warm hearts for years to come. As you delve into this project, you’ll enjoy the satisfaction of creating a cuddly bear that exudes charm and whimsy. The joy of crafting something unique and fulfilling is unmatched, and this crochet bear pattern is designed to make that experience accessible and enjoyable. What will your bear look like? Maybe it’ll sport a pastel hue for a whimsical vibe or stick to a classic neutral tone that enhances its timeless appeal.
Crochet Bear Pattern Materials & Tools

Yarn
Light brown medium worsted weight yarn – approximately 200 yards for a complete bear. Ideal for a soft and structured feel.
Black safety eyes – pick a size that provides a charming look for your bear’s face.
Stuffing – polyester fiberfill works best to give your bear a huggable shape.

Tools & Notions
4.0 mm (G/6) crochet hook – perfect for achieving tight stitches and a neat finish.
Yarn needle – necessary for sewing pieces together and weaving in ends.
Scissors – keep handy for trimming yarn ends while making your crochet bear pattern.

Why You’ll Love This Pattern

Crafting a plush teddy bear has never been simpler! This pattern stands out for its simplicity, making it perfect for novice crafters who are eager to learn. The texture creates a delightfully cuddly finished toy that can’t help but bring smiles. As a stash-buster, this project allows you to utilize leftover yarn, transforming odds and ends into cherished keepsakes. Additionally, you can explore customization options, like dressing your bear in unique colors, hats, or scarves—check out the Crochet Teddy Bear for more ideas! Value for time is another perk; with just a few hours of work, you’ll complete an adorable companion. Lastly, this project appeals not only to children but also to adults, making it an ideal handmade gift for all ages. Why settle for ordinary when you can infuse joy into your crochet endeavors?

Gauge & Sizing Notes for Crochet Bear Pattern

Checking your gauge is essential for the crochet bear pattern to turn out just right. A standard gauge is around 4×4 inches (10×10 cm) equals 12 sc across and 12 rows down for a dense, cuddly bear. If your swatch doesn’t match, you may need to adjust your hook size or starting chain. To resize your finished bear, you can change the number of initial rounds or stitches, adjusting the starting chain accordingly. If your swatch is too loose, consider going down a hook size to achieve that tighter, plush feel. Remember, keeping consistent tension while you crochet will lead to a uniform look for your adorable bear.

Step-by-Step Pattern for Crochet Bear Pattern

Row 1: Create Magic Ring
Start by making a magic ring. Ch 1, then work 6 sc into the ring. Pull the tail to close the ring tightly (6). This is the foundation of your crochet bear’s head and body.

Row 2: Increase Round
In this round, you’ll want to increase. 2 sc in each stitch around (12). Remember to place a stitch marker to keep track of your rounds as you work the crochet bear pattern.

Row 3: Continue Increasing
Continue increasing evenly across the round, placing 1 sc in the first stitch then 2 sc in the next (18). This helps form the round shape of your bear’s head and body.

Row 4: Form the Body Shape
Work 1 sc in each stitch around (18). By keeping this round stitch count consistent, you’re creating the main section of the bear that will hold everything together nicely.

Row 5: Create Body Depth
Begin to add depth to the body by working 1 sc in each stitch around again (18). This is crucial to ensure your bear has a plush feel and maintains its structure.

Row 6: Start Decreasing
Now we will transition. Work 1 sc in the first stitch and then 1 dec in the next (12). This forms the bottom rounding of your crochet teddy bear, making it more stable for sitting.

Row 7: Close the Body
Continue decreasing: 1 sc in the first stitch, then 1 dec in the next (6). At this point, the bear will start taking shape in terms of both form and proportion.

Row 8: Stuff and Finish Body
Before fully closing the body, make sure to stuff it lightly with polyester fiberfill for a huggable feel. Complete this round using 1 sc in the first stitch and 1 dec in the second (3).

Row 9: Create the Head
To form the head, chain up and work in the same way as the body, but you will stop increasing sooner. Work 1 sc in each stitch around until you feel it measures well (8). Ensure it’s proportionate to the body.

Row 10: Structure the Head
Maintain the head’s shape by working several more rounds of 1 sc in each stitch around without increases (8). The head should feel rounded and soft; this is where your crochet skills shine!

Row 11: Add Ears to Bear
Next, let’s make the ears. Create a magic ring, then chain up and increase by placing 6 sc in the ring before securing it and fastening off. Repeat to create the second ear.

Row 12: Attach Ears and Face
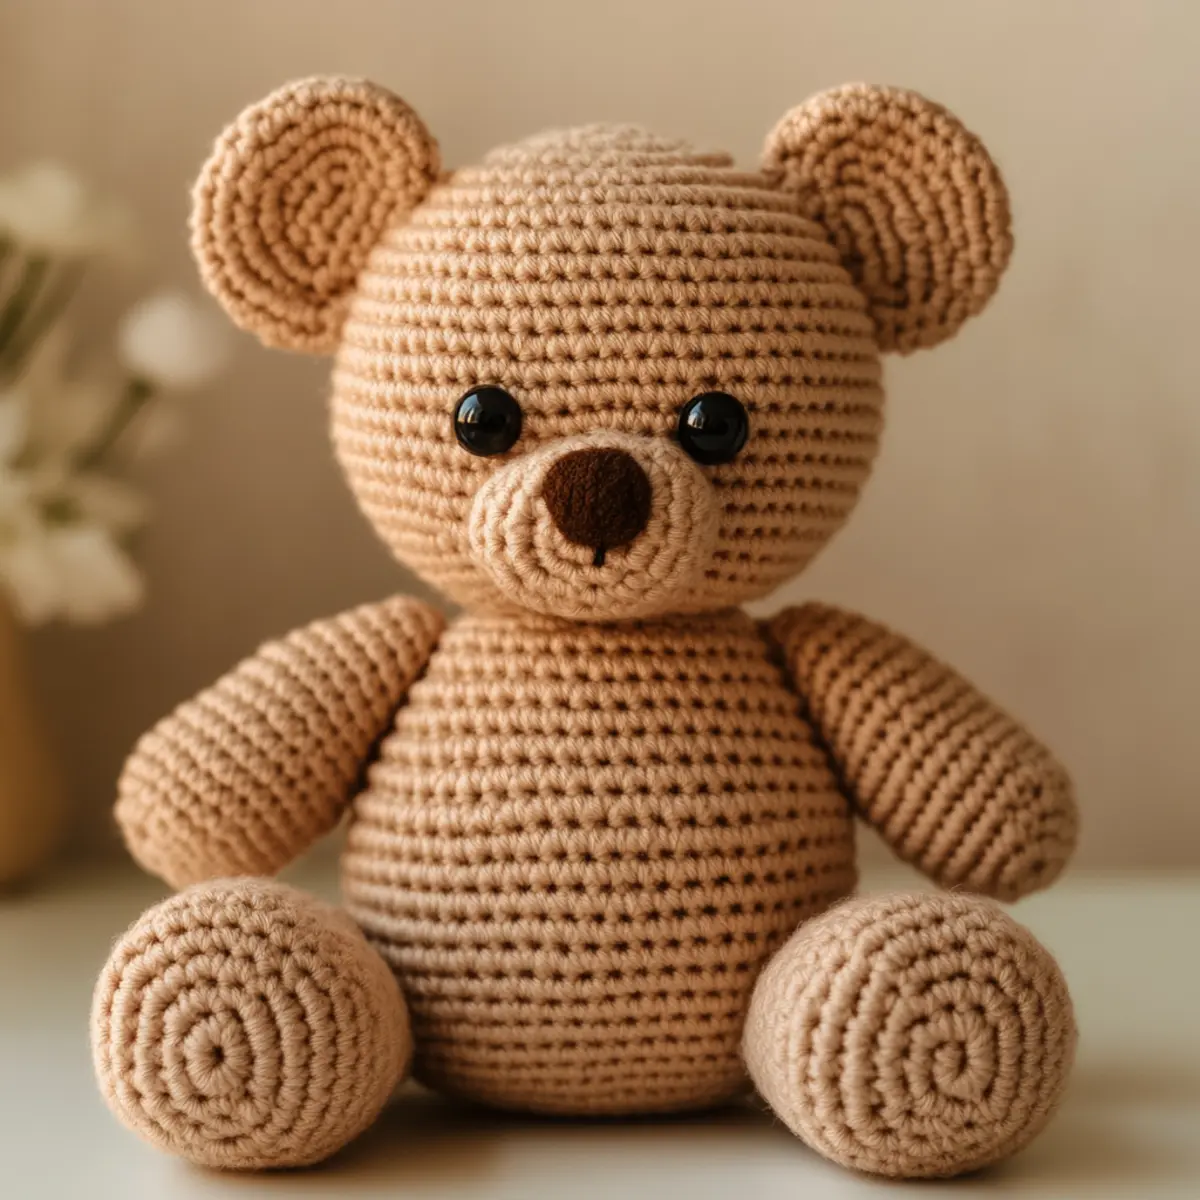
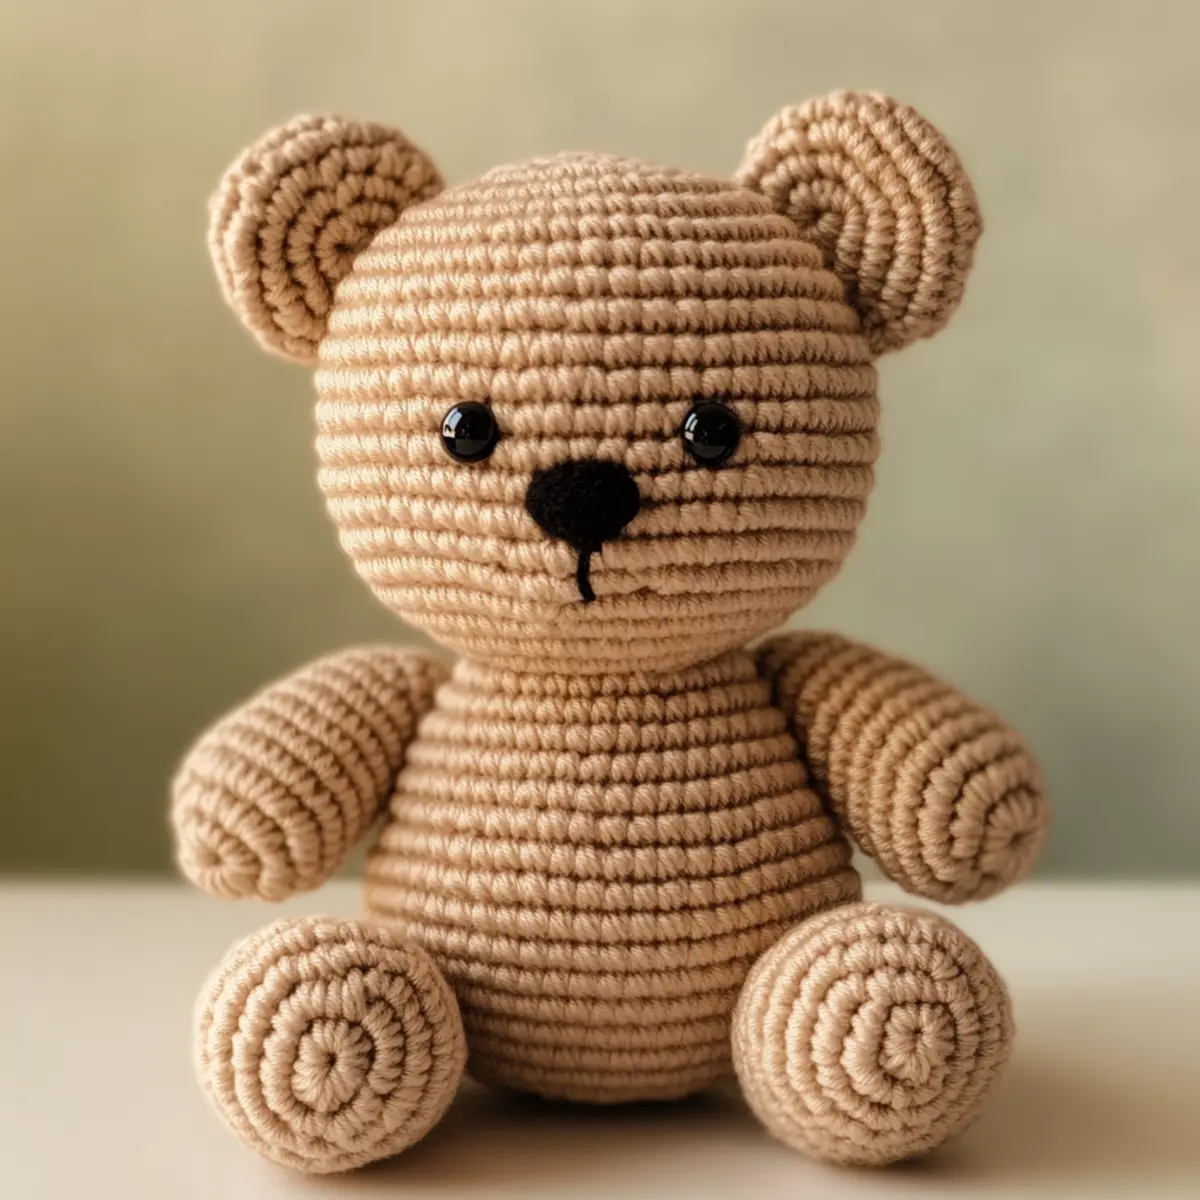
Place the ears at the top of the head, sewing them securely with the yarn needle. Attach safety eyes to give your crochet bear character and a charming look. You can also create a small muzzle by crocheting a few extra rounds before completing assembly.
Expert Tips for the Best Crochet Bear Pattern

Consistent Tension: Keep your tension consistent throughout your stitches to ensure a uniform and even look for your crochet bear.

Accurate Counting: Make sure to count your stitches carefully, especially when creating the limbs and body, to avoid any misproportions in your bear.

Track Rounds: Use a stitch marker to keep track of your rounds while working on the crochet bear pattern, preventing mix-ups and missed increases or decreases.

Proper Stuffing: Lightly stuff each part with fiberfill to ensure your bear maintains its shape without becoming overly firm.

Avoid Twisting: Be cautious when creating your foundation chain; ensuring it isn’t twisted will help form a perfect starting point for your bear’s body.

Experiment with Colors: Don’t be afraid to use different colors or yarn types to create unique variations of your crochet bear pattern that reflect your personal style.

crochet bear pattern variations

Feel free to customize your adorable teddy bear by exploring these fun alternatives!

  • Color Choices: Swap the light brown yarn for vibrant colors. Pastel shades create a whimsical vibe, while deep tones provide a classic twist.
  • Yarn Type: Experiment with cotton or even chunky yarn for a different texture. Each type gives a unique feel that can alter your bear’s character.
  • Texture Modifications: Incorporate fun yarns like boucle or pom-pom yarn for added texture. This not only enhances visual appeal but gives your bear a playful touch.
  • Size Adjustments: Use a smaller hook to create a mini version for adorable keychains or a larger hook for a huggable giant bear. This way, you can cater to all ages!
  • Holiday Theme: Add seasonal flair by using holiday-themed yarns (e.g., reds and greens for Christmas). You can even make themed accessories like a hat or scarf!
  • Accessory Enhancements: Personalize with accessories like a crocheted scarf or a removable hat. This not only makes your bear unique but allows for style changes!
  • Minimalist Version: Create a simplified design by reducing the number of stitches. This quick project is perfect for beginners practicing basic amigurumi skills.
  • Facial Expression Options: Use different button sizes or even embroidery for varied facial expressions. Personalizing emotions can significantly impact the bear’s charm.

Don’t hesitate to innovate and make this project truly yours! Check out the Crochet Teddy Bear pattern and Baby Bear Crochet for more ideas!

How to Wash and Care for Your Crochet Bear

Machine Washing: If you choose to machine wash, use a gentle cycle with cold water and place the bear in a laundry bag to protect its stitches.

Hand Washing: It’s best to hand wash your crochet bear in cool water using mild soap, then gently squeeze out excess water without twisting.

Drying: Always lay your crochet bear flat on a towel to dry instead of hanging it, as this maintains its shape and prevents stretching.

Storage: Keep your bear in a cool, dry place when not in use, avoiding direct sunlight to prevent fading its charming colors.
Crochet Bear FAQs

Is this crochet bear suitable for beginners?
Absolutely! This crochet bear pattern is designed specifically for beginners, making it a fun and easy project to practice basic crochet skills.

What yarn can I use for this bear?
You can use any medium worsted weight yarn, but light brown is recommended for a classic teddy bear look. Feel free to experiment with colors or types, like cotton.

How can I adjust the size of my bear?
To resize, simply adjust the number of initial rounds or stitches in the starting chain. You can also use a smaller or larger crochet hook to modify the bear’s dimensions.

What should I do if my teddy bear has curling edges?
Don’t panic! If your bear is curling at the edges, make sure you’re not working too tightly. You might need to adjust your tension or use a larger crochet hook for looser stitches.

What type of stuffing should I use?
Polyester fiberfill is ideal for stuffing your crochet bear, as it provides a soft, huggable texture while retaining shape. Avoid using cotton or other materials that may clump.

What hook size is best for this pattern?
A 4.0 mm (G/6) crochet hook is recommended for this crochet bear pattern to achieve a neat finish with tight stitches, resulting in a plush teddy bear.
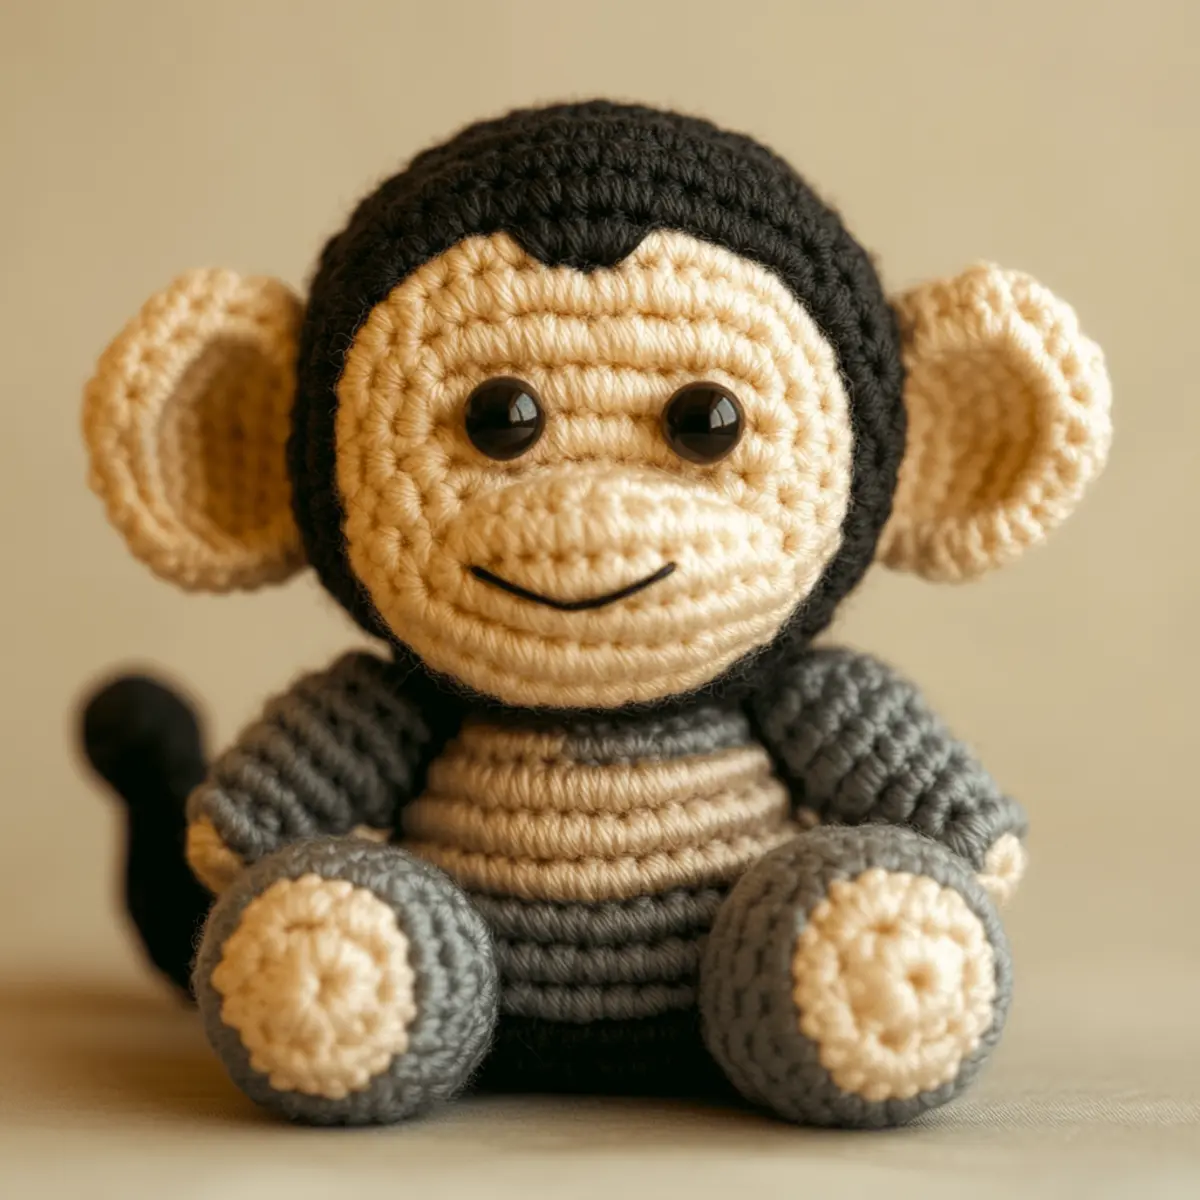
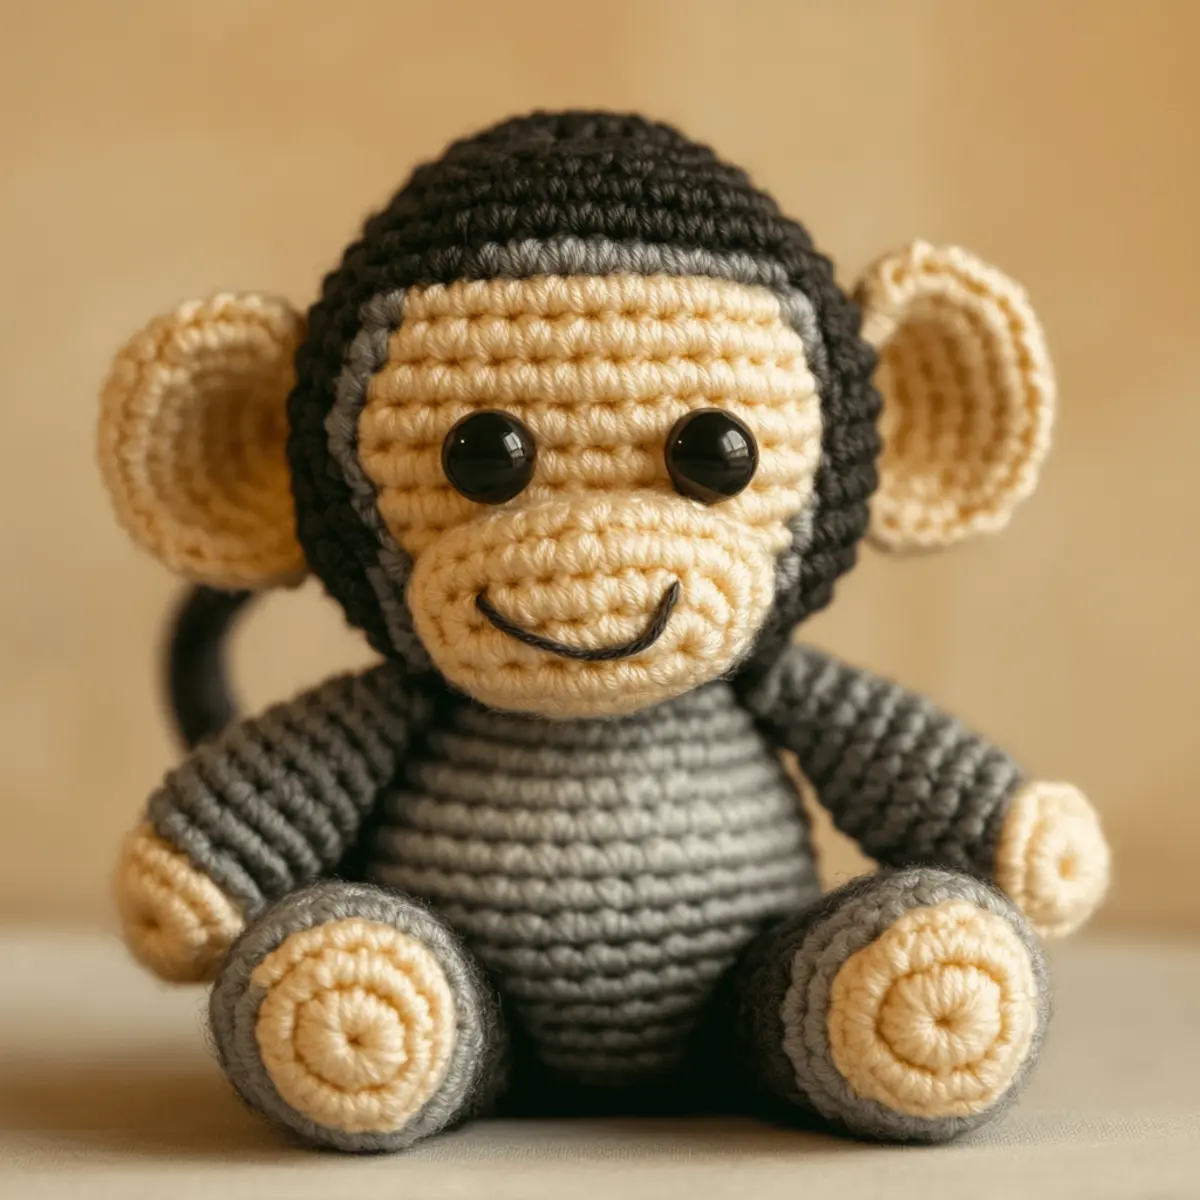
Filed Under: Amigurumi

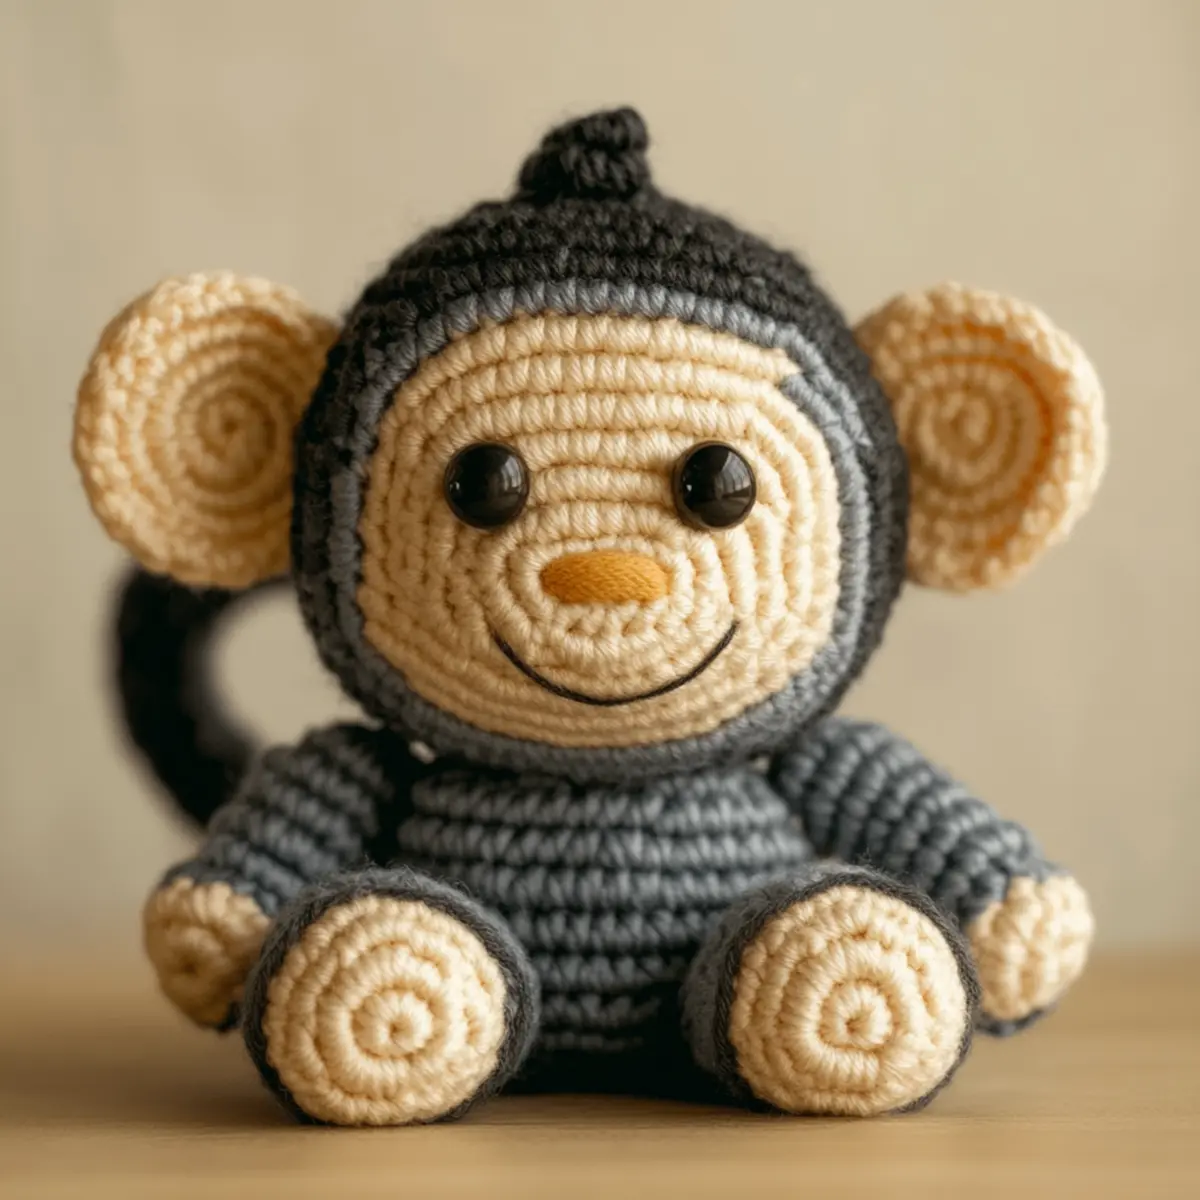
Charming Crochet Monkey Pattern for Joyful Crafters

August 17, 2026 by Publisher Leave a Comment

As I settled into my favorite crochet nook, I couldn’t help but feel a spark of excitement with each twist of the yarn. Today, I’m thrilled to share my latest pattern: the charming crochet monkey pattern! This delightful project combines whimsical designs with the joy of crafting, making it the perfect addition to your amigurumi collection. What’s more, this pattern is not just about creating an adorable plush toy; it also serves as a wonderful way for both beginners and seasoned crafters alike to expand their skills and techniques in a fun way. Picture the smiles on little ones’ faces as they cuddle their new friend! This project is a fantastic stash-buster, allowing you to dip into those extra yarns sitting unused and transform them into something magical. You’ll be playing with textures and colors for a unique touch. Whether you’re crafting for a gift or simply for yourself, this crochet monkey will add a delightful flair to your home. Are you ready to jump into a world of crochet and creativity?

Crochet Monkey Pattern Materials & Tools

Yarn
Medium-weight yarn – You will need about 150-200 yards to complete your crochet monkey pattern beautifully. Aim for a blend of cream, dark gray, and a hint of red for face details.
Safety Eyes – Choose 12mm safety eyes for a sweet yet charming expression on your monkey’s face.
Stuffing – Use polyester fiberfill to give your monkey the perfect plushy feel without excessive stretching.

Tools & Notions
4 mm crochet hook – Essential for creating tightly stitched rounds, this size will help maintain the plush effect.
Yarn Needle – To weave in ends and assemble the different components securely. It’s especially useful for stitching the limbs to the body.
Stitch Markers – Handy for tracking rounds, particularly during color changes or larger sections of stitches. This keeps your work tidy and organized.
Scissors – Sharp scissors will help you cut yarn cleanly during the project.

Why You’ll Love This Pattern

Crafting this crochet monkey pattern is a unique experience ripe with benefits! First off, it’s ideal for all skill levels, making it a fantastic choice whether you’re a novice honing your skills or an experienced crocheter looking for a rewarding project. Plus, the soft and squishy finish of this amigurumi toy is perfect for little hands, ensuring it’s both a cuddle buddy and a stylish decor piece! Additionally, the versatility of this design opens doors to customization; you can mix and match colors to create a monkey that reflects your personality or your child’s favorite hues. And let’s not forget, it serves as a perfect stash-buster, allowing you to use up leftover yarn from previous projects. If you love expanding your crochet repertoire, check out our Bear Crochet Pattern and Crochet Bee Pattern. This beginner-friendly project provides a great balance of challenge and relaxation, resulting in a playful creation that’s sure to bring joy to anyone who receives it!

Gauge & Sizing Notes for Crochet Monkey Pattern

Getting the gauge right is essential when creating your crochet monkey pattern, especially to ensure a snug and soft finish. Aim for a standard gauge of 5 sc = 1 inch for a 4×4 inch (10×10 cm) square. If your swatch does not match the gauge, consider adjusting your hook size; use a larger hook to loosen stitches or a smaller one to tighten them up. The body of the complete monkey is expected to measure around 10-12 inches tall, depending on your personal tension and yarn choice. If you want a larger or smaller toy, adjust your starting chain or the number of rounds as appropriate. This flexibility allows you to tailor the crochet monkey pattern to your preferences, optimizing enjoyment and results!

Step-by-Step Pattern for Crochet Monkey Pattern

Row 1: Head Shaping
Begin by creating a magic ring and work 6 sc into the ring. Pull the ring tight to close. This will form the base of the head. (6)

Row 2: Increasing the Head
Work 2 sc in each sc around for a total of 12 stitches. The head starts to take shape with the increase making it fuller and rounder. (12)

Row 3: Continue Increasing
Inc in the first stitch and sc in the next stitch around, repeating until complete. This row helps to widen the head, achieving 18 stitches total. (18)

Row 4: More Head Rounds
Sc around the whole round, keeping the tension even for a smooth finish. This step preserves the lovely round shape of the monkey’s head. (18)

Row 5: Final Head Shaping
Repeat Row 4 to solidify the shape by working 1 more sc round. You will continue to build the height of the head. (18)

Row 6: Begin to Shape the Body
Change yarn color to dark gray. Start with 1 sc in the first stitch and 2 sc in the second around, creating a gentle curve as you transition to the body. (27)

Row 7: Forming the Body
Continue with 2 sc in the first stitch, followed by 1 sc in the next 2 stitches all around. This gradual increase gives the body a nice shape. (36)

Row 8: Body Rounding
Work one full round of sc without any increases to give depth to the body, maintaining your consistent gauge. (36)

Row 9: Starting the Limbs
For each limb, create 12 sc in a magic ring. This will make the arms that will connect to the body, keeping the monkey’s proportions in check. (12)

Row 10: Shaping Limbs
Sc around in the round for 8 rounds, ensuring that each limb is filled well with stuffing during assembly. The limbs should be plump and cuddly. (12)

Row 11: Creating Ears
For the ears, start with 5 sc into a magic ring. This step creates the adorable ears that will enhance the monkey’s charm, making it extra cute. (5)

Row 12: Completing the Tail
With the same color, chain 2 and make 6 hdc in the second chain from the hook for a spiraled tail. Make sure it remains roly-poly just like the monkey pattern intends. (6)

Crochet Monkey Pattern Variations

Feel free to add your unique twist and flair to this adorable monkey project!

  • Color Swaps: Try using a vibrant color palette or pastels to create a bright, eye-catching monkey.
  • Yarn Textures: Experiment with different textures; for example, a soft chenille yarn will give your monkey a luxuriously plush feel.
  • Size Alteration: Switch to a lighter or heavier yarn to adjust the finished size; a chunky yarn can yield a giant cuddly monkey for a plush toy.
  • Accessories: Add a scarf or tiny hat for an engaging look. Personalizing your monkey will make it stand out.
  • Facial Features: Play with the eye size or use colorful embroidery for the mouth to give your monkey a distinctive expression.
  • Pattern Mix: Combine elements from different amigurumi patterns, such as this Bear Crochet Pattern or Crochet Bee Pattern, to expand your collection. This allows for creativity and fun, resulting in a unique character each time.
  • Use of Glitter Yarn: For special occasions, consider using metallic or glitter yarn to make a festive monkey that’s great for parties or gifts.
  • Safety Modifications: Create a version without safety eyes for younger children by embroidering the eyes instead.

Expert Tips for Crochet Monkey Pattern

Stay Focused: Keeping track of your stitch count is essential to avoid losing count, which can lead to uneven shapes.

Use Stitch Markers: These are a lifesaver when working with extensive rounds, especially during color changes. They help ensure precision in your crochet monkey pattern.

Don’t Overstuff: It’s important to stuff your monkey firmly, but not excessively, to maintain its plush shape without stretching the yarn too much.

Foundation Chain: Make sure your foundation chain isn’t twisted before continuing to round one. This mistake can cause shape issues later.

Tension Matters: Maintaining even tension is vital for a consistent plush effect. This affects the squishiness and overall look of your finished monkey.

Experiment with Yarns: A variety of yarn textures and colors can transform your project. Try mixing yarn weights like worsted and DK for unique results.

How to Wash and Care for Your Crochet Monkey Pattern

Machine Washing: If needed, place your monkey in a mesh laundry bag and wash on a gentle cycle with cold water to avoid agitation that could distort shape.

Hand Washing: For best results, hand wash your monkey in cold water with mild soap. Gently squeeze, don’t wring.

Drying: Always lay your monkey flat to dry. Avoid hanging as this can deform its shape.

Storage: Keep your completed crochet monkey in a cool, dry place to prevent mold and protect from any potential pests like moths. Always ensure it’s clean before storing.

Crochet Monkey Pattern FAQs

Can I use a different yarn for this crochet monkey pattern?
Absolutely! While the suggested medium-weight yarn works great, you can substitute other yarns if you adjust your hook size accordingly. Just ensure it’s still durable and soft to maintain the cuddly quality.

What if I want to make the monkey bigger or smaller?
If you’re looking to adjust the size, use heavier yarn and a larger hook for a bigger monkey. Conversely, a lighter yarn will help you create a smaller version without altering the pattern significantly.

How do I fix a dropped stitch?
Don’t panic! You can actually pull your yarn back to the last stitch, pick up your dropping stitch with your crochet hook, and carry on. Just ensure you maintain the overall tension throughout.

What size hook should I use for this pattern?
For this crochet monkey pattern, a 4 mm (G/6) hook is ideal. It helps create the tight stitches necessary for a plush finish, ensuring you don’t see stuffing poking through.

Why is my monkey curling at the edges?
This usually happens if you’re crocheting too tightly or having uneven tension. Make sure to evaluate your tension as you work and relax your grip when necessary.

Can I add accessories to my crochet monkey?
Absolutely! Adding hats, scarves, or other embellishments is a great way to personalize your monkey, making it even more delightful. Have fun experimenting with different designs!

Filed Under: Amigurumi

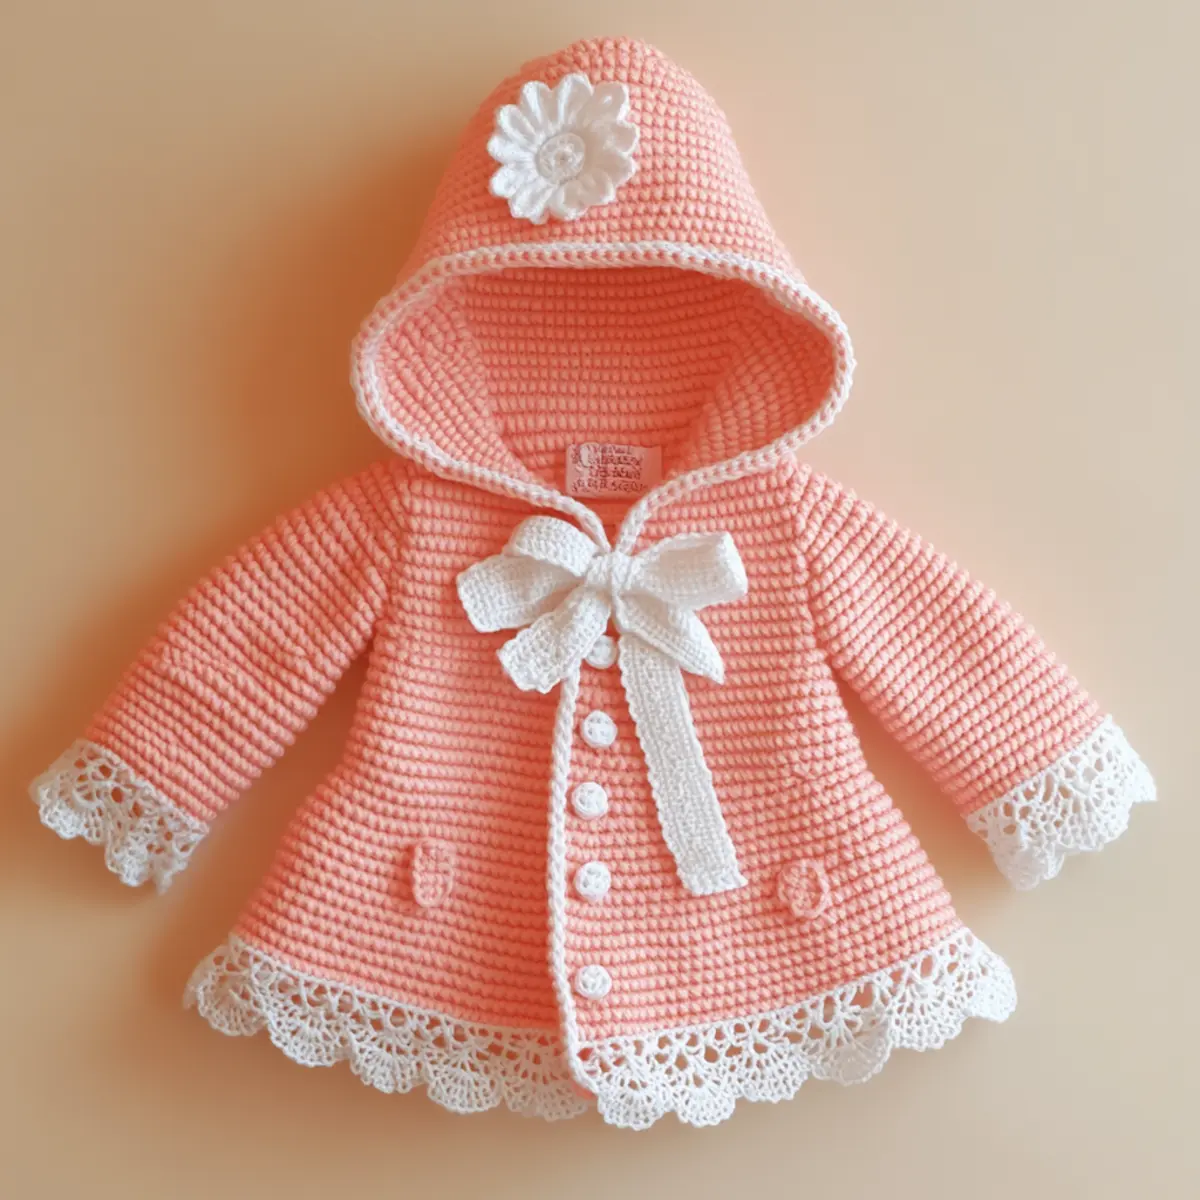
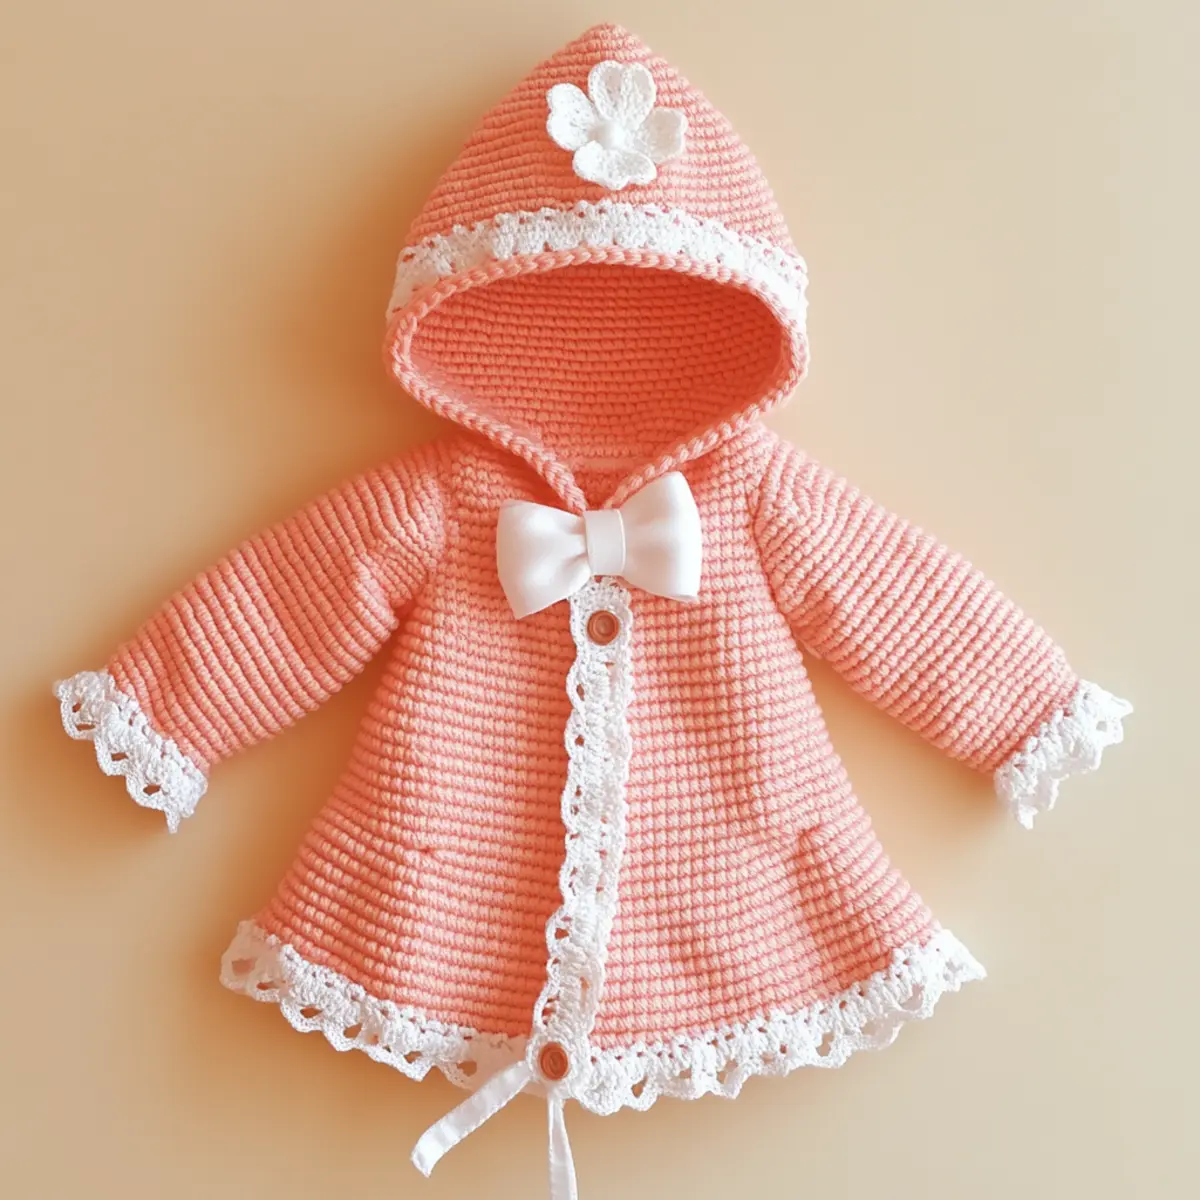
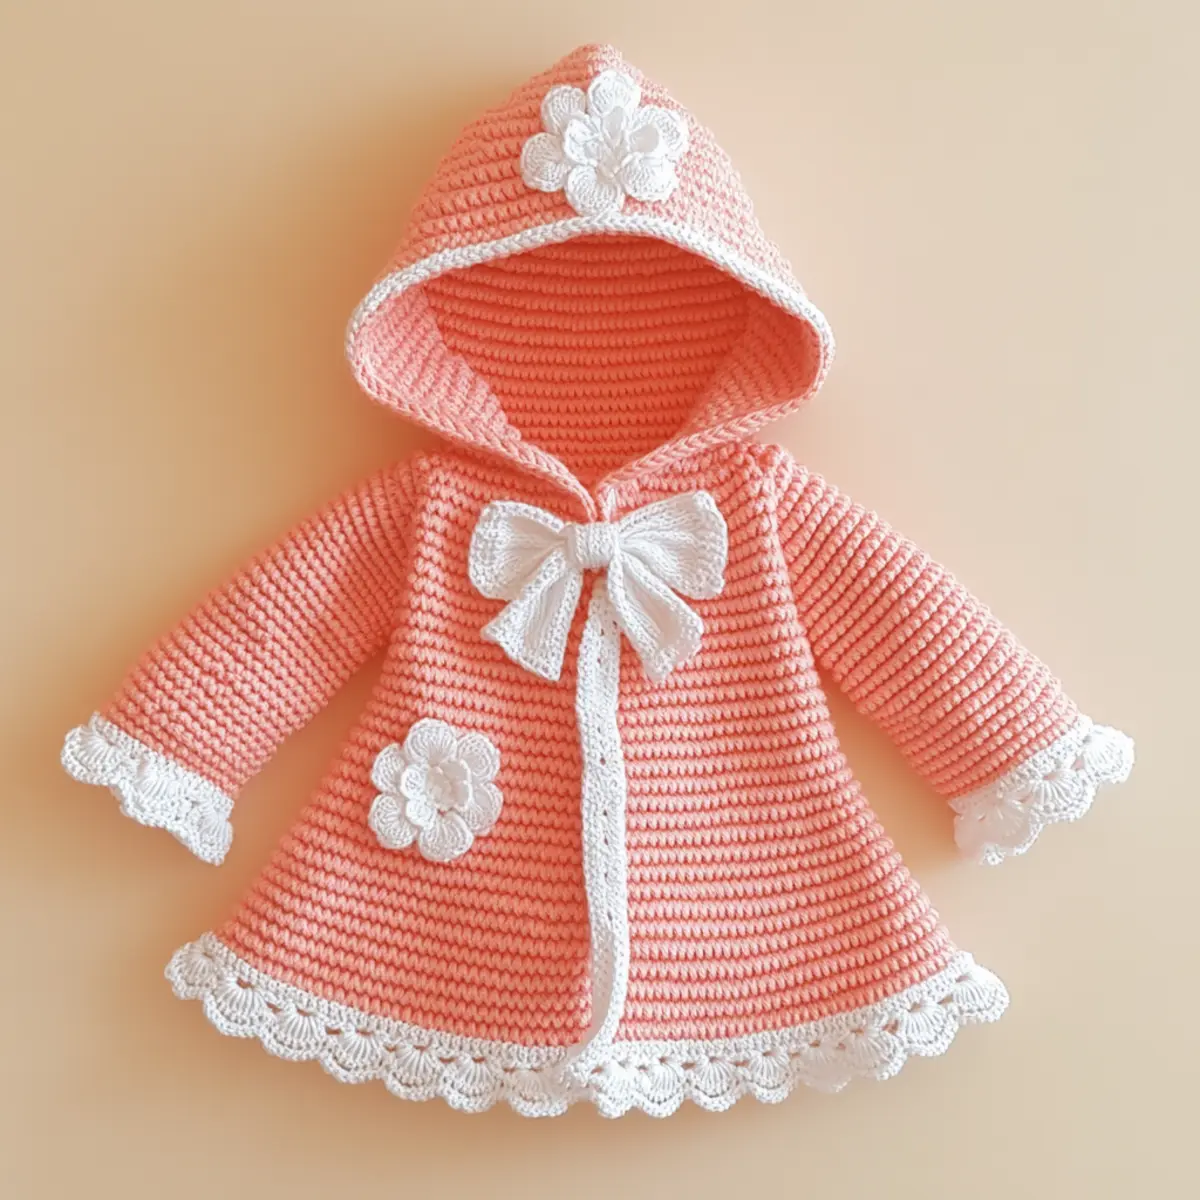
Cozy Baby Hooded Coat Crochet for Beginners

August 17, 2026 by Publisher Leave a Comment

As I sat in my cozy nook with a soft skein of yarn in hand, I felt a spark of inspiration strike. The project I had envisioned? A baby hooded coat crochet pattern that is not just functional but utterly adorable! This small but impactful creation brings a level of warmth and style, making it a perfect gift for parents wanting something special for their little ones. The best part? It’s incredibly beginner-friendly and an excellent stash-buster, allowing anyone to dive into the world of crochet with ease and excitement. Plus, this pattern walks you through each step, ensuring you create something you’ll be proud of without feeling overwhelmed. As you work, the texture builds and the colors come alive, wrapping around your heart like that cozy yarn. What colors will you choose to bring this sweet coat to life, and what personal touch will you add to make it truly unique?

Baby Hooded Coat Crochet Materials & Tools

Yarn

  • Soft medium weight yarn – select a category 4 yarn with approximately 400-600 yards for a cozy finish; colors like pink or mint green work beautifully.

Tools & Notions

  • 4.5 mm (US 7) crochet hook – perfect for this baby hooded coat crochet pattern to create a neat and even fabric.
  • Stitch markers – great for tracking your progress and helping you remember where to make your increases.
  • Yarn needle – essential for weaving in ends to give your project that polished, professional look.
  • Decorative buttons (3) – choose buttons that complement your chosen yarn colors for a sweet touch on the front closure.
  • Lace trim (optional) – a pretty addition around the sleeves and hem can elevate the design and enhance its charm.

Why You’ll Love This Pattern

Simplicity is at the core of this baby hooded coat crochet pattern, making it perfect for those new to crochet and seasoned crafters alike. Quick to whip up, you can create this charming piece in just a few evenings, perfect for last-minute gifts or to welcome a new sibling. It’s also a stellar stash-buster—pull from your existing yarn stash and use vibrant colors that express your creativity, just like when I chose a soft pink combined with white lace. The textured design not only enhances aesthetics but also gives a lovely tactile quality that little ones will adore. You can easily check out similar beginner-friendly projects to gain more crochet confidence. And did I mention the joy of creating something that can cater to unique sizes? Adjustments are simple, allowing you to customize the fit for every baby on your list! By exploring different fibers like cotton or alpaca, you can also achieve various textures that lend extra cozy vibes. With all these delightful features, this baby hooded coat crochet pattern is sure to be a cherished project in your crafting repertoire.

Gauge & Sizing Notes for Baby Hooded Coat Crochet

Checking your tension is crucial for the success of your baby hooded coat crochet project, especially since sizing will directly influence the fit and warmth provided to the little one wearing it. Aim for a gauge of 16 hdc by 18 rows in a 4×4 inch (10×10 cm) square. The project allows minor adjustments in sizing; if the gauge doesn’t match, you may need to experiment with different hook sizes or adjust your starting chain multiple by 3 to suit the desired width. Upon completion, if your swatch comes up smaller or larger than the specified gauge, it may skew the coat’s fit and proportions; be sure to rectify this before commencing the main piece. The finished adult-graded style anticipated ranges from 18-24 inches in length, adjusting the base size in increments to maintain a proportionally pleasing A-line silhouette. This baby hooded coat crochet pattern can easily be adapted by modifying the length, so measure your adorable recipient, and you can make customizations accordingly for perfect warmth and style.

Step-by-Step Pattern for Baby Hooded Coat Crochet

Row 1: Foundation Chain Begin by making a foundation chain of 55 stitches with your medium weight yarn, ensuring it is a loose enough chain to allow for easy stitch placement. This chain will form the base of the hood, so make sure it reflects the desired width of the coat.

Row 2: Begin the Hood Turn your work and chain 3 for your first double crochet (dc) stitch. Continue working dc into each chain across, creating a nice foundation row. At the end of this row, you should have 55 dc stitches.

Row 3: Shape the Hood Chain 3 for the turning height and work dc in each stitch across again, adding an inc (increase) in the last stitch to create a slight curve for the hood. You’ll finish this row with 56 stitches.

Row 4: Continue the Hood Chain 3 again and work dc across, and add 2 inc stitches at the ends to further enhance the curve shaping. You should finish this row with 58 stitches.

Row 5: Height of the Hood For this row, chain 3 and again work dc across, keeping the increases consistent. The total should now be 60 dc. Check your work for height as well, making sure the hood is shaping nicely.

Row 6: Finishing the Hood Chain 1 and turn. Work in sc (single crochet) across the last row to create a neat finish for the hood. This final row of sc will stabilize and tighten the edges, keeping your work clean. You’ll finish with 60 sc.

Row 7: Start the Body With the hood completed, begin the body by chaining 2. This counts as your first hdc (half double crochet) stitch; now work hdc back across all hood stitches for a total of 60 hdc.

Row 8: Body Increases In the next round, chain 2 and work hdc, but this time increase every 10th stitch by adding an extra hdc. You’ll end this round with 66 hdc after establishing the body shape.

Row 9: Create the A-line Shape Chain 2 and work hdc across again, adding 1 inc every 12th stitch this time. Keeping the coat flared is essential, so make sure to maintain an eye on your stitch counts until you reach 72 hdc.

Row 10: Begin the Sleeves To create the sleeves, chain 2 and work hdc. When you reach the last 8 stitches, turn and proceed to just work hdc back across those remaining stitches to start the sleeve portions. You should now have 72 hdc throughout the body with the sleeves transitioned clearly.

Row 11: Finishing the Body Chain 2 and continue working hdc for the next 4 rows without any increases to create a sturdy body. This can also allow you to see how the garment hangs nicely. At the end of 4 rows, you’ll maintain 72 hdc throughout.

Row 12: Add the Lace Trim After completing the main coat, switch to a chain stitch of 3 and proceed around the sleeves and hem with sl st (slip stitches) followed by ch 3, creating a lovely lace-like pattern to polish off your adorable baby hooded coat crochet. This should encompass the entire hem, finishing off with a visually charming edge.

baby hooded coat crochet

Feel free to give this charming project your personal touch!

  • Color Palette: Experiment with colors like mint green or soft lavender for a modern twist.
  • Yarn Type: Try out yarn fibers such as alpaca or bamboo for soft textures and warmth.
  • Lined Interior: Adding a lining for extra warmth can elevate this coat for chilly days.
  • Length Customization: Make it a cropped coat or a cute dress style to suit different occasions.
  • Texture Variation: Incorporate different stitch patterns to create a unique texture and style.

For instance, you can use a shell stitch along the body while keeping the sleeves simple. This design difference enhances visual interest. Don’t forget to check out our guide on how to choose yarn for beginners for more insights on yarn selection.

  • Using Buttons: Select decorative buttons that contrast with the yarn to create a striking effect while maintaining functionality.
  • Personalized Embellishments: Add embroidered names or motifs on the coat to make it exceptionally personal for gifting.
  • Lace Options: You could use contrasting lace trim or even crochet a lace edge yourself to personalize the hem.

Remember, customization allows your creativity to shine. Each adjustment can turn a simple baby hooded coat crochet pattern into an heirloom piece that carries your crafting story!

Expert Tips for Baby Hooded Coat Crochet

Count Carefully: Use stitch markers to avoid losing count, especially when working in rounds. A lost stitch can affect your baby hooded coat’s shape.

Foundation Chain: Make sure your foundation chain isn’t too tight. A twisted chain can lead to problems when crocheting the body of the coat.

Gauge Matters: Always check your gauge before starting. This ensures the coat fits perfectly for your little one, avoiding sizing issues later on.

Consistent Tension: Keep an even tension throughout your work. Inconsistent stitches can lead to a coat that doesn’t drape well, losing its charming look.

Practice Blocking: Don’t forget to block your finished coat! It’ll enhance the lace trim and make your baby hooded coat crochet project look polished.

Creative Colors: Experiment with different colors and yarns. Choosing fun hues or unique fibers can express your style and make the coat even more special.

How to Wash and Care for Your Baby Hooded Coat Crochet

Machine Washing: If machine washing, use a gentle cycle with cold water to prevent fabric damage. Avoid heavy agitation that could distort the shape of your baby hooded coat crochet.

Hand Washing: For delicate care, hand wash in cold water. Use a mild detergent and gently squeeze to remove dirt without stretching the fibers of your beautiful coat.

Drying: Always lay your baby hooded coat flat to dry. Hanging can stretch the fabric out of shape and alter the fit.

Storage: Store your coat in a cool, dry place, ideally folded. Avoid squeezing it into tight spaces to maintain its lovely shape and texture.

Baby Hooded Coat Crochet FAQs

Can I substitute the yarn?
Absolutely! You can substitute medium weight yarn with similar properties, like cotton or bamboo. Just ensure the thickness matches for a consistent fit.

How do I adjust sizing?
You can modify the initial foundation chain to fit specific sizes. Remember, each size typically increases in multiples of three stitches, allowing for minor adjustments without affecting the design.

What if my coat is curling?
Don’t panic! Curling can happen due to tight stitches or incorrect gauge. Consider loosening your tension or blocking the finished coat to help it lay flat.

How to fix dropped stitches?
If a stitch drops, simply use a yarn needle to pick it up from the back of your work. You can also crochet a few extra stitches into the area to correct any noticeable gaps.

What hook size should I use?
The pattern recommends a 4.5 mm (US 7) crochet hook. However, feel free to adjust based on your tension, as a different hook could help achieve the desired gauge.

Can I add more embellishments?
Of course! Get creative with buttons, appliques, or even pockets. Adding personal touches can make your baby hooded coat crochet project uniquely yours!

Filed Under: Baby

Adorable Baby Bear Crochet Pattern for Beginners

August 17, 2026 by Publisher Leave a Comment

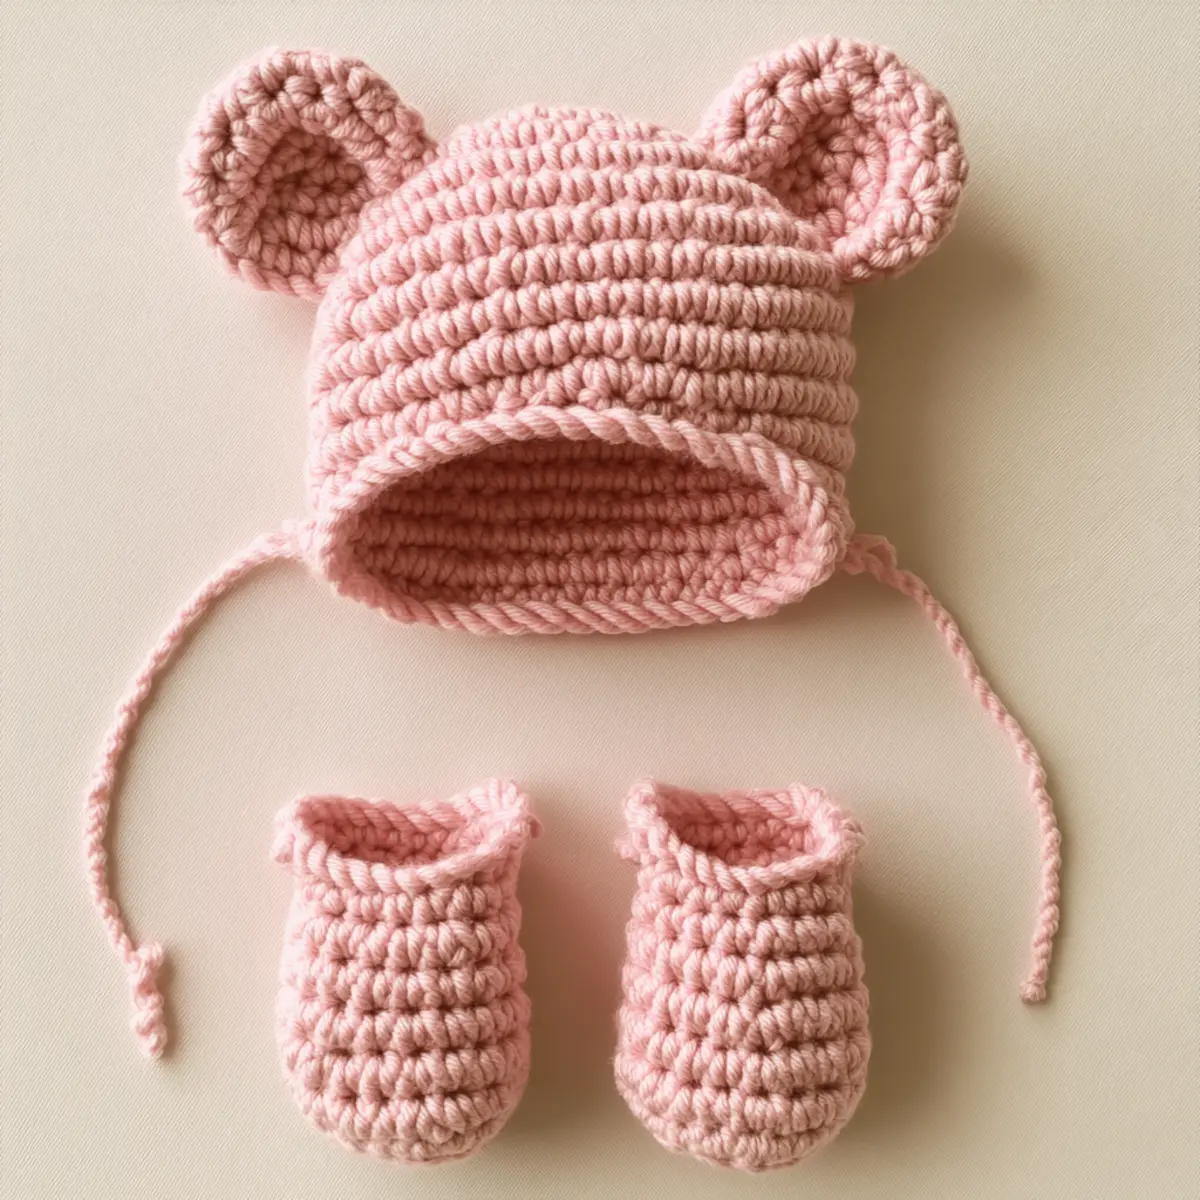
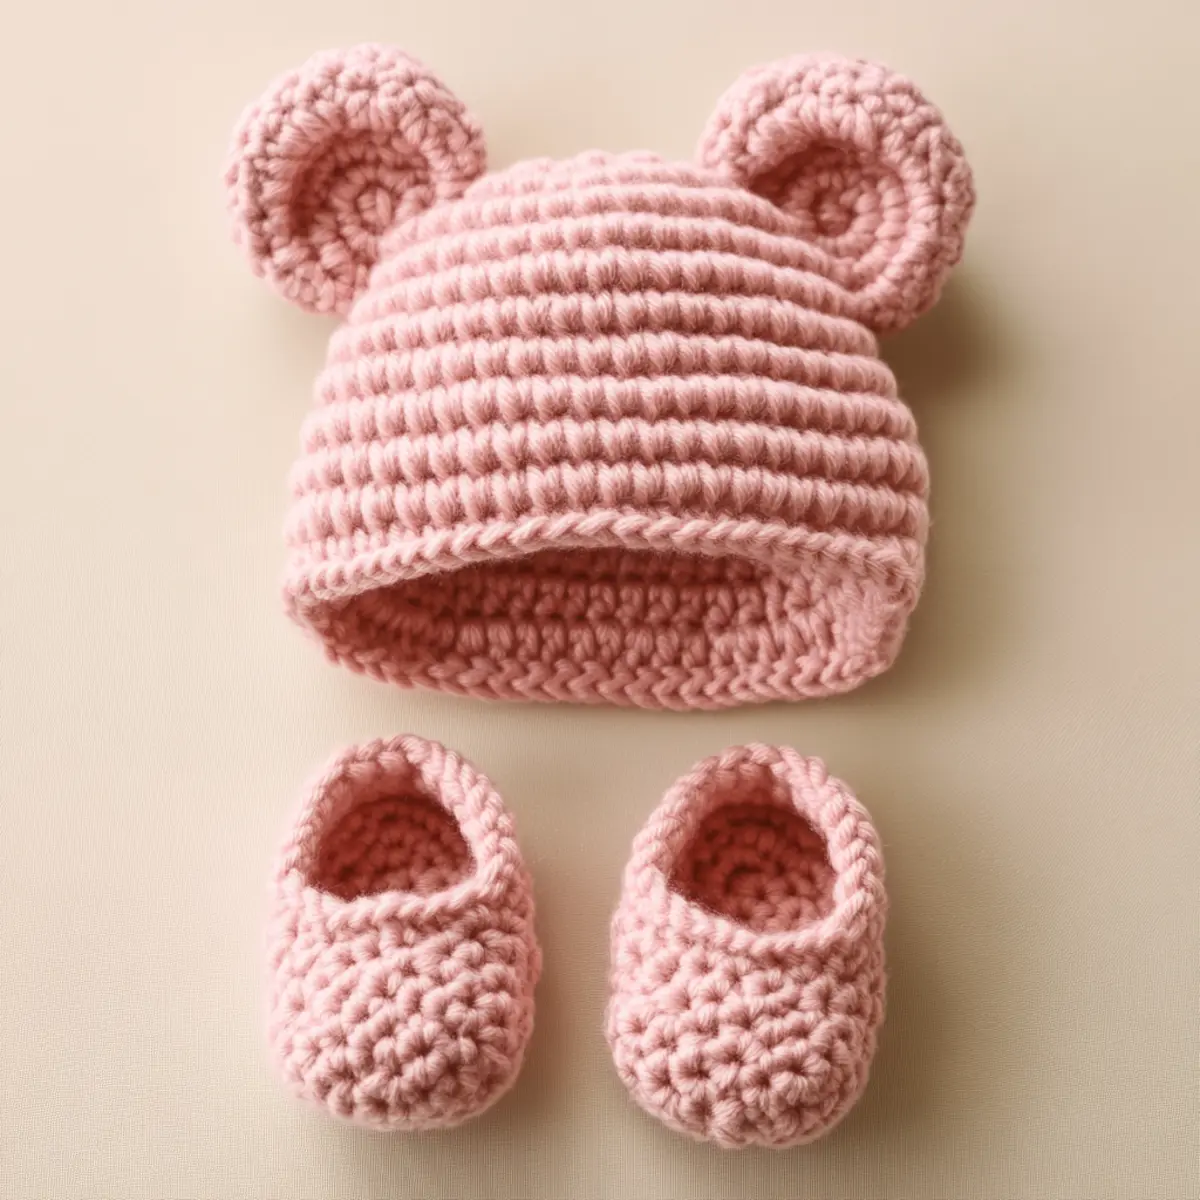
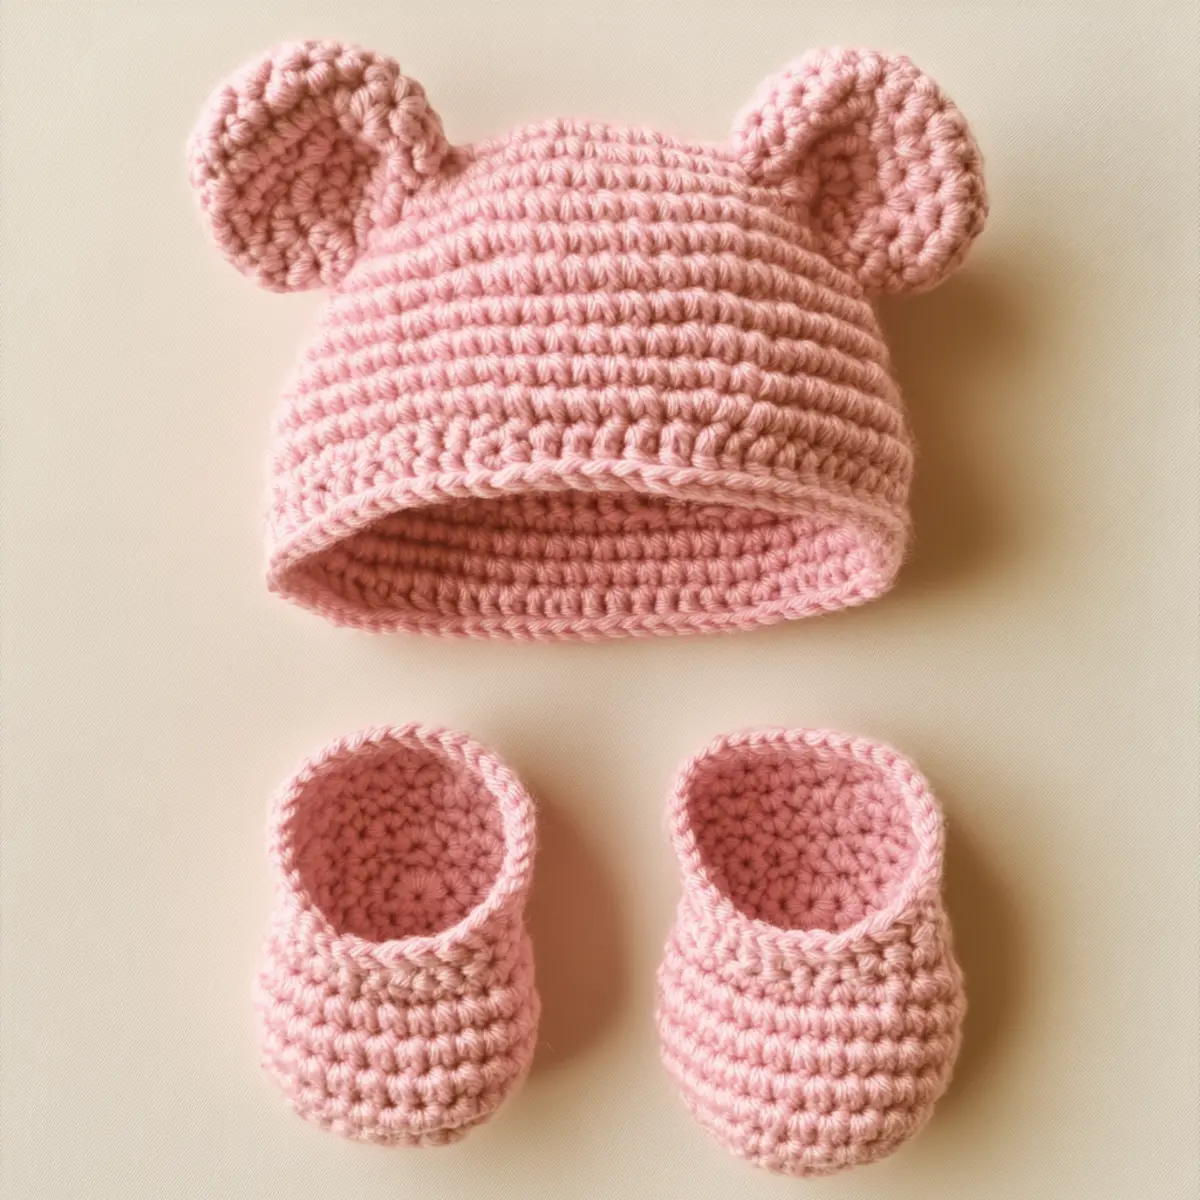
As I was rummaging through my yarn stash, I stumbled upon some soft, luxurious fibers that begged to be transformed into something special. This led me to create the Cozy Crochet Baby Bear Hat and Booties, a heartwarming project that effortlessly combines cuteness and warmth. This baby bear crochet pattern is perfect for beginners, offering an enchanting aesthetic that can brighten any baby’s wardrobe. Not only is the project simple and quick, but it’s also an excellent way to use up leftover yarn, making it a savvy stash-buster! These adorable items radiate comfort and cosiness, making them ideal for keeping little ones snug during chilly weather. Plus, the customization options are endless—you can choose pastel shades or vibrant colors to suit any occasion. Whether you’re prepping for a baby shower or making a thoughtful gift for new parents, this project is sure to create cherished memories. Ready to dive into the world of crochet? You’ll love seeing your crafting skills blossom with this delightful set.

Baby Bear Crochet Pattern Materials & Tools

Yarn

  • Bulky weight yarn – Approximately 150-200 yards total; soft polyester or acrylic blends are recommended for comfort against sensitive baby skin.

Tools & Notions

  • 6.5 mm (K) crochet hook – Ideal for creating a plush, dense structure in your baby bear crochet pattern.
  • Stitch markers – Helpful for keeping track of rounds, ensuring your stitches are neat and precise.
  • Yarn needle – Use to weave in ends and assemble your finished pieces for a polished look.

Why You’ll Love This Pattern

First, the baby bear crochet pattern is crafted with beginners in mind, ensuring that anyone can create this charming set. Second, its versatility allows for easy customization, whether through colors or stitch textures, leading to a truly unique product every time. Third, the plush texture provides a cozy feel, making it an irresistible choice for little ones to wear. Fourth, this pattern is a fantastic stash-buster: it cleverly utilizes smaller amounts of yarn without compromising on style. If you’re looking for more beginner-friendly projects, consider exploring various crochet patterns to elevate your skills. Finally, the satisfaction of making your own baby gifts is unmatched, as it adds a personal touch that purchased items simply cannot replicate. Plus, don’t forget to check out more about simple crochet techniques to boost your crafting journey.

Gauge & Sizing Notes for Baby Bear Crochet Pattern

Getting the correct tension is crucial for your baby bear crochet pattern project. Aim for a gauge of 4×4 inches (10×10 cm) to ensure the pieces fit well and look uniform. Using a 6.5 mm (K) hook with bulky weight yarn will contribute to the plush texture you’re aiming for. If you find your gauge differs from this measurement, you may need to adjust your starting chain or rounds to resize. For larger sizes, simply increase the number of rounds for both the hat and booties. If your swatch does not match, consider either adjusting your hook size or using a different yarn weight. Customization is always encouraged, making this baby bear crochet pattern personal and unique!

Step-by-Step Pattern for Baby Bear Crochet Pattern

Row 1: Create Magic Circle
Begin by forming a magic circle. Work 6 single crochet (sc) stitches into the circle and pull it tight (6 sc).

Row 2: Increase for Base
In this round, perform an increase in each stitch. This means working 2 sc in each of the 6 stitches from the previous round (12 sc).

Row 3: Establish Base Shape
Continue to work in a spiral; this time, sc in the first stitch, then inc in the next. Repeat this pattern around (18 sc).

Row 4: Expand the Base
For this round, sc in the first 2 stitches, then inc in the next. Keep repeating until the end (24 sc).

Row 5: Forming the Hat
Now, work straight without increases for 3 rounds. Sc in each stitch around, ensuring that your stitches remain smooth and tight (24 sc each round).

Row 6: Add Height with Double Crochet
Switch to double crochet (dc) for this round; dc in each stitch around, providing a lovely height to your baby bear hat (24 dc).

Row 7: Another Round of Double Crochet
Repeat row 6 to add even more height and texture with another round of dc stitches (24 dc).

Row 8: Prepare for Edge Finishing
Work 1 sc in each stitch around, transitioning your project towards completing the hat. This creates a clean finish (24 sc).

Row 9: Begin Ears
For each ear, create a magic circle and place 6 sc within. Pull tight to secure (6 sc).

Row 10: Build Ear Shape
Increase in every stitch around for the first ear for a rounded shape (12 sc). Repeat the same for the second ear.

Row 11: Attach the Ears
Carefully sew both ears to the top of the hat, positioning them about 3 stitches apart for aesthetic balance.

Booties Step 1: Foundation Chain
Start your booties by making a foundation chain that comfortably fits around a small ankle. This should be around 12-15 chains.

Booties Step 2: First Row
Sc back along the chain. Turn, and continue to sc for 3 more rows to build up the height of the booties (12 sc).

Booties Step 3: Round the Toe
Begin to round the toe by doing hdc in each of the next 3 stitches and then sc in the last (total 12 stitches in the round).

Booties Step 4: Add Straps
Make long chains of about 20 stitches. Attach these chain straps to either side of the booties, securing with a sl st to keep them firmly in place.

Final Touches: Finishing and Blocking
Ensure all ends are woven in neatly using a yarn needle. Consider blocking the pieces to enhance plushness and shape. This delightful baby bear hat and booties set will be ready to keep that little one cozy!

Expert Tips for the Baby Bear Crochet Pattern

Stay Counted: Pay attention to your stitch count—use stitch markers to avoid losing track and dropping stitches.

Foundation Chain Care: Make sure your foundation chain is not twisted. A twisted chain can lead to uneven starting rows.

Use the Right Hook: A 6.5 mm crochet hook is recommended for this pattern. Switching hook sizes may affect the plush texture and overall fit.

Consistent Tension: Maintaining even tension is essential. Uneven stitches can cause your baby bear hat and booties to warp.

Take Breaks: If you’re feeling frustrated, step back for a bit. Taking short breaks can help you return to the project with fresh eyes.

Practice Blocking: After you complete the set, blocking the pieces will enhance their plush feel and shape. This ensures a professional finish on your baby bear crochet pattern.

Baby Bear Crochet Pattern Variations

Get creative with your project by trying out different materials and styles!

  • Pastel Colors: Use soft shades like mint or lavender for a unique spring vibe. Pastels can enhance the overall sweetness of the bear set.
  • Textured Yarn: Choose boucle or chenille yarn for an added depth of texture. This gives the set a more luxurious feel against a baby’s skin.
  • Size Adjustments: Increase the number of rounds or rows to accommodate older infants or toddlers. This flexibility makes the set wearable for longer.
  • Embellishments: Add cute accessories like bows, flowers, or pom-poms for a playful flair. Personalizing your project ensures no two sets are exactly alike!
  • Color-Blocking: Create contrasting panels by using different colors for the hat and booties. Color-blocking adds a modern touch that appeals to contemporary parents.
  • Animal Variations: Turn your bear set into other characters, such as bunnies or cats, by simply altering ear shapes and adding different embellishments.
  • Using Natural Fibers: Opt for cotton or bamboo blends for a breathable option suitable for warmer climates. These fibers are gentle on a baby’s skin and eco-friendly.

Experimentation can lead to unexpected delights, transforming your baby bear crochet pattern into a cherished keepsake or a practical gift for parents. Explore your creativity and make this project truly yours! Consider checking out our sections on Recommended Hook Sizes or Tips for Beginners for more guidance on customizing your project.

How to Wash and Care for Your Baby Bear Crochet Pattern

Machine Washing: Use a gentle cycle with cold water to protect the fibers of your baby bear set. Always place it in a mesh laundry bag to avoid tangling.

Hand Washing: For best results, hand wash in lukewarm water using mild detergent. Do not wring or twist; gently submerge and rinse.

Drying: Lay flat to air dry away from direct sunlight. This helps maintain the plush structure and color integrity of your baby bear pieces.

Storing: Store your completed pieces in a cool, dry place to prevent moisture and dust from damaging them. Keep them in breathable bags or bins.

Baby Bear Crochet Pattern FAQs

Can I use different yarn types?
Absolutely! You can substitute other yarns, but we recommend using bulky weight yarns for the best results. Just make sure they’re soft and suitable for babies.

How do I adjust the size of the hat and booties?
Great question! To accommodate larger heads or feet, simply add more rounds or rows. You can also adjust the starting chain length for the booties.

What if I drop a stitch?
Don’t panic! You can often fix dropped stitches by carefully re-inserting your hook into the stitch and pulling it back up. If you’re unsure, using a stitch marker can help maintain your count.

Why does my piece curl?
Curling can occur if your tension is too tight or if you’re using a larger hook than recommended. Make sure to crochet with even tension and check your hook size.

What hook size should I use?
For the baby bear crochet pattern, a 6.5 mm (K) crochet hook is ideal. A different size may affect the size or texture of your finished items.

Can I personalize my baby bear set?
Certainly! Feel free to use different colors or add embellishments like bows or pom-poms. This adds a personal touch that any recipient will love.

Filed Under: Baby

Whimsical Crochet Baby Bonnet for Precious Moments

August 17, 2026 by Publisher Leave a Comment

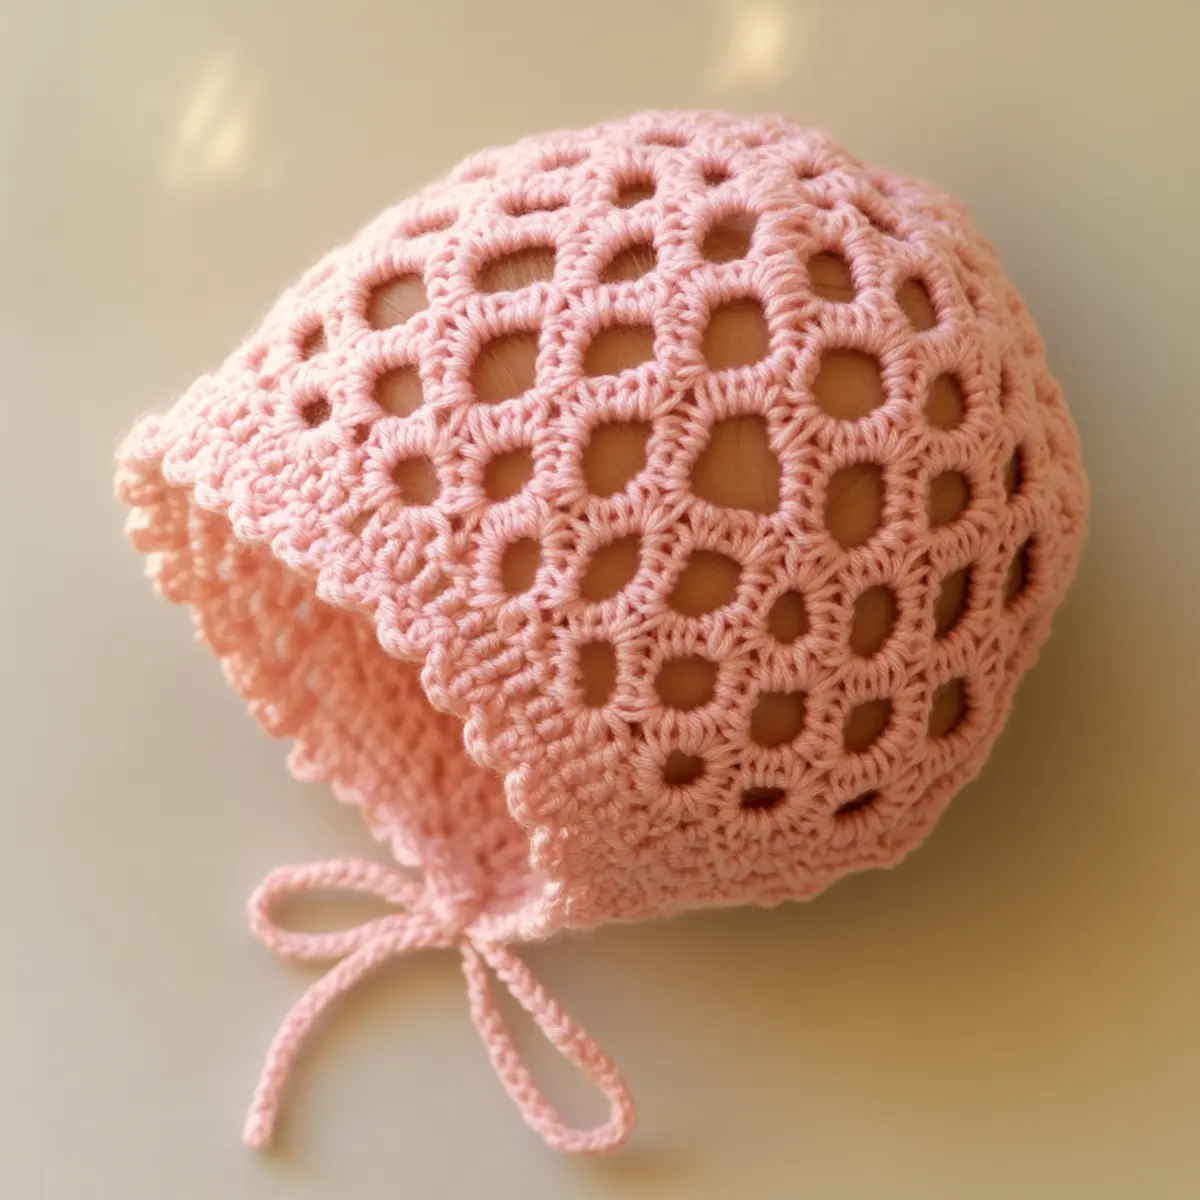
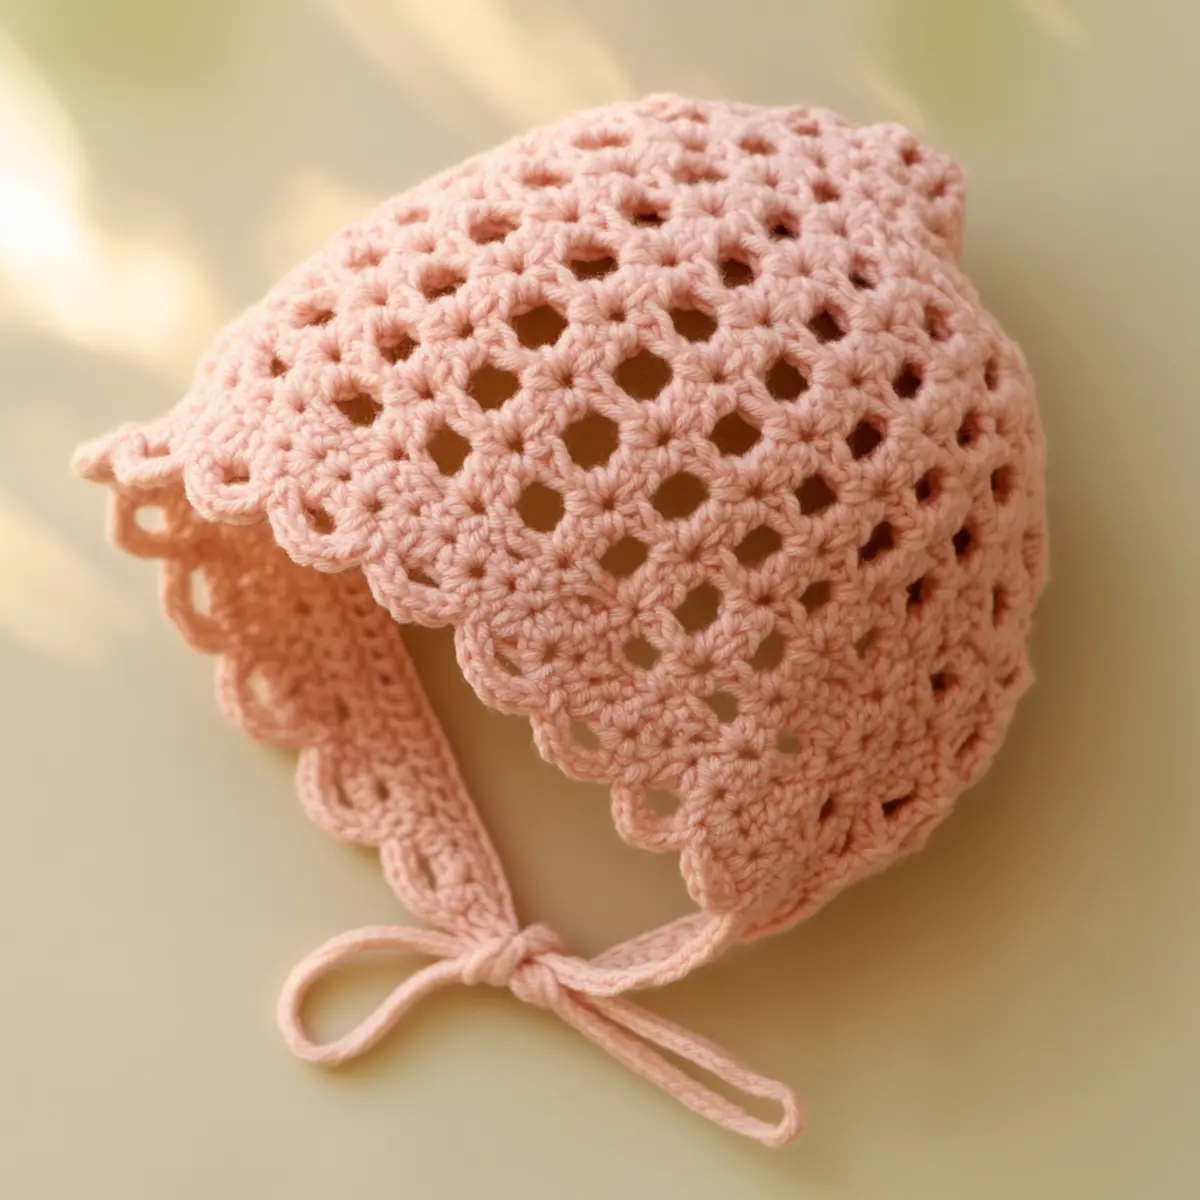
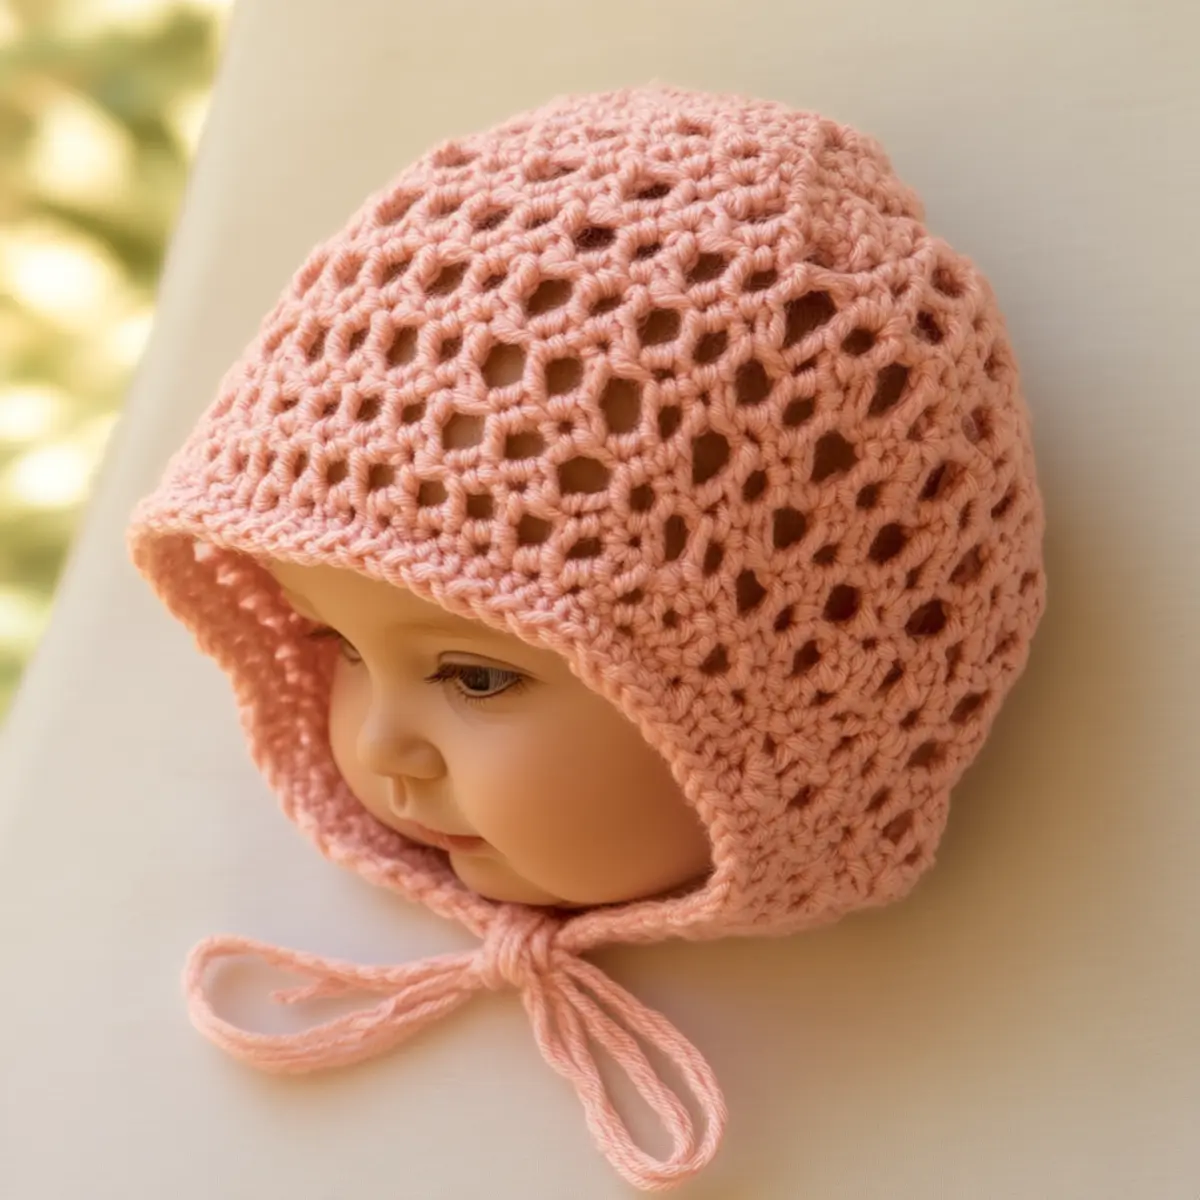
Surprise! A simple crochet project can evoke pure delight, especially the whimsical crochet baby bonnet that I recently crafted. As I watched this charming piece take form, I was smitten with its delightful blend of style and function. Perfect for warm weather, this crochet baby bonnet not only keeps little ones comfortable but also provides a layer of protection from the sun. It’s a fantastic project for both novice and seasoned crafters, bringing satisfaction in just a few hours. The best part? You can use up all those lovely yarn scraps hanging out in your stash! This design offers a cozy and handmade charm that’s bound to warm hearts and keep heads snug. Are you curious to discover how this enchanting piece can become a cherished gift or family heirloom? Let’s dive into the pattern together!

Crochet Baby Bonnet Materials & Tools

Yarn

  • Worsted-weight yarn – Choose a soft, breathable fiber like cotton or acrylic; about 100-150 yards is perfect for this crochet baby bonnet.

Tools & Notions

  • 4.5 mm (G/6) crochet hook – A standard size with optimal tension for lovely stitch definition.
  • Stitch marker – Essential for tracking rows and maintaining your pattern.
  • Scissors – For cutting yarn cleanly at the end of your project.
  • Yarn needle – Great for weaving in ends and finishing touches.
  • Optional: Decorative buttons or small safety eyes – Adds a personal flair to your crochet baby bonnet.

Why You’ll Love This Pattern

First, the whimsical design is an instant head-turner, making it the perfect accessory for any spring outing. Secondly, the open-work section creates a breathable fabric that keeps your little one comfortable in warmer weather, showcasing the lovely crochet stitches. Additionally, this project is stash-friendly—ideal for using up remnants of your favorite yarns. Whether you aim for pastel pinks or striking variegated hues, the customizability allows you to tailor the bonnet to fit personal styles or a special occasion. The quick construction ensures you’ll finish in a jiffy, making it an excellent choice for last-minute gifts. Explore more about making the most of your crochet with our guide on stashing yarn. This crochet baby bonnet brings together simplicity, aesthetic appeal, and practicality, making it a must-have in your crafting repertoire.

Gauge & Sizing Notes for Crochet Baby Bonnet

When creating a crochet baby bonnet, checking your tension is essential to ensure the right fit for your little one. Aim for a standard gauge of 5 dc x 4 rows per 4×4 inch (10×10 cm) swatch. If your swatch falls short or exceeds this measurement, adjust your hook size accordingly—either go down for tighter stitches or up for a looser fabric. This crochet baby bonnet is designed to fit approximately 14-15 inches around the head, which is suitable for newborns up to a year. If resizing is necessary, modify your starting foundation chain or adjust your rounds while maintaining stitch counts to achieve the desired size. A well-fitted bonnet will keep your baby cozy and stylish while providing sun protection, making this project both functional and fashionable.

Step-by-Step Pattern for Crochet Baby Bonnet

Row 1: Start the Foundation Chain
Begin by making a foundation chain with 42 ch. This chain will serve as the base for your bonnet’s band, ensuring a cozy fit around the baby’s head. Use a soft worsted-weight yarn for best results.

Row 2: Form the Band
Starting in the 2nd ch from the hook, work 1 hdc in each ch across to the end, totaling 41 hdc. This creates a snug band that wraps comfortably around the baby’s head. Don’t forget to turn your work after this row.

Row 3: Join and Turn
Next, fold the band in half and sl st the starting and ending edges together. This forms a continuous loop for the bonnet. Now, chain 3 (counts as dc) and prepare for the crown of the bonnet.

Row 4: Begin the Crown
Continue by working 1 dc into the same spot, followed by 1 dc in each stitch around the row (totaling 41 dc). This creates a rounded top part of the crochet baby bonnet, which will be crucial for a good fit.

Row 5: Add the Lacework
Now, for the charming open-work design, chain 4 and skip 1 dc before making 2 dc into the next stitch. Repeat this pattern: skip 1 stitch, (2 dc, ch 1) around. You should end with 20 lace sections at the top of the bonnet.

Row 6: Complete the Lace Detail
In the same manner, ch 1 and 2 dc in the ch-1 spaces around to increase the lace detail. Follow this step uniformly to maintain consistency throughout the project. You will have a total of 41 dc in this round for a beautiful airy look.

Row 7: Start the Scalloped Edge
To give your crochet baby bonnet a lovely scalloped edge, chain 3, then work (2 dc, ch 2, sl st) into the next ch-1 space. Repeat around the circumference for a delicate, wave-like finish. You should have scallops throughout to adorn the edge.

Row 8: Tie Straps
Cut a new strand of yarn around 20 inches long for each tie. Start your tie by creating a slip knot and chaining 70. This will ensure that the bonnet stays securely fastened under the chin.

Row 9: Attach Ties
Join the ties to the sides of the bonnet by using sl st. Ensure they are positioned securely, about 3 rows from the last scallop. This provides both stability and cuteness for your little wearer.

Row 10: Weave in Ends
Using your yarn needle, weave in any loose ends throughout the bonnet. This step is crucial to give a polished finish to your lovely crochet baby bonnet and to prevent any yarn from unraveling.

Row 11: Block the Bonnet
Take a moment to block your finished piece slightly. Lightly wet the bonnet and shape the edges to enhance the scallops. This final touch will ensure a beautiful drape and fit on your baby’s head.

Row 12: Final Fit Check
Lastly, make sure the bonnet fits comfortably on the baby’s head. The finished dimensions should be around 14-15 inches in circumference. If needed, adjust ties for a snug fit, ensuring the baby stays safe and cozy. Now your crochet baby bonnet is complete and ready for use!

How to Wash and Care for Your Crochet Baby Bonnet

Machine Washing: Use the gentle cycle with cold water only, and place the bonnet in a mesh laundry bag to avoid snagging.

Hand Washing: For a more careful clean, gently soak the bonnet in lukewarm water with mild detergent for about 10 minutes before rinsing.

Drying: Lay the crochet baby bonnet flat on a clean towel to dry, avoiding direct sunlight to protect the colors and fibers.

Blocking: After washing, lightly block the bonnet again to maintain its shape and enhance the delicacy of the scalloped edges.

Crochet Baby Bonnet Variations

Feel free to explore different yarns and embellishments to make this project uniquely yours!

  • Color Variations: Experiment with vibrant hues or pastel tones for different seasons, like sunny yellows or soft blues.
  • Yarn Alternatives: Try using bamboo or linen yarn for a unique texture and breathability, ideal for summer wear.
  • Size Modifications: Adjust the pattern for larger bonnets by increasing foundation chains or adding extra rows to fit older children.
  • Embellished Designs: Add flowers or bows made from crochet scraps to give a personalized touch that enhances the charm.
  • Textural Changes: Combine yarns for a color-blocked effect; alternating textures can add visual interest to your baby bonnet.
  • Seasonal Add-ons: Work the bonnet in wool for winter warmth, treating the pattern with thicker yarns suitable for colder months.

Consider using a blend of cotton and acrylic for a soft, cozy feel with excellent drape. The open-work texture not only looks beautiful but also ensures a comfortable fit, keeping your baby snug and stylish. Don’t hesitate to check out more crochet tips and ideas on our blog for creative inspiration!

Expert Tips for the Best Crochet Baby Bonnet

Count Regularly: Consistently check your stitch count, especially during the lace section to avoid dropped stitches and maintain the desired shape.

Track Rows: Use a stitch marker to track which row you’re on to prevent losing count as you work through this intricate crochet baby bonnet.

Fondation Chain: Ensure you don’t twist your foundation chain; a twisted chain can lead to a misfitting bonnet that’s uncomfortable for the baby.

Check Tension: Keep an eye on your tension while crocheting, adjusting your hook size if your stitches feel too tight or too loose.

Block Lightly: After completing your project, don’t forget to block the crochet baby bonnet lightly to shape the scalloped edges perfectly and ensure a well-defined fit.

Choose Right Yarn: Opt for a soft, breathable yarn like a cotton blend, essential for the comfort and airflow in a crochet baby bonnet.

Crochet Baby Bonnet FAQs

Can I substitute yarn for this project?
Absolutely! While worsted-weight yarn is recommended, you can use other yarn types depending on your desired look, just adjust your hook size accordingly.

What size hook should I use?
For the crochet baby bonnet, a 4.5 mm (G/6) hook generally works best. If you find your stitches too tight or loose, consider trying another size.

How can I adjust the size of the bonnet?
To resize, you may increase or decrease the foundation chain. A few extra chains can fit a larger head, while removing chains is perfect for smaller babies.

What if my bonnet keeps curling at the edges?
If curling occurs, examine your tension and stitch pattern. A tighter tension might cause this issue, so try loosening your stitches or blocking the bonnet afterward to help eliminate it.

How can I personalize the bonnet?
You can personalize your crochet baby bonnet using different yarn colors and decorative elements like buttons, flowers, or even small bows to enhance the overall charm.

What’s the best way to store my crochet baby bonnet?
Store your finished bonnet in a cool, dry place away from direct sunlight. Avoid folding it to prevent creases; instead, lay it flat or place it in a breathable bag.

Filed Under: Baby

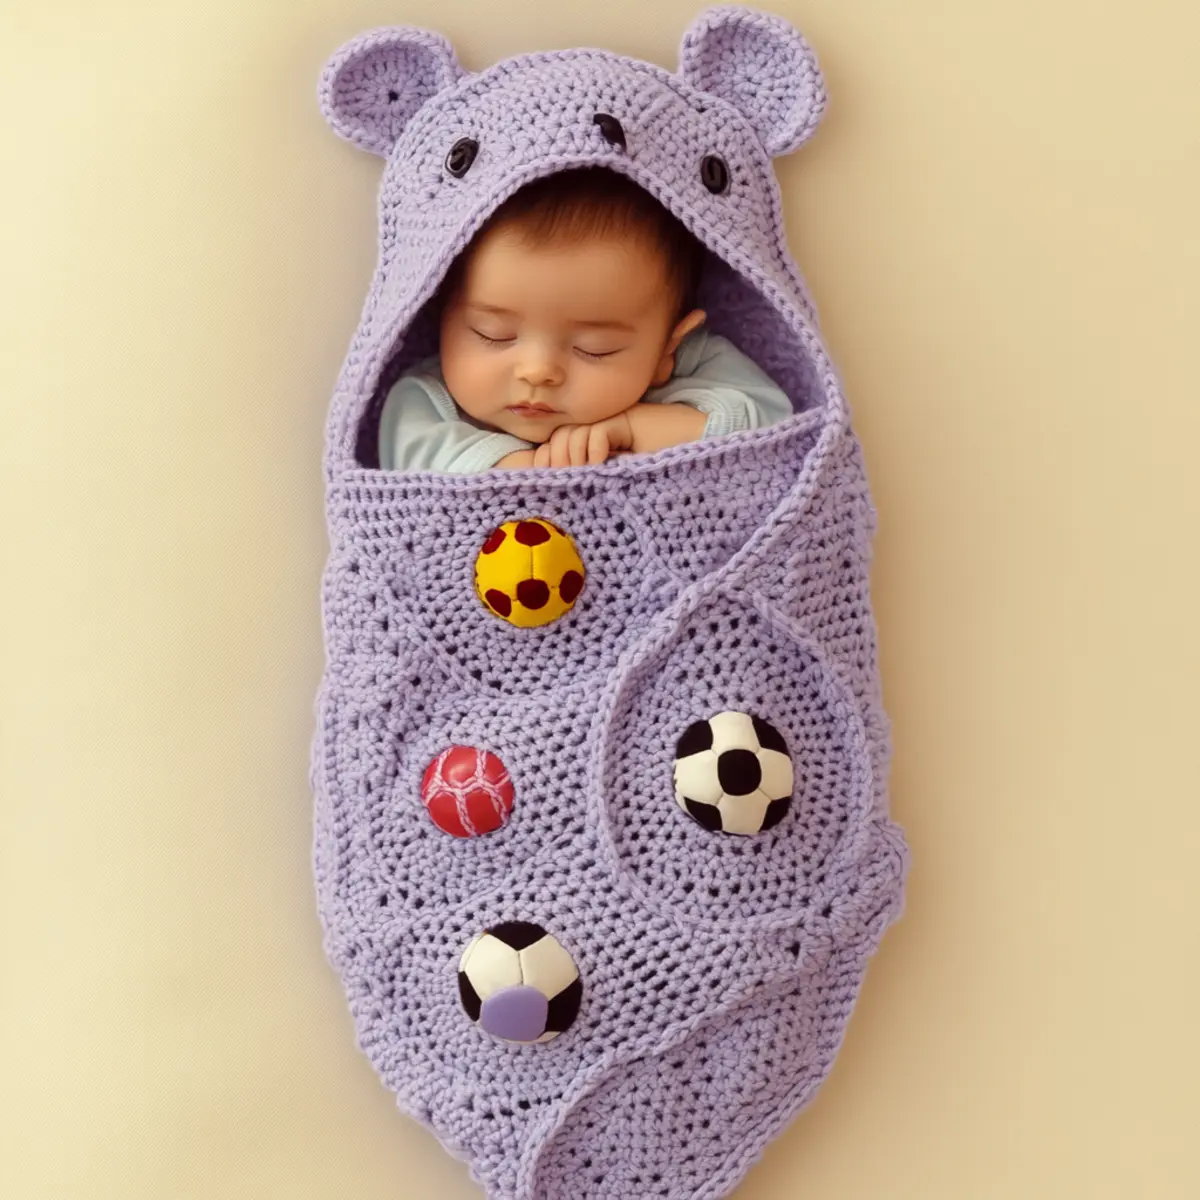
Cozy Crochet Baby Swaddle with Bear Ears for Newbies

August 17, 2026 by Publisher Leave a Comment

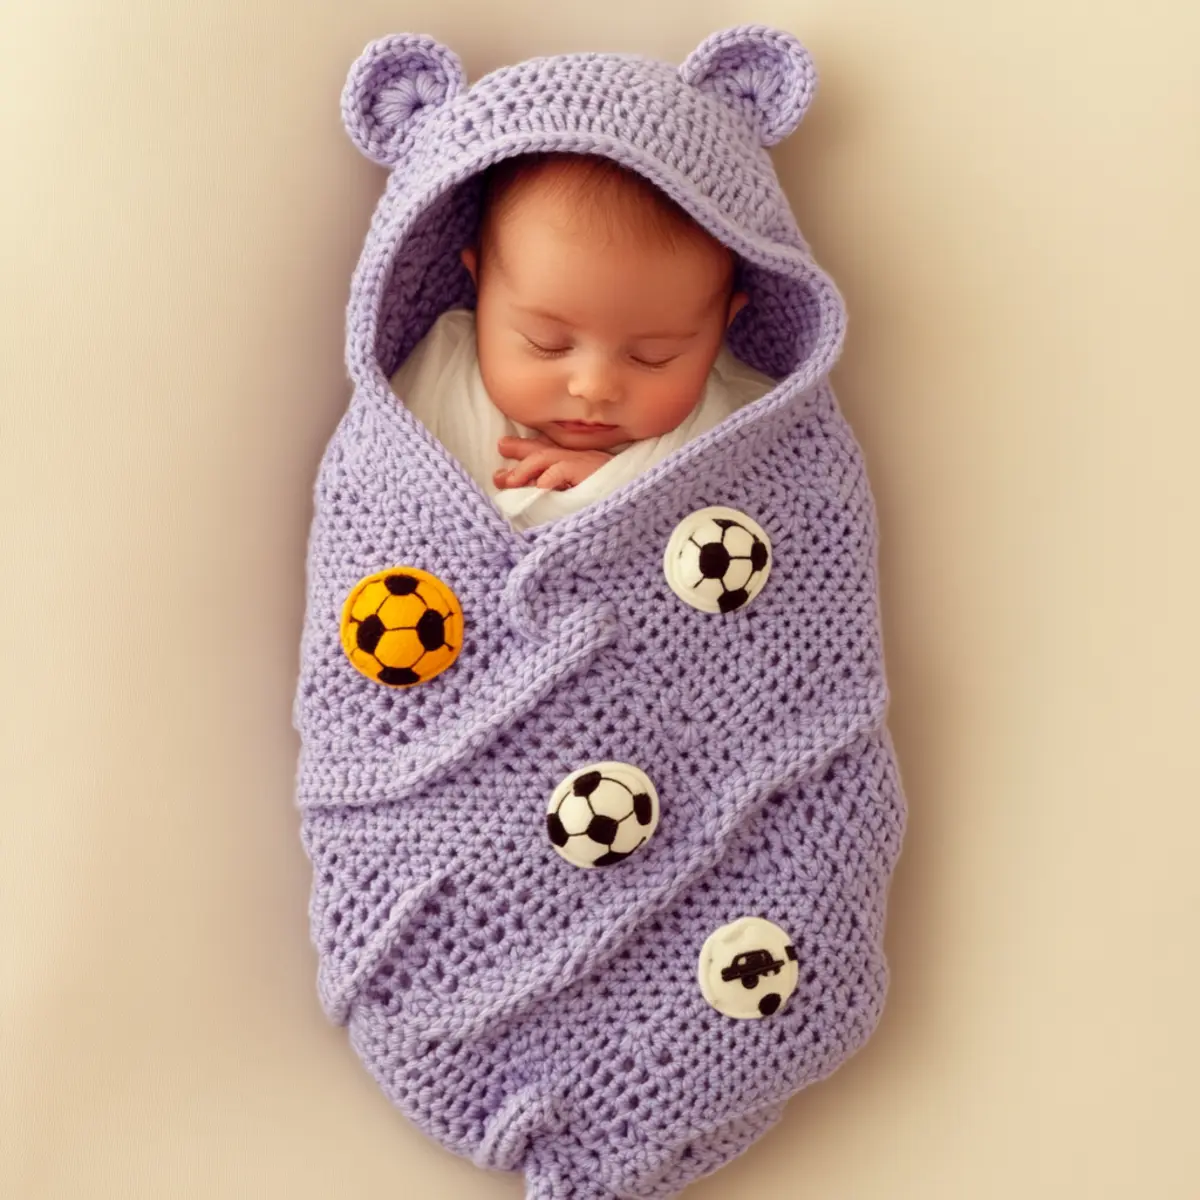
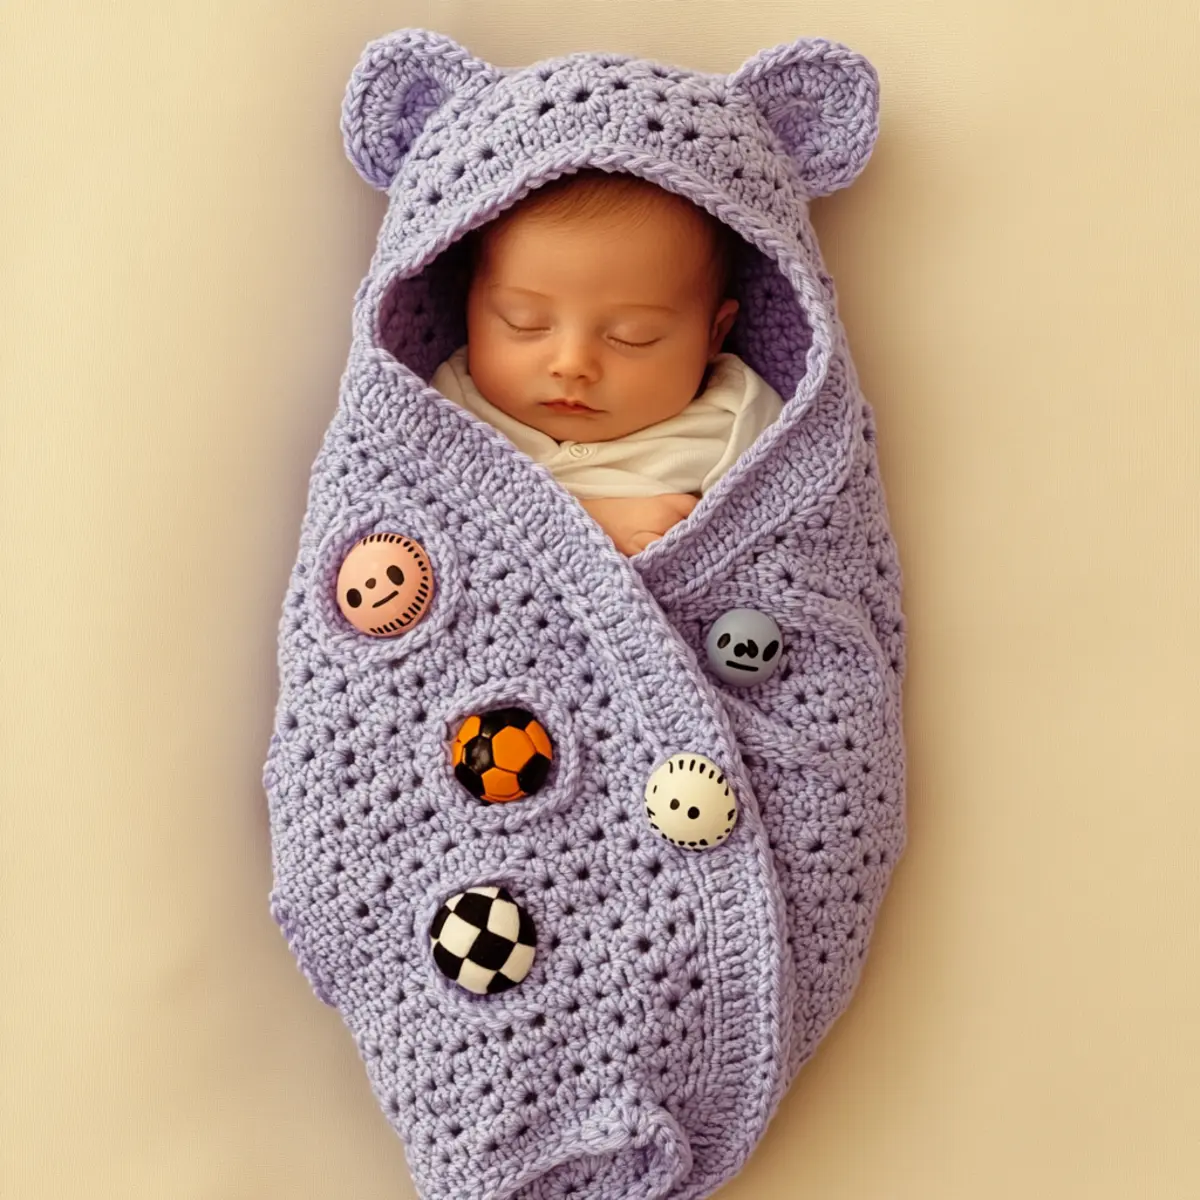
As I settled into my favorite chair with my crochet hook in hand, I felt a familiar sense of excitement wash over me. Today, I would be embarking on a delightful journey to create a Cozy Crochet Baby Swaddle with Bear Ears. This charming project not only offers a whimsical flair but also embraces the practicality that every parent craves. The best part? It’s a beginner-friendly endeavor that allows anyone to use their yarn stash while crafting something truly special. Imagine wrapping your little bundle of joy in a soft, breathable cocoon that keeps them snug, all while showcasing your unique style. With just a few stitches and a dash of creativity, this swaddle becomes a treasured keepsake perfect for gifts or your own nursery. Curious how to add an adorable personal touch? Let’s dive into this cozy creation together, transforming simple yarn into an enchanting piece of artistry.

Crochet Baby Swaddle Materials & Tools

Yarn

  • Worsted weight yarn – Approximately 200-300 yards of a soft cotton-acrylic blend is ideal for a cozy, breathable crochet baby swaddle.
  • Lavender yarn – A lovely choice for a whimsical touch or feel free to substitute with mint green or soft pink.

Tools & Notions

  • 5.0 mm crochet hook – This size helps create the perfect stitch definition without adding bulk, keeping the swaddle lightweight.
  • Stitch marker – Crucial for maintaining even row counts, ensuring a neat finish as you work through the pattern.
  • Decorative buttons (cars, soccer ball) – Great embellishments to add adorable flair to the swaddle, giving it a playful feel and engaging style.

Why You’ll Love This Pattern

Simplicity is at the heart of the Cozy Crochet Baby Swaddle. This pattern utilizes easy-to-follow instructions, making it a fantastic choice for crafters of all skill levels. The texture created with various stitches adds depth to the design while ensuring your baby remains comfortable in their swaddle. Additionally, this project is incredibly stash-friendly; you can use leftover yarn scraps for a truly personalized touch. With the option to customize colors and embellishments, it becomes a unique piece, ideal for those looking for beginner crochet projects to try. The time-saving characteristics of this pattern mean you’ll have a beautiful gift ready for your next baby shower in no time, and with charming details like bear ears, the aesthetic appeal is undeniable. Each stitch brings you joy and satisfaction, making this project not just practical but also delightful.

Gauge & Sizing Notes for Crochet Baby Swaddle

When creating the crochet baby swaddle, checking tension is vital to achieving the desired dimensions and ensuring your swaddle provides a snug fit. The recommended gauge for this project is 4×4 inches (10×10 cm) should equal 12 stitches by 10 rows in hdc. It’s important to adjust your starting chain if your swatch differs from this measurement. If your gauge is tighter than expected, try a larger hook size for the crochet baby swaddle. Conversely, if it’s too loose, decrease your hook size. For sizing adjustments, if you need a larger fit for a bigger infant or toddler, consider increasing your foundation chain in multiples of 2 to gradually widen the body without losing the charm of the design. This will help ensure your crochet baby swaddle not only looks great but fits comfortably and securely around your little one. Properly measuring and adjusting will guide you in achieving the perfect finish.

Step-by-Step Pattern for Crochet Baby Swaddle

Row 1: Create the Foundation Begin by making a foundation chain of 55 ch. This will serve as the base of your cozy crochet baby swaddle, allowing for an adjustable fit. Make sure it’s neither too tight nor too loose for a snug start.

Row 2: Begin the Hood Turn your work and crochet 1 sc in the second ch from the hook. Continue across the chain with 1 sc in each ch until you reach the end (54 sc). This sets the stage for the bear-eared hood, providing a solid foundation.

Row 3: Build Texture For this row, switch to dc stitches. Crochet 1 dc in each stitch across (54 dc). The use of double crochet gives the hood some height and a delightful textural effect that enhances its appearance and coziness.

Row 4: Add Dimension Begin increasing for the sides of the hood by crocheting 2 dc in the first stitch then continuing with 1 dc in each of the next 52 stitches (total 55 dc). This will start shaping the bear ears while the extra height will allow for a snug fit around the baby’s head.

Row 5: Complete the Hood Repeat Row 4 once more to give the hood a sturdy shape and pronounced bear ears (55 dc). The rounded design of the hood is essential for that whimsical look while embracing functionality.

Row 6: Transition to Body Work 1 hdc still in the last dc of the previous row, then ch 2 to create space before beginning the body. This transition between the hood and body of the crochet baby swaddle will ensure a seamless flow of design.

Row 7: Forming the Body Start the body of the swaddle by working 1 hdc in each hdc around (55 hdc). The half double crochet stitch creates a nice, cozy feel while being manageable for beginners learning new techniques.

Row 8: Adding Warmth In this round, create cluster stitches for added warmth. Yarn over, pull up a loop in the first stitch, yarn over again, then pull through all loops on the hook (this counts as 1 stitch). Continue around doing 1 cluster in each stitch (total of 55 clusters). This adds both visual interest and a soft texture, perfect for a baby swaddle.

Row 9: Continue Building the Body Work in 1 sc in each cluster stitch around (55 sc). This rounds out the body of the swaddle while maintaining a lovely structure without bulkiness.

Row 10: Form the Lower Edge For the final row of the body, alternate between 1 hdc and 1 ch all around to create a gently ribbed edge (total should match previous rows, 55 sts). This soft finish adds both style and a secure closure for the swaddle.

Row 11: Attaching the Buttons Take your decorative buttons—one car and one soccer ball—and sew them onto the lower edge of the swaddle, ensuring they are safely fastened for cuteness without compromising safety.

Row 12: Final Assembly and Blocking Once all sections are complete, crochet a simple slip stitch seam along the sides to secure the design. Be sure to lightly block the work to even out stitches, maintaining a lovely drape in the finished crochet baby swaddle. You’re now ready to showcase this handmade treasure!

Crochet Baby Swaddle Variations

Feel free to add your personal touch with various yarns and designs!

  • Pastel Colors: Opt for mint green or soft pink for a fresh, whimsical touch that brightens any nursery.
  • Organic Cotton: Use organic cotton yarn for a hypoallergenic option, perfect for sensitive baby skin while maintaining softness.
  • Texture Changes: Incorporate textured stitches like bobbles or popcorn for extra visual interest without sacrificing comfort.
  • Size Adjustments: Create a larger version for toddlers or customize the dimensions for a unique fit as your child grows. Whimsical customization adds longevity to this beloved piece!
  • Personalized Buttons: Instead of the standard car and soccer ball buttons, consider buttons in the shape of animals or stars, infusing personality and charm.
  • Color Blocking: Introduce a color-blocked design, alternating rows of different shades that can perfectly match baby outfits and nursery decor.
  • Embellished Edges: After finishing, you can add fringed edges or lace trim to enhance the swaddle’s charm, making a simple design pop. This detail will delight everyone who sees your creation!
  • Stitch Pattern Mix: Mix beginner-friendly stitches with more complex ones, like chevrons, to enhance the swaddle’s appeal for those learning new crochet techniques.

Expert Tips for the Best Crochet Baby Swaddle

Stitch Count: Always keep track of your stitch count with a stitch marker to avoid losing count mid-project. This keeps your crochet baby swaddle neat!

Foundation Chain: Avoid a twisted foundation chain by regularly checking your chain before continuing. A twisted chain can lead to a frustrating start.

Tension Matters: Ensure consistency in tension throughout your project. Uneven tension can result in uneven sizes, affecting the overall fit of the swaddle.

Dropped Stitches: If you drop a stitch, don’t panic! Just pick it up and work back into your pattern to maintain the integrity of your crochet baby swaddle.

Blocking: Lightly blocking your finished piece helps in evening out stitches, giving your project a professional look. Plus, it can enhance the design features!

How to Wash and Care for Your Crochet Baby Swaddle

Machine Washing: Use a gentle cycle with cold water when machine washing your crochet baby swaddle. Avoiding agitation helps preserve the yarn quality.

Hand Washing: For best results, hand wash in lukewarm water with mild detergent to protect the crochet work and maintain the softness.

Drying: Lay flat to dry rather than hanging, which can stretch your swaddle. This helps keep the crochet baby swaddle’s shape intact.

Storage: Store your swaddle in a cool, dry place, ensuring it’s folded neatly to prevent creases and maintain its beautiful structure.

Crochet Baby Swaddle FAQs

Can I use a different yarn?
Absolutely! You can substitute with organic cotton or other soft yarns to personalize your crochet baby swaddle while ensuring breathability for your baby’s skin.

How do I adjust the size?
If you’re aiming for a larger swaddle or a toddler size, consider increasing your foundation chain in multiples of 2. This method retains the charm of the design while fitting larger bodies comfortably.

What should I do if my swaddle curls up?
Curls can often be a result of tighter stitches. Try blocking your swaddle after completing it; this may help smooth out areas that have curled.

Which hook size works best?
A 5.0 mm crochet hook is ideal, but if your stitches are too tight, consider sizing up to 5.5 mm to achieve a looser fit for your crochet baby swaddle.

Can I add more embellishments?
Certainly! Decorative buttons add charm, but you can also use embroidery or other embellishments to make your crochet baby swaddle uniquely yours. Be sure everything is securely attached for safety!

What if I drop a stitch?
Don’t worry! If you drop a stitch, just pick it back up and continue. You can weave it back into place, maintaining the integrity of your crochet baby swaddle.

Filed Under: Baby

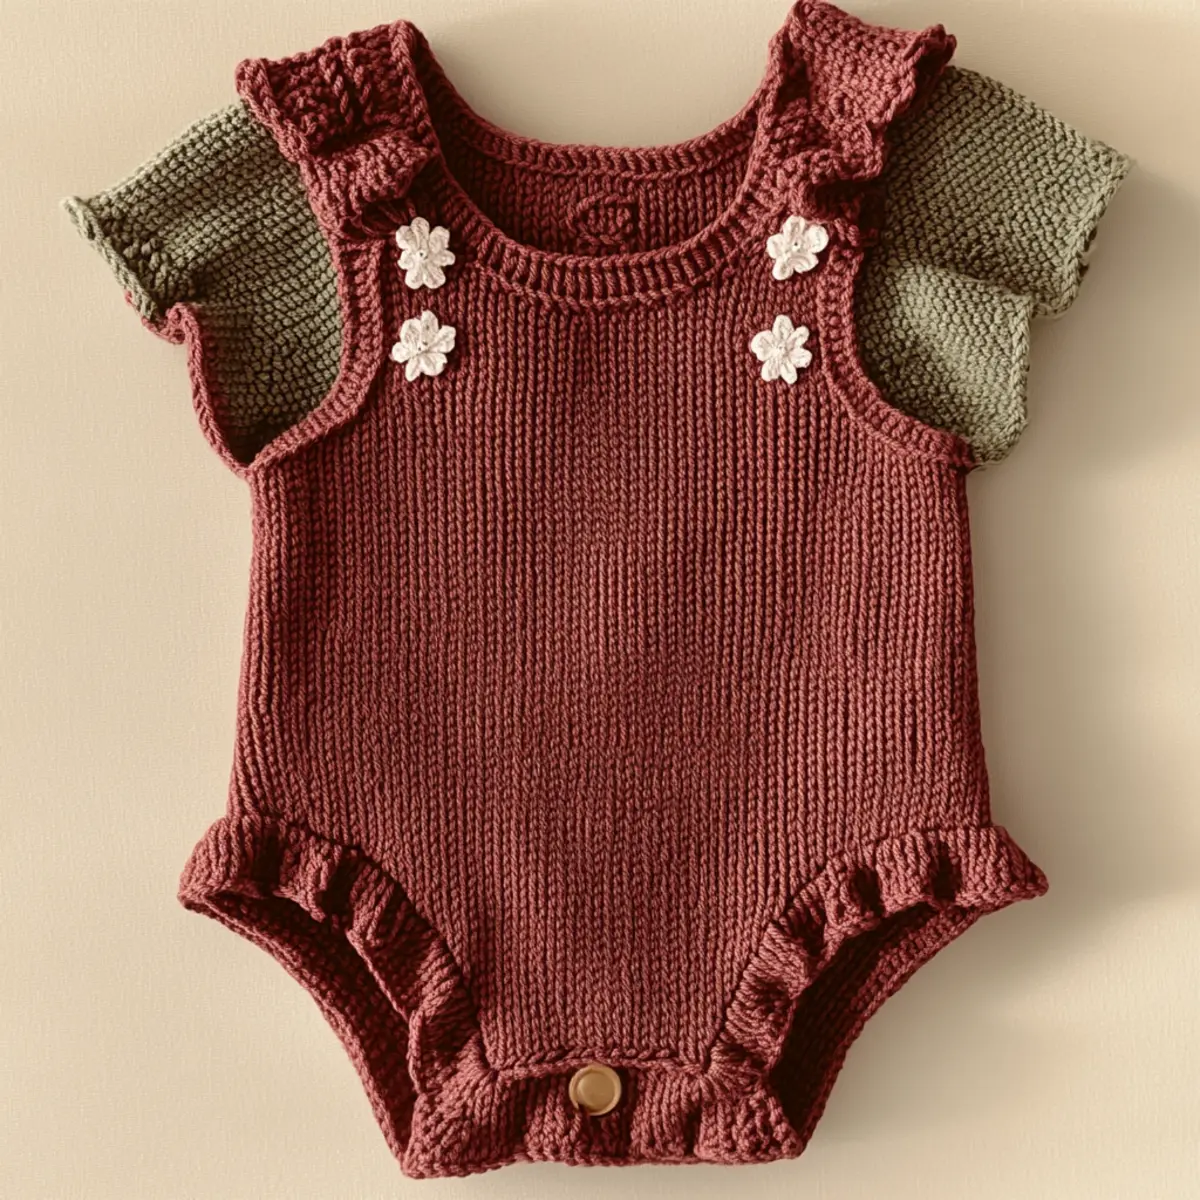
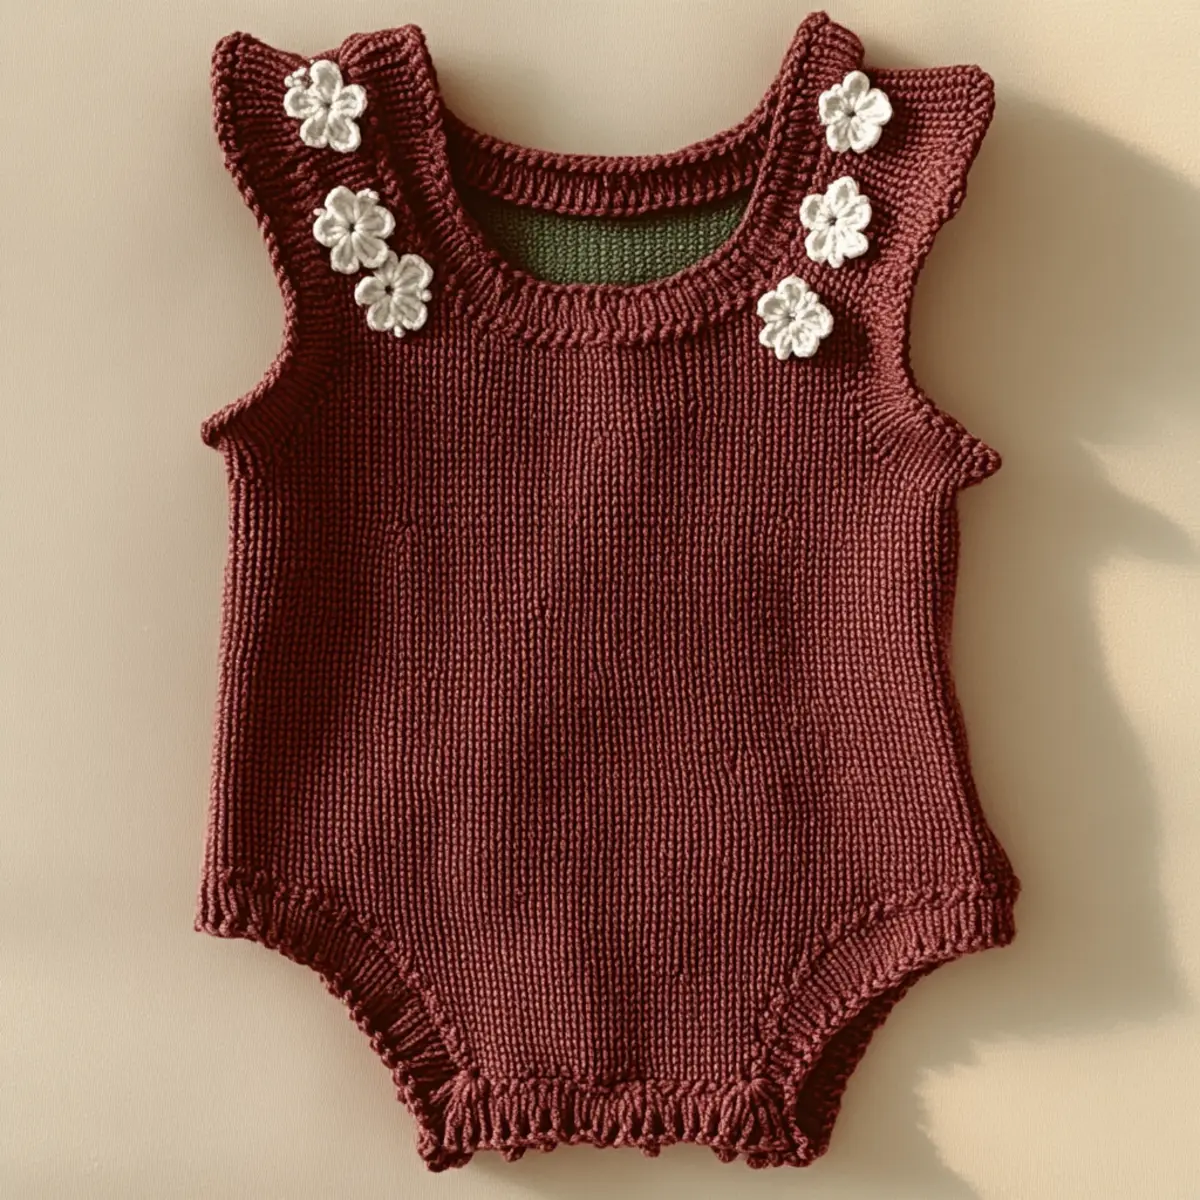
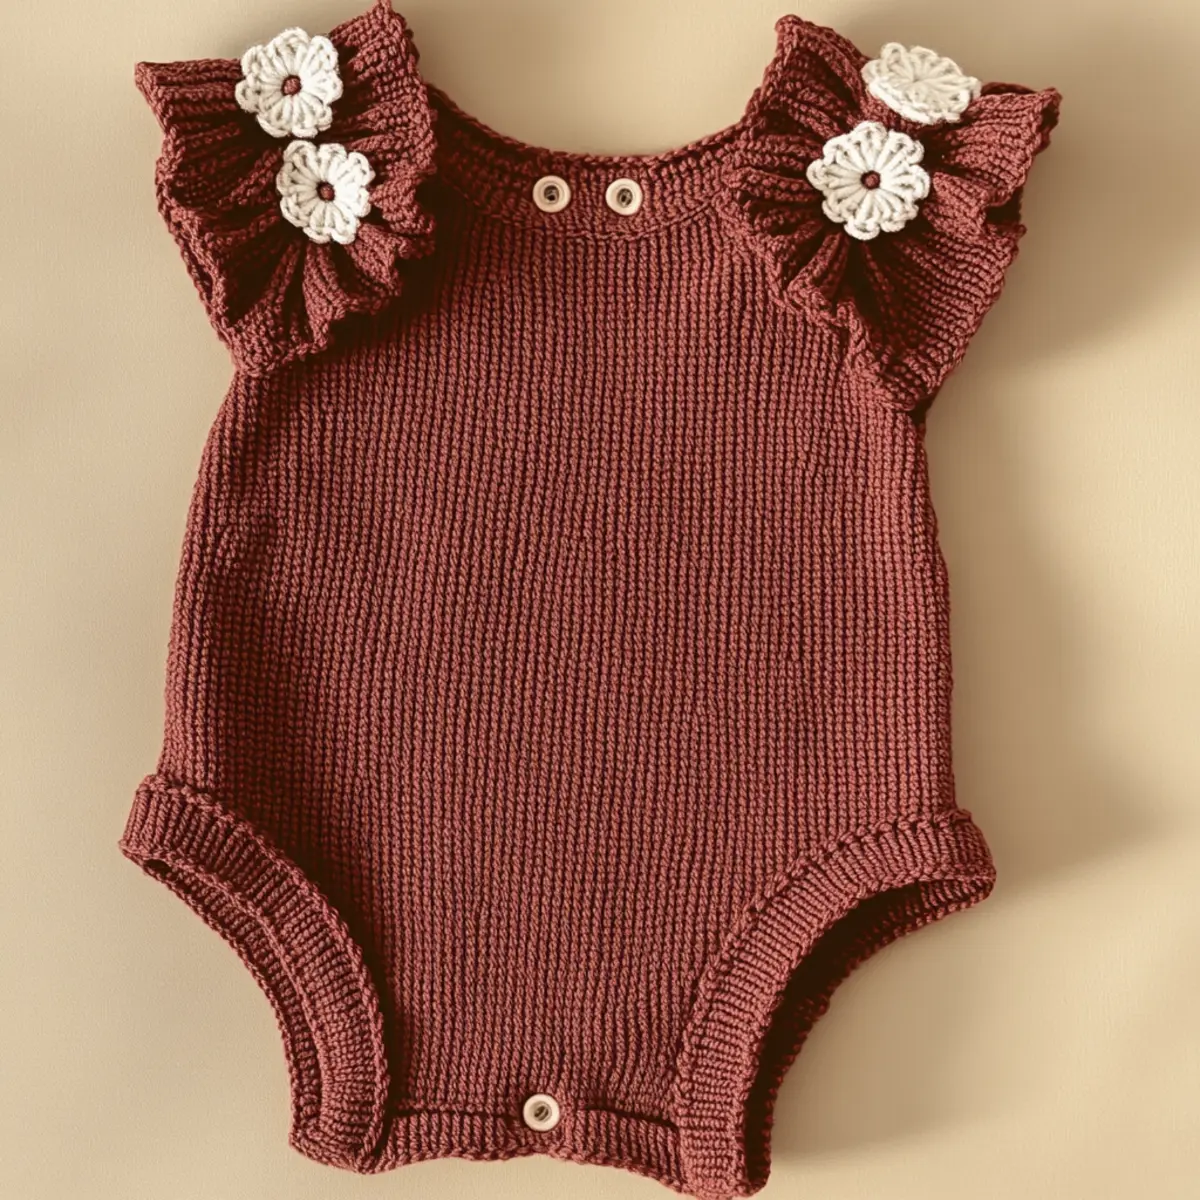
Cozy Baby Crochet Romper Pattern with Floral Touches

August 17, 2026 by Publisher Leave a Comment

Cozying up with crochet projects always brings a spark of delight, especially when it involves crafting for little ones. Recently, I dove into making some whimsical baby rompers, a project that has become a personal favorite of mine. This cozy baby crochet romper pattern offers an enjoyable, quick experience that can help reduce your yarn stash while resulting in adorable outfits for your child or a loved one. These rompers are not only beginner-friendly, thanks to simple stitches and techniques, but they also allow for creative expression with floral accents that transform basic garments into charming masterpieces. Each stitch tells a story, and the joy of seeing a little one in your handmade creation is unlimited. As you delve into this cozy journey, I wonder what color combinations and embellishments will capture your imagination the most?

Baby Crochet Romper Materials & Tools

Yarn

  • Medium weight yarn (size 4) – Approximately 300-400 yards are needed to create both rompers, ensuring comfort and durability for your baby crochet romper.
  • Cotton or acrylic yarn – Both options provide a soft drape, perfect for babies while allowing room for embroidery and decorative elements.

Tools & Notions

  • 4.5 mm crochet hook (G/6 US) – This size is ideal for creating the rompers with a snug yet comfortable fit.
  • Small crochet flowers – Made from lighter yarn for added contrast, these embellishments add a charming touch to the romper’s design.
  • Buttons – Choose buttons that match your yarn colors for closures, enhancing the overall aesthetic of your handmade garment.

What Makes This Romper Unique?

Gauge & Sizing Notes for Baby Crochet Romper

Checking your tension is crucial when crafting the baby crochet romper to ensure that the garment fits comfortably. The standard gauge to aim for is 4×4 inches (10×10 cm) with 15 sc stitches and 18 rows in single crochet. If your tension doesn’t match, you may need to adjust your hook size or yarn choice. To resize the romper, simply add or reduce the foundation chain in increments of 10-15 stitches, ensuring the leg openings and body dimensions are balanced accordingly. If your swatch doesn’t match the gauge, it’s essential to either go down a hook size for tighter stitches or up a size for looser stitches. Personalizing this cozy baby crochet romper with floral accents and vibrant colors further enhances its charm. As this project can cater to various sizes ranging from newborns to 6 months, adjusting the starting chain accordingly ensures a delightful fit for your little one!

Step-by-Step Pattern for Baby Crochet Romper

Row 1: Foundation Chain
Begin by creating a foundation chain that measures approximately 70-80 inches (depending on the size of the romper). Use a medium weight yarn with a 4.5 mm hook to ensure a soft drape. Join the end of the chain with a slip stitch (sl st) to form a circle, being careful not to twist it.

Row 2: Starting the Body
Work in single crochet (sc) around the chain to establish the body of the romper. Distribute your stitches evenly, making sure to place approximately 60-70 stitches total. Remember to place a stitch marker to denote the beginning of the round (70 total stitches).

Row 3: Establishing Rounds
Continue crocheting in single crochet for about 10-12 rounds. This will make up the torso of the romper, ensuring ample coverage for your little one. Make sure to check your tension throughout to maintain consistent sizing.

Row 4: Begin the Leg Openings
To create leg openings, start the round by working and then chaining 20 stitches for the first leg opening, skipping the next 20 stitches from the previous round. Slip stitch (sl st) into the first stitch to close the round, ensuring an even fit (40 total stitches).

Row 5: Crocheting the Legs
In this row, work around each leg opening in double crochet (dc). Add 3-4 additional rounds of dc to develop the length of the leg openings comfortably. You can use an increase (inc) after every 5 stitches to make them slightly wider to fit over diapers.

Row 6: Creating the Ruffles
To introduce ruffles to the legs, switch to a shell stitch pattern (5 dc in the same stitch, skip 1 stitch). Create this for 4-5 rounds to give a whimsical look to the romper. Switch back to regular sc for the following rounds to secure the ruffles.

Row 7: Shaping the Shoulders
Begin the shoulder straps by switching to half double crochets (hdc) for durability. Create a foundation chain of about 20 inches and then make 4-5 rows of hdc. Don’t forget to place buttonholes on one side before finishing the straps to attach to the body of your baby crochet romper.

Row 8: Attaching the Straps
Carefully attach the shoulder straps by stitching them to the back of the romper using slip stitches (sl st) for a neat finish. Ensure that the straps are securely fastened to withstand the playful movements of little ones.

Row 9: Adding Floral Accents
Using a contrasting lighter yarn, create small crochet flowers for embellishment. Work in different colors; typically, five petals using single crochet (sc) stitches for each flower suffices. Attach the flowers at the shoulder seams or along the torso for a charming effect.

Row 10: Final Touches
To complete the romper, add buttons at the strap ends for closures that complement your yarn choice. These buttons serve as both functional elements and cute additions to the overall look of the baby crochet romper.

Row 11: Blocking the Romper
After completing your romper, it’s important to block it. Wet blocking can help even out stitches while avoiding excessive stretching, especially around intricate design elements like the ruffles and flowers. Let it dry flat to maintain its shape.

Row 12: Last Inspection
Finally, perform a thorough inspection of your finished romper, checking for any loose threads or irregular stitches. Make adjustments where necessary and prepare for a baby to wear your lovely creation. The final romper should be snug but comfortable, allowing free movement for crawling or wiggling!

Baby Crochet Romper Variations

Feel free to let your creativity shine by customizing these rompers with different styles and elements!

  • Color Blocking: Experiment with multiple color segments across the romper for a playful twist.
  • Fabric Choices: Opt for bamboo yarn for a softer, eco-friendly alternative that’s gentle on baby skin.
  • Ruffle Styles: Add funky fringe ruffles or larger shell stitch ruffles to elevate the garment’s whimsy.
  • Floral Embellishments: Use fabric flowers instead of crochet for a chic contrast and a unique texture.
  • Size Adjustments: Scale the pattern to accommodate toddlers or older infants, ensuring long-term use.
  • Strap Variations: Try a cross-back strap design for added flair and more comfort.
  • Textured Patterns: Introduce a bobble stitch in some sections for a plush, cozy feel that captivates little hands.
  • Embellished Buttons: Choose decorative buttons that feature interesting shapes to add a personal touch, enhancing the overall aesthetic while being functional. Incorporating family heirlooms or fun shapes like stars or hearts can add nostalgia or playfulness to each piece.

Remember, every stitch you make is a heartfelt story for the baby wearing it! Check out more about customizing your crochet projects in this article.

Expert Tips for Baby Crochet Rompers

Bold Count: – Always keep track of your stitch count to prevent mismatches in size or pattern. Setting up markers can help you stay focused.

Foundation Chain: – Ensure your foundation chain is not twisted before joining it. This avoids distorted shapes in your baby crochet romper.

Consistent Tension: – Maintain even tension throughout the project to keep your stitches uniform, especially in the sections where floral accents are added.

Review Each Round: – After every few rounds, check your work for dropped stitches or curling. Catch mistakes early to save time and frustration.

Yarn Selection: – Choose a soft, durable yarn suitable for babies. Cotton or acrylic works best for both comfort and easy washing. Stick to the recommended medium weight for best results.

Decorative Elements: – When adding ruffles or flowers, be mindful of where they are placed for a balanced aesthetic. Secure embellishments well to avoid them falling off during wear.

How to Wash and Care for Your Baby Crochet Romper

Hand Washing: – Always opt for hand washing with cold water to prevent any damage to the yarn or structure of the romper. Avoid harsh detergents.

Machine Washing: – If using a machine, place the romper inside a mesh laundry bag. Select a gentle cycle with cold water to protect the integrity of your work.

Drying: – Lay the romper flat on a clean towel to dry naturally. This helps maintain its shape and prevents stretching, especially around ruffles.

Blocking: – Check for any irregularities and do wet blocking if necessary after washing. This will smooth out stitches and enhance the floral designs.

Baby Crochet Romper FAQs

Can I substitute yarn for this pattern?
Absolutely! You can use any medium weight yarn, such as cotton or acrylic, but remember that different compositions can alter the drape and feel. Test your yarn for suitability before starting.

What hook size should I use for the romper?
For this baby crochet romper, a 4.5 mm (G/6 US) hook is best. This size helps maintain an even tension while being comfortable to work with, especially for beginners.

How do I adjust the sizing for my baby?
To resize, adjust the foundation chain in increments of 10-15 stitches. Ensure that the leg openings are proportionate to the body by keeping a close eye on gauge throughout the process.

What if the romper starts curling at the edges?
Don’t panic! Curling often happens with crochet pieces. To fix this, ensure you’re using the proper tension and blocking techniques. Wet blocking typically solves this issue.

How can I troubleshoot dropped stitches?
If you notice dropped stitches, simply unravel back to where the stitch was lost and redo that section. Using stitch markers along your rounds can help track your stitches better.

Can I add more embellishments?
Definitely! Feel free to personalize your romper with more floral accents or even different stitch patterns. Just make sure to secure them well to ensure durability while baby wears it.

Filed Under: Baby

Charming Crochet Flower Garland for Whimsical Decor

August 17, 2026 by Publisher Leave a Comment

Cozy Snapshot: The sun poured into my living room as I settled into my favorite chair, yarn in hand, with the perfect project on my mind – the Charming Crochet Floral Garland. This delightful piece not only serves as a joyful burst of color, but it’s also a chance to enhance my crochet skills. The project is utterly stunning and a fantastic way to utilize leftover yarn in your stash while creating something beautiful. Imagine transforming your space into a whimsical haven suitable for any occasion, from brightening up a dull corner to adding charm for a seasonal party. With this crochet flower garland, you can effortlessly bring warmth, charm, and a personal touch to your home décor. Whether you’re gifting it for a birthday or showcasing it at your next gathering, this delightful garland promises to earn its keep. Plus, as you navigate through different stitches to craft each flower, you’ll find yourself honing your skills without feeling overwhelmed. So, are you ready to add a dash of crochet magic to your home? Let’s dive right in and explore how to create this charming masterpiece!

Crochet Flower Garland Materials & Tools

Yarn
Lightweight cotton or acrylic blend – Approximately 200 yards of each color, allowing for various color combinations throughout the crochet flower garland.

Tools & Notions
Crochet hook (E/4) – Use for creating delicate flowers that maintain their shape while avoiding bulkiness.
Stitch markers – Helpful for marking color changes to maintain accuracy and ease in your project.
Tapestry needle – Necessary for weaving in ends and securing flowers together seamlessly.
Blocking tools – Consider using them post-completion to preserve the flowers’ shapes and enhance the final look of your crochet flower garland.

Experiment with a variety of shades to see what works best within your décor. Coloring may range from pastel to vibrant, making the crochet flower garland a fetching addition to every setting!

Why You’ll Love This Pattern

Crafting the Charming Crochet Floral Garland is more than just a project; it’s an experience! First, the pattern offers simplicity—each flower is created with basic crochet stitches, making it beginner-friendly while still engaging for seasoned crafters. Second, the texture of the final product is delightful, with soft petals that dance in the light, showcasing your skill and creativity. Third, it’s a stash-buster—use up your leftover yarn to create a stunning decor piece. You’ll love how each flower carries its own personality, blending colors and styles as you see fit. Not only is it great for personal use, but it’s an excellent choice for a thoughtful, handmade gift that adds a personal touch to celebrations. Plus, if you’re intrigued by other crochet projects, check out these beginner-friendly patterns to supplement your crafting journey. Finally, this garland is incredibly versatile—ideal for a myriad of occasions, from festive gatherings to everyday decor. Don’t miss out on making something uniquely yours!

Crochet Flower Garland Gauge & Sizing Notes

Checking your tension is crucial for the crochet flower garland to ensure each flower maintains a consistent shape and size. The recommended gauge is 3.5 stitches per inch (stitches may vary depending on the yarn and hook size used), and for an accurate measurement, create a swatch that covers a 4×4 inch (10×10 cm) area. If your tension is too loose or tight, adjust your hook size accordingly; a smaller hook for tighter stitches, a larger hook for more spacious ones. If your swatch doesn’t match the gauge, your final flowers may appear smaller or larger than intended, affecting the overall look of your garland. To resize this charming project, simply adjust the number of chains or rounds in your base flower. Every flower ideally should measure about 6-8 inches in diameter, allowing you to scale the garland’s length according to how many flowers you create, which can be anywhere from 3 to 5 feet. Work with care and have fun experimenting with yarn, keeping in mind this lovely crochet flower garland can add whimsical joy to your spaces!

Step-by-Step Pattern for Crochet Flower Garland

Row 1: Create the Magic Ring Begin by making a magic ring to form the center of your flower. This creates a secure foundation that allows the petals to emerge from the center in a lovely round shape. You should be able to pull the tail of the yarn to tighten the loop as needed.

Row 2: Cluster the Base Work 6 single crochet (sc) stitches into the magic ring to form the flower’s base. Pull the magic ring tight to eliminate any gaps. This tight cluster serves as the nice, snug center from which your petals will bloom beautifully. (6 sc)

Row 3: Form Petals One Chain 2 to lift, then make 2 double crochets (dc) into the next stitch. Follow this with a chain space. Repeat in each of the remaining stitches around for the first petal. This first petal is essential to adding dimension to your floral garland, so take care to space them evenly. (6 petals)

Row 4: Continue Petal Creation Slip stitch (sl st) into the first petal’s base stitch to connect. For the next petal, repeat Row 3. Each petal should follow suit, ensuring that the final form is symmetrical and aesthetically pleasing. You want a vibrant, delightful flower with well-defined petals. (12 dc)

Row 5: Attach Yarn for Color Changes As you finish your fifth petal, switch to your next color by joining a new yarn at the base of the last petal. Secure with a slip knot and chain 1 to prepare for the next flower. Color changes lend vibrancy to each flower, allowing creative freedom.

Row 6: Start a New Flower Work another magic ring and repeat Rows 1 to 5 to make subsequent flowers. Maintain consistency in tension for uniformity in size and shape across all flowers in your crochet flower garland.

Row 7: Join Flowers Together Once your flowers are complete, choose one color yarn to create a long chain. Work a series of 30-40 sc following your desired spacing for the flowers along your chain. This also ensures that your garland maintains an overall balanced appearance.

Row 8: Secure the Flowers Begin attaching flowers to the chain by working a slip stitch (sl st) to secure each flower at even intervals. Ensure that they are closely placed yet spaced enough to allow for some overall flow in your crochet flower garland’s design.

Row 9: Add More Details After floral arrangement, consider adding leaves between flowers. Create simple leaf shapes using a combination of sc and dc stitches. This detail will enhance the natural look of your crochet flower garland.

Row 10: Finalize Shape Once all flowers and leaves are complete, hold the garland up to check for balance. If desired, block each flower to help maintain their shape and adjust the spacing. Blocking will also help smooth out your work and enhance the overall presentation.

Row 11: Finish Off & Weave Ends Trim any excess yarn and weave in ends using a tapestry needle. Confirm that all knots are secure, as your floral garland should be both beautiful and durable for long-term display purposes.

Row 12: Hang Your Decoration Finally, choose a charming spot to hang your crochet flower garland. This decorative piece will surely brighten any room while showcasing your creativity and craftsmanship. Think about seasonal themes to keep your spaces lively and colorful!

crochet flower garland Variations and Substitutions

Feel free to customize your crochet flower garland by trying out different materials and techniques!

  • Bulky Yarn: Use a thicker yarn to create larger flowers for a more dramatic effect. Larger flowers make a bold statement in any room!
  • Different Fibers: Swap your cotton yarn for a silk or linen blend for a more luxurious texture. This will give your flowers a unique sheen and drape.
  • Color-Blocking: Experiment with different color groupings in each flower. Charming combinations can enhance the visual appeal of your garland, making it perfect for any party theme.
  • Add Leaves: Crochet simple, leafy accents to complement your flowers. Leaves add depth and a natural look to your garland design, making it even more eye-catching.
  • Seasonal Themes: Create a garland that matches seasonal colors or holidays. Think pastel shades for spring or rich reds and golds for autumn, adding festivity to your decor.
  • Embellishments: Incorporate beads or buttons in the center of your flowers for added flair. This detail can elevate the garland’s overall aesthetic while showcasing your creative flair.
  • Size Modifications: Scale the entire project up or down based on your space. If you want a statement piece, opt for larger flowers and longer chains to increase its presence.
  • Alternative Techniques: Consider learning other crochet stitches to create a textured effect, such as popcorn or shell stitches. This will enhance the uniqueness of your crochet flower garland. Feel free to check out our Crochet Techniques section for inspiration!

Expert Tips for the Best Crochet Flower Garland

  • Count Carefully: Always keep track of your stitches to avoid losing count and maintaining the flower’s structure, especially when changing colors.

  • Use Stitch Markers: Mark your color-changing stitches with stitch markers to help spot where to switch yarn and avoid confusion while crocheting.

  • Tension Matters: Maintain consistent tension for evenly sized flowers. Adjust your hook size if flowers appear too loose or too tight for the desired outcome.

  • Block for Shape: Blocking the completed flowers is essential to ensure they hold their shape, particularly with cotton yarn, providing a polished look to your crochet flower garland.

  • Experiment with Colors: Don’t hesitate to play around with different color combinations to personalize your crochet flower garland, making it unique to your space.

How to Wash and Care for Your Crochet Flower Garland

  • Machine Washing: If needed, wash on a gentle cycle with cold water to prevent damage. Always secure with a mesh bag to avoid snagging.

  • Hand Washing: For delicate care, gently hand wash your crochet flower garland with cold water and mild detergent to retain the integrity of yarn.

  • Drying: Lay the garland flat on a clean towel to air dry, avoiding hanging to prevent stretching. Reshape the flowers as they dry to maintain their look.

  • Storage: Store your crochet flower garland in a cool, dry place, away from direct sunlight, to preserve colors and prevent any fabric deterioration.

Crochet Flower Garland FAQs

  • Can I substitute yarn for this project?
    Absolutely! You can use different types of lightweight yarn, but be aware that the overall look and drape may vary with different fibers.

  • What hook size should I use?
    A size E/4 (3.5 mm) crochet hook is recommended, but feel free to adjust depending on your tension and yarn type to achieve the desired stitch appearance.

  • How do I troubleshoot dropped stitches?
    If you drop a stitch, don’t panic! Use a crochet hook to pick it up and rework the stitch seamlessly, ensuring it flows with the rest of your project.

  • Can I adjust the size of the flowers?
    Yes! To resize, simply change the number of rounds or chains in your base flower or switch to a different hook size, keeping gauge consistent.

  • Why are my flowers curling?
    Curling can occur if your tension is too tight. Blocking your flowers can help flatten them out and improve their appearance. Adjust tension in future projects for better results.

  • How can I ensure even flowers?
    Maintain consistent tension and use stitch markers to help keep track of your color changes and stitches throughout your crochet flower garland project.

Filed Under: Flowers

Charming Crochet Pansy Flower Pattern for Cozy Decor

August 17, 2026 by Publisher Leave a Comment

The moment I first held a delicate crochet pansy flower in my hands, I knew I stumbled upon something special. This charming crochet pansy flower pattern not only showcases vibrant colors and intricate stitches but also serves as a fantastic way to expand your crochet skills. One of the best aspects of this project is its versatility – it can easily transform everyday items like hats, bags, or scarves into eye-catching pieces of art. Plus, it’s a wonderful stash-buster, allowing you to use up leftover yarn and create breathtaking blooms that can blossom in any corner of your home. With this pattern, beginners will find themselves weaving joyfully through the rows, guided by simple instructions and a bloom that promises a satisfying experience. Can you picture a bouquet of these cheerful flowers decorating your projects? Let’s dive into the details and uncover the beauty of crocheting these pansies together.

Crochet Pansy Flower Materials & Tools

Yarn

  • Medium Weight Yarn – Approximately 100 yards total for multiple flowers; consider 100% cotton or a cotton blend for comfort.
  • Vibrant Colors – Embrace variations; experiment with blue and yellow, or even pink and white for your crochet pansy flower.

Tools & Notions

  • 4.5 mm (G) Hook – This size perfectly suits the worsted yarn, ensuring a tight and structured hold.
  • Yarn Needle – Essential for weaving in ends, achieving a tidy finish for your flower.
  • Green Yarn – A must for creating the stems, enhancing the overall botanical flair.
  • Optional Buttons or Embellishments – Add a personal touch to your finished pansy flower, making it uniquely yours.

What Makes This Pansy Pattern Unique?

Simplicity is at the core of this design, making it accessible even for those stepping into the crochet world. The straightforward instructions make it an enjoyable experience while achieving stunning results. Textured elements are introduced within the petals and center using techniques like popcorn stitches, giving your pansy a lifelike quality. What’s more, it’s a perfect stash-buster – you can combine leftover yarns to create unique flower combinations. Want to get creative? With a little improvisation, you can customize the size using different yarn weights as outlined in the materials and tools section. The aesthetic appeal of the pansy adds a charming touch to home decor, and when showcased against soft pastels, it’s sure to brighten any space. And don’t forget, the elegance of these flowers can even be enhanced with embellishments, transforming them beyond mere crochet into stunning decorative pieces.

Gauge & Sizing Notes for Crochet Pansy Flower

Checking your gauge is essential when working on your crochet pansy flower to ensure that each flower maintains a consistent size and beautiful drape. The standard gauge measurement for this project is 4×4 inches (10×10 cm), achieved by creating a sample swatch using your chosen yarn and the specified 4.5 mm (G hook). If your swatch does not meet the gauge, you can adjust your starting chain or rounds to resize the flower accordingly; for example, if you want a larger flower, you might consider using a thicker yarn or increasing your hook size. Conversely, to create smaller versions, use lighter yarn and reduce the number of initial chains or rounds. When crocheting the petals and center, be consistent with your stitch counts to maintain symmetry in your crochet pansy flower. If your tensions differ across sections, gently block the finished flower for a polished finish and to help the petals lay flat. This ensures that your decorations showcase their intricate details effectively.

Step-by-Step Pattern for Crochet Pansy Flower

Row 1: Create the Petal Base Begin by making a magic ring, then ch 3 (counts as first dc) and work 11 more dc into the ring. Pull tight to close the ring and join with a sl st in the top of the ch-3. (Total 12 dc)

Row 2: Form the First Petal Ch 1, then work 2 hdc in the first dc, 2 dc in the next, 1 dc in the following dc, and 2 dc in the next dc. Repeat around for a total of 6 petals. Join with a sl st. (6 petals)

Row 3: Build Tension For each petal, work 1 dc into each of the next 5 stitches, and in the last stitch, work 2 dc. This establishes the shape and texture of the petals. Join with a sl st. (Total 12 stitches)

Row 4: Create Color Variation Change to a contrasting color for your flower. First, ch 1, then sc in the same stitch, followed by working 1 sc across each dc of the petals. This adds depth and character. (Total 12 sc)

Row 5: Angle the Petals Continue in the first established stitch; work 1 sc, then inc in the next stitch. This begins to create the natural curve of your pansy flower. Repeat around, ensuring even spacing. (Total 18 stitches)

Row 6: Define the Floral Shape Change colors again; ch 1 and work 1 dc, 1 hdc, and 2 dc in the first stitch to add a nice curve to your petals. Continue this around the circle for a full, rounded look. (Total 24 stitches)

Row 7: Craft the Petal Edges Incorporate a decorative edge by working 1 dc in each stitch around. As you complete this round, appreciate how the edges start to define the pansy’s shape and create texture. (Total 24 dc)

Row 8: Make the Center Switch to a different shade for the center; use a new magic ring to start. Work 6 sc into the ring, establishing the center of your pansy. This will be a focal point, enhancing the flower’s visual interest.

Row 9: Increase the Center Size Ch 1, then work 2 sc in each stitch around. Pull tight to close the ring. This will give volume and a prominent look to the center of your flower. (Total 12 sc)

Row 10: Add Texture to the Center To create texture, work popcorn stitches: In the first sc, work 5 dc, then drop the loop off the hook and insert it back in the first dc to create the popcorn. Repeat this around the flower center to add dimension and character.

Row 11: Attach the Center Align the center with the flower petals and use sl st to attach securely, ensuring it sits well against the back of your pansy flower. This step is crucial for overall stability.

Row 12: Finish with the Stems Using green yarn, create a foundation chain that is the width you desire for your stem. Use sc for the additional rows after the first to achieve the desired thickness. Ensure that the stem is long enough to hold the flower upright in arrangements. This final touch completes the crochet pansy flower beautifully.

Crochet Pansy Flower Variations

Feel free to customize your crochet pansy flower with these delightful variations!

  • Color Combinations: Experiment with pairs like red and yellow or purple and pink for striking contrast. Bold choices can turn heads!
  • Yarn Types: Swap cotton for a bamboo blend for a softer touch, or consider acrylic for a more budget-friendly option. Each fiber offers a unique drape.
  • Petal Shapes: Use shells or bobbles in place of standard petals to create texture. The added interest can dramatically enhance your flower’s aesthetic.
  • Size Adjustments: Opt for a bulky yarn and larger hook for oversized pansies, perfect for centerpieces or standout decor. Conversely, go for lace weight to craft miniatures as embellishments.
  • Embellishments: Add beads or sequins to the center of your flower for eye-catching details. Subtle touches elevate the overall charm.
  • Texture Variations: Play with different stitches in the petals such as front post or feather stitches to add dimension. The outcome can range from elegant to whimsical.
  • Layered Look: Create a bunch by stacking multiple flowers with varying sizes for a full bouquet effect. Use wire stems for flexibility in arrangement.
  • Blocked Designs: Experiment with blocking techniques to enhance petal shapes. This can make each bloom look professional and crisp.

With these alterations, you can make each crochet pansy uniquely yours, letting your creativity blossom!

Expert Tips for the Best Crochet Pansy Flower

Stay Counted: Keep a close watch on your stitch count while crocheting the petals and center to maintain symmetry. It’s easy to lose track, especially with color changes.

Foundation Focus: Ensure your foundation chain is not twisted before you start. A twisted foundation can lead to a crooked flower that doesn’t lay flat.

Consistent Tension: Check your tension regularly. An even tension across stitches will elevate the overall look of your crochet pansy flower.

Blocking Necessity: After finishing, block your flower to set its shape. This helps each petal lay flat, showcasing the detailed stitch work beautifully.

Experiment with Colors: Don’t hesitate to mix and match colors for your flower’s petals. Vibrant combinations can bring a unique flair to your crochet pansy flower.

Try Different Yarns: You can get creative and use different yarn weights or textures. Thicker yarn can create oversized flowers, while lighter weights are perfect for smaller versions.

How to Wash and Care for Your Crochet Pansy Flower

Machine Washing: Use a gentle cycle in cold water if you decide to machine wash. Always place your flower in a lingerie bag to prevent snagging.

Hand Washing: It’s best to hand wash your crochet pansy flower in cold water with mild detergent. Avoid agitation to keep the shape intact.

Drying: Lay your finished crochet pansy flower flat to dry. Hanging it could cause stretching, so ensure it maintains its lovely shape.

Storage: Store your crochet pansy flower in a cool, dry place. Avoid compressed spaces to maintain its form, especially if you want it fresh for decor.

Crochet Pansy Flower FAQs

Can I use different yarn types for this project?
Absolutely! You can substitute with various yarns like a cotton blend or even acrylic. Just ensure the weight is similar to the recommended worsted yarn to maintain the shape of the crochet pansy flower.

How do I adjust the size of my pansy flower?
To alter the size, simply use a thicker yarn and a larger hook for bigger flowers. For smaller versions, choose lighter yarn and reduce the stitch count in your initial chain or rounds.

What should I do if my petals curl?
Don’t panic! If your petals curl, it can usually be fixed by blocking. Wet your flower and gently reshape the petals before allowing it to dry flat.

What’s the ideal hook size for this pattern?
The recommended hook size is a 4.5 mm (G hook), which provides a good balance for working with worsted weight cotton yarn and helps achieve the necessary stitch definitions.

How can I troubleshoot dropped stitches?
If you notice dropped stitches, retrace your steps to the last complete round. Use a stitch marker if you’re likely to forget your place, especially during complex stitch work.

Can I embellish my crochet pansy flower?
Definitely! Adding buttons or using metallic threads can elevate your flower’s appearance. You can even incorporate additional beadwork for a delightful texture.

Filed Under: Flowers

Charming Crochet Hydrangea Flower for Whimsical Decor

August 17, 2026 by Publisher Leave a Comment

There’s something undeniably delightful about crafting blooming beauties. Each stitch brings to life the charm of spring with a playful twist, just like my latest adventure in crochet: the Charming Crochet Hydrangea Flower. This enchanting project not only serves as a fantastic stash-buster, allowing you to transform leftover yarn into vibrant floral masterpieces, but it also offers a quick sense of accomplishment as you create intricately textured blooms beautifully suited for brooches or home decor. You’ll find the warmth of this project soothing as you navigate its uniquely intricate stitches and color changes, creating lifelike motifs that effortlessly elevate your surroundings. As you delve into this crochet hydrangea flower pattern, I can’t help but wonder what variations or unexpected designs you’ll incorporate into your final project.

Crochet Hydrangea Flower Materials & Tools

Yarn
Lightweight yarn – Choose a mix of cotton and acrylic fibers for softness and structure; approximately 50-100 yards in pastel hues perfect for crafting your crochet hydrangea flower.
Stitch markers – Essential for keeping track of rounds, especially when adding outer petals.
Tools & Notions
3.5 to 4.0 mm crochet hook – Your choice of hook size can alter the flower’s dimensions; ideal for the detailed stitches required for the hydrangea flower.
Small pearls – Use as embellishments to add a touch of charm to your finished flower design.
Light fabric or ribbon – Great for tying decorative bows, enhancing the overall presentation of your crochet hydrangea flower.

What Makes This Hydrangea Pattern Special?

Bold and vivid, this crochet hydrangea flower pattern stands out for its incredible simplicity paired with intricate details, making it a perfect blend for both intermediate crafters and those seeking a creative challenge. The project allows for creative expression as you pick various color palettes to evoke different moods—whether pastel for a soft look or vibrant for a stunning visual impact. The stitch variety, from magic circles to double crochet, adds dimension and richness, while the pattern accommodates stash-busting opportunities for scrap yarn lovers. You can also create customized sizes by adjusting your hook and yarn weight, allowing you to design flowers perfect for embellishing accessories or decorations. Plus, for anyone enchanted by texture, this design is a visual feast that might inspire you to dive deeper into the world of crochet artistry with patterns like the crochet flower brooch or explore the techniques in creating textured accessories.

Gauge & Sizing Notes for Crochet Hydrangea Flower

For this crochet hydrangea flower, checking your tension is crucial due to the intricate details and varied stitch patterns involved. Strive for a gauge of 4×4 inches (10×10 cm) to ensure that your petals maintain a uniform appearance. If you find that your swatch does not match the gauge, adjust the hook size or yarn weight accordingly. A smaller hook will create tighter stitches while a larger hook will give a looser effect. When altering the size, adapt your starting chain or the number of rounds based on your desired dimensions; for example, consider adding extra rows to increase the overall size of your crochet hydrangea flower while maintaining the same shape and pattern flow. The final blooms are typically around 3 to 4 inches in diameter, enhancing their lifelike beauty and ensuring they are perfect for versatile uses. Embrace the creative process as you play with colors, techniques, and sizes to develop unique arrangements of your crochet hydrangea flowers.

Step-by-Step Pattern for Crochet Hydrangea Flower

Row 1: Start the Magic Circle
Begin by creating a magic circle. Chain 3 (counts as 1st dc), then work 11 more dc into the circle. Pull the tail to close the circle tightly, and join with a sl st to the top of the initial chain. (12 dc)

Row 2: Building the Base
Ch 2 (counts as 1st hdc), then in the same stitch, work 1 hdc, and chain 1. In the next stitch, work 2 hdc, followed by a chain 1. Repeat this around, making sure to finish with a sl st at the top of the ch 2 at the end. (12 hdc, 12 ch spaces)

Row 3: Create the Petals
Ch 1, in each chain space, work a (1 sc, 1 hdc, 1 dc, 1 hdc, 1 sc). This will create the petals of your hydrangea flower. Finish the round with a sl st to the first sc. (12 petals)

Row 4: Adding Color Depth
Change to a different color; ch 2. In each petal, work 1 dc; add an inc (2 dc) in the middle stitch of each petal to make them fuller. Sl st to close the round (36 dc total).

Row 5: Layering Petals
With the new color, ch 1 and in each petal, work 2 sc and a chain in the gap. This will add depth to each petal. Keep consistent pressure on yarn. Finish with a sl st. (12 petal clusters)

Row 6: Forming the Center
Switch colors again; ch 3. In the center of your flower, work (2 dc, ch 1) and repeat around until you reach the end. Remember to sl st to complete the round. (12 clusters)

Row 7: Greenery Touch
For the leaves, use green yarn; ch 5, then in 2nd ch from hook work 1 sc, then 1 hdc in the next. In the last remaining stitch, work 2 dc. Sl st back down the chain to form a leaf. (1 leaf)

Row 8: Secure with Ribbons
Once your flower and leaf are complete, choose a lovely ribbon or light fabric. Tie around the base of the flower for a romantic touch. You can also secure everything with a small pearl for added charm.

Row 9: Assemble Your Wreath
If desired, assemble multiple flowers and leaves into a circular arrangement. Use a strong thread to hold them together and consider adding more decorative ribbons for visual interest.

Row 10: Final Blocking Step
Carefully block your finished hydrangea flower to enhance its shape and texture. Lightly steam or pin on a blocking mat, ensuring petals lay beautifully.

Row 11: Enjoy the Finished Product
Now your crochet hydrangea flower is ready to be used as a brooch or decorative piece on bags or hats. Experiment with unique color schemes for different effects, and do not hesitate to create various sizes by adjusting your yarn and hook!

Row 12: Share Your Creative Journey
Take photos of your finished crochet hydrangea flower projects and share them with fellow crafters. Inspire others with your color choices and customization techniques! Your beautiful creation is sure to bring joy to many!

How to Wash and Care for Your Crochet Hydrangea Flower

Machine Washing: If needed, use a gentle cycle in cold water and a mesh bag to protect your flower. Avoid harsh detergents.
Hand Washing: Hand wash your crochet hydrangea flower in cold water with mild soap, gently squeezing without wringing to prevent any damage.
Drying: Lay the flower flat on a towel to dry, reshaping the petals gently while damp. Avoid direct sunlight to prevent fading.
Blocking: Lightly steam your flower or block it on a mat to maintain its shape and enhance the texture, ensuring it stands out beautifully in decor.

Expert Tips for the Best Crochet Hydrangea Flower

Count Carefully: Keep a close eye on your stitch count, especially in the first few rounds where it can easily be lost. Use markers to help.
Avoid Dropped Stitches: To prevent dropped stitches, maintain consistent tension throughout the project. Don’t yank too hard.
Twist-Free Chain: When starting with a magic circle, ensure the foundation chain isn’t twisted to maintain the flower’s shape.
Color Changes: Plan your color transitions ahead of time to achieve a seamless gradient in the petals. Make notes if needed!
Differing Sizes: To create smaller flowers, simply adjust your crochet hook size and yarn weight. This flexibility is key when making embellishments.
Experiment: Don’t hesitate to play with different color palettes or yarn types. Novelty yarns can add wonderful textures to your finished crochet hydrangea flower.

Crochet Hydrangea Flower Variations and Substitutions

Explore creative avenues to personalize your crochet hydrangea flower! From bold choices to subtle tweaks, the possibilities are endless.

  • Bold Colors: Opt for vibrant, saturated hues to make your flower stand out in any decor. These striking choices can turn your hydrangea into a statement piece.
  • Novelty Yarns: Use yarns with texture or shimmer for a unique look. These fibers might add an eye-catching quality and elevate your flower’s charm.
  • Size Modifications: Adjust hook size to vary the flower’s size, accommodating your design needs. Smaller flowers can become perfect accents for brooches or appliques, while larger blooms can serve as focal points in wreaths.
  • Gradient Effects: Experiment with ombre techniques by changing yarn colors every few rounds. This adds depth and visual interest to your hydrangea, enhancing its lifelike qualities.
  • Layering Design: Create multi-layered versions by crocheting multiple flowers in varying sizes. Stack and attach them together for a captivating brooch or a stunning accent piece.
  • Different Petal Textures: Incorporate a variety of stitches for the petals, such as bobbles or shells, to introduce texture and uniqueness. This gives each flower a distinct personality.
  • Leaf Styles: Explore different leaf shapes, like elongated or round, to strengthen your bloom’s aesthetic. These details can significantly enhance your flower’s visual appeal.
  • Embellished Centers: Add beads or buttons to your flower’s center for an extra charming touch. These small adjustments can transform the entire vibe of your floral creation. You not only have the option to make refreshing modifications, but each variation also tells a different story, enhancing your crochet journey. Feel free to share your unique spin on the Charming Crochet Hydrangea Flower!

Crochet Hydrangea Flower FAQs

What yarn can I substitute?
Absolutely! You can substitute yarn with similar weight, like a light worsted (DK) cotton blend if you want more texture or even synthetic blends for colorfastness.

Can I adjust the size of the flower?
Absolutely! You can alter the size by changing the hook size or yarn weight. A larger hook will yield a bigger flower, perfect for various decor purposes.

What if my petals curl?
Don’t panic! If your petals curl, it might be due to tension. Lightly blocking or steaming the finished flower should help flatten them and enhance their appearance.

What hook size works best?
For this crochet hydrangea flower, a 3.5 to 4.0 mm crochet hook is recommended. Adjusting this size will impact the density and size of your flower, so feel free to experiment!

How do I fix dropped stitches?
If you’ve dropped a stitch, carefully unravel back to the last solid point and rework the missed stitch. Using stitch markers helps track your progress to avoid this in the future.

Can I add embellishments?
Certainly! Adding small pearls, beads, or ribbons can elevate your crochet hydrangea flower, making it a charming brooch or decorative piece. Get creative!

Filed Under: Flowers

  • « Previous Page
  • 1
  • …
  • 37
  • 38
  • 39
  • 40
  • 41
  • Next Page »

Recent Posts

  • Chic Crochet Watch Band Pattern: Scalloped Elegance
  • Vibrant Crochet Granny Square: A Floral Delight to Create
  • Pocket Otter Crochet: Your Adorable Amigurumi Companion
  • Cozy Up with This Festive Crochet Tree Cozy Pattern
  • Chic Crochet Babydoll Dress: A Timeless Pattern for Spring

Recent Comments

No comments to show.
Fast Crochet Patterns Logo

Welcome to Fast Crochet Patterns, your curated editorial blog for modern, handmade aesthetics. Discover an elegant collection of contemporary designs and carefully crafted tutorials—where every beautiful pattern is completely free to inspire your next creation.

Join the Studio

Subscribe for our latest free patterns and warm, minimal crochet inspiration delivered to your inbox.


Collections

  • Accessories
  • Amigurumi
  • Baby
  • Bags

More Patterns

  • Cardigan
  • Dress
  • Flowers
  • Granny Square

Information

  • About
  • Contact
  • Privacy Policy
  • Terms Of Use
  • Disclaimer

© 2026 Fast Crochet Patterns. All rights reserved.