Fast Crochet Patterns

  • Home
  • Contact
  • Patterns
    • Amigurumi
    • Granny Square
    • Flowers
    • Baby
    • Dress
    • Bags
    • Cardigan
    • Accessories
menu icon
go to homepage
  • Home
  • Contact
  • Patterns
    • Amigurumi
    • Granny Square
    • Flowers
    • Baby
    • Dress
    • Bags
    • Cardigan
    • Accessories
search icon
Homepage link
  • Home
  • Contact
  • Patterns
    • Amigurumi
    • Granny Square
    • Flowers
    • Baby
    • Dress
    • Bags
    • Cardigan
    • Accessories
×

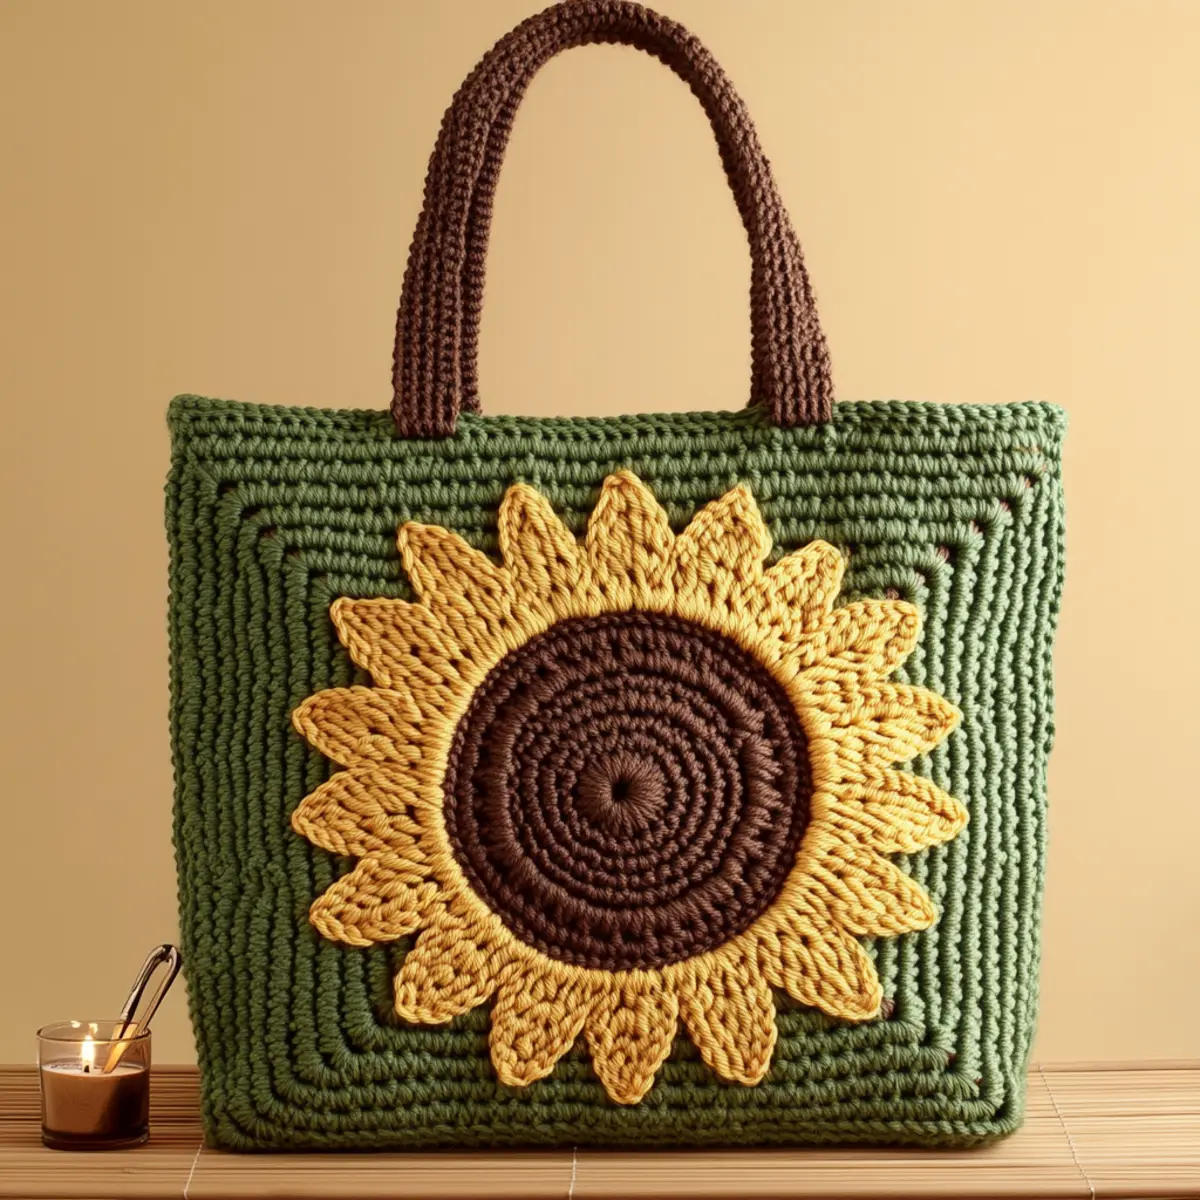
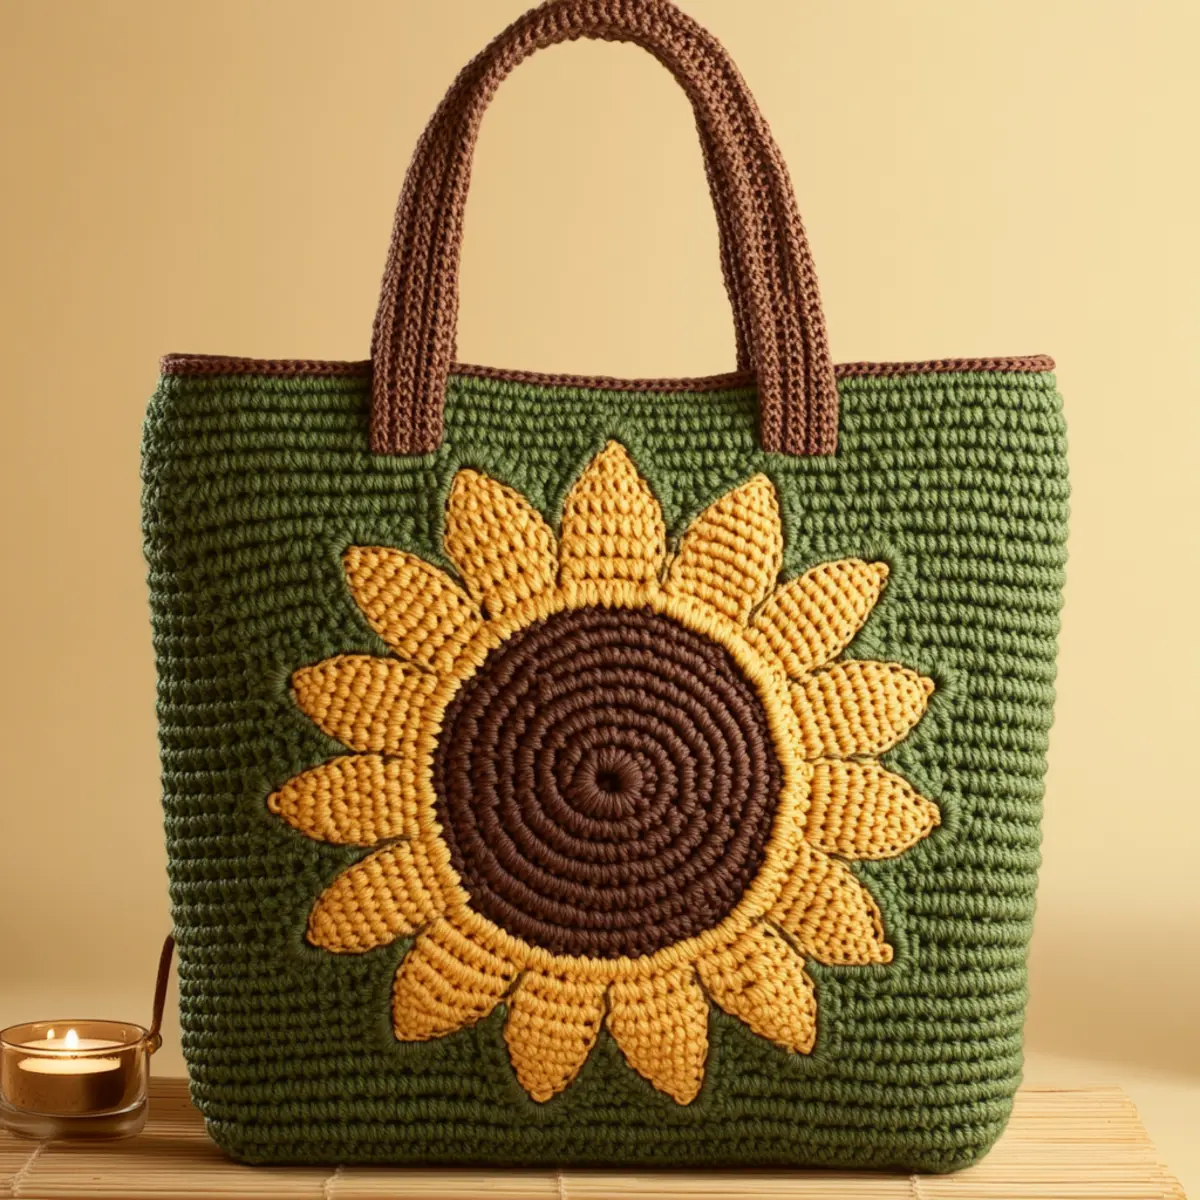
Charming Crochet Sunflower Pattern for Whimsical Décor

August 17, 2026 by Publisher Leave a Comment

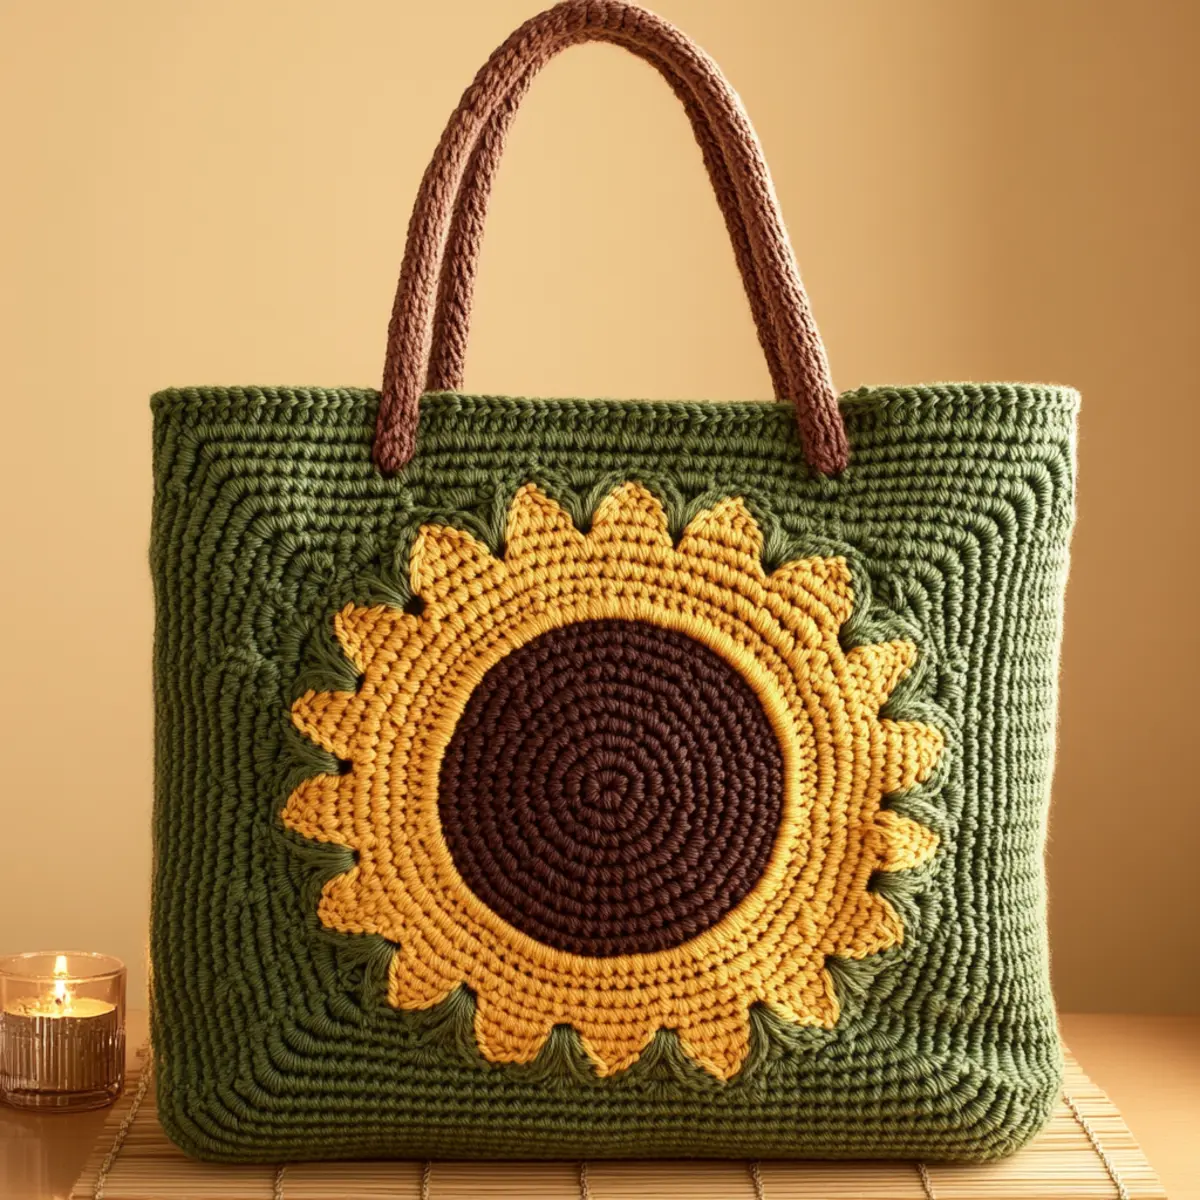
Have you ever felt the joy that comes from creating something beautiful with your own two hands? When I first designed the Charming Crochet Sunflower Pattern, I knew it would bring cheer not just to my home but to anyone who picked up a hook to make it. This crochet sunflower, with its vibrant and playful aesthetic, offers the perfect opportunity for personal creativity, allowing crafters to customize colors and sizes to match their unique style. What’s even better is its versatility; it can effortlessly transform into home décor, a delightful gift, or a lovely accessory, making it ideal for all occasions. Plus, this project is a quick stash-buster—perfect for those of us who love to use up yarn remnants! As you venture into this floral design, you might find yourself surprised at how easy and enjoyable it is. Are you ready to learn how to crochet this gorgeous sunflower?
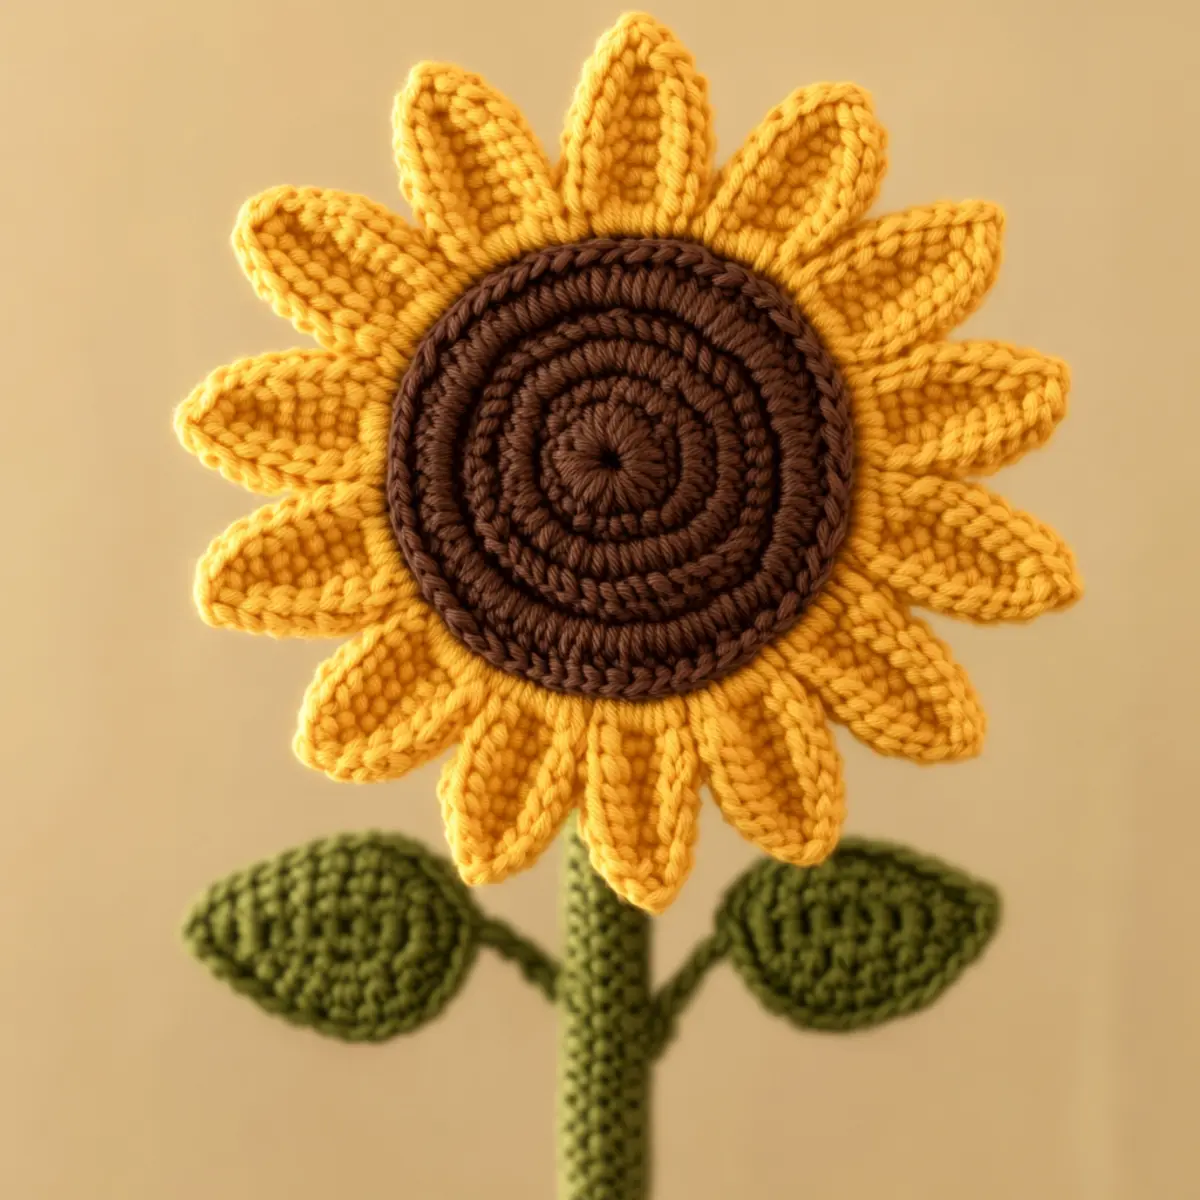
Crochet Sunflower Materials & Tools

Yarn

  • Worsted weight yarn (Weight Category 4) – Ideal for achieving a sturdy yet light structure in the crochet sunflower.
  • Approximately 120-150 yards of yellow yarn – Essential for forming vibrant petals that stand out.
  • 30-40 yards of brown yarn – Needed for crafting the warm, inviting center of the flower.
  • 30-50 yards of green yarn – Used to create realistic leaves that add a touch of nature to your design.

Tools & Notions

  • 4.0 mm (G-6) crochet hook – The perfect size for working comfortably on this crochet sunflower project.
  • Stitch markers – Helpful in managing stitch counts to ensure an even number of petals.
  • Yarn needle – Useful for weaving in ends and securing elements of the sunflower together.

Why You’ll Love This Pattern

Embracing the charm of nature, this crochet sunflower pattern stands out for many reasons. First and foremost, its simplicity makes it accessible to intermediate crafters, ensuring that you won’t feel overwhelmed. The delightful texture created by using double crochet stitches gives the flower a lovely feel, drawing attention whether displayed in a bouquet or as part of a wreath. Furthermore, it’s incredibly stash-friendly: a fantastic way to use up those leftover yarns! You’ll find that this pattern allows for customizability; why not experiment with varying shades of yellow or even bold colors? Each sunflower can be personally tailored to fit your theme! This project is undoubtedly a time-saver too, as it requires relatively quick work, letting you revel in your creation before you know it. For tips on enhancing your stitching skills, be sure to check out our crochet tips! If you’re interested in exploring more whimsical designs, you can also find inspiration in our easy crochet patterns section!

Gauge & Sizing for Crochet Sunflower

When crafting this crochet sunflower, checking your tension is vital to achieve a beautiful final product. Aim for a gauge of 4×4 inches (10×10 cm) with 12 dc and 14 rows in pattern. If your gauge doesn’t match, don’t worry; you can adjust the initial chain or rounds to resize your project to the desired dimensions. To ensure proper sizing, the finished sunflower head will measure about 8-10 inches in diameter, while the total height can reach 12-15 inches depending on your stem length. If your swatch is too small, try using a larger hook or adding additional rounds to increase the size. For larger sunflowers, consider starting with a longer chain to increase the stem length, keeping in mind the focus keyword crochet sunflower for reference during your crafting session.

Step-by-Step Pattern for Crochet Sunflower

Row 1: Make the Center Begin by creating a magic ring using brown yarn. Work 10 single crochet (sc) stitches into the ring, pulling tight to close the circle, and slip stitch (sl st) to the first sc to join (10 sts).

Row 2: Build the Base Chain 1 (ch 1) and work 2 sc in each stitch around to increase, which will give the center a sturdy base. Slip stitch to the first sc to join (20 sts).

Row 3: Add Texture Ch 1 and sc in next st, 2 sc in next st; repeat around for a textured center. Slip stitch to first sc to join, ensuring a full center shape (30 sts).

Row 4: Petal Preparation Switch to yellow yarn to add the petals. Ch 4, then double crochet (dc) in the same st, forming a cluster. Chain 1 and skip 2 sts, then sl st into the next st to form one petal. Repeat 12 times for each petal around the center.

Row 5: Form Petals For each petal, ch 4, dc in same st, ch 1, sk 2 sts, sl st into next st. Count to ensure you’ve formed 12 petals total, spacing them around the center evenly.

Row 6: Create Leaves Change to green yarn and ch 10. From the 2nd ch from the hook, work 1 sc in each ch back down to create a leaf shape. Turn and work 1 sc in first st, 1 hdc in next, 2 dc in next, 1 hdc, 1 sc in last st for a tapered look.

Row 7: Leaf Attachment With still green, leave a long tail for attaching the leaves. Slip stitch to the base of the sunflower and attach the finished leaf using the tail. Repeat this process to create two leaves total, attaching them securely.

Row 8: Build the Stem For the stem, ch 20 with green yarn. Work 1 sc in each ch to create a sturdy stem structure. When reached the desired length, sl st to the base of the petals to secure.

Row 9: Final Adjustments Turn the sunflower right side out if necessary. Make sure the petals are evenly spaced and adjust as needed. Tie off and weave in all ends securely to maintain integrity.

Row 10: Block to Perfection To ensure your crochet sunflower holds its shape, lightly block it by wetting the petals and shaping them gently into place. Let it dry completely to retain the lovely shape.

Row 11: Experiment Customize your sunflower by trying different shades for petals or experimenting with a mix of yarns for unique textures. Creating variations keeps your creativity flowing!

Row 12: Enjoy Your Creation Once completed, find a spot to display your stunning crochet sunflower. Whether as décor or a thoughtful gift, this cheerful flower brings warmth and a smile to any space!
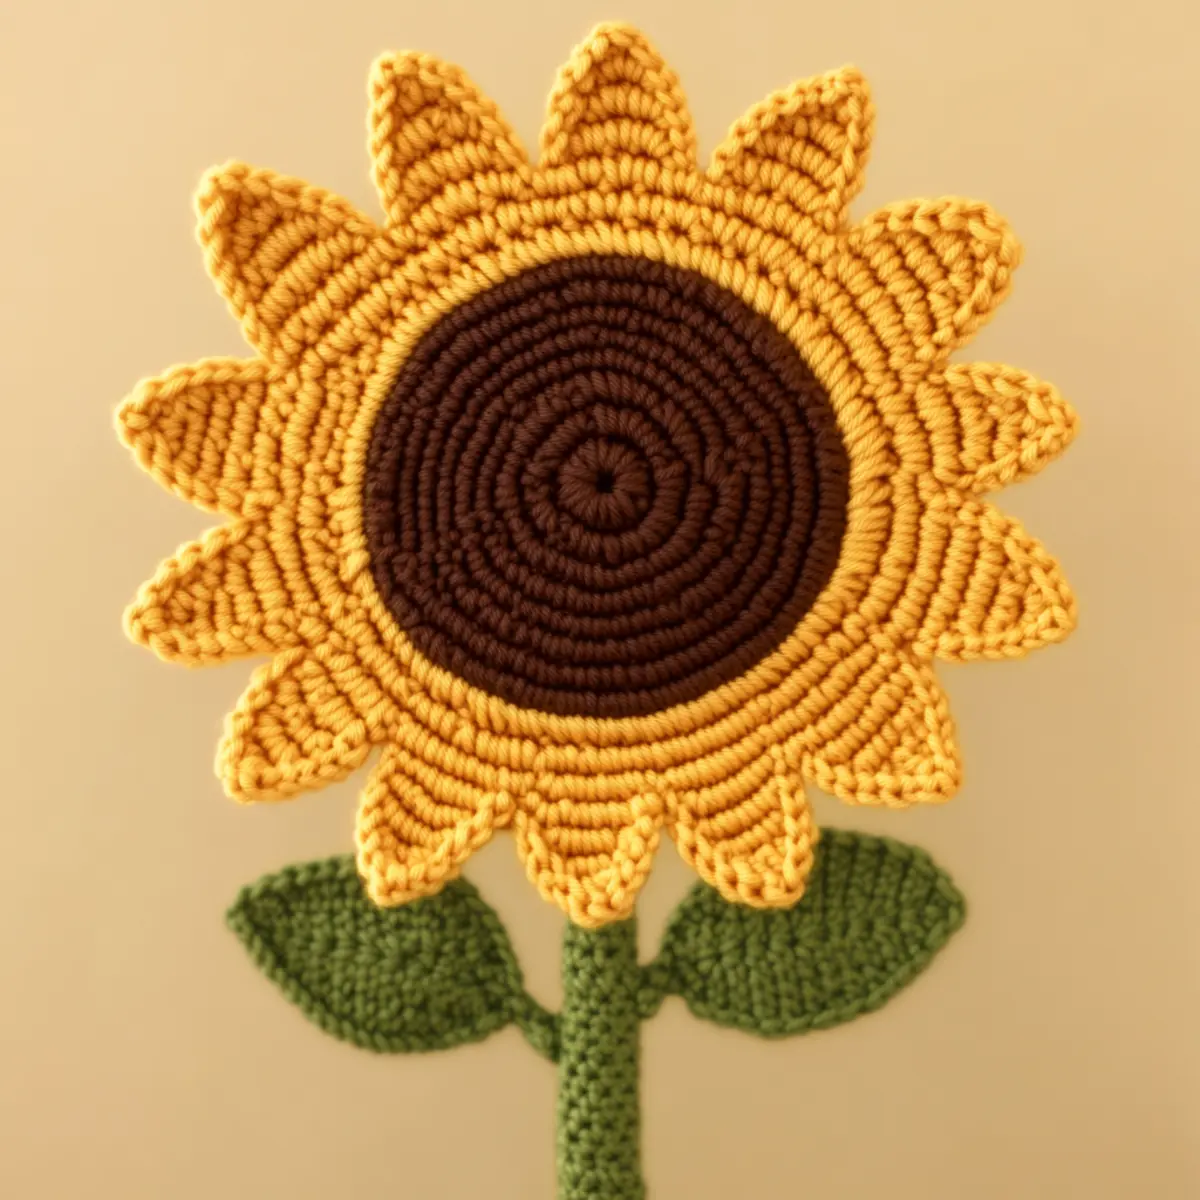
Crochet Sunflower Variations

Feel free to put your own twist on this charming pattern!

  • Color Swaps: Experiment with vibrant shades like orange or red for a unique take on traditional sunflowers.
  • Yarn Blends: Use a blended yarn for added texture and depth, contributing to a more dynamic final piece.
  • Mini Version: Create a smaller crochet sunflower by reducing the yarn weight, using a lighter yarn for a delicate charm.
  • Accessorize: Incorporate embellishments like glittery threads or beads in the center, adding an enchanting sparkle and personal touch.
  • Bouquet Cluster: Craft multiple sunflowers in varying heights and colors for a beautiful bouquet effect, perfect for gifts or home décor.

For rhythm and variety within your crochet technique, consider using cotton yarn instead of acrylic for better definition. Cotton creates a firm structure, ideal for delicate projects like coasters or hair accessories. This also allows you to utilize your finished creations in different realms of decor!

  • Size Alterations: Adjust your hook size to alter the dimensions of your sunflower, creating a larger centerpiece or several smaller ones for unique arrangements.
  • Texture Modifications: Play with different stitches to vary the texture of your petals and leaves, making each sunflower truly one-of-a-kind. By customizing this crochet sunflower pattern, you ensure every piece is truly reflective of your creativity.

What to Pair with / What to Make after Crochet Sunflower

Once you’ve finished your vibrant crochet sunflower, explore more delightful projects!

  • Crochet Leaves: Create additional leaves to accessorize your sunflower or other plants, providing a lush green backdrop.
  • Flower Pot Cozy: Use the same color palette to make a cozy for your favorite plant pot, tying your floral theme together beautifully.
  • Sunflower Headband: Craft a cute headband featuring miniature sunflowers that will brighten up any outfit and put smiles on everyone’s faces.
  • Garden Bunting: Stitch multiple flowers together to form cheerful bunting perfect for any garden party or festive celebration.

For even more fun, consider making themed coasters and placemats with crochet sunflowers that act as cheerful complements to your table setting. It’s a great way to bring that sunny charm indoors while enjoying the creativity of crochet! After trying these projects, you may also want to check out the latest patterns for other flowers to add to your growing crochet collection.

How to Wash and Care for Your Crochet Sunflower

  • Machine Washing: If you choose to machine wash your sunflower, use a gentle cycle with cold water and avoid agitation to prevent felting or distortion.

  • Hand Washing: For better care, hand wash your crochet sunflower in cold water with mild soap. Gently squeeze without twisting to preserve its shape.

  • Drying: Always lay your sunflower flat to dry after washing. This helps maintain its beautiful shape without the risk of stretching.

  • Storage: When not in use, store your sunflower in a cool, dry place, preferably in a breathable bag to avoid crushing delicate petals.

Expert Tips for Crochet Sunflower

  • Count Stitches: Keep track of your stitch count, especially on petals, to avoid having uneven petals in your crochet sunflower project.

  • Tension Control: Maintain even tension throughout to prevent distortion. Uneven stitches can lead to a lopsided sunflower.

  • Magic Ring Basics: Don’t skip the magic ring when starting your center. It helps create a tight, tidy finish, which is crucial for the flower’s base.

  • Petal Placement: When attaching petals, double-check your spacing to ensure they are evenly distributed around the center for a lovely full look.

  • Blocking Benefits: Remember to block your finished sunflower to define its shape and enhance its texture beautifully. It holds its form better after blocking.

  • Experiment with Yarn: Feel free to use different shades or even a mix of yarn types. Customizing your sunflower allows for a more personalized touch that matches your décor.
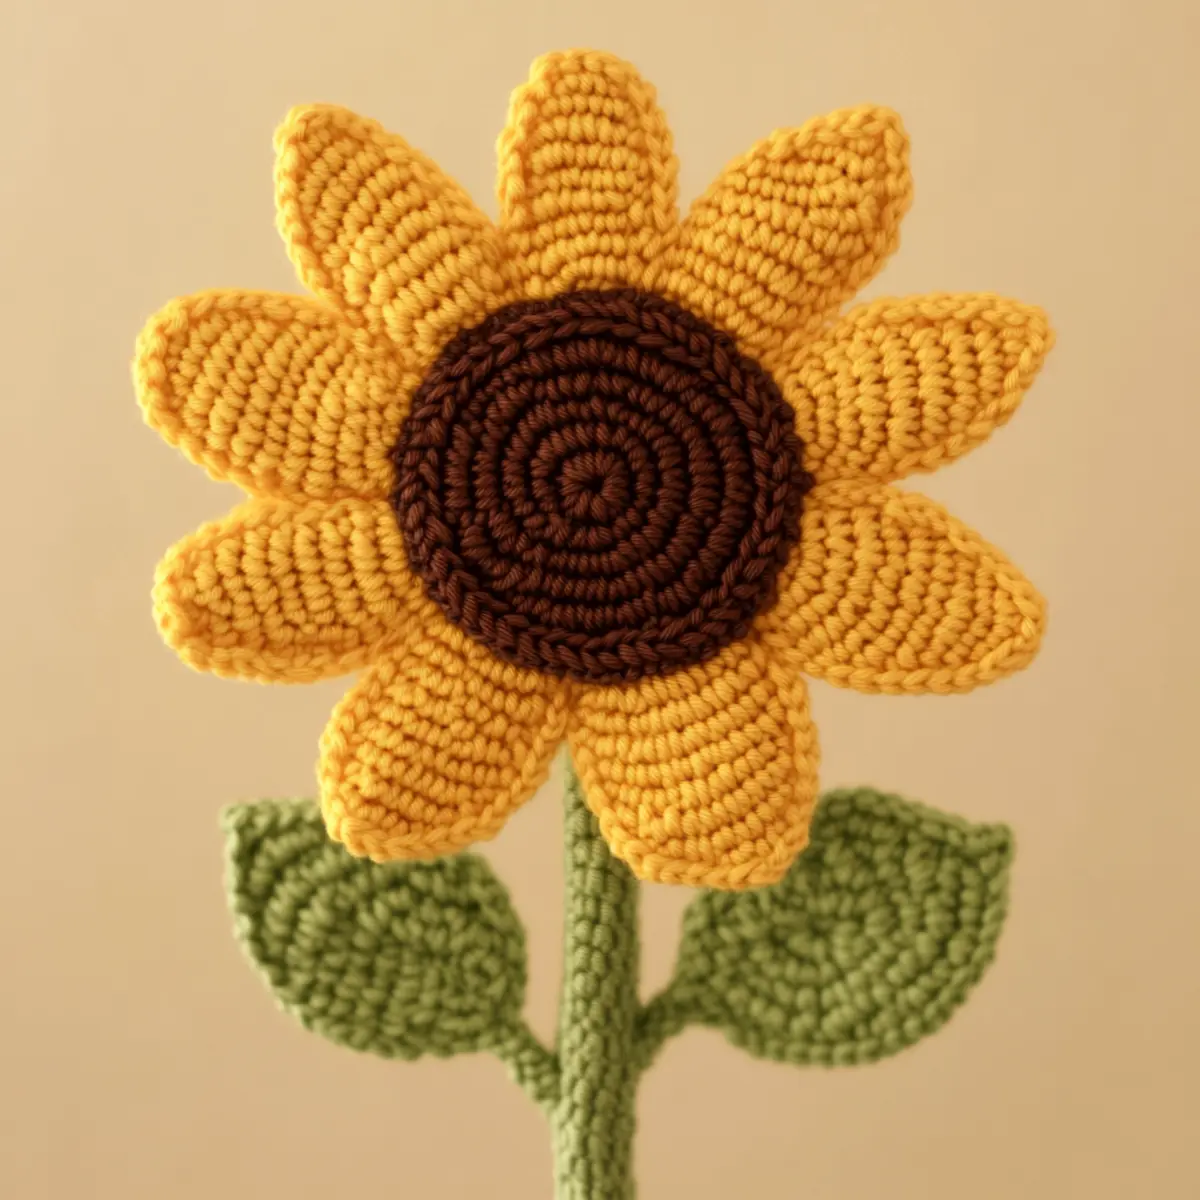
Crochet Sunflower FAQs

Can I substitute different yarn types?
Absolutely! You can use cotton yarn for more structure or acrylic yarn for a softer feel, just make sure to maintain the same weight category.

How do I adjust the size of my sunflower?
To resize your crochet sunflower, adjust the hook size or vary the chain length for the stem. Keeping an eye on your gauge will also help achieve your desired dimensions.

What should I do if my petals curl?
Don’t panic! Curling can happen with tension issues. Make sure to block your sunflower after completion, as this often corrects the curvature in the petals.

What if I drop a stitch while making the petals?
If you drop a stitch, simply pick it up and rework it to maintain your stitch count. Use stitch markers for better management.

Which hook size is best for this project?
A 4.0 mm (G-6) crochet hook is recommended, but you can adjust it based on your personal tension. Always check gauge for best results.

Can I create a smaller version of the sunflower?
Yes! Using a smaller hook and lighter yarn will allow you to create a mini sunflower. Experiment with different sizes for added fun!
Filed Under: Flowers

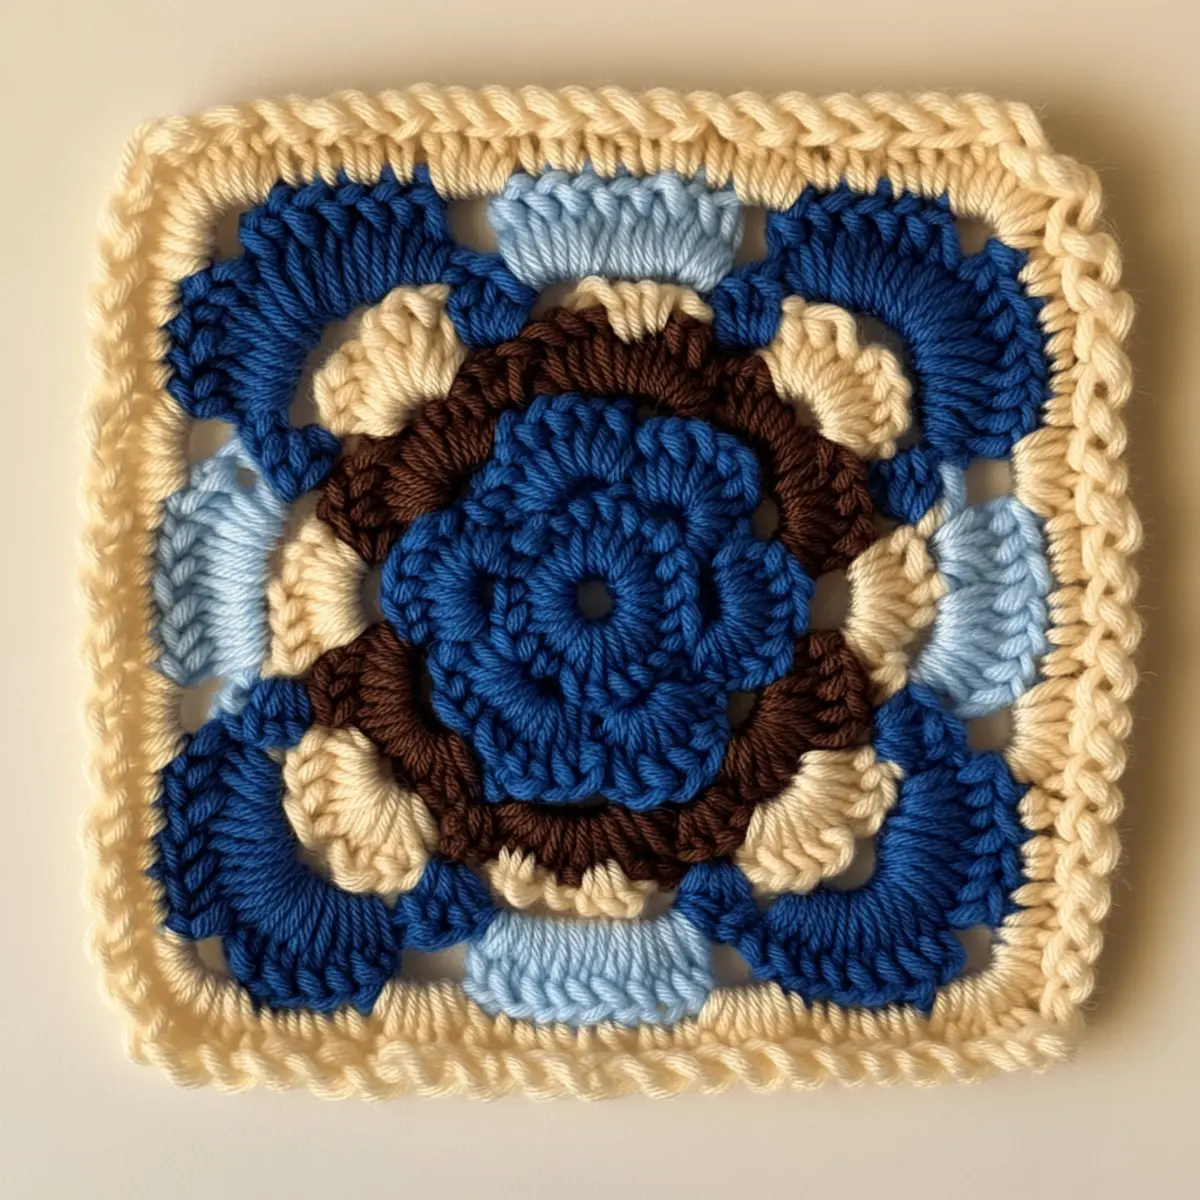
Majestic Crochet Dahlia Flower – A Cozy Home Décor Delight

August 17, 2026 by Publisher Leave a Comment

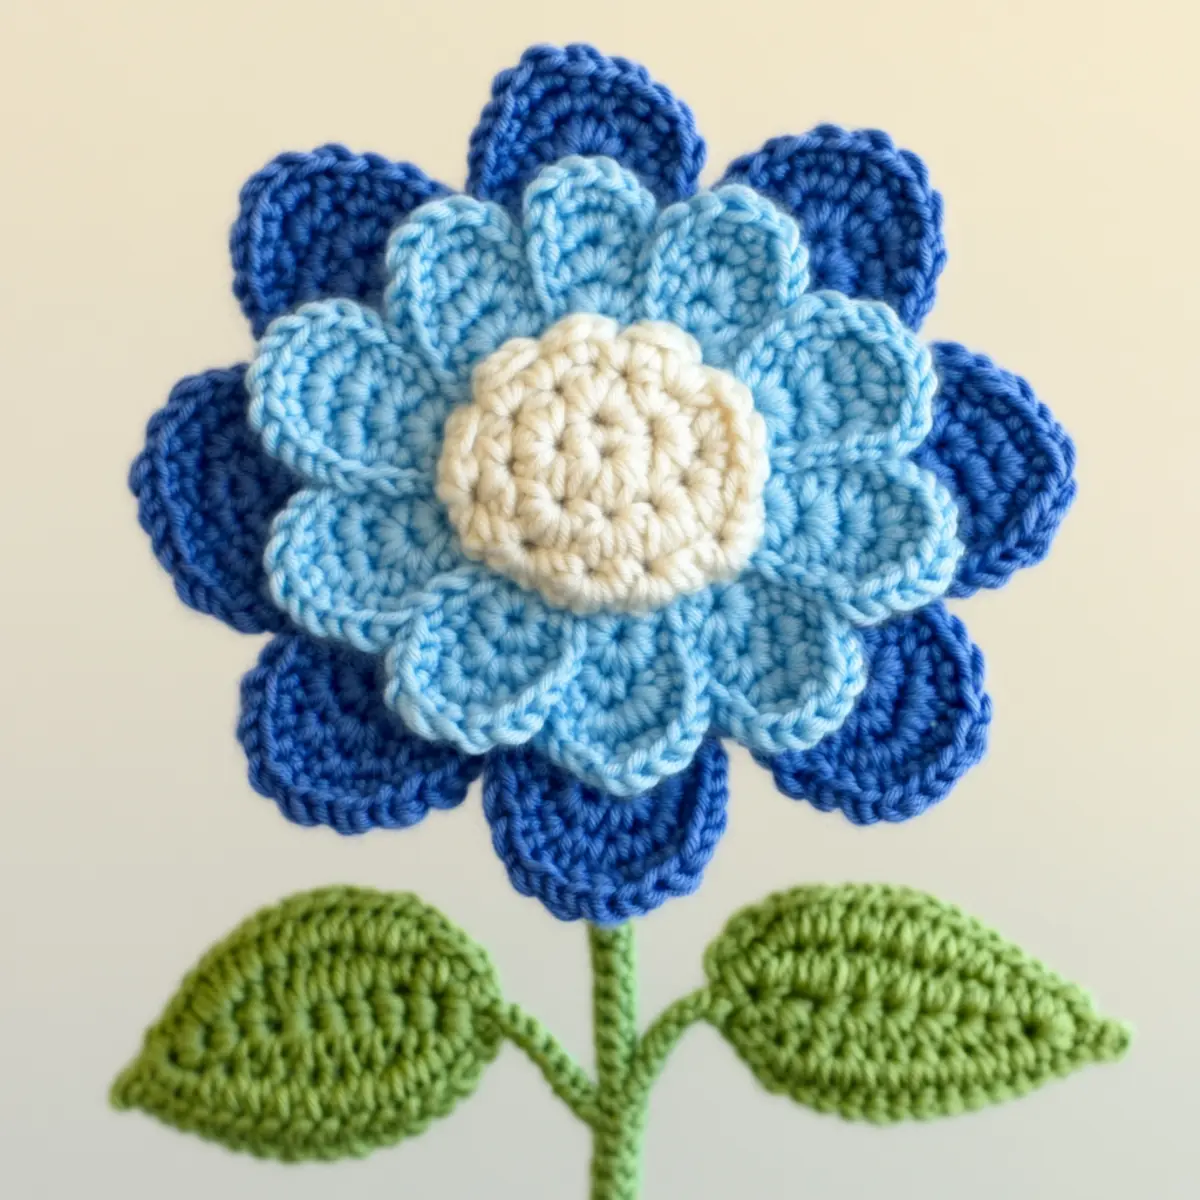
As I sat surrounded by my yarn stash, I felt a spark of inspiration hit me while contemplating the beauty of nature. That day, I decided to embark on a project unlike any other: the Majestic Crochet Dahlia Flower. This crochet dahlia flower not only elevates your home décor but serves as a playful piece that showcases your crochet skills. With its eye-catching petals and cozy elegance, it’s the perfect way to bring a touch of artistry to any room. What I love most about this project is its dual appeal; it’s both beginner-friendly and a fantastic stash-buster! You can easily integrate leftover yarn from past projects into the petals, allowing your creativity to flourish without breaking the bank. Plus, the satisfaction of creating a visually stunning flower that endures through time is immeasurable. Wouldn’t it be lovely to craft a bouquet of these stunning pieces that can last year-round? Let’s dive into the steps to create your very own crochet dahlia flower, and embrace your artistic side together!

Crochet Dahlia Flower Materials & Tools

Yarn

  • Medium (worsted weight) yarn – Opt for an acrylic or cotton blend for durability and easy maintenance. About 200-300 yards is needed for the crochet dahlia flower, allowing for multiple color changes and layered petals.
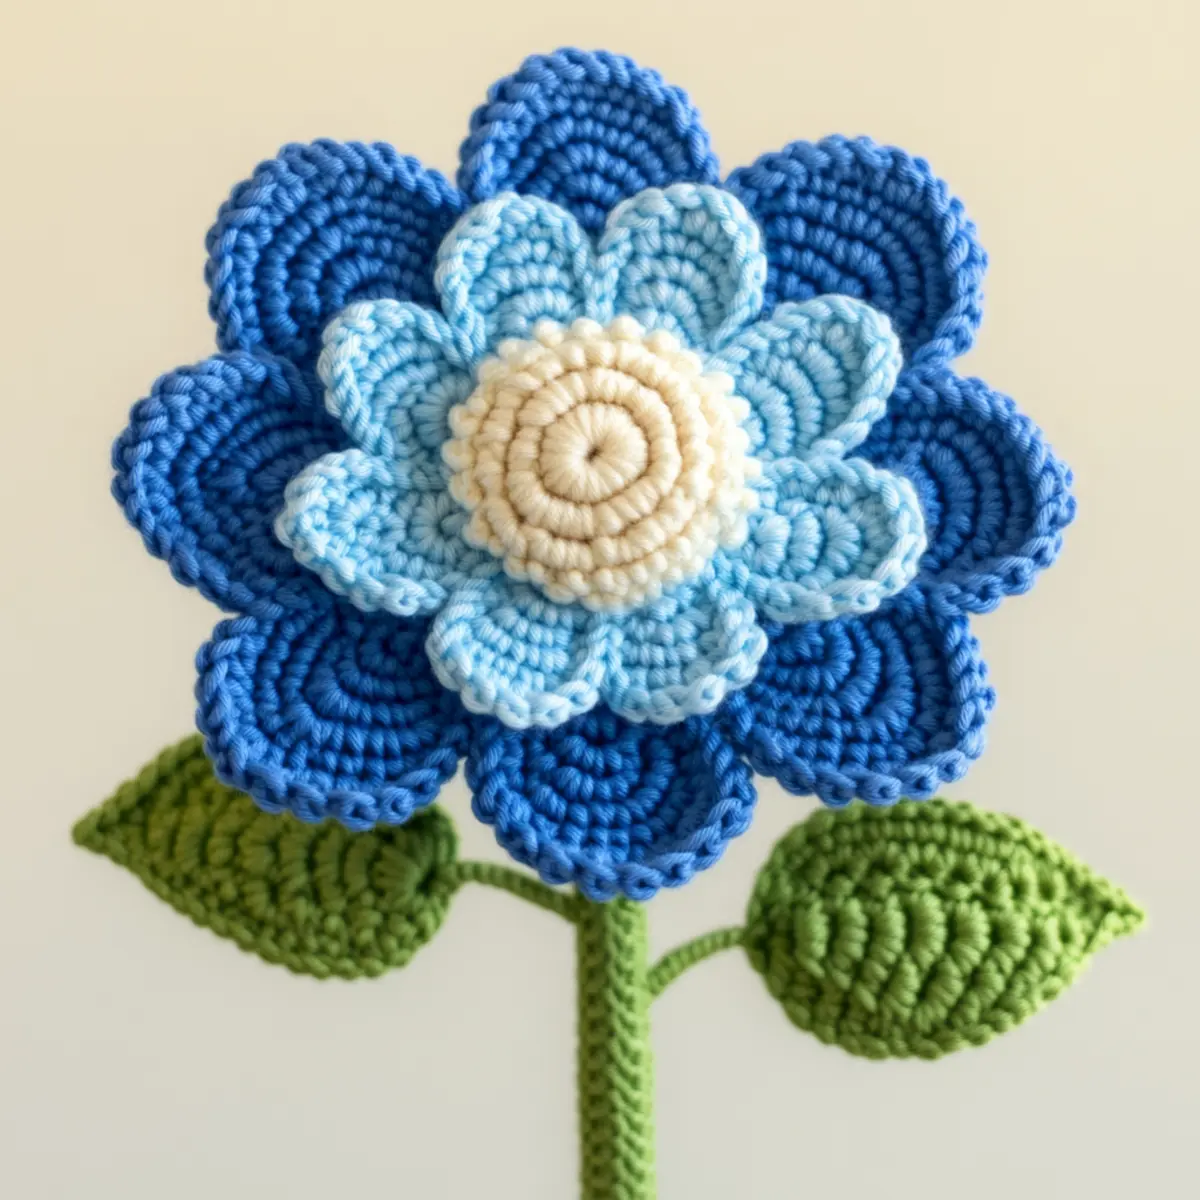
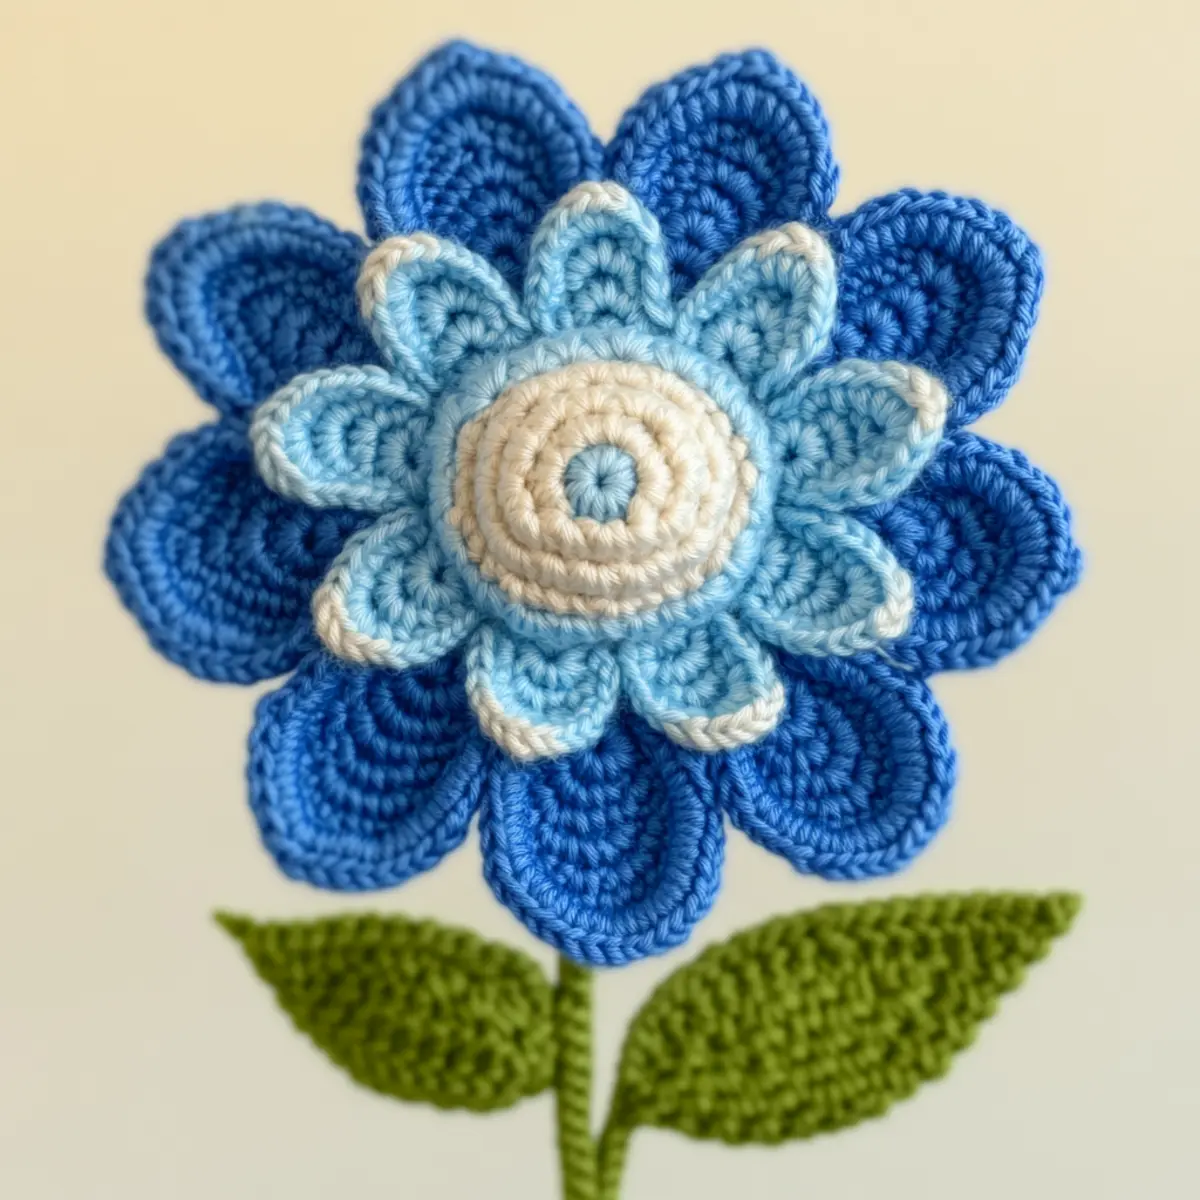
  • Color suggestions – Light and dark shades of blue for petals, with cream for the center, and green for the leaves.

Tools & Notions

  • 4.0 mm hook (G/6) – This size hook helps maintain a consistent tension, crucial for the overall look of your crochet dahlia flower.
  • Stitch markers – Helpful for keeping track of rounds, especially important in the construction of layered petals.
  • Yarn needle – Necessary for weaving in ends and attaching flower components together.

Why You’ll Love This Pattern

Simplicity is at the heart of this crochet dahlia flower pattern, making it accessible even for those new to crochet while still offering enough challenge to keep seasoned crafters engaged. Textured petals create an enticing visual feast that draws the eye. Plus, it’s remarkably stash-friendly; you can incorporate a multitude of colors and yarn types, giving each flower its own unique personality. Want to learn more? With the help of our guide on color gradients, you can easily explore various shades and combinations. This pattern is also a rewarding time-saver; the steps flow in a rhythm that makes crafting feel effortless. Lastly, the crochet dahlia flower brings undeniable aesthetic appeal to any space, making it the perfect gift for loved ones or a charming addition to your home decor.

Gauge & Sizing Notes for Crochet Dahlia Flower

When creating your crochet dahlia flower, checking your gauge is crucial, especially for achieving the desired proportions in the delicate petal and leaf shapes. For this project, a typical gauge is 4 inches by 4 inches (10 cm x 10 cm) made with your 4.0 mm (G/6) hook, where you should aim for 18 sc across your swatch. If your swatch doesn’t match, consider adjusting your hook size or tension. Make sure to count stitches regularly to maintain that perfect, rounded look. If you want to adjust the size of your crochet dahlia flower, simply change your starting chain or the number of rounds for pets and leaves. Keep in mind that a larger hook and bulkier yarn tend to yield a larger flower, while a tighter tension can produce a smaller dahlia. Embracing this technique will maximize your creative exploration of the stunning crochet dahlia flower without compromising its aesthetic appeal.

Step-by-Step Pattern for Crochet Dahlia Flower

Row 1: Create the Center Start by making a magic ring. Crochet 6 sc into the ring and pull tight to close (6 st).

Round 2: Build the Base In this round, work 2 sc in each stitch around. This will form a solid base for your flower center (12 st).

Round 3: Begin Increasing Ch 1, then sc in the first stitch, 2 sc in the next. Repeat around. This will help to give shape to your center (18 st).

Round 4: Shape the Center Start by ch 1, and then sc in each st around. This will create a uniform foundation for layering the petals (18 st).

Round 5: Introduce Petal Colors Change to cream yarn. Make 1 hdc, 1 dc in each st around. This solidifies the center and prepares it for the petals (18 st).

Row 6: Begin Petal Layering Start the first petal with a new color. From the center, work (1 dc, 2 tr, 1 dc) into the first stitch, creating a petal shape. Slip stitch to the center to secure the petal (1 petal).

Row 7: Form Petal Curves From the base of your first petal, ch 3, then dc in same stitch to create a second petal. Repeat the petal pattern, making sure each overlaps slightly (2 petals).

Row 8: Continue Petal Creation Add another petal by working 1 hdc, 2 dc, 1 hdc in the next stitch. Repeat this step around the flower until you have 5 petals total. Remember to keep the tension consistent (5 petals).

Row 9: Add More Petals For a lush look, continue adding petals with the samepetal structure. Aim for a total of 8 overlapping petals around the flower center, shaping them naturally (8 petals).

Row 10: Create the Leaves Switch to green yarn. Starting with 5 sc in a magic ring, pull tight to form the leaf base. This gives an organic feel to your crochet dahlia flower (5 st).

Row 11: Shape the Leaves For making the leaves, work back and forth in rows of hdc and dc. Remember to allow for an elongated shape that mimics natural leaves, using increasing and decreasing methods to define edges (5 leaves).

Row 12: Final Assembly Finally, sew each petal onto the center with a yarn needle, ensuring they overlap for dimension. Attach leaves in appropriate places to finish off your crochet dahlia flower beautifully. Block the flower for shape if necessary.

Expert Tips for the Best Crochet Dahlia Flower

Count Regularly: Keep track of your stitch count, especially when working in the round, to avoid gaps in your crochet dahlia flower.

Use Stitch Markers: Place stitch markers at the start of each round; they help prevent dropped stitches and maintain your progress.

Maintain Tension: Consistent tension is crucial for uniform petals. Use the same hook size throughout the project to achieve a cohesive look.

Choose Yarn Wisely: Opt for a medium worsted weight acrylic or cotton blend for durability. This choice ensures intricate details and a lasting shape.

Be Mindful of Petals: When layering petals, ensure they overlap slightly; this creates the natural fullness that characterizes a beautiful crochet dahlia flower.

Experiment with Colors: Play with different color palettes to add personality to your blooming creations, reflecting various seasons or styles.

Crochet Dahlia Flower Variations

Feel free to get creative with colors and yarn types to truly make this project your own!

  • Color Blocking: Experiment with contrasting colors for each petal, creating a bold statement piece that can adapt to different themes.
  • Larger Petals: Use a larger hook and bulkier yarn to create more oversized petals, giving your crochet dahlia a dramatic effect.
  • Alternative Fibers: Try using alpaca or bamboo yarn instead of acrylic for a softer feel and unique texture.
  • Metallic Yarn: Incorporate metallic or shimmer yarns for a dazzling look, perfect for special occasions or festive decor.
  • Embellished Center: Add beads or buttons to the center of the flower to create a fun focal point that adds a touch of whimsy.
  • Seasonal Colors: Use soft pastels for spring or rich warm tones for fall to reflect the beauty of the seasons in your crochet work.

Mixing and matching these variations allows you to personalize your crochet dahlia flower, ensuring it fits seamlessly with your home decor. This way, you not only enhance your crochet skills but also express your unique artistic style through every bloom you create.

How to Wash and Care for Your Crochet Dahlia Flower

Machine Washing: If necessary, use a gentle cycle with cold water to avoid damaging the delicate structure of your crochet dahlia flower.

Hand Washing: It’s best to hand wash with mild detergent and cold water. Gently squeeze and avoid wringing to retain the flower’s shape and texture.

Drying: Lay flat to dry on a clean, dry towel. This prevents stretching and helps maintain the uniform structure of your crochet dahlia flower.

Blocking: Consider blocking your finished flower for enhanced visual shape. This helps define the petals and leaves, showcasing their intricate details beautifully.

Crochet Dahlia Flower FAQs

Can I use different yarn types for my crochet dahlia flower?
Absolutely! While a medium worsted weight yarn works best, feel free to experiment with other types, keeping in mind that this will influence the overall size and texture of your flower.

How do I adjust the size of my crochet dahlia flower?
To make a larger flower, simply use a bigger hook and bulkier yarn. Conversely, for a smaller flower, tighten your tension or decrease the number of rounds for the petals and leaves.

What should I do if I notice curling in my petals?
Don’t panic! Curling can be addressed by blocking your finished flower, which helps to smooth the petals and achieve a more rounded shape.

What hook size is recommended for this project?
A 4.0 mm (G/6) hook is recommended, as it helps maintain the correct tension for the delicate shapes of the crochet dahlia flower.

How can I prevent dropped stitches?
Using stitch markers can help keep track of your progress and stitch count. Additionally, examine your work regularly to catch any issues early on.

How do I incorporate color gradients into my dahlia flower?
To achieve beautiful color gradients, gradually change yarn colors every few rows. This technique adds depth and vibrancy to your petals, making your crochet dahlia flower truly stand out.

Filed Under: Flowers

Colorful Crochet Hexagonal Bag for a Fun, Stylish Twist

August 17, 2026 by Publisher Leave a Comment

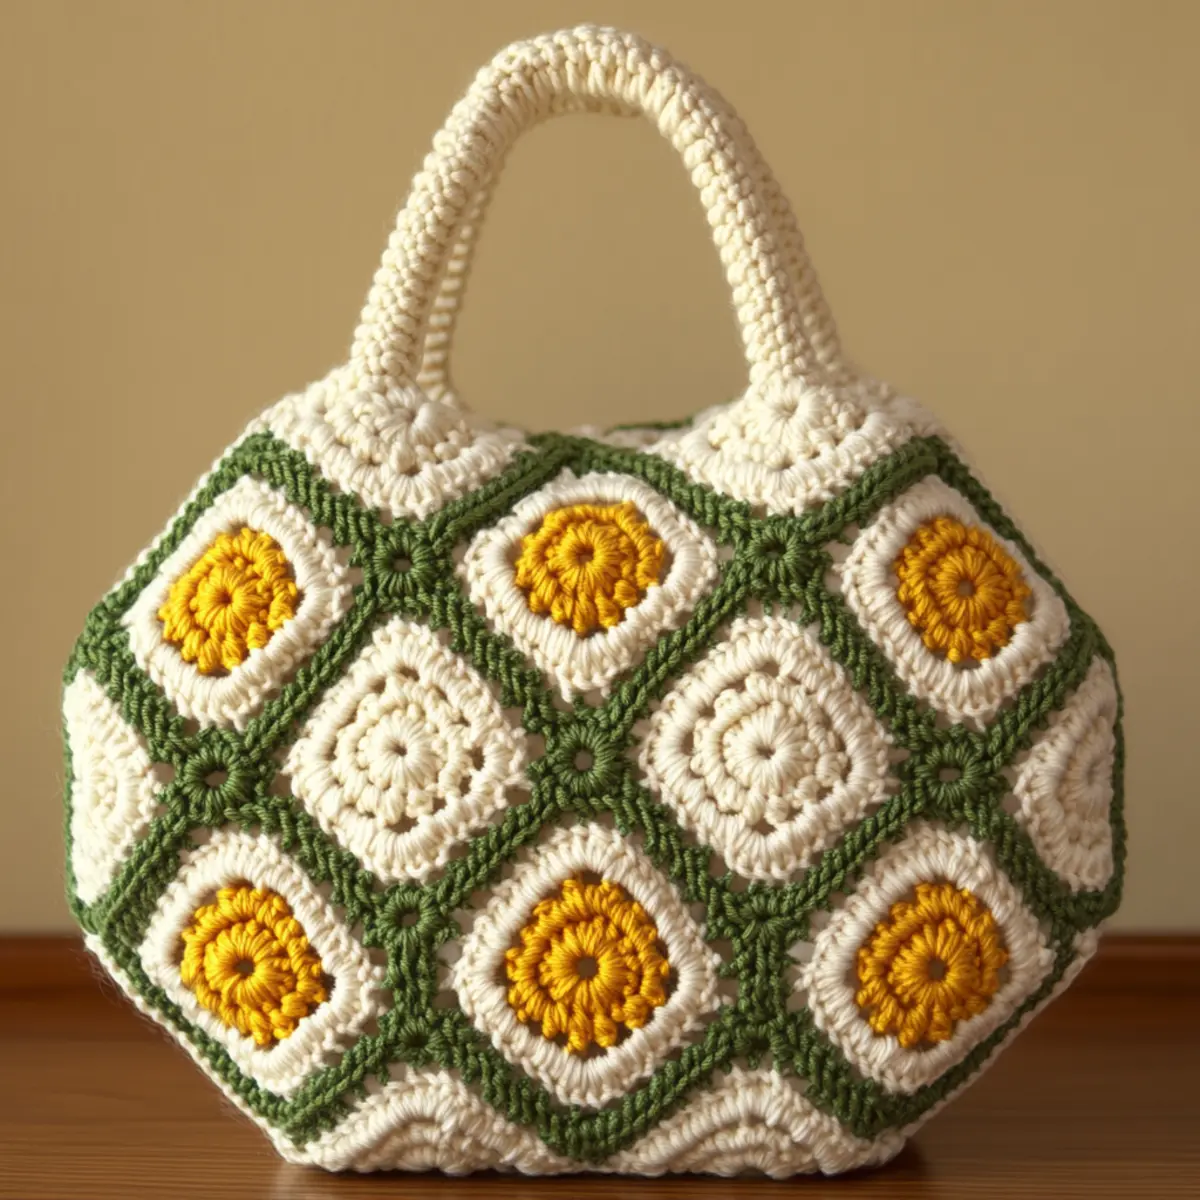
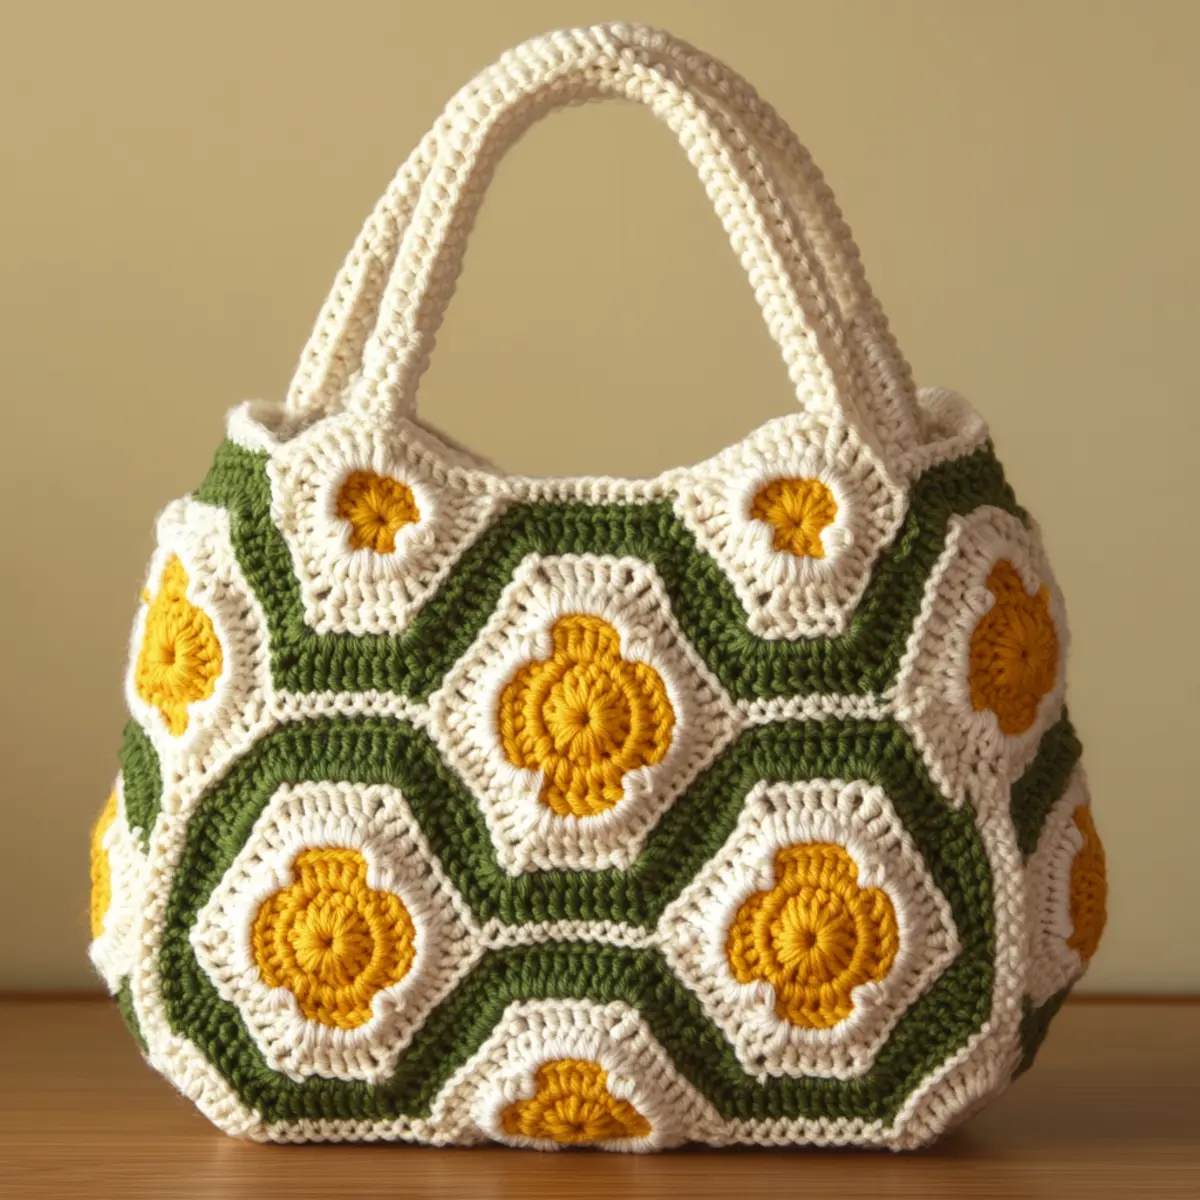
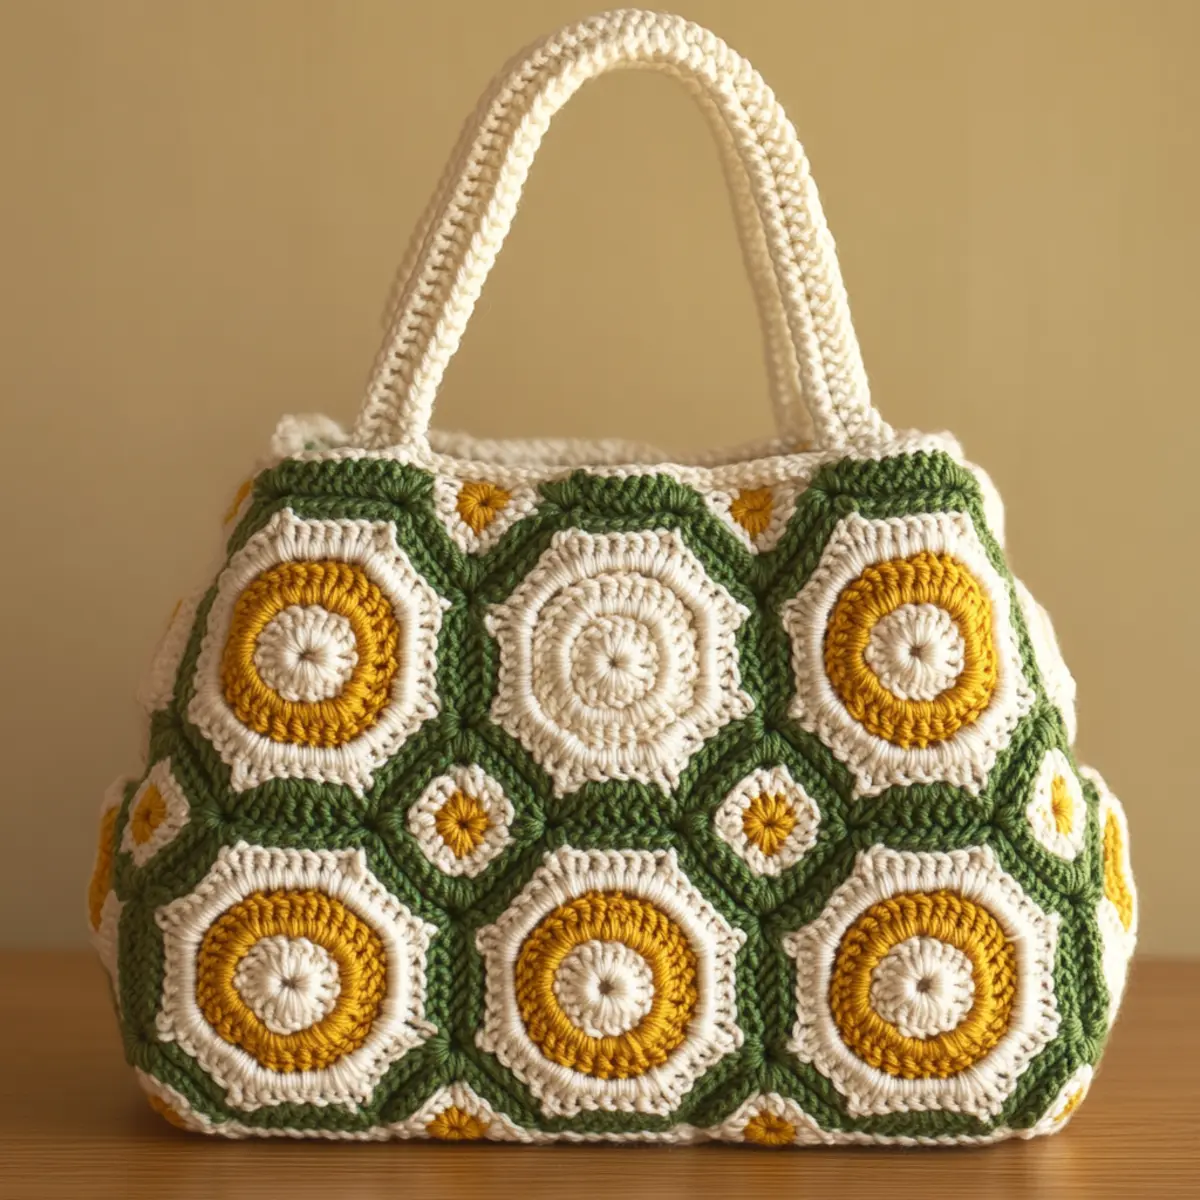
During my latest crafting adventure, I stumbled upon an exciting and vibrant project: the Colorful Crochet Hexagonal Bag. This playful piece is perfect for adding a touch of whimsy to any outfit while holding all your essentials. As I delved into creating this crochet hexagonal bag, I quickly realized that it not only serves as a fashionable accessory, but it also doubles as a fantastic stash-buster, allowing you to use up those leftover yarn scraps in a colorful way. The uncomplicated stitches make it a beginner-friendly project, which means even if you’re new to crochet, you can bring this beauty to life without feeling overwhelmed. Plus, the customizable colors mean that each bag can reflect your unique style effortlessly. With the potential to entertain your creativity and produce a practical finished piece, you might just find yourself planning your next color palette before the first bag is even done. Let’s explore what makes this pattern so special!

Crochet Hexagonal Bag Materials & Tools

Yarn

  • Worsted weight yarn in three colors – Approximately three skeins are needed, ideally cotton or acrylic, to create your crochet hexagonal bag.
  • Yardage – Aim for about 350-400 yards to ensure adequate material for all hexagons and the border.

Tools & Notions

  • 5 mm (H/8) crochet hook – This hook size is great for achieving the desired stitch definition and drape in your crochet hexagonal bag.
  • Stitch markers – Useful for marking the beginning of rounds or sections, especially when joining hexagons.
  • Yarn needle – Essential for weaving in ends neatly and finishing up your colorful project.
  • Comfortable working surface – Using a light-colored rug or table can enhance color visualization as you crochet.

Why You’ll Love This Pattern

Not only is the Colorful Crochet Hexagonal Bag a fun and colorful project, but it also stands out in a myriad of ways. Its simplicity allows crafters at any skill level to jump in and enjoy the process of creation. The texture offered by the popcorn stitches, combined with the vibrant colors, creates an eye-catching piece that is bound to spark compliments. Additionally, this bag is a true stash-buster, enabling you to use up leftover yarn scraps while treating yourself to a delightful accessory. Moreover, the pattern can easily be customized to fit your personal style, allowing for a variety of color combinations or sizes, giving you the chance to create a truly unique piece. On top of that, its time-saving construction means you’ll have a new favorite accessory in no time. You’ll love how each stitch builds on the previous one, and with every completed hexagon, you’ll see your design come to life!

Gauge & Sizing Notes for Crochet Hexagonal Bag

Checking your tension is essential for achieving the correct sizing in your crochet hexagonal bag. Aim for a gauge of 13 dc x 8 rows in a 4×4 inch (10×10 cm) swatch when using the recommended worsted weight yarn. If your swatch does not match this gauge, adjust your crochet hook size accordingly to tighten or loosen your stitches. If you want to resize your bag, you can modify the starting chain or increase the number of hexagons used—the flexibility of this crochet hexagonal bag pattern allows for easy alterations. Remember that maintaining even tension throughout each hexagon will help in retaining a consistent size, ensuring that all motifs align perfectly when assembled. Allowing your design to flow in harmony will significantly influence the final look of your bag.

Step-by-Step Pattern for Crochet Hexagonal Bag

Row 1: Start the Magic Ring
Begin by creating a magic ring. Inside the ring, work 6 sc to establish the base of the hexagon. Pull the ring to tighten it and join with a sl st to the first sc (6 sts).

Row 2: Create Petals
In this round, ch 3 (counts as dc) and work 1 dc, ch 1, 2 dc in the same stitch. Skip next st and repeat this pattern 5 times around, so you have 6 petals total, and finish with a sl st to the top of the beginning ch 3 (12 sts).

Row 3: Expand the Hexagon
For this row, ch 1 and work 1 sc in first petal. In the next petal, create 3 dc, ch 1, 3 dc for an increase. Repeat this across all petals, ensuring that every other petal has the increased stitch count (24 sts).

Row 4: Build Height
Repeat a round of 1 sc in first petal, followed by 2 dc, ch 1, 2 dc in the next petal, ensuring to alternate around. This will create a wavy shape enhancing your hexagons’ appeal (36 sts).

Row 5: make more motifs
Continue creating additional hexagons, following Rows 1-4, altering the colors for vibrancy as you prefer. Aim for a minimum of 12 hexagons to piece together for the bag.

Row 6: Joining Hexagons
Select two hexagons to join. With a sl st, connect edges of adjacent hexagons by working through both stitches. Continue this way until you have a connected strip of three or more hexagons.

Row 7: Completing the Base
As you join the motifs together, ensure to create a flat base. With three rows of hexagons, the base should span a width of about 12 inches when fully connected. Block your hexagons till they are flat.

Row 8: Create the Border
Around the perimeter of your bag, attach your yarn with a sl st. Ch 1, then work 1 sc in each stitch around, and on the corners, use a (3 sc) increase to add structure (approximately 128-144 sts).

Row 9: Top Finishing Edge
To finish the top edge, decide on either a scallop border or a straight finish. For a scallop, work 5 dc in the same stitch, skip 2, and sl st to the next (repeat this for a decorative edge).

Row 10: Weave in Ends
With your yarn needle, weave in all loose ends carefully to tidy up your crochet hexagonal bag. Ensure there are no visible ends sticking out and that every join is secure.

Row 11: Adding Straps
For straps, cut two lengths of yarn approximately 30 inches long. Fold and join them to the top of the bag using a sl st. You can also choose to crochet the straps separately using the same motifs or create simple chains.

Row 12: Final Touches
After assembling, consider adding embellishments such as small tassels or floral motifs around the handle. This adds a distinct personal touch to your crochet hexagonal bag, making it uniquely yours.

How to Wash and Care for Your Crochet Hexagonal Bag

Machine Washing: If machine washing, use a delicate cycle with cold water to preserve colors and shape. Always place your bag in a mesh bag to prevent snagging.

Hand Washing: Hand wash in cold water with a mild detergent. Gently press water out without wringing to maintain the shape of your crochet hexagonal bag.

Drying: Lay flat to dry, avoiding direct sunlight to prevent fading. Never hang your bag, as this may distort its shape.

Storage: Store your bag in a cool, dry place. Avoid damp areas, as moisture can affect the yarn and cause mold or mildew.

Expert Tips for the Crochet Hexagonal Bag

Count Stitches: Always count your stitches regularly to avoid losing count, which can lead to uneven hexagons. Re-check after each round.

Twisted Chains: When starting, ensure your foundation chain isn’t twisted. This will give your crochet hexagonal bag a clean, professional appearance.

Consistent Tension: Maintain even tension while crocheting. Inconsistent tension can warp your hexagonal motifs and lead to a distorted final piece.

Join with Care: When joining hexagons, use a slip stitch carefully to maintain the shape of the motifs. A loose join may cause the bag to sag.

Blocking Help: Block your finished hexagons before assembly. This will help to achieve sharp, clean edges and enhance the visual appeal of your crochet hexagonal bag.

Yarn Choices: Consider using a blend of cotton and acrylic yarn for durability and comfort. This will enhance the look and feel of your bag.

Crochet Hexagonal Bag Variations

Feel free to add a personal touch to your crochet hexagonal bag and make it uniquely yours!

  • Pastel Colors: Choose soft pastel shades to create a more muted, elegant look perfect for spring outings.
  • Monochromatic Scheme: Use various shades of one color for a sophisticated, modern approach that highlights texture.
  • Larger Size: Increase the number of hexagons for a tote-size version; this modification is great for carrying larger items or books.
  • Different Yarn Types: Experiment with lighter-weight or heavier yarn, such as DK or bulky, to alter the bag’s drape and feel.
  • Textured Borders: Instead of a straight edge, use a picot or zigzag stitch for the border to add interest.
  • Embellishments: Add crochet flowers, buttons, or tassels around the handle for a playful touch that can match your outfit.

By mixing three colors for your hexagons, your bag can reflect seasonal themes or your personality. Changing yarn types can make the bag cozy for winter or light for summer. Don’t shy away from experimenting!

  • Color-Blocking: Create segments of color within your hexagons to add even more visual interest. Combine your favorite contrasts or complementary colors for a one-of-a-kind look, using techniques you can explore in another article.

Crochet Hexagonal Bag FAQs

What yarn can I substitute for this pattern?
Absolutely! You can substitute worsted weight yarn with any similar weight yarn, but keep in mind that different fiber types may alter the bag’s drape and appearance.

How can I adjust the size of my crochet hexagonal bag?
Don’t panic! You can easily increase size by adding more hexagons. If you want a smaller version, consider using a lighter weight yarn or reducing the number of motifs used in construction.

What should I do if my pieces are curling?
Curling might happen if you’re using a smaller hook or too tight a tension. Try switching to a larger hook or crochet looser to keep the bag flat.

What if I drop a stitch while crocheting?
No worries! Simply locate the dropped stitch, use a crochet hook to pull it back through, and secure it in the appropriate place. It’s easier than you think!

What hook size should I use for the best results?
A 5 mm (H/8) crochet hook is recommended for optimal stitch definition and drape in this crochet hexagonal bag project. Adjust as needed based on your tension.

Can I add decorations to my crochet hexagonal bag?
Yes! Feel free to embellish your bag with tassels, tassel strings, or floral decorations to personalize it and make it uniquely yours. Have fun with it!

Filed Under: Bags

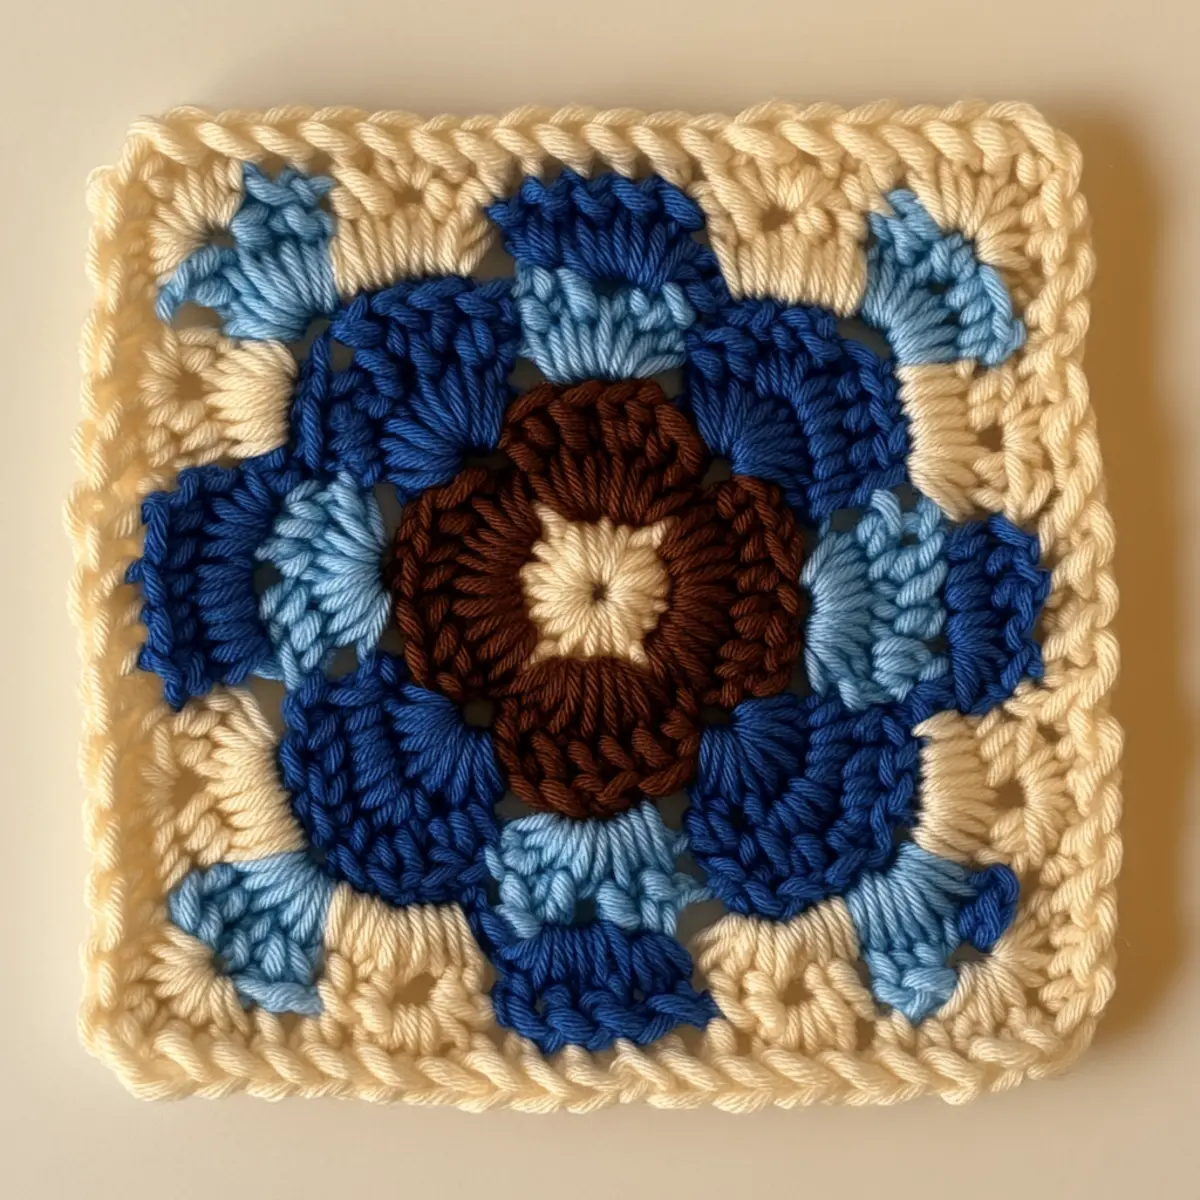
Cozy Floral Granny Square Pattern for Colorful Creations

August 17, 2026 by Publisher Leave a Comment

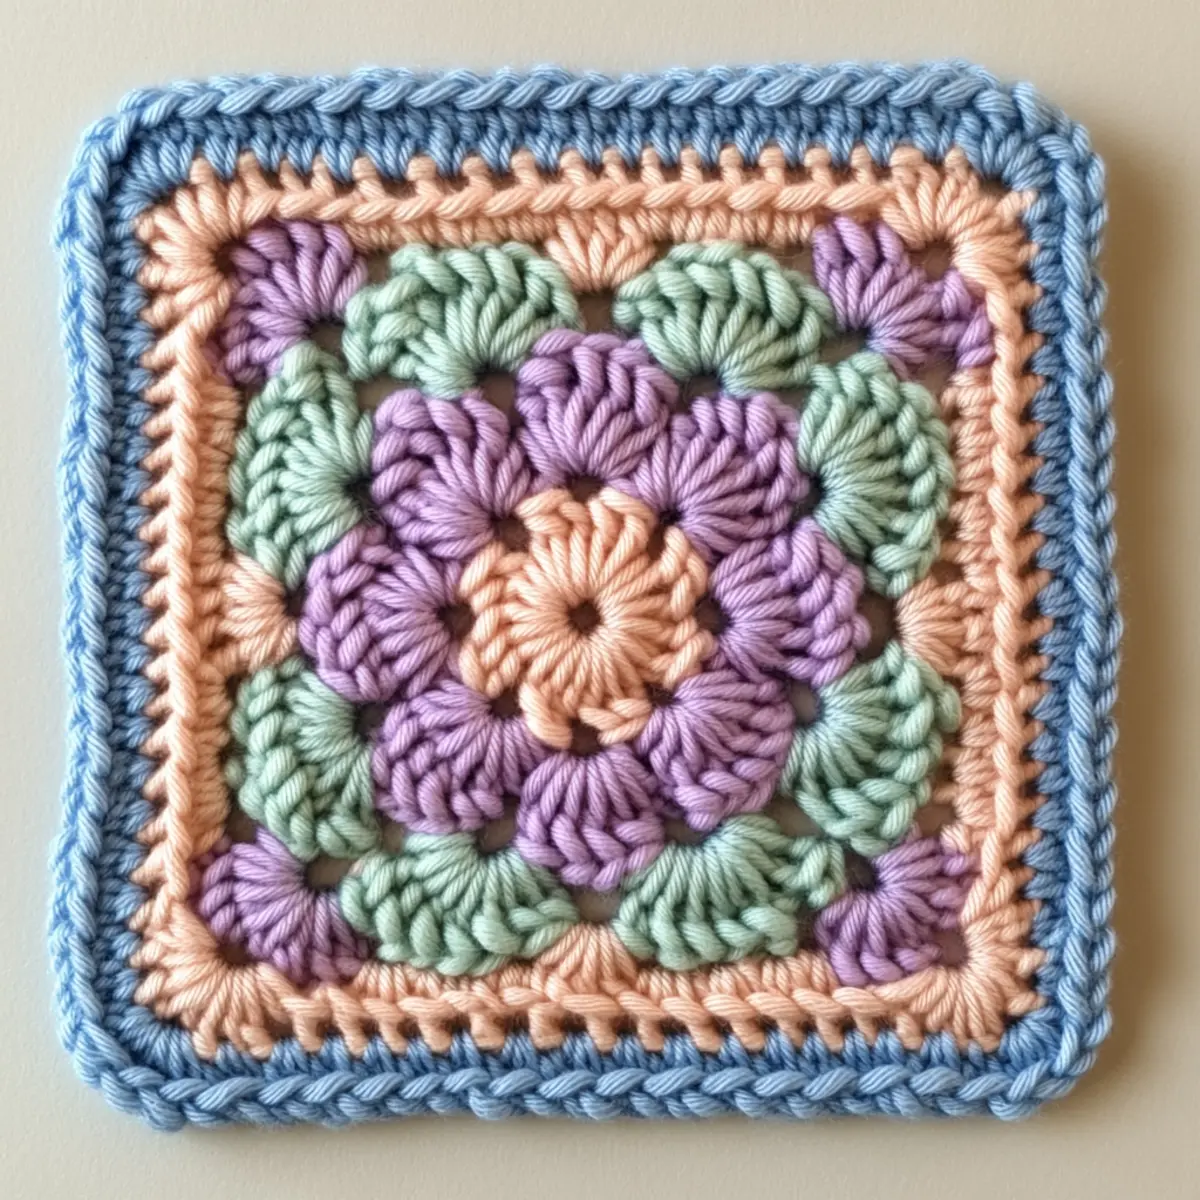
Surrounded by colorful yarns and the gentle rhythm of my hook, I found myself captivated by the Cozy Floral Granny Square Pattern. Each square is more than just a project; it is a delightful fusion of creativity and comfort, seamlessly blending skill building with fun. This granny square pattern is both stash-buster and beginner-friendly, making it an ideal project for anyone looking to indulge in some relaxing crochet time. What’s most exciting is how quickly these squares come together, allowing you to create vibrant pieces for your home or thoughtful gifts for friends. The joy of crafting is not only in the finished product but in the journey itself—transforming simple yarn into beautiful squares that reflect your unique style. I can’t help but wonder, what amazing color combinations will you choose for your own floral squares?

Granny Square Pattern Materials & Tools

Yarn

  • Acrylic or cotton yarn – Choose worsted weight, approximately 100 to 200 yards for making several squares.
  • Colorful scraps – Great for using up leftover yarn to create diverse looks.

Tools & Notions

  • 5.0 mm (H-8) crochet hook – Ideal size for achieving the perfect tension in your granny square pattern.
  • Stitch markers – Helpful for marking the start of rounds, especially when working with double crochet stitches.
  • Tape measure – Useful for ensuring your squares reach the desired dimension of 6 to 8 inches per side.
  • Scissors – For trimming yarn ends neatly at the finish.
  • Blocking mats – Perfect for shaping and setting the final look of your granny squares.

Why Will This Pattern Inspire You?

Versatile in its design, this granny square pattern allows for endless creativity, making it perfect for various décor styles. Texture is another standout feature, as the layered stitches give each square a lovely tactile quality that invites touch. Plus, it’s a wonderful stash-friendly project, enabling you to use up scraps of yarn while experimenting with surprising color combinations. The simplicity of the construction makes it beginner-friendly, inviting crafters of all levels to push their boundaries. These squares also offer a fantastic opportunity for customizability; explore different stitch types to create unique looks and fit your personal aesthetic perfectly. Be sure to check out our guide on joining granny squares for tips on construction, and don’t forget to experiment with color as discussed in our post on choosing yarn colors to make your blanket truly one-of-a-kind!

Gauge & Sizing Notes for Granny Square Pattern

Checking your tension with this granny square pattern is crucial for achieving a consistent and beautiful result. A standard gauge measurement of 4×4 inches (10×10 cm) should yield approximately 12 dc and 6 rows for a solid design. If your swatch doesn’t match, adjust the hook size or yarn weight to reach the desired tension. This will ensure that each square measures about 6 to 8 inches per side. Adjust your starting chain or rounds to modify the square size, enabling a personalized fit for your project. Experimenting with the number of rounds or the thickness of the yarn provides flexibility in design, allowing crafters to create larger squares for blankets or smaller ones for coasters. Remember, consistent tension throughout your crafting will greatly enhance the finished product, so take the time to test your gauge as you delve into this delightful granny square pattern!

Step-by-Step Pattern for Granny Square Pattern

Row 1: Start the Magic Circle Begin with a magic circle, leaving a tail for later sewing. Chain 3 (counts as 1 dc) and work 11 dc into the ring, then pull the tail to close. Join with a sl st to the top of the first ch-3 (12 dc).

Row 2: Create the V-Stitch Chain 3 (counts as 1 dc) and work 1 dc in the same st. Next, (ch 1, 2 dc in the next st) in the gaps around the circle. Continue this until you have created 6 V-stitches, joining with a sl st to the top of the ch-3 (12 dc + 6 ch-1 spaces).

Row 3: Expand the Floral Design Chain 3 (counts as 1 dc) and in each ch-1 space from the previous row, work (2 dc, ch 1, 2 dc) in the same space. Repeat around, joining with a sl st to the top of the first ch-3 (24 dc + 6 ch-1 spaces).

Row 4: Adding More Petals Chain 3 (counts as 1 dc) and work 1 dc in the same st. Skip the first ch-1 space, and in the next ch-1 space, work (2 dc, ch 1, 2 dc). Repeat this pattern, skipping spaces as needed, until you join back with a sl st (12 petals).

Row 5: Color Change For a beautiful visual, change colors. Begin with a new color, chaining 3, and (2 dc in ch-1 space, ch 1) for each petal space. Join this round with a sl st to the top of the starting ch-3 for a total of 30 stitches.

Row 6: Continue Floral Expansion Keep expanding with your new color; chain 3, then (2 dc, ch 1, 2 dc) in each ch-1 space. Remember to keep track of your increases, ensuring a smooth transition with sl st each round. Finish with a total of 12 V-stitches at the end of this round.

Row 7: Outer Border Start the border by chaining 1 and working 1 sc in each stitch around. Ensure to place 3 sc in each corner for adequate turning room. This will help shape your square into perfection. End the round with a sl st.

Row 8: Final Touches Finish your granny square pattern by creating a final outer round. Use a contrasting color for a pop, chaining 1, and adding 1 sc, 1 hdc, and 1 dc in the same stitch for the corners. Join seamlessly and fasten off.

Row 9: Weave in Ends Use scissors to trim your yarn, leaving a short tail for weaving. Take your tapestry needle and weave in all ends to secure the stitches. This step is vital to keep your granny square sturdy.

Row 10: Blocking To enhance your squares, it’s recommended you block them. Lay them flat and spray with water, adjusting corners to create crisp edges. This elevates the visual appearance and helps in sewing them together later.

Row 11: Experiment with Color Feel free to mix colors at any round to achieve unique designs. Pastels yield soft themes, while bold hues create a cheerful vibe. Playful color choices can elevate the basic granny square pattern into a stunning design.

Row 12: Join Squares Once you have made several granny squares, it’s time to join them! Use a whip stitch or slip stitch method between the edges to create your blanket or desired project. This adds to the adventure and joy of your creative journey.

How to Wash and Care for Your Granny Square Pattern

Machine Washing: Use a gentle cycle and cold water to maintain the integrity of the yarn. Avoid harsh detergents that could affect color vibrancy.

Hand Washing: If cleaning your granny squares by hand, soak them in cool water with mild soap, gently swishing to avoid agitation that can distort shapes.

Drying: Lay your squares flat to dry instead of hanging, as this helps preserve their dimensions and shape.

Storage: Store your finished squares in a dry, cool place, away from direct sunlight to prevent fading and avoid moisture that can damage fibers.

Expert Tips for the Best Granny Square Pattern

Count Carefully: Always keep track of your stitch count to avoid losing your place, which can lead to uneven squares.

Stitch Markers: Use stitch markers at the start of each round to prevent dropped stitches and maintain consistency throughout your granny square pattern.

Consistent Tension: Maintain a steady tension while crocheting; fluctuations can cause some squares to be larger or smaller than others. This ensures a uniform size for all squares.

Avoid Twisting: When creating the foundation chain, ensure that it lies flat and is not twisted to prevent issues later in your granny square pattern assembly.

Experiment Freely: Don’t hesitate to try out different colors and stitch types within the floral design. This adds a personal touch and uniqueness to each granny square you create.

Block for Perfection: After finishing, consider blocking your squares to define their shape and enhance their overall appearance.

Granny Square Pattern Variations

Feel free to get creative! Each variation allows you to personalize your crochet project and make it uniquely yours.

  • Yarn Swaps: Use cotton or bamboo yarn for different textures and finishes.
  • Color Blocking: Alternate between vibrant and pastel colors to give your squares an entirely new look.
  • Texture Modifications: Integrate popcorn or bobble stitches in the floral design for a textured touch.
  • Larger Squares: Opt for bulky yarn to create larger, cozier squares for winter projects.
  • Seasonal Themes: Experiment with seasonal colors—soft pinks and greens for spring, or rich oranges and browns for fall.
  • Ombre Effect: Transition shades of a single color from light to dark for a modern look.
  • Add Embellishments: Consider adding sewn-on flowers or buttons in the center for extra flair. A bold center can redefine the entire square.

You can mix and match these variations to create a range of sizes and designs, allowing for ample opportunities to experiment and showcase your crochet skills. Don’t forget to check out our guide on color combinations for inspiration!

Granny Square Pattern FAQs

Can I use different yarn weights?
Absolutely! You can adjust the yarn weight to create larger or smaller squares, but be mindful of maintaining a consistent tension for the best results.

What if my granny square curls at the edges?
Don’t panic! Edge curling can happen due to uneven tension. Try blocking your finished squares flat, which helps relax the stitches and corrects the shape.

How do I adjust the size of my granny square?
You can modify the size by changing your hook size or the number of rounds you work. For larger squares, add more rounds; for smaller ones, reduce them accordingly.

What’s the best hook size for this pattern?
A 5.0 mm (H-8) crochet hook is ideal for achieving a nice tension with worsted weight yarn, but your actual hook size may vary based on personal tension preferences.

Can I add embellishments to my granny square?
Certainly! You can incorporate buttons, beads, or additional decorative stitches to personalize your granny squares. This is a great way to showcase your creativity!

How should I join my granny squares?
There are various methods, such as whip stitch or slip stitch. Choose one that best fits your style and the look you wish to achieve in your final project.

Filed Under: Granny Square

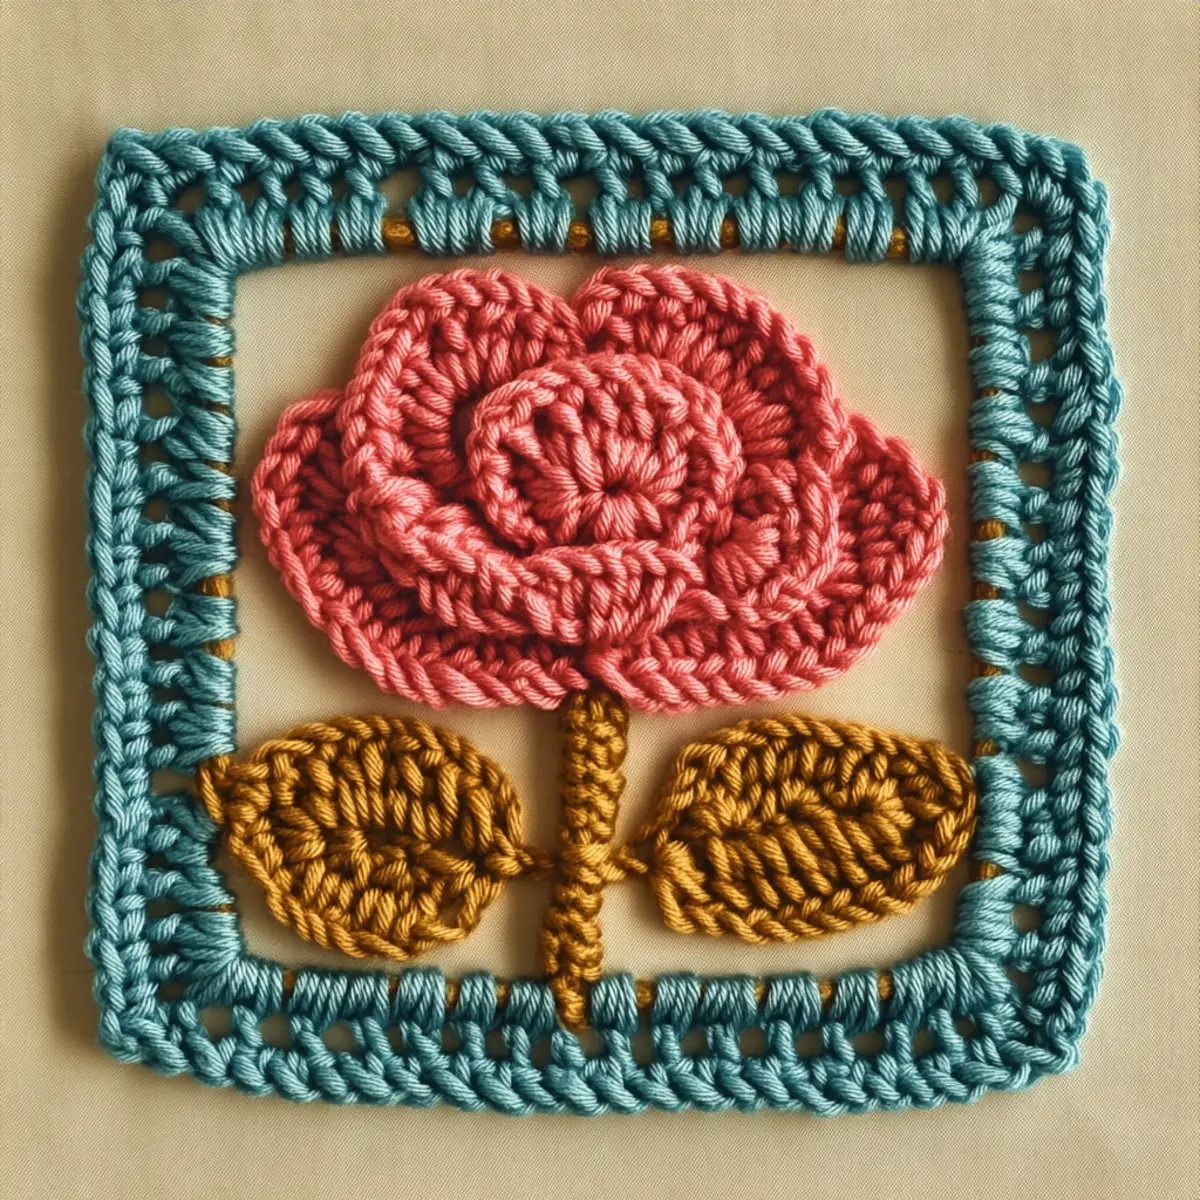
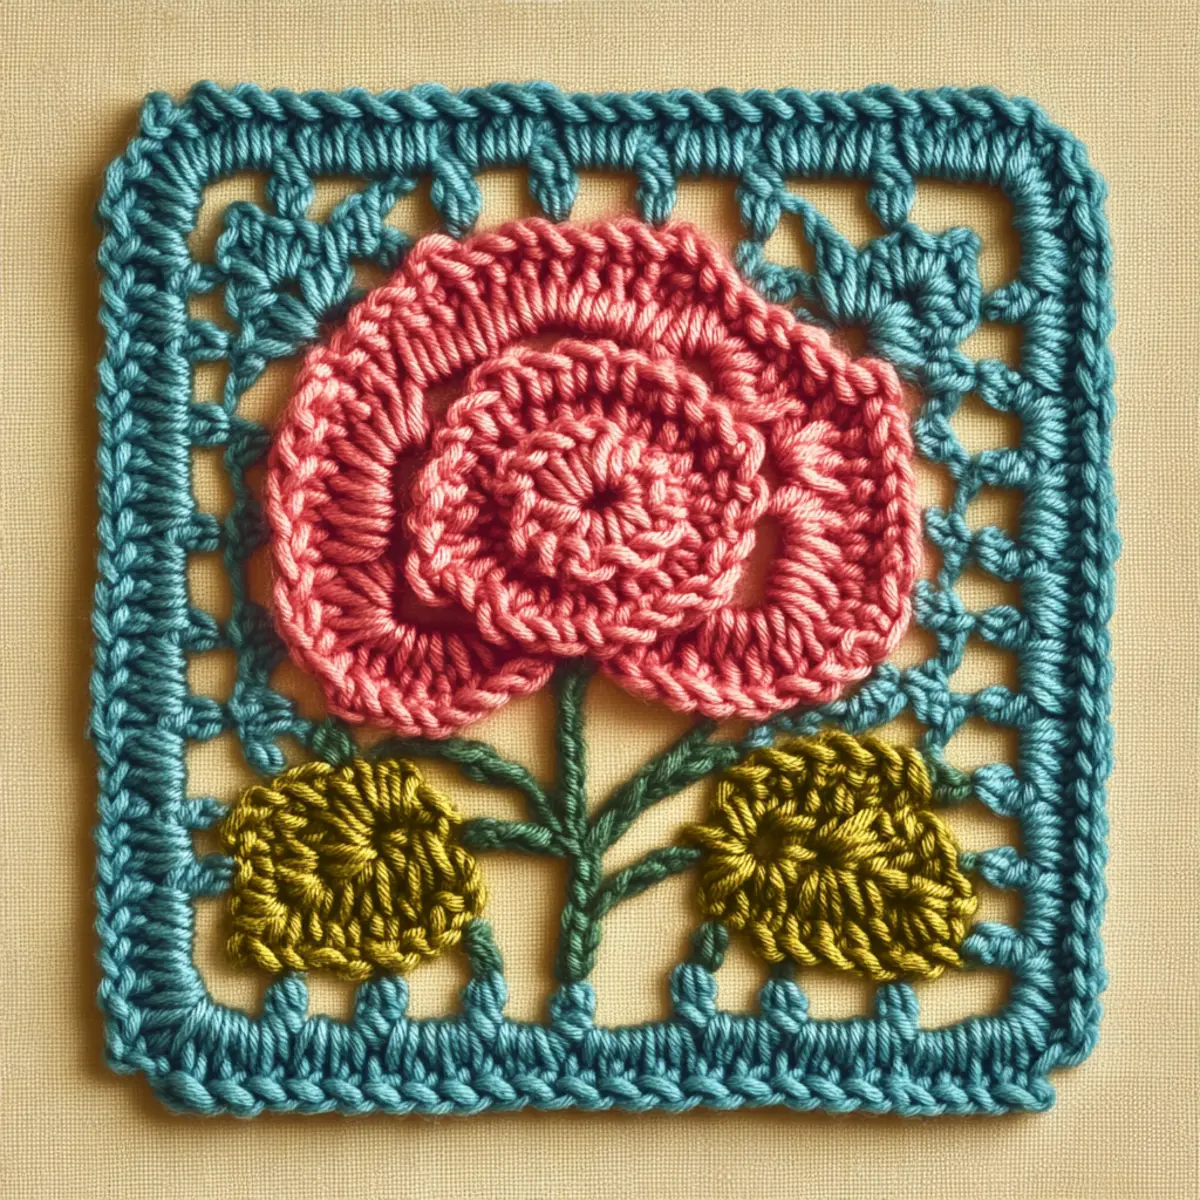
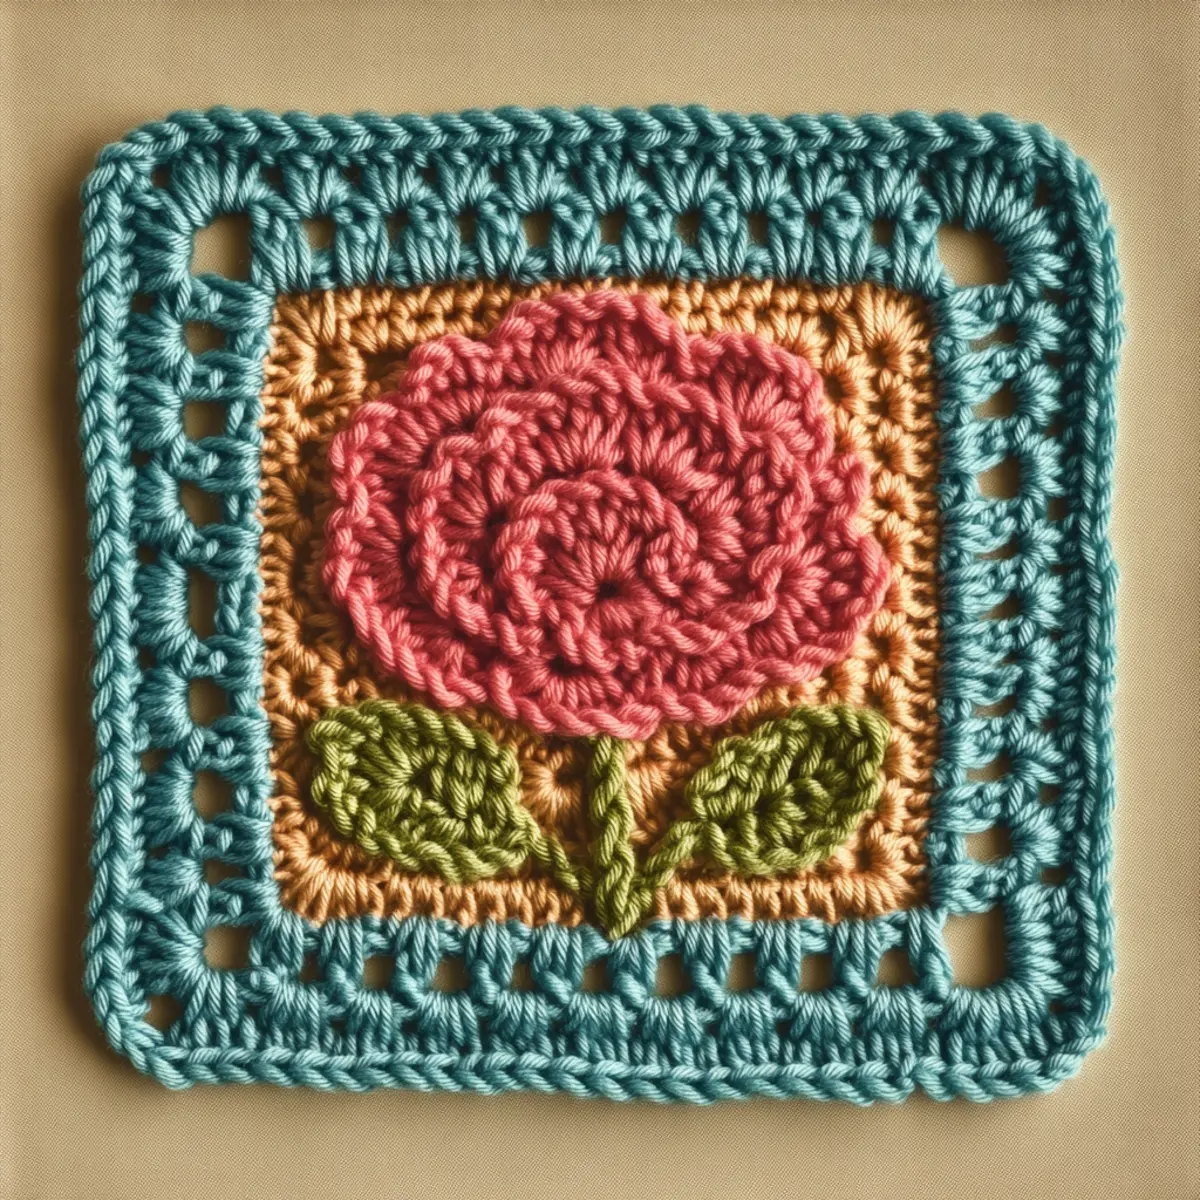
Charming Floral Crochet Square for Vibrant Home Decor

August 17, 2026 by Publisher Leave a Comment

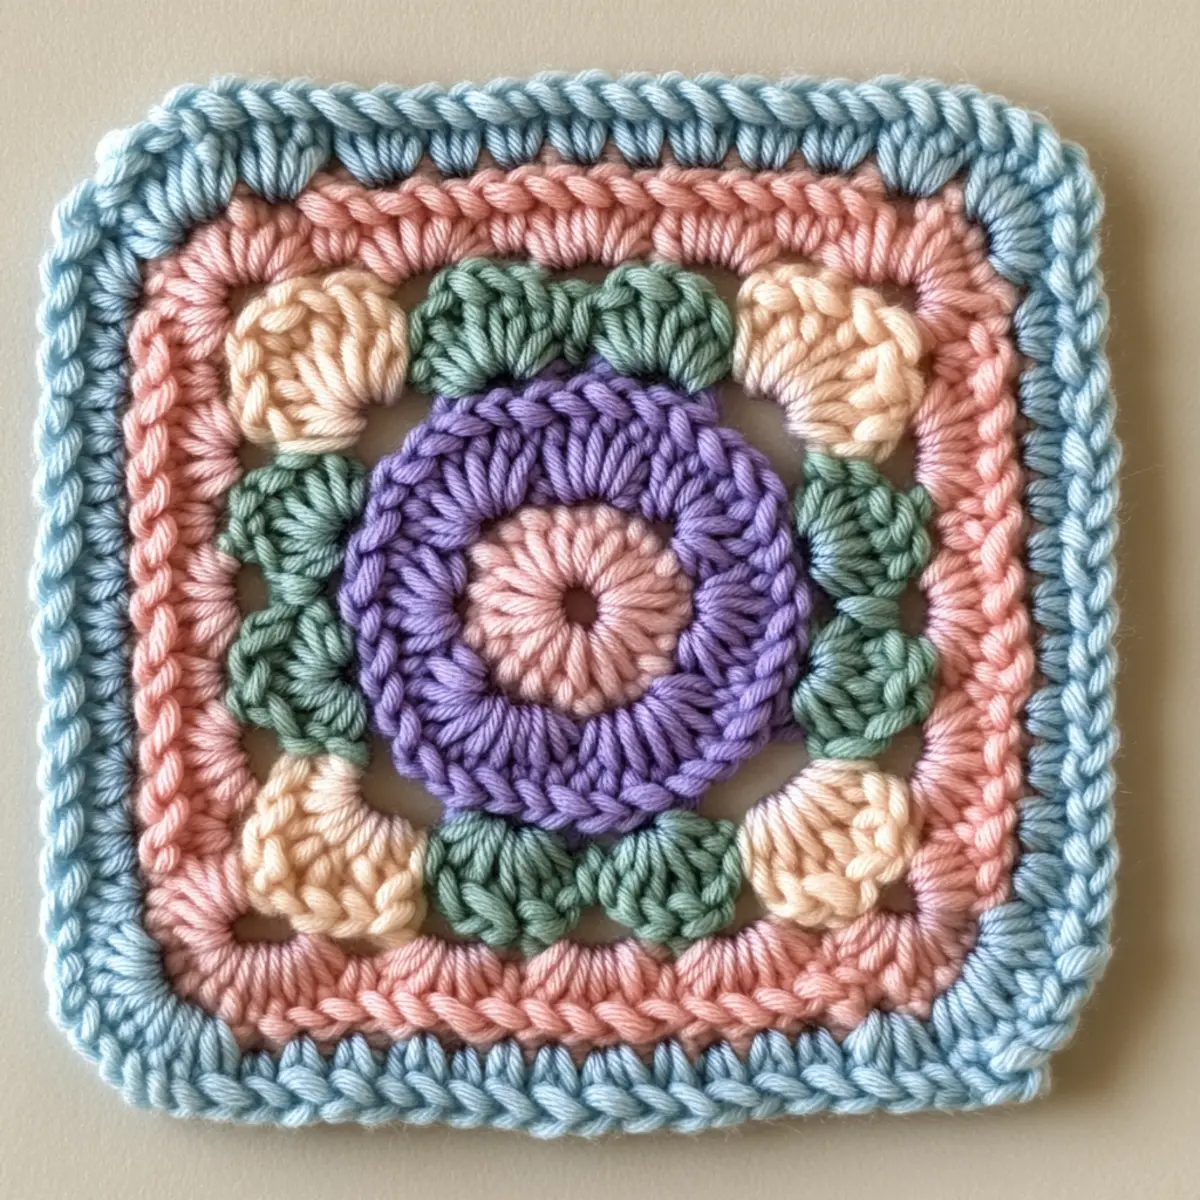
Recently, I embarked on a delightful journey with the Charming Floral Crochet Square that ignited my passion for crochet all over again. You see, this project isn’t just about stitches; it’s about transforming yarn into a blooming masterpiece that can brighten up any corner of your home. What I adore about this floral crochet square is its adaptability—whether as a cozy coaster or a statement piece for a decorative wall, it offers endless possibilities. Plus, it’s an engaging way to enhance your crochet skills while keeping it beginner-friendly! You’ll learn essential techniques, like the popcorn stitch and layering, without feeling overwhelmed. As I wrapped my fingers around the vibrant yarn, I could feel the excitement bubbling within. Each stitch felt like a celebration of creativity, allowing me to express my love for nature through crochet. Have you ever wanted to crochet a piece that showcases a whimsical flower design while keeping your creative spirit alive? Join me as we dive into the beauty of this project and explore how to make your own Blooming Floral Square.

Floral Crochet Square Materials & Tools

Yarn
Worsted weight yarn – Choose three colors such as pink for blossoms, gold or yellow for the stem, and aqua for the background; approx. 200-250 yards total needed.
Tools & Notions
5 mm (H-8 US) crochet hook – A great size to achieve the right tension for your floral crochet square.
Yarn needle – Use for weaving in ends to give your project a neat finish.
Stitch markers (optional) – Helpful for tracking rounds, especially in the more intricate layered stitches of this design.

What Makes This Pattern So Special?

Versatility is at the heart of the Charming Floral Crochet Square. Create a vibrant and personal home decor item perfect for any season or occasion! Skill Development comes next—this pattern incorporates various stitches, giving you the chance to refine your abilities while having fun. Each square can truly become a unique work of art by customizing colors and sizes, allowing you to tap into your personal style. Not to mention, it’s an effective stash-buster, enabling you to utilize leftover yarn scraps in a delightful, aesthetic way. For other fun crochet projects, don’t miss our guide on beginner-friendly crochet squares and learn how to master more intricate designs with our intermediate crochet patterns!

Gauge & Sizing Notes for Floral Crochet Square

Checking your gauge is an essential step when creating the floral crochet square to ensure your finished project turns out the right size and shape. For this pattern, a basic gauge of 4×4 inches (10×10 cm) using a 5 mm (H-8 US) crochet hook and worsted weight yarn should yield approximately 12 dc and 8 rows. If your swatch differs from this gauge, you may need to adjust your hook size or tension. To resize the floral square, simply modify the starting chain in multiples of 2 to maintain stitch counts or increase/decrease the number of rounds worked based on the desired size. If your swatch does not match the gauge, try a larger hook for a looser stitch or a smaller hook for a tighter gauge. Emphasizing these adjustments early on will allow your floral crochet square to maintain its integrity while showcasing your creativity!

Step-by-Step Pattern for Floral Crochet Square

Row 1: Start the Foundation Begin by creating a foundation chain of 40 stitches using your aqua yarn, ensuring it is not too tight. Join the last chain to the first with a slip stitch to form a ring and start working in the round with a 5 mm hook.

Row 2: Establish Base Round In the same ring, ch 3 (counts as the first dc) and work 1 dc in each of the next 39 chains. This forms the base for your floral crochet square, allowing for a total of 40 stitches in your first round. Join with a sl st to the top of the ch 3.

Row 3: Create the Background For this round, ch 2 (counts as first hdc), then work hdc in each stitch around (40 hdc total). This round adds a bit of texture and forms a solid background to support the floral elements.

Row 4: Add Chain Spaces Ch 3, then dc in next stitch, ch 1, skip 1 stitch. Repeat this pattern around for a total of 20 chain spaces, then join the last stitch with a sl st to the top of the ch 3. The chain spaces create airflow and help define the floral design.

Row 5: Flower Petal Foundation Switch to your pink yarn and attach it in any chain space from the previous round. Ch 3 (counts as 1st dc), 2 dc, ch 2, 3 dc in the same space to create the first petal. Repeat the same process in each of the 20 spaces around to complete the flower petals.

Row 6: Forming the Petals To enhance the petals, work a popcorn stitch in each petal (4 dc worked together, pull first stitch through the last) in each of the previous round’s petals. You will see the flower beginning to take shape! Finish with a sl st to close the round and secure the petals in place.

Row 7: Add the Leaves For the leaves, switch to your gold or yellow yarn in the spaces between petals. Work 3 sc in each gap, creating a leaf appearance. Remember to keep your tension loose to ensure the leaves do not curl. Continue around until every gap has a leaf.

Row 8: Shape the Square At this point, you will go back to aqua yarn to create your edging. Ch 1, sc in the same stitch, then work around the entire square with 1 sc in each stitch of the previous rows. Make sure to create crisp corners by adding 3 sc in each corner.

Row 9: Final Touches Join the round with a sl st. This creates a neat finish around your floral crochet square. No additional rounds are needed unless you’d like a thicker border.

Row 10: Weave in Ends Use your yarn needle to weave in all the ends from your work. This step is crucial for a clean-looking final piece, hiding all color changes that occurred while making your floral design.

Row 11: Blocking for Shape Lightly dampen your finished square and pin it to shape, ensuring the flower petals lay flat and defined. Blocking enhances the entire floral crochet square’s appearance.

Row 12: Admire Your Work! Now that you’ve completed your floral crochet square, take a moment to admire your handiwork! This stunning piece can be used as a coaster, wall art, or added to a larger blanket effortlessly, showcasing your skill and creativity.

Expert Tips for the Floral Crochet Square

Tension Matters: Maintain consistent tension throughout your floral crochet square to ensure even stitch size. A swatch with your yarn and hook can help confirm this.

Avoid Gaps: Ensure smooth transitions when joining new colors to avoid visible gaps that may disrupt the floral design flow. Yarn choices can affect this too, so take care!

Count Those Stitches: Track your stitch count carefully after each round. Losing count may lead to undesired shape distortions, particularly in such intricate designs like the floral crochet square.

Foundation Chain Checks: Make your foundation chain not too tight. This will allow for better flexibility when beginning your rounds and crafting your square.

Popcorn Stitch Flow: When creating popcorn stitches for the flower petals, practice on a swatch first. This ensures you master the stitch before using it in the main project for precise results.

Block Your Work: After completing the floral crochet square, blocking can greatly improve its overall appearance. It defines shapes better and showcases the intricate flower and leaf details beautifully.

How to Wash and Care for Your Floral Crochet Square

Machine Washing: If necessary, use a gentle cycle in cold water. Avoid agitation to maintain the integrity of the floral crochet square.

Hand Washing: Hand wash is preferred using mild detergent and cold water. Allow the square to soak, then rinse gently without scrubbing.

Drying: Always lay flat to dry after washing to maintain the delicate shapes of the flowers and ensure no curling occurs along the edges.

Storage: Store your floral crochet square in a cool, dry place away from direct sunlight to prevent fading colors and preserve its beauty.

Floral Crochet Square Variations

Feel free to explore creative variations on the floral crochet square to make it truly your own!

  • Color Palette Change: Experiment with pastel shades for a soft look or vibrant primary colors for a bold statement.
  • Different Yarn Weight: Use lighter or heavier yarns for a larger or smaller square, changing its overall impact.
  • Embellishments Added: Sew on buttons or beads in the flower’s center to give it a unique, charming touch. This mix of textures can create an impressive focal point in the square.
  • Border Variations: Consider using scalloped edges or braided borders for added flair, enhancing the overall appeal of your design.
  • Textures Exploration: Introduce a variety of stitch patterns—such as bobble or shell stitches—for the background to create a rich, textured experience. With these alterations, you can transform a simple plaine square into a breathtaking masterpiece.
  • Layered Stitch Effects: Play with layering different stitches to create depth and dimension in both the flowers and leaves. This can elevate your piece to new artistic heights!
  • Size Adjustments: If you’re feeling adventurous, don’t hesitate to increase or decrease the size by altering your foundation chain length or the hook used. Whether it’s a cozy coaster or a bold wall hanging, the choice is yours!

Additionally, you may find that integrating color-blocking techniques can ramp up the visual interest.

What to Pair with / What to Make after Floral Crochet Square

Once you’ve completed your floral crochet square, consider these delightful projects that will perfectly complement it.

  • Matching Coasters: Create a set of coasters in similar colors to your square for unified decor. These fun additions can brighten up any coffee table!
  • Colorful Pillow Covers: Transform your crochet skills into plush pillow covers that echo the floral design, creating an inviting atmosphere.
  • Flower Garland: Use multiple floral squares to form an enchanting garland that can liven up a room or outdoor space effortlessly.
  • Charming Wall Hanging: Assemble several floral squares into a larger wall hanging art piece that showcases your crochet artistry beautifully. A lovely statement will soon captivate your guests!

These paired projects allow you to continue expressing your creativity while showcasing the beautiful floral designs throughout your home.

Floral Crochet Square FAQs

Can I substitute yarns for this pattern?
Absolutely! You can use any worsted weight yarn, but remember that different fibers may affect the drape and appearance of your floral crochet square.

How do I adjust the size of my square?
To adjust the size, you can change the yarn weight or hook size. Modify the starting chain in multiples of 2 for best results.

What should I do about dropped stitches?
Don’t panic! If you notice a dropped stitch, use a crochet hook to pull the yarn back up through the layers, then secure it neatly.

Why is my square curling at the edges?
Curling can happen due to tight stitches or incorrect gauge. Try experimenting with a larger hook for a looser stitch, or block it to help flatten edges.

What’s the best hook size for this project?
A 5 mm (H-8 US) crochet hook is recommended for this floral crochet square. It provides the right tension for the stitch definition.

Can I add embellishments to my floral square?
Definitely! Adding buttons, beads, or different yarn textures can enhance the overall design and make your floral crochet square truly unique. Have fun with it!

Filed Under: Granny Square

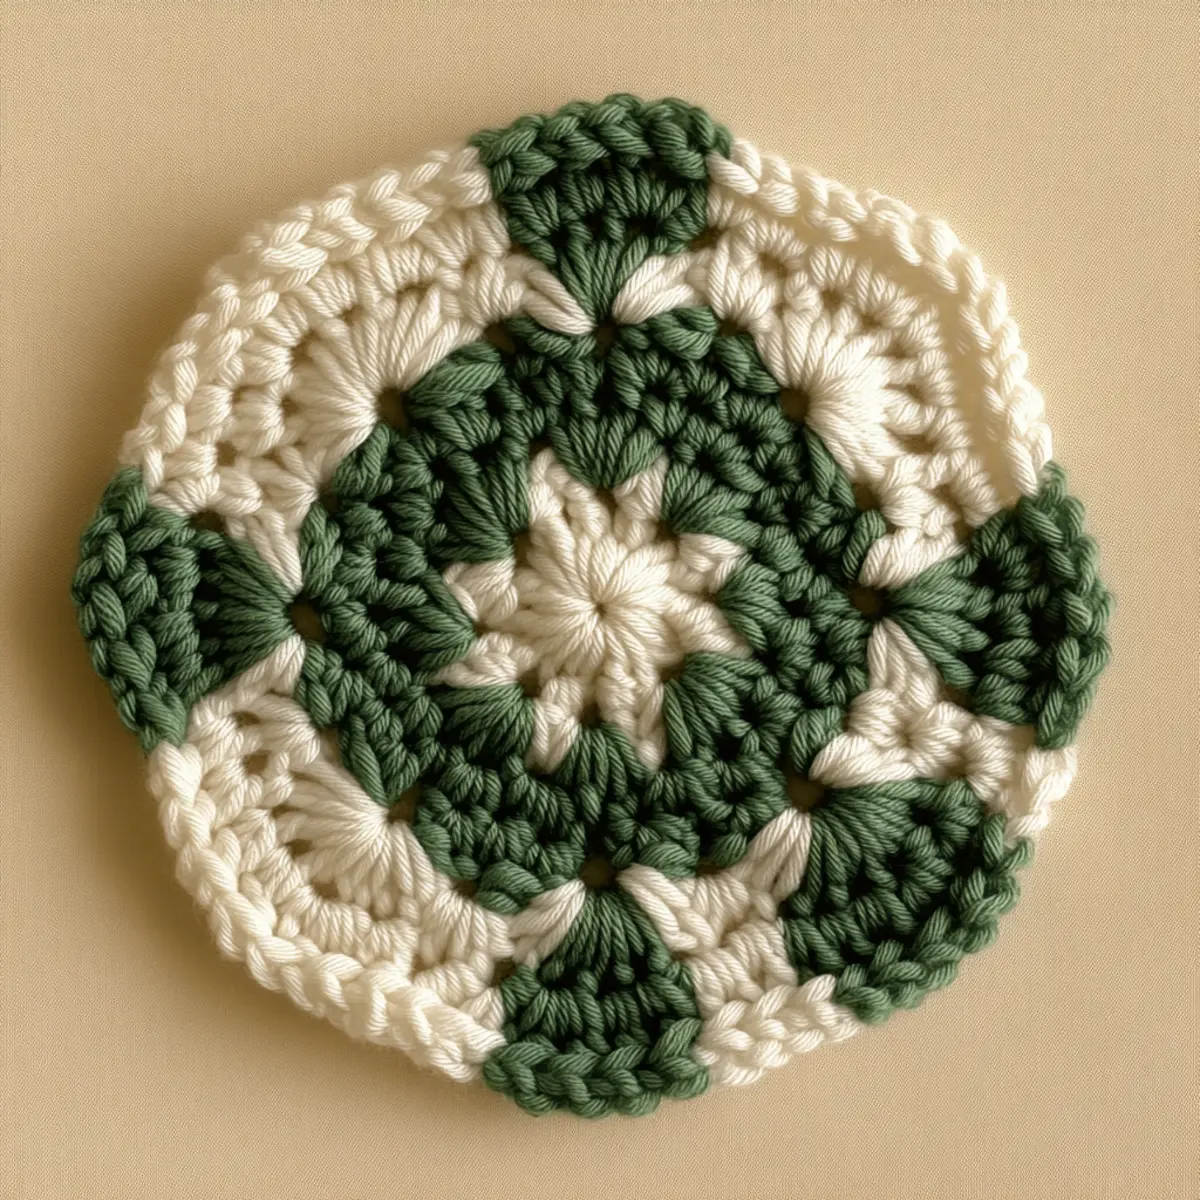
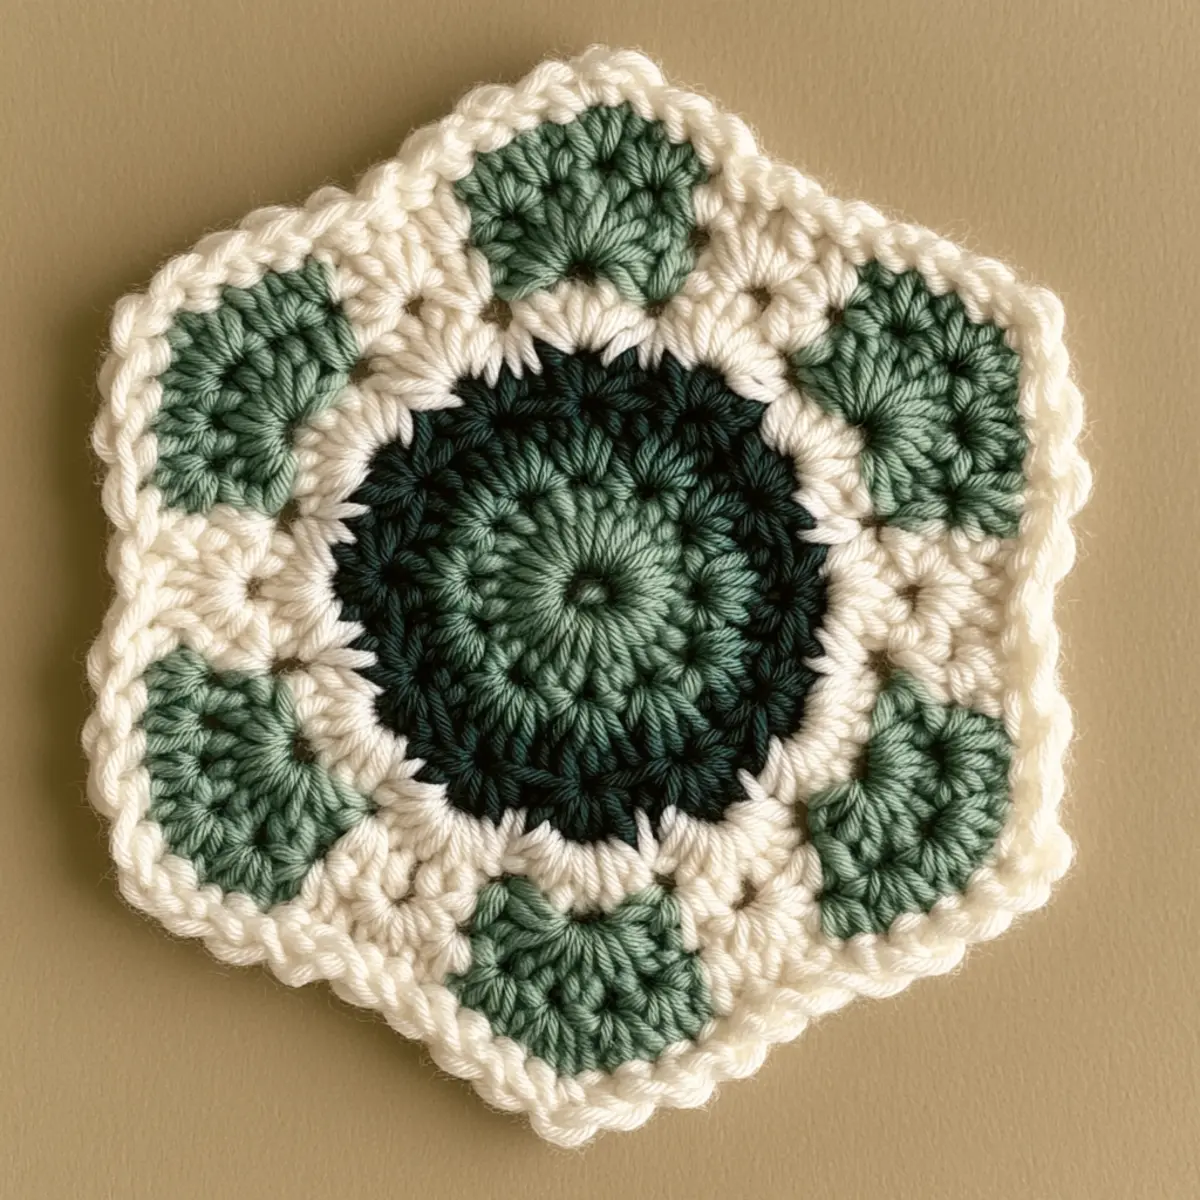
Charming Ombre Granny Hexagon for Cozy Decor

August 17, 2026 by Publisher Leave a Comment

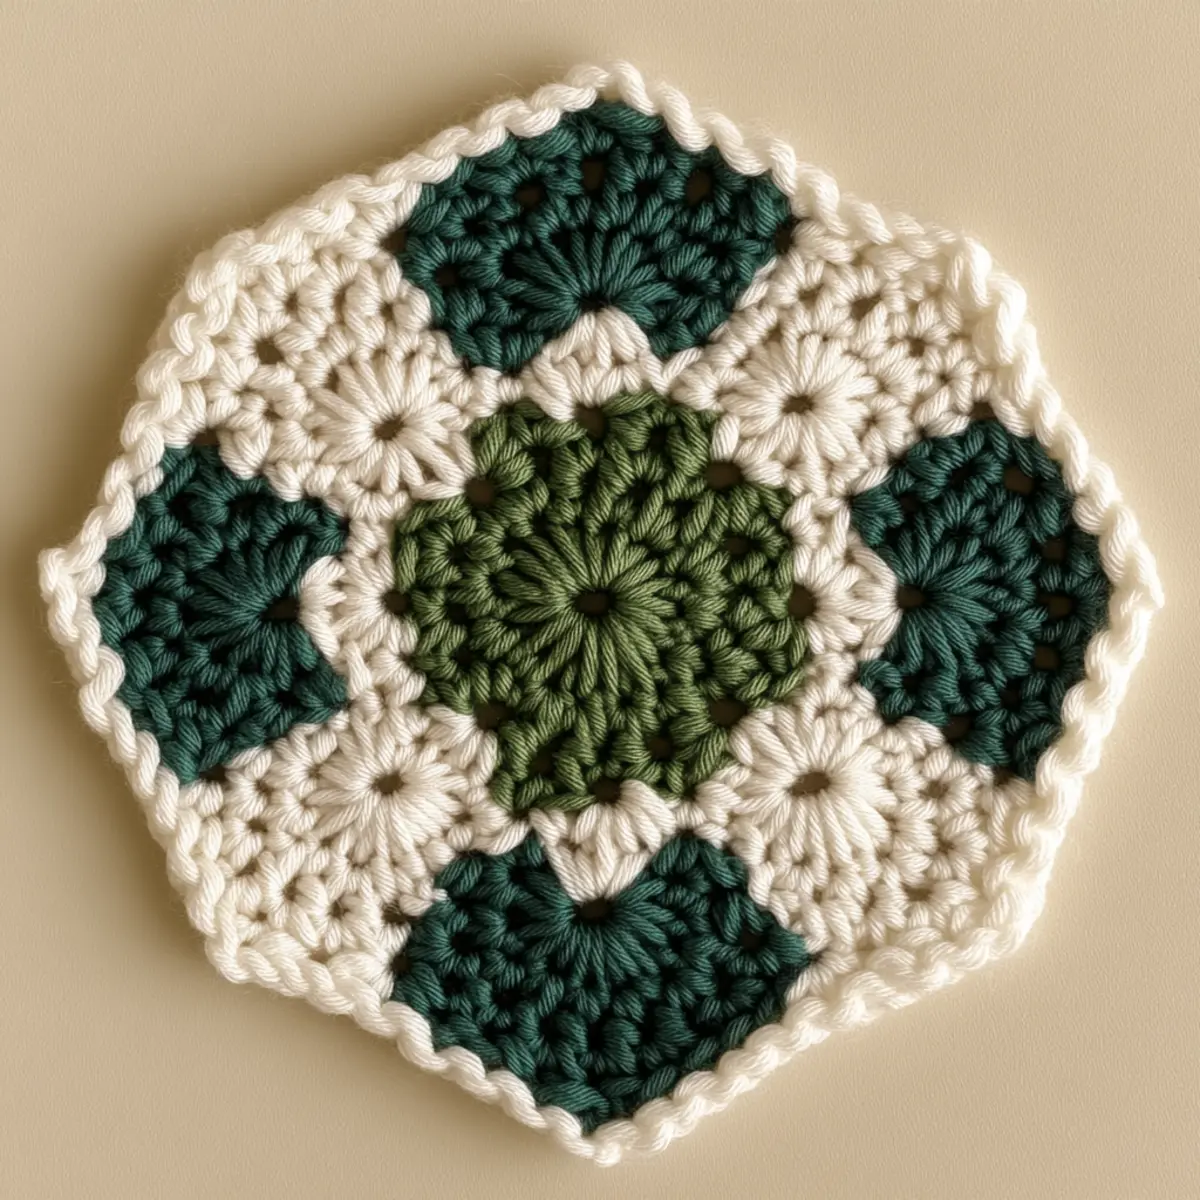
Creating crochet pieces can be both rewarding and therapeutic, and this Ombre Granny Hexagon pattern exemplifies that notion beautifully. With just a few simple stitches and an effortless color transition, these hexagons bring a fresh twist to traditional granny squares, making them irresistibly charming. This project is not only a stash-buster, perfect for utilizing leftover yarn bits, but it’s also beginner-friendly, allowing even the most novice crafters the delight of creating something truly beautiful. The ombre effect, with its seamless gradient from bold to soft tones, adds an elegant touch to your home decor while being quick to complete, offering instant gratification. As you embrace the rhythm of your hook and yarn, you might find that your tension and technique improve with each stitch. I can’t wait to see how you personalize these hexagons to reflect your unique style and cozy atmosphere. What color combinations will you choose to make them your own?

Ombre Granny Hexagon Materials & Tools

Yarn

  • Worsted Weight Yarn (Category 4) – 200-300 yards per color; this yarn works well for the textured stitch patterns and the ombre effect.
  • Cotton-Acrylic Blend Yarn – Ideal for a soft, washable texture that holds its shape beautifully.

Tools & Notions

  • 5.5 mm (I/9) Crochet Hook – A perfect size for achieving nice stitch tension and facilitating easy color changes.
  • Stitch Markers – Aid in tracking rounds and ensuring your color changes remain consistent throughout your project.
  • Yarn Needle – Essential for weaving in ends and finishing off your ombre granny hexagons neatly.

Why You’ll Love This Pattern

Simplicity is key with the ombre granny hexagon, making it an accessible choice for newcomers while providing enough fun for seasoned crafters. The texture created through the cluster stitches not only adds visual interest but also a tactile element that enhances the overall aesthetic of your projects. Additionally, this pattern is incredibly stash-friendly; it’s perfect for using up leftover yarn scraps and turning them into something spectacular. You can explore your creativity by customizing the hexagons in various sizes or color gradients, truly making them your own. This project is also a fantastic quick crochet fix for those days when you want a satisfying completion without an extensive time commitment, meaning you’ll likely end up with beautiful decor faster than you imagine! Once completed, these hexagons can easily be assembled into a blanket or turned into unique cushions. Overall, the ombre granny hexagon is a delight to work on and transforms any space into a cozy haven.

Gauge & Sizing Notes for Ombre Granny Hexagon

Checking your gauge is key for achieving the desired outcome with your ombre granny hexagons. Aim for a gauge of 4×4 inches (10×10 cm) with a stitch count that reflects the necessary tightness for your pattern. If your tension is too tight, your hexagons may shrink significantly, whereas overly loose stitches will yield larger pieces that may not hold their shape well. To resize your hexagons, you can modify the starting chain or rounds; simply add or subtract stitches based on your preferred dimensions. If your swatch doesn’t match the gauge, make sure to switch to a larger or smaller hook size to adjust the tension. This helps ensure that your final project maintains a uniform look and feel, particularly when combining several hexagons into larger items. Each completed ombre granny hexagon should measure approximately 6-8 inches across, making them versatile for various applications in your cozy decor.

Step-by-Step Pattern for Ombre Granny Hexagon

Row 1: Create the Center Ring
Begin by making a slip knot, then chain 6 and join with a slip stitch (sl st) to form a ring. This small circle will be the foundation of your ombre granny hexagon, from which you will work your clusters and color transitions. (6 ch)

Row 2: Build the First Round
Chain 3 (counts as 1 dc), then work 2 dc into the ring to form your cluster. Continue making 3 clusters of 3 dc into the ring and finish with a sl st in the top of the initial ch-3. You should have a total of 3 clusters (9 dc cluster). (3 clusters)

Row 3: Define the Hexagon Shape
Start with a ch 3, then in the next cluster, you will create 1 dc, 2 ch, and 3 dc in the space to form a corner. In every cluster space, work 1 dc, until you reach the next corner space, making sure to finish with a sl st for neatness. This creates the hexagon shape. (6 corners with 12 dc total)

Row 4: Add Color Transition
For this round, change color; begin with a ch 3, then cluster into the corners as you did before but using your second color for added ombre. Remember to incorporate a ch2 between clusters for spacing. Ensure that all cluster stitches are consistently formed to maintain an even shape. (3 colors)

Row 5: Continue the Color Gradient
Start this round with your final color and repeat the cluster work as before, creating three clusters in each corner space. You’ll want to slip stitch for neat edges again. Be careful to keep tension consistent throughout the rows, as it helps the hexagon maintain its shape. (6 corners)

Row 6: Final Round Adjustments
This round finishes the ombre effect; continue using your last color. Add more 3 dc clusters in each corner but incorporate longer chains (ch 3) between while maintaining solid sides. Complete with a sl st when you reach the beginning chain, showcasing your vibrant color transition. (6 clusters)

Row 7: Secure Ends
Using your yarn needle, weave in the ends from your color changes. This process is crucial as it keeps a clean finish on your ombre granny hexagon. As you work, ensure each end is drawn back into the previous stitches to conceal them nicely. (Ends woven in)

Row 8: Block Your Hexagon
To shape the hexagon, lightly steam block your piece to ensure it lays flat. This helps unify the stitch tension and enhances the overall look of your hexagon, especially when preparing it for assembly with other pieces. (Correctly blocked)

Row 9: Prepare for Assembly
Once several hexagons are completed, lay them out to decide on a favorable arrangement that maximizes your color transitions. You can vary your layout to see how the shades play against each other and find a style that appeals to your decor. (Sample layout)

Row 10: Join Hexagons for Project
To attach the hexagons together, use slip stitches or whip stitch in the back loops only to keep the design clean. This way, you maintain the lovely ombre appearance without disrupting the clusters. Remember, working with flat surfaces makes joining easier! (Joining technique)

Row 11: Create Larger Items
These hexagons can be combined to form blankets, pillow covers, or even wall hangings. Experiment with spacing and arrangement to create unique designs that reflect your style. Layer them for a more textured look or keep it simple with consistent spacing. (Project ideas)

Row 12: Personalize Your Project
Add embellishments, such as embroidered patterns or beads, to give a personal touch to your ombre granny hexagons. This not only enhances their visual interest but makes your project uniquely yours, showcasing your creativity and individuality. (Personal touches)

Expert Tips for the Best Ombre Granny Hexagon

Avoid Counting Mistakes: Always mark the beginning of each round with a stitch marker to avoid losing your count.

Manage Your Tension: Keep your stitches even; overly tight or loose stitches can warp your hexagon shape.

Prevent Twists: Be cautious with your foundation chain to avoid twisting, and lay it flat when forming the ring.

Color Changes: Use a consistent method for color transitions. Incorporate a slip stitch to connect rows neatly for a polished look.

Choose Yarn Wisely: Select yarn blends that are soft, durable, and suitable for washing to maintain the ombre granny hexagon effectiveness.

Practice Cluster Stitches: Take time to master the cluster stitches; they are essential for creating the lovely ombre effect in your project.

How to Wash and Care for Your Ombre Granny Hexagon

Machine Washing: Use cold water on a gentle cycle to prevent colors from fading. Always turn your work inside out before washing.

Hand Washing: Soak your ombre granny hexagon in cold, soapy water. Gently agitate without twisting or wringing.

Drying: Lay the hexagons flat on a clean towel to dry. Avoid hanging to prevent stretching and maintain shape.

Storage: Keep your finished pieces in a cool, dry place, away from direct sunlight, to avoid discoloration and retain their beauty.

Ombre Granny Hexagon Variations

Embrace your creativity and make this project your own with these fun variations!

  • Different Yarn Types: Experiment with different fiber compositions like pure cotton or bamboo for a unique drape and texture.
  • Color Blocking: Try bold, contrasting colors instead of an ombre effect for a striking visual that stands out in any room.
  • Larger Hexagons: Utilize a thicker yarn and larger hook for bigger pieces; these can add warmth and coziness to your home without as much time commitment.
  • Texture Play: Introduce textured yarns, like boucle or bobble yarn, for an interesting tactile experience.
  • Personalize with Stitch Patterns: Add unique stitch patterns, like shells or popcorn stitches, to give extra depth to your granny hexagons.

For instance, consider color-blocking your hexagons by using bright, vivid colors that contrast beautifully instead of a single gradient. This can turn your project into a statement piece, especially if paired with a neutral background or accessories. You can also try layering different stitch techniques to provide more texture and intrigue to your finished piece. Don’t forget to explore crochet accessories that can enhance your projects’ details!

  • Size Alterations: Change the size by adjusting both yarn weight and hook size for hexagons that can suit various projects, like small coasters or large blankets.

  • Adding Embellishments: Sew on beads or create picots edges for visual interest. These alterations not only enhance aesthetics but also the individuality of each piece, allowing for unique personalized crochet experiences!

  • Seasonal Colors: Think about using seasonal hues that reflect your favorite holidays or seasonal changes for themed decor that brings joy throughout the year.

Ombre Granny Hexagon FAQs

Can I substitute yarn for the ombre granny hexagon?
Absolutely! You can substitute with any worsted weight yarn. However, ensure it’s a blend that’s soft and machine washable for best results.

How do I adjust the size of my hexagons?
To modify size, change your yarn weight or hook size. Increasing the hook will yield larger hexagons, while a smaller hook will make them tighter.

What if my hexagons curl at the edges?
Don’t panic! This can occur if stitches are too tight. Relax your tension while crocheting, and blocking can help flatten curled edges.

What type of crochet hook is best for this project?
A 5.5 mm (I/9) crochet hook is fantastic for achieving good tension. However, if your tension is loose or tight, consider adjusting your hook size accordingly.

What if I drop a stitch while crocheting?
If you drop a stitch, gently unravel back to that point and fix it before proceeding. Keeping a stitch marker can help track sections and prevent dropped stitches.

Can I add embellishments to the ombre granny hexagon?
Yes! Adding embroidery, beads, or picots can personalize your hexagons, giving them a unique flair that reflects your style.

Filed Under: Granny Square

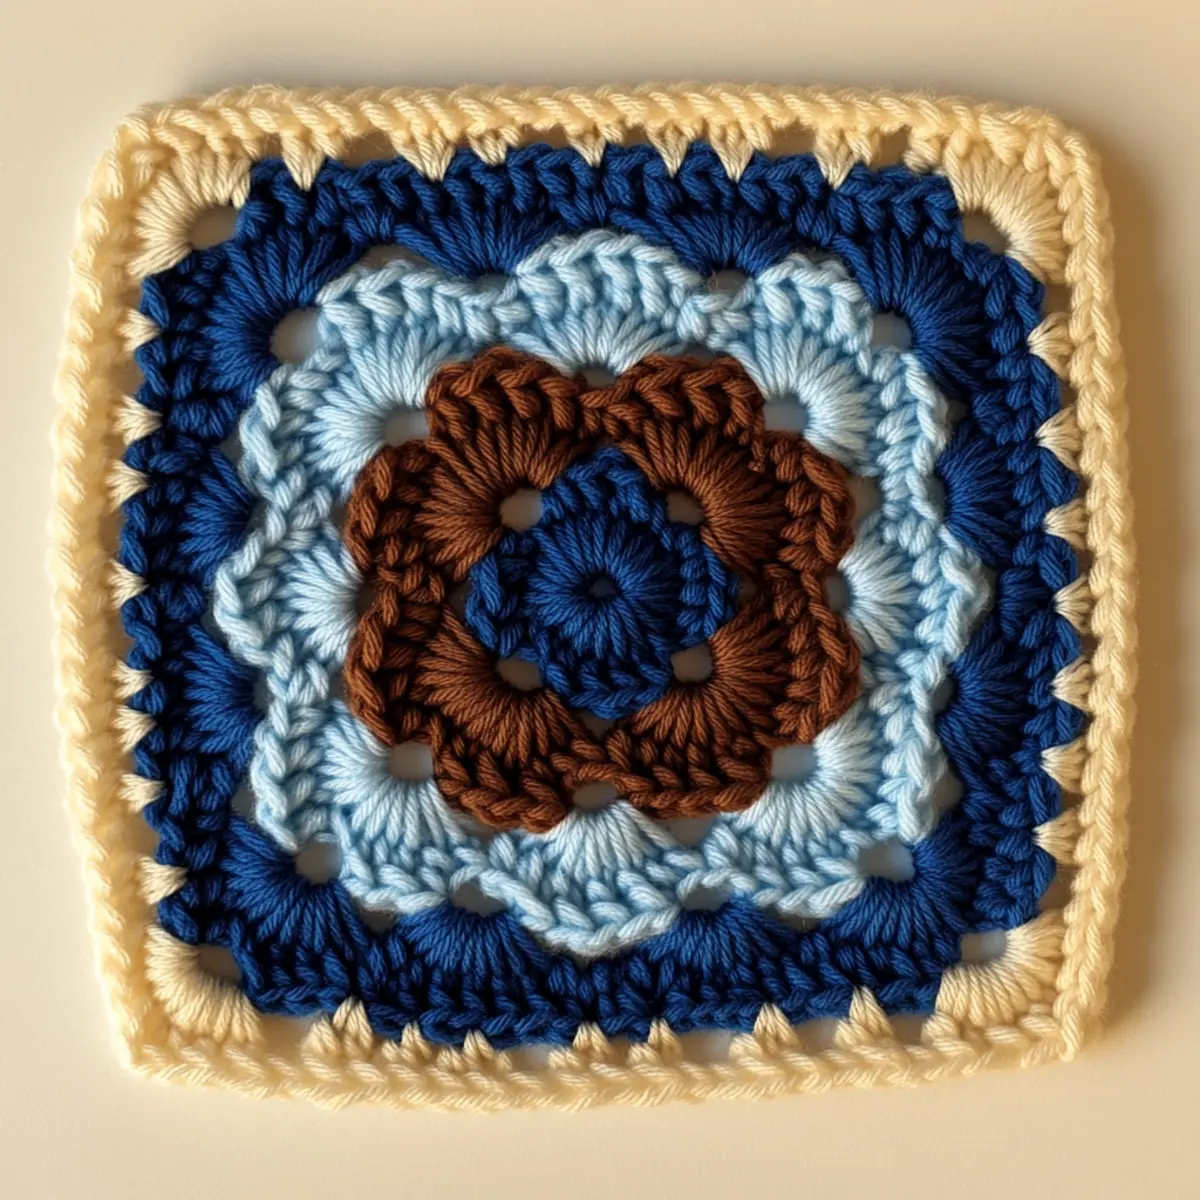
Pastel Floral Crochet Granny Square for Cozy Projects

August 17, 2026 by Publisher Leave a Comment

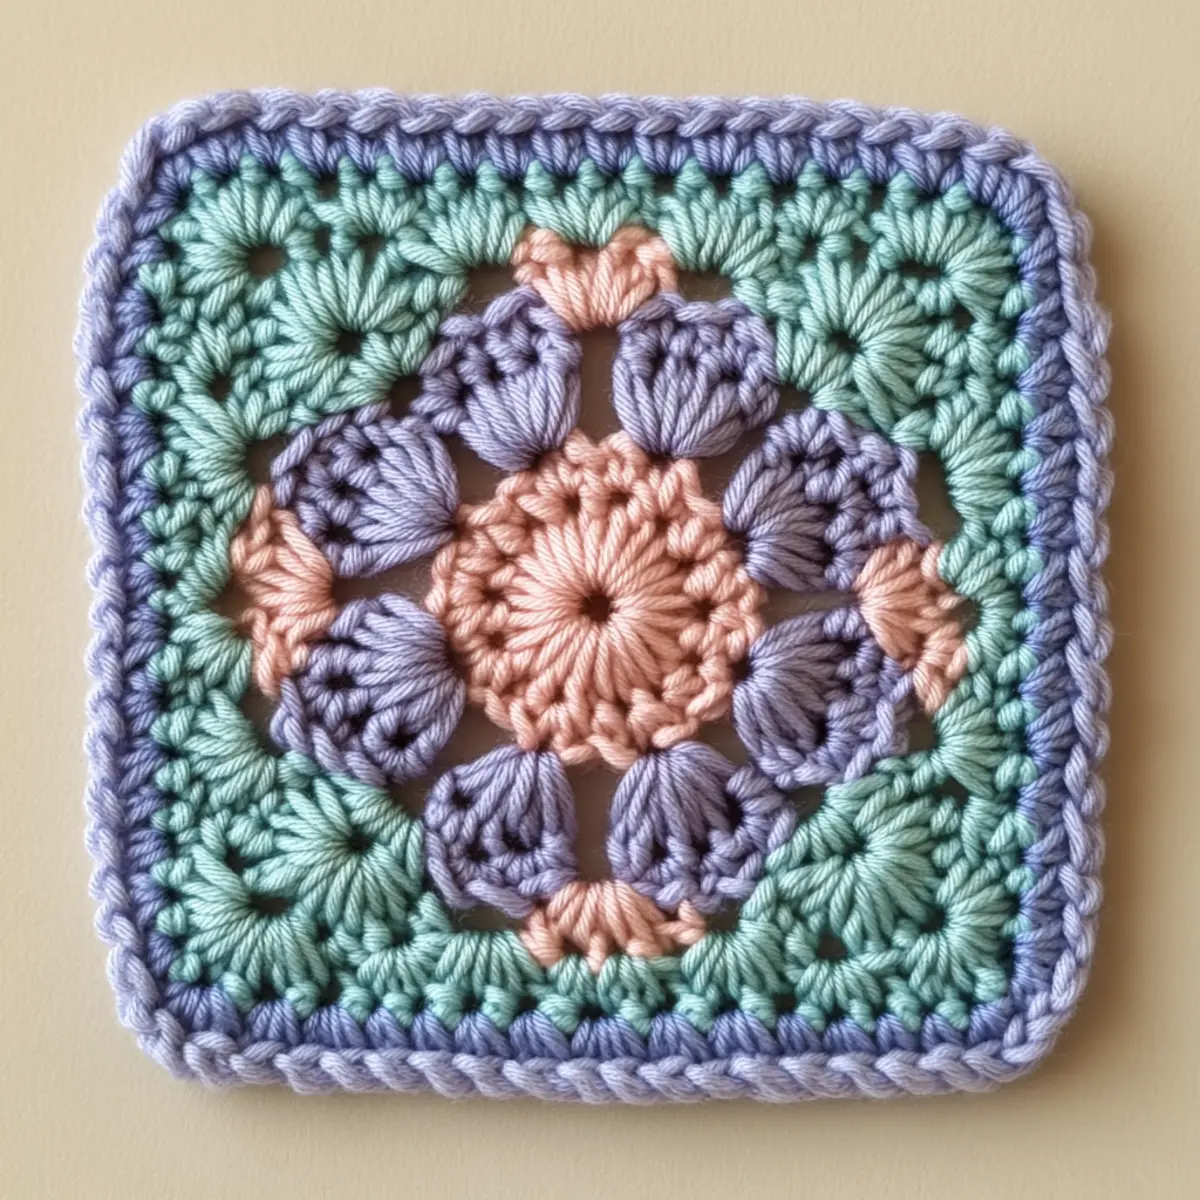
Have you ever felt that rush of excitement when the perfect project idea strikes? That was me while experimenting with colors, and I decided to design the Pastel Floral Crochet Granny Square. This gorgeous square is not just your average granny square; it encapsulates a joyful floral theme that is simply irresistible. It’s a fantastic stash-buster, allowing you to utilize those vibrant pastel yarns piling up in your craft drawer, and it also presents a cozy, inviting aesthetic that’s perfect for home decor. As you crochet this pattern, you’ll not only improve your skills with engaging color changes and stitch techniques but also create a stunning piece for your next cozy throw or pillow project. It’s perfect for beginners yet offers enough challenge to keep seasoned crafters engaged. So, are you ready to embark on a colorful journey with your crochet hook and yarn?

Crochet Granny Square Materials & Tools

Yarn
Worsted weight yarn – Approximately 150-200 yards in pastel colors will give your crochet granny square that lovely floral effect.
Cotton blend or acrylic yarn – These provide durability while maintaining a soft sheen in your crochet granny square.

Tools & Notions
4.5 to 5.0 mm crochet hook – Ideal size for working with worsted weight yarn, ensuring your stitches are uniform.
Stitch markers – Essential for keeping track of rounds and pattern changes as you craft your crochet granny square.
Yarn needle – Necessary for weaving in ends once your beautiful granny square is complete.

Why You’ll Love This Pattern

First, this crochet granny square is beautifully versatile; perfect for cozy blankets or individual decor, the only limit is your imagination. Secondly, its delightful floral design adds texture that stands out, especially when paired with other patterns in a project. Thirdly, it’s an excellent stash-buster, making use of colorful remnants you might have lying around, which can also align with sustainable crafting. Additionally, this project is incredibly customizable; feel free to mix and match colors or even try different stitches to suit your personal style. For more inspiration on how to combine colors, check out our guide on color theory in crochet. Finally, its time-saving nature means you’ll have a finished piece in no time, making it a guilt-free project when you need a quick crafting fix. Dive into this pattern and see how satisfying it is to create something so beautiful yet uncomplicated!

Gauge & Sizing Notes for Crochet Granny Square

For your crochet granny square, checking your tension is crucial to ensure a consistent and visually appealing result. The standard 4×4 inch (10×10 cm) gauge for this project, using worsted weight yarn, should ideally consist of 12 dc rows and 14 dc stitches. If your swatch does not match this gauge, consider adjusting your hook size; if your square is larger than specified, switch to a smaller hook. Conversely, if smaller, try a larger hook to achieve the appropriate size for your granny square. Additionally, to resize, you can modify the starting chain or add extra rounds for a bigger square, making this design flexible for any project. Achieving the right tension not only ensures the final piece lies flat but also maintains the integrity of the flower motif, allowing your crochet granny square to stand out beautifully.

Step-by-Step Pattern for Crochet Granny Square

Row 1: Start the Magic Circle
Make a magic circle and ch 3 (counts as 1st dc). Work 11 dc into the circle before closing it tightly. Pull the yarn to tighten the circle and sl st into the top of the ch 3 to join. (12 dc)

Row 2: Forming the First Round
Ch 3 (counts as 1st dc of the next round), then within the same stitch, work 2 dc, creating a shell. *Skip 1 dc, then in the next dc, work 3 dc; repeat from * until you complete the round. Sl st to the top of ch 3 to join. (4 shells)

Row 3: Adding Petals
Ch 3 to start, then 2 dc in the same space. *In each space formed by the previous shells, work 3 dc, ch 2, and 3 dc to form a petal shape. Continue around, ensuring even spacing. Sl st to join at the top of ch 3. (4 petals)

Row 4: Creating the Floral Design
Begin with ch 3 for the next round. In the ch-2 space from the previous row, work 3 dc, ch 2, and 3 dc to form a petal. Continue to the next ch-2 space, working the same petal stitch. Repeat until you reach the starting point and sl st to join. (8 petals total)

Row 5: Color Changing for the Border
Switch to the contrasting color yarn. Ch 3, then dc in every previous petal space’s ch-2, but add a ch 1 between each set. This will give a lacy appearance. Remember to keep the tension uniform to maintain shape. Sl st to join. (total stitches will vary based on petals)

Row 6: Building the Outer Edge
Maintain the contrasting color; continue from where you left off. Work dc in each dc made in the last row. For each corner (those with a ch-1 space), work (dc, ch 1, dc) for a rounded look. Sl st to close the round. (total stitches will be counted as you go)

Row 7: Establishing Texture
In this round, you will make a fun textured border. Ch 2 (counts as hdc), then hdc in each stitch. Make sure to hdc in each dc and into the ch-1 spaces to create a ridged effect. Transform it by varying tension for visual interest. Complete all around and sl st to join. (total hdc count varies)

Row 8: Finalizing Your Square
To finish off, slip stitch into the first hdc, then fasten off, leaving a long tail for weaving. Use yarn needle to weave in loose ends. Block your square to achieve a crisp shape, ensuring even edges and flattening curled areas if necessary.

Row 9: Showcase your Work
Now that your crochet granny square is complete, you can use it in various projects. Whether you’re adding it to a cozy blanket or using it as a standalone piece, flaunt your creative use of vibrant pastels! Each square is a small work of art.

Row 10: Consider Customization
Feel free to deviate from the pattern, adjusting colors or stitch placements to create personalized pieces. Consider mixing different stitch designs to make each square unique while still tying them together with the chosen color palette.

Row 11: Get Inspired
As you complete your crochet granny square, think about how you can integrate this square into larger projects or add embellishments like buttons or fabric accents. The key is to let your creativity shine through every piece you create.

Row 12: Enjoy Your Creation
Be proud of your completed crochet granny square! It represents not just a pattern, but your journey and growth as a fiber artist. Share with friends or keep it as a cozy reminder of your crafting skills.

Helpful Tricks for Your Crochet Granny Square

Track Your Stitches: Use stitch markers to avoid losing count and dropping stitches during your crochet granny square project.

Avoid Twisted Chains: Always check your foundation chain for twists before beginning the first round, as this ensures a smooth start.

Maintain Tension: Consistent tension leads to a beautiful, even crochet granny square. Don’t pull too tight or leave it too loose!

Explore Color Changes: Practice switching colors smoothly within the petal stitches; avoid knots by leaving enough yarn length between colors.

Block After Completion: Once your crochet granny square is complete, blocking helps finalize dimensions and even out any irregularities in shape.

How to Wash and Care for Your Crochet Granny Square

Machine Washing: If you choose to machine wash, use a gentle cycle with cold water to maintain the square’s vibrant colors and prevent felting.

Hand Washing: Hand wash your crochet granny square in lukewarm water using mild detergent; gently press, do not wring, to avoid distortion.

Drying: Always lay your square flat to dry, away from direct sunlight to protect the colors and ensure it retains its shape.

Storage: Store your crochet granny square in a cool, dry place to avoid moisture, making sure it’s placed away from direct sunlight to protect its colors.

Crochet Granny Square Variations

Get creative with your crochet granny square by experimenting with colors, fibers, and stitches!

  • Larger Size: Increase your hook size or add more rounds for a pillow cover. This can create a stunning focal point in any room.
  • Color Blocking: Alternate bold colors in different sections for a unique look. Using three contrasting colors can create a striking visual impact.
  • Jewel Tones: Swap pastel shades for rich jewel tones for a more sophisticated granny square. This change can elevate your project for a more elegant finish.
  • Texture Variations: Consider using a combination of stitches like bobbles or shells to add interest. Mixing textures can create a more dynamic design.
  • Different Yarn Fibers: Use a cotton blend for a lighter feel, or try a fluffy yarn for a softer touch. Each fiber changes the look and feel of the square.

The beauty of crochet is in customization. For instance, by changing your yarn weight to a bulky option, your granny square will transform into a cozy throw that’s perfect for chilly evenings. You can also experiment with tighter or looser stitches to create a different texture altogether. Don’t forget to check out more yarn options for your next project!

Crochet Granny Square FAQs

Can I substitute the yarn?
Absolutely! You can use various worsted weight yarns, including blends of cotton or acrylic, to achieve different textures and effects in your crochet granny square.

How can I adjust the size of my square?
To resize your crochet granny square, modify the number of rounds you complete or use a larger hook to create a bigger square, allowing customization based on your project’s needs.

What should I do if my stitches are curling?
Don’t panic! If your crochet granny square starts curling, it may be due to tight tension. Try blocking your square, which often corrects the shape and flattens it nicely.

What hook size should I use?
For worsted weight yarn, 4.5 to 5.0 mm (US size 7-8) hooks work best. Experiment within this range to find a comfortable grip for your crochet granny square.

How do I troubleshoot dropped stitches?
If you notice a dropped stitch, go back to the last completed round and rework those stitches carefully. Placing stitch markers can help you avoid this issue in the future.

Can I mix textures in this pattern?
Definitely! Feel free to play with different yarn textures and colors in your crochet granny square. This creativity adds dimension and personalization to your projects.

Filed Under: Granny Square

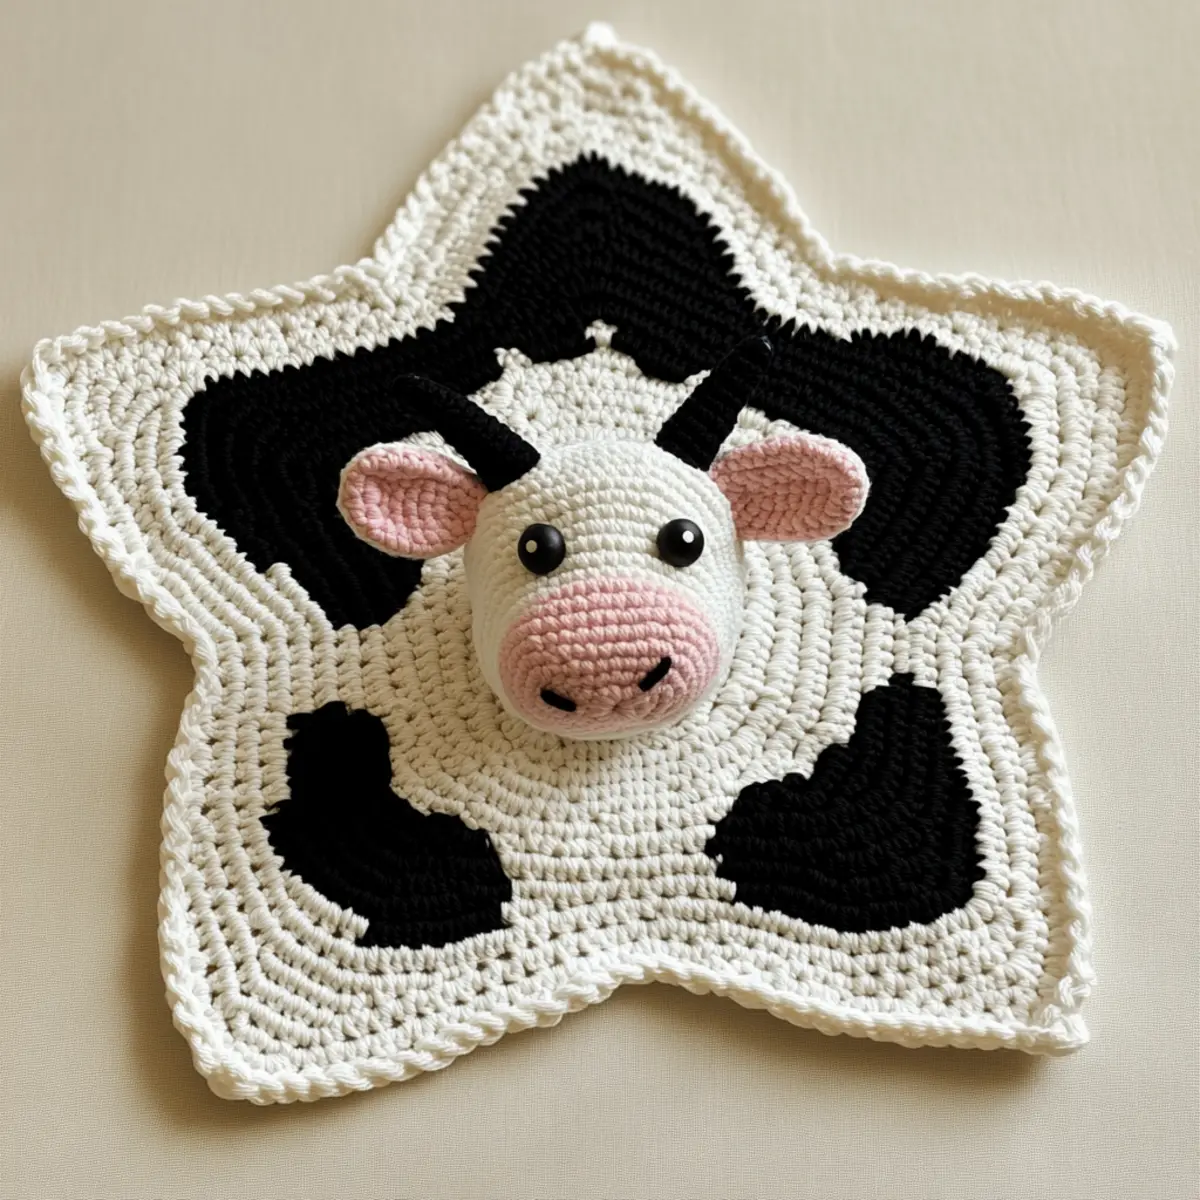
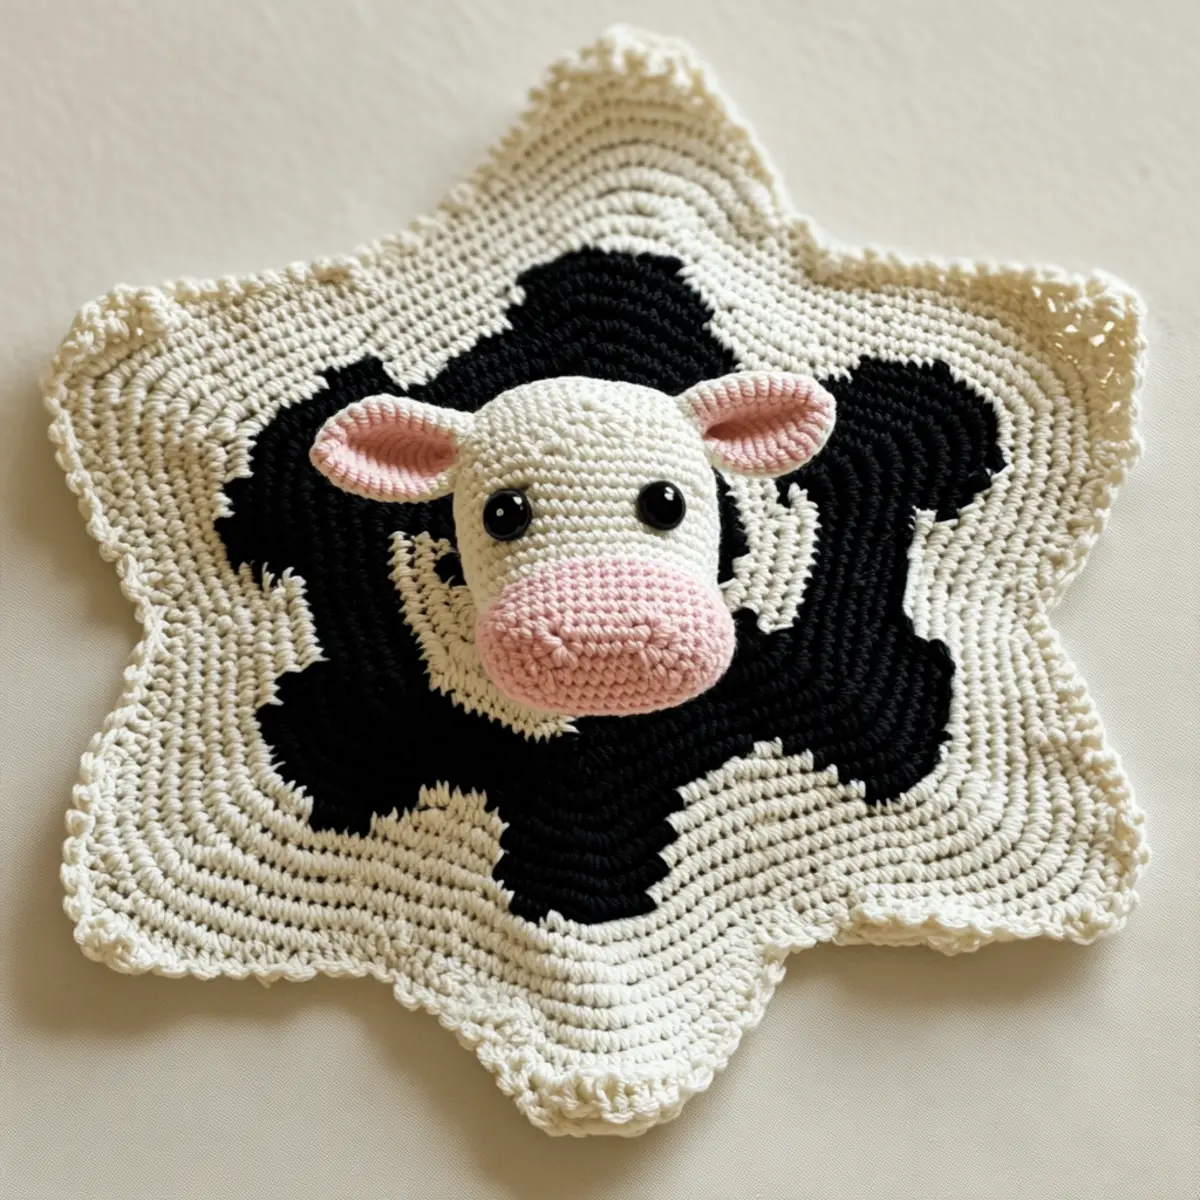
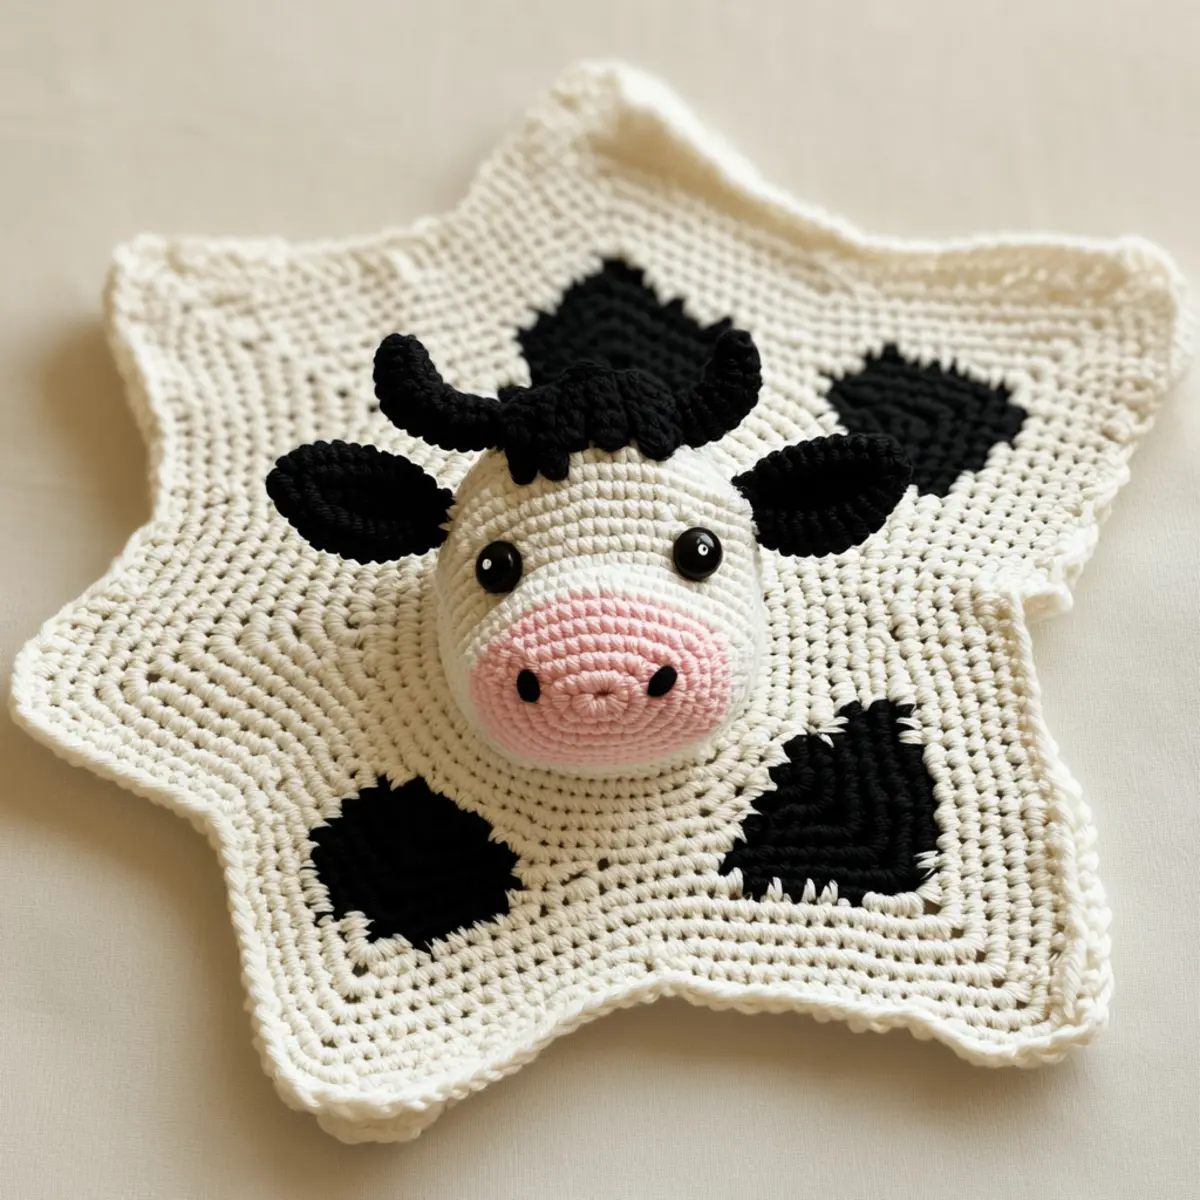
Cozy Crochet Cow Blanket for Whimsical Nursery Decor

August 17, 2026 by Publisher Leave a Comment

In the bustling world of crochet, there’s nothing quite like the tactile thrill of bringing a cozy crochet cow blanket to life. As my hook dances through stitches, I can almost feel the excitement lingering in the air. This project isn’t just about crafting; it’s about creating an enchanting companion for little ones, enhancing both their naptime and playtime experiences. What I love most about this delightful crochet cow blanket is its beginner-friendly vibes, allowing even novice crafters to dive into the whimsical realm of crochet. The versatility of techniques you’ll encounter means that it’s an excellent opportunity for skill enhancement, whether you’re mastering the magic ring or perfecting slip stitches. Plus, it’s a wonderful stash-buster—a terrific way to use up those leftover yarn scraps while crafting something genuinely special. As the sun sets and I admire my newly finished masterpiece, I find myself wondering what custom animal themes could bring even more joy into our homes.

Crochet Cow Blanket Materials & Tools

Yarn

  • Medium worsted weight yarn (Category 4) – Approximately 400 to 600 yards in total, ideal for creating the cozy crochet cow blanket that will delight your little one.
  • Acrylic yarn – Offers durability and ease of washing, perfect for maintaining the blanket’s playful charm through countless adventures.

Tools & Notions

  • 4.5mm crochet hook (US G/6) – Ensures a lovely, even tension throughout the crochet cow blanket, making the stitches stand out beautifully.
  • Safety eyes – Adds character to the cow’s face, ensuring a friendly expression for that extra cozy touch.
  • Yarn needle – Essential for weaving in ends and giving your blanket a polished finish.
  • Stitch markers – Helpful in keeping track of rounds while working on various crochet techniques for this delightful project.

What Makes This Crochet Cow Blanket Special?

Gauge & Sizing Notes for Crochet Cow Blanket

Checking your tension is vital for this crochet cow blanket to ensure an even fabric and the proper dimensions for cuddling. The ideal gauge for a cozy crochet cow blanket is 12 dc and 8 rows per 4×4 inches (10×10 cm). This consistency allows for a predictable finish size of about 32 inches across at the widest points. If you’re hoping to resize the blanket, you can adjust the initial starting chain or the number of rounds you crochet; increase or decrease by multiples of 16 for star rounds. If your gauge swatch differs significantly, consider changing your hook size or adjusting your yarn tension. The crochet cow blanket should ultimately be a blend of fun and functional, with the correct measurements ensuring it serves its charming purpose in a child’s nursery.

Step-by-Step Pattern for Crochet Cow Blanket

Row 1: Create the Star Center
Start by making a magic ring (mr) and chain 3 (ch 3) to count as your first double crochet (dc). Into the magic ring, work 15 dc, then pull the ring tight and sl st (slip stitch) into the top of the initial ch 3 to close the round (16 dc total).

Row 2: Expand the Points
Ch 3 (counts as first dc), then dc into the same stitch. Repeat to create 2 dc in each stitch around, ending the round with 32 dc. This gives the star its iconic shape and adds bulk for warmth.

Row 3: Create Star Tips
Ch 3 to begin, then dc in the same stitch. Now, ch 2, sk 1 st, [2 dc in next st] around and sl st to join. This forms the distinctive points of the star and increases texture (16 points).

Row 4: Add Cow Spots
Switch to cream yarn and ch 1. Sc tightly in the top of each dc from the previous row around. To add character, change to black yarn in random spots, using sc to keep consistent tension (32 total stitches).

Row 5: Setup for Cow Head
Ch 3, then in the next sc, work 2 dc to increase, and repeat until the round ends (48 dc). This round builds a base for the cow head, making it appear more pronounced.

Row 6: Forming the Cow Features
Ch 1 for the next round, then hdc (half double crochet) into each stitch. You’ll create a softer edge, and this completes a round that transitions beautifully into detailed shaping (48 total hdc).

Row 7: Shape the Snout Base
Begin with a magic ring (mr) again and ch 1. In the ring, work 10 sc, tighten the ring, and sl st to join. This will form the cow’s snout that serves as the charming centerpiece.

Row 8: Add Snout Details
From the snout, ch 1, then work 3 dc in the first stitch, followed by a slip stitch in the next. Continue this way, alternating stitches until the snout is rounded nicely. This gives depth and character to the cow’s face (4-5 rounds).

Row 9: Attach Safety Eyes
Position safety eyes about halfway up the snout and securely attach them. It’s essential to ensure they’re well-placed to give your cow a friendly expression that adds a whimsical touch to your blanket.

Row 10: Finish Cow Head
Go back to the main blanket area. Attach the cow’s head using a yarn needle and working sl sts around where it meets the star center. Secure it well to avoid falling off during playtime (add additional stitches as needed).

Row 11: Add Final Touches
Ch 3 and dc around the entire edge of the blanket for a finished look. This border helps to contain all elements securely inside while adding a polished edge with a nice drape (total stitches depend on the border setup).

Row 12: Create the Scalloped Border
To finish, use ch 3, skip 2 stitches, and then work 5 dc in the next stitch. Repeat around with sc in between to create a lovely scallop that enhances the blanket’s charm. Close with a slip stitch in the starting ch and weave in all ends (total scallops depend on spacing).

Crochet Cow Blanket Variations

Feel free to customize this sweet project for even more enchanting charm!

  • Color Swaps: Use pastel shades for a softer appearance, creating a cuddly feel perfect for any nursery.
  • Animal Themes: Consider using a sheep or bunny design to celebrate different seasons or themes, enhancing creativity and fun.
  • Yarn Options: Opt for cotton yarn for breathability in warmer climates, while maintaining your project’s delightful texture.
  • Size Adjustments: Make the blanket larger by increasing the number of rounds, allowing it to grow with the child and provide longer-lasting warmth.
  • Texture Modifications: Incorporate different stitch techniques like bobble or popcorn stitches for added dimension and tactile interest.

By adjusting the cow’s features, you can create variations like a unicorn or dragon head, providing playful versions that are uniquely yours. Experimenting with colors can also add a playful touch—color-blocking the spots in vibrant hues can captivate the imagination while making yarn choices feel fresh and exciting. To explore more inspiring ideas, check out our Crochet Monkey Pattern or the Crochet Teddy Bear for delightful companions to accompany your cozy creations.

Helpful Tricks for Crochet Cow Blanket

Count Carefully: Make sure to count your stitches frequently to avoid losing track, particularly when transitioning between rows. This helps maintain proper shape.

Keep Tension Relaxed: Maintaining relaxed tension is key when switching colors. This ensures that your crochet cow blanket will have a smooth appearance without puckering.

Monitor Color Changes: Pay attention to your color transitions when adding the cow spots. Dropped stitches can occur if you rush through these moments.

Use Stitch Markers: Place stitch markers at the end of each round. This eliminates confusion and helps you keep an accurate count during round construction.

Practice Makes Perfect: If you’re unsure about the magic ring or slip stitches, practice a few swatches beforehand. This will build your confidence for the final blanket.

Block Lightly: After finishing, blocking the crochet cow blanket lightly will give a polished look and help all shapes lay flat without distortion.

How to Wash and Care for Your Crochet Cow Blanket

Machine Washing: If you opt for machine washing, use a gentle cycle with cold water to preserve the vibrant colors and integrity of the yarn.

Hand Washing: Hand wash the crochet cow blanket in cold water with mild detergent. Gently press out excess water to protect the delicate stitches.

Drying: Always lay the blanket flat to dry. Avoid hanging or wringing, which can distort its adorable shape and lead to curling edges.

Storage: Store the blanket in a cool, dry place away from direct sunlight to maintain its colors. Keep it in a breathable fabric bag for longevity.

Crochet Cow Blanket FAQs

Can I use a different yarn?
Absolutely! You can swap out for a bulky or lighter yarn, just be mindful of adjusting your hook size and gauge accordingly.

What if my blanket curls at the edges?
Don’t panic! This can happen if your tension is too tight. Try blocking your blanket post-completion to flatten the curl effectively.

How can I adjust the size?
To resize the crochet cow blanket, simply add or reduce the starting chains or the number of star rounds in multiples of 16, maintaining the basic shape.

What hook size should I use?
A 4.5mm crochet hook (US G/6) is recommended. This ensures a perfect tension balance, making your stitches stand out beautifully.

What if I drop a stitch?
Don’t worry! Simply pull back to the dropped stitch and work it back in. It’s a common beginner mistake, and you can fix it easily.

Can I customize the animal theme?
Of course! Swap the cow for other animals like a sheep or bunny. You can also play around with color palettes for a fun holiday twist!

Filed Under: Baby

Vibrant Crochet Baby Cardigan for Stylish Infants

August 17, 2026 by Publisher Leave a Comment

Surprise! I recently discovered the joy of crocheting baby clothes, and my latest creation is a stunning Vibrant Crochet Baby Cardigan. As a lifelong crocheter, I never imagined how fulfilling it would be to craft charming, cozy garments that bring smiles to parents and babies alike. This crochet baby cardigan project is perfect for honing your skills while bringing a touch of color and flair to your little one’s wardrobe. It’s not just beginner-friendly; it also stands out as a delightful stash-buster, utilizing leftover yarn to create a unique piece. Each time I see a completed cardigan, I’m reminded of how transformative crochet can be in creating not just clothing but cherished memories. I can’t wait to share this vibrant design with you and encourage you to explore the endless possibilities of color combinations; you might just create something that is as much of a piece of art as it is practical. Are you ready to dive into this colorful adventure?

Crochet Baby Cardigan Materials & Tools

Yarn

  • DK or Lightweight Worsted Yarn – Roughly 300-400 yards of cotton or acrylic blend ensures softness and durability for baby.

Tools & Notions

  • 4.5mm Crochet Hook – Essential for achieving the right gauge and perfect stitch definition.
  • Smaller Crochet Hook – Use for tighter stitches or detailed edging if desired.
  • Stitch Marker – Helps keep track of color changes and stitch counts throughout the project.
  • Two Buttons – Choose cute, decorative buttons that blend with your chosen colors for added flair.
  • Yarn Needle – For weaving in ends and finishing off your crochet baby cardigan with a polished look.

Why You’ll Love This Pattern

Simplicity is at the heart of the Vibrant Crochet Baby Cardigan, making it accessible for crafters of all levels. Versatile color combinations allow for endless personalization, ensuring each cardigan can reflect unique styles and vibes. The construction method is both engaging and straightforward, focusing on texture through granny stitch squares while still being mindful of your time. You won’t waste hours wrestling with intricate designs, allowing more time for enjoyment. Not to forget, this pattern is a fantastic stash-buster; with little yarn waste, you can finally tackle that overflowing yarn basket. Plus, by following our additional guides like the Crochet Monkey Pattern or the adorable Crochet Teddy Bear, you can create matching toys that amplify your baby’s wardrobe even more. Get ready to create a cozy and stylish piece for your little one that not only looks stunning but is also practical and fun!

Gauge & Sizing Notes for Crochet Baby Cardigan

Checking your gauge is crucial for this crochet baby cardigan project to ensure a proper fit. Aim for a 4×4 inch (10×10 cm) gauge swatch with granny stitches. If your swatch does not match the tension, adjust your hook size accordingly; using a larger hook will loosen the fabric, while a smaller one tightens it. Depending on the final size desired (newborn to toddler), you may need to tweak the starting chain by adding or subtracting multiples of 3 stitches for width. The finished dimensions can range from 20 to 24 inches in chest circumference with sleeves measuring around 10-12 inches wide. Note that blocking the garment after completion will also help achieve the intended drape and fit of the crochet baby cardigan. Take your time to achieve accurate measurements and guidelines for the unique style and comfort of your little one’s wardrobe.

Step-by-Step Pattern for Crochet Baby Cardigan

Row 1: Foundation Chain
Begin by making a foundation chain of 60 stitches for the back panel. This should give you the perfect width for the baby cardigan; adjust as needed based on the desired size. Turn your work.

Row 2: First Row of Granny Stitches
In the second chain from the hook, work a granny cluster (3 dc in one stitch) and continue this pattern across the row. After reaching the end, you should have around 20 granny clusters, creating a vibrant texture for your crochet baby cardigan.

Row 3: Color Change
To introduce the first color, complete your last granny cluster, then change yarn and sl st into the next cluster. Work across the row, switching yarn every 3 clusters to maintain a rhythmic striped pattern. Remember to keep the clusters consistent for a polished finish.

Row 4: Repeat Granny Stitch
Continue with the established pattern of granny stitches for the next 3 rows, switching colors every 4 rows. These transitions will add depth and visual interest to your crochet baby cardigan, ensuring each piece is uniquely vibrant.

Row 5: Body Length Adjustment
To achieve the desired cardigan length, create additional rows using granny stitches. Aim for approximately 12 inches in total body length before moving to the armholes. Adjust the number of rows if a longer cardigan is desired for the crawler.

Row 6: Armhole Shaping
To create armholes, mark 4 stitches from either side of the row. Work across without including these stitches for the next 2 rows, which will start forming the sides of your crochet baby cardigan.

Row 7: Sleeves Foundation
After the main body is complete, create a separate foundation chain for sleeves by chaining 30 stitches. Join the chain to form a loop, then start working in the round making granny stitches while maintaining your colorful stripe pattern. This playful twist adds charm to the overall design.

Row 8: Sleeve Length
Continue working in rounds, completing 10-12 rows for the sleeves, ensuring to change colors every 3-4 rows. This will create a delightful continuation of the striped effect established in the body.

Row 9: Attaching Sleeves
Once the sleeves are finished, position them onto the body of the cardigan. Use slip stitches to carefully attach the sleeves to the armholes. Ensure all stitches are well-defined for a strong and stable join.

Row 10: Button Bands
For the button bands, crochet a single crochet row on each side of the cardigan front. Work 25 single crochet stitches to create a sturdy edging, keeping the spacing for your buttons in mind. Make sure these bands align with the sleeve openings.

Row 11: Create Pockets
For added functionality, consider creating simple pockets. Chain 15 and work in single crochet for 5 rows, then attach to the front of the cardigan. This can involve color complements that tie into your cardigan’s palette.

Row 12: Finishing Touches
Finally, add a border around the entire cardigan by working single crochet stitches along both the bottom and neckline. Make sure the border aligns smoothly to give your crochet baby cardigan a clean, finished look. Block the completed item to ensure it maintains its shape while enhancing that finished appearance.

crochet baby cardigan variations

Feel free to customize this project to suit your style!

  • Earth Tones: Use warm, earthy shades for a cozy, nature-inspired look that adds a calming aesthetic to your baby’s wardrobe.
  • Monochromatic Schemes: Choose varying shades of a single color to create a sophisticated, modern look while maintaining an elegant harmony throughout the cardigan.
  • Color-Blocking: Explore bold contrasts or complementary colors through unique color-blocking techniques, giving each section its own vibrant identity. This will take your crochet baby cardigan from ordinary to extraordinary, showcasing your artistic flair!
  • Button Alternatives: Experiment with unique closures like toggles or snaps instead of traditional buttons to add a touch of personalization and convenience to your design.
  • Wool Blend Swap: Switch to a wool blend yarn for added warmth, creating a snug, cozy cardigan perfect for cold weather wear. Not only will it keep infants warm, but the result will have a lovely, soft drape.
  • Add Embroidery: Personalize the cardigan with embroidered initials or cute motifs on the pockets. This simple step transforms your project into a cherished keepsake that’s uniquely yours.
  • Different Sizes: Adjust the size to make cardigans suitable for newborns to toddlers by altering the stitch count and row length, ensuring they fit different ages beautifully.
  • Textured Details: Incorporate various stitches like bobbles or shells for texture, which enhances visual appeal while keeping your project engaging and dynamic.

Expert Tips for the Best Crochet Baby Cardigan

Consistent Tension: Maintain a relaxed grip on your yarn and hook to keep tension even across color changes.

Track Your Count: Use a stitch marker to track your stitch counts, especially after each color change to avoid mistakes.

Proper Foundation: Ensure your foundation chain is not twisted before you begin – this is crucial for a seamless start.

Blocking Matters: Don’t skip blocking! It enhances edges and helps the cardigan lay flat, particularly around button bands.

Use Stitch Holders: To keep your stitches secure during construction, use stitch holders or safety pins to avoid dropped stitches as you switch parts of the cardigan.

Color Planning: Plan your color scheme before starting. Experiment with different combinations to see what looks best for your crochet baby cardigan.

How to Wash and Care for Your Crochet Baby Cardigan

Machine Washing: Gentle cycle with cold water is best. Avoid using fabric softeners which can alter yarn properties and make it less breathable.

Hand Washing: If you prefer, hand wash your cardigan in cold water with mild detergent, gently agitating without twisting the fabric to avoid stretching.

Drying: Always lay your cardigan flat to dry, as hanging can stretch the fabric out of shape. Avoid direct sunlight during the drying process.

Blocking: Consider re-blocking after washing to maintain the shape and definition of stitches, especially if you’ve used cotton yarn.

Crochet Baby Cardigan FAQs

Can I use different yarns? Absolutely! You can substitute the recommended cotton yarn with a wool blend for added warmth or an acrylic yarn for ease of care. Just ensure you check gauge.

How do I adjust the size? To adjust sizing, increase the number of foundation chain stitches or add rows to lengthen the body. Each size may require a few adjustments, but it’s easy to modify!

What if my gauge is off? If your gauge doesn’t match, adjust your hook size. Use a larger hook to loosen the fabric or a smaller one to tighten it. Always check with a gauge swatch before starting.

Help! I dropped a stitch! Don’t panic! Simply use a crochet hook to pick it back up. If it’s too far along, secure the stitch with a stitch marker and proceed carefully.

What hook size should I use? The recommended hook size is 4.5mm (US 7). For small or tight sections, you might want a smaller hook to ensure a nice finish and to maintain a tight tension over the design.

Can I add other designs or features? Certainly! Consider adding embroidered initials on pockets or even contrast piping along the edges for a pop of color. Customize your crochet baby cardigan however you like!

Filed Under: Baby

Cozy Crochet Tote Bag with Sunflower Appliqué

August 17, 2026 by Publisher Leave a Comment

In the realm of crochet, there’s something so enchanting about transforming simple materials into a functional work of art. As I worked on my latest project, the Cozy Crochet Tote Bag with Sunflower Appliqué, I was instantly captivated by how this creation intertwines both beauty and practicality. This crochet tote bag is not only a quick project but also serves as an incredible stash-buster, allowing crafters to use leftover yarn while crafting something unique. It offers an effortless way to incorporate a taste of the outdoors into your everyday routine with its delightful sunflower motif. Plus, it doubles as a chic accessory to carry your essentials, from groceries to crafts. The easy-to-follow instructions make this project beginner-friendly, while the skilled crocheter will appreciate the opportunity to build on their techniques. Curious about how to create this beautiful bag and incorporate treasured scraps into your design? Let’s dive into the materials and methods that will transform your creative aspirations into a tangible masterpiece!

Crochet Tote Bag Materials & Tools

Yarn

  • Medium-weight yarn (Worsted, #4) – Approximately 300-400 yards in green, with small amounts of yellow and brown for the sunflower; opt for a cotton blend for durability and breathability.

Tools & Notions

  • 5.5 mm (I/9) crochet hook – Ideal for achieving the bag’s ideal stitch definition and comfort.
  • Stitch markers – Essential for keeping track of rounds and ensuring even tension throughout your bag’s construction.
  • Yarn needle – Helps in weaving in ends seamlessly, making your crochet tote bag look polished and professional.

Why You’ll Love This Pattern

Crocheting a tote bag sounds fun? This pattern stands out for several reasons that will elevate your crafting experience. Simplicity is at the forefront, as the steps are clear and easy to follow, making it accessible for beginners and seasoned crafters alike. Texture is another highlight, with the combination of single and double stitches creating a visually appealing surface that is soft yet sturdy. You’ll love how this bag is not just functional but makes an aesthetic statement; it’s perfect for showcasing at local farmers’ markets or casual outings. This pattern is also a fantastic stash-buster, allowing you to experiment with leftover yarns and colors to craft a piece that reflects your style. Additionally, consider customizing it with other embellishments or sizes to make it uniquely yours. Plus, the quick construction means you’ll see results fast, bringing a sense of accomplishment and joy to your crochet sessions.

Gauge & Sizing Notes for Crochet Tote Bag

Checking your gauge is essential when creating this crochet tote bag to ensure your bag’s dimensions meet your expectations. Aim for a gauge of 4×4 inches (10×10 cm) to achieve the right stitch definition, particularly with the combination of single and double crochet stitches. If your swatch does not match, consider adjusting your hook size; a larger hook can loosen up your work, while a smaller one will tighten it. To resize your tote bag, you can modify the starting chain or the number of rows worked; for a larger bag, add increments of 6 stitches to the foundation chain, or work extra rows accordingly. Conversely, to create a smaller version, simply reduce these amounts. This flexibility is crucial for ensuring your crochet tote bag meets your personal sizing needs while reflecting the beauty intended in the sunflower appliqué design.

Step-by-Step Pattern for Crochet Tote Bag

Row 1: Create the Base
Begin with a foundation chain of 30 stitches. Work 1 single crochet (sc) in each chain across the row, maintaining a steady tension. At the end of the row, you should have 29 stitches (incl. 1 turning chain).

Row 2: Build the Foundation
Chain 1 and turn your work. Continue working 1 sc in each sc across the row to form a sturdy base. This will be the foundation of your crochet tote bag, ensuring it holds its shape well (29 sc).

Row 3: Start the Walls
Chain 2 for height (equivalent to a dc). In the same stitch, work a double crochet (dc) and then 1 dc in each of the next 28 stitches across. This creates a lovely height for your crochet tote bag that will accommodate lots of items (29 dc).

Row 4-10: Expand the Height
For the next several rows, continue chaining 2 at the beginning and working dc in each stitch. Repeat this process until you have completed 8 additional rows, providing ample height to your bag (total of 9 dc rows).

Row 11: Begin the Sunflower
Start creating the sunflower motif by attaching brown yarn. Chain 1, then work 6 sc into the same stitch to create a small circle. This will be the center of the sunflower. Join with a slip stitch (6 sc).

Row 12: Petal Formation
Change to yellow yarn. Chain 2, then work 1 dc into the same stitch. In the next sc, work 2 dc to form a petal. Repeat this around your circle, ensuring to create 6 petals (total of 12 dc). Join with a sl st.

Row 13: Attach the Flower
With the sunflower complete, position it at the desired spot on your tote bag. Use a yarn needle to attach it securely by sewing or slip stitching the base of the sunflower to the bag (ensure it’s centered).

Row 14-15: Completing the Design
Turn your attention back to the tote and continue working in rows with your initial yarn. Add 2 additional rows of dc to allow the flower to pop without crowding the design (final height will now be 12 rows of dc).

Row 16: Create the Handles
For the handles, chain 30. Work 1 sc in the second chain from hook, and then 1 sc across to maintain a sturdy construction for the handle. This keeps it practical and beautiful (29 sc).

Row 17: Attach the Handles
Position the completed handle on one side of your tote bag. Seam it securely with sc or slip stitches to ensure it holds well. Repeat on the opposite side with the second handle, maintaining even spacing.

Row 18: Final Touches
To finish, weave in all ends with your yarn needle. If desired, block your bag lightly to help shape and even out any unequal areas in tension. This angular finish will enhance your crochet tote bag’s overall look.

How to Wash and Care for Your Crochet Tote Bag

Machine Washing: Use a gentle cycle with cold water to preserve colors and prevent fading. Avoid agitation that could stretch or damage the fabric.

Hand Washing: For delicate care, hand wash in cold water with mild detergent. Gently squeeze without twisting to avoid distortion.

Drying: Lay the crochet tote bag flat to dry. Avoid hanging as it may stretch the fabric and alter the bag’s shape.

Storage: Store your bag in a cool, dry place. Avoid direct sunlight to maintain vibrant colors in your crochet tote bag.

Crochet Tote Bag Variations and Substitutions

Explore endless possibilities for personalizing your Sunflower Appliqué Tote Bag!

  • Color Choices: Select a bright yellow for the sunflower against a navy blue background for a striking contrast.
  • Yarn Type: Consider using a bamboo yarn for a softer texture; it’s eco-friendly and drapes beautifully.
  • Bag Size: Increase or decrease the foundation chain to create a mini version for kids or a large tote for beach outings.
  • Handle Design: Swap single crochet handles with braided straps for a unique handmade flair.
  • Additional Appliqués: Try adding crochet leaves or a cute ladybug to bring more charm to the overall design! For extra dimension, incorporate embroidered details alongside the sunflower.
  • Textured Patterns: Step outside the box by adding a cluster stitch row before the sunflower for more depth. It will create a bumpy texture that enhances the design.
  • Lining Options: Consider lining the bag with fun fabric for added structure and support. It adds an extra layer of durability, making your tote perfect for heavier items.
  • Stitch Variations: Use half double crochet (hdc) instead of dc for a slightly different texture that feels cozy to the touch.

By mixing colors, yarn types, and designs, your crochet tote bag can reflect your unique personality while showcasing your crochet prowess. Don’t hesitate to experiment and make it your own, potentially even checking out other projects like the Crochet Monkey Pattern for further inspiration!

Expert Tips for Crochet Tote Bag

Stitch Count: Frequently check your stitch count to avoid losing track. A mistake in the count can affect the bag’s symmetry.

Tension Consistency: Maintain even tension for a uniform fabric. Too tight creates stiffness, too loose can lead to gaps and an unstructured bag.

Blocking: Consider blocking your finished bag to smooth and even out stitches. This enhances the overall appearance of your crochet tote bag.

Petal Precision: When crafting the sunflower, ensure you follow the petal count accurately to achieve the desired flower shape, avoiding dropped stitches.

Handle Security: Reinforce the attachment of your handles. Strong handles are essential to support your crochet tote bag when filled with items.

Crochet Tote Bag FAQs

Can I use different yarn for my tote bag?
Absolutely! You can substitute medium-weight yarn with any favorite yarn type, but ensure it has similar thickness for proper shape and size.

How do I adjust the bag size?
Alter the foundation chain length or the number of rows. Add increments of 6 stitches for a larger bag or reduce for a mini version, keeping the sunflower in scale.

My bag is curling at the top, what should I do?
Don’t panic! This is usually due to not enough stitches or not blocking. Adding a few more rows or blocking can help flatten the edge nicely.

What hook size should I use?
A 5.5 mm (I/9) crochet hook is recommended. You can adjust depending on your tension; a larger hook creates a looser fabric, while a smaller hook tightens it.

Can I add more flowers or designs?
Certainly! Feel free to embellish with additional sunflowers or other designs. Just ensure they complement the overall aesthetic without overcrowding.

What if I drop a stitch?
If you drop a stitch, don’t worry. It’s fixable! Carefully pull your work back to the dropped stitch, use a crochet hook to pick it up, and continue from there.

Filed Under: Bags

  • « Previous Page
  • 1
  • …
  • 38
  • 39
  • 40
  • 41
  • Next Page »

Recent Posts

  • Chic Crochet Watch Band Pattern: Scalloped Elegance
  • Vibrant Crochet Granny Square: A Floral Delight to Create
  • Pocket Otter Crochet: Your Adorable Amigurumi Companion
  • Cozy Up with This Festive Crochet Tree Cozy Pattern
  • Chic Crochet Babydoll Dress: A Timeless Pattern for Spring

Recent Comments

No comments to show.
Fast Crochet Patterns Logo

Welcome to Fast Crochet Patterns, your curated editorial blog for modern, handmade aesthetics. Discover an elegant collection of contemporary designs and carefully crafted tutorials—where every beautiful pattern is completely free to inspire your next creation.

Join the Studio

Subscribe for our latest free patterns and warm, minimal crochet inspiration delivered to your inbox.


Collections

  • Accessories
  • Amigurumi
  • Baby
  • Bags

More Patterns

  • Cardigan
  • Dress
  • Flowers
  • Granny Square

Information

  • About
  • Contact
  • Privacy Policy
  • Terms Of Use
  • Disclaimer

© 2026 Fast Crochet Patterns. All rights reserved.