Fast Crochet Patterns

  • Home
  • Contact
  • Patterns
    • Amigurumi
    • Granny Square
    • Flowers
    • Baby
    • Dress
    • Bags
    • Cardigan
    • Accessories
menu icon
go to homepage
  • Home
  • Contact
  • Patterns
    • Amigurumi
    • Granny Square
    • Flowers
    • Baby
    • Dress
    • Bags
    • Cardigan
    • Accessories
search icon
Homepage link
  • Home
  • Contact
  • Patterns
    • Amigurumi
    • Granny Square
    • Flowers
    • Baby
    • Dress
    • Bags
    • Cardigan
    • Accessories
×

Cozy Floral Granny Square Pattern for Colorful Creations

August 17, 2026 by Publisher Leave a Comment

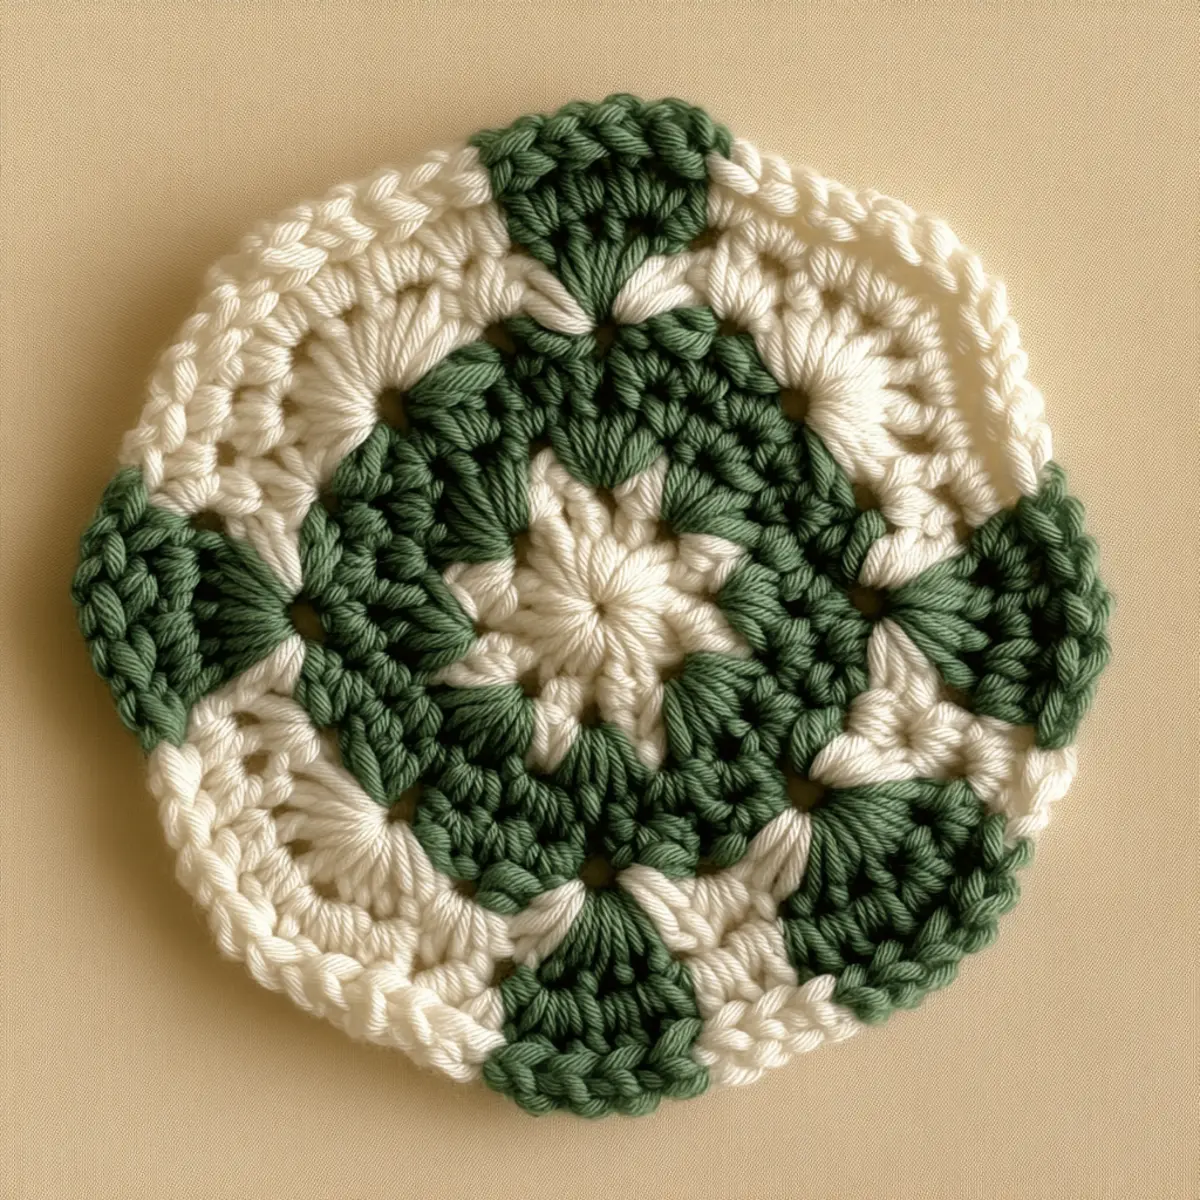
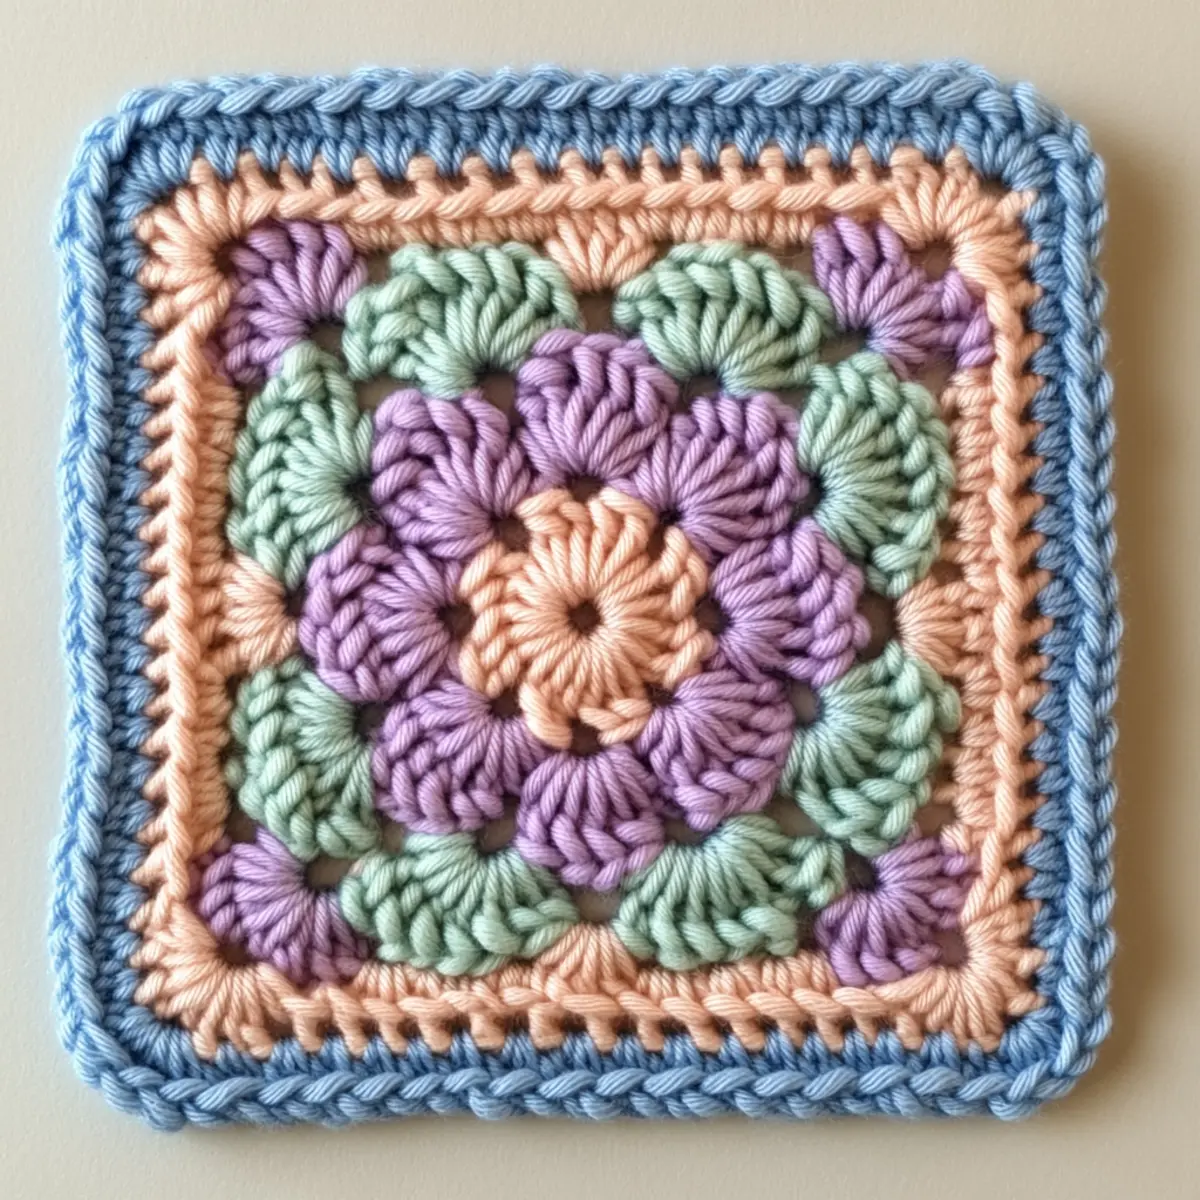
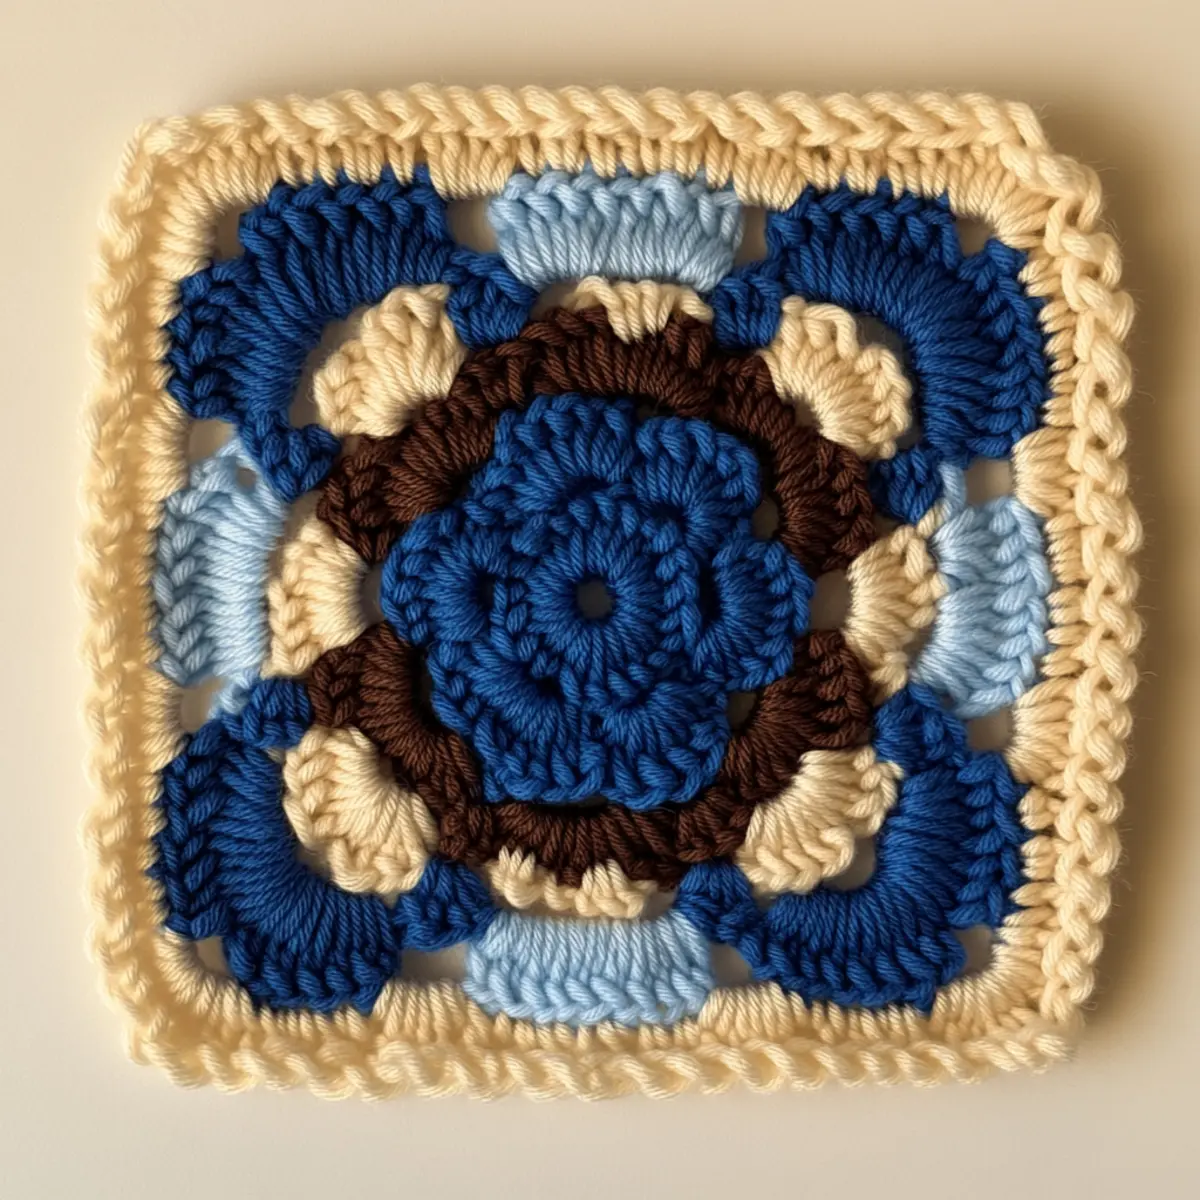
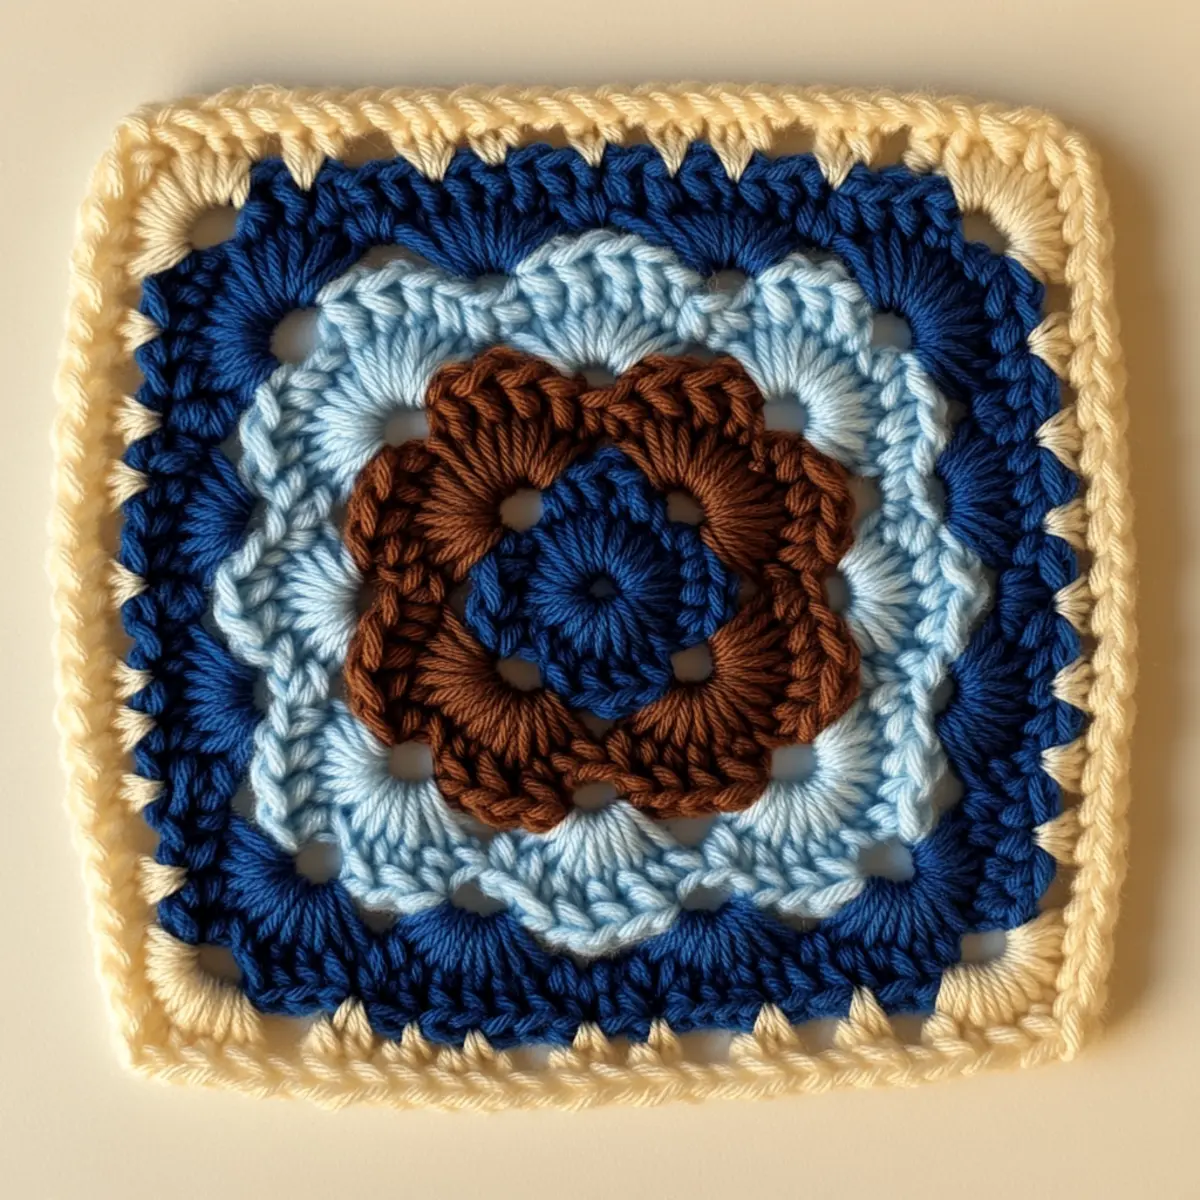
Surrounded by colorful yarns and the gentle rhythm of my hook, I found myself captivated by the Cozy Floral Granny Square Pattern. Each square is more than just a project; it is a delightful fusion of creativity and comfort, seamlessly blending skill building with fun. This granny square pattern is both stash-buster and beginner-friendly, making it an ideal project for anyone looking to indulge in some relaxing crochet time. What’s most exciting is how quickly these squares come together, allowing you to create vibrant pieces for your home or thoughtful gifts for friends. The joy of crafting is not only in the finished product but in the journey itself—transforming simple yarn into beautiful squares that reflect your unique style. I can’t help but wonder, what amazing color combinations will you choose for your own floral squares?
Granny Square Pattern Materials & Tools

Yarn

  • Acrylic or cotton yarn – Choose worsted weight, approximately 100 to 200 yards for making several squares.
  • Colorful scraps – Great for using up leftover yarn to create diverse looks.

Tools & Notions

  • 5.0 mm (H-8) crochet hook – Ideal size for achieving the perfect tension in your granny square pattern.
  • Stitch markers – Helpful for marking the start of rounds, especially when working with double crochet stitches.
  • Tape measure – Useful for ensuring your squares reach the desired dimension of 6 to 8 inches per side.
  • Scissors – For trimming yarn ends neatly at the finish.
  • Blocking mats – Perfect for shaping and setting the final look of your granny squares.

Why Will This Pattern Inspire You?

Versatile in its design, this granny square pattern allows for endless creativity, making it perfect for various décor styles. Texture is another standout feature, as the layered stitches give each square a lovely tactile quality that invites touch. Plus, it’s a wonderful stash-friendly project, enabling you to use up scraps of yarn while experimenting with surprising color combinations. The simplicity of the construction makes it beginner-friendly, inviting crafters of all levels to push their boundaries. These squares also offer a fantastic opportunity for customizability; explore different stitch types to create unique looks and fit your personal aesthetic perfectly. Be sure to check out our guide on joining granny squares for tips on construction, and don’t forget to experiment with color as discussed in our post on choosing yarn colors to make your blanket truly one-of-a-kind!

Gauge & Sizing Notes for Granny Square Pattern

Checking your tension with this granny square pattern is crucial for achieving a consistent and beautiful result. A standard gauge measurement of 4×4 inches (10×10 cm) should yield approximately 12 dc and 6 rows for a solid design. If your swatch doesn’t match, adjust the hook size or yarn weight to reach the desired tension. This will ensure that each square measures about 6 to 8 inches per side. Adjust your starting chain or rounds to modify the square size, enabling a personalized fit for your project. Experimenting with the number of rounds or the thickness of the yarn provides flexibility in design, allowing crafters to create larger squares for blankets or smaller ones for coasters. Remember, consistent tension throughout your crafting will greatly enhance the finished product, so take the time to test your gauge as you delve into this delightful granny square pattern!

Step-by-Step Pattern for Granny Square Pattern

Row 1: Start the Magic Circle Begin with a magic circle, leaving a tail for later sewing. Chain 3 (counts as 1 dc) and work 11 dc into the ring, then pull the tail to close. Join with a sl st to the top of the first ch-3 (12 dc).

Row 2: Create the V-Stitch Chain 3 (counts as 1 dc) and work 1 dc in the same st. Next, (ch 1, 2 dc in the next st) in the gaps around the circle. Continue this until you have created 6 V-stitches, joining with a sl st to the top of the ch-3 (12 dc + 6 ch-1 spaces).

Row 3: Expand the Floral Design Chain 3 (counts as 1 dc) and in each ch-1 space from the previous row, work (2 dc, ch 1, 2 dc) in the same space. Repeat around, joining with a sl st to the top of the first ch-3 (24 dc + 6 ch-1 spaces).

Row 4: Adding More Petals Chain 3 (counts as 1 dc) and work 1 dc in the same st. Skip the first ch-1 space, and in the next ch-1 space, work (2 dc, ch 1, 2 dc). Repeat this pattern, skipping spaces as needed, until you join back with a sl st (12 petals).

Row 5: Color Change For a beautiful visual, change colors. Begin with a new color, chaining 3, and (2 dc in ch-1 space, ch 1) for each petal space. Join this round with a sl st to the top of the starting ch-3 for a total of 30 stitches.

Row 6: Continue Floral Expansion Keep expanding with your new color; chain 3, then (2 dc, ch 1, 2 dc) in each ch-1 space. Remember to keep track of your increases, ensuring a smooth transition with sl st each round. Finish with a total of 12 V-stitches at the end of this round.

Row 7: Outer Border Start the border by chaining 1 and working 1 sc in each stitch around. Ensure to place 3 sc in each corner for adequate turning room. This will help shape your square into perfection. End the round with a sl st.

Row 8: Final Touches Finish your granny square pattern by creating a final outer round. Use a contrasting color for a pop, chaining 1, and adding 1 sc, 1 hdc, and 1 dc in the same stitch for the corners. Join seamlessly and fasten off.

Row 9: Weave in Ends Use scissors to trim your yarn, leaving a short tail for weaving. Take your tapestry needle and weave in all ends to secure the stitches. This step is vital to keep your granny square sturdy.

Row 10: Blocking To enhance your squares, it’s recommended you block them. Lay them flat and spray with water, adjusting corners to create crisp edges. This elevates the visual appearance and helps in sewing them together later.

Row 11: Experiment with Color Feel free to mix colors at any round to achieve unique designs. Pastels yield soft themes, while bold hues create a cheerful vibe. Playful color choices can elevate the basic granny square pattern into a stunning design.

Row 12: Join Squares Once you have made several granny squares, it’s time to join them! Use a whip stitch or slip stitch method between the edges to create your blanket or desired project. This adds to the adventure and joy of your creative journey.
How to Wash and Care for Your Granny Square Pattern

Machine Washing: Use a gentle cycle and cold water to maintain the integrity of the yarn. Avoid harsh detergents that could affect color vibrancy.

Hand Washing: If cleaning your granny squares by hand, soak them in cool water with mild soap, gently swishing to avoid agitation that can distort shapes.

Drying: Lay your squares flat to dry instead of hanging, as this helps preserve their dimensions and shape.

Storage: Store your finished squares in a dry, cool place, away from direct sunlight to prevent fading and avoid moisture that can damage fibers.

Expert Tips for the Best Granny Square Pattern

Count Carefully: Always keep track of your stitch count to avoid losing your place, which can lead to uneven squares.

Stitch Markers: Use stitch markers at the start of each round to prevent dropped stitches and maintain consistency throughout your granny square pattern.

Consistent Tension: Maintain a steady tension while crocheting; fluctuations can cause some squares to be larger or smaller than others. This ensures a uniform size for all squares.

Avoid Twisting: When creating the foundation chain, ensure that it lies flat and is not twisted to prevent issues later in your granny square pattern assembly.

Experiment Freely: Don’t hesitate to try out different colors and stitch types within the floral design. This adds a personal touch and uniqueness to each granny square you create.

Block for Perfection: After finishing, consider blocking your squares to define their shape and enhance their overall appearance.

Granny Square Pattern Variations

Feel free to get creative! Each variation allows you to personalize your crochet project and make it uniquely yours.

  • Yarn Swaps: Use cotton or bamboo yarn for different textures and finishes.
  • Color Blocking: Alternate between vibrant and pastel colors to give your squares an entirely new look.
  • Texture Modifications: Integrate popcorn or bobble stitches in the floral design for a textured touch.
  • Larger Squares: Opt for bulky yarn to create larger, cozier squares for winter projects.
  • Seasonal Themes: Experiment with seasonal colors—soft pinks and greens for spring, or rich oranges and browns for fall.
  • Ombre Effect: Transition shades of a single color from light to dark for a modern look.
  • Add Embellishments: Consider adding sewn-on flowers or buttons in the center for extra flair. A bold center can redefine the entire square.

You can mix and match these variations to create a range of sizes and designs, allowing for ample opportunities to experiment and showcase your crochet skills. Don’t forget to check out our guide on color combinations for inspiration!
Granny Square Pattern FAQs

Can I use different yarn weights?
Absolutely! You can adjust the yarn weight to create larger or smaller squares, but be mindful of maintaining a consistent tension for the best results.

What if my granny square curls at the edges?
Don’t panic! Edge curling can happen due to uneven tension. Try blocking your finished squares flat, which helps relax the stitches and corrects the shape.

How do I adjust the size of my granny square?
You can modify the size by changing your hook size or the number of rounds you work. For larger squares, add more rounds; for smaller ones, reduce them accordingly.

What’s the best hook size for this pattern?
A 5.0 mm (H-8) crochet hook is ideal for achieving a nice tension with worsted weight yarn, but your actual hook size may vary based on personal tension preferences.

Can I add embellishments to my granny square?
Certainly! You can incorporate buttons, beads, or additional decorative stitches to personalize your granny squares. This is a great way to showcase your creativity!

How should I join my granny squares?
There are various methods, such as whip stitch or slip stitch. Choose one that best fits your style and the look you wish to achieve in your final project.
Filed Under: Granny Square

Charming Floral Crochet Square for Vibrant Home Decor

August 17, 2026 by Publisher Leave a Comment

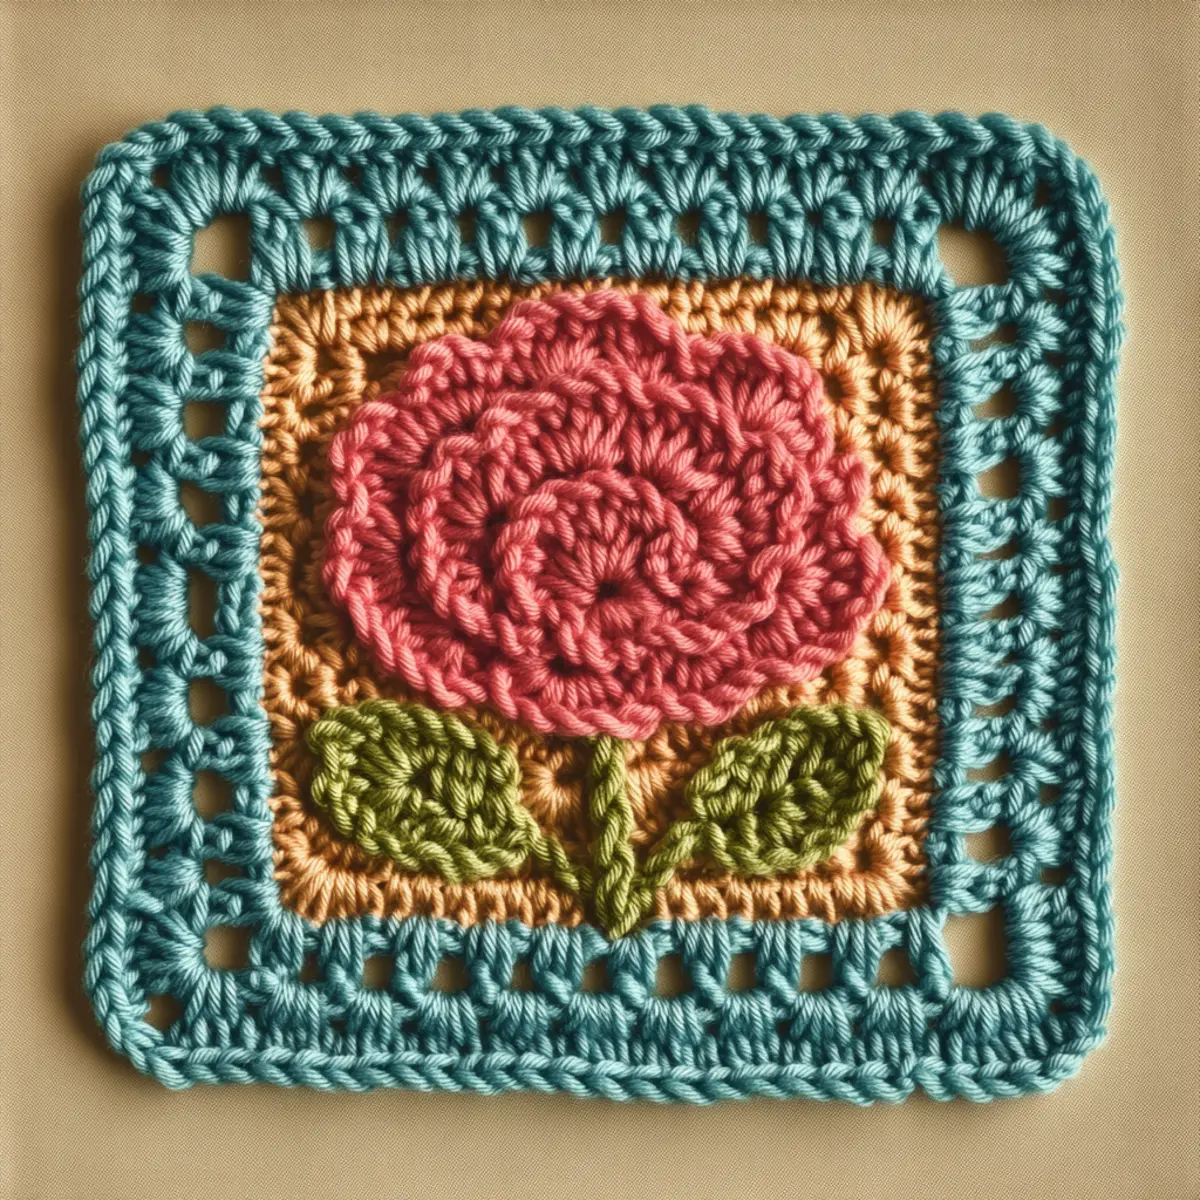
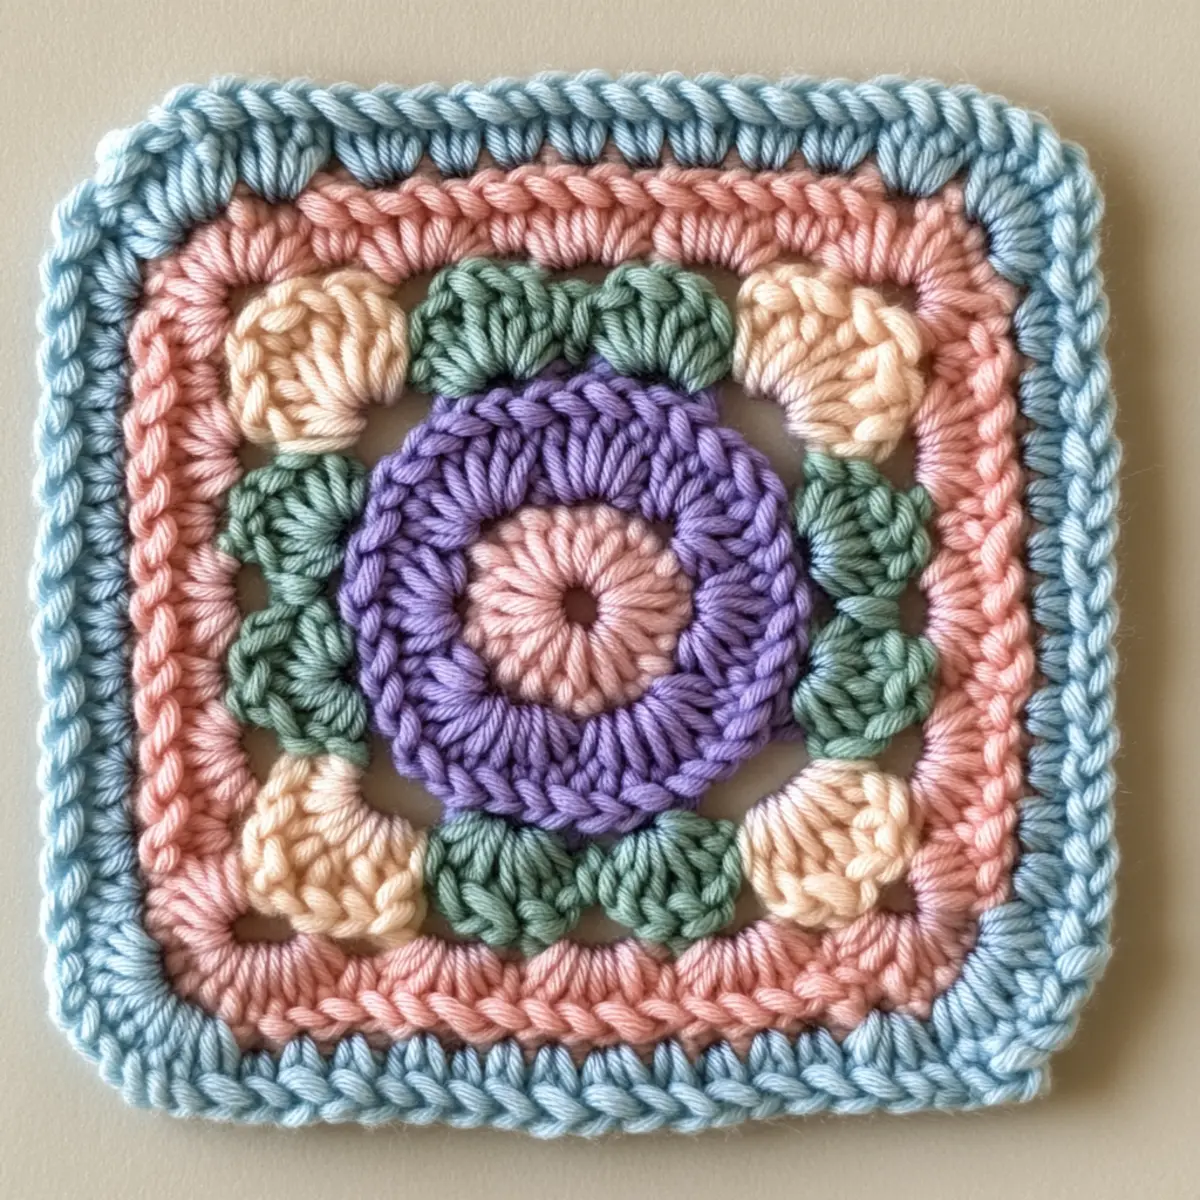
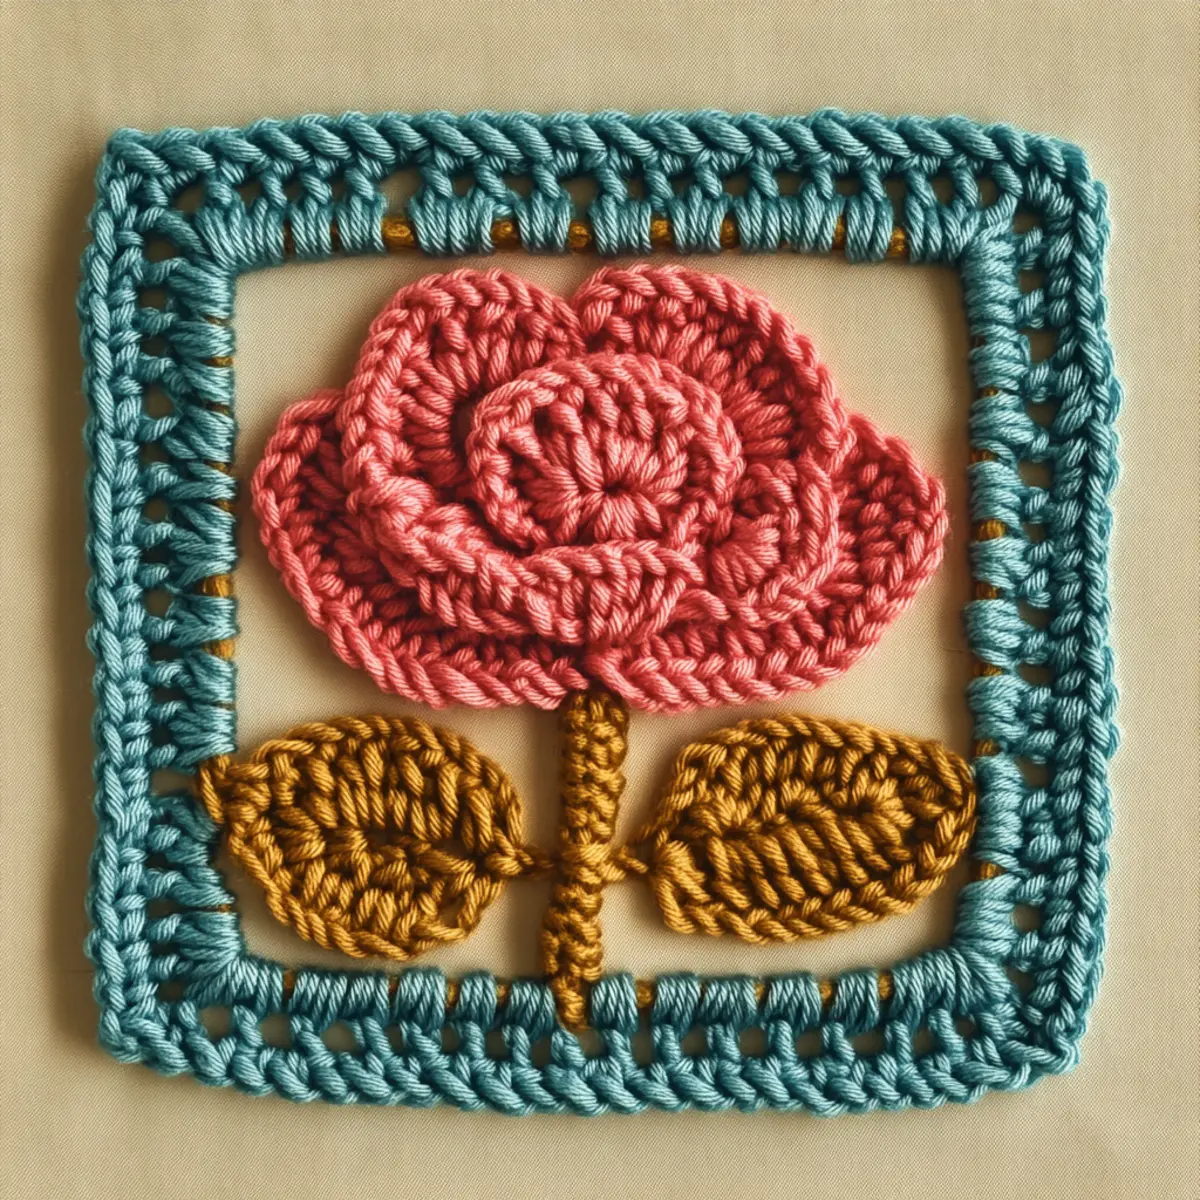
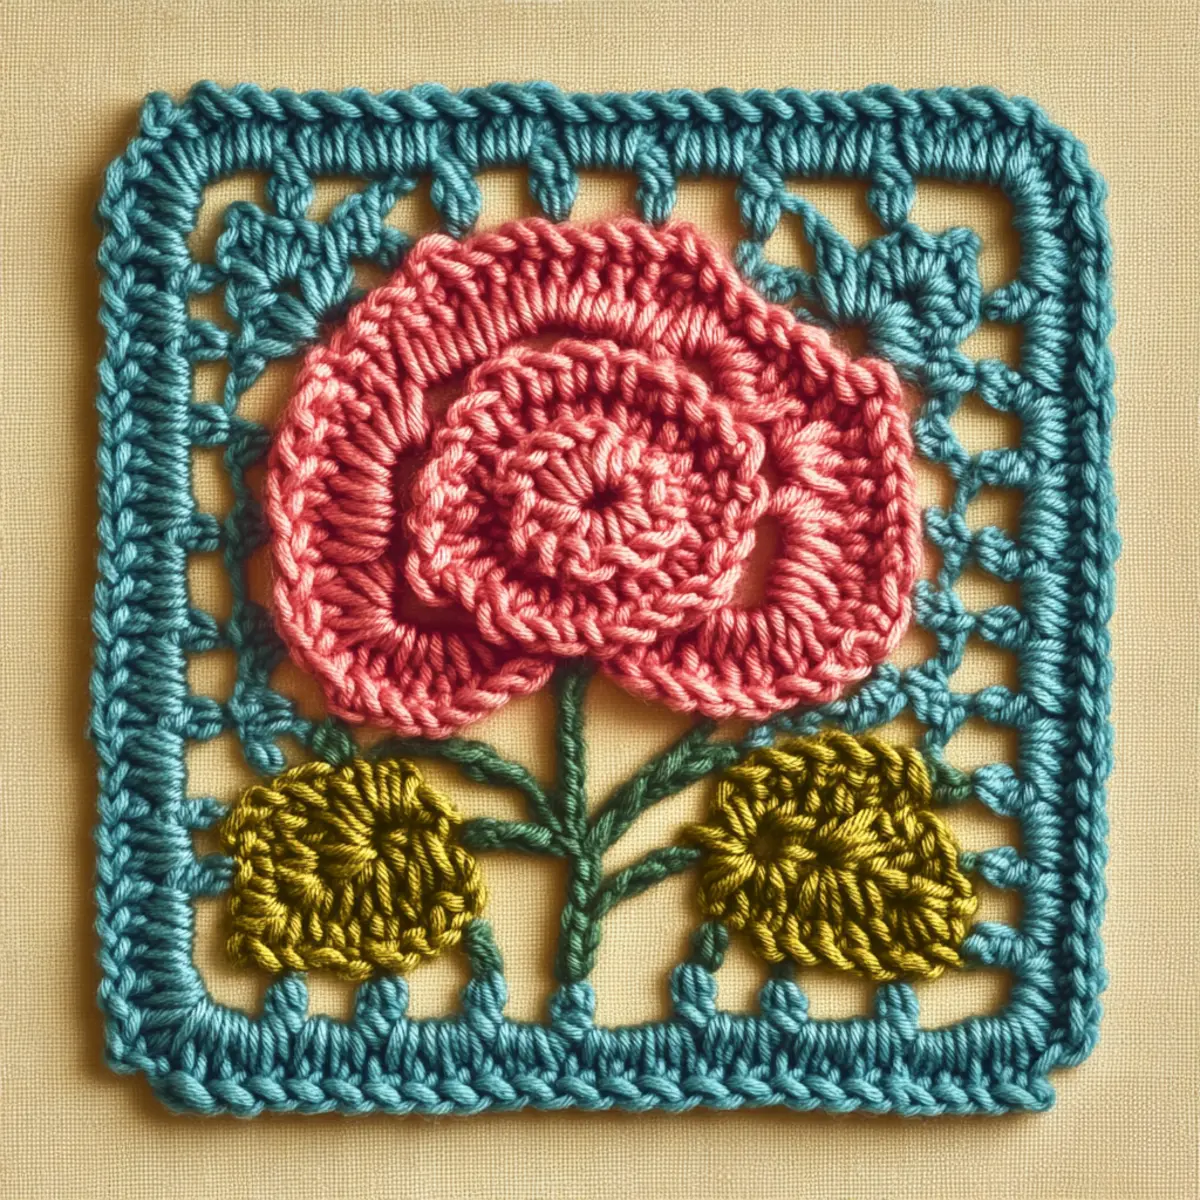
Recently, I embarked on a delightful journey with the Charming Floral Crochet Square that ignited my passion for crochet all over again. You see, this project isn’t just about stitches; it’s about transforming yarn into a blooming masterpiece that can brighten up any corner of your home. What I adore about this floral crochet square is its adaptability—whether as a cozy coaster or a statement piece for a decorative wall, it offers endless possibilities. Plus, it’s an engaging way to enhance your crochet skills while keeping it beginner-friendly! You’ll learn essential techniques, like the popcorn stitch and layering, without feeling overwhelmed. As I wrapped my fingers around the vibrant yarn, I could feel the excitement bubbling within. Each stitch felt like a celebration of creativity, allowing me to express my love for nature through crochet. Have you ever wanted to crochet a piece that showcases a whimsical flower design while keeping your creative spirit alive? Join me as we dive into the beauty of this project and explore how to make your own Blooming Floral Square.

Floral Crochet Square Materials & Tools

Yarn
Worsted weight yarn – Choose three colors such as pink for blossoms, gold or yellow for the stem, and aqua for the background; approx. 200-250 yards total needed.
Tools & Notions
5 mm (H-8 US) crochet hook – A great size to achieve the right tension for your floral crochet square.
Yarn needle – Use for weaving in ends to give your project a neat finish.
Stitch markers (optional) – Helpful for tracking rounds, especially in the more intricate layered stitches of this design.

What Makes This Pattern So Special?

Versatility is at the heart of the Charming Floral Crochet Square. Create a vibrant and personal home decor item perfect for any season or occasion! Skill Development comes next—this pattern incorporates various stitches, giving you the chance to refine your abilities while having fun. Each square can truly become a unique work of art by customizing colors and sizes, allowing you to tap into your personal style. Not to mention, it’s an effective stash-buster, enabling you to utilize leftover yarn scraps in a delightful, aesthetic way. For other fun crochet projects, don’t miss our guide on beginner-friendly crochet squares and learn how to master more intricate designs with our intermediate crochet patterns!

Gauge & Sizing Notes for Floral Crochet Square

Checking your gauge is an essential step when creating the floral crochet square to ensure your finished project turns out the right size and shape. For this pattern, a basic gauge of 4×4 inches (10×10 cm) using a 5 mm (H-8 US) crochet hook and worsted weight yarn should yield approximately 12 dc and 8 rows. If your swatch differs from this gauge, you may need to adjust your hook size or tension. To resize the floral square, simply modify the starting chain in multiples of 2 to maintain stitch counts or increase/decrease the number of rounds worked based on the desired size. If your swatch does not match the gauge, try a larger hook for a looser stitch or a smaller hook for a tighter gauge. Emphasizing these adjustments early on will allow your floral crochet square to maintain its integrity while showcasing your creativity!

Step-by-Step Pattern for Floral Crochet Square

Row 1: Start the Foundation Begin by creating a foundation chain of 40 stitches using your aqua yarn, ensuring it is not too tight. Join the last chain to the first with a slip stitch to form a ring and start working in the round with a 5 mm hook.

Row 2: Establish Base Round In the same ring, ch 3 (counts as the first dc) and work 1 dc in each of the next 39 chains. This forms the base for your floral crochet square, allowing for a total of 40 stitches in your first round. Join with a sl st to the top of the ch 3.

Row 3: Create the Background For this round, ch 2 (counts as first hdc), then work hdc in each stitch around (40 hdc total). This round adds a bit of texture and forms a solid background to support the floral elements.

Row 4: Add Chain Spaces Ch 3, then dc in next stitch, ch 1, skip 1 stitch. Repeat this pattern around for a total of 20 chain spaces, then join the last stitch with a sl st to the top of the ch 3. The chain spaces create airflow and help define the floral design.

Row 5: Flower Petal Foundation Switch to your pink yarn and attach it in any chain space from the previous round. Ch 3 (counts as 1st dc), 2 dc, ch 2, 3 dc in the same space to create the first petal. Repeat the same process in each of the 20 spaces around to complete the flower petals.

Row 6: Forming the Petals To enhance the petals, work a popcorn stitch in each petal (4 dc worked together, pull first stitch through the last) in each of the previous round’s petals. You will see the flower beginning to take shape! Finish with a sl st to close the round and secure the petals in place.

Row 7: Add the Leaves For the leaves, switch to your gold or yellow yarn in the spaces between petals. Work 3 sc in each gap, creating a leaf appearance. Remember to keep your tension loose to ensure the leaves do not curl. Continue around until every gap has a leaf.

Row 8: Shape the Square At this point, you will go back to aqua yarn to create your edging. Ch 1, sc in the same stitch, then work around the entire square with 1 sc in each stitch of the previous rows. Make sure to create crisp corners by adding 3 sc in each corner.

Row 9: Final Touches Join the round with a sl st. This creates a neat finish around your floral crochet square. No additional rounds are needed unless you’d like a thicker border.

Row 10: Weave in Ends Use your yarn needle to weave in all the ends from your work. This step is crucial for a clean-looking final piece, hiding all color changes that occurred while making your floral design.

Row 11: Blocking for Shape Lightly dampen your finished square and pin it to shape, ensuring the flower petals lay flat and defined. Blocking enhances the entire floral crochet square’s appearance.

Row 12: Admire Your Work! Now that you’ve completed your floral crochet square, take a moment to admire your handiwork! This stunning piece can be used as a coaster, wall art, or added to a larger blanket effortlessly, showcasing your skill and creativity.

Expert Tips for the Floral Crochet Square

Tension Matters: Maintain consistent tension throughout your floral crochet square to ensure even stitch size. A swatch with your yarn and hook can help confirm this.

Avoid Gaps: Ensure smooth transitions when joining new colors to avoid visible gaps that may disrupt the floral design flow. Yarn choices can affect this too, so take care!

Count Those Stitches: Track your stitch count carefully after each round. Losing count may lead to undesired shape distortions, particularly in such intricate designs like the floral crochet square.

Foundation Chain Checks: Make your foundation chain not too tight. This will allow for better flexibility when beginning your rounds and crafting your square.

Popcorn Stitch Flow: When creating popcorn stitches for the flower petals, practice on a swatch first. This ensures you master the stitch before using it in the main project for precise results.

Block Your Work: After completing the floral crochet square, blocking can greatly improve its overall appearance. It defines shapes better and showcases the intricate flower and leaf details beautifully.

How to Wash and Care for Your Floral Crochet Square

Machine Washing: If necessary, use a gentle cycle in cold water. Avoid agitation to maintain the integrity of the floral crochet square.

Hand Washing: Hand wash is preferred using mild detergent and cold water. Allow the square to soak, then rinse gently without scrubbing.

Drying: Always lay flat to dry after washing to maintain the delicate shapes of the flowers and ensure no curling occurs along the edges.

Storage: Store your floral crochet square in a cool, dry place away from direct sunlight to prevent fading colors and preserve its beauty.

Floral Crochet Square Variations

Feel free to explore creative variations on the floral crochet square to make it truly your own!

  • Color Palette Change: Experiment with pastel shades for a soft look or vibrant primary colors for a bold statement.
  • Different Yarn Weight: Use lighter or heavier yarns for a larger or smaller square, changing its overall impact.
  • Embellishments Added: Sew on buttons or beads in the flower’s center to give it a unique, charming touch. This mix of textures can create an impressive focal point in the square.
  • Border Variations: Consider using scalloped edges or braided borders for added flair, enhancing the overall appeal of your design.
  • Textures Exploration: Introduce a variety of stitch patterns—such as bobble or shell stitches—for the background to create a rich, textured experience. With these alterations, you can transform a simple plaine square into a breathtaking masterpiece.
  • Layered Stitch Effects: Play with layering different stitches to create depth and dimension in both the flowers and leaves. This can elevate your piece to new artistic heights!
  • Size Adjustments: If you’re feeling adventurous, don’t hesitate to increase or decrease the size by altering your foundation chain length or the hook used. Whether it’s a cozy coaster or a bold wall hanging, the choice is yours!

Additionally, you may find that integrating color-blocking techniques can ramp up the visual interest.

What to Pair with / What to Make after Floral Crochet Square

Once you’ve completed your floral crochet square, consider these delightful projects that will perfectly complement it.

  • Matching Coasters: Create a set of coasters in similar colors to your square for unified decor. These fun additions can brighten up any coffee table!
  • Colorful Pillow Covers: Transform your crochet skills into plush pillow covers that echo the floral design, creating an inviting atmosphere.
  • Flower Garland: Use multiple floral squares to form an enchanting garland that can liven up a room or outdoor space effortlessly.
  • Charming Wall Hanging: Assemble several floral squares into a larger wall hanging art piece that showcases your crochet artistry beautifully. A lovely statement will soon captivate your guests!

These paired projects allow you to continue expressing your creativity while showcasing the beautiful floral designs throughout your home.

Floral Crochet Square FAQs

Can I substitute yarns for this pattern?
Absolutely! You can use any worsted weight yarn, but remember that different fibers may affect the drape and appearance of your floral crochet square.

How do I adjust the size of my square?
To adjust the size, you can change the yarn weight or hook size. Modify the starting chain in multiples of 2 for best results.

What should I do about dropped stitches?
Don’t panic! If you notice a dropped stitch, use a crochet hook to pull the yarn back up through the layers, then secure it neatly.

Why is my square curling at the edges?
Curling can happen due to tight stitches or incorrect gauge. Try experimenting with a larger hook for a looser stitch, or block it to help flatten edges.

What’s the best hook size for this project?
A 5 mm (H-8 US) crochet hook is recommended for this floral crochet square. It provides the right tension for the stitch definition.

Can I add embellishments to my floral square?
Definitely! Adding buttons, beads, or different yarn textures can enhance the overall design and make your floral crochet square truly unique. Have fun with it!

Filed Under: Granny Square

Charming Ombre Granny Hexagon for Cozy Decor

August 17, 2026 by Publisher Leave a Comment

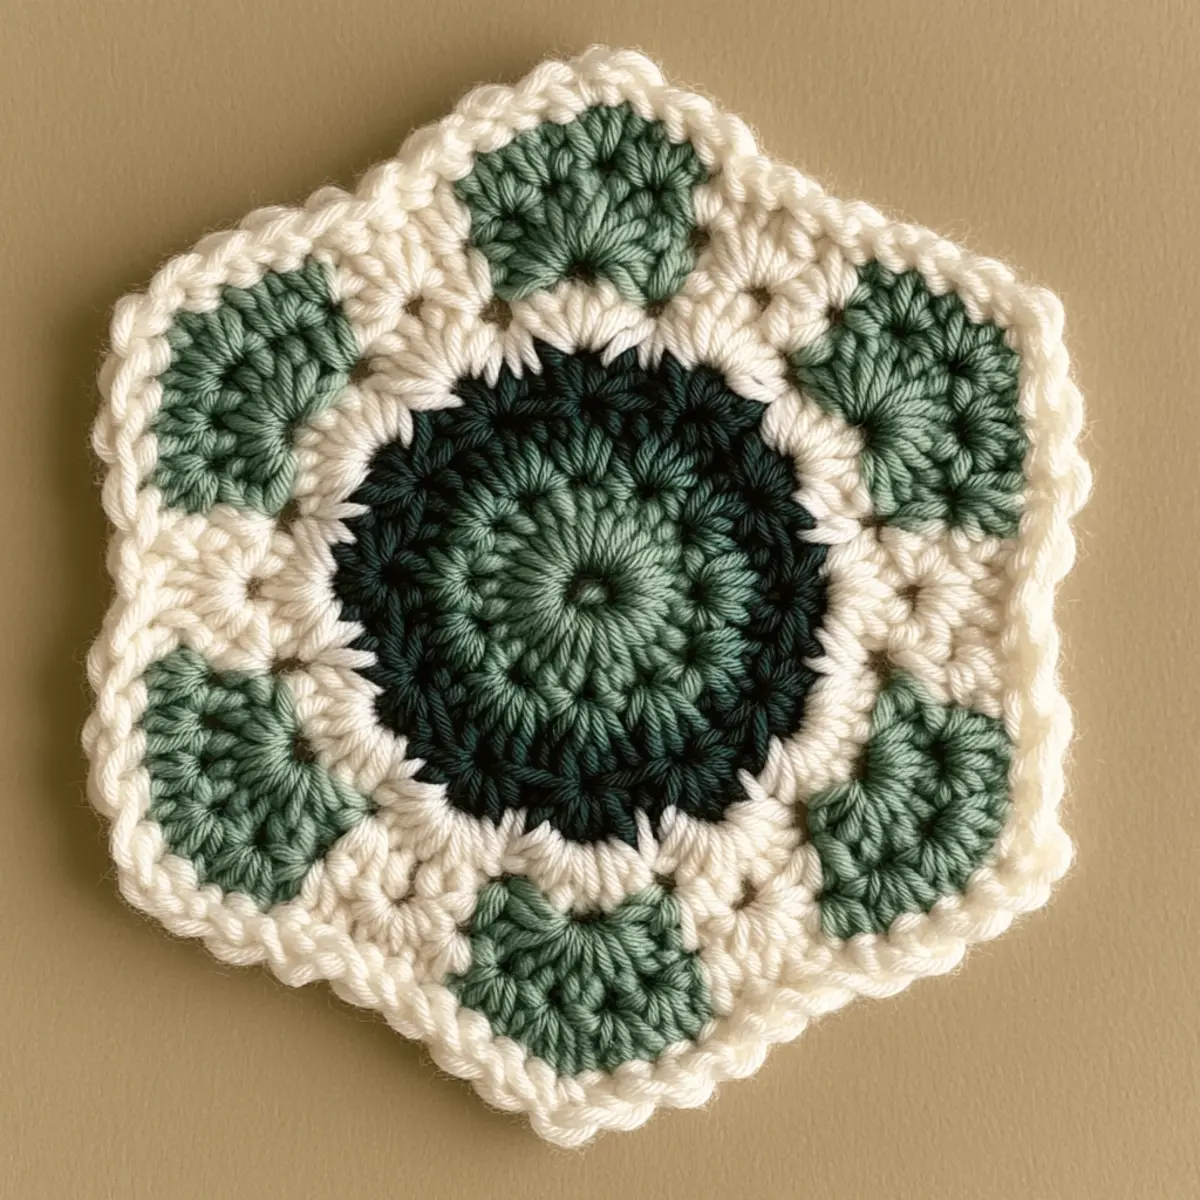
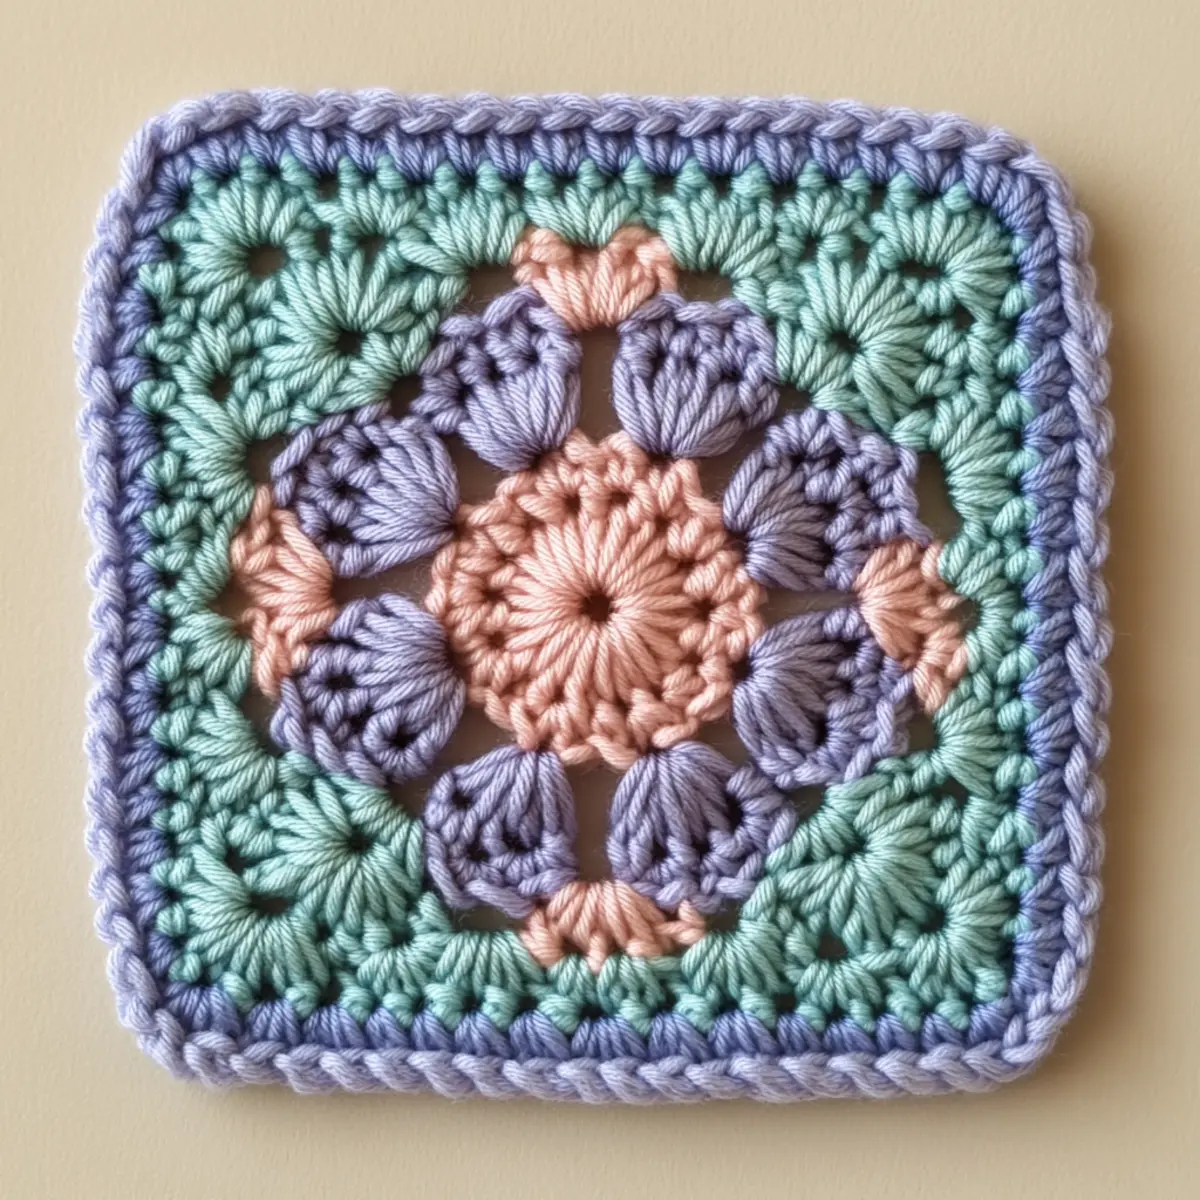
Creating crochet pieces can be both rewarding and therapeutic, and this Ombre Granny Hexagon pattern exemplifies that notion beautifully. With just a few simple stitches and an effortless color transition, these hexagons bring a fresh twist to traditional granny squares, making them irresistibly charming. This project is not only a stash-buster, perfect for utilizing leftover yarn bits, but it’s also beginner-friendly, allowing even the most novice crafters the delight of creating something truly beautiful. The ombre effect, with its seamless gradient from bold to soft tones, adds an elegant touch to your home decor while being quick to complete, offering instant gratification. As you embrace the rhythm of your hook and yarn, you might find that your tension and technique improve with each stitch. I can’t wait to see how you personalize these hexagons to reflect your unique style and cozy atmosphere. What color combinations will you choose to make them your own?

Ombre Granny Hexagon Materials & Tools

Yarn

  • Worsted Weight Yarn (Category 4) – 200-300 yards per color; this yarn works well for the textured stitch patterns and the ombre effect.
  • Cotton-Acrylic Blend Yarn – Ideal for a soft, washable texture that holds its shape beautifully.

Tools & Notions

  • 5.5 mm (I/9) Crochet Hook – A perfect size for achieving nice stitch tension and facilitating easy color changes.
  • Stitch Markers – Aid in tracking rounds and ensuring your color changes remain consistent throughout your project.
  • Yarn Needle – Essential for weaving in ends and finishing off your ombre granny hexagons neatly.

Why You’ll Love This Pattern

Simplicity is key with the ombre granny hexagon, making it an accessible choice for newcomers while providing enough fun for seasoned crafters. The texture created through the cluster stitches not only adds visual interest but also a tactile element that enhances the overall aesthetic of your projects. Additionally, this pattern is incredibly stash-friendly; it’s perfect for using up leftover yarn scraps and turning them into something spectacular. You can explore your creativity by customizing the hexagons in various sizes or color gradients, truly making them your own. This project is also a fantastic quick crochet fix for those days when you want a satisfying completion without an extensive time commitment, meaning you’ll likely end up with beautiful decor faster than you imagine! Once completed, these hexagons can easily be assembled into a blanket or turned into unique cushions. Overall, the ombre granny hexagon is a delight to work on and transforms any space into a cozy haven.

Gauge & Sizing Notes for Ombre Granny Hexagon

Checking your gauge is key for achieving the desired outcome with your ombre granny hexagons. Aim for a gauge of 4×4 inches (10×10 cm) with a stitch count that reflects the necessary tightness for your pattern. If your tension is too tight, your hexagons may shrink significantly, whereas overly loose stitches will yield larger pieces that may not hold their shape well. To resize your hexagons, you can modify the starting chain or rounds; simply add or subtract stitches based on your preferred dimensions. If your swatch doesn’t match the gauge, make sure to switch to a larger or smaller hook size to adjust the tension. This helps ensure that your final project maintains a uniform look and feel, particularly when combining several hexagons into larger items. Each completed ombre granny hexagon should measure approximately 6-8 inches across, making them versatile for various applications in your cozy decor.

Step-by-Step Pattern for Ombre Granny Hexagon

Row 1: Create the Center Ring
Begin by making a slip knot, then chain 6 and join with a slip stitch (sl st) to form a ring. This small circle will be the foundation of your ombre granny hexagon, from which you will work your clusters and color transitions. (6 ch)

Row 2: Build the First Round
Chain 3 (counts as 1 dc), then work 2 dc into the ring to form your cluster. Continue making 3 clusters of 3 dc into the ring and finish with a sl st in the top of the initial ch-3. You should have a total of 3 clusters (9 dc cluster). (3 clusters)

Row 3: Define the Hexagon Shape
Start with a ch 3, then in the next cluster, you will create 1 dc, 2 ch, and 3 dc in the space to form a corner. In every cluster space, work 1 dc, until you reach the next corner space, making sure to finish with a sl st for neatness. This creates the hexagon shape. (6 corners with 12 dc total)

Row 4: Add Color Transition
For this round, change color; begin with a ch 3, then cluster into the corners as you did before but using your second color for added ombre. Remember to incorporate a ch2 between clusters for spacing. Ensure that all cluster stitches are consistently formed to maintain an even shape. (3 colors)

Row 5: Continue the Color Gradient
Start this round with your final color and repeat the cluster work as before, creating three clusters in each corner space. You’ll want to slip stitch for neat edges again. Be careful to keep tension consistent throughout the rows, as it helps the hexagon maintain its shape. (6 corners)

Row 6: Final Round Adjustments
This round finishes the ombre effect; continue using your last color. Add more 3 dc clusters in each corner but incorporate longer chains (ch 3) between while maintaining solid sides. Complete with a sl st when you reach the beginning chain, showcasing your vibrant color transition. (6 clusters)

Row 7: Secure Ends
Using your yarn needle, weave in the ends from your color changes. This process is crucial as it keeps a clean finish on your ombre granny hexagon. As you work, ensure each end is drawn back into the previous stitches to conceal them nicely. (Ends woven in)

Row 8: Block Your Hexagon
To shape the hexagon, lightly steam block your piece to ensure it lays flat. This helps unify the stitch tension and enhances the overall look of your hexagon, especially when preparing it for assembly with other pieces. (Correctly blocked)

Row 9: Prepare for Assembly
Once several hexagons are completed, lay them out to decide on a favorable arrangement that maximizes your color transitions. You can vary your layout to see how the shades play against each other and find a style that appeals to your decor. (Sample layout)

Row 10: Join Hexagons for Project
To attach the hexagons together, use slip stitches or whip stitch in the back loops only to keep the design clean. This way, you maintain the lovely ombre appearance without disrupting the clusters. Remember, working with flat surfaces makes joining easier! (Joining technique)

Row 11: Create Larger Items
These hexagons can be combined to form blankets, pillow covers, or even wall hangings. Experiment with spacing and arrangement to create unique designs that reflect your style. Layer them for a more textured look or keep it simple with consistent spacing. (Project ideas)

Row 12: Personalize Your Project
Add embellishments, such as embroidered patterns or beads, to give a personal touch to your ombre granny hexagons. This not only enhances their visual interest but makes your project uniquely yours, showcasing your creativity and individuality. (Personal touches)

Expert Tips for the Best Ombre Granny Hexagon

Avoid Counting Mistakes: Always mark the beginning of each round with a stitch marker to avoid losing your count.

Manage Your Tension: Keep your stitches even; overly tight or loose stitches can warp your hexagon shape.

Prevent Twists: Be cautious with your foundation chain to avoid twisting, and lay it flat when forming the ring.

Color Changes: Use a consistent method for color transitions. Incorporate a slip stitch to connect rows neatly for a polished look.

Choose Yarn Wisely: Select yarn blends that are soft, durable, and suitable for washing to maintain the ombre granny hexagon effectiveness.

Practice Cluster Stitches: Take time to master the cluster stitches; they are essential for creating the lovely ombre effect in your project.

How to Wash and Care for Your Ombre Granny Hexagon

Machine Washing: Use cold water on a gentle cycle to prevent colors from fading. Always turn your work inside out before washing.

Hand Washing: Soak your ombre granny hexagon in cold, soapy water. Gently agitate without twisting or wringing.

Drying: Lay the hexagons flat on a clean towel to dry. Avoid hanging to prevent stretching and maintain shape.

Storage: Keep your finished pieces in a cool, dry place, away from direct sunlight, to avoid discoloration and retain their beauty.

Ombre Granny Hexagon Variations

Embrace your creativity and make this project your own with these fun variations!

  • Different Yarn Types: Experiment with different fiber compositions like pure cotton or bamboo for a unique drape and texture.
  • Color Blocking: Try bold, contrasting colors instead of an ombre effect for a striking visual that stands out in any room.
  • Larger Hexagons: Utilize a thicker yarn and larger hook for bigger pieces; these can add warmth and coziness to your home without as much time commitment.
  • Texture Play: Introduce textured yarns, like boucle or bobble yarn, for an interesting tactile experience.
  • Personalize with Stitch Patterns: Add unique stitch patterns, like shells or popcorn stitches, to give extra depth to your granny hexagons.

For instance, consider color-blocking your hexagons by using bright, vivid colors that contrast beautifully instead of a single gradient. This can turn your project into a statement piece, especially if paired with a neutral background or accessories. You can also try layering different stitch techniques to provide more texture and intrigue to your finished piece. Don’t forget to explore crochet accessories that can enhance your projects’ details!

  • Size Alterations: Change the size by adjusting both yarn weight and hook size for hexagons that can suit various projects, like small coasters or large blankets.

  • Adding Embellishments: Sew on beads or create picots edges for visual interest. These alterations not only enhance aesthetics but also the individuality of each piece, allowing for unique personalized crochet experiences!

  • Seasonal Colors: Think about using seasonal hues that reflect your favorite holidays or seasonal changes for themed decor that brings joy throughout the year.

Ombre Granny Hexagon FAQs

Can I substitute yarn for the ombre granny hexagon?
Absolutely! You can substitute with any worsted weight yarn. However, ensure it’s a blend that’s soft and machine washable for best results.

How do I adjust the size of my hexagons?
To modify size, change your yarn weight or hook size. Increasing the hook will yield larger hexagons, while a smaller hook will make them tighter.

What if my hexagons curl at the edges?
Don’t panic! This can occur if stitches are too tight. Relax your tension while crocheting, and blocking can help flatten curled edges.

What type of crochet hook is best for this project?
A 5.5 mm (I/9) crochet hook is fantastic for achieving good tension. However, if your tension is loose or tight, consider adjusting your hook size accordingly.

What if I drop a stitch while crocheting?
If you drop a stitch, gently unravel back to that point and fix it before proceeding. Keeping a stitch marker can help track sections and prevent dropped stitches.

Can I add embellishments to the ombre granny hexagon?
Yes! Adding embroidery, beads, or picots can personalize your hexagons, giving them a unique flair that reflects your style.

Filed Under: Granny Square

Pastel Floral Crochet Granny Square for Cozy Projects

August 17, 2026 by Publisher Leave a Comment

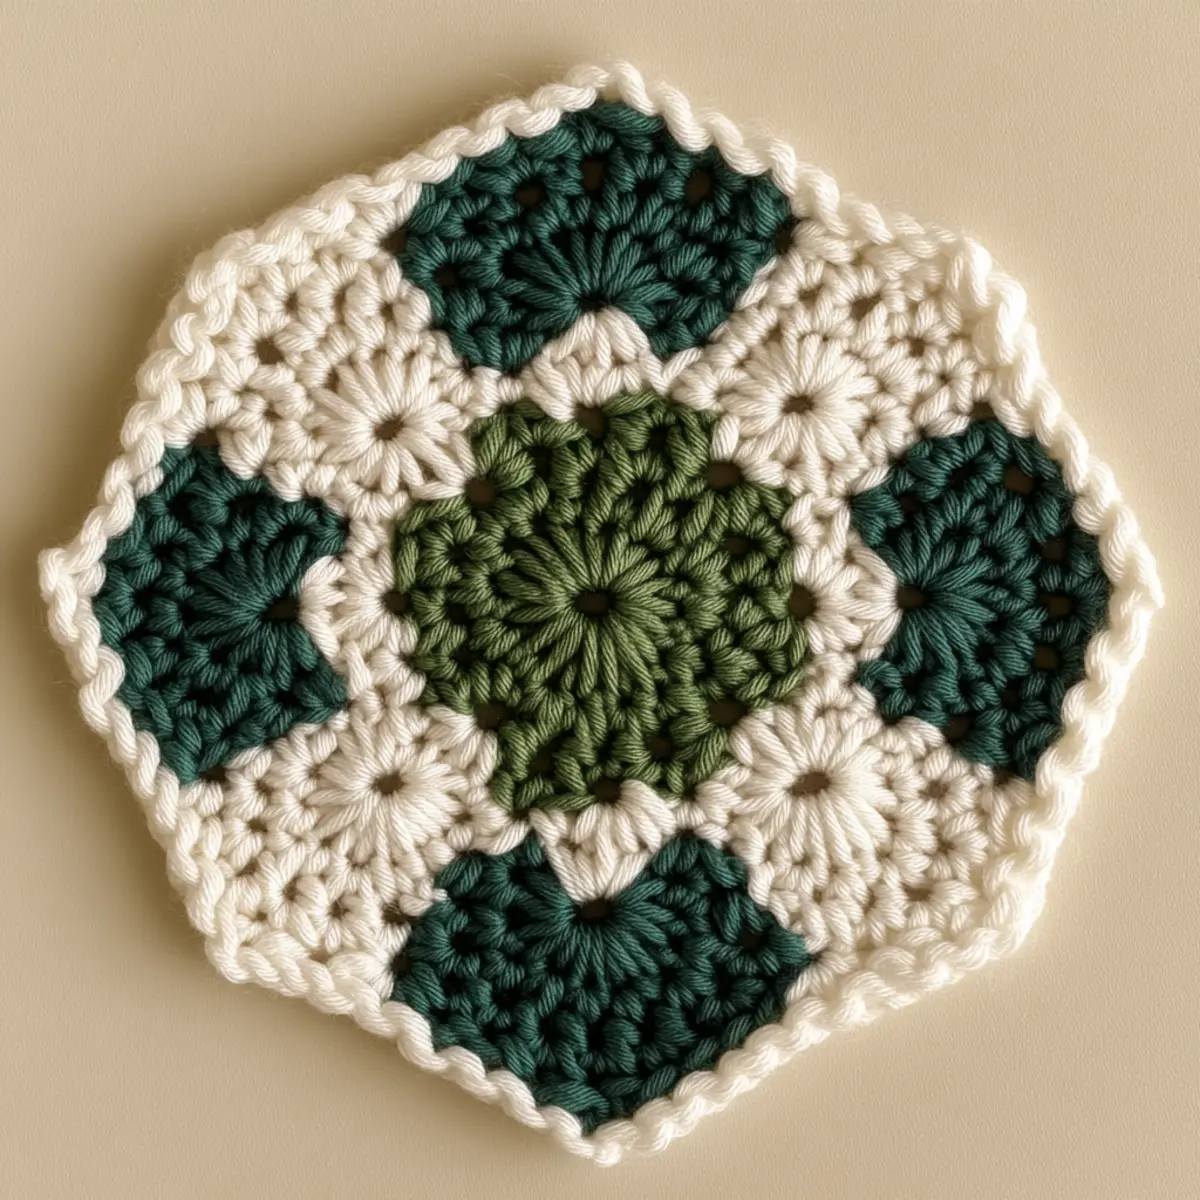
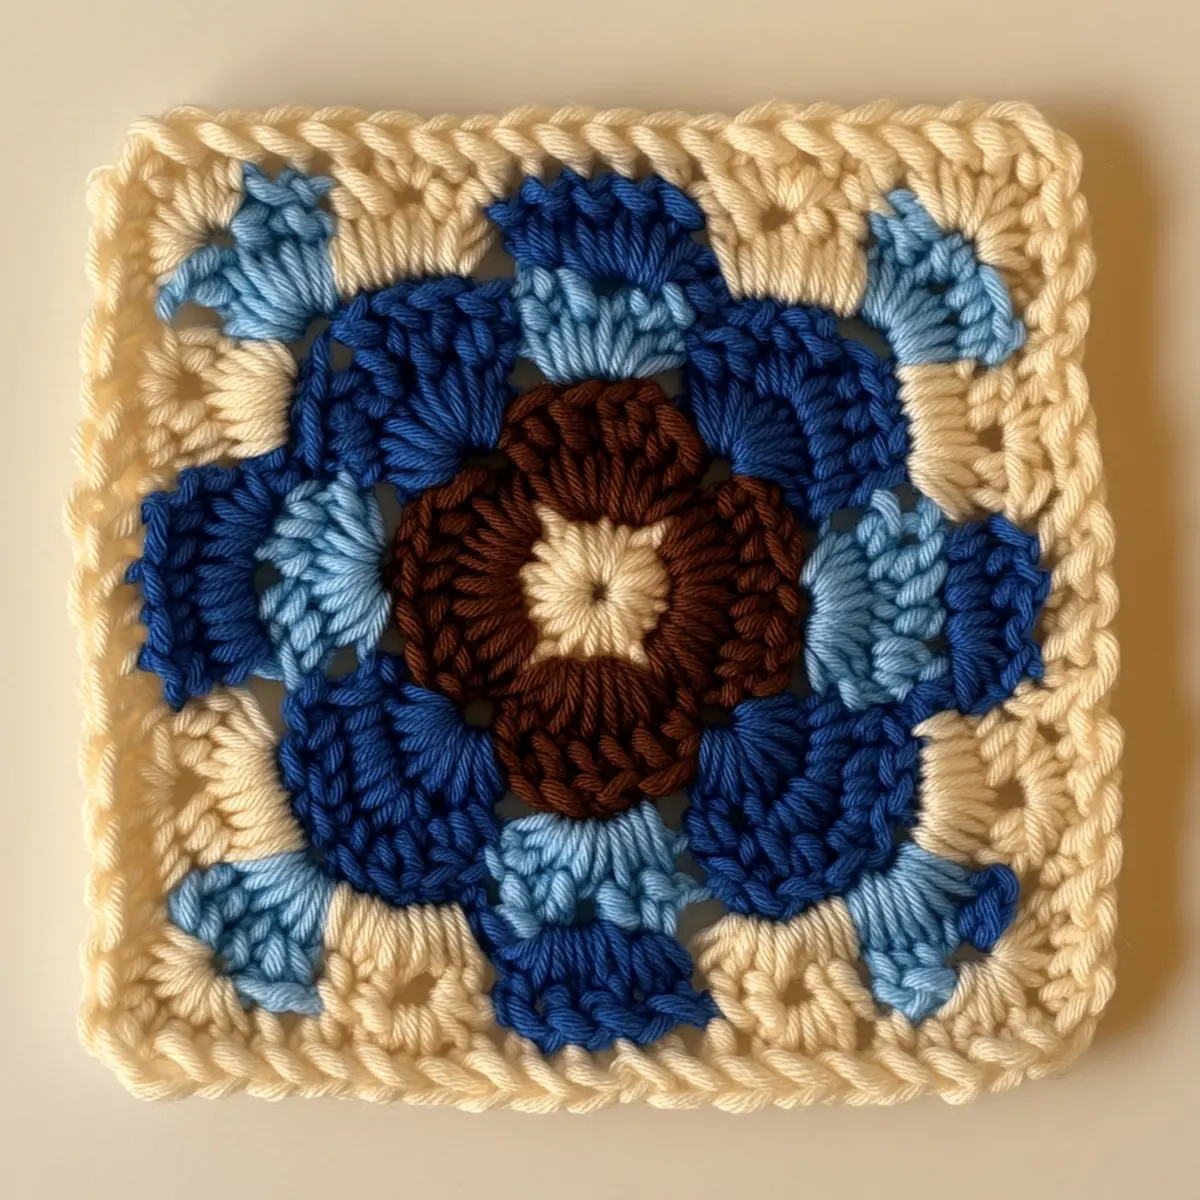
Have you ever felt that rush of excitement when the perfect project idea strikes? That was me while experimenting with colors, and I decided to design the Pastel Floral Crochet Granny Square. This gorgeous square is not just your average granny square; it encapsulates a joyful floral theme that is simply irresistible. It’s a fantastic stash-buster, allowing you to utilize those vibrant pastel yarns piling up in your craft drawer, and it also presents a cozy, inviting aesthetic that’s perfect for home decor. As you crochet this pattern, you’ll not only improve your skills with engaging color changes and stitch techniques but also create a stunning piece for your next cozy throw or pillow project. It’s perfect for beginners yet offers enough challenge to keep seasoned crafters engaged. So, are you ready to embark on a colorful journey with your crochet hook and yarn?

Crochet Granny Square Materials & Tools

Yarn
Worsted weight yarn – Approximately 150-200 yards in pastel colors will give your crochet granny square that lovely floral effect.
Cotton blend or acrylic yarn – These provide durability while maintaining a soft sheen in your crochet granny square.

Tools & Notions
4.5 to 5.0 mm crochet hook – Ideal size for working with worsted weight yarn, ensuring your stitches are uniform.
Stitch markers – Essential for keeping track of rounds and pattern changes as you craft your crochet granny square.
Yarn needle – Necessary for weaving in ends once your beautiful granny square is complete.

Why You’ll Love This Pattern

First, this crochet granny square is beautifully versatile; perfect for cozy blankets or individual decor, the only limit is your imagination. Secondly, its delightful floral design adds texture that stands out, especially when paired with other patterns in a project. Thirdly, it’s an excellent stash-buster, making use of colorful remnants you might have lying around, which can also align with sustainable crafting. Additionally, this project is incredibly customizable; feel free to mix and match colors or even try different stitches to suit your personal style. For more inspiration on how to combine colors, check out our guide on color theory in crochet. Finally, its time-saving nature means you’ll have a finished piece in no time, making it a guilt-free project when you need a quick crafting fix. Dive into this pattern and see how satisfying it is to create something so beautiful yet uncomplicated!

Gauge & Sizing Notes for Crochet Granny Square

For your crochet granny square, checking your tension is crucial to ensure a consistent and visually appealing result. The standard 4×4 inch (10×10 cm) gauge for this project, using worsted weight yarn, should ideally consist of 12 dc rows and 14 dc stitches. If your swatch does not match this gauge, consider adjusting your hook size; if your square is larger than specified, switch to a smaller hook. Conversely, if smaller, try a larger hook to achieve the appropriate size for your granny square. Additionally, to resize, you can modify the starting chain or add extra rounds for a bigger square, making this design flexible for any project. Achieving the right tension not only ensures the final piece lies flat but also maintains the integrity of the flower motif, allowing your crochet granny square to stand out beautifully.

Step-by-Step Pattern for Crochet Granny Square

Row 1: Start the Magic Circle
Make a magic circle and ch 3 (counts as 1st dc). Work 11 dc into the circle before closing it tightly. Pull the yarn to tighten the circle and sl st into the top of the ch 3 to join. (12 dc)

Row 2: Forming the First Round
Ch 3 (counts as 1st dc of the next round), then within the same stitch, work 2 dc, creating a shell. *Skip 1 dc, then in the next dc, work 3 dc; repeat from * until you complete the round. Sl st to the top of ch 3 to join. (4 shells)

Row 3: Adding Petals
Ch 3 to start, then 2 dc in the same space. *In each space formed by the previous shells, work 3 dc, ch 2, and 3 dc to form a petal shape. Continue around, ensuring even spacing. Sl st to join at the top of ch 3. (4 petals)

Row 4: Creating the Floral Design
Begin with ch 3 for the next round. In the ch-2 space from the previous row, work 3 dc, ch 2, and 3 dc to form a petal. Continue to the next ch-2 space, working the same petal stitch. Repeat until you reach the starting point and sl st to join. (8 petals total)

Row 5: Color Changing for the Border
Switch to the contrasting color yarn. Ch 3, then dc in every previous petal space’s ch-2, but add a ch 1 between each set. This will give a lacy appearance. Remember to keep the tension uniform to maintain shape. Sl st to join. (total stitches will vary based on petals)

Row 6: Building the Outer Edge
Maintain the contrasting color; continue from where you left off. Work dc in each dc made in the last row. For each corner (those with a ch-1 space), work (dc, ch 1, dc) for a rounded look. Sl st to close the round. (total stitches will be counted as you go)

Row 7: Establishing Texture
In this round, you will make a fun textured border. Ch 2 (counts as hdc), then hdc in each stitch. Make sure to hdc in each dc and into the ch-1 spaces to create a ridged effect. Transform it by varying tension for visual interest. Complete all around and sl st to join. (total hdc count varies)

Row 8: Finalizing Your Square
To finish off, slip stitch into the first hdc, then fasten off, leaving a long tail for weaving. Use yarn needle to weave in loose ends. Block your square to achieve a crisp shape, ensuring even edges and flattening curled areas if necessary.

Row 9: Showcase your Work
Now that your crochet granny square is complete, you can use it in various projects. Whether you’re adding it to a cozy blanket or using it as a standalone piece, flaunt your creative use of vibrant pastels! Each square is a small work of art.

Row 10: Consider Customization
Feel free to deviate from the pattern, adjusting colors or stitch placements to create personalized pieces. Consider mixing different stitch designs to make each square unique while still tying them together with the chosen color palette.

Row 11: Get Inspired
As you complete your crochet granny square, think about how you can integrate this square into larger projects or add embellishments like buttons or fabric accents. The key is to let your creativity shine through every piece you create.

Row 12: Enjoy Your Creation
Be proud of your completed crochet granny square! It represents not just a pattern, but your journey and growth as a fiber artist. Share with friends or keep it as a cozy reminder of your crafting skills.

Helpful Tricks for Your Crochet Granny Square

Track Your Stitches: Use stitch markers to avoid losing count and dropping stitches during your crochet granny square project.

Avoid Twisted Chains: Always check your foundation chain for twists before beginning the first round, as this ensures a smooth start.

Maintain Tension: Consistent tension leads to a beautiful, even crochet granny square. Don’t pull too tight or leave it too loose!

Explore Color Changes: Practice switching colors smoothly within the petal stitches; avoid knots by leaving enough yarn length between colors.

Block After Completion: Once your crochet granny square is complete, blocking helps finalize dimensions and even out any irregularities in shape.

How to Wash and Care for Your Crochet Granny Square

Machine Washing: If you choose to machine wash, use a gentle cycle with cold water to maintain the square’s vibrant colors and prevent felting.

Hand Washing: Hand wash your crochet granny square in lukewarm water using mild detergent; gently press, do not wring, to avoid distortion.

Drying: Always lay your square flat to dry, away from direct sunlight to protect the colors and ensure it retains its shape.

Storage: Store your crochet granny square in a cool, dry place to avoid moisture, making sure it’s placed away from direct sunlight to protect its colors.

Crochet Granny Square Variations

Get creative with your crochet granny square by experimenting with colors, fibers, and stitches!

  • Larger Size: Increase your hook size or add more rounds for a pillow cover. This can create a stunning focal point in any room.
  • Color Blocking: Alternate bold colors in different sections for a unique look. Using three contrasting colors can create a striking visual impact.
  • Jewel Tones: Swap pastel shades for rich jewel tones for a more sophisticated granny square. This change can elevate your project for a more elegant finish.
  • Texture Variations: Consider using a combination of stitches like bobbles or shells to add interest. Mixing textures can create a more dynamic design.
  • Different Yarn Fibers: Use a cotton blend for a lighter feel, or try a fluffy yarn for a softer touch. Each fiber changes the look and feel of the square.

The beauty of crochet is in customization. For instance, by changing your yarn weight to a bulky option, your granny square will transform into a cozy throw that’s perfect for chilly evenings. You can also experiment with tighter or looser stitches to create a different texture altogether. Don’t forget to check out more yarn options for your next project!

Crochet Granny Square FAQs

Can I substitute the yarn?
Absolutely! You can use various worsted weight yarns, including blends of cotton or acrylic, to achieve different textures and effects in your crochet granny square.

How can I adjust the size of my square?
To resize your crochet granny square, modify the number of rounds you complete or use a larger hook to create a bigger square, allowing customization based on your project’s needs.

What should I do if my stitches are curling?
Don’t panic! If your crochet granny square starts curling, it may be due to tight tension. Try blocking your square, which often corrects the shape and flattens it nicely.

What hook size should I use?
For worsted weight yarn, 4.5 to 5.0 mm (US size 7-8) hooks work best. Experiment within this range to find a comfortable grip for your crochet granny square.

How do I troubleshoot dropped stitches?
If you notice a dropped stitch, go back to the last completed round and rework those stitches carefully. Placing stitch markers can help you avoid this issue in the future.

Can I mix textures in this pattern?
Definitely! Feel free to play with different yarn textures and colors in your crochet granny square. This creativity adds dimension and personalization to your projects.

Filed Under: Granny Square

asd

August 4, 2026 by admin Leave a Comment

Filed Under: Accessories, Amigurumi, Baby, Bags, Cardigan, Dress, Flowers, Granny Square

Recent Posts

  • Chic Crochet Watch Band Pattern: Scalloped Elegance
  • Vibrant Crochet Granny Square: A Floral Delight to Create
  • Pocket Otter Crochet: Your Adorable Amigurumi Companion
  • Cozy Up with This Festive Crochet Tree Cozy Pattern
  • Chic Crochet Babydoll Dress: A Timeless Pattern for Spring

Recent Comments

No comments to show.
Fast Crochet Patterns Logo

Welcome to Fast Crochet Patterns, your curated editorial blog for modern, handmade aesthetics. Discover an elegant collection of contemporary designs and carefully crafted tutorials—where every beautiful pattern is completely free to inspire your next creation.

Join the Studio

Subscribe for our latest free patterns and warm, minimal crochet inspiration delivered to your inbox.


Collections

  • Accessories
  • Amigurumi
  • Baby
  • Bags

More Patterns

  • Cardigan
  • Dress
  • Flowers
  • Granny Square

Information

  • About
  • Contact
  • Privacy Policy
  • Terms Of Use
  • Disclaimer

© 2026 Fast Crochet Patterns. All rights reserved.