Fast Crochet Patterns

  • Home
  • Contact
  • Patterns
    • Amigurumi
    • Granny Square
    • Flowers
    • Baby
    • Dress
    • Bags
    • Cardigan
    • Accessories
menu icon
go to homepage
  • Home
  • Contact
  • Patterns
    • Amigurumi
    • Granny Square
    • Flowers
    • Baby
    • Dress
    • Bags
    • Cardigan
    • Accessories
search icon
Homepage link
  • Home
  • Contact
  • Patterns
    • Amigurumi
    • Granny Square
    • Flowers
    • Baby
    • Dress
    • Bags
    • Cardigan
    • Accessories
×

Charming Crochet Tote Bag: Beginner-Friendly Floral Design

August 17, 2026 by Publisher Leave a Comment

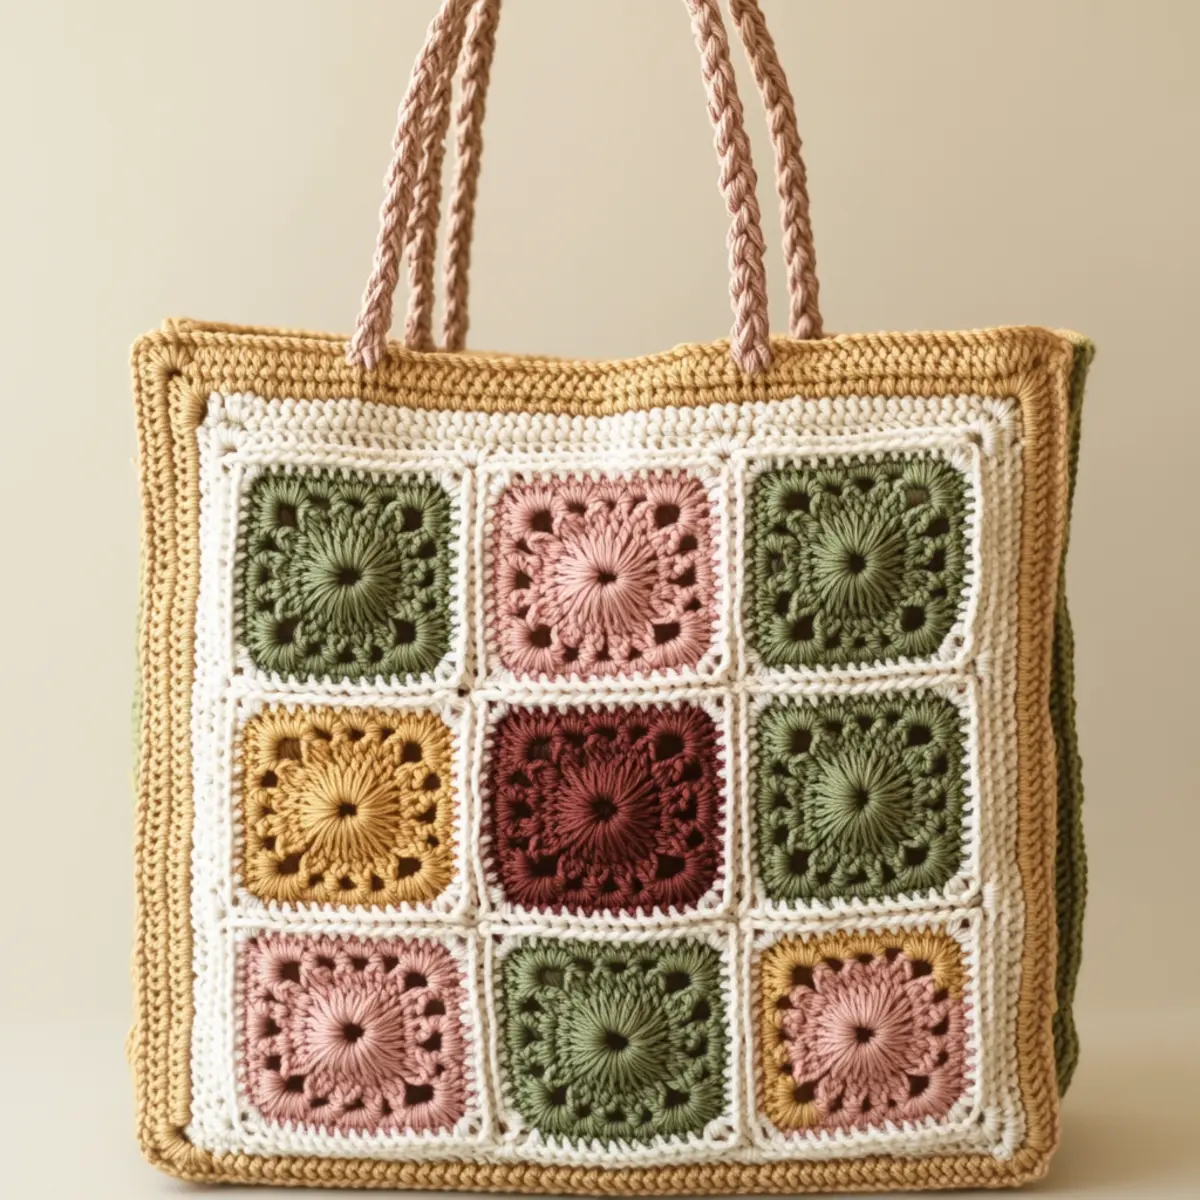
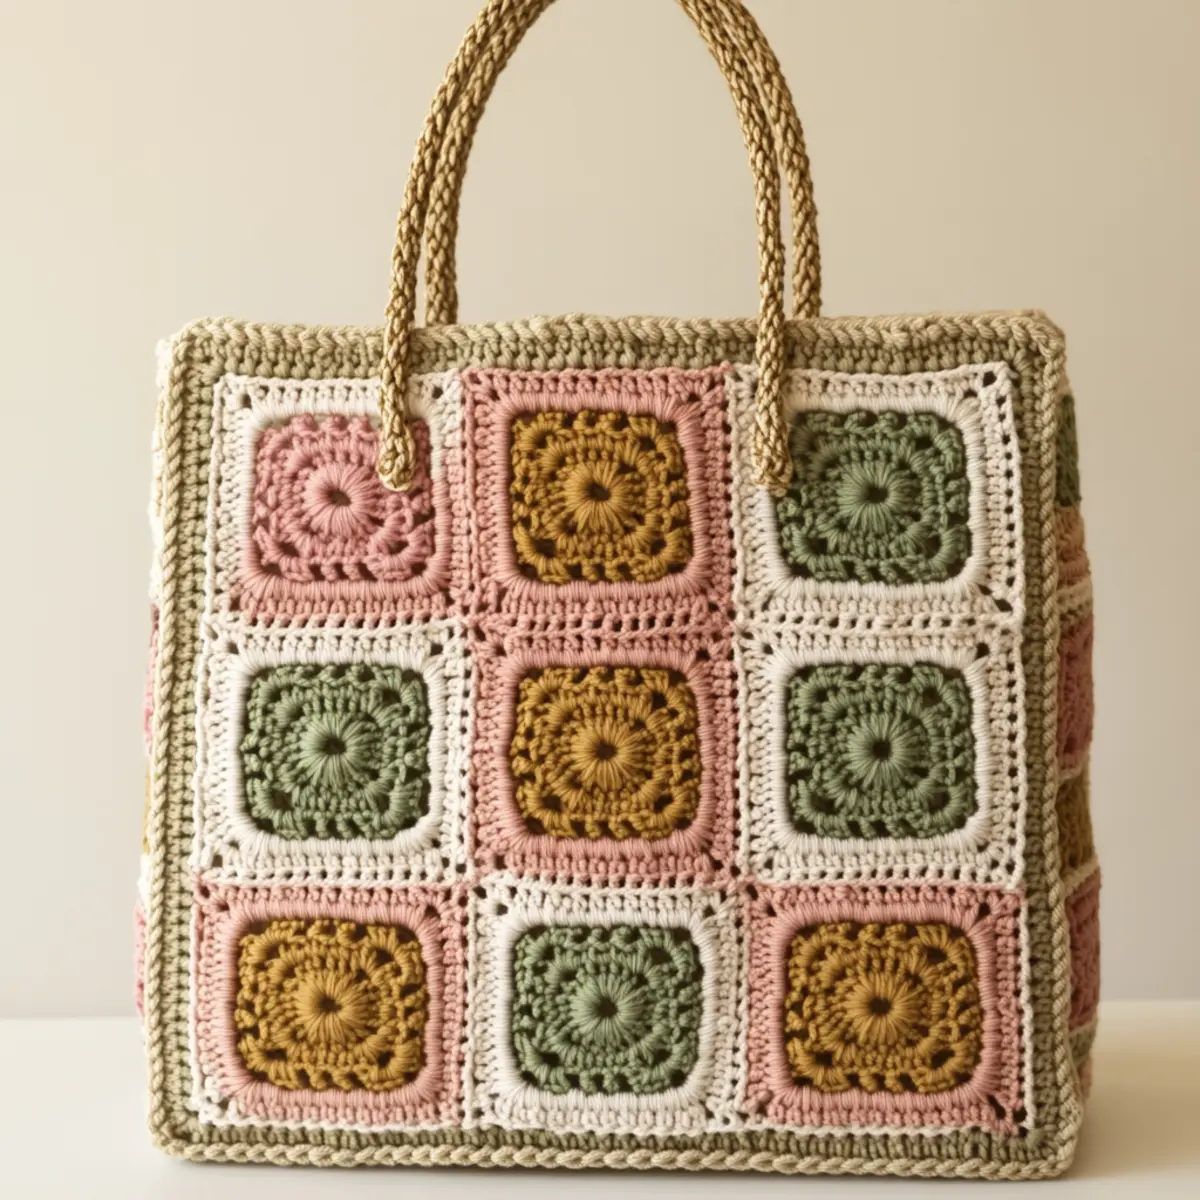
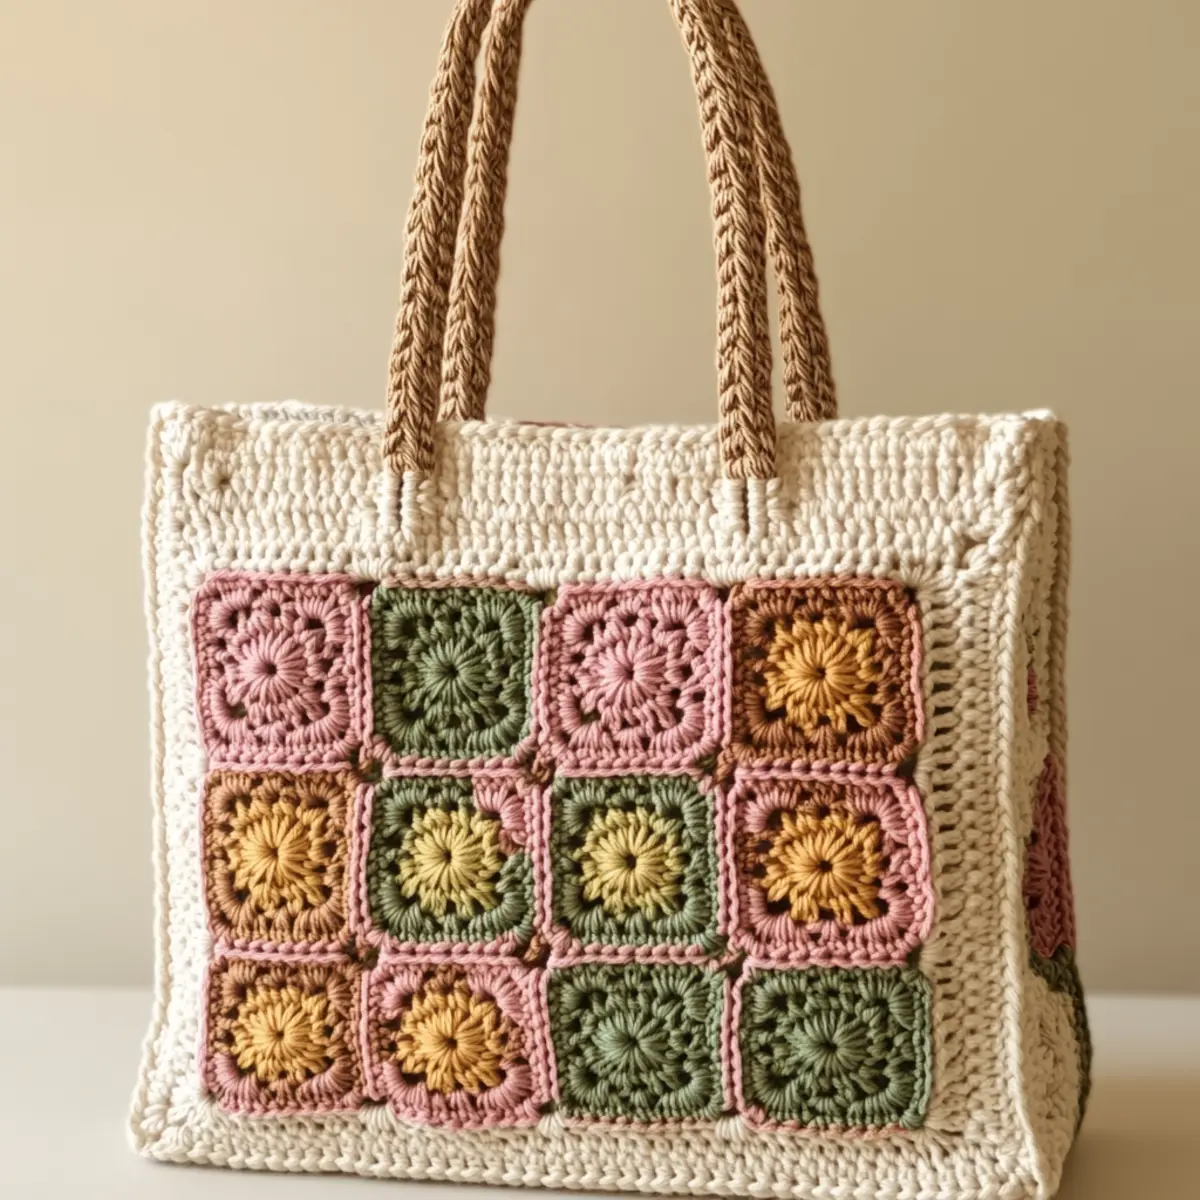
A cozy snapshot comes to mind as I think of the charming Crochet Lucy Tote Bag, a project that beautifully marries practicality and elegance. From the first stitch, you’ll find that this design offers both a stunning floral aesthetic and incredible functionality. It’s a beginner-friendly crochet tote bag perfect for using up leftover yarn, making it a must-try stash-buster for crafters of all skill levels. Picture yourself effortlessly carrying everything you need—whether headed to the grocery store or a day at the beach—while turning heads with your handmade accessory. The granny square motif, full of delightful blooms, adds a bit of whimsy that elevates this bag from ordinary to extraordinary. And as you work through the simple stitches, you’ll appreciate how quickly this project comes together. Before you know it, you’ll have a gorgeous, usable bag that reflects your unique style and creativity. Crafting this tote bag may just become your new favorite weekend project. Are you ready to dive into the world of crochet and unleash your creativity with some yarn and hooks?
Crochet Tote Bag Materials & Tools

Yarn

  • Worsted weight cotton yarn – Choose shades like cream, blush, sage, mustard, and brown for a beautiful floral effect; approximately 250 to 300 yards total needed for the tote bag.

Tools & Notions

  • 4.5 mm (size 7 US) crochet hook – Ideal for creating a stable yet flexible fabric.
  • Scissors – Essential for cutting yarn and finishing ends cleanly.
  • Yarn needle – Use this for weaving in ends neatly at the end of your project.
  • Stitch markers – Keep track of your rounds easily, especially when assembling your squares.
  • Measuring tape – Ensure that your tote bag dimensions are accurate for optimal functionality.

Why You’ll Love This Pattern

Simple yet stunning, this crochet tote bag invites even the most novice crafters to join in the fun. With basic stitches and a straightforward construction, you’ll find it easy to whip up each vibrant granny square. Versatile in design, you can customize your tote to match seasonal colors or personal favorites, making it a unique addition to your accessories. This pattern also serves as a true stash-buster, helping you make the most of leftover yarn from previous projects. The construction of the bag allows for delightful textural variation, with the floral motifs standing out beautifully against the fabric. Plus, with a size that comfortably fits all your essentials, it effortlessly combines aesthetic appeal with functionality, perfect for any environment. And the best part? This is a time-saving project, ensuring that you’ll have a finished tote bag in no time, giving you more chances to get crafty with other crochet patterns!

Gauge & Sizing Notes for Crochet Tote Bag

Checking your tension is important for making a successful crochet tote bag like the Floral Granny Square Tote. Aim for a standard gauge of 4×4 inches (10×10 cm) using a 4.5 mm (size 7 US) crochet hook, ensuring that each granny square measures approximately 6 inches on each side. If your swatch does not match the gauge, consider adjusting your hook size or the tension with which you crochet. Remember, for a larger tote bag design, simply add additional granny squares along with corresponding increases in the base and handle lengths, so that your bag maintains its proportion. Experimenting with different yarn weights may also provide you with a unique feel and aesthetic for your crochet tote bag while keeping the overall design functional.

Step-by-Step Pattern for Crochet Tote Bag

Row 1: Start Your Square
Begin with a slip knot and chain 4 (ch 4) to form a ring. Into the ring, work 3 double crochet (dc), 3 chain stitches (ch), and 3 more dc to form the first square corner. Repeat this step for a total of 3 corners before closing with a slip stitch (sl st) to the first dc. (4 dc, 3 ch for each corner)

Row 2: Continue Squaring
For the second round, slip stitch into the corner ch space. Then, work 3 dc, 2 ch, and 3 more dc in that same space. Continue to each corner, placing 3 dc, 2 ch, 3 dc for each corner. Close the round with a sl st in the top of the first dc. (Total 4 corners, 12 dc throughout)

Row 3: Add Floral Design
In the last round, attach your yarn in a corner. In the corner ch space, work 2 dc, 1 ch, and 2 dc to form the petal base. In the next ch space, begin another petal by working 2 dc, 1 ch, and 2 dc. Repeat around the square for a lovely floral detail, closing with a sl st. (Each flower has 1 petal on each of the 4 sides)

Row 4: Create Additional Squares
Repeat Rows 1-3 to create a total of 8 floral granny squares. Use different yarn colors to make each square unique and vibrant, ensuring a harmonious blend of colors for your crochet tote bag. You’ll need approximately 200 yards of yarn for squares.

Row 5: Assembling Squares
Lay the floral granny squares out in a layout you prefer; a 2×4 arrangement works nicely. Using a whip stitch, connect the squares by attaching the edges together. Make sure to align corners neatly and crochet tightly for a sturdy finish. This will form the front and back of your tote bag. (Connect all 8 squares)

Row 6: Crocheting the Base
For the base, chain 40 to start. Work a row of single crochet (sc) back across the chain. Turn and chain 1, then sc back for about 5 rows. This section will provide the structural integrity needed to support your crochet tote bag. (Base swatch: 5 rows)

Row 7: Attach the Base
Once your base is complete, place it between the two assembled square panels. Secure it with whip stitches all around the edges. This will connect the base with the square sides of your crochet tote bag seamlessly. (All sides must be secured at the base)

Row 8: Upper Edging
Using a contrasting color, join yarn at any corner and chain 1. Work 1 sc in each stitch around the top opening of the bag for reinforcement, and add 3 sc in each corner for a rounded look. Finish by joining with a sl st at the first sc to ensure your tote has a polished look. (Total st count may vary)

Row 9: Adding Handles
For handles, chain 50 and sc back down the chain to create a sturdy strap. Make two handles and sew them onto the bag approximately 6 inches apart for optimal strength. Secure with reinforcement stitches for added durability. (Each handle should be attached firmly)

Row 10: Weaving in Ends
Using your yarn needle, weave in all loose yarn ends neatly along the edges of the squares and on the base. This step is crucial for maintaining the appearance of your crochet tote bag, creating a clean finish for your project. (Ensure all ends are woven securely)

Row 11: Final Touches
Lightly block your crochet tote bag by soaking in cool water and laying flat to dry. This will help your floral granny squares to lay flat and give your bag a polished final look. Once dried, your charming crochet tote bag is ready to use! (Blocking ensures a uniform appearance)

Row 12: Ready to Use!
Now that your floral granny square tote bag is complete, use it for shopping trips, beach days, or any other occasion! Show off your unique design and how you’ve personalized this beginner-friendly project with your choice of colors and stitches. (Perfect for daily needs)
How to Wash and Care for Your Crochet Tote Bag

Machine Washing: If necessary, machine wash in cold water on a gentle cycle to avoid damaging the cotton yarn, using a mesh laundry bag for protection.

Hand Washing: For best results, hand wash with mild detergent and cool water; gently squeeze to remove dirt without wringing or twisting.

Drying: Lay your crochet tote bag flat to dry to maintain its shape and ensure that the squares remain flat and aligned, enhancing the overall aesthetic.

Storage Tips: Store your tote bag in a cool, dry place folded neatly; avoid hanging to prevent stretching of the cotton fabric over time.

Crochet Tote Bag Variations

Feel free to personalize your crochet tote bag to reflect your unique style!

  • Different Colors: Try vibrant colors like teal, lavender, or coral to make an eye-catching statement.
  • Yarn Blends: Experiment with a cotton blend for added softness and a luxurious feel.
  • Size Adjustments: Increase or decrease the number of granny squares for a larger shopping tote or a smaller purse.
  • Alternate Motifs: Incorporate other crochet motifs, such as hexagons or stars, while maintaining the granny square framework for visual interest.
  • Textured Stitches: Use textured stitches like front post double crochets to elevate the design from plain to eye-catching.

For a fabulous twist, you could also add a decorative lining to the inside of the tote bag. It adds a touch of elegance while providing additional structure! Don’t forget to check out our previous article on crochet motifs for bags for more fun ideas!

  • Seasonal Styles: Craft seasonal adaptations of your crochet tote bag by using autumn hues for a fall look or pastel colors for spring.
  • Embellishments: Add charms, tassels, or buttons for a personalized touch that showcases your crafting personality.

Expert Tips for the Best Crochet Tote Bag

Track Your Stitches: Always count your stitches after each row to avoid losing track—this is especially crucial when working with granny squares.

Consistent Tension: Maintain even tension throughout your project to ensure that all granny squares come out uniform in size, preventing assembly issues.

Twist-Free Foundation: Be careful with your foundation chain to avoid twists; this will help maintain the proper shape of your crochet tote bag.

Sample Swatch: Crochet a small sample swatch to check your gauge before starting, which ensures that your squares will be the correct size for the tote.

Blocking Benefits: Don’t skip the blocking step; it helps your finished crochet tote bag lay flat and look polished, highlighting the lovely floral designs effectively.
Crochet Tote Bag FAQs

Can I use different yarn types?
Absolutely! You can experiment with cotton blends or even acrylic yarns to achieve various textures and looks for your crochet tote bag.

How can I adjust the size?
Don’t panic! Simply add or remove granny squares when assembling the tote; larger bags need more squares and longer base and handles.

What if I drop a stitch?
If you drop a stitch while crocheting, locate the stitch and carefully pull the yarn back to secure it; you can fix it later with a yarn needle if needed.

What crochet hook size should I use?
A 4.5 mm (size 7 US) crochet hook is ideal for this project, providing the perfect balance of tension and flexibility for cotton yarn.

What to do if my tote curls?
Curling often happens due to tension issues. Consider blocking your completed bag, or adjusting your tension while crocheting each square.

How much yarn do I need for the entire bag?
For the crochet tote bag, around 250 to 300 yards of worsted weight cotton yarn is recommended, depending on the number of squares you make.
Filed Under: Bags

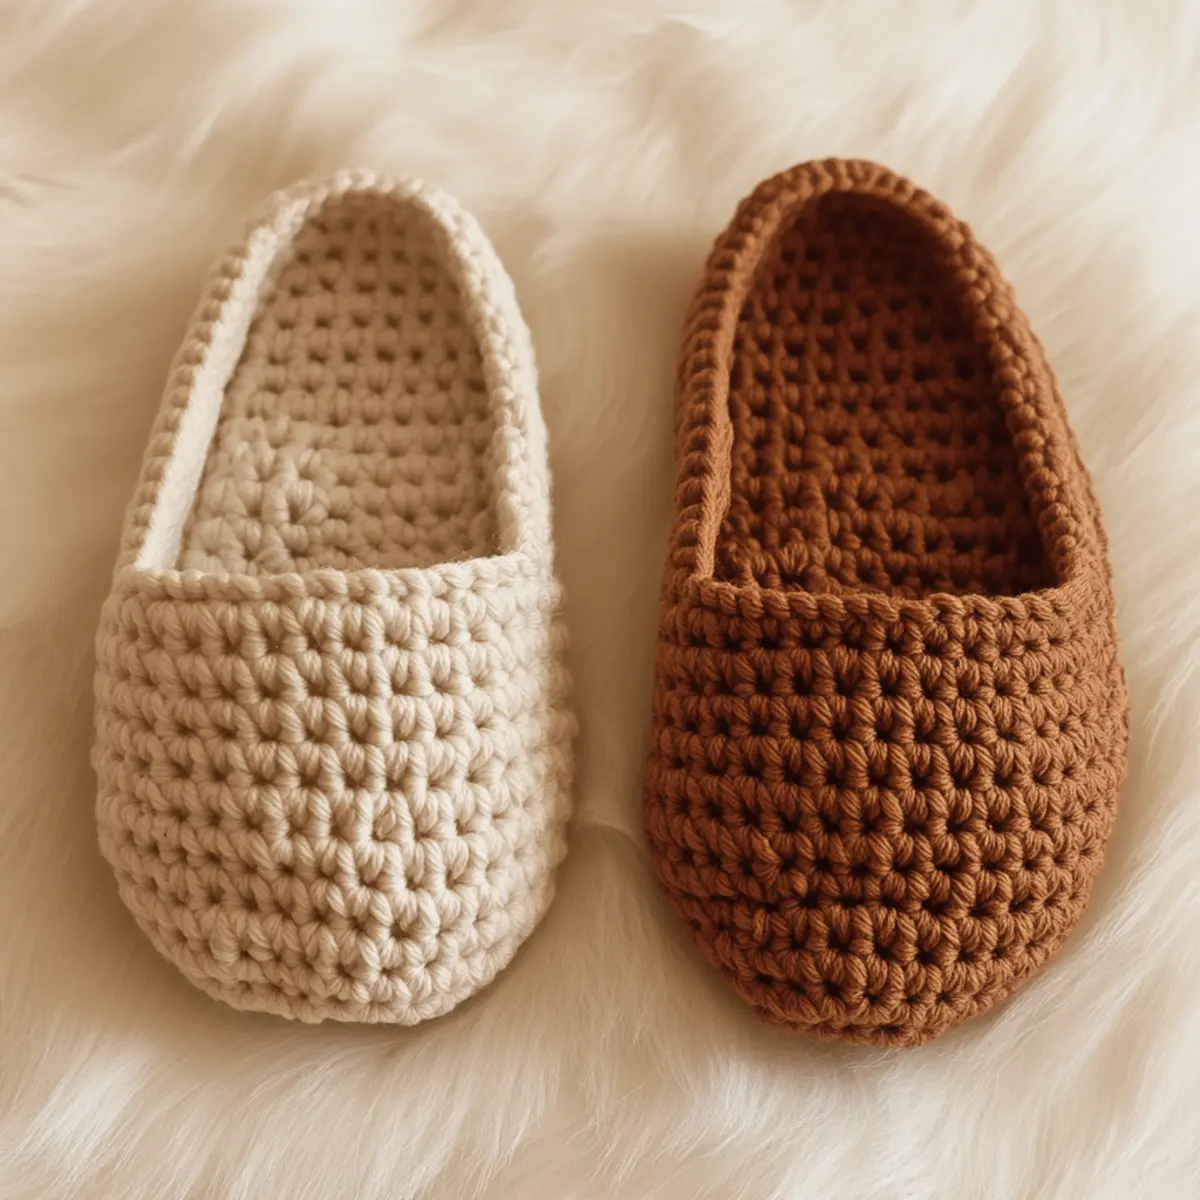
Cozy Crochet Slippers Pattern for Beginners and Beyond

August 17, 2026 by Publisher Leave a Comment

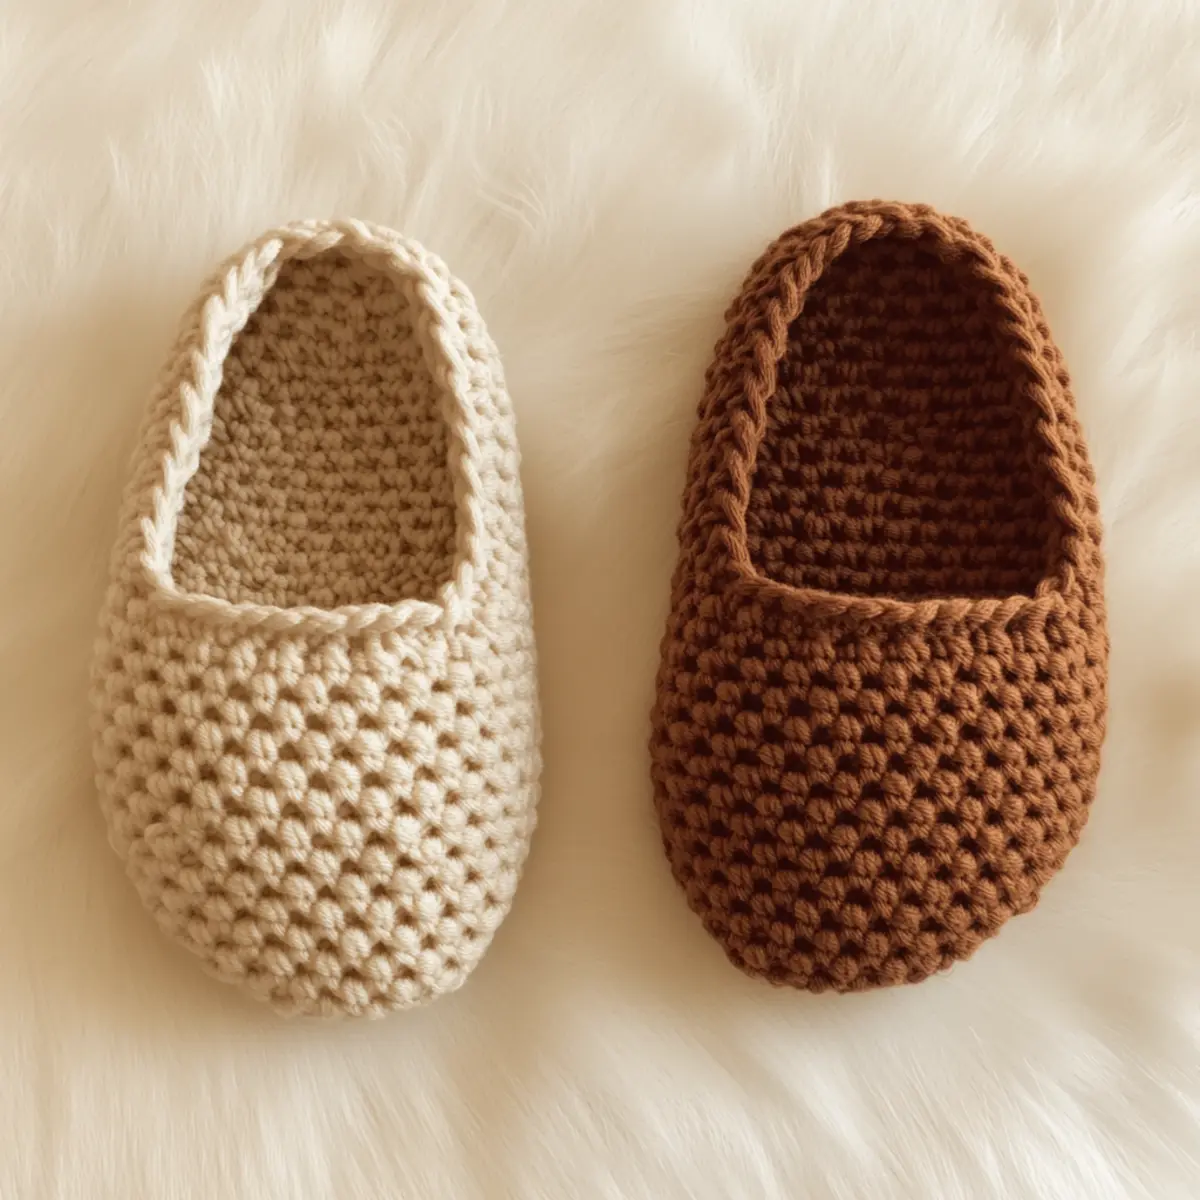
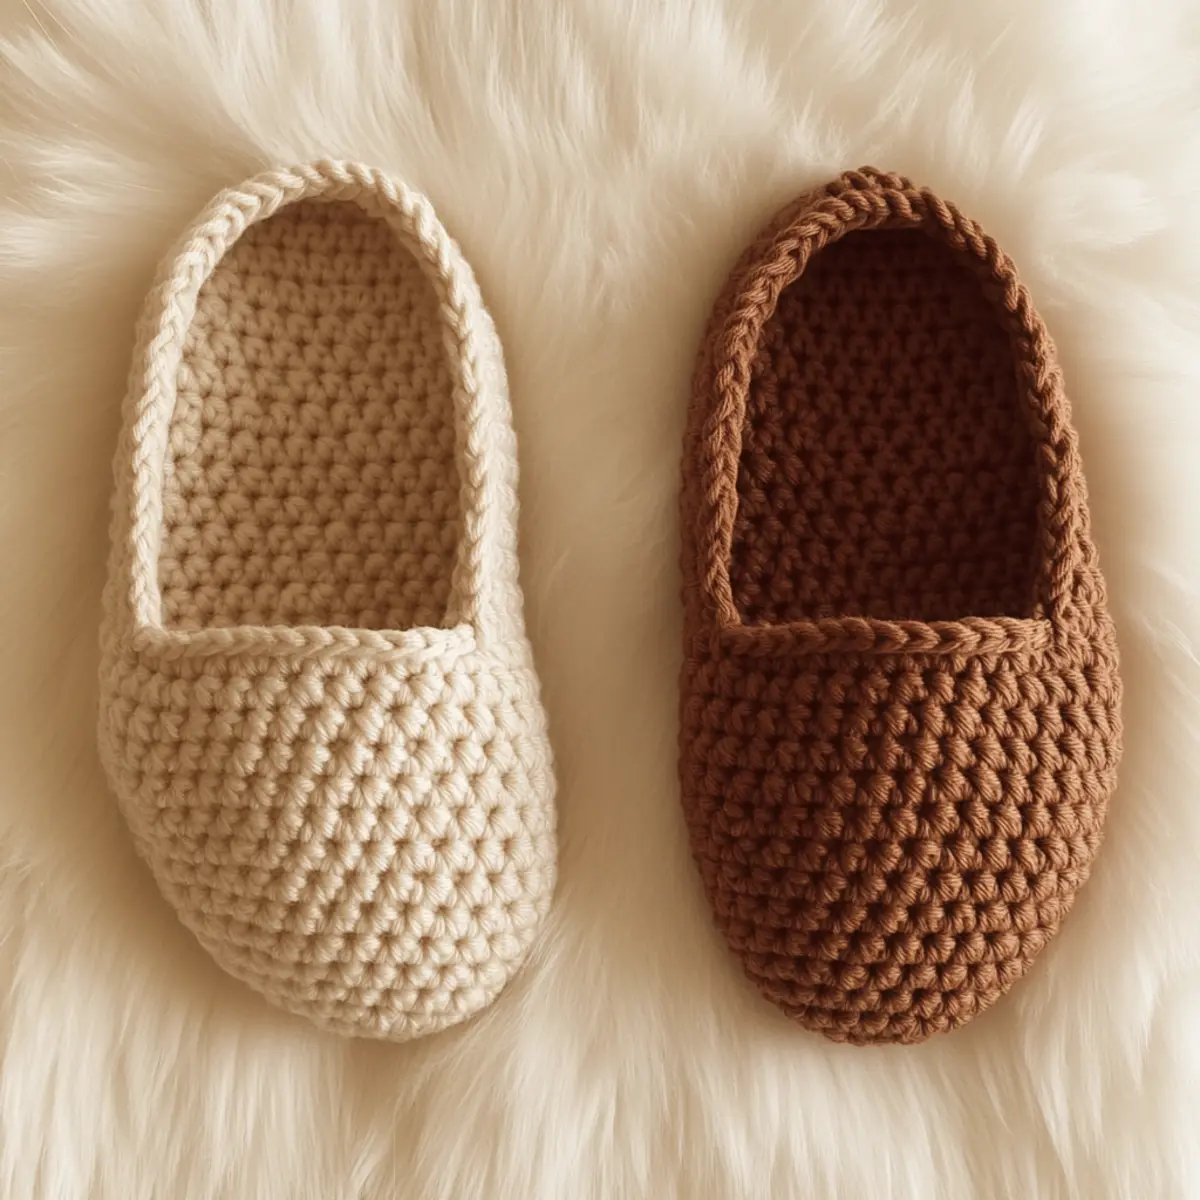
As I sat on my couch, wrapped in a soft blanket, I felt the chill of the floor seep through my feet. That’s when I stumbled upon the idea of crocheting my own cozy slippers, and it clicked! This crochet slippers pattern has become my go-to project for those chilly evenings. Not only are they quick to make, but they’re also the perfect stash-buster, allowing me to use up leftover yarn and create something functional. The textured stitches add a wonderful aesthetic touch, making each pair unique and style-driven. Best of all, this pattern is incredibly beginner-friendly—ideal for anyone keen to dive into crochet or enhance their skills. Trust me, there’s nothing like slipping into a pair of these warm, snug slippers after a long day. So why not give it a shot? You might just find a new favorite project waiting for you!

Crochet Slippers Pattern Materials & Tools

Yarn

  • Worsted weight yarn – 200-300 yards per pair recommended for the cozy crochet slippers pattern.
  • 100% Acrylic or Cotton Blend – Choose a soft yarn for added comfort.

Tools & Notions

  • Crochet hook (5.00 mm or 6.00 mm) – Depending on the size you desire for your slippers.
  • Stitch markers – Helpful for tracking your stitch counts, especially in textured sections.
  • Yarn needle – For weaving in the ends and finishing touches.
  • Optional non-slip soles – To enhance safety and comfort, particularly on slippery floors.

What Makes This Crochet Slippers Pattern Irresistible?

Comfortable: These slippers provide a snug fit that feels like a warm hug for your feet, perfect for lounging around the house. Textured: The unique basketweave stitch not only enhances the aesthetic appeal but also adds durability and sophistication to your project. Stash-friendly: They use just about 200-300 yards of medium weight yarn, which means you can dig through your yarn stash and get creative without needing to buy new supplies! Plus, it allows the flexibility to experiment with different color palettes that match your decor. Moreover, this pattern is easily customizable, so you can embellish it with buttons or pom-poms and even adjust the size for kids or various adult sizes. Ready to take your crochet skills to the next level? Explore the world of crochet with this Crochet Monkey Pattern for more fun projects or pair these slippers with the adorable Crochet Teddy Bear for a gift that will be cherished!

Gauge & Sizing Notes for Crochet Slippers Pattern

It’s essential to check your tension with this crochet slippers pattern to ensure a proper fit. Maintain a 4×4 inch gauge measurement using your chosen stitch—typically, it should be around 15 sc x 18 rows. Adjust your starting chain based on your desired size; for larger slippers, increase your initial chain in multiples of 2 or 3. If your swatch doesn’t reflect the correct dimensions, consider shifting up or down a hook size until the stitch count matches. This ensures your slippers hug your feet just the right way, making it a comfortable accessory for lounging at home. Experimenting with this pattern allows for various sizing adjustments, making it versatile for both kids and adults.

Step-by-Step Pattern for Crochet Slippers Pattern

Row 1: Foundation Chain
Start by chaining 23 for a standard adult size. This foundation chain sets the base of the slipper, so ensure it’s not too tight, allowing for a comfortable fit as you progress.

Row 2: Establish Base
In the second row, work 1 sc into the 2nd chain from the hook, then continue to sc across the chain. This shapes the sole of your slipper, and at the end of the row, you should have 22 sc.

Row 3: Forming the Toe
Begin to round the toe by increasing. In this row, sc into the next 10 stitches, then inc in the next stitch. Repeat this pattern to the end of the row. You should end with 24 stitches here.

Row 4: Continue Toe Shaping
For Row 4, sc into the first 11 stitches, then inc in the next stitch. Repeat this for the remainder of the row to create a fuller toe area. End this row with 26 stitches.

Row 5: Start the Basketweave
Change your stitch to begin the basketweave pattern. Work fpdc around the post of the next stitch and bpdc around the post of the following stitch. Continue alternating for this row until you reach the end, maintaining your stitch count at 26.

Row 6: Build Texture
Keep the basketweave going by repeating the previous stitch pattern, ensuring you keep the fpdc and bpdc alternating throughout. This adds both texture and visual interest to your cozy crochet slippers.

Row 7: Climbing Up
For Row 7, continue the basketweave pattern for one more row. Make sure that it aligns with the previous rows to maintain the integrity of the design. Still at 26 stitches.

Row 8: Forming the Upper
Now start to form the upper by working sc for the next two rows. This solidifies the shape while your slippers start to look more like footwear. Stick to 26 sc.

Row 9: Joining the Sides
Fold the piece to create your slipper shape, but don’t fasten off yet! Instead, join the sides using sl st, ensuring a snug fit around the heel. You’ve now turned your flat piece into a cozy slipper.

Row 10: Adding Slip Stitches
Finish the edges by working sl st around the top opening of your slippers. This gives a clean and polished look, preventing any unraveling, while ensuring comfort on the edges.

Row 11: Weave In Ends
Using your yarn needle, carefully weave in all loose ends from your crochet slippers pattern. This is a very important step to secure any loose yarn, enhancing both durability and finish.

Row 12: Optional Non-Slip Soles
If you desire more grip on your slippers, consider adding optional non-slip soles. Attach these with a simple whip stitch or fabric glue, ensuring safety while lounging in your handmade crochet slippers!

Crochet Slippers Pattern Variations

Customize your pair of cozy crochet slippers to truly make them your own!

  • Plush Yarn: Swap out standard yarn for a plush yarn for an even softer feel that cradles your feet.
  • Bold Colors: Experiment with bright colors or bold patterns to give your slippers a unique style that stands out.
  • Size Adjustments: Alter the number of foundation chains to create child-sized slippers or size up for larger adult versions.
  • Embellishments: Add fun embellishments like pom-poms, buttons, or even decorative flowers to enhance the visual appeal.
  • Different Stitches: Instead of the basketweave, try utilizing a cluster stitch or scalloped edge for a new texture.
  • Color Blocking: Incorporate color blocking by alternating yarn colors mid-project for a contemporary flair. This gives you a chance to explore different combinations, making each pair distinct.
  • Wool Blend: Use a wool blend yarn for increased warmth during winter months while providing breathability. Wool’s natural property will also provide some elasticity, ensuring a snug fit.
  • Lined Slippers: For extra comfort and luxury, line your slippers with a soft fleece or cotton fabric, perfect for added coziness during cold evenings. Try not to skip this step as it improves both warmth and style!

Expert Tips for the Best Crochet Slippers

Track Your Count: Always use stitch markers to keep track of your stitches and avoid losing count, especially in textured sections.

Foundation Chain: Ensure that your foundation chain isn’t too tight; it can affect the fit of your crochet slippers and make them uncomfortable.

Consistent Tension: Keep your tension even throughout the project to ensure a snug fit; varying tension can lead to uneven slippers.

Block After Completion: Consider blocking your finished slippers to give them a polished look, especially if you’ve used natural fibers that can benefit from this technique.

Avoid Twisted Chains: Make sure your foundation chain isn’t twisted before starting; this common mistake can lead to more work later on.

Experiment with Yarn: Don’t hesitate to try different yarn types or fibers for varied textures and comfort in your crochet slippers pattern.

How to Wash and Care for Your Crochet Slippers

Machine Washing: If using synthetic fibers, wash your slippers on a gentle cycle with cold water to prevent agitation and maintain shape.

Hand Washing: For delicate yarns, hand wash your crochet slippers with mild detergent in cool water to avoid damage and shrinking.

Drying: Always lay your slippers flat to dry to prevent distortion; never hang them, as this can lead to misshapen footwear.

Storage: Store your slippers in a cool, dry place, and avoid compression; this helps to keep their shape intact for future use.

Crochet Slippers FAQs

Can I use different yarn types?
Absolutely! You can use any medium weight yarn, but yarns like cotton and acrylics work best for comfort and durability in your crochet slippers pattern.

How can I adjust the size of my slippers?
To adjust sizing, simply modify your foundation chain in multiples of 2 or 3, and gauge your stitches accordingly to ensure a proper fit for both kids and adults.

What should I do if my slippers curl at the edges?
Curling edges can occur if your tension is too tight. Try increasing your hook size or using a looser tension to combat this issue in your crochet slippers pattern.

Which hook size should I use?
Refer to your yarn label, usually a 5.00 mm (H/8) or 6.00 mm (J/10) hook is recommended. Always check a gauge swatch to ensure a proper fit!

Can I add embellishments to my slippers?
Absolutely! Feel free to customize with buttons or pom-poms, adding a personal touch to your crochet slippers and showcasing your creativity.

What should I do if I’ve dropped a stitch?
Don’t panic! If you drop a stitch, you can easily recover it by carefully re-pulling your yarn and using a crochet hook to guide it back through the correct loops. Ensure you check your stitch count afterwards.

Filed Under: Accessories

Charming Crochet Chameleon: Whimsical and Colorful Fun

August 17, 2026 by Publisher Leave a Comment

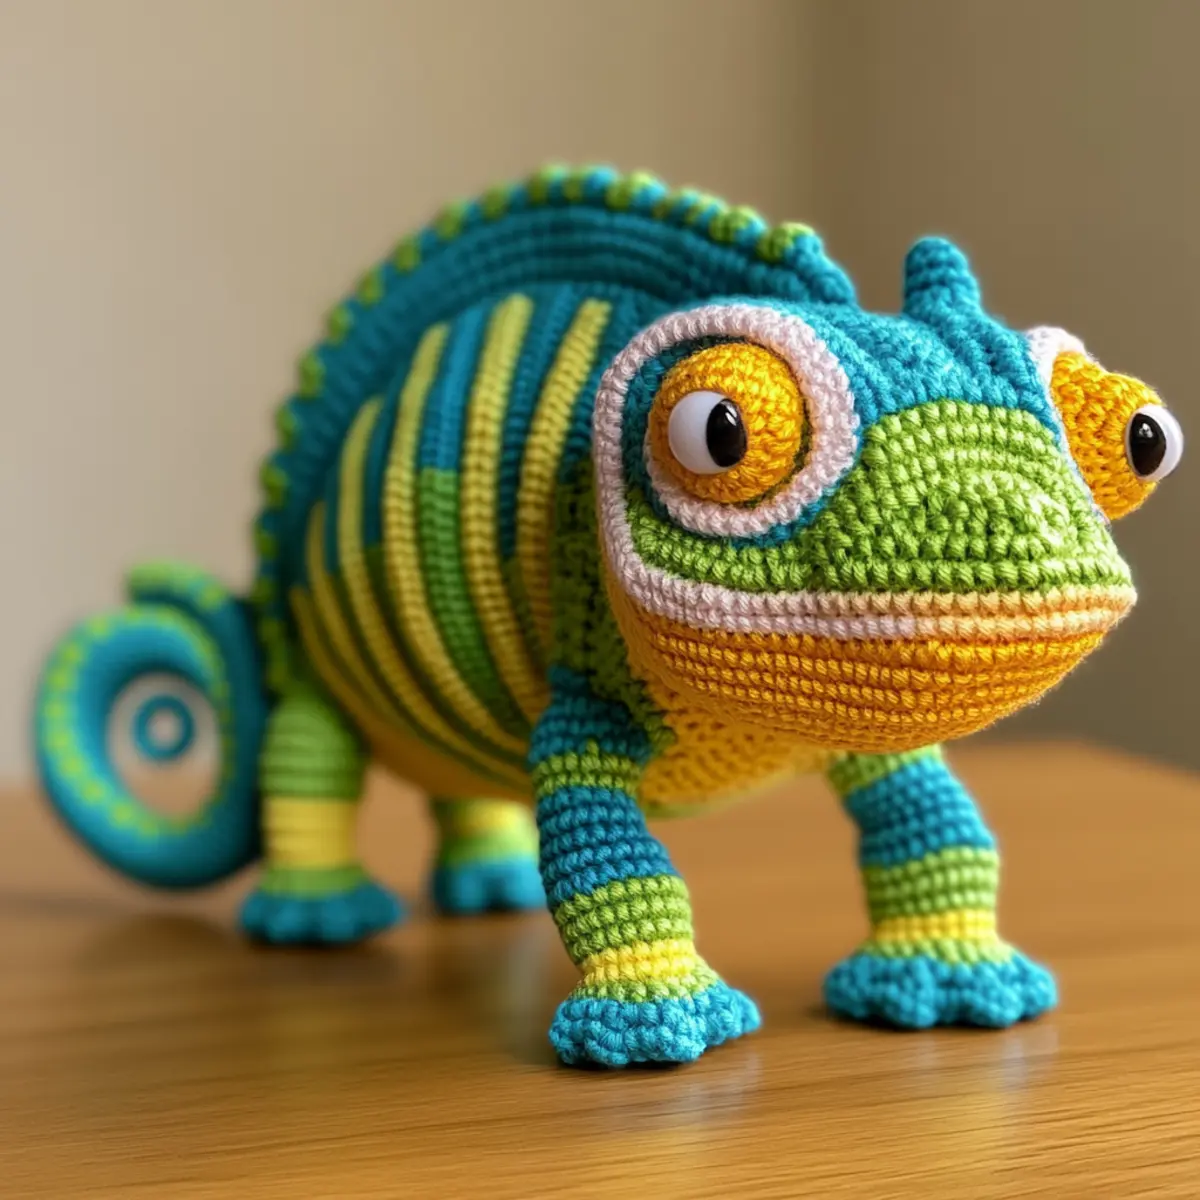
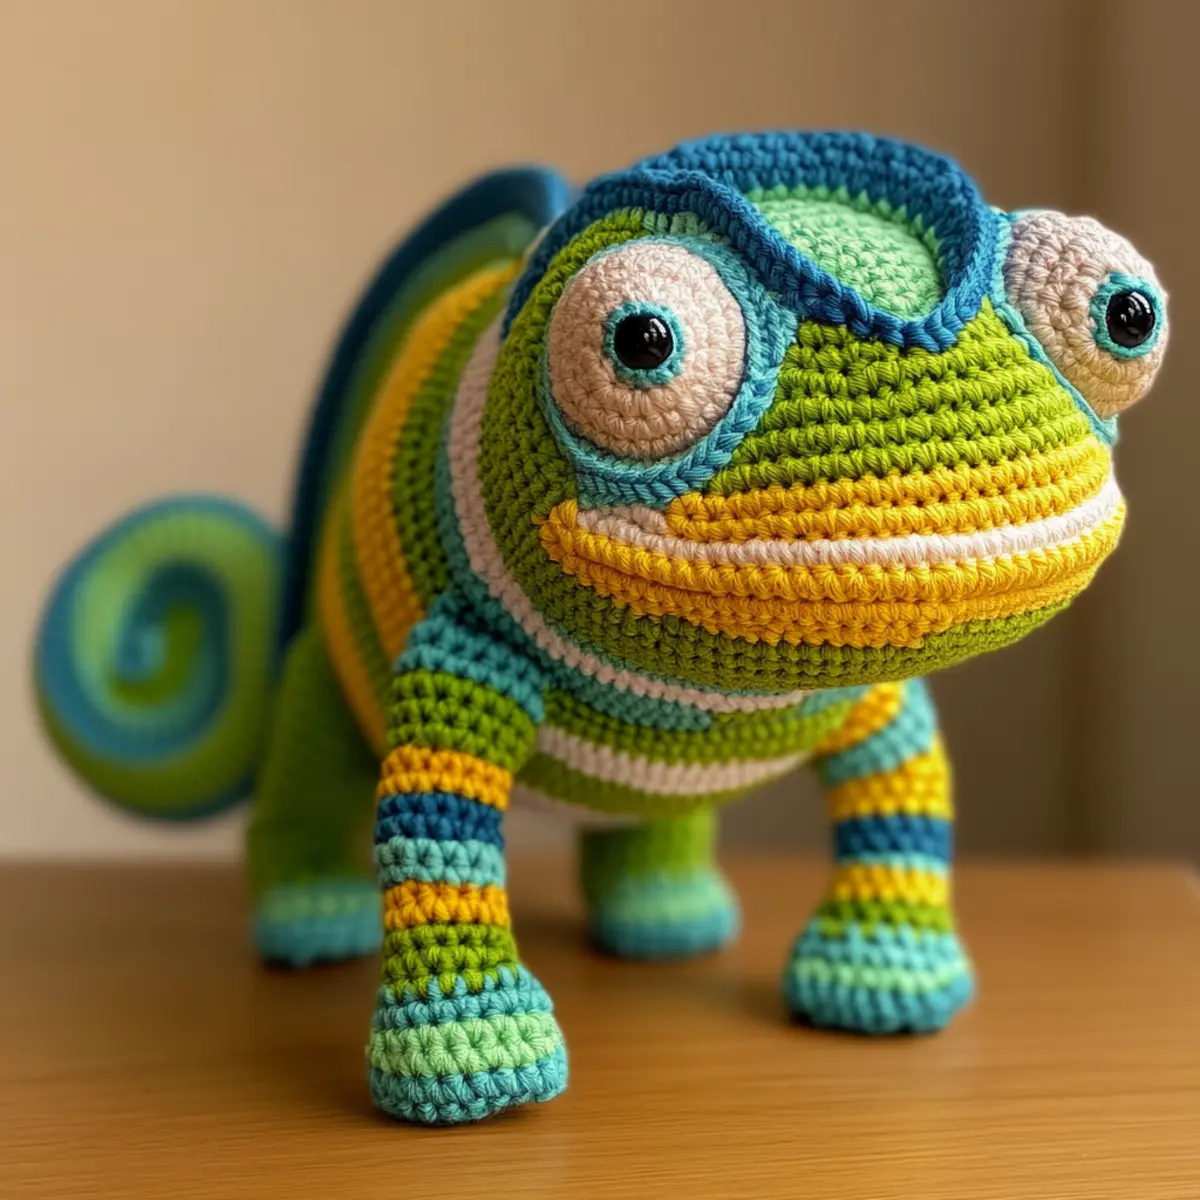
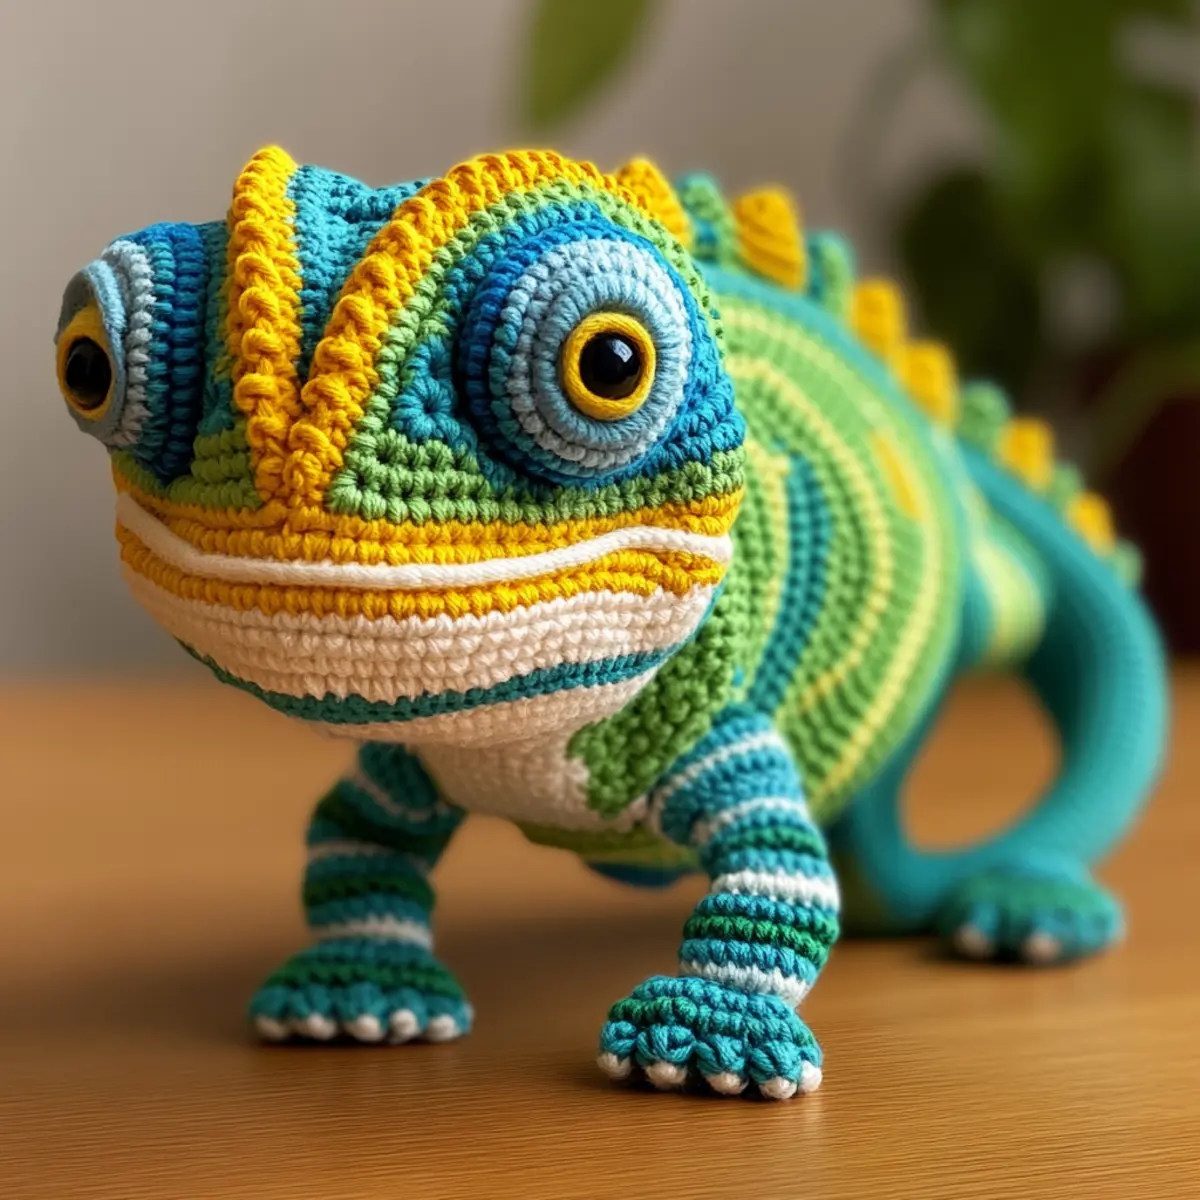
There’s something truly magical about creating your own plush toys, and my latest project, the crochet chameleon, brings that magic right into your hands. This vibrant little creature is not only a delightful stash-buster but also a fantastic beginner-friendly project that can easily elevate your crocheting skills. With its playful design and charming features, this chameleon will inspire your creativity and give you a sense of accomplishment as you bring it to life. Plus, it’s ready to be transformed into your very own unique color palette: whether you’re in the mood for bright, whimsical hues or perhaps something a bit more subtle, the possibilities are endless. As you run your fingers over the soft, cozy yarn, the experience is both fulfilling and relaxing. The best part? You’ll have a wonderful new friend to show off at the end of your crafting journey. I can’t wait to tell you more about how to make this adorable crochet chameleon and hope you’re just as excited as I am to dive into this vibrant world of color and creativity.

Crochet Chameleon Materials & Tools

Yarn

  • Bulky Chenille Yarn – Approximately 150-200 yards total in assorted colors for your crochet chameleon, ensuring a soft and squishy finish.

Tools & Notions

  • 4 mm Hook – Use a G hook for maintaining the correct tension and shape in your project.
  • Safety Eyes (12 mm) – Gives your chameleon a playful and friendly face.
  • Polyester Stuffing – Provides that plush feel, making your chameleon perfect for cuddles.
  • Yarn Needle – Essential for weaving in ends and assembling your crochet chameleon.
  • Scissors – Keep them handy for cutting yarn at the end of your project.

Why You’ll Love This Pattern

Simplicity is at the heart of this crochet chameleon pattern; each stitch is straightforward, making it easy to follow along even for beginners. Textured chenille yarn enhances the cuddly appeal of the toy, offering a soft touch that’s perfect for little hands or as a decorative piece on your shelf. What makes this project even more satisfying is its stash-friendliness; you can use leftover yarn scraps, creating a one-of-a-kind look while reducing waste. Ready to explore more? The Crochet Monkey Pattern also offers a playful project that complements your chameleon. Customizable color options allow you to experiment with shades that suit your style, and you can even time-save by working in rounds, speeding up your crocheting experience dramatically. Lastly, its aesthetic appeal can’t be understated—create a whimsical companion that adds joy and personality to any space.

Gauge & Sizing Notes for Crochet Chameleon

Checking your tension is essential for the crochet chameleon to ensure it maintains its adorable and toy-like shape. For this project, a standard gauge measurement of 4×4 inches (10×10 cm) should yield approximately 10 sc across and 10 rows high in your chosen bulky chenille yarn. If your swatch does not match, consider adjusting your hook size or modifying your yarn tension before committing to the entire chameleon. If you want to resize your toy, increase the starting chain for the body or add an additional row of sc. Keep in mind that the finished crochet chameleon will measure around 8 inches tall, with a body length of about 10 inches, and a tail length of 6 inches when fully curled. Don’t hesitate to customize by experimenting with different yarn textures or even embellishments to make the toy uniquely yours!

Step-by-Step Pattern for Crochet Chameleon

Row 1: Start the body Begin with a magic circle, then work 6 sc into the circle. Pull tight to close the circle, ensuring there’s no hole. This forms the base for the crochet chameleon. (6)

Row 2: Increase body size Work 2 sc in each st around to create a wider body base, reflecting the fullness of your chameleon. Count your stitches to maintain consistency and proper shape. (12)

Row 3: Shape the body Continue with 1 sc in the next st, inc in the next st. Repeat this pattern around for a slight increase, building the plush body for your crochet chameleon. (18)

Row 4: Further increases Work 2 sc in the next st followed by 1 sc in the next 2 sts; repeat till the end of the round, enhancing the body size even more. Your toy is starting to take on a charming form! (24)

Row 5: Accentuate the body Repeat the previous step once more, increasing your stitch count and creating a rounder shape for better support. It’s important to maintain good tension to keep the stuffing hidden. (30)

Row 6: Preparing for the head Sc around for 2 rows, focusing on keeping your work tight and uniform. This section is crucial for transitioning smoothly from the body into the head of the crochet chameleon. (30)

Row 7: Round the head Switch to the head formation by working 1 sc in the next 3, inc. Go around, ensuring your chameleon has a fuller head to showcase its adorable features. (36)

Row 8: Final head shape Now, do 1 sc in the next 4, inc. This gradual increase will provide the extra room needed to attach the facial details for your crochet chameleon later on. (42)

Row 9: Attach the eyes Insert safety eyes (12 mm) between Rows 7 and 8, about 6 stitches apart. Be sure they are secure for safety, creating the playful expression your chameleon will have!

Row 10: Form the legs Switch to leg creation: ch 2 for your leg and work sc in each st around. After reaching the end, use a slip stitch to secure your leg to the body. Repeat for all 4 legs, ensuring symmetrical attachment. (total of 4 legs)

Row 11: Craft the tail Ch 10 and then work 1 hdc in the second ch from the hook, followed by 1 hdc in each ch till you reach the end. The tail should have a natural curl, so you can adjust the tension as needed here. (tail length = 6 inches)

Row 12: Final assembly Secure the head onto the body, attach arms and legs, and stitch the tail into place. Use yarn needle to weave in any remaining ends and tweak the features like the mouth and nostrils for added charm. Enjoy your completed crochet chameleon!

Expert Tips for Crochet Chameleon

Stitch Counting: Always count your stitches at the end of each round to maintain the correct shape of your crochet chameleon. Consistency is key!

Foundation Chain: Avoid twisting your foundation chain; it’s essential for a clean start. Lay it flat before joining to ensure it’s even.

Color Changes: If changing colors, learn the right methods to avoid visible yarn tails. Try using a magic knot for neat transitions.

Tension Control: Keep your tension consistent throughout the project. A tighter gauge will help maintain the shape, preventing stuffing from showing through.

Use Safety Eyes Properly: When attaching safety eyes, double-check their placement. Secure them between the right rows for an adorable chameleon face.

Finishing Touches: After assembly, embroider the mouth and nostrils to give your crochet chameleon the perfect whimsical expression. Don’t skip this step for optimum charm.

crochet chameleon variations

Looking to add a personal touch to your crochet chameleon? Explore various ways to customize this delightful project!

  • Color Swaps: Choose a more subdued palette with shades of gray and white for a realistic chameleon look. Perfect for mature decor themes.
  • Yarn Textures: Experiment with cotton or wool yarn; each fiber adds unique textures and feels. Your chameleon will have a different character depending on your choice!
  • Size Adjustments: To make a giant chameleon, simply use a thicker yarn and the corresponding larger hook. Imagine a cuddly 18-inch friend!
  • Embellishments: Add beads or sequins for a delightful sparkle effect. It will enhance your chameleon’s playful personality and catch the eye of admirers.
  • Fantasy Creatures: Instead of a chameleon, transform the pattern into other creatures like a whimsical unicorn or a friendly dragon! Simply adjust the shape and add horns or wings for a unique twist.

Crafting your own crochet chameleon opens a world of possibilities! The freedom to customize enhances your crafting experience while allowing you to showcase your creativity.

  • Mixed Media: Incorporate elements like fabric scraps or faux fur for added dimension. This can generate a stunning mixed-media amigurumi that attracts attention, adorning any space as a lovably quirky feature.
  • Personalized Designs: Add initials or names using embroidery; perfect for a cherished gift! Personalizing enhances its sentimental value, making it a perfect surprise for loved ones. Don’t forget to revisit Crochet Monkey Pattern for further inspiration!

How to Wash and Care for Your Crochet Chameleon

Machine Washing: If machine washing, use a gentle cycle with cold water. Place the chameleon in a pillowcase for extra protection.

Hand Washing: For best results, hand wash your crochet chameleon in cold water with mild detergent. Gently squeeze and avoid wringing out.

Drying: Lay your chameleon flat to dry on a clean towel. Avoid hanging it up as this can distort its adorable shapes and features.

Storage: Keep your crochet chameleon in a dry, cool space. Avoid direct sunlight to maintain vibrant colors and prevent fading.

Crochet Chameleon FAQs

Can I use different yarn types for this project?
Absolutely! While bulky chenille yarn is recommended for softness, you can experiment with cotton or wool for varied textures. Just adjust your hook size accordingly.

What if my chameleon has curling edges?
Don’t panic! Curling is often a sign of inconsistent tension. Check your gauge and ensure you’re maintaining even tension throughout your project. Also, a gentle steam block can help reshape if needed.

How do I adjust the size of my crochet chameleon?
You can increase the starting chain for the body or use a thicker yarn with a larger hook, allowing you to create a bigger chameleon easily. Just be cautious with the stitch count to maintain proportion.

What size hook should I use?
A 4 mm (G) hook is recommended for this pattern. However, if your gauge doesn’t match the specified tension, adjust your hook size to ensure the body retains its lovely shape.

How to fix dropped stitches?
Don’t worry! If you notice a dropped stitch, you can use your crochet hook to pull the yarn back through and secure it in place. Just be careful to maintain your tension afterward.

Can I add embellishments to my crochet chameleon?
Of course! Adding beads or sequins can give your crochet chameleon a fun flair while enhancing its playful nature. Just ensure any additions are securely attached for safety!

Filed Under: Amigurumi

Cozy Crochet Duck Pattern for Beginners: Playful & Cute

August 17, 2026 by Publisher Leave a Comment

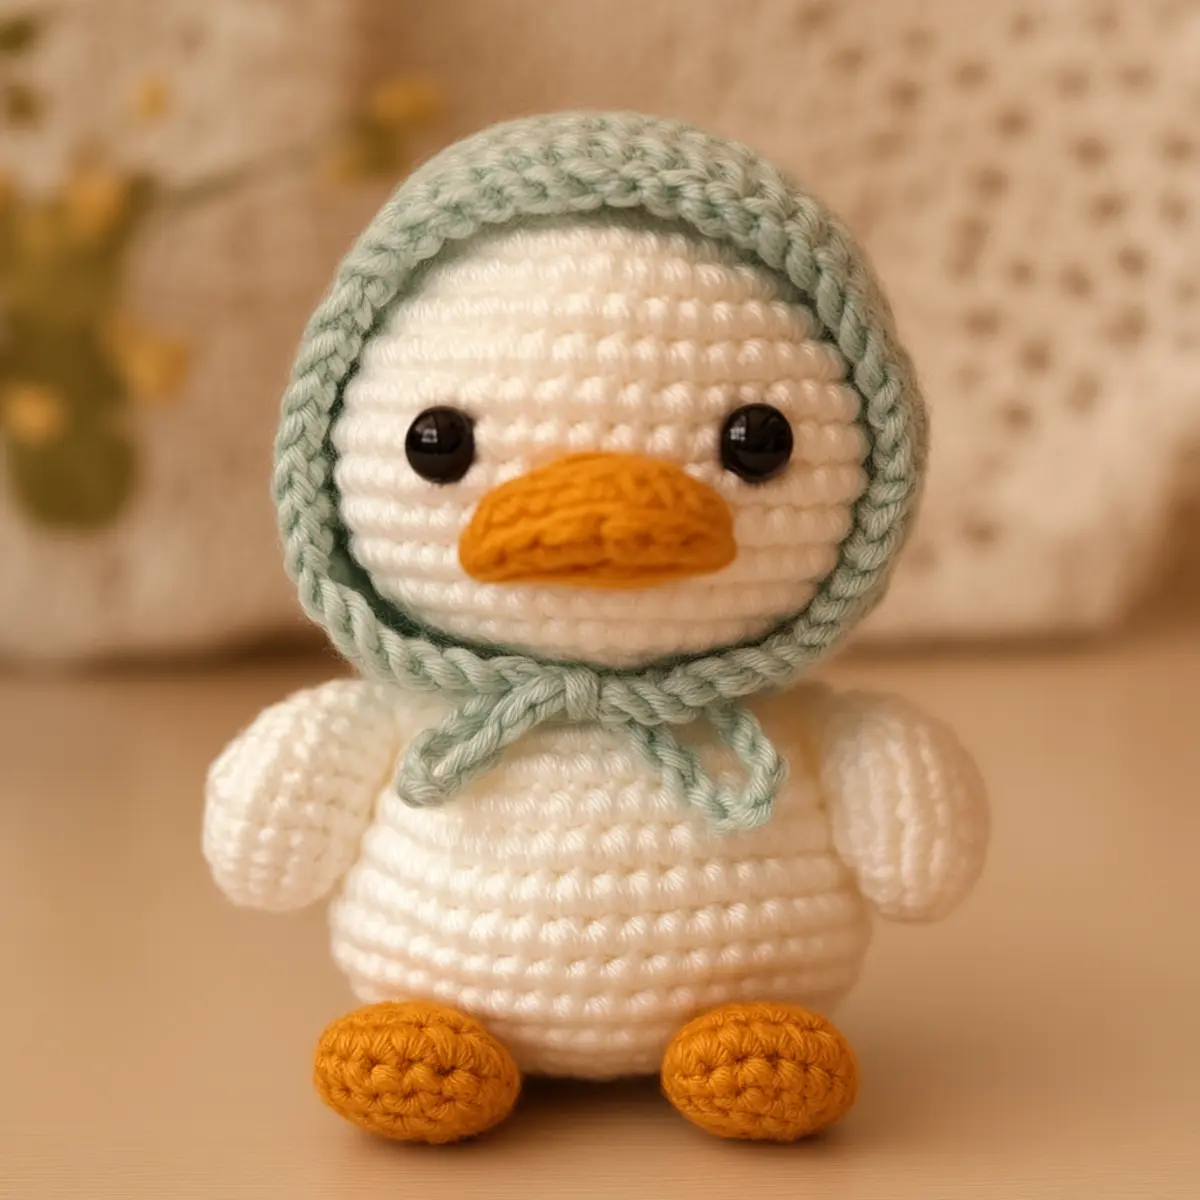
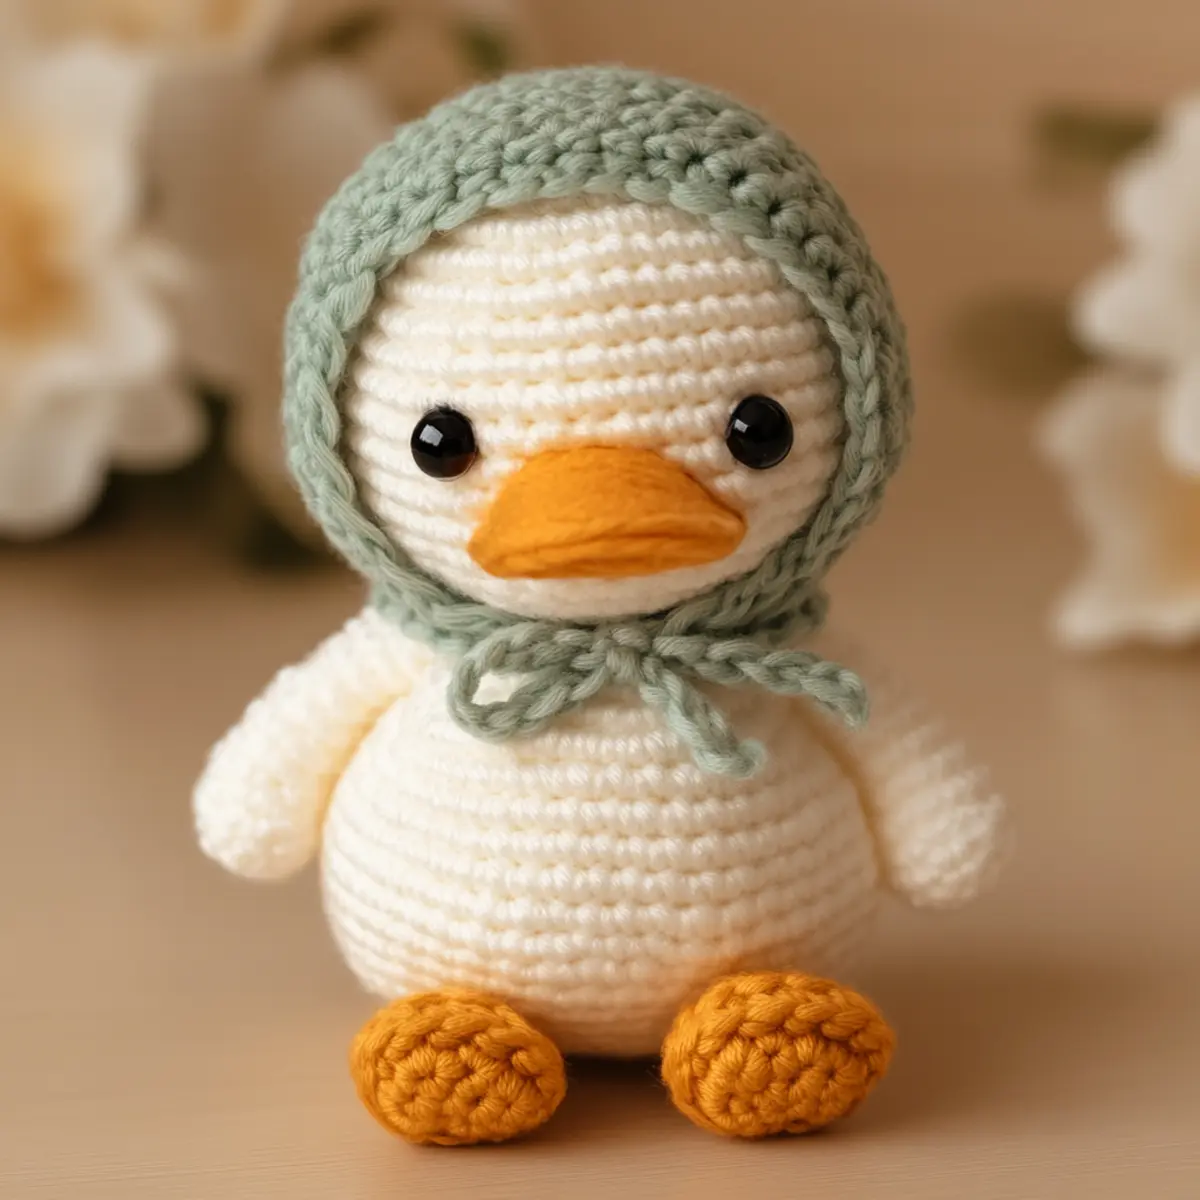
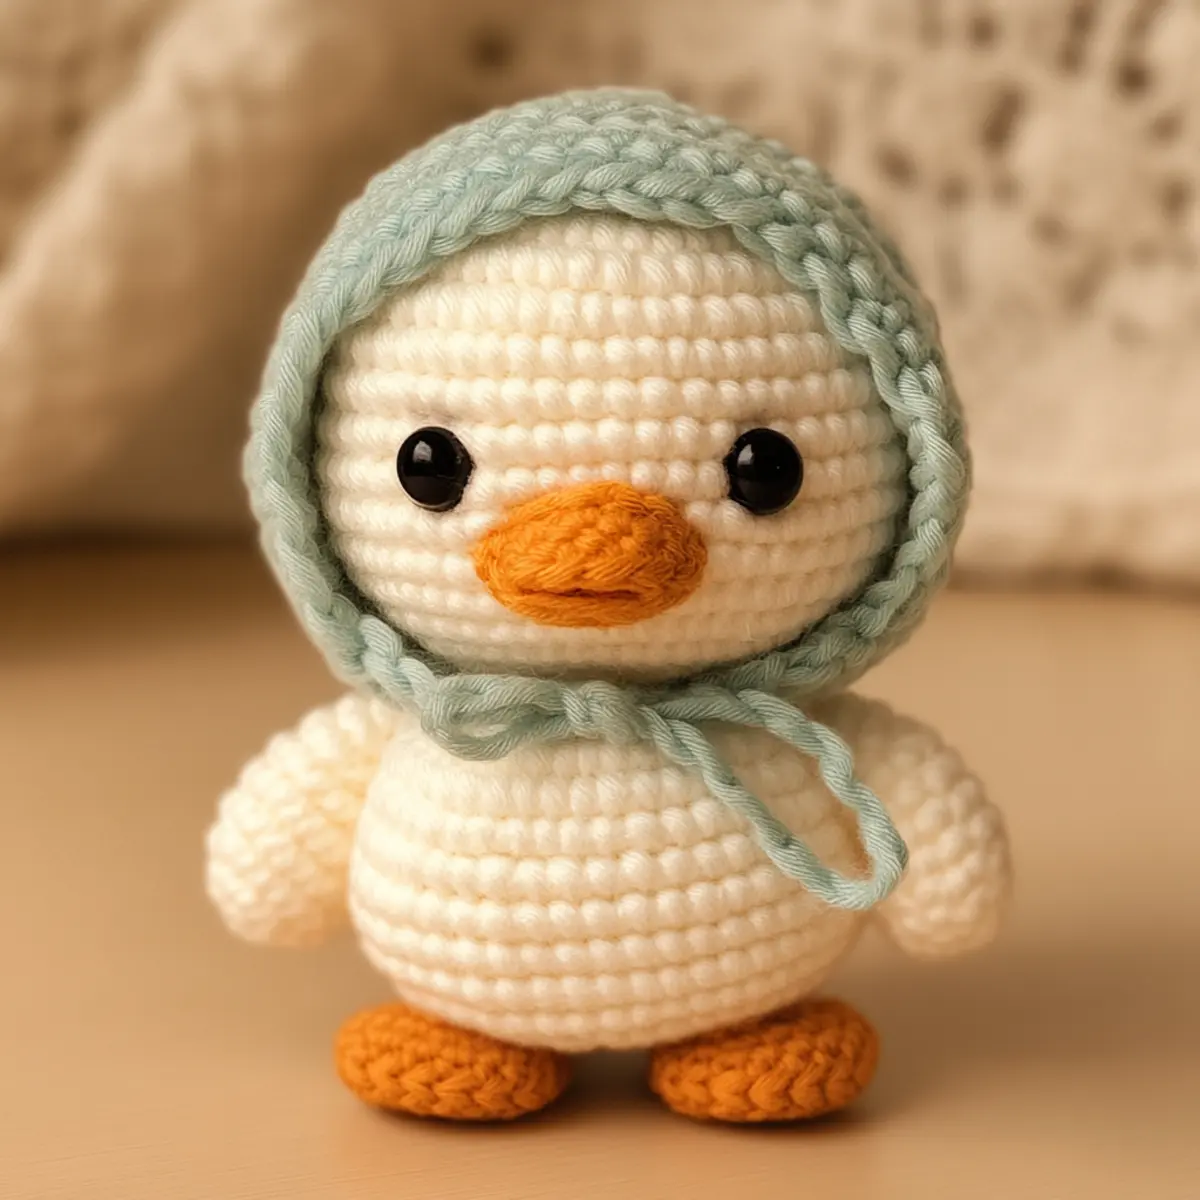
Bringing a whimsical creature into your life can be incredibly fulfilling, especially when that creature is as enchanting as an adorable crochet duck. This crochet duck pattern is more than just a lovely decorative piece; it’s a delightful project that showcases the joy of crafting while being beginner-friendly. You’ll quickly fall in love with its plush texture and bright colors. The best part? This adorable duck emerges from your yarn stash with minimal effort and a quick assembly process, making it a perfect stash-buster and a cozy addition to any decor or gifts for loved ones. Whether you’re a seasoned crocheter or taking your first stitches, you’ll find this project rewards you with a sense of accomplishment and pride. So, are you ready to dive into the world of crochet and create something simply delightful?

Crochet Duck Pattern Materials & Tools

Yarn

  • Medium to bulky weight plush yarn – Approx. 100-150 yards total, perfect for achieving that soft, snuggly feel.
  • Acrylic or polyester blend yarn – Offers durability while maintaining the fuzzy texture essential for your crochet duck pattern.

Tools & Notions

  • 5.0 mm hook (H/8) – Ideal for plush yarn, helping create a tight, stuffable fabric.
  • Safety eyes – For a charming touch and personality, these eyes make the duck come alive.
  • Yarn needle – Necessary for sewing parts together; choose a sturdy one for best results.
  • Stitch markers – Helpful for keeping track of your rows, especially for beginners eager to monitor their progress.

Why You’ll Love This Pattern

Simplicity makes this pattern accessible for novices and seasoned crafters alike. The straightforward techniques guide you through each stage of the process, ensuring a stress-free crafting experience. Plush textures bring comfort and charm, resulting in a delightful plush duck that you’ll want to snuggle with. Also, it’s a stash-friendly design; perfect for using up leftover yarn from past projects. You can even customize your duck’s coloring to match your home’s aesthetics or personal tastes. Opt for cheerful pastels or vibrant tones to make it truly unique. And what’s more, it’s a time-saving adventure—ideal for those who love completing projects in a weekend! If you’d like to explore more fun crochet toys, check out our Crochet Monkey Pattern or create something classic like our Crochet Teddy Bear to expand your crafting skills even further.

Gauge & Sizing Notes for Crochet Duck Pattern

To ensure your crochet duck pattern turns out perfect, checking your tension is key. Aim for a gauge of 4×4 inches (10×10 cm) with 18 sc and 22 rows to get the right size and maintain the plush quality of the doll. When creating this project, you may find altering your starting chain or rounds is necessary for your sizing needs. If your tension differs from the standard, don’t worry! Adjust by trying a larger hook or adding/subtracting rounds to achieve your desired dimensions. The finished crochet duck stands approximately 7-8 inches tall, making it an ideal addition to your decor or a wonderful gift. Embrace your creativity with color choices for the duck, and don’t hesitate to consider thicker yarn or different stitch techniques to modify the final look. The crochet duck pattern is versatile, allowing for unique expressions while maintaining its delightful character.

Step-by-Step Pattern for Crochet Duck Pattern

Row 1: Start with a Magic Ring Begin by making a magic ring, allowing the yarn to create a small loop. This will be the foundation for your duck’s head, ensuring a tight start. (1 st.)

Row 2: Forming the Head Ch 1, then work 6 sc into the ring to begin shaping the head. Pull the tail to close the ring tight; this will create a snug base for your plush duck. (6 sc)

Row 3: Increase the Round Ch 1, inc in each st around. This step will help round out the duck’s head, making it nice and plump as you crochet. (12 sc)

Row 4: Continue Increasing Ch 1, 1 sc, inc across the row; repeat until you reach the end. This will create a beautiful shape while adding size to your head. (18 st)

Row 5: Build Up Height Ch 1, work 1 sc in each st around. Keep your tension consistent to maintain the plush look, allowing your crochet duck to take form. (18 st)

Row 6: Inserting Safety Eyes Ch 1, work 1 sc in each st. Before closing the round, position safety eyes about 6 stitches apart to create the sparkle in your duck’s personality, then secure tightly. (18 st)

Row 7: Shaping the Beak Ch 1, turn your piece, and work in rows: 6 ch, 1 sc in 2nd ch from hook, 1 sc in next 4 ch. Sew the completed beak attach with a long tail on the head; ensure it’s secure. (5 sc)

Row 8: Creating the Body Start another magic ring, ch 1, and crochet 6 sc into the ring for the body base. This will cradle the duck’s underbelly, so make it sturdy yet soft. (6 st)

Row 9: Increase the Body Ch 1, inc in each st around to begin forming the duck’s full body. The increase rounds ensure a plushy feel that is both cuddly and adorable. (12 st)

Row 10: Round Out the Shape Ch 1, 1 sc, inc around for a total of 18 stitches. This ensures the body is eagerly awaiting its assembly with the head. (18 st)

Row 11: Completing the Body Ch 1, work 1 sc in each st around, creating layers and height until the body reaches your desired size. This will guide the look and balance of the duck. (18 st)

Row 12: Crafting the Feet Create two separate pieces; start with a magic ring, ch 1, and 6 sc to shape the foot. This will add stability and character to your crochet duck. (6 sc)

Row 13: Provide Form to Feet Ch 1, increase in each st around, then create a row of sc to make the feet flatter and secure. (12 st)

Row 14: Attaching Parts Together Once the body and feet are completed, sew them together with a yarn needle. Secure strongly, making sure your duck will sit nicely. This will finalize your adorable crochet duck’s shape and beauty.

Row 15: Optional Bonnet If desired, start a magic ring, inc as needed to fit the duck’s head shape, adding personalized touches like flowers or ribbons. The bonnet will enhance its charming appearance. (Adjust to fit.)

Row 16: Complete and Enjoy Once all parts are sewn and attached, you can block gently if desired. Celebrate your hard work and admire your finished adorable crochet duck that stands ready for warmth and joy. Perfect for gifts or decor!

Crochet Duck Pattern Variations

Feel free to bring your unique twist to this crochet duck pattern!

  • Pastel Colors: Try using soft pastel shades like pinks and greens to create an adorable, dreamy effect.
  • Cotton Yarn: Swap plush yarn for cotton if you desire a smooth, breathable finish that’s great for warm weather.
  • Personalized Bonnet: Create a charming bonnet for your duck with floral embellishments or ribbons for a personalized touch.
  • Oversized Duck: Utilize a larger hook and thicker yarn, turning this pattern into a sweet oversized plushie for display.
  • Safety Eyes Alternatives: If you prefer a softer look, consider embroidered eyes for a more whimsical finish.
  • Color-Blocking: Experiment with color-blocking techniques on different parts of the duck; this adds visual interest and style.
  • Textured Variation: Combine different textured yarns, like mixing soft velvet with fuzzy yarn to create a more dynamic look.

For an entire colorful collection, consider crafting this crochet duck in various colors and sizes to elevate your decor alongside other playful creations like a Crochet Monkey Pattern or a charming Crochet Teddy Bear. You can also personalize your duck to represent special occasions or favorite themes, allowing you to express creativity uniquely.

Expert Tips for the Best Crochet Duck Pattern

  • Consistent Tension: Maintain even tension to prevent gaps, especially in tightly stuffed areas. This ensures your crochet duck maintains a solid shape and plush quality.

  • Stitch Counting: Regularly count your stitches to keep track of increases and decreases. Using stitch markers can be a lifesaver for beginners.

  • Magic Ring Mastery: Practice your magic ring technique; it helps create a tight starting point that keeps your stitches secure and snug, essential for shaping the head.

  • Safety Eye Placement: Position safety eyes before closing the round for the head to ensure they are evenly spaced and enhance your duck’s personality.

  • Blocking Necessity: Consider gently blocking the pieces after assembly to help them maintain their shape and ensure a polished finish on your crochet duck.

How to Wash and Care for Your Crochet Duck

  • Machine Washing: Use a gentle cycle with cold water to keep your crochet duck looking fresh without risking damage to the plush yarn.

  • Hand Washing: If you prefer, hand wash with mild detergent, ensuring all soap is rinsed away. Avoid wringing which can distort the shape.

  • Drying: Lay your crochet duck flat on a clean towel to dry; this helps to maintain its structure and plush appearance. Avoid hanging, as it can stretch.

  • Storage: Store your duck in a cool, dry place away from direct sunlight to preserve the color and texture of your yarn.

Crochet Duck FAQs

Can I use different yarn types for this project?
Absolutely! You can substitute with cotton yarn for a smoother finish or experiment with different fibers to create unique textures.

What size crochet hook should I use?
A 5.0 mm hook (H/8) is ideal for a close-knit fabric using plush yarn, ensuring proper stuffing and an appealing finish.

How can I adjust the size of the crochet duck?
If you wish to make a larger duck, opt for thicker yarn or a larger hook. Alternatively, increase or decrease rounds based on your gauge for desired dimensions.

What should I do if my stitches start curling?
Don’t panic! Curling can occur due to uneven tension or incorrect stitch counts. Adjust your tension and check stitch counts to achieve a flat finish.

How do I fix dropped stitches?
If you notice a dropped stitch, gently pull the neighboring stitches close to it, then use a yarn needle to secure the stitch back into place. This keeps your plush duck looking flawless.

Can I add embellishments to the crochet duck?
Certainly! Adding small flowers or ribbons to the bonnet provides a delightful personalized touch, making your crochet duck even more charming.

Filed Under: Amigurumi

Charming Crochet Bee Pattern for Aesthetic Amigurumi Fun

August 17, 2026 by Publisher Leave a Comment

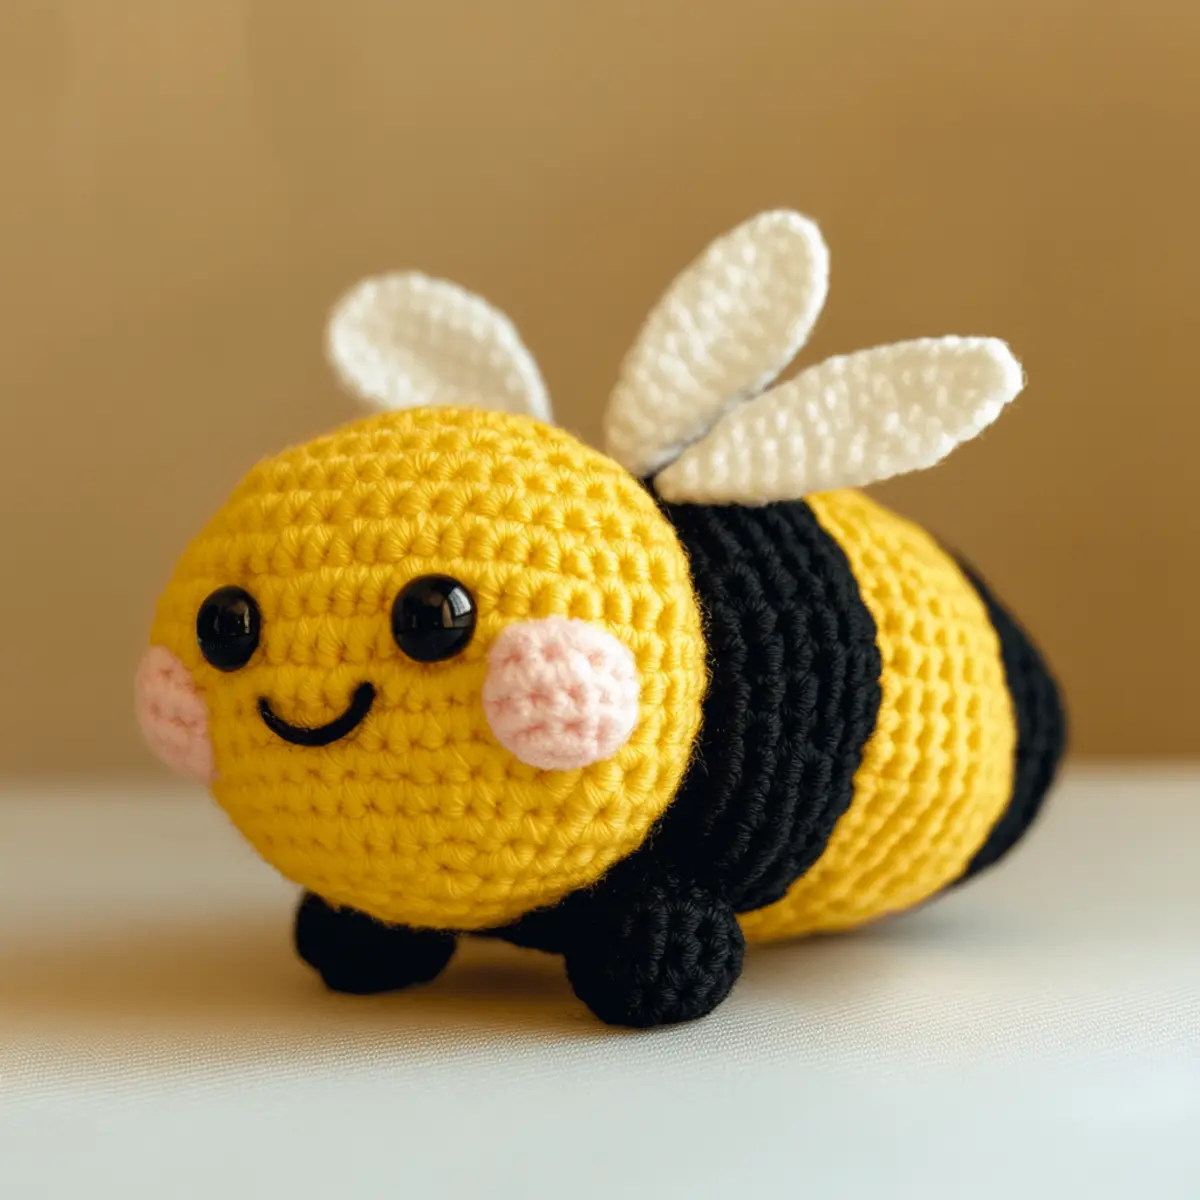
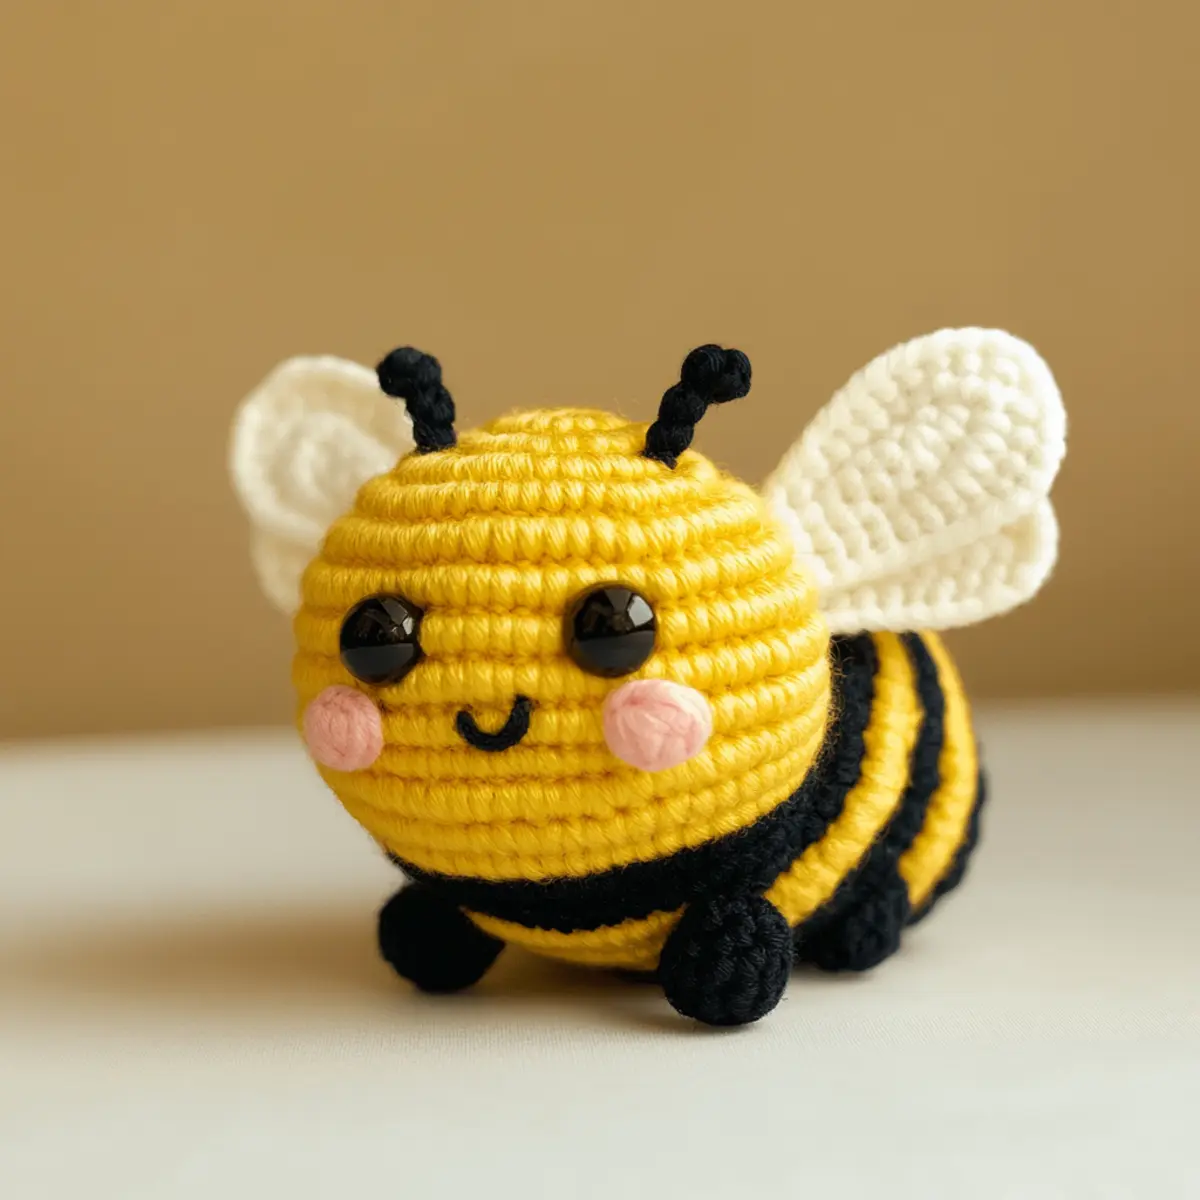
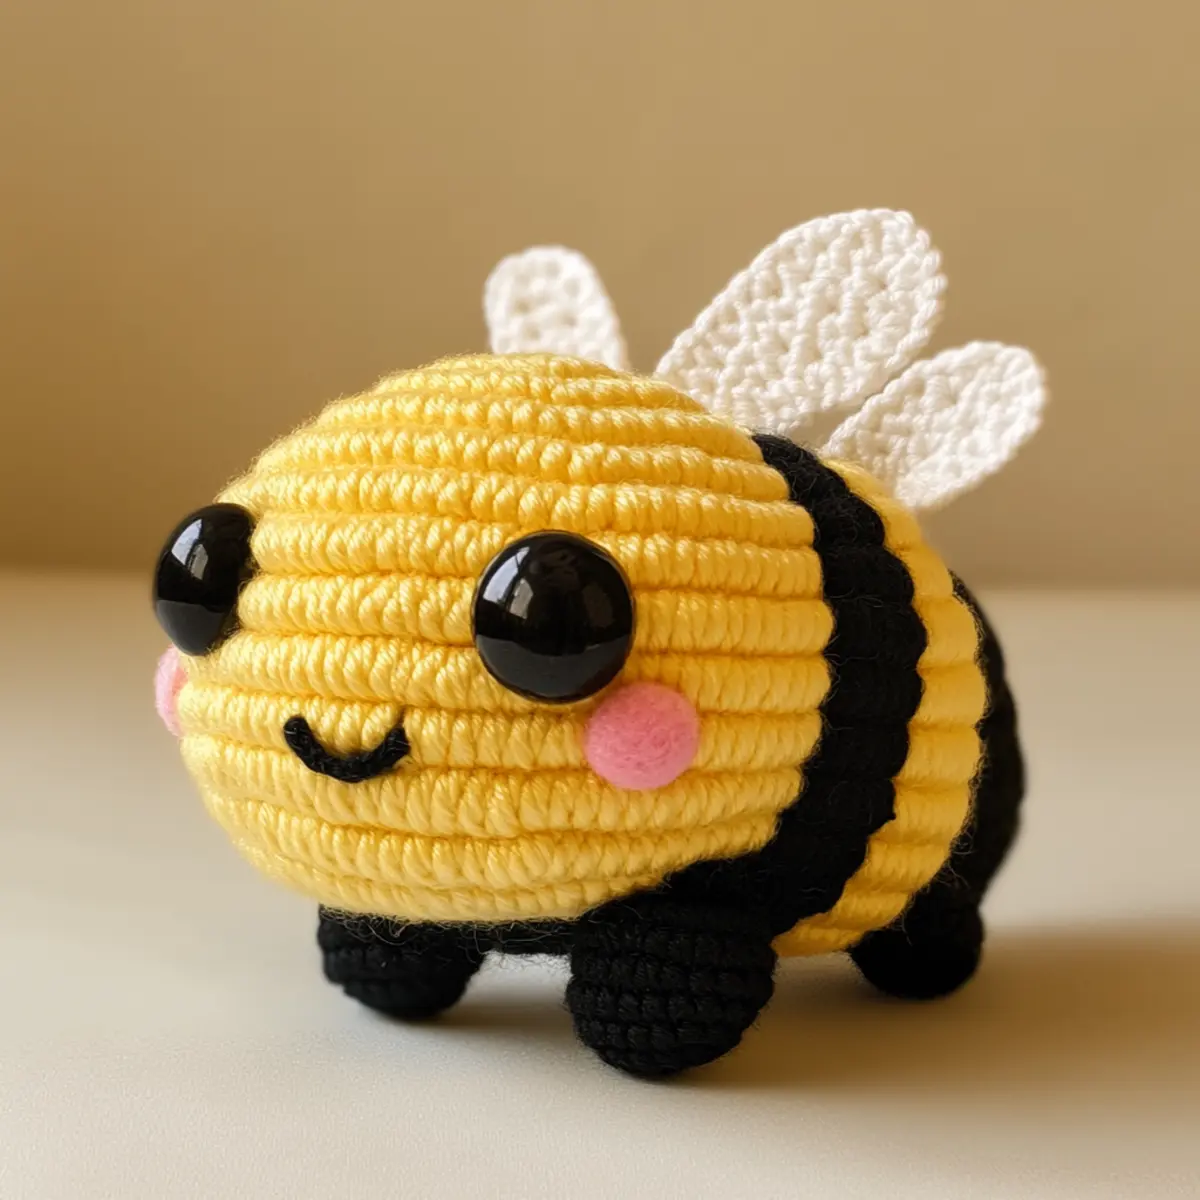
There’s something captivating about bringing a crochet project to life, especially when it comes to creating something as delightful as a buzzing bee. This Charming Crochet Bee Pattern stands out not only for its cute aesthetics, but it’s also a fantastic stash-buster, making it easy to use up leftover yarn from previous projects. As you dive into this colorful world, you’ll discover the joy of personalizing your bee with vibrant colors and textures just perfect to match your style. Making it beginner-friendly ensures that crafters of all skill levels can join in the fun. The process of learning while creating a plush toy that can brighten up your living space or serve as a thoughtful gift adds layers of satisfaction to your crafting journey. Plus, you’ll relish the feeling of producing a cozy, whimsical addition to your home. Every stitch, every color choice, offers endless possibilities. So, are you ready to embark on this delightful crochet adventure?

Crochet Bee Pattern Materials & Tools

Yarn

  • Plush or Chenille Yarn – Opt for a soft yarn to create a cuddly texture; approximately 100-150 yards needed for the entire crochet bee pattern.
  • Light Yellow Yarn – This will form the head and body of your bee; ensure it’s a cozy shade for an inviting look.
  • Black Yarn – Perfect for the adorable stripes that define your bee’s personality.
  • White Yarn – Use this for the wings to create contrast and detail.

Tools & Notions

  • 4.0 mm Crochet Hook (Size G) – A must-have for achieving tight stitches, crucial for solid amigurumi pieces like this crochet bee.
  • Safety Eyes (12 mm) – Choose these to give your bee friendly facial features that add to its charm.
  • Polyester Stuffing – Ensures your bee is plush and huggable.
  • Yarn Needle – Essential for sewing parts together securely during assembly.
  • Scissors – Have these handy for cutting your yarn at the end of your project.

What Makes This Bee Pattern So Special?

Crafting this crochet bee pattern is not only a fun experience but also an opportunity to delve into the wonderful world of amigurumi. Its simplicity makes it approachable for beginners while providing enough fun details to keep seasoned crocheters engaged. You can customize this pattern in countless ways! Use different yarn types—try a plush texture for the body or vibrant colors for stripes that really pop. The pattern encourages creativity through options, like adding a whimsical flower accessory, which enhances both the aesthetic appeal and charm. What’s even better is that this crochet bee pattern acts as a fantastic stash-buster, allowing you to utilize yarn leftovers effectively. Plus, amigurumi projects are generally quick to finish, giving you that instant gratification we all crave. The result is an adorable, squeezable bee that stands out as a lovely decoration or a heartwarming gift for someone special.

Gauge & Sizing Notes for crochet bee pattern

Checking your tension is vital for this crochet bee pattern to achieve a plush and hug-able finish. For this amigurumi project, the standard gauge is approximately 4×4 inches (10×10 cm) with a working stitch count of 6 sc to a width of 1 inch. If the gauge swatch does not match, adjust your hook size either up or down, ensuring it fits your desired tension and look. For resizing the bee, simply make your initial chain length longer or shorter according to your preference; this allows for a bee that matches your unique vision. Each row contributes to the overall size, and you can easily add or reduce rounds to create a smaller or larger bee as desired. Taking these steps ensures that your crochet bee pattern turns out just right, making it not only beautiful but functional as well.

Step-by-Step Pattern for crochet bee pattern

Row 1: Start with a Magic Ring
Begin your crochet bee pattern by creating a magic ring (MR). This will form the center of the bee’s head. Pull the yarn through the loop, and single crochet (sc) 6 times into the ring (6 sc).

Row 2: Increase the Circle
For the next round, crochet 2 sc in each stitch around to increase the circle size. You should now have a total of 12 stitches. Remember, it’s crucial to maintain tight tension to keep the stuffing inside coverd. (12 sc)

Row 3: Adding More Stitches
In this row, sc in the first stitch, then 2 sc in the next. Repeat this pattern around the circle. This will create gradual enlargements for a smooth shape. You should now have 18 stitches total. (18 sc)

Row 4: Shape the Head
Continue with sc in the first two stitches, followed by an increase (2 sc in the next stitch). Repeat this pattern until you complete the round. The head should start looking bulbous. You should have 24 stitches here. (24 sc)

Row 5: Transition to the Body
For the fifth row, sc in the first three stitches, then inc the next. Keep working around the bee’s head and down into the body part, maintaining the shape. Now you should have 30 stitches. (30 sc)

Row 6: Begin the Stripes
Switch to your black yarn to start creating the bee’s stripes. Work 5 sc with yellow, then switch to black yarn and inc in the next stitch. This playful color transition keeps the bee looking vibrant. (30 sc)

Row 7: Continue Stripes
For this round, alternate between 5 yellow sc and 1 black inc around the body. This will solidify the striped pattern on your amigurumi bee, making it easy to visually balance the colors. (36 sc)

Row 8: Adding Legs
In this row, begin shaping the arms and legs. Crochet your body shape, leaving space for where you will attach arms later on. Don’t forget to keep counting evenly. You’ll want to have about 36 stitches here, too. (36 sc)

Row 9: Attach the Legs
Crochet 2 sc for each leg in their respective spaces as you transition to the next round. Focus on maintaining a clean joint to keep the legs secure for soft play. (18 legs, 36 total)

Row 10: Make the Wings
To form the delicate wings, start with a MR, then chain 3 and make 3 dc in the ring, followed by a sl st to finish. This creates a wing shape perfect for your bee. Do this for 2 wings. (Each wing: 3 dc)

Row 11: Building Antennae
For the antennae, chain 5 and sl st back in the first stitch to make a small loop. Determine where to attach these on the head, ensuring they stick out playfully. Make 2 antennae. (2 pieces)

Row 12: Assemble Your Bee
Finally, it’s time to put your charming crochet bee together! Sew on the wings and antennae carefully using a yarn needle. Secure any loose ends and stuff the body gently, ensuring everything looks plush and inviting. Stand back and admire your adorable creation.

How to Wash and Care for Your Crochet Bee

Machine Washing: If necessary, place your crochet bee in a mesh garment bag, select a gentle cycle, and use lukewarm water to avoid damage.

Hand Washing: For best results, hand wash using mild detergent, avoid wringing, and gently agitate in water to keep the plush texture intact.

Drying: Always lay flat to dry after washing to maintain the shape of your crochet bee; avoid hanging, as this may distort its form.

Storage: Keep your crochet bee in a cool, dry place. If you’re storing it long-term, consider a breathable bag to protect it from dust.

Helpful Tricks for Crochet Bee Pattern

Count Stitches: Always keep track of your stitch count, especially during increases; this ensures proper shaping of your bee.

Use Good Yarns: Opt for plush or chenille yarn; these materials help create a huggable texture that enhances the appearance of your crochet bee pattern.

Magic Ring Mastery: Perfect your magic ring technique as it sets the foundation for the bee’s head, preventing gaps and ensuring a neat finish.

Consistent Tension: Maintain even tension throughout the project to avoid distortion, especially around the head and body sections of your crochet bee pattern.

Secure Seams: Join parts securely during assembly, avoiding loose fittings that might affect the bee’s integrity. This will help it withstand hugs and playtime.

Experiment with Colors: Don’t hesitate to mix yarn colors, materials, and textures. Your crochet bee pattern can be unique by trying different palettes!

crochet bee pattern variations

Feel free to let your creativity buzz by customizing your bee!

  • Mix Colors: Experiment with vibrant neon hues or pastel shades to fit your style or occasion.
  • Different Yarns: Substitute plush yarn with cotton for a firmer texture or try a bamboo blend for a unique feel.
  • Size Adjustments: Change your hook size (larger or smaller) to create a bee that matches your intended display size.
  • Textured Wings: Consider using a textured yarn for the wings to add an artistic element, like a shimmery finish that will catch the light.
  • Add Accessories: Crochet a tiny flower or leaf to attach for a delightful garden theme!

By mixing and matching these variations, you can personalize your craft in endless ways. Maybe try a contrasting color on the belly or multiple shades for the stripes! These adjustments not only allow you to express your artistic flair but also make this project ideal for various occasions—whether it’s a gift or part of a cozy home decor setup. Don’t forget to check out our color guide for more inspiration!

Crochet Bee FAQs

Can I use different yarns for this pattern?
Absolutely! You can experiment with various yarn types. Plush or chenille yarn is ideal, but cotton blends can work too. Just be mindful of the texture!

What if my crochet bee starts curling?
Don’t panic! Curling may happen if your stitches are too tight. Adjust your tension or hook size as needed, and remember to stuff your bee evenly to help with shape.

How can I adjust the size of the bee?
To resize, alter the initial chain length. You can add or reduce rounds throughout the body too. This flexibility allows you to create either a large or smaller crochet bee that fits your vision.

What hook size should I use?
A 4.0 mm crochet hook (size G) is recommended for this project. It creates tight stitches essential for amigurumi. If your fabric feels too loose, consider switching to a smaller hook.

How do I avoid dropped stitches?
Focus on counting and maintaining tension throughout your project. Dropped stitches can be a hassle, so check each round to ensure stitches are intact before moving on!

Can I personalize my crochet bee?
Absolutely! Customize colors and add accessories like flowers or crowns. Let your creativity shine through to make your crochet bee pattern truly unique!

Filed Under: Amigurumi

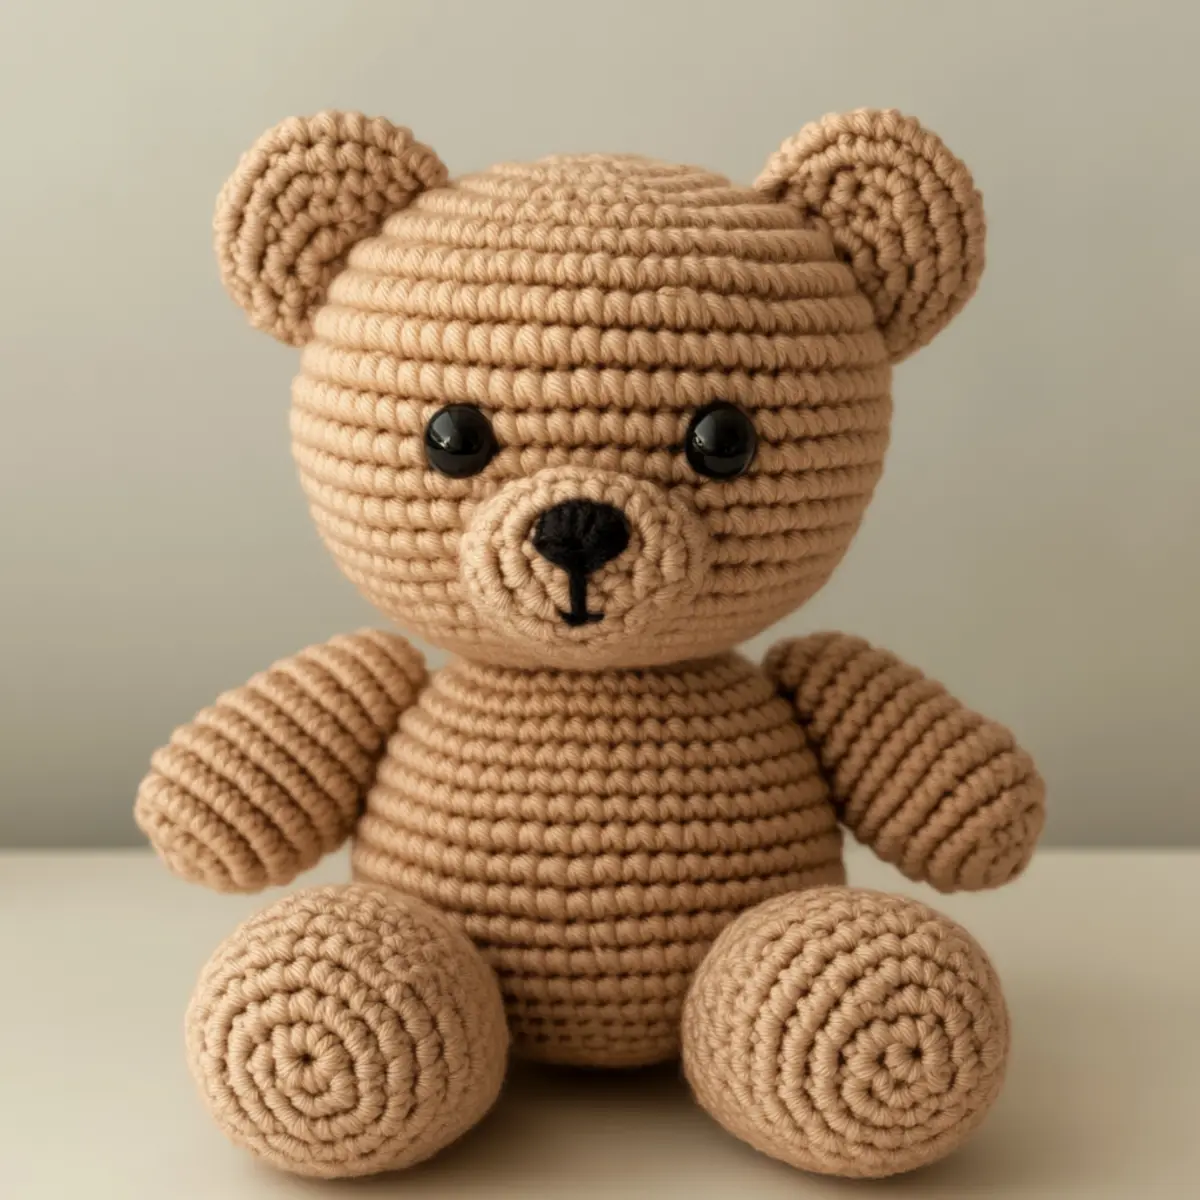
Cozy Crochet Teddy Bear: A Quick Beginner-Friendly Guide

August 17, 2026 by Publisher Leave a Comment

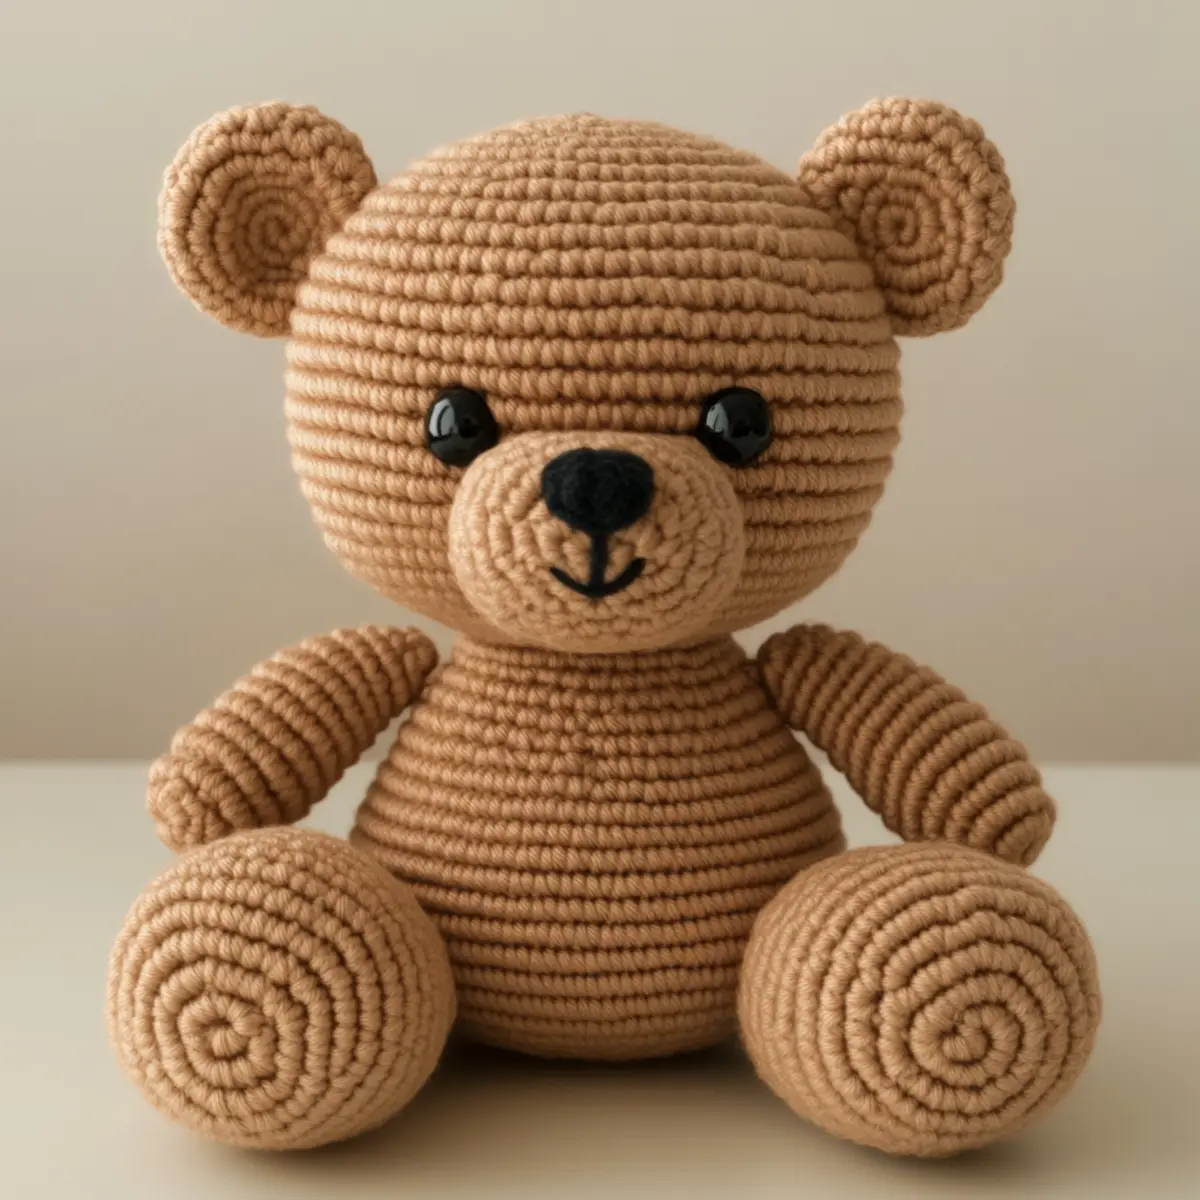
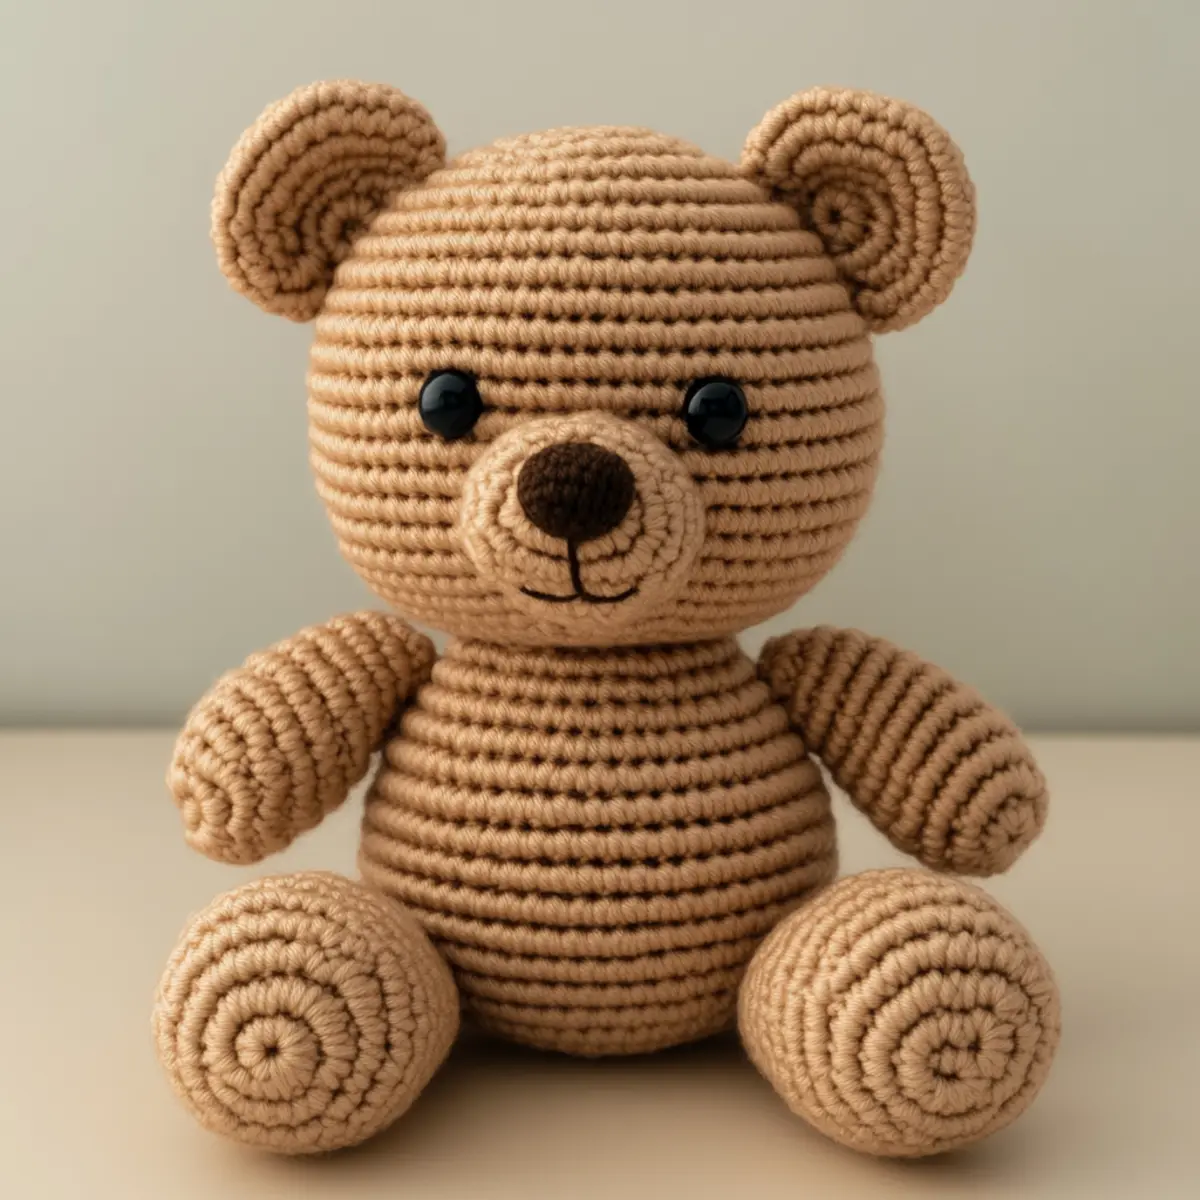
When I embarked on the journey to create my very own cozy crochet teddy bear, I had no idea how much joy and warmth it would bring – not just to me, but to everyone who laid eyes on it! This crochet teddy bear project is an absolute gem for beginner crocheters, offering an inviting dive into the whimsical world of amigurumi. It’s incredibly quick to make, perfect for those who crave instant gratification in their crafting. Imagine wrapping your fingers around colorful yarn, feeling those cozy stitches form a delightful stuffed friend that radiates love. However, it’s not just about the end product; the process provides essential skills, from mastering basic stitches to perfecting the art of shaping with increases and decreases. Plus, the customization possibilities are endless—choose your colors, adjust the size, and even add your unique touch with personalized features! With every stitch, I found myself unraveling a layer of creativity and joy, leaving me to wonder what other adventures my hook would lead me on.

Crochet Teddy Bear Materials & Tools

Yarn

  • Light worsted yarn – Approximately 200-250 yards of yarn is ideal for crafting a delightful crochet teddy bear. You can choose a cotton or acrylic blend for soft, cozy textures.
  • Alternative colors – Experiment with pastel shades for a softer look or vibrant colors for a modern take on this classic toy.

Tools & Notions

  • Crochet hook – A 4-5 mm (G-6 to H-8) hook works perfectly for maintaining a consistent tension and achieving the right drape for your teddy bear.
  • Safety eyes – Use 10mm black safety eyes to give your bear an adorable face, enhancing its charm.
  • Embroidery thread – Needed for detailed expressions like the bear’s nose, adding character to its sweet visage.
  • Stuffing material – Lightly stuff the bear and its limbs for a pleasant density, ensuring it’s cuddly yet sturdy enough to stand independently.

Why You’ll Love This Pattern

Simplicity is one of the key elements that makes this crochet teddy bear a favorite among beginners. It offers an easy-to-follow structure, allowing novice crafters to build confidence as they create their cuddly companions. The texture achieved with light worsted yarn adds a touch of charm and cuddles. Best of all, it’s a fantastic stash-buster; you can use up leftover yarn from previous projects or explore delightful pastels and vibrant shades that brighten your crafting corner. Plus, it’s a time-saving project; most will finish their bear in a single afternoon! And don’t forget about the aesthetic appeal—this adorable amigurumi can be a lovely decoration in any room or an unforgettable gift to a loved one. Feel free to explore more crochet patterns, like the Crochet Amigurumi Basics, to enhance your skills, or check out this Charming Toy Collection for further inspiration!

Gauge & Sizing Notes for Crochet Teddy Bear

Checking your tension is essential while crafting this crochet teddy bear, ensuring that your piece turns out just right in terms of size and structure. The standard gauge for this project is 4×4 inches (10×10 cm) with approximately 10-12 sc stitches across. If your swatch doesn’t match this gauge, you may want to adjust your hook size or the yarn you’re using. For resizing your teddy bear, you can adjust the starting chain or rounds based on how large or small you’d like your bear to be—remember that increasing the foundational rounds can help yield a bigger bear, while reducing them can create a lovely mini version. If your piece seems too tight or too loose, make sure to examine your yarn tension and switch your approach as needed. You can also consider using light worsted weight yarn in different shades to customize your cozy crochet teddy bear even further.

Step-by-Step Pattern for Crochet Teddy Bear

Row 1: Start with a Magic Ring Begin your adorable crochet teddy bear by making a magic ring (MR). This MR will serve as the foundation for the head of the bear. Chain 1 to secure the ring and be ready to crochet 6 single crochet (sc) stitches into the ring; at the end of this row, you should have 6 sc in your MR (6).

Row 2: Increase for Bulk Pull on the tail of the magic ring to tighten the circle. In this row, work 2 sc in each stitch around, allowing the teddy bear’s head to swell to a charming size. Remember to count your stitches carefully to ensure your teddy maintains its rounded shape; you should finish with 12 stitches at the end of this row (12).

Row 3: More Increases To continue shaping the teddy bear’s head, crochet in the following pattern: 1 sc in the first stitch, then 2 sc in the next. Repeat this sequence around to create the appropriate dome shape you want. You’ll end up with 18 sc at the end of this round (18).

Row 4: Steady On For this row, crochet 2 sc in the first stitch, and then 1 sc in the next 2 stitches. Repeat around to further increase the number of stitches and allow your teddy’s head to grow. This will give you a soft, rounded appearance with a total of 24 stitches (24).

Row 5: Keep it Round Continue by crocheting 1 sc in each stitch around for this row, maintaining tension to ensure no holes appear in the fabric. This helps in building the height of the teddy bear’s head without additional increases. You’ll complete this round with a consistent total of 24 stitches (24).

Rows 6-9: Form the Neck For four more rows, crochet 1 sc in each stitch around for a total of 4 rounds. This establishes a sturdy neck area that will support the head while you transition to the body. You’ll maintain 24 stitches throughout these rounds (24).

Row 10: Solid Base for the Body Start forming the body of the crochet teddy bear! For this row, use the same pattern as before—crocheting 1 sc in each stitch around, and keep your stitch count steady at 24 for a firm foundation (24).

Row 11: Begin Shaping the Body Now, let’s add some width for the body. Work 2 sc in the first stitch, then 1 sc in the next 3 stitches. Repeat this pattern to create a nice curvy body shape. By the end of this row, you will have 30 stitches (30).

Rows 12-16: Build the Body For the next five rows, continue crocheting 1 sc in each stitch around. This helps develop the teddy bear’s appealing plumpness and stability. Ensure you maintain your stitch count of 30 stitches throughout (30).

Row 17: Shaping the Body To create a rounded torso, use the pattern of 1 sc in the first stitch, then 1 dec (decrease) in the next stitch for this row. Make sure to repeat this all the way around, resulting in a total of 24 stitches (24).

Row 18: Finishing the Body Continue reducing the stitch count in preparation for closing the body. Crochet a decrease for every second stitch (dec, 1 sc). You’ll have a snug 12 stitches left at the end (12).

Row 19: Completing the Body For the final round of the body, use 1 sc for each stitch around (12). After this, it’s time to stuff your bear lightly! This provides that cozy texture that makes your teddy bear delightful to hold.

Row 20: Add the Legs For the first leg, work in a new yarn segment to create a magic ring (MR). Begin with 6 sc in your MR, and follow the steps to increase to 12 stitches, just like the bear’s body (12). Repeat for the second leg. The legs will give your crochet teddy bear some adorable stubbiness!

Row 21: Attach Ears Using the same style as the legs, create two small ears. Start with MR, do about 6 rounds for their base, then reduce to form them into little puffs. Attach the ears between Rows 3 and 4 of the head using sl st for a seamless look.

Expert Tips for Your Crochet Teddy Bear

Consistent Tension: Maintain a steady tension throughout your work to avoid holes or uneven stitches, ensuring a polished final product.

Count Carefully: Always double-check your stitch counts at the end of each round to prevent mistakes that require frogging.

Magic Ring Mastery: Start with a magic ring correctly to create a tight, neat center; this helps avoid gaps in your crochet teddy bear’s head.

Block Pieces: Lightly blocking your teddy bear parts after completing them helps maintain shapes, especially important for the ears and muzzle.

Adjust Hook Size: If your stitches are too tight or too loose, consider adjusting your hook size. This affects the overall bear size and feel, allowing for customization.

Crochet Teddy Bear Variations

Customization is key to making your crochet teddy bear truly unique! Feel free to explore different yarns, colors, and creative techniques to personalize your cuddly creation.

  • Pastel Shades: Swap light brown yarn for soft pastel hues to create a gentle and dreamy bear.
  • Vibrant Colors: Use bright, bold colors for a modern twist on a classic teddy bear look.
  • Chunky Yarn: Experiment with chunky yarn for a larger, more plush teddy bear that enhances the snuggle factor.
  • Unique Facial Features: Embroider personalized expressions or accessories like hats and scarves to give your bear character.
  • Adjustable Size: Modify the hook size to craft a smaller or larger version based on your preference.

For those who want to really challenge themselves, consider adding a tail or different ear shapes to your bear. Embellishing your teddy with additional crochet flowers or a tiny blanket can elevate its charm. These personalized touches make your crochet teddy bear not just a toy, but a treasured keepsake.
Prepare Your Next Project by gathering supplies for some fun accessories! You won’t regret exploring all these exciting options to make your bear your own.

How to Wash and Care for Your Crochet Teddy Bear

Machine Washing: If you choose to machine wash, use a gentle cycle in cold water and place your bear in a laundry bag to prevent damage.

Hand Washing: For better care, hand wash in cold water with a mild detergent; gently press to remove excess water, avoiding wringing or twisting.

Drying: Lay your crochet teddy bear flat on a towel to dry, reshaping as necessary, and avoid hanging which could distort its shape.

Storage: Store in a cool, dry place away from direct sunlight to keep colors vibrant and prevent fading; consider a storage box for added protection.

Crochet Teddy Bear FAQs

What yarn can I substitute for this project?
Absolutely! You can use any light worsted yarn, such as cotton or acrylic blends. Just ensure that the weight is similar for consistent results.

How do I adjust the sizing of my teddy bear?
To resize, simply alter your starting chain or the number of rounds you work. For a larger bear, add more rounds, and for smaller ones, reduce them accordingly.

What should I do if my stitches are too tight?
If you’re struggling with tight stitches, consider switching to a larger hook size or check your tension. Looser tension can lead to a more enjoyable crochet experience.

Why does my teddy bear’s face curl?
Curling may occur if your tension is inconsistent. Make sure to keep your tension even, and if necessary, block the finished head to reshape it correctly.

What size hook should I use?
A 4-5 mm crochet hook (G-6 to H-8) is recommended for this crochet teddy bear. If your stitches are tight, you may want to try a slightly larger hook for comfort.

Can I add features to personalize my teddy bear?
Absolutely! You can personalize your crochet teddy bear by adding unique expressions through embroidered features, or even accessories like scarves, hats, or glasses to give it character.

Filed Under: Amigurumi

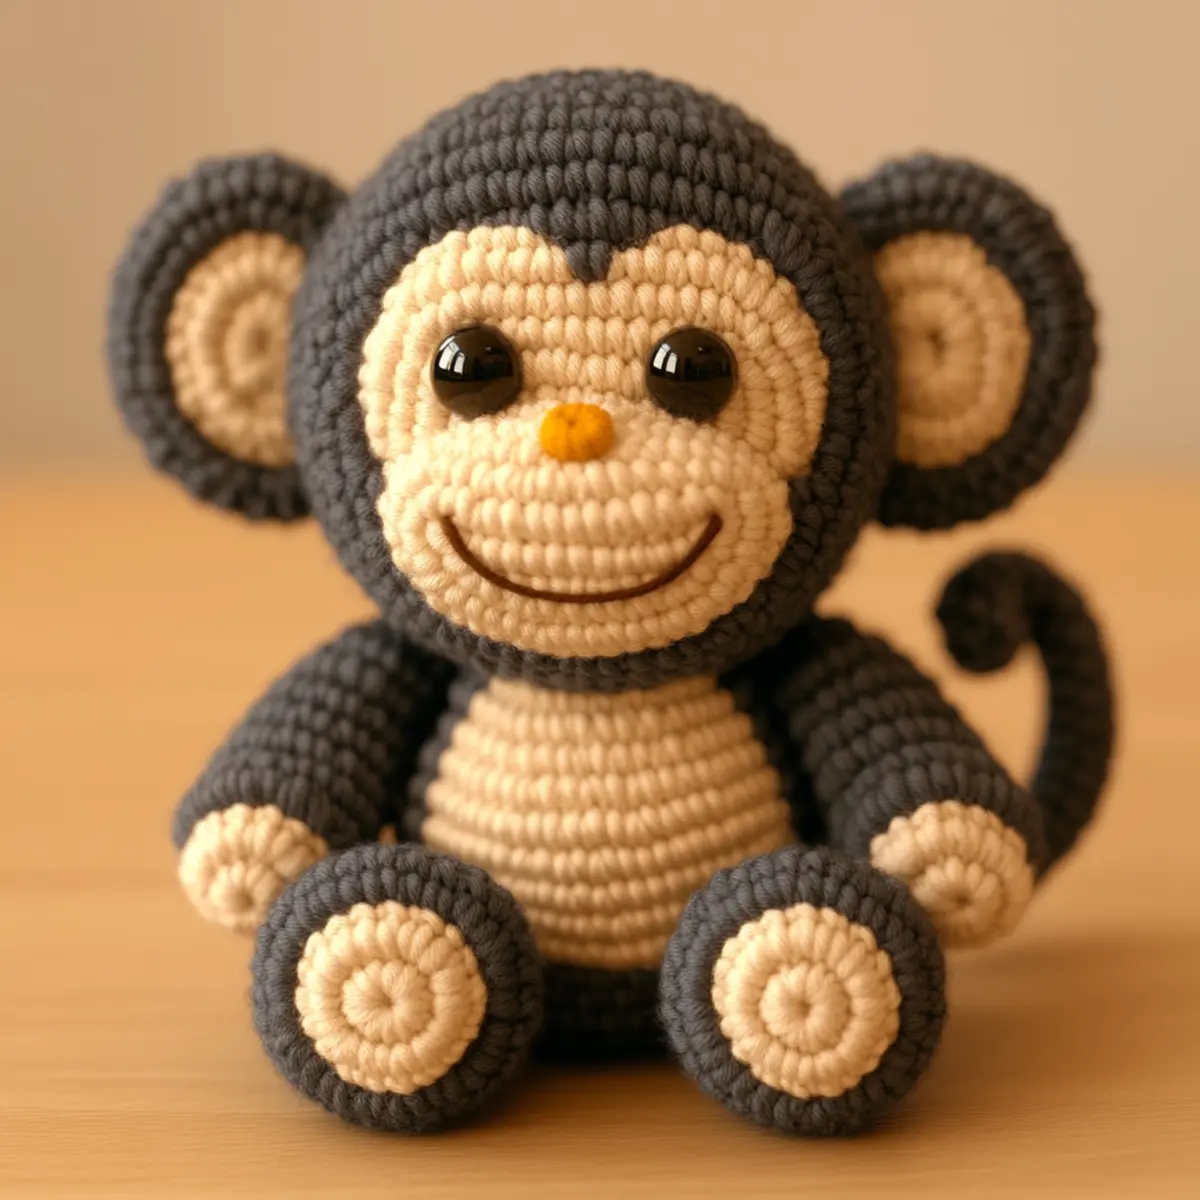
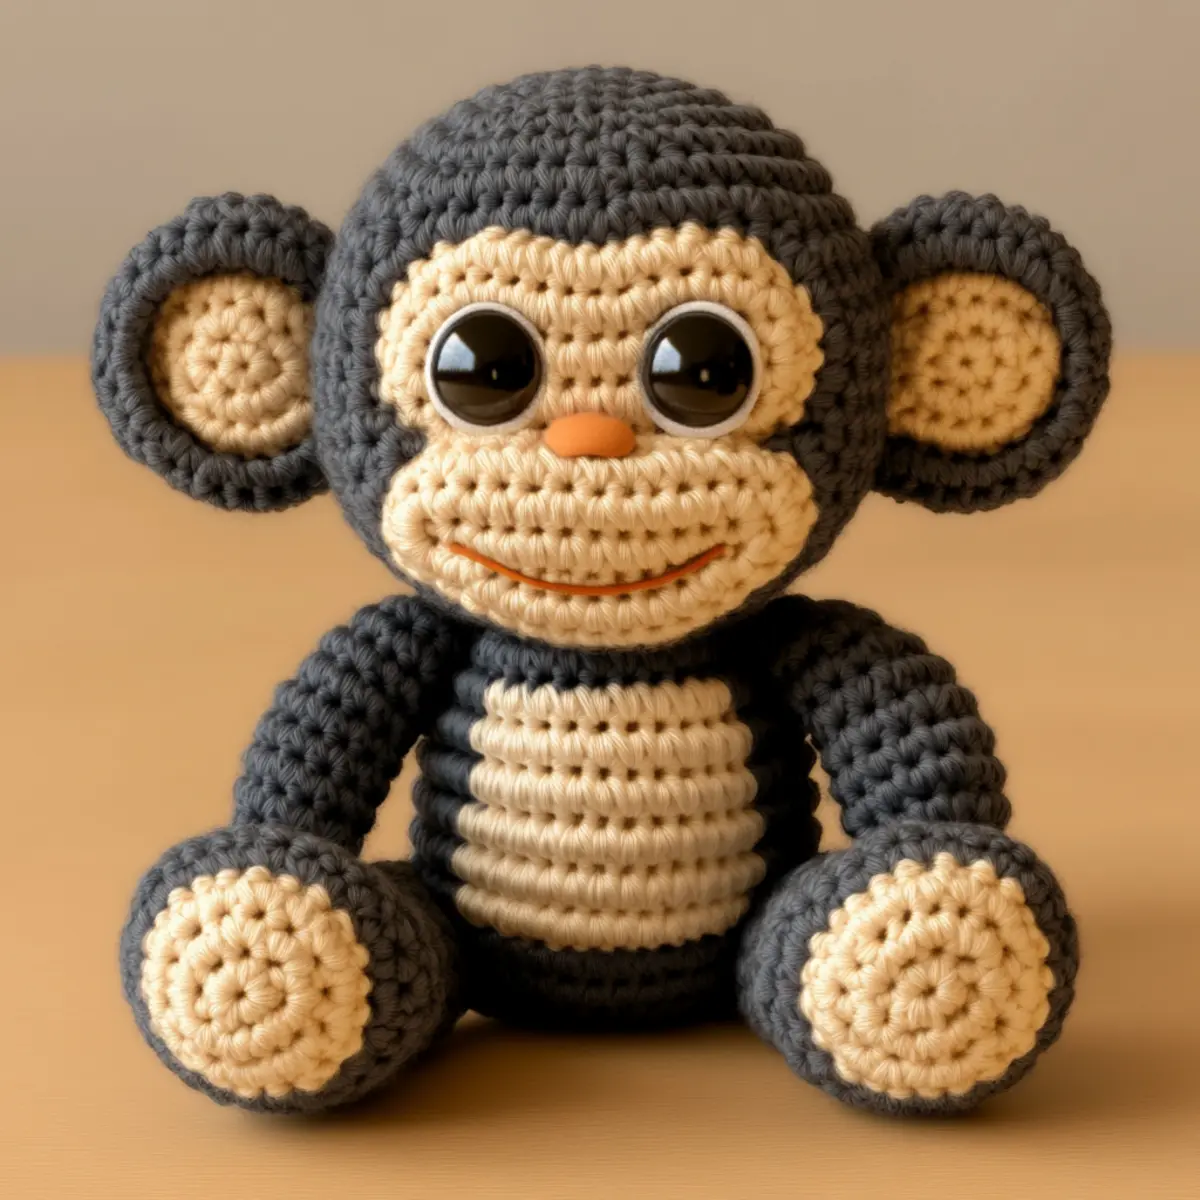
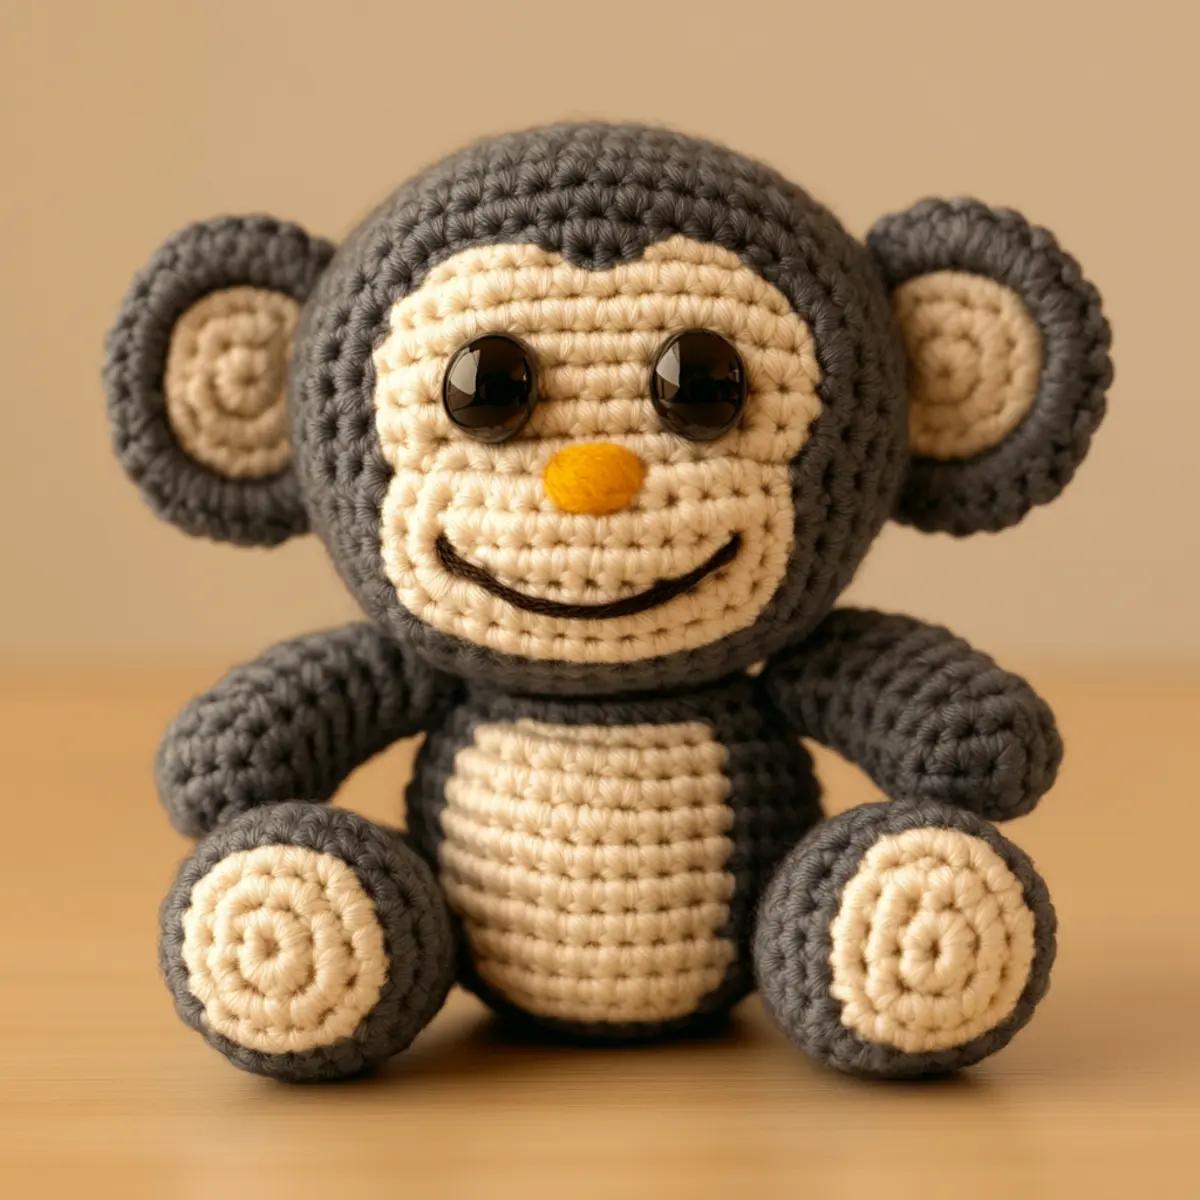
Charming Crochet Monkey Pattern for Fun, Whimsical Cuddles

August 17, 2026 by Publisher Leave a Comment

Sitting in my cozy corner, I just finished crafting the most adorable crochet monkey pattern that has completely stolen my heart! This whimsical little creature brings a wave of joy as I fondly remember giggles and playful afternoons. The crochet monkey pattern not only offers a delightful project for those with some experience under their belts, but it also doubles as a fabulous way to enhance your crochet skills while having fun. One of the best parts about this design is how versatile it is—you can create a unique monkey tailored to your preferences with just a few simple color changes! Letting your creativity run wild while using up some of that yarn stash makes this project a fantastic stash-buster as well. Plus, it’s a great opportunity to add an endearing companion to your cozy collection or gift it to someone special in your life. This sweet little monkey is eager to be a part of your crochet adventures, sparking curiosity about what unique twist you might give to your own cozy creation.

Crochet Monkey Pattern Materials & Tools

Yarn
Worsted weight acrylic yarn – Around 100-150 yards of cream and dark gray yarn is ideal for this crochet monkey pattern.

Tools & Notions
G-6 (4.0 mm) crochet hook – A tight gauge is necessary to keep the stuffing hidden.
Safety eyes (10 mm) – Ensure safety as well as a cute face for your monkey.
Tapestry needle – Essential for assembling your crochet parts securely.
Stitch markers – Perfect for tracking rounds and maintaining stitch counts.
Fiberfill stuffing – Choose a soft filling to make your monkey extra cuddly.

Why You’ll Love This Pattern

One of the standout features of this crochet monkey pattern is its simplicity—you’ll find it accessible even as you tackle color changes and shaping techniques! Crafting this little buddy also allows for a fantastic level of customizability; you can play with hues and add your unique flair throughout the project. Not only is it a stash-friendly endeavor where you can mix and match available yarns, but it also saves you time with straightforward instructions—ideal for crafters on the go. And let’s not forget the aesthetic appeal of a cute companion that brightens any room! Whether you decide to follow the classic color scheme or try something entirely your own, this project allows for creative exploration and leaves you with a charming piece you’ll be proud to display. For more ideas on fun, colorful projects, check out these tips on color changing techniques or explore other fabulous stash-busting patterns!

Gauge & Sizing Notes for Crochet Monkey Pattern

Checking your tension is crucial for achieving the desired look and size of your crochet monkey pattern. Aim for a standard gauge of 6 sc per inch with 7 rows yielding 4×4 inches (10×10 cm). Adjust your starting chain or round based on tension variations; for a smaller size, use a lighter yarn or hook, while a thicker yarn can yield a larger creature. If your gauge varies, re-evaluate your yarn choice or hook size to ensure a compatible fit. When you make this crochet monkey pattern, remember that a tighter gauge will help you avoid visible stuffing, giving your lovely creation the charming squishiness it deserves. Aim for a final height of about 8-10 inches and 4-5 inches in width. By ensuring proper gauge, you can create an adorable, huggable monkey that maintains its shape beautifully!

Step-by-Step Pattern for Crochet Monkey Pattern

Row 1: Start the Head Begin with a magic ring (MR) and work 6 sc into the ring. Pull tight to close the MR, forming a base for the head. Make sure to keep the stitches tight to avoid stuffing from showing through the final project. (6)

Row 2: Increase for Roundness Work 2 sc in each stitch around for a total of 12 stitches. This round creates the fullness needed for the monkey’s head. Always use a stitch marker to keep track of your rounds. (12)

Row 3: Form the Shape Now, work 1 sc in the first stitch, then 2 sc in the next. Repeat this pattern around to end with 18 stitches. This gradual increase is crucial to maintain the rounded shape. (18)

Row 4: Muzzle and Color Changes Switch to cream yarn for the face. Work 1 sc in the first 3 stitches, 2 sc in the next 3, and 1 sc in the last 3. This creates the foundational shape for the monkey’s adorable muzzle. (24)

Row 5: Build Up the Face Continue with 1 sc in each stitch around using cream. This will solidify the base of your monkey’s face and prepare for more detailed features. (24)

Row 6: Add Ears Start shaping the cute ears by working 5 sc in a separate magic ring with the cream yarn. Slip stitch to close and fasten off, leaving a tail for assembly later. It’s important to keep ears proportionate to the head. (5)

Row 7: Creating the Body Repeat a similar method as for the head, starting with a MR and working 6 sc in it. Increase as before until you reach 30 stitches, creating a sturdy base for the body. This section should be more elongated compared to the head. (30)

Row 8: Round the Base Work in sc around for 10 rounds, maintaining the same stitch count. This solidifies the body shape while you prepare to attach the legs. Remember to check for snugness as you go. (30)

Row 9: Shaping Arms and Legs Work 6 sc in a new magic ring for an arm. Repeat for the second arm. Each arm should have around 12 rows following the same increase pattern, gradually forming a small bulbous shape. Make 2 for both sides. (12)

Row 10: Assemble Arms and Legs Attach the arms to the body at your desired height using the tapestry needle. Take care to sew them securely, ensuring they are evenly placed. The limbs provide a sense of balance and personality to your crochet monkey pattern.

Row 11: Create the Tail Using dark gray yarn, make a spiral tail starting with a chain of 30, followed by sc back down the chain. This unique feature offers personality to the design while allowing for easy manipulation and poseability. (30)

Row 12: Final Assembly and Stuffing Before closing the monkey, stuff the body and limbs lightly, ensuring they are not over-packed. Close with a slip stitch and securely weave in all ends to prevent any stuffing from poking out. Your delightful crochet monkey pattern is now ready to brighten a room or be gifted to a loved one!

How to Wash and Care for Your Crochet Monkey Pattern

Machine Washing: Use a gentle cycle in cold water. Avoid agitation to maintain shape and prevent damage to the yarn used in your crochet monkey pattern.

Hand Washing: For best results, hand wash with mild detergent in cold water to preserve color and integrity of your creation.

Drying: Lay flat to dry away from direct sunlight to prevent fading and maintain the cute shape of your monkey.

Storage: Keep your finished monkey in a cool, dry place, avoiding damp areas that could lead to mold or texture damage.

Expert Tips for Crochet Monkey Pattern

Tight Tension: Keep the stitches tight to avoid stuffing showing through when making limbs and the head.

Count Carefully: Always count stitches, especially during color changes. It helps maintain your pattern’s shape throughout.

Use Stitch Markers: Place stitch markers to track your rounds, especially in circular projects like this crochet monkey pattern.

Secure Assembly: Make sure all parts are securely stitched together before closing. A snug assembly helps keep the shape intact.

Creative Variations: Don’t hesitate to play with colors and embellishments! This crochet monkey pattern is all about your unique touch.

Crochet Monkey Pattern Variations

Feel free to let your creativity shine by customizing this charming monkey!

  • Color Scheme: Use pastels for a soft baby-themed monkey or bold primary colors for a vibrant appeal. Color choices can completely change the vibe and personality of your monkey.
  • Size Modification: Use thicker yarn and a larger hook for a more substantial plush toy or finer yarn to create a pocket-sized version. Changing yarn weights can drastically alter the finished product’s scale, making it fun and versatile.
  • Themed Set: Craft various animals in a consistent color palette to form a fun collection. This approach encourages creativity and can lead to delightful gifting options for different occasions, allowing for a glowing mix of accessories such as dolls and toys.
  • Embellishments: Add a scarf, a beanie, or perhaps a playful bowtie to personalize your creation. Details can make the piece unique to its owner, sparking joy and conversations. Every embellishment can reflect personal or seasonal themes!
  • Different Fibers: Experiment with cotton or bamboo yarn instead of acrylic for a unique texture. Each fiber holds its charm, potentially leading to varying feels and looks that can enchant different audiences.

Don’t shy away from using alternative yarns or crafting various sizes, as these changes will enhance your experience, allowing each crochet monkey to embody your flair and personal touch. With each variation, the fundamental design remains, fostering creativity in an endless looping pursuit.

Crochet Monkey Pattern FAQs

What type of yarn can I use?
Absolutely! You can substitute worsted weight acrylic yarn with any medium-weight yarn, but note that it may change the size and texture of your final product.

How do I adjust the size of my monkey?
To make your crochet monkey pattern larger, use a bulkier yarn and a larger hook for a bigger plushie. Conversely, a finer yarn with a smaller hook will yield a mini version.

What if my monkey’s head is curling?
Don’t panic! This often happens with tight stitches. Adjust your tension or steam block gently to correct the shape. Ensure consistent stitch tension as you progress.

How do I fix dropped stitches?
If you drop a stitch, simply pull the yarn gently to create a loop and use your crochet hook to pull the loop back through. It’s a quick fix!

What hook size is recommended?
For this crochet monkey pattern, a 4.0 mm (G-6) hook is ideal. This size helps achieve a tight gauge, crucial for hiding stuffing.

Can I add accessories to my monkey?
Definitely! Feel free to add accessories like a scarf or a hat to personalize your crochet monkey pattern. Just ensure they stay proportional to your monkey’s size.

Filed Under: Amigurumi

  • « Previous Page
  • 1
  • …
  • 39
  • 40
  • 41

Recent Posts

  • Chic Crochet Watch Band Pattern: Scalloped Elegance
  • Vibrant Crochet Granny Square: A Floral Delight to Create
  • Pocket Otter Crochet: Your Adorable Amigurumi Companion
  • Cozy Up with This Festive Crochet Tree Cozy Pattern
  • Chic Crochet Babydoll Dress: A Timeless Pattern for Spring

Recent Comments

No comments to show.
Fast Crochet Patterns Logo

Welcome to Fast Crochet Patterns, your curated editorial blog for modern, handmade aesthetics. Discover an elegant collection of contemporary designs and carefully crafted tutorials—where every beautiful pattern is completely free to inspire your next creation.

Join the Studio

Subscribe for our latest free patterns and warm, minimal crochet inspiration delivered to your inbox.


Collections

  • Accessories
  • Amigurumi
  • Baby
  • Bags

More Patterns

  • Cardigan
  • Dress
  • Flowers
  • Granny Square

Information

  • About
  • Contact
  • Privacy Policy
  • Terms Of Use
  • Disclaimer

© 2026 Fast Crochet Patterns. All rights reserved.