Fast Crochet Patterns

  • Home
  • Contact
  • Patterns
    • Amigurumi
    • Granny Square
    • Flowers
    • Baby
    • Dress
    • Bags
    • Cardigan
    • Accessories
menu icon
go to homepage
  • Home
  • Contact
  • Patterns
    • Amigurumi
    • Granny Square
    • Flowers
    • Baby
    • Dress
    • Bags
    • Cardigan
    • Accessories
search icon
Homepage link
  • Home
  • Contact
  • Patterns
    • Amigurumi
    • Granny Square
    • Flowers
    • Baby
    • Dress
    • Bags
    • Cardigan
    • Accessories
×

Cozy Bunny Amigurumi: Beginner-Friendly Crochet Delight

August 22, 2026 by Publisher Leave a Comment

Cozy Bunny Amigurumi: Beginner-Friendly Crochet Delight

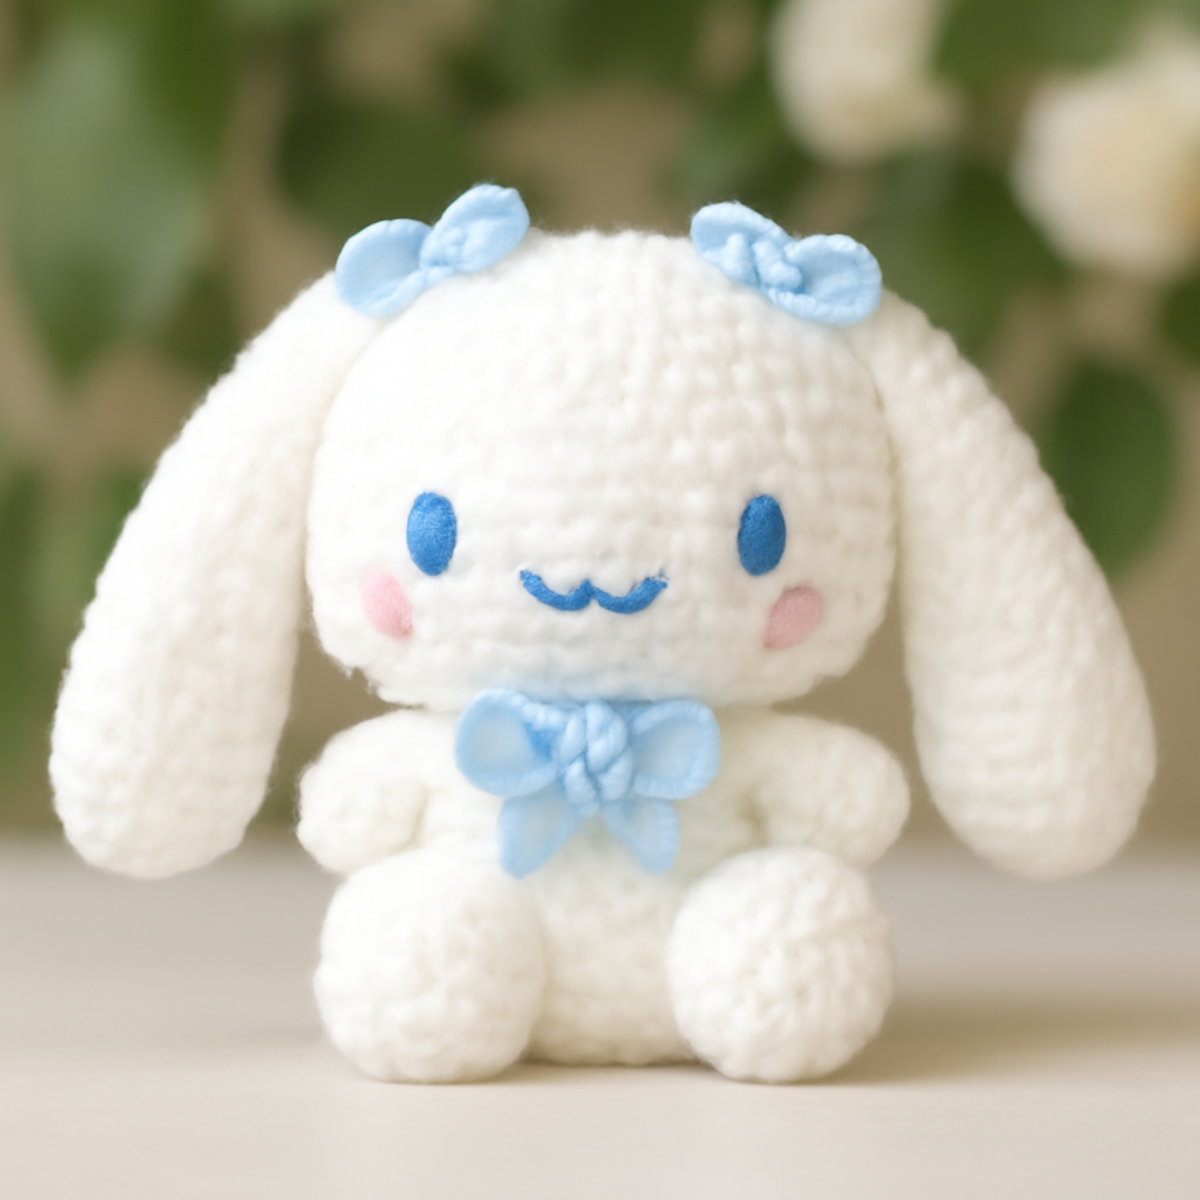
As I settled into my favorite cozy nook, an idea hopped into my mind—why not create a charming bunny amigurumi? With its delightfully soft textures and whimsical design, this lovely little fellow can easily find a spot in any child's toy collection or serve as a heartwarming decor piece. What makes this bunny amigurumi irresistible is not just the fun of working with basic crochet techniques, but the joy of developing those foundational skills while crafting something uniquely yours. Plus, it’s a fantastic stash-buster, allowing you to play with colors and textures to personalize your furry friend! I'm excited to guide you through the steps, so grab your yarn and hook—let’s bring this adorable bunny to life together!

Bunny Amigurumi Materials & Tools

  • Medium Weight Yarn (Category 4) – Choose a soft acrylic or cotton blend for a plush look; you'll need approximately 100-150 yards in white for the body, 20-30 yards in light blue for bows, and about 20 yards in a contrasting color for facial features.
  • 3.5 mm (US Size E) Hook – This size helps create tight stitches, ensuring no stuffing shows through.
  • Yarn Needle – Essential for weaving in ends and finishing your bunny amigurumi neatly.
  • Safety Eyes – Add expressive features to your bunny for a charming look.
  • Stitch Markers – These will help you keep track of your rounds as you crochet.

Why is this bunny amigurumi special?

Whimsical Design: The adorable bunny amigurumi features a playful style that brightens any space, making it perfect for both kids and cozy decor!
Beginner-Friendly: Designed for crafters of all levels, this pattern employs basic crochet techniques, ensuring a smooth learning experience while boosting your skills.
Soft Texture: Crafted with medium-weight yarn, you'll create a plush, cuddly bunny that invites snuggles and playful interactions.
Customizable Colors: Bring your creativity to life! Personalize your bunny using vibrant hues or soft pastels to match any personality or decor.
Quick Project: With its straightforward construction, you can complete this charming bunny in no time, making it an excellent last-minute gift or weekend project.

Gauge & Sizing Notes

Don't skip the gauge swatch! For your bunny amigurumi, checking your crochet gauge is crucial to achieving the desired size and fluffy texture. As a general guideline, aim for a tension swatch that measures approximately 4×4 inches (10×10 cm), which should yield about 18 single crochets by 22 rows; however, check your specific tension as needs can vary. If you'd like your bunny to be larger or smaller, simply adjust your starting chain or overall rounds in multiples of 6. If your tension doesn't match, don't worry—if your swatch is too small, try going up a hook size for that perfect fit!

Step-by-Step Pattern for Charming Bunny Amigurumi

Row 1: Body Start
Begin by creating a magic circle (MC). Inside the MC, work 6 single crochets (sc). Pull the circle tight to close. This is the base of your bunny amigurumi's body. Your work should appear as a small tight circle. (6 sts)

Row 2: Increase Round
In this round, create an increase in each stitch by working 2 sc in each previous stitch. This will help form a plump shape for your bunny. After completing this round, your body should start expanding nicely. (12 sts)

Row 3: More Increases
Continue increasing by crocheting 1 sc in the first stitch, followed by an increase (2 sc in the next stitch). Repeat this pattern around for a total of 6 increases. Your piece should now start to curve outward. (18 sts)

Row 4: Shaping the Body
For this round, crochet 2 sc in the first stitch, followed by 1 sc in the next 2 stitches. Repeat around. This gradually adds volume to the bunny amigurumi without making it too wide just yet. (24 sts)

Row 5-9: Body Rounds
Work 5 rounds of sc without any increases or decreases to build the bunny's torso. Aim for even tension in your stitches to maintain a uniform appearance. At this point, your body should measure around 4 inches tall. (24 sts per round)

Row 10: Decrease Start
To start closing off the body, crochet 2 sc in the first stitch, then work a single crochet in the next 2 stitches (sc). Repeat this around, allowing the body to taper slightly. Your work should start to look more defined. (18 sts)

Row 11: Further Decreases
Continue with decreases by crocheting 1 sc in the first stitch, then 2 sc together (dec). This will add more shape to the bunny while decreasing the stitch count. Your bunny amigurumi should be looking more compact now. (12 sts)

Row 12: Finished Body
For the final round, work 6 dec around to close up the bottom of your bunny's body. Stuff the body lightly with fiberfill before completing this round. It should be firm but soft to touch. (6 sts)

Row 13: Head Start
Transition to the head by creating a new magic circle (MC). Work 6 sc into the MC. Just like the body, this will form the base for your bunny amigurumi's head. Pull tight to close. (6 sts)

Row 14: Head Increase
Increase in each stitch by crocheting 2 sc in each of the 6 stitches. This forms a rounded head shape and will set the stage for more rounds ahead. You should end up with a smooth circle. (12 sts)

Row 15-18: Work the Head
Crochet 4 rounds of sc without any increases. This helps form the bunny's head, retaining a nice soft structure. Make sure your stitches are even as you go along to keep everything neat! (12 sts per round)

Row 19: Create Face Shape
In this round, do 1 sc, followed by an increase (2 sc in next), and repeat around. This will give the bunny's face a slightly rounded look to enhance its cuteness. (18 sts)

Row 20: Final Head Shape
Next, crochet 1 sc, then a dec across the round. This starts to taper the head, giving it a defined shape. Fill the head lightly with stuffing to keep it cuddly. (12 sts)

Row 21: Complete the Head
Finish off by working 6 dec around. This will close the head entirely. Leave a long tail for sewing and ensure your bunny's head is firmly stuffed. (6 sts)

Step 1: Ears Construction
To create the ears, start with a chain of 15. In the second chain from the hook, work 1 sc and continue with 1 sc in each chain across. This forms a long strip that will be folded for floppy ears. (14 sts)

Step 2: Ear Shaping
For the next row, ch 1, turn, and work even across with sc for 5 additional rows. This adds length and thickness to your bunny amigurumi's ears. (14 sts)

Step 3: Completing Ears
Fold the ear strip in half and slip stitch the edges together to secure. You'll need two ears total. They should have a soft, floppy appearance once sewn onto the head.

Step 4: Arm Creation
For the arms, chain 8 and, in the second chain from the hook, work 1 sc across. Repeat this for 6 rows to form short and stubby arms for your bunny. (7 sts)

Step 5: Edging and Bows
Crochet small bows separately using a simple chain of 10, then slip stitch to form loops. Embellish your bunny amigurumi with these adorable bows by stitching them to the neck or ears.

Step 6: Assembly
Finally, begin assembling your bunny by positioning the head onto the body with a slip stitch or sewing method to secure. Attach the arms and ears accordingly. Your charming bunny is now coming together beautifully!

Step 7: Final Touches
Sew safety eyes for features and add any additional decorative elements you like. These small details will make your bunny amigurumi uniquely yours and full of personality!

What to Pair with Charming Bunny Amigurumi?

Imagine a delightful collection where your bunny amigurumi plays alongside whimsical creations that radiate warmth and charm.

  • Matching Teddy Bear: A cuddly companion that complements your bunny, creating an enchanting duo for little ones to cherish.
  • Playful Bow Headband: Use leftover yarn to craft a charming headband adorned with bows, echoing your amigurumi's playful accessories.
  • Cute Mini Blanket: Perfect for snuggling, a mini blanket in soft hues can create a cozy setting for your bunny's adventures.
  • Adorable Plush Carrot: Create a cute carrot to complete your bunny’s whimsical world—it's a playful touch that brings your amigurumi to life.
  • Colorful Baby Mobile: If you’re feeling adventurous, crochet a mobile with playful animals, including your bunny, to add whimsy to a nursery.

Care Instructions for Bunny Amigurumi

Machine Washing: Wash your bunny amigurumi in cold water on a gentle cycle to avoid agitation, which can lead to felting or pilling. Keep it safe in a mesh laundry bag.

Hand Washing: If possible, hand wash your bunny amigurumi in cold water using a mild detergent. Gently agitate and avoid twisting to maintain the plush texture.

Drying/Blocking: Lay your bunny flat to dry, reshaping if necessary. Avoid hanging to prevent misshaping, ensuring it retains its cuddly charm.

Storage: Store your bunny amigurumi in a cool, dry place. Keep it in a breathable bag or container to maintain its beautiful shape while protecting it from dust.

Bunny Amigurumi Customization Ideas

Feel the excitement of personalizing your crochet creation with these delightful options that invite your creativity to shine!

  • Yarn Substitutions: Try using a soft cotton yarn for a more breathable, summery bunny. It will give a fresher texture ideal for warmer months.

  • Color Variations: Embrace a playful palette! Mix in pastel shades or bold, vibrant hues to craft a bunny that perfectly reflects the personality of its future owner.

  • Texture Twist: Swap to a fuzzy yarn for an irresistibly cuddly bunny. This variation will transform your amigurumi into a delight that just begs to be hugged.

  • Size Adjustments: For a portable version, use a lighter yarn and smaller hook to create a mini bunny amigurumi. This tiny friend can easily fit into pockets or bags for on-the-go cuddles!

  • Accessorizing with Bows: Experiment with different types of bows, like crocheting hearts or flowers, for an accessory that adds extra flair and charm to your bunny.

  • Bunny Variants: Create a family of bunnies by adding features like a cute tail or different ear styles—stiff, straight ears for a different whimsical look or extra long floppy ones!

  • Surface Embellishments: Consider incorporating embroidery or felt shapes to decorate your bunny with patterns or even initials. This creative touch will make each bunny a unique keepsake.

  • Fringed Ears: Add a fringe effect to the top of the ears by weaving in short strands of contrasting yarn. This fun twist brings playful movement and texture to your bunny's overall look.

Expert Tips for Bunny Amigurumi

  • Even Tension: Maintain consistent tension throughout your stitches to ensure your bunny amigurumi has a uniform look. Avoid too tight or loose stitches for best results.
  • Count Relentlessly: Regularly count your stitches, particularly in the body and head sections, to prevent unintended increases or decreases that can disrupt proportions.
  • Use Stitch Markers: Employ stitch markers to keep track of your rounds, helping you stay aligned in your pattern and preventing confusion along the way.
  • Blocking Benefits: Consider gently blocking your bunny after finishing. It helps smooth out any uneven sections, enhancing the final look of your adorable creation.
  • Secure Finishing: For safety and stability, ensure that all components are stitched together securely, especially the head and limbs, to make your bunny durable for all those cuddles!

Charming Bunny Amigurumi FAQs

Can I use a different yarn than medium-weight yarn?
Absolutely! While medium-weight yarn (category 4) is recommended for the bunny amigurumi, you can experiment with different yarn weights. Just remember that using a finer yarn may result in a smaller bunny, so you'll need to adjust your hook size accordingly to maintain your desired dimensions.

How do I adjust the size of my bunny amigurumi?
To make your bunny larger, consider using a thicker yarn and a larger hook. Alternatively, work additional rounds in the body and head sections for a bulkier look. Conversely, for a smaller size, use lighter yarn and a smaller hook, and decrease the number of rounds as needed.

Why is my bunny amigurumi curling at the edges?
Don't panic! Curling can happen if your tension is uneven or if you're using a hook that's too small for your yarn. I recommend checking your tension and ensuring it remains consistent throughout. If you find your work is still curling, consider lightly blocking your bunny to shape it.

What hook size should I be using for the bunny amigurumi?
For this pattern, a 3.5 mm (US Size E) crochet hook is ideal to create a tight stitch pattern, preventing stuffing from showing through. If you find your stitches are too loose, you might want to switch to a smaller hook for a denser finish.

How do I fix dropped stitches in my bunny amigurumi?
It's an easy fix! If you notice a dropped stitch, simply pick it up with your hook and work it back into the pattern. For best results, follow up by crocheting a few stitches around the area to secure it, ensuring that your bunny stays cute and balanced!

Can I use safety eyes of different sizes for my bunny amigurumi?
Yes, you can absolutely use different sizes of safety eyes! Just keep in mind that larger eyes might give your bunny a more whimsical and playful look, while smaller ones might lend a more classic style. Experimenting with sizes can add unique charm to your creation!
Filed Under: Uncategorized

Cozy Plush Bunny Crochet: Adorable Huggable Friends

August 22, 2026 by Publisher Leave a Comment

Cozy Plush Bunny Crochet: Adorable Huggable Friends

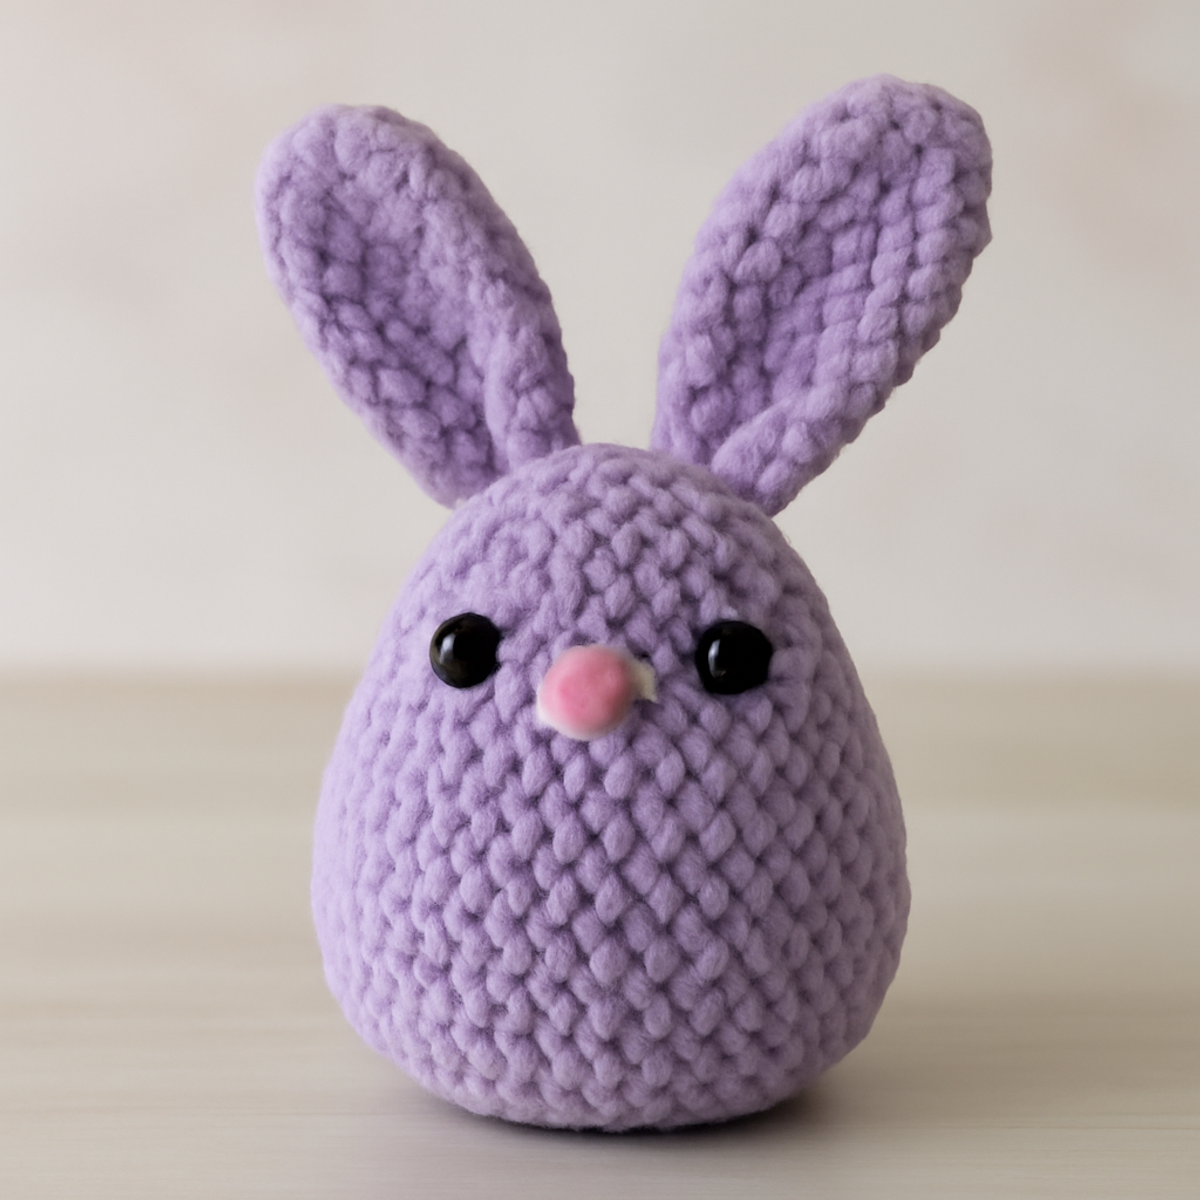
As I settled into my favorite nook with a cozy cup of tea, the idea of crafting a plush bunny crochet project tugged at my heartstrings, transforming this moment into something magical. Introducing the “Charming Plush Bunny Duo” pattern—a delightful adventure in soft toy making that embraces the joy of cuddly creations. Perfect for intermediate crafters, these adorable bunnies are not just aesthetically pleasing, but their huggable texture makes them irresistible companions or thoughtful gifts to celebrate Easter and springtime festivities. You'll love the versatility of personalizing each bunny with colors and embellishments, ensuring each one carries a unique touch. So, grab your bulky yarn and let's hop into this charming journey together!

Plush Bunny Crochet Materials & Tools

  • Bulky Weight Yarn – Approximately 100-150 yards of each color (white and lavender) will give your bunnies that lovely plush texture.
  • 6.0 mm (J-10) Hook – This size is perfect for creating tight stitches that help maintain the adorable shape of your plush bunnies.
  • Safety Eyes (12mm) – These add a charming touch; place them before stuffing to ensure the perfect placement.
  • Pink Felt or Yarn – Use for crafting the cute nose to add to that huggable aesthetic.
  • Stuffing – Make sure to fill your bunnies well, creating a squishy and comfy feel.

Why Choose the Plush Bunny Crochet?

Charming Aesthetic: The simple shapes and gentle textures of these bunnies make them an enchanting addition to your seasonal decor or gifting options.

Huggable Softness: Made with bulky yarn, these plush bunnies boast a squishy texture that invites cuddling and comfort.

Endless Customization: Personalize each creation by experimenting with different colors and fun embellishments, ensuring every bunny is uniquely yours.

Quick to Create: With easy-to-follow instructions, this project is perfect for crafting enthusiasts looking for a cozy and satisfying make.

Perfect Size: Standing approximately 8 inches tall, they are just the right size for little hands or as adorable decor pieces in your home.

How to Check Your Gauge for Plush Bunny Crochet

Don't skip the gauge swatch! Checking your tension is essential when creating your plush bunny crochet, as it ensures your adorable creations turn out just the right size for cuddling. A general guideline to follow is to aim for a 4×4 inch (10×10 cm) square using bulky weight yarn at a 6.0 mm (J-10) hook. If you want to make your bunny larger or smaller, simply adjust your starting chain or the number of rounds. For example, to make this bunny wider, add extra stitches in multiples of 6. If your swatch is smaller than expected, don’t fret—just try going up a hook size to achieve that perfect plush bunny crochet!

Step-by-Step Pattern for plush bunny crochet

Row 1: Start the Body with a Magic Ring
Begin your plush bunny crochet by creating a magic ring. Work 6 single crochets (sc) into the ring, pulling it tight to close. This forms the foundation of the bunny's round bottom. Your work should feel snug, and the initial stitches will set the stage for the cute body shape. (6 sts)

Row 2: Increase for the Bunny's Base
In the next round, make 2 single crochets (sc) in each stitch around to increase the size of the base. This will create a more rounded form. Keep your tension consistent, as the transitions into the next rounds will benefit from a firm structure. Your work will start to expand significantly. (12 sts)

Row 3: Gradual Increases for the Body
Continue to form the body by working 1 single crochet (sc) in the first stitch, then 2 single crochets (sc) in the next. Repeat this pattern around to further grow the bunny's base. The shape should begin to take on a gentle curve at this stage, adding to the huggable bunny aesthetic. (18 sts)

Row 4: Maintain Body Shape with More Increases
For this row, work 2 single crochets (sc) in the next stitch, followed by 1 single crochet (sc) in the next 2 stitches. Repeat to finish this round, smoothly increasing the size. As you progress, the cup shape should become more pronounced, giving your plush bunny a well-formed bottom section. (24 sts)

Row 5: Solidify the Body Structure
Now, simply single crochet (sc) in each stitch around without increasing. This will give the bunny a firm and supportive body, allowing it to hold its shape when stuffed. Your work should feel stable, and the form should be nicely rounded and ready for the next steps. (24 sts)

Row 6: Start Decreasing for Tapering
To shape the bunny's body, start decreasing stitches. Work 1 single crochet (sc) in the first 2 stitches, followed by a decrease (dec) over the next 2 stitches. Repeat this until you close the round, tapering the body gradually while ensuring it maintains a soft, rounded look. (18 sts)

Row 7: Continue Decreasing
In this round, do another round of decreases. Work 1 single crochet (sc) in the first stitch, then a decrease (dec) over the next 2 stitches. This will continue shaping your plush bunny nicely, leading to a rounded head section. Your work should feel like it's getting smaller and more compact. (12 sts)

Row 8: Final Decrease Round
For the last decrease round, simply single crochet (sc) in the first stitch, and then a decrease (dec) for the remaining stitches until the base is ready to close. Your plush bunny crochet project should be starting to look like a recognizable bunny shape now! Stuff the body lightly at this point. (6 sts)

Step 1: Ears Foundation
For the bunny's ears, start with a foundation chain of 10. Once you reach the desired chain length, turn your work and begin with a double crochet (dc) in the fourth chain from the hook to create height. This will form the first portion of the ear and provide a lovely structure as you continue.

Step 2: Ears Height and Shape
Continue working double crochets (dc) into the chains until reaching the end. For each successive row, reduce by one chain to shape the ears. As you traverse each row, your ear shape will become more recognizable, creating balanced proportions for your plush bunny. Finish off with fastening your yarn.

Step 3: Assembly of the Bunny
Sew the safety eyes securely onto the plush bunny's face in a position that feels right; ensure they're set before final stuffing. Use pink felt or yarn to fashion a nose and attach it in place. This assembly will greatly enhance your plush bunny crochet's character and charm.

Step 4: Attaching Ears
Once the body is stuffed and shaped to your liking, sew the ears onto the head, ensuring they’re securely fixed. Position them at a lovely angle, appearing playful and inviting. This final touch will give your plush bunny those delightful, huggable qualities that make it a joy to hold.

Step 5: Final Touches and Edging
Check for any finishing touches, like ensuring all ends are woven in. You could also add a decorative edge if you like. Your charming plush bunny crochet duo is now ready to be loved and enjoyed—perfect for seasonal decor or as a heartfelt gift.

Care Instructions for Plush Bunny Crochet

  • Machine Washing: Use cold water on a gentle cycle to safely clean your plush bunny crochet project, protecting its soft texture and preventing any potential felting or pilling.

  • Hand Washing: For a more careful approach, hand wash your bunnies in cool water with a mild detergent, gently squeezing to clean and avoiding agitation for the best results.

  • Drying/Blocking: Lay your plush bunny flat on a clean towel to air dry, reshaping it as needed. Avoid hanging to prevent stretching and maintain its adorable form.

  • Storage: Keep your bunnies in a cool, dry place away from direct sunlight to help preserve their color and plush texture, ensuring they remain huggable for years to come.

What to Pair with Charming Plush Bunny Duo?

Continuing your cozy crafting journey, consider creating delightful companions that enhance your plush bunny crochet experience.

  • Matching Plush Blanket: A soft, oversized blanket in complementary colors creates the perfect snuggle space for your bunnies. Use the same yarn to maintain a cohesive look.
  • Lavender Bunny Scarf: Crochet a whimsical scarf that mirrors the colors of your bunnies, adding warmth and charm to chilly spring days.
  • Easter Basket Set: Craft matching baskets in the same plush yarn for an adorable way to present your bunnies as gifts or for Easter decorations.
  • Floral Crown: Add uniqueness to your plush bunnies by creating tiny floral crowns adorned with vibrant yarn flowers, elevating their cuteness.
  • Soft Bunny Pillow: Design a plush pillow perfect for children’s naptime, using the same pattern elements to ensure your decor feels harmonious.

Expert Tips for Plush Bunny Crochet

  • Maintain Tension: Keep your tension consistent throughout the project, especially on the ears, to achieve a polished finish and avoid uneven shapes.

  • Avoid Losing Count: Use stitch markers or write down your stitch count after each round to prevent losing track, ensuring accurate decreases at the right points.

  • Secure Stuffing: Firmly stuff the bunny to maintain its shape. If you find it challenging, stuff in stages and check as you go to achieve the perfect plush bunny crochet result.

  • Ears with Structure: If desired, use wire inside the ears to give them structure, but make sure the wire is securely sealed within the yarn to prevent any poking.

  • Final Touch Check: Before finishing, double-check for any loose ends. A well-finished piece not only looks better but also lasts longer—perfect for those snuggly hugs!

Plush Bunny Crochet Variations

Unleash your creativity and transform each plush bunny crochet into a unique masterpiece, sure to brighten any space!

  • Color Swaps: Experiment with pastel colors or vibrant shades to match seasonal themes or personal tastes. A rainbow of bunnies can celebrate every moment of joy!

  • Embellishments: Add bows, scarves, or floral crowns for a delightful touch. These little details can elevate your bunnies from simple toys to stunning decor pieces.

  • Oversized Versions: Use thicker yarn and a larger hook to create a statement piece. Imagine a giant plush bunny, perfect for cuddles and eye-catching charm!

  • Different Fibers: Try cotton for a breathable summer toy or a wool blend for added warmth during colder months. Choose fibers that reflect your bunny’s personality!

  • Texture Adjustments: Add fun elements like pom-poms or fringe to the ears for whimsical flair. Each added detail can give your bunny a playful twist!

  • Size Variations: Alter the body dimensions to create mini bunnies for little gifts or gifts that accompany a larger one. A bunny family can bring joy to all ages!

  • Pattern Mix-ins: Incorporate different stitch patterns on the body for visual intrigue. Think bobbles, shells, or even a textured surface for added character.

  • Seasonal Themes: Create themed bunnies for holidays—think festive outfits or colors. Customizing each bunny will bring cheer throughout the year!

Cozy Plush Bunny Crochet FAQs

Can I substitute the bulky yarn with a different fiber?
Absolutely! While the plush bunny crochet pattern uses bulky yarn to achieve that irresistible texture, you can substitute it with a medium-weight yarn. However, keep in mind that this may result in a slightly smaller finished product, so adjust your hook size and stitch count accordingly for balance.

How can I make my plush bunnies bigger or smaller?
To modify the size of your plush bunnies, you can easily adjust the yarn weight and hook size. Using thicker yarn or a larger hook will give you a larger bunny, while thinner yarn and a smaller hook will yield a more petite version. Just remember to keep your stitch count in check and adjust as necessary.

Why is my bunny’s work curling?
Don't panic! Curling can happen if your tension is too tight or if you're using a hook that's too small for your yarn. Check your gauge and consider loosening your tension as you crochet. If it's still curling, give it a light steam with an iron or a hair dryer on a low setting while protecting the fibers.

What’s the best way to fix dropped stitches?
It's an easy fix! If you notice a dropped stitch, you can use a crochet hook to carefully pick it back up and work it into the stitch below. Alternatively, if it's too loose, you may need to re-crochet a few stitches. Just stay calm, and your plush bunny will be perfect in no time.

What size hook should I use for this pattern?
The recommended hook size for the cozy plush bunny crochet is a 6.0 mm (J-10). This size will help create snug stitches to maintain the bunny's delightful shape. If you're unsure about your tension, always do a quick gauge swatch before starting!

Can I add additional embellishments to my bunnies?
Absolutely! Feel free to get creative with your plush bunny crochet by adding bows, scarves, or floral crowns. These embellishments provide a personal touch and can be easily sewn on during the assembly phase, making your bunnies even more charming and unique!

Filed Under: Uncategorized

Chubby Cat Amigurumi: Adorable Plushies to Cuddle!

August 22, 2026 by Publisher Leave a Comment

Chubby Cat Amigurumi: Adorable Plushies to Cuddle!

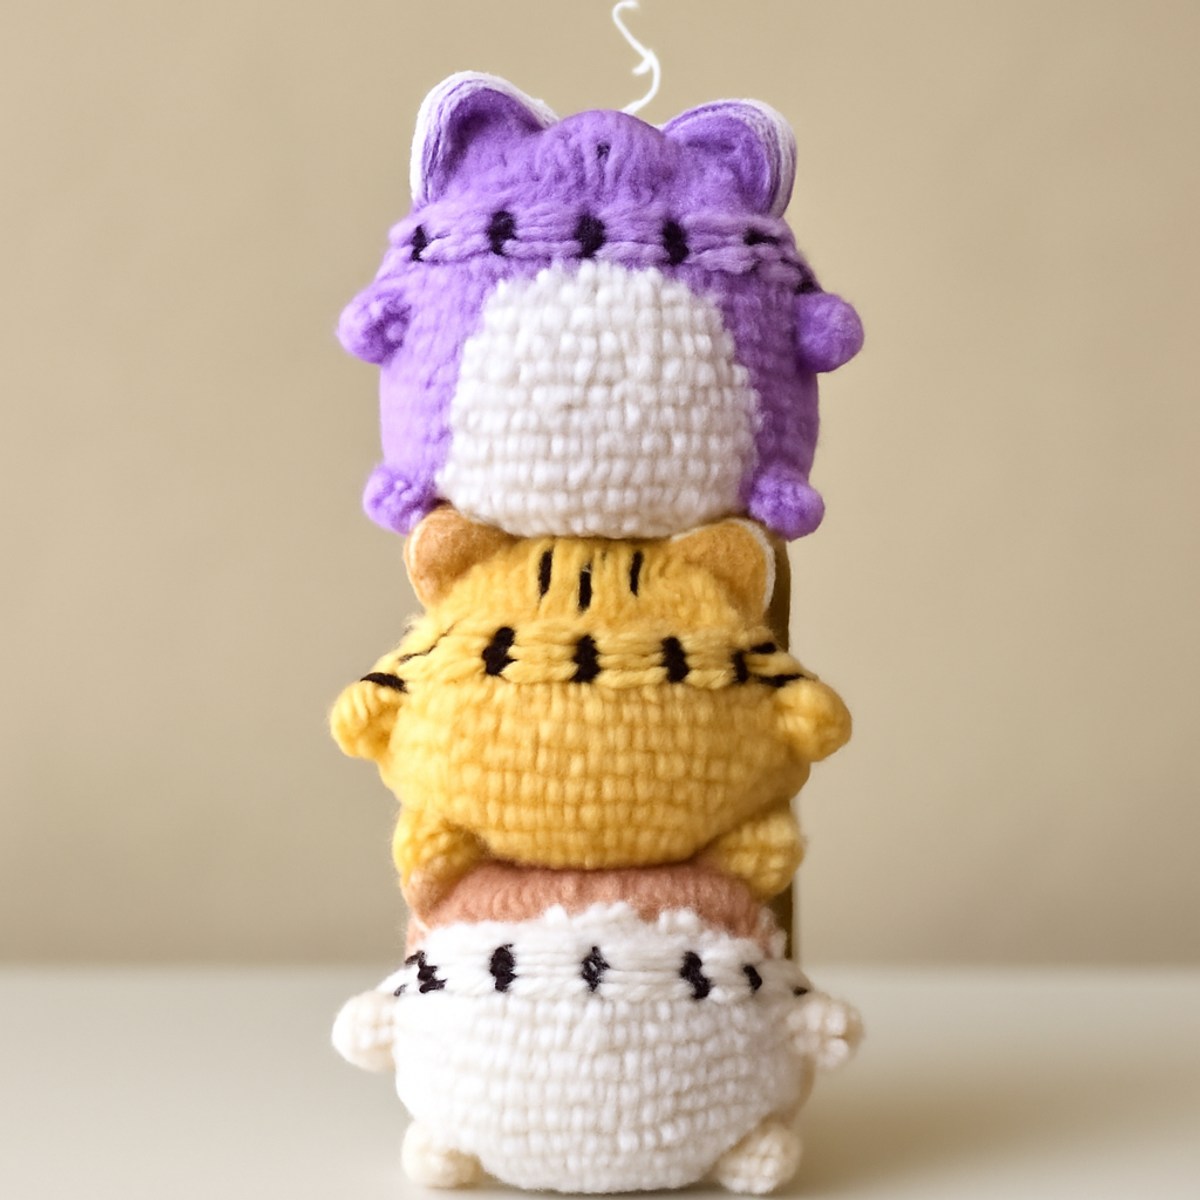
There’s something magical about cuddling a plush creation that carries a little piece of our creativity. As I crafted these chubby cat amigurumi, each stitch felt like a playful addition to my collection of yarn friends. This project not only results in an irresistibly cute and squishy cat plushie, perfect for brightening up any shelf or delighting a child, but it also serves as a wonderful bridge for honing your crochet skills through engaging techniques. With just some medium-weight yarn and a few basic supplies, you’ll find yourself experimenting with colors and textures, transforming simple yarn into a heartfelt gift or a whimsical decor piece. Ready to jump into the joy of creation and meet your new furry friend? Let's start stitching these adorable chubby cats together!

Chubby Cat Amigurumi Materials & Tools

Yarn

  • Medium Weight Yarn – Approximate yardage of 100-150 yards per chubby cat amigurumi, perfect for achieving that soft, squishy texture.
  • Acrylic or Cotton Blend Yarn – Choose this fiber type for durability and a lovely finish on your plushies.

Tools & Notions

  • 4.5mm (US G/6) Hook – Ideal for the stitch tightness needed to create a solid structure for your adorable cats.
  • Safety Eyes – Add these for expressive faces that bring your chubby cat amigurumi to life!
  • Stitch Markers – Helpful for tracking rounds and maintaining accuracy as you work on those charming bodies.

Enjoy exploring your creativity with these materials as you embark on making your very own chubby cat amigurumi!

Why Love This Chubby Cat Amigurumi?

Adorable Designs: These chubby cat amigurumi are irresistibly cute, making them perfect companions or delightful gifts.
Skill Enhancement: The blend of techniques not only keeps the project fun but also enhances your crochet skills, bridging the gap between simplicity and complexity.
Cozy & Fun: With their soft, squishy texture, these plushies are inviting to hug, adding a cozy charm to any space.
Creative Freedom: Explore and experiment with color combinations, enabling a unique creation that reflects your style.
Perfect Size: Measuring around 5-6 inches tall, they’re just the right size for little hands or as a whimsical decor accent.
Get ready to stitch these delightful cuddle buddies and enjoy the crafting journey!

How to Check Your Gauge for Chubby Cat Amigurumi

Don't skip the gauge swatch! Ensuring your tension is consistent is crucial for your chubby cat amigurumi so that each plushie comes out perfectly cute. A standard guideline to gauge for this project could be around 4×4 inches (10×10 cm) producing approximately 16 single crochets by 18 rows; however, please check your own tension as yarns can behave differently. To adjust the size of your amigurumi, simply increase your starting chain in multiples of 6, or if you wish to make a smaller version, reduce it accordingly. If your swatch comes out too small, try going up a hook size to get the squishy texture just right. Happy crocheting!

Step-by-Step Pattern for chubby cat amigurumi

Round 1: Starting the Body
Begin by creating a magic ring. Work 6 single crochets (sc) into the ring, pulling tightly to close. This will form the foundation for your chubby cat amigurumi. Your work should start to form a small, tight circle (6 sts).

Round 2: Building Up
In this round, increase the stitches to create a rounded shape. Work 2 single crochets (sc) in each stitch around. You should now have a total of 12 stitches, and your work will begin to cup slightly (12 sts).

Round 3: Continuing to Shape
To further enlarge your cat’s body, alternate between 1 single crochet (sc) and 2 single crochets (inc) in each stitch. This means you’ll work 1 sc in the first stitch, then an increase in the next. At the end of the round, you’ll have 18 stitches, and your cat’s body should have a gentle curve (18 sts).

Round 4: Expanding the Base
Increase your stitch count again by crocheting 1 single crochet (sc) in the next 2 stitches, followed by an increase (inc) in the next. Repeat this sequence around. After this round, you will have a total of 24 stitches, and your work will start to look more pronounced as a plump body (24 sts).

Round 5: Working the Body Height
For this round, simply work 1 single crochet (sc) in each stitch around without any increases. This will create the height of your chubby cat amigurumi body. After completing this round, you should still have 24 stitches, and your work will resemble a small pot shape (24 sts).

Round 6: Creating Dimension
Continue the body by repeating Round 5 for two more rounds. This adds more height to your chubby cat, completing the body segment. Your work should feel solid and purposed, maintaining a stitch count of 24 (24 sts for each round).

Round 7: Shaping the Head
To transition to the cat's head, reduce stitch count by working 1 single crochet (sc) in the first 2 stitches, followed by a decrease (dec) in the next. This round should leave you with 18 stitches, with your work slightly tapering at the top (18 sts).

Round 8: Final Head Shaping
Now, work 1 single crochet (sc) in each stitch around. This step further shapes the rounded head of your chubby cat amigurumi, maintaining a total of 18 stitches throughout (18 sts).

Round 9: Adding the Face
Sew safety eyes onto the head, spacing them evenly for a balanced look. For added character, use embroidery thread to create a small nose or mouth. This will start giving your chubby cat its adorable expression while ensuring they feel warm and inviting.

Step 10: Adding Ears
Create the ears by chaining 6 and turning your work. In the second chain from the hook, work 1 single crochet (sc), then 2 single crochets (inc) in the next stitch, followed by 2 single crochets (sc). Finish with 1 slip stitch (sl st) to close. This can be repeated for the second ear, resulting in two symmetrical pieces.

Step 11: Assembling the Cat
Attach the ears to the top of the cat's head using a whip stitch or needle. Position them appropriately for a cute stance. Your charming chubby cat amigurumi will start looking like a complete plushie, ready for hugs!

Step 12: Finishing Touches
Weave in any loose ends and consider adding a touch of blush to the cheeks for extra cuteness. You can also shape the body slightly by gently steam blocking. Your chubby cat amigurumi is now complete, ready to be treasured or gifted!

Expert Tips for Chubby Cat Amigurumi

Tension Matters: Consistent tension is crucial for a uniform appearance. Keep your stitches even to maintain the charming plumpness of your chubby cat amigurumi.

Count Stitches: Always count your stitches as you go. This prevents gaps and ensures seamless curves, keeping the adorable shape of your plushies intact.

Secure Features: When adding safety eyes and facial features, double-check their placement. Ensuring symmetry will give your chubby cat a delightful expression that enhances its charm.

Finishing Touches: Weave in all loose ends carefully to achieve a polished look. Consider steam blocking your finished plushies to smooth and shape any uneven areas, making them even more inviting.

Avoiding Mistakes: Be mindful not to twist the foundation chain when starting. A straight start will ensure a seamless, rounded body for your chubby cat amigurumi.

How to Wash and Care for Your Chubby Cat Amigurumi

Machine Washing: If you must machine wash your chubby cat amigurumi, use a gentle cycle with cold water and place it inside a mesh bag to avoid agitation and help maintain its shape.

Hand Washing: For the best care, hand wash your plushies in cold water using a mild detergent to preserve the texture and avoid any potential felting or pilling.

Drying/Blocking: After washing, lay your chubby cat amigurumi flat on a clean towel to dry. Avoid hanging, as it may stretch the shape. You can gently reshape it while damp.

Storage: Keep your amigurumi in a cool, dry place, away from direct sunlight. This prevents fading and keeps your adorable plushies safe when not on display!

What to Pair with Cute and Squishy Chubby Cat Plushies

As you delight in crafting these whimsical chubby cat amigurumi, consider expanding your cozy collection with adorable companions.

  • Mini Cat Bed: A cute little nest for your chubby cat amigurumi, perfect for snuggling or display.
  • Paw Print Blanket: Crocheting a soft blanket with paw prints creates a warm backdrop for your plushies. Wrap yourself and your creations in comfort!
  • Cat Tree Toy: A fun twist, create a small yarn ball or dangling toy perfect for adventurous kitties. This adds playful flair to your plush collection!
  • Whimsical Wall Hanging: A decorative piece that can showcase your chubby cat amigurumi and other crochet treasures, bringing warmth to your space.
  • Matching Amigurumi Friends: Crafting a few other animal plushies ensures your chubby cat amigurumi has friends for delightful playtime or gifting!

Chubby Cat Amigurumi: Customization Ideas

Embrace the joy of personalizing your chubby cat amigurumi with these delightful variations and substitutions that will spark your creativity!

  • Yarn Alternatives: Swap out your medium-weight yarn for a cotton blend for a softer, more breathable finish.
  • Hypoallergenic Options: Choose alpaca or bamboo yarn for a gentle touch, perfect for sensitive skin and eco-friendly projects.
  • Color Combinations: Experiment with color-blocking techniques by creating distinct sections on your cat, such as a pastel belly contrasting a vibrant body.
  • Size Adjustments: Scale the pattern by using a thicker yarn and larger hook to create a giant chubby cat, perfect for snuggling and display.
  • Textured Finishes: Add some flair by incorporating textured yarns, such as boucle or chenille, for a different tactile experience that’s fun to touch.
  • Dress Up Your Cat: Crocheting tiny accessories, like a bow tie or a scarf, can add character and turn your chubby cat into a trendy little friend.
  • Pom-Poms & Fringe: Attach colorful pom-poms to the tail or fringe to the ears for a playful touch that enhances charm and whimsy.
  • Personal Touches: Add embroidery stitches for unique facial expressions, or use fabric paint to give your cats unique patterns, making every piece truly one-of-a-kind.

Dive into these variations and let your imagination run wild, transforming your chubby cat amigurumi into a truly special creation!

Chubby Cat Amigurumi FAQs

Can I use a different yarn weight for my chubby cat amigurumi?
Absolutely! While the pattern suggests medium (worsted) weight yarn for that delightful squishy texture, you can experiment with other weights. Just remember that using a lighter weight yarn may require adjusting your hook size and stitch count to maintain the plush shape.

How can I make my chubby cat amigurumi bigger or smaller?
To adjust the size, you can simply use a larger or smaller hook or yarn. If you want to make your plushie bigger, consider increasing the number of stitches in your initial rounds. For a smaller version, you can decrease the stitch count or use a finer yarn. Just keep track of your adjustments to maintain consistency!

Why is my amigurumi work curling?
Don't panic! Curling often happens due to uneven tension in your stitches. Make sure your tension is consistent throughout your work. If you've followed the pattern carefully and it's still curling, try steam blocking the finished piece to help shape it more evenly.

What should I do if I drop a stitch while crocheting?
It’s an easy fix! Just take a deep breath and carefully pull the working yarn back to the dropped stitch. Use your crochet hook to pick it back up and keep crocheting. If you’ve lost multiple stitches, it might be helpful to frog back a few rounds to ensure a neat finish.

What hook size should I use for the chubby cat amigurumi?
The pattern recommends a 4.5mm (US G/6) hook for the best results. This size allows for tight stitches, helping to maintain the stuffed shape of your plushies. If you find your stitches are too loose or too tight, adjusting your hook by half a size can help achieve the right gauge.

Can I use safety eyes in different sizes?
Yes! You can absolutely use safety eyes of various sizes to give your chubby cat amigurumi unique expressions. Just consider the overall scale of your plushie; larger eyes can make the cats look extra adorable, while smaller ones lend a more understated charm. Enjoy customizing their faces!

Filed Under: Uncategorized

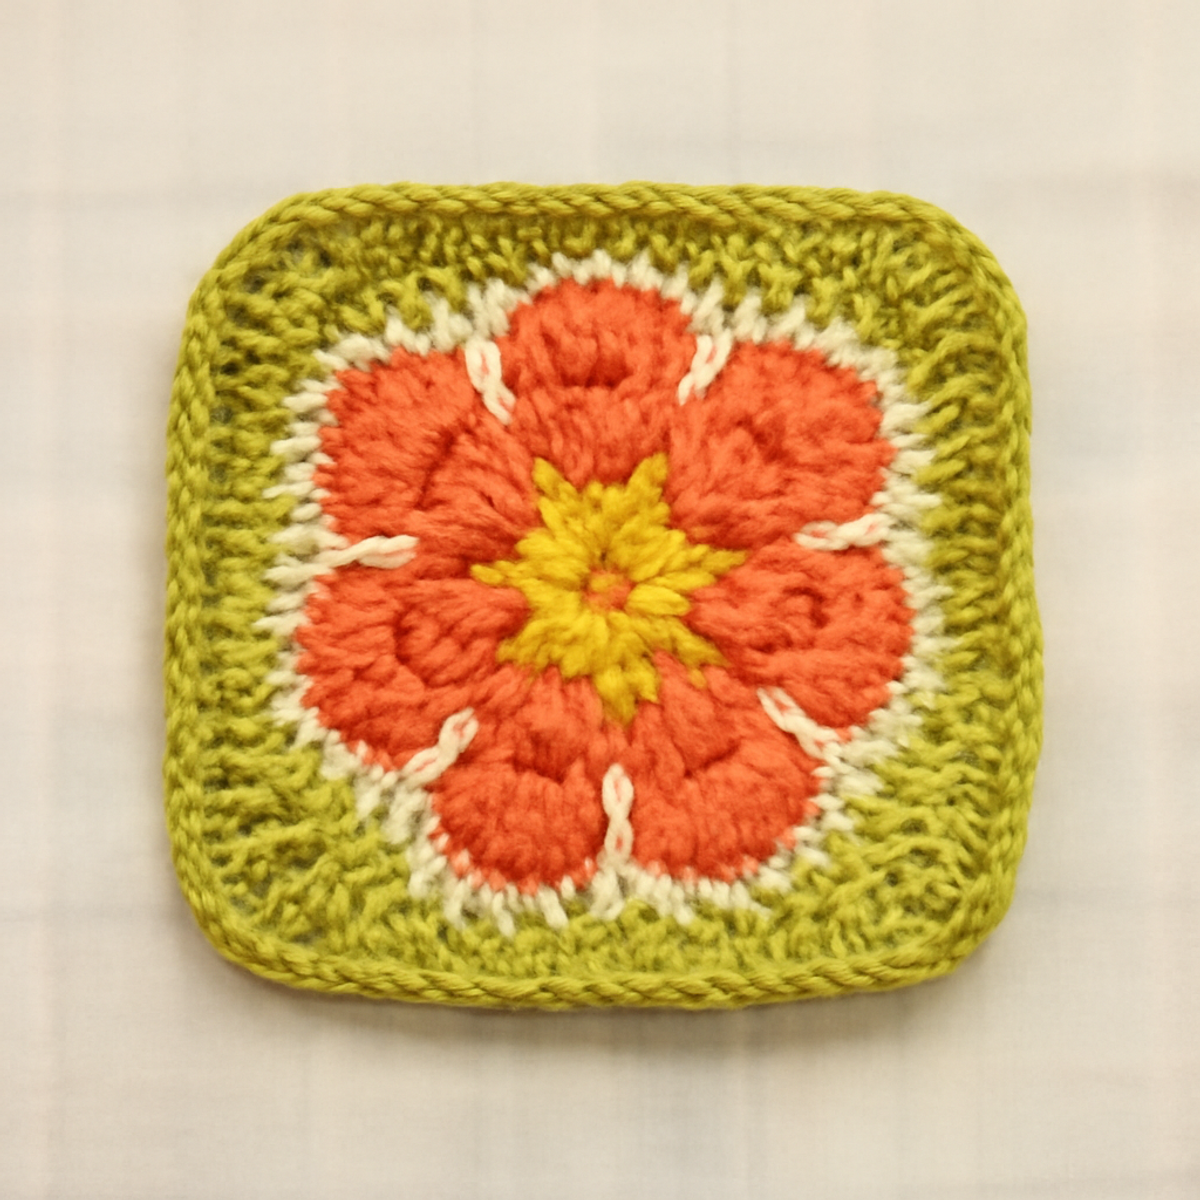
Vibrant African Flower Crochet Squares for Cozy Creations

August 22, 2026 by Publisher Leave a Comment

Vibrant African Flower Crochet Squares for Cozy Creations

As I unraveled the vibrant yarn for my latest project, I couldn’t help but feel the excitement of color dancing through my fingertips. This week's adventure in crochet features the delightful African Flower crochet squares, an enchanting blend of cheerful petals and intricate designs. Perfect for intermediate crafters, these squares provide a fulfilling way to play with hues while lending themselves beautifully to larger projects like blankets, bags, or unique home decor. Not only do these squares work up quickly, but their handmade charm guarantees that each piece reflects your personal touch. So, grab your hooks and let’s dive into creating these stunning squares that will surely brighten any corner of your world!

African Flower Crochet Materials & Tools

Note: Gather these materials to create your vibrant African Flower crochet squares!

Yarn

  • Worsted Weight Yarn – Choose acrylic or cotton for durability and ease of care; you'll need about 50-75 yards per square.
  • Colorful Yarn Options – Experiment with bright hues for the petals and a contrasting green for the border to showcase your creativity.

Tools & Notions

  • 4.5 mm (US G/6) Hook – This size helps create a tight stitch definition for good structure in your squares.
  • Stitch Markers – These are essential to track your rounds and maintain organization as you work through the pattern.
  • Yarn Needle – Use this for weaving in loose ends to finish each square neatly.

Why Choose African Flower Crochet Squares?

Colorful Creativity: These African Flower crochet squares allow you to experiment freely with vibrant hues, producing unique designs each time.
Quick and Enjoyable: The straightforward technique means you can whip up squares in no time, perfect for gifts or quick projects.
Therapeutic Experience: Engaging with color and texture can be a meditative crafting experience, rejuvenating your creative spirit.
Versatile Decoration: Use these cheerful squares in a variety of projects, from cozy blankets to playful coasters, making them perfect for any occasion.
Crafters' Pride: With each completed square, you’ll hold a tangible piece of artistry that showcases your dedication and skill.

How to Check Your Gauge for Vibrant African Flower Crochet Squares

Don't skip the gauge swatch! Checking your crochet gauge is essential to ensure your vibrant African Flower crochet squares turn out just as beautifully as intended. A standard guideline for these squares is that 4×4 inches (10×10 cm) should comprise approximately 12 double crochets by 8 rows. If you find your tension doesn't match, don’t worry! You can adjust your size by changing your hook; if your swatch is too small, simply go up a hook size. To make each square larger, increase your starting chain in multiples of 6, and feel free to experiment with additional rounds for a grander finish. Happy hooking!

Step-by-Step Pattern for Vibrant African Flower Crochet Squares

Row 1: Start the Center
Begin with a magic ring. Inside the ring, work 12 single crochet stitches (sc) and pull the ring tight to close. This foundation creates the center of your African Flower crochet square. Your work should lay flat and form a small circle at this stage (12 sts).

Row 2: Form the First Round
Ch 3 (counts as first double crochet dc), then in the same ring, work 2 dc, ch 2, and (3 dc, ch 2) three times. Slip stitch (sl st) into the top of the initial ch 3 to close the round. You should see lovely petal shapes starting to emerge from the center (12 dc + 4 ch-2 spaces).

Row 3: Create the Petals
In each ch-2 space from the previous round, work (3 dc, ch 2, 3 dc). This will create the first layer of colorful petals for your African Flower crochet square. Make sure the petals are well-defined, and at the end of this row, count your stitches to ensure consistency (24 dc + 4 ch-2 spaces).

Row 4: Add a Second Layer of Petals
In each ch-2 space of the previous round, repeat the pattern of (3 dc, ch 2, 3 dc). This round will enhance the flower’s texture and fullness, adding depth to your African Flower crochet square. Your work should appear lush and floral as you complete this round (36 dc + 4 ch-2 spaces).

Row 5: Start the Color Change
Change to your border color. In each ch-2 space, work 2 dc, ch 1, and then 2 dc. Slip stitch to the first dc to close the round. This round will help transition from the petals to the finishing border. Your square should have more defined edges now (48 dc + 4 ch-1 spaces).

Row 6: Establish the Final Border
Continue with your border color. In each ch-1 space from the previous round, work 1 dc, and then in each corner, work (3 dc, ch 2, 3 dc). This round solidifies the structure of your African Flower crochet square and gives it a neat finish. At this point, your square should have nearly straight sides (72 sts).

Row 7: Finalizing the Square
For the last round, work 1 dc in each stitch around, making sure to place 3 dc in each corner space. This provides a tight finish and helps the square hold its shape beautifully. As you complete this round, check that your square lies flat and even, ready for blocking (96 sts).

Row 8: Weaving in Ends and Blocking
Finish by fastening off your yarn and weaving in any loose ends with a yarn needle. Blocking the completed squares will help enhance the vibrant colors and maintain the floral shape. Your finished vibrant African Flower crochet square is now ready to shine in your next cozy creation!

What to Pair with Vibrant African Flower Crochet Squares

Imagine creating a whimsical collection of pieces that harmonize beautifully with your vibrant squares, turning your space into a cozy haven.

  • Charming Coasters: A set of coasters in the same floral colors will protect your surfaces while adding a cheerful touch.
  • Delightful Tote Bag: Combine these squares into a tote bag, perfect for carrying your crafting supplies in vibrant style.
  • Cozy Blanket: Join several squares together to form a stunning blanket that shines with color and warmth, perfect for chilly nights.
  • Festive Pillow Covers: Use your squares to craft delightful pillow covers, creating cozy accents that invite relaxation and conversation.
  • Playful Keychain: Make small squares for a unique keychain, allowing you to carry a piece of your African flower crochet artistry everywhere you go.

Care Instructions for African Flower Crochet

Machine Washing: Use cold water on a gentle cycle to prevent felting or pilling. Always place your African Flower crochet squares inside a mesh laundry bag for added protection.

Hand Washing: If you prefer, gently hand wash your squares in cold water using a mild detergent. Avoid excessive agitation, as this can alter the texture of your beautiful squares.

Drying/Blocking: Lay your squares flat to dry, reshaping them to maintain their floral design. Blocking is crucial to enhance the colors and ensure your African Flower crochet squares hold their shape beautifully.

Storage: Store your finished squares in a cool, dry place, away from direct sunlight. Consider using acid-free storage bags to prevent any dust buildup and preserve your creative work.

African Flower Crochet Variations

Feel free to let your creativity bloom by customizing these African Flower crochet squares to match your style!

  • Yarn Weight Swap: Use chunky yarn for larger squares, creating a cozy, plush feel perfect for blankets.
  • Fiber Alternatives: Try bamboo or wool for a different texture and warmth, offering unique drape and visual appeal.
  • Color Blocking: Experiment by creating two-color squares, using contrasting hues for petals and background to add depth.
  • Size Adjustments: Increase the hook size for a roomier square, or use a smaller hook for tighter, more defined shapes.
  • Textured Borders: Consider adding a scalloped or picot edge for a whimsical finish that frames your floral design beautifully.
  • Pom-Pom Accents: Attach small pom-poms to the centers of your squares for playful texture that adds a fun twist to traditional designs.
  • Embellishments: Incorporate buttons or beads to the flower centers to elevate the handmade charm with a touch of sparkle.
  • Multi-layered Squares: Create a three-dimensional flower effect by adding additional rounds to the petals, making your designs truly pop.

Expert Tips for African Flower Crochet

  • Consistent Tension: Maintain an even tension throughout your project. Using a yarn guide can help avoid tight or loose stitches that lead to uneven squares.

  • Count Your Stitches: Regularly count your stitches after each round. It’s easy to lose track, especially during color changes; checking often can prevent a frustrating frogging session.

  • Check Your Gauge: Before diving in, ensure your gauge matches the recommended size. This ensures all your squares fit together neatly, especially for larger projects.

  • Block for Beauty: After completing your squares, don’t skip blocking. This step shapes your squares and enhances the colors, making your African Flower crochet squares truly stand out.

  • Secure Your Ends: Weave in all loose ends neatly with a yarn needle. This gives your squares a polished look and prevents unraveling during use or washing.

Vibrant African Flower Crochet Squares FAQs

Can I use a different yarn weight instead of worsted weight for my African Flower crochet squares?
Absolutely! You can substitute with lighter or heavier yarns, but keep in mind that this will affect the size and texture of your squares. If you choose a lighter yarn, like DK weight, consider going down a hook size so your stitches remain tight and defined.

How can I adjust the size of my African Flower crochet squares?
To make your squares bigger or smaller, you can simply change your hook size. Using a larger hook will produce a looser square, while a smaller hook will create a tighter fit. Additionally, you can add or reduce rounds in the petal section for your desired size!

Why is my African Flower crochet square curling at the edges?
Don’t panic! This is a common issue that can occur due to inconsistent tension or not blocking your squares. Check your tension during stitching to ensure it’s uniform. After finishing, be sure to block your squares flat to help them lay properly—the edges should relax beautifully!

What hook size should I use for my African Flower crochet squares?
I recommend using a 4.5 mm (US G/6) hook for the best stitch definition and structure. If you're experimenting with different yarn weights, adjust the hook size accordingly to match the yarn's recommendations to keep your stitches even.

How do I fix dropped stitches while working on my African Flower crochet squares?
It's an easy fix! Simply identify the dropped stitch and use your crochet hook to pull the yarn back up through the nearest stitch. If it's a larger area, you might need to frog back a few stitches. Just take your time, and remember practice makes perfect!

Can I add embellishments to my finished African Flower crochet squares?
Yes, adding embellishments like buttons or beads is a fabulous way to personalize your squares! Just make sure they’re securely attached, so they don’t come off during use. This little touch can transform a lovely square into a unique statement piece!

Filed Under: Uncategorized

Charming Crochet Daisy Keychain: Whimsical & Handcrafted Delight

August 22, 2026 by Publisher Leave a Comment

Charming Crochet Daisy Keychain: Whimsical & Handcrafted Delight

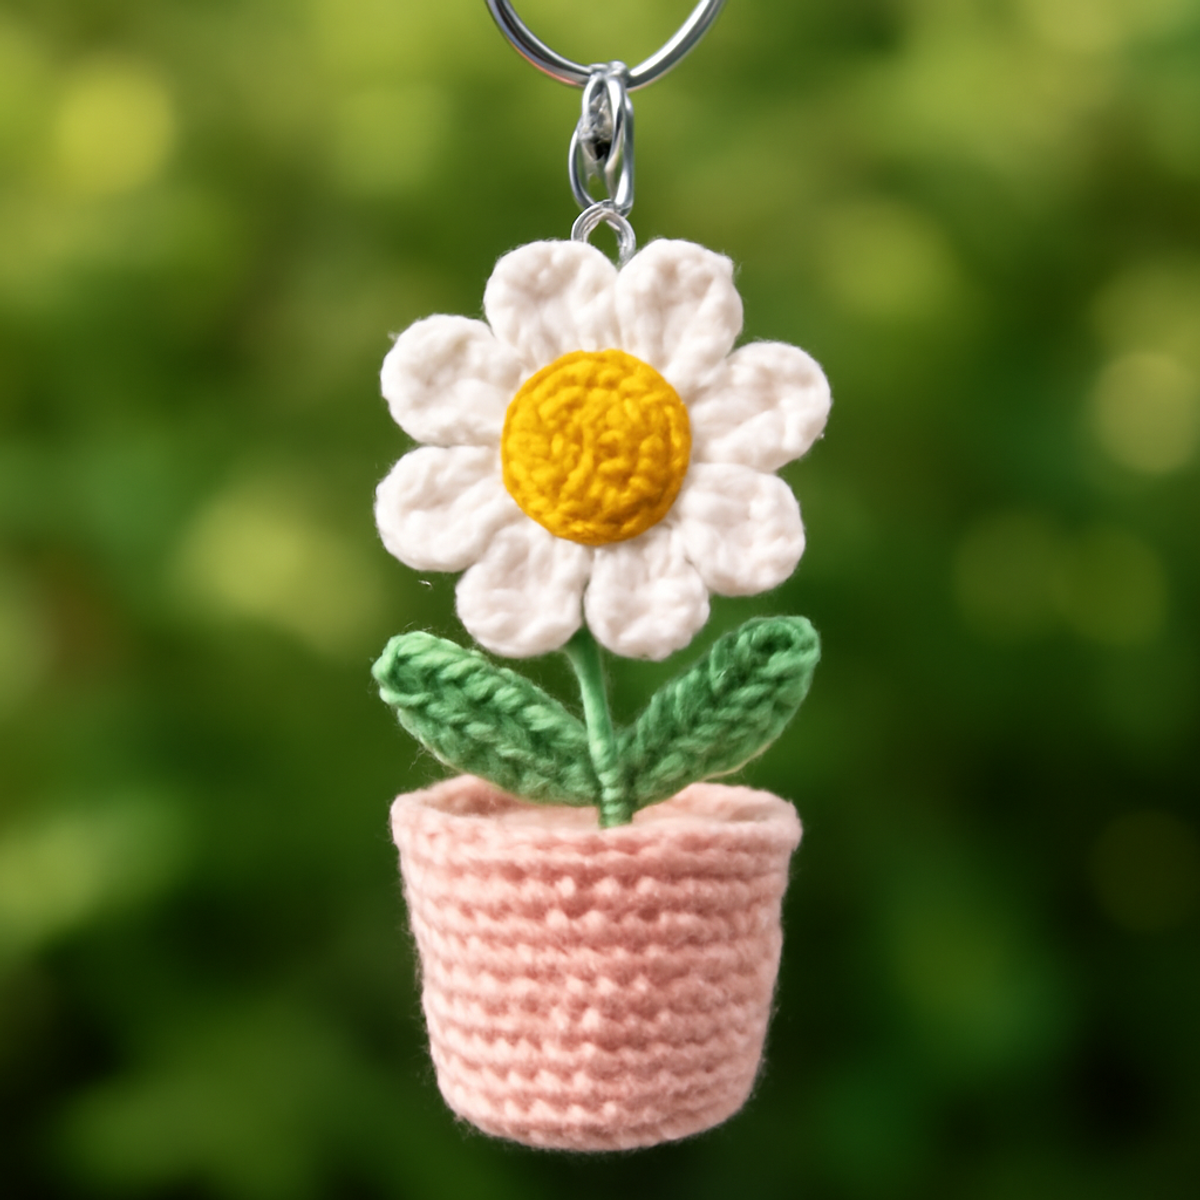
The moment I held my latest creation—a crochet daisy keychain—between my fingers, I knew I had something special. This charming little accessory brightens my daily routine while showcasing my love for all things handmade. This project, known as the "Daisy in a Pot Keychain," is perfect for intermediate crafters ready to elevate their skills with intricate flower construction and delightful color choices that reflect your personal style. Not only does this crochet daisy keychain add a whimsical touch to your bag or keys, but it also serves as a fantastic stash-buster, making use of those lightweight yarns you’ve been saving. Whether you want to create a gift or a treat for yourself, I can’t wait for you to experience the joy of turning yarn into a blooming piece of art that stands out in every way. Let’s dive into this creative journey together!

Crochet Daisy Keychain Materials & Tools

  • Worsted Weight Yarn – Use approximately 50-70 yards per color for this lovely project; cotton or cotton blend is best for structure.
  • 3.5mm (E) Hook – This size will help you achieve the tight fabric needed for the detailed flower construction.
  • Yarn Needle – Essential for weaving in ends and finishing off your keychain beautifully.
  • Safety Eyes (optional) – Consider these for added embellishment if you want to enhance your daisy's charm.

Why Make a Crochet Daisy Keychain?

Whimsical design: This keychain's enchanting daisy motif brings a playful charm to your everyday accessories.
Skill-building: Perfect for those looking to sharpen intermediate skills, you’ll master flower construction and assembly.
Stash-friendly: Utilizing just 50-70 yards of yarn, this project efficiently uses leftover skeins.
Personalized flair: Choose your favorite colors to match your mood or decor, making it a truly unique piece.
Portable project: Compact and lightweight, it’s ideal for crafting on the go, whether at home or out and about!

Gauge & Sizing Notes

Don't skip the gauge swatch! Checking your tension is crucial for the perfect crochet daisy keychain. A standard gauge measurement for this project is approximately 4×4 inches (10×10 cm), which typically yields about 20 single crochets by 22 rows using a 3.5mm (E) hook. If your gauge doesn’t match, don’t worry! To make your keychain larger, simply increase your starting chain or round in multiples of 6 for the pot and adjust your flower layers accordingly. If your swatch is too small, try going up a hook size to achieve that lovely, cozy look that makes your crochet daisy keychain shine!

Step-by-Step Pattern for Crochet Daisy Keychain

Row 1: Begin the Daisy Center
Create a magic ring, then work 6 sc into the ring, pulling snugly to close. This forms the daisy center, giving it a nice rounded shape. As you crochet, be sure to maintain an even tension so your work sits neatly. Pull the yarn tail to close the ring tightly. (6 sts)

Row 2: Build the Daisy Center
In the next round, work 2 sc in each stitch around to increase the size of the center. This will brighten the middle of your crochet daisy keychain and give it a plushy feel. Continue crocheting, ensuring your stitches stay tight and compact. (12 sts)

Round 3: Create Petal Base
Switch to white yarn. In the same stitch, work 1 dc, ch 2, 1 dc to form the first petal. Skip the next stitch and repeat this for a total of 6 petals around the circle. Your petals should start to stand out, creating that charming daisy shape. (6 petals)

Round 4: Petal Finishing Touch
For each petal, make 1 sl st in the next stitch and repeat the previous step for each petal around. This will define the edges and give your petals a lovely curl. Look for rippling among the petals, adding to the flower's charm. (6 petals)

Step 5: Add the Leaves
With green yarn, create a leaf by ch 8, then work 1 sl st in the 2nd ch from the hook, 1 sc in the next ch, 1 hdc in the next, and 1 dc in the last 4 chs. Turn your leaf and work back down the other side of the chain, mirroring the stitches. Your leaves will start to take shape and add a fresh pop of color. (1 leaf)

Step 6: Create the Pot
Change to a contrasting color for the pot. Ch 2, then work 6 sc in the first ch to form a circle. Continue crocheting in rounds, increasing by 6 stitches every other row until you reach the desired height for your pot, tapering slightly for a neat finish. Be sure to leave enough space for the flower at the top. (12-18 sts)

Step 7: Assemble Pieces
Position the daisy flower atop the pot and secure them together with a yarn needle, stitching neatly through the center. Attach the leaves on either side for a full look. Keep your stitching tight to ensure durability, and check to balance the flower with respect to the pot below.

Step 8: Final Touches
If desired, finish with a round of reverse single crochet (rsc) around the top of the pot for a neat edge. This will create a lovely decorative finish while hiding any join yarn ends. Your crochet daisy keychain is now taking its charming final form and is ready to brighten your day!

Proper Washing for Crochet Daisy Keychain

Machine Washing: Use a gentle cycle with cold water to prevent any potential felting or pilling. Always place your crochet daisy keychain in a mesh bag for extra protection.

Hand Washing: If you prefer, soak your keychain in cold water with mild detergent, gently swishing it around. Avoid wringing, as it can distort the shape and detail of your crochet daisy keychain.

Drying/Blocking: Lay your keychain flat on a clean towel to dry, reshaping the petals if needed. Avoid direct sunlight, as it may fade the colors; instead, let it air dry in a cool shaded area.

Storage: Keep your crochet daisy keychain in a cool, dry place, ideally in a padded container to avoid squashing its intricate details and beauty.

Crochet Daisy Keychain Variations

Explore new aspects of your crochet journey by adding personal touches to your daisy keychain!

  • Yarn Weight Swaps: Use lighter or heavier yarn to create a mini or oversized version of your keychain. This twist will give the daisy a different feel and presence.
  • Cotton vs Acrylic: Opt for an acrylic blend for a softer texture, or stick to 100% cotton for structure. Each choice brings a unique personality to your design.
  • Color Blocked Petals: Experiment with different colors for each petal! Choose a bright palette for summer vibes or earthy tones for fall charm. The result will be truly eye-catching.
  • Sizing Adjustments: Change the hook size to modify the overall dimensions. With a larger hook, you can produce a more relaxed appearance, while a smaller hook enhances detail.
  • Embellished Pot: Enhance the functionality of your keychain by embroidering a small pattern on the pot. This brings depth and personal flair to your project.
  • Fringed Leaves: Add a playfully textured fringe to the leaves for a whimsical touch. Cut lengths of yarn and tie them off at the leaf points for a unique finish.
  • Pom-Pom Fun: Attach a small pom-pom to the top of your pot or near the daisy for a playful accent, providing a pop of interest to the overall design.
  • Additional Colors: Craft a whole bouquet of daisy keychains in various hues to celebrate every season. Mixing them allows for a cheerful collection to share or gift.

Expert Tips for Crochet Daisy Keychain

  • Consistent Tension: Maintain an even tension while crocheting to ensure a balanced and beautiful flower shape, which is essential for your crochet daisy keychain.

  • Track Your Rounds: Use a stitch marker to keep track of your rounds, especially when constructing the flower. This helps avoid losing count and keeps your petals uniform.

  • Secure Assembly: When stitching the flower to the pot, ensure your stitches are tight. A firm attachment will prevent the flower from wobbling over time.

  • Final Block: After finishing, lightly steam block the flower petals. This will help them hold their shape beautifully and give a polished look to your crochet daisy keychain.

  • Check Edge Details: If using a reverse single crochet finish on the pot, double-check your stitches; a clean edge enhances the overall aesthetic of your delightful piece!

What to Pair with Daisy in a Pot Keychain

Create a matching set of delightful accessories that embody your love for whimsy and intricate craftsmanship.

  • Charming Coin Purse: A cute pouch using the same yarn will keep your essentials organized while complementing your keychain's floral beauty.

  • Crochet Bookmark: A playful bookmark featuring daisy motifs can elevate your reading experience. Imagine cozy evenings spent with your favorite book!

  • Plant Hanger: Bring the garden theme home with a crochet plant hanger, adding a dash of charm for your leafy greens.

  • Flower Pot Cozy: Dress up a small plant pot with a crochet cozy that matches your daisy keychain, creating a cohesive decor vibe in your home.

  • Whimsical Hair Clip: Craft a daisy-infused hair accessory that echoes your keychain's joyful essence, perfect for brightening any hairstyle or outfit.

Daisy in a Pot Keychain FAQs

Can I substitute yarn types for this crochet daisy keychain?
Absolutely! While a worsted weight cotton yarn is recommended for structure, you can use acrylic or a cotton blend as alternatives. Just ensure that the yarn you choose has a similar weight so that the final size and drape remain consistent.

How can I adjust the size of the keychain?
If you’d like to make your crochet daisy keychain larger or smaller, you can change your yarn weight. Using a thicker yarn will give you a bigger keychain, whereas a thinner yarn will produce a smaller version. Additionally, you can adjust your hook size accordingly to maintain the desired tightness of the fabric.

Why is my work curling?
Don’t panic! Curling often happens when stitches are too tight or if the pattern calls for different stitches that have varying tensions. Make sure your tension is consistent across the project, and consider using a larger hook if your work is overly tight.

What hook size should I use for this project?
For this crochet daisy keychain, a 3.5 mm (E) hook is suggested to achieve the tight fabric needed for the flower details. If you’re using a different yarn weight, you may need to adjust the hook size. It’s always a good idea to check your gauge with a swatch to find your sweet spot.

How do I fix a dropped stitch?
It’s an easy fix! Simply use your yarn needle to pick up the dropped stitch from the row below. Reinsert your hook into the stitch and carry on. If it's a severe drop, you might need to frog back a couple of rows—don't be discouraged, it's all part of the crafting journey!

Can I add embellishments after completing my daisy keychain?
Certainly! Feel free to get creative by adding beads, buttons, or even embroidery designs on the pot. These little touches can personalize your crochet daisy keychain and make it truly one-of-a-kind, reflecting your unique style!

Filed Under: Uncategorized

“Charming Daisy Flower Buddy Crochet Pattern for Joyful Crafters”

August 22, 2026 by Publisher Leave a Comment

"Charming Daisy Flower Buddy Crochet Pattern for Joyful Crafters"

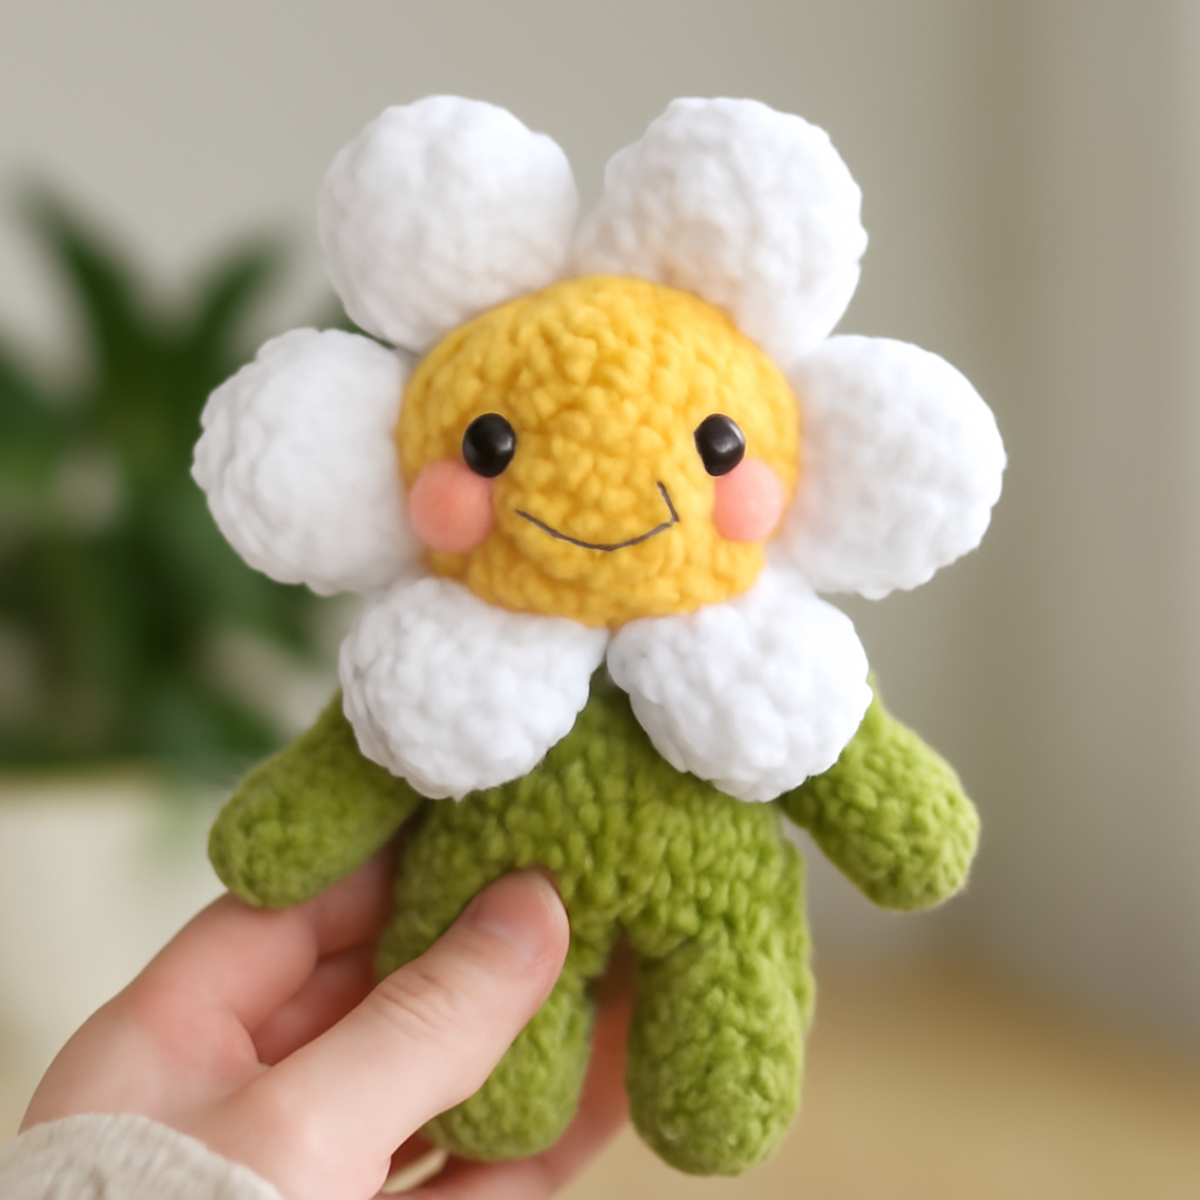
As I settled into my favorite corner of the couch, the gentle rhythm of my hook weaving through vibrant yarn always brings a sense of peace and joy. Today, I’m excited to share the delightful daisy flower buddy crochet pattern! This whimsical project, perfect for any level of crafter, embodies the cheerful spirit of spring while creating charming little flower companions. One of the best parts? The soothing repetition of simple stitches makes it an enjoyable and quick make—ideal for those of us with busy lives or the need for a last-minute gift. These daisy flower buddies also serve as lovely decorations that can brighten any space, infusing warmth and happiness into your home. Let’s dive into this creative journey together and stitch up some joy!

Daisy Flower Buddy Materials & Tools

To create your cheerful daisy flower buddy, gather the following materials to let your creativity blossom!

Yarn

  • Worsted Weight Yarn – A medium weight yarn works best; around 100-150 yards in soft yellow, bright white, and fresh green will bring your buddies to life.

Tools & Notions

  • 4.5 mm (G-6) Hook – This size is perfect for achieving the plush look that makes your daisy flower buddy charming.
  • Safety Eyes – Add some personality to your buddy; choose 6mm safety eyes for that perfect expressive look.
  • Blush (for cheeks) – A soft touch to give your flower buddies a sweet look; any acrylic-safe blush will do!
  • Yarn Needle – Essential for sewing pieces together; a blunt tip will work best to avoid splitting the yarn.

Feel free to explore various colors and textures to personalize your daisy flower buddy even further!

Why Choose the Daisy Flower Buddy?

Whimsical Design: The charming daisy flower buddy is not only visually appealing but also brings a playful touch to any space, perfect for all ages.
Simple Stitches: Ideal for beginners, this pattern leverages basic crochet techniques, making it accessible and enjoyable for crafters at any skill level.
Quick Project: With its efficient construction, you can complete these sweet buddies in no time, making them a great option for last-minute gifts or quick crafting sessions.
Customizable Touches: Feel free to experiment with colors and accessories, allowing you to put your unique spin on each flower buddy for a personalized finish.
Joyful Vibes: Infusing your creation with the spirit of spring, these delightful buddies are sure to evoke smiles and happiness, lighting up your home or brightening someone else's day.

Gauge & Sizing Notes

Don't skip the gauge swatch! Ensuring the correct tension is vital for your daisy flower buddy to achieve the perfect plush and rounded shape. A general guideline for amigurumi projects is aiming for a gauge of approximately a 4×4 inch (10×10 cm) square, which typically yields about 14 single crochets by 8 rows. If you're looking to scale your daisy flower buddy up or down, consider adjusting the starting chain in multiples of 6 to modify the size of the body and petals. If your tension swatch is too small, simply go up a hook size to ensure your daisy flower buddy has that adorable, inviting look you desire!

Step-by-Step Pattern for Daisy Flower Buddy

Round 1: Starting the Head
Begin with a magic ring using soft yellow yarn. Work 6 single crochets (sc) into the ring and pull tightly to close. You should have a small circle. This forms the center of your daisy flower buddy’s head.

Round 2: Expanding the Head
Crochet 2 single crochets (sc) in each stitch around for Round 2, yielding 12 stitches (12 sts). Your project should begin to round out nicely. Maintain even tension to keep the stitches uniform.

Round 3: Shaping the Head
For Round 3, work 1 sc in the first stitch, 2 sc in the next and repeat around. This will result in 18 stitches (18 sts). You'll notice the head puffing out slightly, forming a lovely round shape.

Round 4: Continuing the Head
In Round 4, crochet 1 sc in the first two stitches, 2 sc in the next around, bringing you to 24 stitches (24 sts). Your daisy flower buddy’s head should look quite round and plump now, ready for its petals!

Round 5: Petal Foundation
Switch to bright white yarn for the petals. In Round 5, chain 3 (ch 3) for the first petal, then work 1 double crochet (dc), 1 slip stitch (sl st) back into the center of the head. Repeat this process around, creating 6 petals for your daisy flower buddy.

Round 6: Finishing Petals
Continue chaining 3 (ch 3) and working your slip stitches (sl st) and double crochets (dc). After completing all petals, your work should now display a lovely flower shape, ready to move on to forming the body.

Round 7: Starting the Body
Change to fresh green yarn and slip stitch (sl st) into the base of the petals. In Round 7, work 6 single crochets (sc) into the space between petals. This will create the bottom of your daisy flower buddy’s body.

Round 8: Shaping the Body
For Round 8, crochet 1 sc in the first stitch, 2 sc in the next around, to yield 9 stitches (9 sts). You’ll begin to see a bulbous body forming, adding character to your creation.

Round 9: Continuing Body Structure
Round 9 consists of 1 sc in each of the first 2 stitches, 2 sc in the next. Repeat this to achieve 12 stitches (12 sts). Make sure your daisy flower buddy feels firm yet plush at this stage.

Step 10: Adding Limbs
To create the limbs, crochet 2 separate pieces: chain 6 (ch 6) and work 5 single crochets (sc) back to the starting end for each arm. For each leg, chain 8 (ch 8) and repeat the same as the arms but place a few extra stitches for added width.

Step 11: Attaching Limbs
Using a yarn needle, gently attach the prepared limbs to the body. Secure with slip stitches (sl st) or by sewing. Your daisy flower buddy should now have a lively stance!

Step 12: Finishing Touches
Finally, add 6mm safety eyes and some blush on the cheeks using soft acrylic-safe colors. Ensure the head sits firmly atop the body and check that everything is secure. Your adorable daisy flower buddy is now ready to be enjoyed!

How to Wash and Care for Your Daisy Flower Buddy

Machine Washing: Use cold water and a gentle cycle to care for your daisy flower buddy; this protects the yarn and maintains its vibrant colors.

Hand Washing: For delicate cleaning, gently submerge in cold water with mild detergent, pressing lightly to clean without agitating the fibers; avoid felting.

Drying/Blocking: Lay your daisy flower buddy flat on a clean towel to dry; reshaping your buddy while damp will retain its charming form and soft texture.

Storage: Keep in a cool, dry place away from direct sunlight to prevent fading; using a breathable bag can help maintain the daisy flower buddy’s texture and vibrancy.

Expert Tips for Daisy Flower Buddy

  • Tension Consistency: Maintain even tension throughout to achieve a well-proportioned daisy flower buddy. Avoid loosening your grip, especially when switching between yarn colors.
  • Stitch Counting: Keep a careful count of your stitches per round to prevent any discrepancies in size. Using a stitch marker can be very helpful for tracking your progress.
  • Secure Assembly: When attaching limbs, ensure they are stitched tightly to avoid any wobbling. Double-check that all pieces are securely fastened before completing your buddy.
  • Color Changes: When changing yarn colors, avoid tight pulls to prevent distortion. Gently weave in ends to keep your work neat and tidy, enhancing the final look.
  • Final Blocking: Lightly steam block your daisy flower buddy after finishing. This not only improves shape but also adds a polished touch to your charming creation.

What to Pair with Daisy Flower Buddy

As you bask in the joy of crafting your daisy flower buddy, consider creating complementary projects that deepen your springtime vibe.

  • Cheerful Grapevine Wreath: Adorn your door with a vibrant wreath by weaving in the same colors for a seasonal touch. A delightful way to welcome guests!

  • Flower Pot Cozy: Transform plain pots into charming displays by crocheting co ordinating cozies; a lovely home for your daisy flower buddy!

  • Mini Flower Buds: Create a bouquet of tiny flower buddies in assorted colors to accompany your larger daisy, making an enchanting spring centerpiece.

  • Buddy Storage Basket: Crochet a matching basket using the same yarn to store small items, blending functionality with whimsy—ideal for a cheerful space!

  • Petal Garland: Craft a playful garland of crocheted petals that can drape across windows or walls, infusing the atmosphere with joy and light.

Let your creativity flourish and enjoy the journey of making a cohesive, enchanting collection!

Daisy Flower Buddy Variations

Unlock your creativity and infuse your daisy flower buddy with a personal touch through these delightful variations!

  • Yarn Weight Swaps: Try lighter or heavier yarn to create a mini or larger version—just adjust your hook size accordingly.
  • Color Palette Changes: Explore pastel tones for a soft look, or opt for vivid colors for a striking, cheerful buddy that pops.
  • Texture Additions: Introduce texture by adding a fuzzy yarn around the petals or body to enhance the cozy feel and visual interest.
  • Size Customization: Use sport weight yarn for a daintier buddy, or go chunky for an oversized version that makes a statement.
  • Seasonal Accessories: Craft themed accessories like a tiny sun hat or a pair of sunglasses to celebrate summer vibes—charmingly playful!
  • Fringe Fun: Add fringe to the bottom edges of the petals to create a whimsical, bohemian vibe that adds flair to your design.
  • Multiple Flower Combinations: Stitch together different flower buddies into a bouquet, varying your colors and shapes to create a delightful centerpiece.
  • Whimsical Faces: Add unique embroidered facial expressions or add cute felt features to personalize each buddy’s character and charm.

Daisy Flower Buddy FAQs

Can I use a different yarn besides Worsted weight for the daisy flower buddy?
Absolutely! You can experiment with other yarn weights, such as Sport weight for a smaller buddy or Bulky yarn for a larger one. Just remember to adjust your hook size accordingly to maintain the plush look!

How do I make my daisy flower buddy bigger or smaller?
To adjust the size, simply switch to bulkier yarn for a larger version or use a lighter weight yarn for a smaller buddy. Additionally, you could increase the number of rounds in the head and body to achieve the desired size while keeping your tensions in check.

Why is my daisy flower buddy curling at the edges?
Don't panic! Curling can happen due to tight tension or uneven stitches. I recommend checking your gauge, ensuring your tension is consistent, and relaxing your grip a bit while crocheting. If curl persists, gently blocking the finished work can help flatten and shape it beautifully.

What hook size should I use for the daisy flower buddy?
A 4.5 mm (G-6) crochet hook is ideal for creating this charming daisy flower buddy. This size helps achieve the perfect plushness while keeping your stitches uniform. Feel free to adjust slightly if you find a different tension comfortable for you.

How do I fix a dropped stitch in my crochet work?
It's an easy fix! Just use your crochet hook to pull the dropped stitch back up through the work, redoing any stitches as necessary. If you've lost several stitches, simply pick up the last loop and crochet through the remaining stitches until you reach the end.

Can I add more petals to my daisy flower buddy?
Absolutely! Adding more petals can create a fuller flower and give your buddy a unique twist. Just remember to evenly space out your stitches to keep the shape balanced as you work around the head. Happy crocheting!

Filed Under: Uncategorized

Vibrant Crochet Flower Pattern: Whimsical Amigurumi Delight

August 22, 2026 by Publisher Leave a Comment

Vibrant Crochet Flower Pattern: Whimsical Amigurumi Delight

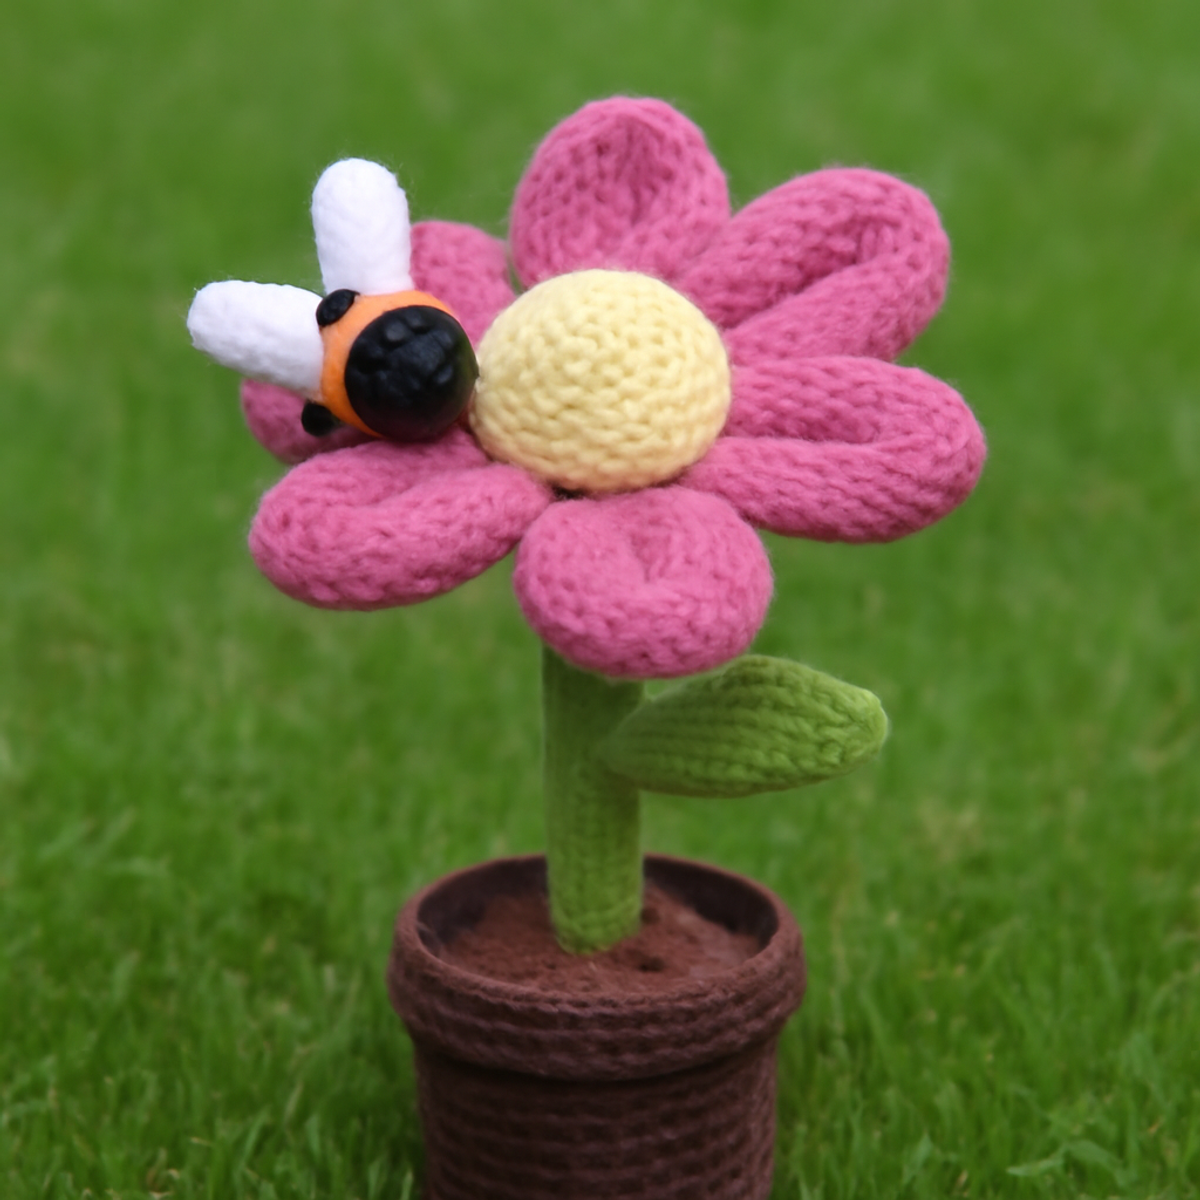
As I sat in my favorite cozy nook surrounded by soft pastels, I felt an undeniable urge to bring a bit of spring into my home. That’s when I discovered the Bumble Blossom Amigurumi, a delightful crochet flower pattern that captures the essence of blooming gardens and playful days. Not only does this project let your creativity shine through its vibrant colors and charming bee design, but it's also a fantastic way to craft a beautiful decoration or a heartfelt gift for a little one. Perfect for intermediate crocheters, this adorable amigurumi works up fairly quickly, making it the ideal canvas for showcasing your crochet skills. I can't wait for you to dive into this whimsical project and let your hooks fly as you create something truly special!

Bumble Blossom Amigurumi Materials & Tools

  • Yarn

    • Medium Weight Acrylic Yarn – Approximately 150-200 yards are needed for vibrant colors and durability.
  • Tools & Notions

    • 4.0-5.0 mm (G/6 to H/8) Hook – This size is ideal for achieving a pleasant tension in your stitches.
    • Black Safety Eyes – Use these for the bee to add a lively expression.
    • Stitch Markers – Helpful for tracking your rounds and maintaining an accurate count for the petals and center.
    • Scissors – For trimming ends and cleaning up your project.
    • Yarn Needle – Useful for weaving in ends and assembling pieces.

Let your creativity flow as you embark on this enchanting crochet flower pattern adventure!

Why is the Bumble Blossom a must-try?

Joyful Design: This pattern's charming bee and vibrant flower will bring smiles to anyone who sees it.
Quick & Fun: With its easy-to-follow instructions, you'll be whipping up this whimsical amigurumi in no time.
Decorative & Giftable: Perfect for sprucing up your space or presenting as a thoughtful gift for children, adding versatility to your crochet repertoire!
Textured Touch: The combination of plush petals and a sturdy stem creates a delightful tactile experience.
Creative Freedom: Experiment with colors and variations to match any season or occasion, sparking your imagination and creativity!

Gauge & Sizing Notes

Don't skip the gauge swatch! Checking your tension is crucial for the Bumble Blossom Amigurumi, as it ensures your adorable flower maintains its intended structure and size. While the specific measurements may vary, a general guideline is to aim for a crochet gauge of approximately 4×4 inches (10×10 cm) equaling around 12 double crochets by 10 rows. If your stitches are too tight, try going up a hook size; conversely, if they’re too loose, downsize your hook. To adjust the size of your Bumble Blossom, remember to start your chain in multiples of 6 + 2, allowing your creativity to shape a bloom that perfectly fits your vision!

Step-by-Step Pattern for Bumble Blossom Amigurumi

Row 1: Petal Foundation
Begin your Bumble Blossom by making a magic ring (MR). Chain 3 (counts as your first double crochet), then work 11 double crochets (dc) into the ring, pulling it tight. Join the round by slip stitching (sl st) into the top of the starting chain. Your work should form a small circle with 12 dc (12 sts).

Row 2: Petal Expansion
In this round, you'll create the petal shapes. Chain 3 (counts as a dc), then work 1 dc in the same stitch. In the next stitch, make 2dc, repeating this process around. This increases the number of petals, so you should end the round with a total of 24 dc (24 sts). Your work should now have a lovely petal structure beginning to form.

Row 3: Petal Texture
For added texture, chain 2, then work 1 half double crochet (hdc) into the next stitch. Skip one stitch and sl st into the following stitch. Repeat this pattern around the entire round. You’ll create a lovely ruffled edge along the petals, making it look more whimsical and flower-like. Your petal edge should be wavy and delightful (24 sts).

Row 4: Center Construction
To create the flower's center, attach your yarn in any petal space. Chain 1, then work 6 single crochets (sc) into the space. Pull the yarn tight and join with a sl st to the first sc. It should form a small circle that rounds out the flower center, approximately 6 sc (6 sts) in total.

Row 5: Stem Creation
To make the stem of your Bumble Blossom, use a fresh color and chain 1 to start. Work 6 sc back into the same center stitch from the previous round. Continue crocheting in sc, adding a slight taper by decreasing the number of stitches every few rounds until the desired height is reached. Aim for about 20 inches long for your stem (20 sts).

Step 6: Bee Construction
To craft the bee, begin with the main body in yellow yarn. Chain 2 and work 6 sc into the second chain from the hook. Increase evenly around for the next two rounds, resulting in 18 sc. Next, switch to a fuzzy yarn for texture, and create wings by chaining 4, then working 1 dc into the second chain from the hook, followed by 2 dc in the next two chains.

Step 7: Assembly
Now it’s time to assemble your Bumble Blossom. Start by sewing the flower center onto the petals securely. Position your bee atop the flower, ensuring it's snug and balanced. Use your yarn needle to thread through the pieces where necessary, creating a seamless and secure join. Your flower should now look vibrant and inviting.

Step 8: Finishing Touches
Finally, weave in all loose ends using a yarn needle to keep your Bumble Blossom looking neat and tidy. Optional: Lightly block your completed work to enhance its shape, helping the petals flare and the flower bloom beautifully. Your delightful crochet flower pattern is now complete and ready to brighten any space!

How to Wash and Care for Your Bumble Blossom Amigurumi

Hand Washing: Gently wash your project in cold water with mild soap. Avoid agitation to prevent any pilling or felting on your beautiful crochet flower pattern.

Drying: Lay your Bumble Blossom flat on a clean towel and reshape it while damp. This helps maintain its adorable structure and vibrant colors without distortion.

Storage: Store your amigurumi in a cool, dry place away from direct sunlight to protect the yarn colors and keep it looking fresh and bright for years to come.

Expert Tips for the Bumble Blossom

  • Test Swatches: Before starting your crochet flower pattern, practice with test swatches to find the perfect tension, ensuring a neat and consistent look.

  • Stitch Marker Use: Engage a stitch marker at the beginning of each round. This helps keep track of your rounds, preventing count mishaps during the petal and center construction.

  • Blocking Benefits: Lightly block your petals and center before assembly. This enhances their shapes and visibility, creating a more professional finish in your final amigurumi.

  • Mind Your Count: Pay careful attention to your stitch count in each round, particularly during increases. Losing track can lead to uneven petals and a lopsided flower.

  • Weave Ends Tightly: When finishing, weave in all loose ends well to maintain a clean look. A neatly finished piece adds charm and professionalism, elevating the Bumble Blossom’s appeal.

What to Pair with Bumble Blossom Amigurumi?

Ready to create a charming ensemble that complements your vibrant crochet flower pattern?

  • Whimsical Crochet Pot: Design a cozy pot cover to cradle your Bumble Blossom, adding an extra layer of charm to your decor.
  • Charming Bee Keychain: Craft a delightful bee keychain using similar yarn, perfect for quick gifts or personal accessories.
  • Pastel Flower Garland: Create a colorful garland of smaller flowers to match, bringing a festive feel to any room or gathering.
  • Textured Granny Square Blanket: Use leftover yarn to whip up a granny square blanket that harmonizes beautifully with the amigurumi’s colors.
  • Playful Flower Coasters: Make cheerful coasters to accompany your decor, bringing the springtime vibes to your coffee table gatherings.

Crochet Flower Pattern Variations

Embrace your creativity and customize the Bumble Blossom Amigurumi to your heart's content with these delightful variations!

  • Yarn Substitutions: Consider using cotton yarn for a summer vibe; it adds breathability and a different texture.
  • Color Blocking: Mix and match different colors for petals and stem to create a playful, multi-hued flower for an eye-catching look.
  • Larger Size: Go up a hook size and use bulkier yarn to create an impressively larger Bumble Blossom that becomes a statement piece in any room.
  • Sparkly Center: Incorporate a glittery yarn for the flower's center to add a touch of sparkle, making it a real showstopper.
  • Seasonal Petals: Create interchangeable petals in seasonal colors. Think rich oranges and reds for fall, or festive pastels for spring.
  • Textured Touch: Add pom-poms or fringes around the petal edges for a whimsical texture, inviting touch and playfulness.
  • Bee Variations: Experiment with different bee colors such as bright blue or purple for a unique twist on this adorable companion.
  • Mini Version: For a sweet gift, reduce the yarn weight and hook size to create darling mini Bumbles, perfect for decorative accents!

Bumble Blossom Amigurumi FAQs

Can I substitute yarn for the Bumble Blossom crochet flower pattern?
Absolutely! While the medium weight acrylic yarn is recommended for durability, you can use cotton or a blend—just keep in mind that this may impact the texture and final look of the amigurumi. Make sure to match the gauge for the best results!

How can I adjust the size of the Bumble Blossom?
If you want a bigger or smaller flower, simply change the yarn weight and hook size. Using a thicker yarn with a larger hook will yield a more substantial flower, while lighter yarn with a smaller hook will create a delicate version. Remember to adjust your stitch count accordingly!

Why is my Bumble Blossom amigurumi curling at the edges?
Don’t panic! Curling is often due to tight tension. I recommend checking your gauge before starting and trying to loosen your stitches a bit. If the curling persists, blocking the petals and edges after finishing will help them lay flat and look fantastic.

What hook size should I use for the Bumble Blossom?
For this project, a 4.0-5.0 mm (G/6 to H/8) hook is recommended. This size ensures a lovely balance between softness and structure, allowing your flowers to bloom beautifully while maintaining their form. Adjust if you’re working with different yarn!

How do I fix dropped stitches in my amigurumi?
It’s an easy fix! Simply use your crochet hook to pull the dropped stitch back through the right loops. If you’ve lost a few stitches, use a yarn needle to seamlessly weave the yarn back in, ensuring the flower keeps its lovely shape.

Can I add embellishments or change the bee design?
Of course! Get creative by adding embellishments like glittery yarn or different colors for the bee. Customize its wings or antennae with fun yarns or fabrics—this charming flower amigurumi is a blank canvas for your creativity to shine!

Filed Under: Uncategorized

Cozy Baby Dino Lovey: A Fun Crocheted Comfort Toy for Kids

August 22, 2026 by Publisher Leave a Comment

Cozy Baby Dino Lovey: A Fun Crocheted Comfort Toy for Kids

As I sifted through my yarn stash the other day, the playful colors and soft textures sparked a wave of inspiration for a project that would bring joy to little ones. Enter the Baby Dino Lovey—a delightful blend of whimsy and practicality, perfect for both seasoned crocheters and those eager to level up their skills. With its charming design and comforting plush texture, this lovey not only enchants infants but also guarantees hours of cuddly playtime. Plus, you'll love how quickly this project comes together, making it a fantastic choice for thoughtful gifts to new parents or a treasured keepsake for your own little dino lover. Ready to embark on this adorable crochet adventure? Let's dive into the steps to create your very own Baby Dino Lovey!

Baby Dino Lovey Materials & Tools

  • Worsted Weight Yarn – Approximately 200-250 yards total; choose soft and durable yarn perfect for a baby dino lovey.
  • 5.0mm (H/8) Hook – This size is ideal for creating that plush texture needed for a cuddly finish.
  • Safety Eyes – Adding these provides a charming, expressive face to your dino while ensuring they are securely fastened for safe play.
  • Stitch Markers – Helpful for keeping track of your rounds, especially as you work on this delightful project!

Why will you adore this lovey?

Charming Design: The Baby Dino Lovey's whimsical style captivates both parents and little ones, making it a standout gift for any newborn.

Plush Comfort: Crafted with a soft texture, this lovey provides the ultimate comfort for infants during play or nap time.

Skill Level Up: Ideal for intermediate crocheters, it offers a chance to refine your crochet skills while creating a delightful toy.

Quick Project: With rapid assembly, you'll enjoy the satisfaction of completing this lovable dino before you know it.

Gift Worthy: This adorable lovey is perfect for baby showers or as a treasured keepsake for your own child, combining practicality and aesthetic appeal.

Gauge & Sizing Notes

Don't skip the gauge swatch! Checking your tension is crucial when creating your adorable Baby Dino Lovey, as proper sizing ensures a comforting fit for little hands. A typical gauge measurement for crochet is around 4×4 inches (10×10 cm), which might yield about 14 single crochets by 8 rows; however, remember that individual tension can vary. To create a larger lovey, consider increasing your starting chain in multiples of 6 + 2 to accommodate added size. If your gauge swatch is coming out too small, don’t worry! Simply try going up a hook size to achieve that perfect plush texture. Happy stitching with your Baby Dino Lovey!

Step-by-Step Pattern for baby dino lovey

Row 1: Starting the Body
Begin by creating a magic ring, then ch 1. Work 6 sc into the ring, pulling it tight to close. This forms the base of your body. Your work should be compact, and you should have 6 stitches (6 sts) in total at this point.

Row 2: Increasing the Body
Ch 1, then inc in each st around for a total of 12 sc. This step should allow your piece to begin to cup slightly, indicating growth. Mark your beginning stitch for easy tracking as you continue (12 sts).

Row 3: Continue Increasing
Ch 1, *sc in the next st, inc in the following st; repeat from * around. This will create a total of 18 sc. Your work should appear wider and flatter without losing its original circular shape (18 sts).

Row 4: More Increases
Ch 1, *sc in the next 2 sts, inc in the next st; repeat from * around. You should now have 24 sc. Your piece will begin to look more like the dino's body, maintaining its increased form (24 sts).

Row 5–8: Body Rounds
Ch 1, sc in each st around for 4 rounds. This will provide ample space for the body, giving it a plush feel. You should have a total of 24 sc in each round on rows 5 through 8 (24 sts).

Row 9: Begin Shaping the Head
Ch 1, *sc in the next 2 sts, dec over the next 2 sts; repeat from * around. Your work will start to taper toward the head, and you should end this round with 18 sc (18 sts).

Row 10: Continue Head Shaping
Ch 1, *sc in the next st, dec over the next 2 sts; repeat from * around. Keep an eye on the shape; it should start to narrow even more, resulting in 12 sc by the end of this round (12 sts).

Row 11: Final Round for the Head
Ch 1, dec in each pair of sts around. This will cinch your head, creating a rounded shape for the dino's face. You should have reduced your stitches down to 6 (6 sts).

Step 2: Creating the Legs
Start with a magic ring, ch 1, and work 6 sc into the ring. This creates the base for one leg. Keep your ring tight, and you should have 6 stitches (6 sts) total.

Step 3: Leg Rounds
Ch 1, sc in each st around for 2 rounds. This allows the leg to develop a sturdy base, resulting in 6 sc on each round (6 sts per round). You will have created a small cylinder for each leg.

Step 4: Create a Second Leg
Repeat steps from Step 2 and Step 3 to create the second leg. Ensure both legs are identical, providing a balanced base for the baby dino lovey.

Step 5: Making the Arms
For the arms, use a magic ring and ch 1, working 5 sc into the ring. This creates a slightly shorter base than the legs, resulting in a snug arm shape (5 sts).

Step 6: Arm Rounds
Ch 1, sc in each st around for 2 rounds. The end of this round will complete each arm, ensuring they taper nicely. You should have 5 sc in each round (5 sts per round) for a lovely dinosaur arm.

Step 7: Attaching Arms and Legs
Position the arms and legs on the body and sl st to join securely. Ensure they are evenly placed on the body for that charming dino look.

Step 8: Working on the Head Details
For the head, follow previous rounds, but now incorporate 2 dc in a few stitches around for pop-out features like eyes. Assess how the face shape emerges, focusing on comfort during play.

Step 9: Assembly
Join all parts of your baby dino lovey together by placing the head atop the body and securing it with sl st. Ensure everything feels snug and balanced.

Step 10: Edging
Ch 1 and hdc around the edges of the body. This final step will give your lovey a finished look while adding texture and durability. Your work should now be complete and ready for cuddles!

What to Pair with Baby Dino Lovey?

Creating a whimsical crochet set to delight little ones can be such a fulfilling journey, and the Dino Lovey is just the beginning.

  • Dino Beanie: Craft a playful hat to keep tiny heads warm, using the same yarn for a cohesive look.
  • Matching Dino Blanket: Extend the comfort with a cozy blanket featuring the same dino motif, perfect for snuggly moments.
  • Dino Pacifier Clip: Whip up a functional and cute clip to keep pacifiers close at hand, ensuring they match the beloved lovey.
  • Playful Dino Rattle: Make a soft rattle that harmonizes with your lovey, adding sensory delight and engagement for babies.
  • Dino Wall Art: Create charming crochet wall hangings to tie a dino-themed nursery together, bringing the enchanting world of dinosaurs into their space.

Expert Tips for Your Baby Dino Lovey

  • Watch Your Tension: Maintaining consistent tension is crucial, especially for areas that will be stuffed, to ensure a snug and uniform shape.

  • Track Your Stitches: Use stitch markers to help keep your place and avoid twisting your work, which is particularly important during increases and decreases.

  • Count Often: Check your stitch count at the end of each round to avoid losing track; a missed stitch could alter the shape of your dinosaur.

  • Secure Edging: When finishing off, make sure to secure all edges with half double crochet (hdc) to add durability and polish to your cuddly baby dino lovey.

  • Check for Gaps: Before you finalize your assembly, inspect for any gaps between the limbs and body; a little extra attention here will ensure your lovey is snug and safe for play!

Baby Dino Lovey: Customization Ideas

As you embark on creating your Baby Dino Lovey, let your creativity roam free with these delightful customizations.

  • Yarn Weight Swap: Experiment with a lighter DK yarn for a softer, more delicate version ideal for tiny hands.
  • Fiber Alternatives: Try using organic cotton for a hypoallergenic option, ensuring it's gentle against a baby’s skin.
  • Spunky Color Blocking: Create a vibrant dino with different colors for body, spikes, and limbs, each representing a cheerful hue.
  • Size Modifications: Scale up the pattern to make a cozy blanket or downsize it for a mini plush companion to fit in a pocket.
  • Textured Enhancements: Add charming features like fringed spikes or a tail made from a different stitch to give your dino extra character.
  • Personalized Details: Incorporate embroidered initials or playful patterns on the lovey’s body for a unique, cherished touch.
  • Velvet Texture: Opt for velvet yarn instead of worsted weight for a luxurious feel that will make it extra cuddly.
  • Safety Features: Consider adding a secure flap around the fabric edges for added durability, making it even safer as playtime grows wild!

Care Instructions for Baby Dino Lovey

Machine Washing: Wash your Baby Dino Lovey in cold water on a gentle cycle to keep its plush texture intact. Avoid harsh agitation to prevent any felting or pilling.

Hand Washing: For a delicate touch, consider hand washing with a mild detergent in cold water. Gently agitate and rinse thoroughly to maintain the lovey’s charming appearance.

Drying/Blocking: Lay your lovey flat to dry, reshaping as needed. Avoid hanging it to prevent stretching out those darling dino features you worked so hard to create!

Storage: When not in use, store your Baby Dino Lovey in a breathable bag or container to keep it dust-free and ready for cuddles anytime!

Baby Dino Lovey FAQs

Can I substitute a different yarn for the Baby Dino Lovey?
Absolutely! While the pattern recommends worsted weight (#4) yarn for its softness and durability, you could use a cotton or bamboo blend for a different texture. Just keep in mind that gauge may vary, so you might need to adjust your hook size accordingly.

How can I adjust the size of the Baby Dino Lovey?
If you want to make a larger lovey, simply increase the number of rounds in the body and head shaping sections. For a smaller version, try reducing the number of stitches in each round. Remember, adjustments in size may also require some tweaking in the assembly of the limbs!

Why is my crochet work curling at the edges?
Don't panic! Curling can happen, especially if your tension is too tight. Make sure you’re using the recommended hook size and check your gauge. A little blocking might help flatten the edges, giving it a more polished appearance!

What hook size should I use for the Baby Dino Lovey?
For this project, a 5.0 mm (H/8) crochet hook is recommended. This size is perfect for achieving that lovely plush texture while keeping your stitches neat and tight. If you find your stitches look a bit looser than you'd like, consider going down a hook size!

How do I fix dropped stitches in my work?
If you notice a dropped stitch, don’t worry; it’s an easy fix! You can pick it up using a hook, carefully working the yarn back through the stitches. Make sure to secure it well to prevent it from unraveling further. It also helps to check your stitch count regularly to catch any mistakes early!

Can I add more features to my Baby Dino Lovey?
Absolutely! Feel free to get creative! Adding a tail or some textured spikes using different stitches can give your lovey its unique twist. Just remember to keep safety in mind, especially if it's for a baby—ensure that all features are securely attached!

Filed Under: Uncategorized

Charming Crochet Flower Square for Cozy Home Decor

August 22, 2026 by Publisher Leave a Comment

Charming Crochet Flower Square for Cozy Home Decor

As I sat with my hook in hand, a sunny afternoon light spilling through the window, I was reminded of the joy that comes from creating something beautiful—enter the crochet flower square. This delightful motif is not only a feast for the eyes with its intricate design, but it's also a versatile piece that can enhance your home décor or serve as a thoughtful gift. Ideal for blanket patches, coasters, or wall art, the blooming square allows your creativity to blossom in vivid color combinations. Plus, its relatively quick assembly makes it a perfect project for intermediate crocheters looking to stretch their skills. Whether you’re adding a touch of whimsy to a cozy blanket or crafting decorative pieces that reflect the changing seasons, this pattern invites you to explore and express your personal style. Ready to dive into the world of textured florals? Let’s get those stitches flowing!

Crochet Flower Square Materials & Tools

Prepare to embark on your journey to create a stunning crochet flower square with these essential materials!

Yarn

  • Medium (Worsted Weight) Yarn – An acrylic or cotton blend provides durability, making it easier to wash and maintain.
  • Approximately 150-200 yards total – This accounts for the vibrant color combinations you'll use in your floral square.

Tools & Notions

  • 5 mm (H-8) Hook – A standard size for medium-weight yarn that will make your stitching project enjoyable.
  • Stitch Markers – Helpful for tracking color changes in the layered techniques of your crochet flower square.
  • Tapestry Needle – Perfect for weaving in ends after you've completed your stunning motif.

Why Trust This Crochet Flower Square?

Versatile Design: The charming crochet flower square is perfect for all your home décor needs, whether you’re creating patches for a cozy blanket or decorative coasters.
Intermediate Challenge: With its layered techniques, this project offers a delightful way to enhance your skills while producing beautiful results.
Texture That Pops: Expect a lovely drape, striking a balance between lightweight and sturdy, making it suitable for various applications.
Customization Galore: Imaginative crafters can easily swap colors and enhance dimensions, ensuring each square reflects their unique style.
Aesthetic Appeal: Bright colors and intricate floral patterns bring a cheerful vibe, making your creations stand out in any setting.

Gauge & Sizing Notes

Don't skip the gauge swatch! Ensuring your tension is correct is essential for achieving the beautiful dimensions of your crochet flower square. Aim for a gauge of approximately 4×4 inches (10×10 cm) to create a consistent stitch size and maintain the intricate floral design. If your swatch is coming out too small, consider going up a hook size or adjusting your tension as needed. To make this crochet flower square larger, simply increase your starting chain in multiples of 2 or add more rounds to each petal section. With a bit of practice, you'll be crafting a stunning piece that fits perfectly into your decor!

Step-by-Step Pattern for Crochet Flower Square

Row 1 (or Round 1): Start with a Magic Circle
Begin your crochet flower square by creating a magic circle. Chain 4, then work 11 double crochet stitches (dc) into the circle. Pull the tail to tighten the circle, and slip stitch (sl st) into the top of your initial chain to join your round. Your work should form a compact circle (12 sts).

Row 2: Building the First Round of Petals
Chain 3 to count as your first double crochet. Work 1 dc in the same stitch, then create 2 dc in the next 11 stitches around. Slip stitch (sl st) to close the round. This round will build the foundation for your petals, and your crochet flower square should begin to take shape with 24 dc total.

Row 3: Creating the Petals
Chain 4 to start the next round, then work 3 double crochets (dc) in the next stitch to form the first petal. Repeat this sequence of chaining 4 and placing 3 dc in each stitch around, joining with a sl st at the end of the round. After this round, you should see lovely petals forming (total of 8 petals).

Row 4: Adding a Contrasting Color
Join a contrasting color yarn with a slip stitch in any petal base. Chain 2, then work 4 half double crochets (hdc) into the space between each petal. This will give the flower square added dimension. As you finish this round, you should see a sturdy ridge forming around your petals (8 sets of 4 hdc).

Row 5: Shell Stitch Accents
In this round, work in the back loops of each cluster. Chain 3, skip the next stitch, then create a shell stitch by making 5 double crochets into the next stitch. Skip the next stitch again and repeat this sequence around, securing your round with a sl st. Your crochet flower square will have a textured look with distinct, raised clusters (5 shells).

Final Round: Neat Border
To finish off, switch to navy blue yarn and chain 1. Work a single crochet (sc) around the entire square, placing 3 sc in each shell space for a defined edge. Slip stitch to join and fasten off your yarn. This final border will add a lovely finished touch to your crochet flower square, creating a polished look suitable for décor or gifts.

Crochet Flower Square Variations

Embrace your creativity by customizing your beautiful crochet flower square in unique ways that reflect your style!

  • Color Swaps: Choose a pastel hue for the border to create a soft, springtime vibe. This gentle touch adds a fresh twist to your design.

  • Gradient Petals: Incorporate a gradient yarn for the petals to create a stunning visual effect. The shifting colors will give your flower square a dynamic and eye-catching appearance.

  • Size Expansion: Increase the square's size by adding extra rounds. This allows you to transform it into a larger project, perfect for blankets or throws that envelop you in warmth.

  • Textured Petals: Use a raised stitch technique for the petals, adding depth and dimension. This will create a delightful three-dimensional effect that invites touch and admiration.

  • Funky Fringe: Add fringe along the edges of your square for a playful, bohemian flair. This simple addition can instantly elevate the aesthetic and introduce movement.

  • Color Blocking: Create blocks of contrasting colors within your square's design. This bold approach can showcase your personality and make your piece a modern art statement.

  • Luxe Boucle: Swap in a boucle yarn for the petals to introduce a whimsical, textured look. The soft loops will create a cozy feel perfect for draping.

  • Charming Borders: Experiment with lace or scalloped borders instead of a single crochet finish. This subtle change adds elegance and captures attention effortlessly.

How to Wash and Care for Your Crochet Flower Square

Machine Washing: Use a gentle cycle with cold water to keep your crochet flower square looking fresh and bright. Avoid agitation that could lead to pilling or felting.

Hand Washing: If you prefer, wash your square gently by hand in cold water using a mild detergent. This helps maintain the intricate details of your floral design.

Drying/Blocking: Lay your crochet flower square flat to dry on a clean towel. Block it to shape and enhance the texture, ensuring a crisp, beautiful finish.

Storage: Store your crochet flower square in a cool, dry place away from direct sunlight. This will help preserve its color and delicate stitchwork.

Expert Tips for Crochet Flower Square

  • Tension Control: Maintain consistent tension throughout your project to prevent warping. A firm yet relaxed grip creates a nicely shaped square.

  • Tracking Stitches: Use stitch markers to keep track of your color changes. This helps ensure you don’t lose count, especially in the layered petal rounds.

  • Blocking Benefits: Blocking your finished crochet flower square is essential. It helps to flatten and enhance the intricate design, giving it a polished look.

  • Regular Check-ins: Periodically check your stitch count after each round. This will help you catch any mistakes early, avoiding the struggle of unraveling later.

  • Thorough Weaving: When using multiple colors, take extra time to weave in ends carefully. A tidy finish enhances the overall appeal of your crochet flower square.

What to Pair with the Blooming Square Crochet Pattern

Enhance your crafting experience by creating a delightful collection that resonates with the vibrant colors and floral designs of your crochet flower square.

  • Floral Pillow Cover: Create a matching pillow to add cozy charm to your space, echoing the flower design.

  • Decorative Coasters: Pair your squares with lovely coasters, perfect for showcasing those same vibrant stitches while protecting surfaces.

  • Comfortable Throw Blanket: Expand your beautiful crochet flower squares into a warm throw, ideal for those chilly evenings on the couch.

  • Wall Hanging: Transform your squares into a stunning wall piece, creating a focal point of floral art to brighten any room.

  • Charming Mug Rug: Make a small, delightful rug that complements your coasters, perfect for cozy coffee moments.

These suggestions invite you to further explore your creativity, encouraging you to craft a harmonious and inviting aesthetic throughout your home.

Crochet Flower Square FAQs

Can I substitute the recommended yarn with a different fiber?
Absolutely! While the pattern calls for a medium (worsted weight) acrylic or cotton blend, you can experiment with other fibers like bamboo or wool. Just ensure the yarn weight matches to maintain the project's integrity.

How can I adjust the size of my crochet flower square?
If you're looking to make your crochet flower square larger, adding more rounds is a great way to increase its size. Each round should ideally mirror the previous ones to avoid distortion. Conversely, you can make it smaller by using a finer yarn and a smaller hook size; just keep your stitch count in mind!

Why is my crochet flower square curling up at the edges?
Don't panic! Curling is often due to inconsistent tension or not chaining enough in your initial rounds. Try gently blocking your square after you're finished, which can help flatten and flatten the edges.

What size hook should I use for this pattern?
For this crochet flower square, a 5 mm (H-8) hook is recommended. This size works beautifully for medium-weight yarn, helping to achieve the right drape and tension.

How do I fix a dropped stitch in my crochet flower square?
It's an easy fix! Just locate the dropped stitch, grab your crochet hook, and pull the yarn back up through the stitch to reintroduce it. If you're unsure, take the time to closely examine your rows—this way, you can catch any mistakes early!

Can I incorporate more colors into my crochet flower square?
Yes! This pattern is perfect for showcasing creativity. Feel free to change colors or create a gradient effect in the petals. Just remember to keep track of your color changes with stitch markers to avoid confusion!

Filed Under: Uncategorized

Charming Crochet Floral Motif: Intermediate Pattern Delight

August 22, 2026 by Publisher Leave a Comment

Charming Crochet Floral Motif: Intermediate Pattern Delight

As I gently run my fingers over the vibrant yarn, I can already picture the beauty of the Charming Floral Square Crochet Motif taking shape. This delightful crochet floral motif is just what you need to infuse your home with a splash of color and warmth! With its intricate floral center and elegant scalloped edging, it's perfect for crafting unique coasters or chic embellishments on your favorite afghans. Not only does it showcase a lovely blend of vintage crochet aesthetics with contemporary flair, but this pattern is also an intermediate-level project that allows you to hone your skills while creating something truly special. So, gather your lightweight cotton or acrylic yarn, and let’s dive into this enchanting pattern together—your next cozy masterpiece awaits!

Charming Floral Square Motif Materials & Tools

  • Yarn

    • Worsted Weight Yarn (4) or Fine Weight Yarn (3) – A blend of cotton and acrylic is recommended for texture and durability, with an estimated yardage of 150-200 yards for a complete crochet floral motif.
  • Hook

    • 4.5mm (G/6) Hook – This size is ideal for achieving the desired stitch definition and drape, enhancing the beauty of your floral square.
  • Notions

    • None Required – Focus on your yarn and hook to create this lovely motif without any distractions!

Why Choose This Crochet Floral Motif?

Versatility: This charming crochet floral motif is perfect for a multitude of projects, from coasters to decor accents, allowing your creativity to flourish.

Unique Texture: The combination of floral and lace techniques provides a rich visual depth that captivates the eye and enhances any space.

Skill-Building: Designed for intermediate crafters, it offers a fantastic opportunity to refine your crochet skills with varied stitch patterns.

Vibrant Aesthetics: Featuring a stunning yellow center and scalloped edges, the motif adds a cheerful brightness to your home decor, bridging vintage and modern styles.

Customizable: Easily switch up colors or embellish with beads to create a personal touch, making each piece unique to you!

Gauge & Sizing Notes

Don't skip the gauge swatch! Checking your crochet gauge is essential for the Charming Floral Square Crochet Motif to ensure your finished piece measures correctly and looks balanced. While an exact gauge isn't specified, aiming for a tension swatch around 4 inches (10 cm) should guide you to a proper fit. To adjust the size, be sure to increase your starting chain in multiples of 6 to create larger motifs or decrease if you want a smaller version. If your swatch ends up smaller, try using a larger hook size to loosen up your stitches. Happy crafting with your crochet floral motif!

Step-by-Step Pattern for Charming Crochet Floral Square Motif

Row 1: Start with the Magic Ring
Begin your crochet floral motif by creating a magic ring. Work 6 single crochets (sc) into the ring and pull it tight to close. This forms the foundation for your floral motif's center. Your work should be compact, with a small circle at the center of your magic ring (6 sts).

Row 2: Create the Yellow Center
Chain 2 (ch 2) to start the next round. In the first stitch, place 2 double crochets (dc) to form a petal. Skip the next stitch, and in the following stitch, work 2 dc, followed by a chain 1 (ch 1). Repeat this process until you have 6 petals around the magic ring. Your work should radiate outward, creating a delicate floral shape (12 dc, 6 ch-1 spaces).

Row 3: Build the First Layer of Petals
For the next round, slip stitch (sl st) into the next ch-1 space. Chain 3 (ch 3), then work 2 dc, ch 1, and 3 dc in the same space to create a shell. Skip the next petal and repeat this process in each ch-1 space around. Your floral motif should now feature a lovely layered look with each shell accentuating the structure (6 shells total).

Row 4: Adding the Second Layer of Petals
Continue in the next round by slip stitching into the first shell. Chain 4 (ch 4) and work 3 dc, ch 1, and 3 dc into this same shell. Skip the next shell, and repeat this petal arrangement in each shell around. You'll notice your floral motif growing taller with this second layer of petals (6 shells, 12 dc).

Row 5: Light Blue Corner Formation
Slip stitch to the next ch-1 space and chain 3 to start a corner. In the same space, work 3 dc to create the corner cluster. Skip 2 shells and repeat this corner formation across the sides. Your motif will start to take on a square shape with vibrant colors enhanced (3 corner clusters per side).

Row 6: Create Lace Edging
After forming all corners, slip stitch to the next corner cluster. Chain 1, then work 5 dc into the corner cluster, followed by a slip stitch in the next stitch along the edge. Repeat this lace edging around the entire square. The edges will have a beautiful scalloped finish, enhancing your floral motif’s elegance (5 dc in each corner).

Row 7: Finishing Touches
Once you reach the beginning of your edging, join with a slip stitch to finish. Cut the yarn, leaving a tail for weaving in ends. Gently block your crochet floral motif to open up the petals and ensure the scalloped edges lay flat. Your charming floral square is now complete, ready to brighten up your space!

Care Instructions for Crochet Floral Motif

Machine Washing: Use cold water and a gentle cycle to protect the delicate stitches of your crochet floral motif. Avoid agitation to prevent felting or pilling.

Hand Washing: If preferred, gently hand wash your piece in cold water with a mild detergent. Swirl it softly, avoiding any twisting or pulling to maintain its shape.

Drying/Blocking: Lay your crochet floral motif flat to dry on a clean, dry surface. This helps retain its beautiful scalloped edges and floral details. Consider lightly blocking for a polished finish.

Storage: Store your completed motif in a cool, dry place, carefully folded or laid flat to avoid creasing or distortion. Protect its vibrant colors for long-lasting enjoyment!

What to Make after Charming Floral Square Crochet Motif

Imagine the joy of creating beautiful items that harmonize and elevate your crochet experience, bringing coziness to your space.

  • Matching Coasters: Transform extras into charming coasters that mirror your floral motifs, protecting surfaces in style.
    These elegant coasters will make a delightful set, perfect for sunny afternoons with tea or coffee.

  • Beautiful Wall Hanging: Use multiple motifs to create an eye-catching wall hanging, bursting with color and texture.
    Adorn your walls with something uniquely crafted by you, showcasing your new skills in an artistic way.

  • Festive Bunting: Connect your squares to form vibrant bunting for special occasions or simple decor.
    This cheerful addition will infuse any space with a touch of whimsy and a warm sense of celebration.

  • Floral Pillow Covers: Use the motifs as decorative elements on pillow covers, adding personality to your living space.
    Your couch will thank you for this inviting touch, creating a cozy reading nook perfect for relaxation.

  • Chic Afghan: Integrate the floral squares into a larger afghan, combining various motifs for stunning visual appeal.
    The completed piece will be a testament to your creativity, warming both body and heart in chilly weather.

Crochet Floral Motif Variations

Embrace the joy of customization for your crochet project and discover how small changes can bring new life to your creations.

  • Vibrant Color Palette: Swap in bold shades like deep reds or electric blues to give your motif a contemporary twist.

  • Alternative Fibers: Experiment with bamboo or wool to discover unique textures that enhance the softness and drape of your crochet work. These fibers can also introduce a lovely sheen to your floral designs.

  • Size Adjustments: Increase the motif’s dimensions by adding extra rounds to the floral center; a larger piece makes a stunning wall hanging or accent for oversized projects. Just imagine how a big bloom could transform your space!

  • Textured Embellishments: Add beads or buttons at the center for a playful touch and to personalize your motif. These little details can add unexpected charm and depth to your work.

  • Fringed Edging: Consider finishing your motif with a playful fringe for a bohemian feel. The texture from the fringe will enhance the overall aesthetic and give it a fun, flirty vibe.

  • Color-Blocked Sections: Create a striking contrast by color-blocking different segments of the motif. Use two or three colors in alternating rounds for a fresh, modern look that pops!

  • Layered Flower Centers: For additional dimension, try layering different flower center designs. A contrasting color for the center can really make your floral motif stand out.

  • Border Variations: Instead of the typical scalloped edging, play with a shell border or a simple picot finish. The new borders bring different visual dynamics that can elevate your crochet floral motif even further!

Expert Tips for Crochet Floral Motif

  • Count Carefully: Keep a close eye on your stitch count throughout the project. Losing track can lead to uneven motifs, so mark your rounds if needed.

  • Maintain Tension: Regularly check your yarn tension, especially with intricate stitches. Consistent tension will ensure an even finish and the proper drape for your crochet floral motif.

  • Seamless Color Changes: When using multiple colors, carry the yarn along the edges to avoid gaps. This practice keeps your work neat and visually appealing.

  • Finish with Care: Lightly blocking your completed motif can help open up the floral details and ensure that scalloped edges lay beautifully flat.

  • Weaving Ends: Don't forget to weave in your ends securely after finishing. A clean finish enhances the look of your crochet floral motif and ensures durability.

Charming Floral Square Crochet Motif FAQs

Can I use a different yarn than the one recommended?
Absolutely! While a worsted weight cotton and acrylic blend works wonderfully, feel free to explore other yarns. Just keep in mind that switching to a heavier or lighter yarn will affect the drape and size of your crochet floral motif. I recommend checking your gauge to ensure the final piece maintains its intended dimensions.

How can I make my crochet floral motif bigger or smaller?
To adjust the size of your floral motif, simply add or reduce rounds in the floral center. For a larger motif, include extra rounds of petals or clusters; for a smaller version, you can skip rounds altogether. Just remember to maintain stitch count for a balanced look!

Why is my crochet floral motif curling at the edges?
Don't panic! Curling can often occur from inconsistent tension or missing stitches. Make sure you're maintaining even tension throughout the project. Additionally, lightly blocking your completed motif can help flatten the edges, giving your work a polished appearance.

What size hook should I use for this pattern?
The recommended hook size for the Charming Floral Square Motif is 4.5 mm (G/6). If you find your stitches are too tight, consider going up a hook size; conversely, if they seem loose, try a smaller size. Finding the right fit for your tension is key!

What should I do if I accidentally drop a stitch while crocheting?
It's an easy fix! If you drop a stitch, simply pick it up using your hook. Gently pull the yarn to reintroduce it into the working loops. If you're concerned about it unraveling, you can secure the stitch with a safety pin until you're able to weave in the ends properly.

How do I seamlessly change colors while crocheting this motif?
When changing colors, I recommend carrying the unused yarn along the edges of your work. This method helps avoid gaps and keeps your motif looking tidy. Be mindful to pull the carried yarn gently to maintain even tension and ensure a seamless transition between colors!

Filed Under: Uncategorized

  • « Previous Page
  • 1
  • …
  • 33
  • 34
  • 35
  • 36
  • 37
  • …
  • 41
  • Next Page »

Recent Posts

  • Chic Crochet Watch Band Pattern: Scalloped Elegance
  • Vibrant Crochet Granny Square: A Floral Delight to Create
  • Pocket Otter Crochet: Your Adorable Amigurumi Companion
  • Cozy Up with This Festive Crochet Tree Cozy Pattern
  • Chic Crochet Babydoll Dress: A Timeless Pattern for Spring

Recent Comments

No comments to show.
Fast Crochet Patterns Logo

Welcome to Fast Crochet Patterns, your curated editorial blog for modern, handmade aesthetics. Discover an elegant collection of contemporary designs and carefully crafted tutorials—where every beautiful pattern is completely free to inspire your next creation.

Join the Studio

Subscribe for our latest free patterns and warm, minimal crochet inspiration delivered to your inbox.


Collections

  • Accessories
  • Amigurumi
  • Baby
  • Bags

More Patterns

  • Cardigan
  • Dress
  • Flowers
  • Granny Square

Information

  • About
  • Contact
  • Privacy Policy
  • Terms Of Use
  • Disclaimer

© 2026 Fast Crochet Patterns. All rights reserved.