Fast Crochet Patterns

  • Home
  • Contact
  • Patterns
    • Amigurumi
    • Granny Square
    • Flowers
    • Baby
    • Dress
    • Bags
    • Cardigan
    • Accessories
menu icon
go to homepage
  • Home
  • Contact
  • Patterns
    • Amigurumi
    • Granny Square
    • Flowers
    • Baby
    • Dress
    • Bags
    • Cardigan
    • Accessories
search icon
Homepage link
  • Home
  • Contact
  • Patterns
    • Amigurumi
    • Granny Square
    • Flowers
    • Baby
    • Dress
    • Bags
    • Cardigan
    • Accessories
×

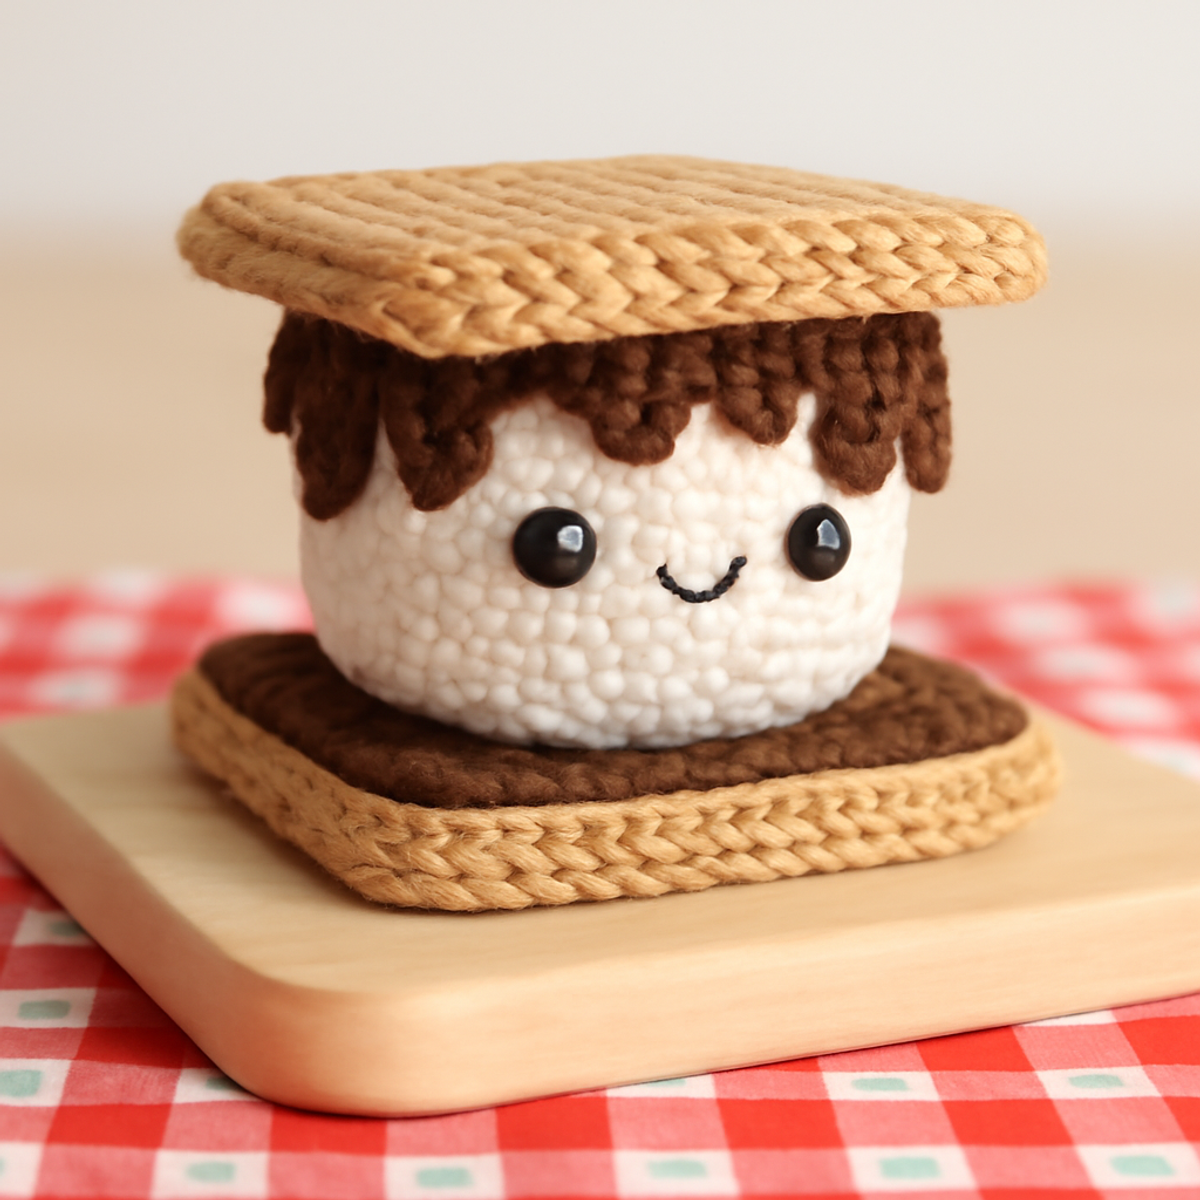
Charming Crochet S’mores Pattern: Whimsy in Every Stitch

August 23, 2026 by Publisher Leave a Comment

Charming Crochet S'mores Pattern: Whimsy in Every Stitch

As I settled into my favorite nook with a cup of tea, I couldn't help but gaze at my latest crochet adventure—the whimsical S'mores amigurumi set. This crochet S'mores pattern is a delightful way to spark creativity while indulging in a bit of nostalgia. Crafted with love, these adorable treats not only brighten up a room but also invite playful moments, making them perfect companions for both display and fun. With a quick and easy assembly, you’ll experience the joy of completing a charming project with your own hands. Plus, it’s a fantastic opportunity to develop your amigurumi skills while creating cute, conversation-starting decor. Ready to add a splash of whimsy to your crafting? Let’s dive into the stitches!

Crochet S'mores Pattern Materials & Tools

  • Worsted Weight Yarn – Use acrylic yarn in cream or white for marshmallows, light brown for graham crackers, and dark brown for chocolate, with an estimated total of 150-200 yards.
  • 4.00 mm (G) Hook – This size is perfect to achieve the tension needed for crafting your crochet S'mores pattern.
  • Yarn Needle – Essential for stitching your pieces together securely and weaving in those pesky tails.
  • 10-12mm Safety Eyes – Add that adorable touch to your S'mores and ensure they are firmly attached for added safety.

Why Choose This Crochet S'mores Pattern?

Whimsical Design: The playful charm of these amigurumi S'mores brings joy and creativity to any crafting session, making it an ideal project for those looking to infuse some fun into their crochet journey.

Skill Enhancement: Perfect for intermediate crocheters, this pattern encourages you to refine your skills while crafting delightful details that easily capture attention.

Quick & Rewarding: With a relatively straightforward assembly process, you'll find instant gratification as you watch your cute creations come to life in no time.

Versatile Variations: Customize your S'mores by experimenting with colors and textures, allowing you to create festive versions for any season, or even scale the size to fit your decor needs!

Charming Presence: Measuring around 4-5 inches, these delightful treats are not just toys—they're eye-catching decor pieces that spark conversation and add a cozy touch to your space.

Gauge & Sizing Notes

Don't skip the gauge swatch! Checking your tension is crucial in the crochet S'mores pattern, as it ensures your adorable creations maintain their intended size and shape. A standard guideline for amigurumi projects like these is to aim for a gauge that is about 6 single crochets per inch (2.5 cm). If you want to make your S'mores a little bigger, simply increase your starting chains or rounds, adjusting in multiples of 2 for the graham crackers and multiples of 6 for the marshmallow. If you find your tension swatch is too tight, don’t worry! Just go up a hook size, and you'll soon be on your way to crafting the perfect plush treats.

Step-by-Step Pattern for Whimsical S'mores Amigurumi Set

Row 1: Marshmallow Base
Begin with a magic ring, ch 1, then work 6 sc into the ring. Pull the magic ring tight and join with a sl st to the first sc. Your work should form a small circle (6 sts).

Row 2: Increase for Shape
Ch 1, inc in each sc around (12 sts). Your marshmallow base should start to curl slightly, giving it a thicker appearance.

Row 3: Build the Height
Ch 1, sc in next sc, inc in next sc around (18 sts). Continue to work in the round, letting your marshmallow take on a rounded shape while maintaining consistent tension.

Row 4: Continue to Add Height
Ch 1, sc in next 2 sc, inc in next sc around (24 sts). Your work will be expanding nicely, creating a fluffy marshmallow form.

Row 5: Round Off the Edge
Ch 1, sc in next 3 sc, inc in next sc around (30 sts). The marshmallow should look puffy and starting to take its final shape.

Row 6: Complete the Marshmallow
Ch 1, sc in each sc around for the next three rounds (30 sts each). The height will increase steadily, giving your marshmallow a charming, rounded profile.

Row 7: Finish and Close
Fasten off and weave in ends. Your marshmallow piece should be soft and round, ready to be attached.

Row 8: Graham Cracker Base
With light brown yarn, ch 11, then sc in 2nd ch from hook and in each ch across (10 sts). This will create the first side of your graham cracker.

Row 9: Create Texture
Ch 2, turn, hdc in each st across (10 sts). The texture will begin to give your graham cracker a more playful look.

Row 10: Complete Shape
Ch 1, turn, sc in each st across (10 sts). You should have a nice flat square that forms part of your S'mores.

Row 11: Make the Second Graham Cracker
Repeat Rows 8-10 for a second graham cracker. You should now have two identical square pieces that will sandwich the marshmallow.

Row 12: Chocolate Layer
With dark brown yarn, ch 7, then sc in the 2nd ch from hook and in each ch across (6 sts). This rectangular piece represents the chocolate layer of your crochet S'mores.

Row 13: Add Chocolate Texture
Ch 2, turn, hdc in each st across (6 sts). This will shape the chocolate piece, creating a decadent layer for your S'mores.

Row 14: Finish Chocolate Piece
Ch 1, turn, sc in each st across (6 sts). The completed chocolate should be nicely shaped, ready to become part of the assembly.

Step 1: Assembly
Begin by placing the marshmallow between the two graham crackers. Use your yarn needle to stitch through, securing each piece together. This will create the main body of your S'mores.

Step 2: Attach Chocolate
Position the chocolate piece on top of the marshmallow and secure it in place. Use the yarn needle to weave in and secure all ends. Your whimsical S'mores amigurumi set is now complete!

Step 3: Finishing Touches
Sew safety eyes onto the marshmallow, ensuring they are secure for safety. A little embroidery can add fun details, enhancing the overall charm of your crochet S'mores pattern.

Expert Tips for Crochet S'mores Pattern

  • Count Carefully: Keep track of your stitch count throughout the project to ensure that each component, especially the marshmallow, fits snugly without gaps.

  • Secure Safety Eyes: When placing safety eyes, make sure they are firmly secured to avoid any dislodgment, especially for small hands that may play with them.

  • Consistent Tension: Maintain the same tension across all pieces, so your finished amigurumi looks cohesive and beautifully crafted. This helps prevent the pieces from varying in size.

  • Block for Detail: Lightly block your graham cracker pieces after finishing to enhance their shape and ensure details are clearly defined. This adds a polished look to your crochet S'mores pattern.

  • Weave in Ends Neatly: Ensure all yarn ends are woven in securely during assembly to keep your creation tidy and durable for play or display.

Crochet S'mores Pattern Variations

Embrace your creativity as you explore fun ways to customize this charming project to fit your unique style!

  • Yarn Texture: Consider using cotton yarn for a rustic look, or try a fluffy yarn for added whimsy and coziness.

  • Seasonal Colors: Swap the colors for festive themes; think pastel shades for spring or warm, rich tones for autumn décor.

  • Larger Size: Increase the stitch count to create oversized S'mores that can double as plush toys or bold decorative statements.

  • Color-Blocking: Create a striking version by color-blocking your graham crackers, mixing shades that complement your home or seasonal theme.

  • Pom-Pom Finish: Add playful pom-poms to the tops of the graham crackers for an extra touch of fun and texture that makes your S'mores stand out.

  • Fringe Detail: Incorporate fringe along the edges of the graham crackers to bring a whimsical, bohemian vibe to your crochet S'mores design.

  • Embroidered Features: Personalize with embroidered faces or details on the marshmallow to bring extra character to your charming creations.

  • Border Trim: Enhance the look with a decorative border around the graham cracker pieces to elevate your S'mores and give them a polished finish.

What to Pair with Whimsical S'mores Amigurumi Set

As you bask in the joy of crafting your crochet S'mores, why not explore delightful companion projects that enhance their charm?

  • Cheerful Cupcake: Create a sweet counterpart that adds whimsy and color to your display, capturing the essence of a dessert theme.

  • Fuzzy Hot Chocolate Mug: This adorable mug complements your S'mores perfectly, inviting the idea of cozy, tasty moments by the fire.

  • Tiny Picnic Basket: Imagine a charming basket cradling your S'mores; it brings a playful storytelling element to your creations.

  • Colorful Fruit Slice Amigurumi: These cheerful fruit slices beside your S'mores introduce a burst of color, making your display vibrant and fun.

  • Adorable Mini Marshmallow Pals: These soft little friends create an even cozier atmosphere while keeping with the theme of your crochet S'mores pattern.

How to Wash and Care for Your Crochet S'mores Pattern

  • Hand Washing: Gently hand wash your crochet S'mores in cold water with a mild detergent to ensure their vibrant colors remain intact and prevent any felting.

  • Avoid Agitation: When washing, do not agitate or scrub, as this can cause the yarn to pill or felt, ruining the delightful texture of your crochet S'mores.

  • Drying/Blocking: Lay your finished crochet S'mores flat on a clean towel to dry, reshaping them if necessary to maintain their adorable form. Avoid hanging, as this may stretch the yarn.

  • Storage: Store your crochet S'mores in a dry, cool place, away from direct sunlight. This helps preserve their charm and ensures they remain a delightful decor piece for years to come.

Whimsical S'mores Amigurumi Set FAQs

Can I substitute yarn types when making the crochet S'mores pattern?
Absolutely! While the pattern suggests worsted-weight acrylic yarn, you can swap it with cotton for a more rustic finish or even a fluffy yarn for a cozier look. Just keep in mind that this might alter the overall texture and size slightly, so check your gauge before starting!

How can I make the S'mores bigger or smaller?
If you want a larger S'mores, you can increase the number of stitches in each round while following the same pattern. For a smaller version, try using a lighter yarn weight and appropriate hook size, like a 3.5 mm (E) hook, to bring them down in scale. Just be sure to maintain the overall proportions!

What should I do if my work is curling?
Don't panic! Curling often happens if your tension is too tight. To fix this, gently block your work after finishing to help flatten it out. If you’re still experiencing issues, take a moment to loosen up your tension as you crochet to achieve a smoother finish.

What size hook should I use for this pattern?
The recommended hook size for the crochet S'mores pattern is a 4.00 mm (G) hook. This size works well with worsted-weight acrylic yarn to ensure your stitches are tight enough to create a sturdy structure while still providing a soft drape.

How do I fix dropped stitches in my S'mores?
It’s an easy fix! If you notice a dropped stitch, simply use your crochet hook to pull the working yarn back up through the missing stitch. Then, you can work it back into the row by making a new stitch in the correct place. Remember to check your stitch count periodically to catch any mishaps early!

Why do my safety eyes seem loose?
If your safety eyes are loose, it’s crucial to ensure they are securely fastened during assembly. I recommend checking the back of the eyes to make sure the washers are firmly pushed into place. If they still feel loose, you might consider using a stronger adhesive to give additional security.
Filed Under: Uncategorized

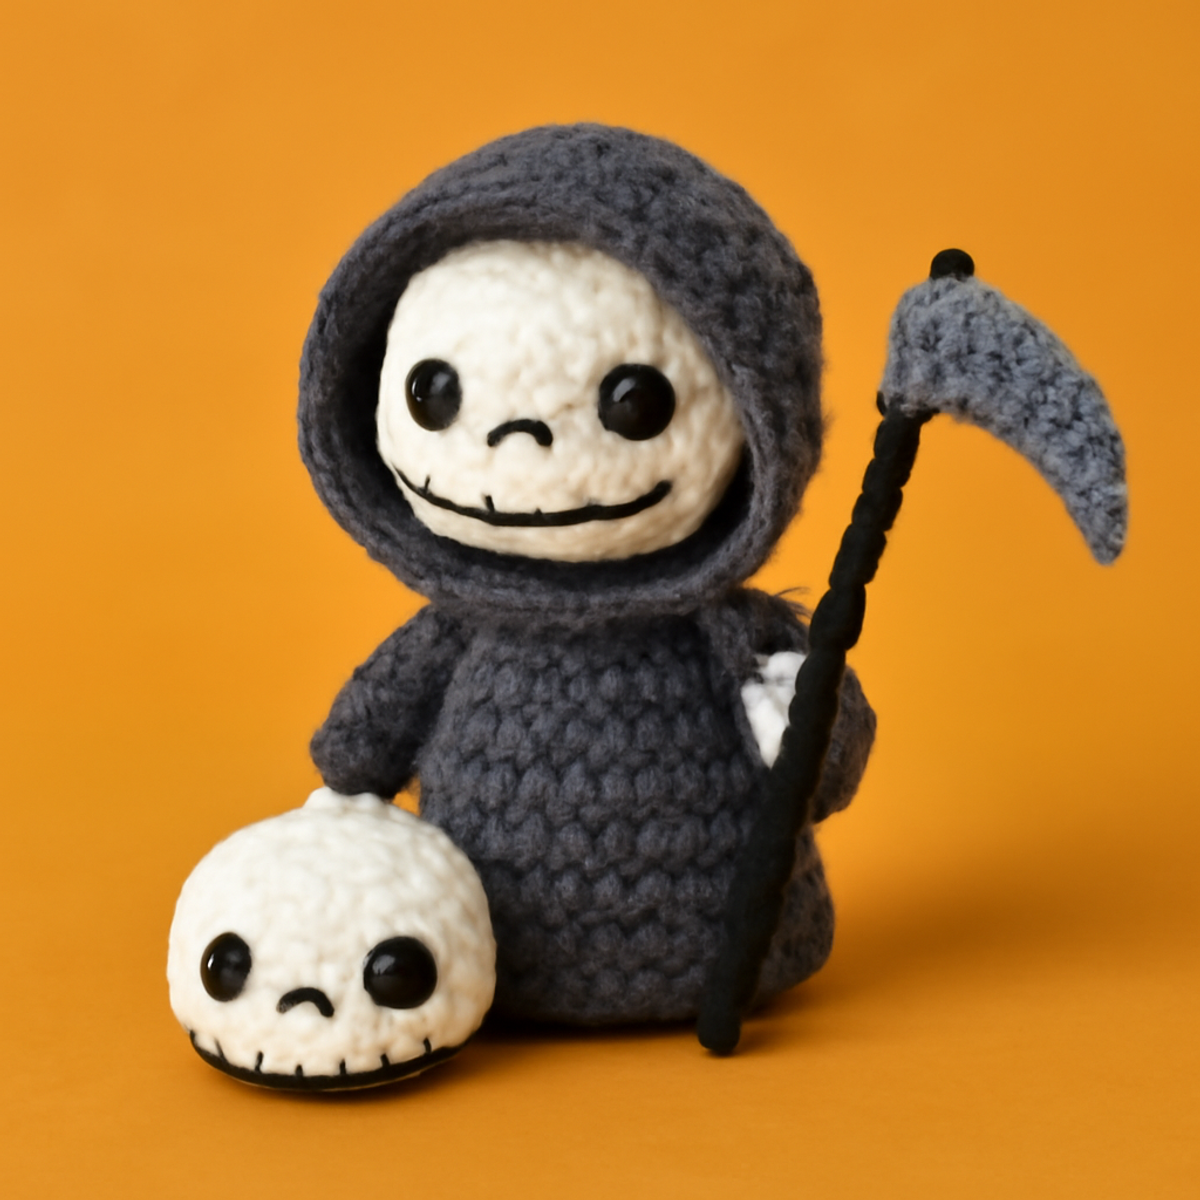
Whimsical Crochet Grim Reaper: A Charming Amigurumi Project

August 23, 2026 by Publisher Leave a Comment

Whimsical Crochet Grim Reaper: A Charming Amigurumi Project

As I sat with my hook in hand, I couldn’t help but grin at the idea of crafting my own charming crochet grim reaper. This project isn't your typical spooky décor; rather, it’s a delightful amigurumi that adds a playful touch to any yarn lover's collection. Perfect for those chasing a little Halloween magic year-round, this pattern allows for personal flair, so you can choose colors that make your heart sing. Plus, it combines basic stitches with just enough detail to keep things interesting for intermediate crafters. Whether it's a cuddly companion or a quirky display piece, get ready to create a character that brings joy instead of chills! Let’s dive in and bring this cute creature to life together.

Creepy Cute Crochet Grim Reaper Materials & Tools

Note: Get ready to gather your supplies for this delightful crochet grim reaper project!

Yarn

  • Worsted Weight Acrylic Yarn – Roughly 100-150 yards each in dark gray and white; consider adding a bit of black for details.

Tools & Notions

  • 4.0-5.0mm (G-H) Crochet Hook – This size will help create a snug yet plush amigurumi texture.
  • Safety Eyes – Use 10mm for the skull face to bring your character to life.
  • Fiber Fill – Needed for stuffing to give your reaper its delightful squishiness.
  • Stitch Marker – Essential for keeping track of your rounds and ensuring consistent stitch count.
  • Tapestry Needle – Perfect for sewing pieces together and weaving in ends.

Why Will You Love This Crochet Grim Reaper?

Charmingly Unique: This project offers a whimsical twist on traditional Halloween themes, making it a standout piece in any collection.
Fun Detailing: Intermediate crafters will enjoy incorporating delightful features, like safety eyes and a charming scythe, adding extra personality.
Year-Round Appeal: While perfect for spooky season decoration, this adorable reaper can also serve as a quirky plush companion anytime.
Customizable Colors: You have the freedom to choose your yarn hues, creating a unique amigurumi that reflects your style.
Squishy Softness: The plush texture ensures it’s cuddly enough for hugs while maintaining a sturdy shape. Embrace your creativity with this cozy crochet project!

How to Check Your Gauge for Crochet Grim Reaper

Don't skip the gauge swatch! Checking your tension is essential for achieving the adorable proportions of your crochet grim reaper. A standard guide suggests making a 4×4 inch (10×10 cm) tension swatch to ensure your stitches are consistent; ideally, it should yield around 14 single crochets by 16 rows. If you find your swatch is smaller, increase your hook size to loosen your stitches; conversely, if it’s larger, switch to a smaller hook for a snug fit. To customize your crochet grim reaper for different sizes, adjust your starting chain or rounds in multiples of 6 and add any extra stitches to maintain the style! Happy hooking!

Step-by-Step Pattern for crochet grim reaper

Row 1: Start the Skull
Begin by creating a magic ring with your white yarn. Chain 1, then work 6 single crochet (sc) into the ring. Pull the tail to tighten, and join with a slip stitch (sl st) into the first sc. Your work should form a small circle (6 sts).

Row 2: Increase for Shape
For the second row, chain 1 and make an increase (inc) in each stitch around. This means you will work 2 sc in each previously made stitch. Join with a sl st. Your circle should begin to take shape and should measure approximately 12 stitches (12 sts).

Row 3: Expanding the Skull
Chain 1 and then make 1 sc in the first stitch, followed by an increase in the next stitch. Repeat this pattern around the row: 1 sc, inc. Join with a sl st at the end of the round. You should now have a total of 18 stitches (18 sts), and the shape should be rounding out nicely.

Row 4: Continue Shaping
For this round, chain 1 and sc in the first two stitches, then make an inc. Continue this pattern: sc in 2 stitches, inc around. Join with a sl st at the end. Your work should appear fuller and measure 24 stitches (24 sts) at the end of this row.

Row 5-6: Form the Skull
For Row 5, chain 1 and sc in each stitch around for a total of 24 stitches, keeping your work snug and uniform (24 sts). In Row 6, repeat this same stitch pattern, allowing the skull to gain height and become more three-dimensional (24 sts).

Row 7: Add Safety Eyes
In the next round, sc in the first 12 stitches, then add safety eyes in the center of the face. Continue sc for the remaining 12 stitches to secure them in place. Your work should look lively with the eyes set in (24 sts).

Row 8: Finish the Skull
For this round, chain 1 and work in the established pattern. Sc in the first stitch, then make a dec (decrease) twice. Work 1 sc in the following two stitches, and repeat the pattern. Join with a sl st to finish – your skull shape continues to emerge beautifully (20 sts).

Step 1: Start the Body
Switch to dark gray yarn and chain 1. For the body, work 1 sc in each of the next 18 stitches to create the base of the hood. This round creates an enchanting little gown shape (18 sts) that will complement the spooky skull.

Step 2: Create the Hood
For the second row of the body, chain 1 and work an inc, then sc in 4, repeating until the end. This allows the body to have a widening base at the hood while maintaining an elegant silhouette (24 sts).

Step 3: Form Body Length
Continue to crochet in rounds for about 10 more rows, keeping the body in long rounds (24 sts). During this time, adjust the length as desired, allowing the gown to expand. The cozy feel of the piece will start to take shape.

Step 4: Add Arms
To create arms, chain 1 with dark gray and work 6 sc in a magic ring. Pull tight and join with a sl st. Work 2 additional rounds of sc around, which adds a plump feeling to the arms (8 sts). Repeat this to create a second arm.

Step 5: Attach the Arms
Position one arm on each side of the body, reinserting your hook through both layers to secure. Use a tapestry needle to weave ends and attach firmly, giving your crochet grim reaper a delightful appearance.

Step 6: Create a Scythe
Using black yarn, chain 10 for the scythe handle and sc back down, which creates structure. For the blade, chain 5, and sc in the second chain from the hook, then hdc (half double crochet) and finally a dc (double crochet), creating a pointed shape. Attach the scythe to your grim reaper for an extra touch.

Step 7: Add Decorative Border
Finish your crochet grim reaper by stitching a small decorative border around the hood with white yarn. This adds charm and helps provide a polished finish, wrapping the gown together beautifully. Your project is now complete and ready to show off!

What to Make after Creepy Cute Crochet Grim Reaper?

Imagine the joy of creating a whimsical family of crochet friends to complement your delightful grim reaper, bringing warmth and charm into your crafting space.

  • Playful Witch Hat: Create a fun witch hat that adds an enchanting touch to your decoration, making your reaper’s look even more festive.

  • Mini Skull Plushies: These little skulls can be made in various colors, enhancing your grim reaper’s charm and giving it some vibrant company.

  • Cozy Cauldron Basket: Crochet a cauldron to hold your crafting supplies, perfectly matching the Halloween spirit of your grim reaper while adding practicality.

  • Charming Ghost Companion: Make a matching ghost to float alongside your reaper, using soft pastels to create an adorable contrast that captures the seasonal cheer.

  • Webby Spider Friend: A cute spider with tiny legs can add a whimsical element to your display, tying together the Halloween vibes beautifully.

Each project can be crafted using the same yarn, ensuring a delightful harmony throughout your crochet grim reaper ensemble. Happy crafting!

How to Wash and Care for Your Crochet Grim Reaper

Machine Washing: Use a gentle cycle with cold water to prevent any felting or pilling, ensuring your crochet grim reaper stays adorable and intact.

Hand Washing: For best results, hand wash your amigurumi in cold water using a mild detergent. This method protects the yarn and keeps your creation looking fresh.

Drying/Blocking: Lay your crochet grim reaper flat on a clean towel to dry. Avoid hanging it to prevent stretching. If desired, lightly block with steam to enhance shape.

Storage: Store your finished project in a cool, dry place, away from direct sunlight. This preserves the vibrant colors and soft texture for years of enjoyment!

crochet grim reaper Variations & Substitutions

Embrace your creativity with these fun ways to customize your crochet grim reaper pattern.

  • Yarn Weight Swap: Experiment with lighter DK weight yarn for a smaller version, creating a delightful pocket-sized charm!
  • Cotton Instead of Acrylic: Try using cotton yarn for a soft, summery feel, perfect for year-round cuteness in warmer climates.
  • Bold Color Blocking: Alternate dark gray and vibrant colors—imagine pink, green, or blue stripes for a whimsical spin on the traditional design!
  • Larger Size Option: Use a larger hook and bulkier yarn to create a cuddly giant grim reaper that’s sure to steal hearts!
  • Texture Additions: Introduce charming pom-poms or fringe to the edges of the hood for added flair and some playful texture.
  • Facial Expressions: Stitch different smiles or quirky frowns to your grim reaper's face for unique personalities with each creation.
  • Accessorize with Props: Create tiny props like a pumpkin or a ghost companion to enhance its Halloween theme and provide more character.
  • Decorative Scythe Variations: Craft the scythe using metallic yarn or by adding glitter to give it a magical touch in the hands of your amigurumi.

Expert Tips for Your Crochet Grim Reaper

  • Consistent Tension: Always maintain an even tension as you work, especially on facial details, to keep the features looking sharp and defined.

  • Count Carefully: Pay close attention to your stitch count, especially in rounds. Use a stitch marker to help track where each round begins, preventing errors.

  • Final Touches: Don't forget to block your finished project; it enhances drape and style, especially around the hood. This step can give your crochet grim reaper a lovely, polished look.

  • Secure Loose Ends: When finishing, weave in the ends thoroughly to avoid any unraveling. A tidy finish lets your amigurumi shine!

  • Personalize with Details: Feel free to customize your grim reaper with different accessories or yarn colors, making this project truly your own while exploring your creativity!

Creepy Cute Crochet Grim Reaper FAQs

Can I substitute different yarns for this project?
Absolutely! While worsted weight acrylic yarn is recommended for durability and texture, you can experiment with other fibers like cotton or bamboo. Just remember that changing the yarn may affect the final sizing, so it’s best to check your gauge if you use a different material.

How can I adjust the size of my crochet grim reaper?
If you'd like to make your reaper bigger or smaller, simply adjust your hook size or yarn weight. Using a bulkier yarn or a larger hook will yield a larger amigurumi, while a smaller hook can create a more compact version. But definitely keep an eye on your stitch count to maintain shape!

Why is my work curling up around the edges?
Don’t panic! Curling can occur if the tension is too tight or if the starting chain is too loose. Consider relaxing your grip when you crochet or adjusting the initial chain's tension to ensure a smoother edge. A little bit of blocking at the end can also help flatten it out!

What should I do if I drop a stitch?
It's an easy fix! Gently pull the working yarn to loosen the surrounding stitches, and using your tapestry needle or hook, pick up the dropped stitch and guide it back into place. Keep practicing, and don’t hesitate to ask for help if you need it!

What hook size is best for this crochet grim reaper project?
I recommend using a hook size between 4.0mm and 5.0mm (G/6-H/8 US) to achieve the plush texture and durability you’ll want for your amigurumi. If you find your stitches are too tight or loose, feel free to adjust the size based on your tension preferences.

Filed Under: Uncategorized

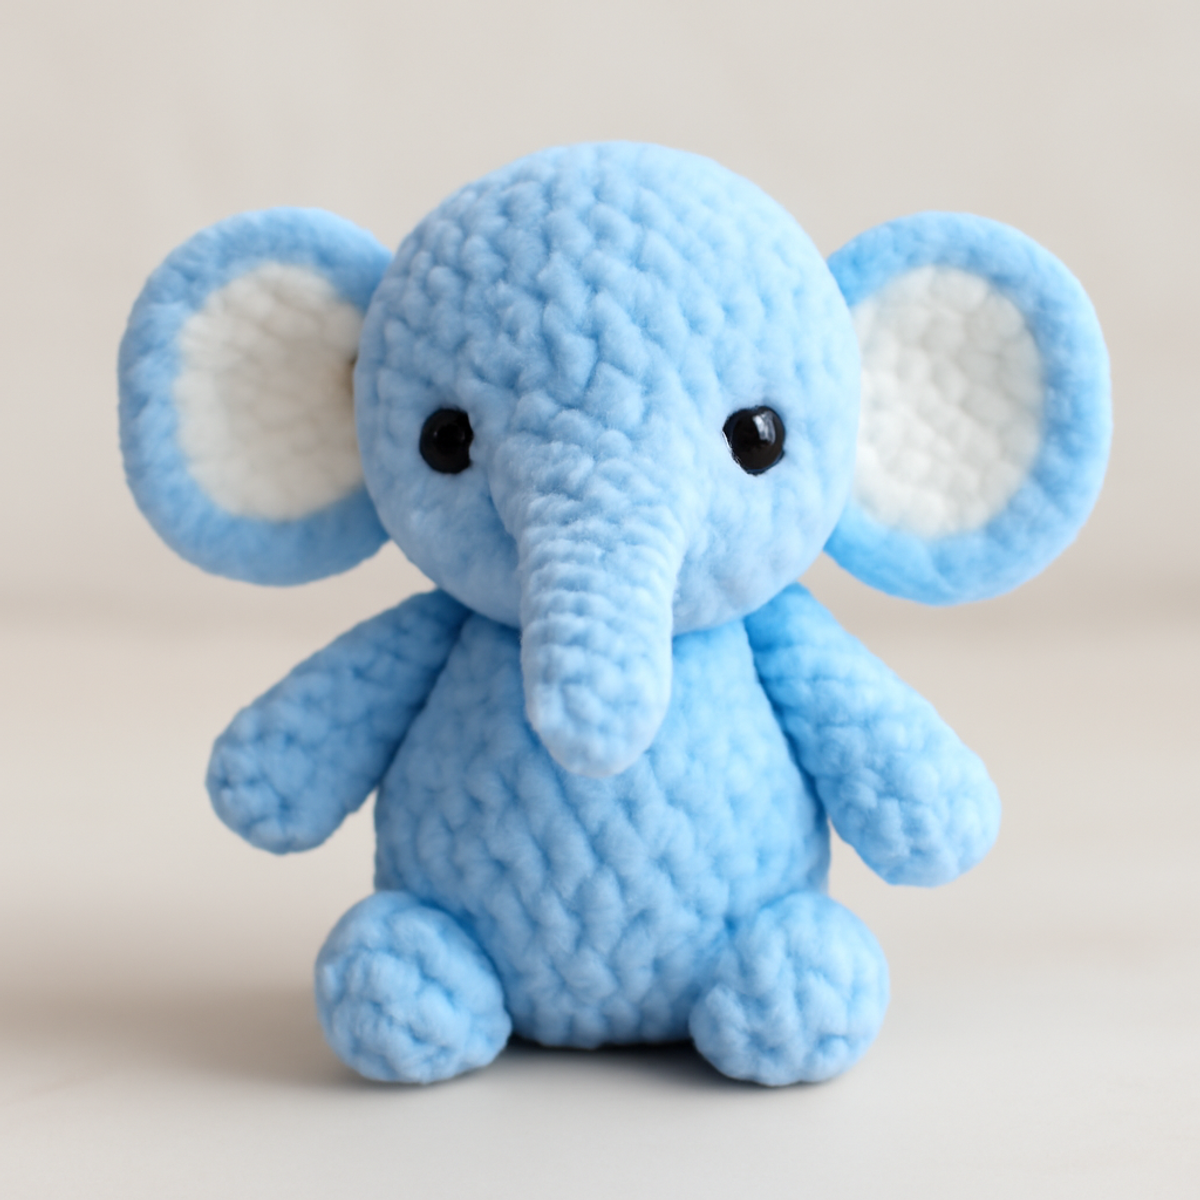
“Cozy Baby Elephant Crochet Toy: A Whimsical Delight”

August 23, 2026 by Publisher Leave a Comment

"Cozy Baby Elephant Crochet Toy: A Whimsical Delight"

There’s something truly magical about the soft plushness of yarn slipping through my fingers as I create a cuddly treasure. With this adorable baby elephant crochet pattern, you can dive into an enchanting project that will not only boost your amigurumi skills but also give rise to a cherished companion for little hands to hug. This whimsical design is perfect for gifting and will bring joy to anyone who lays their eyes on it. Featuring a delightful elephant character and made with soft yarn, this toy is not just a craft, but a creation that offers both beauty and functionality. Ready to embark on this charming journey? Let’s get stitching and craft a little joy together!

Baby Elephant Crochet Materials & Tools

  • Yarn
    Bulky or Plush Yarn – Use a soft 100% polyester plush yarn for ultimate cuddly softness, paired with standard acrylic or cotton yarn for accents.

  • Hook
    3.5mm (US E/4) Hook – This size is ideal for working with bulky yarn, ensuring your stitches are tightly defined for a sturdy finished shape.

  • Approximate Yardage
    150-200 yards (Main Color) – Roughly estimate this yardage for the elephant's body, while needing 25-50 yards for accent colors.

  • Notions
    8mm Black Safety Eyes – Adds that adorable charm to your baby elephant, ensuring it's safe for little ones.
    Yarn Needle – Essential for sewing the pieces together securely and making those finishing touches.
    Scissors – Keep a pair handy for trimming your yarn and snipping tails to keep your project neat as you go.

Embrace the joy of crafting your very own baby elephant crochet toy—it's a delightful journey filled with creativity and love!

Why Create a Baby Elephant Crochet Toy?

Joyful Experience: Crocheting this baby elephant is an adventure in creativity, allowing you to enhance your amigurumi skills while crafting a lovable companion.
Plush Comfort: The use of soft polyester plush yarn ensures maximum cuddly appeal, making it perfect for little ones to snuggle.
Whimsical Design: With its charming features and playful expression, this elephant adds a delightful touch to nurseries or playrooms.
Gift-Ready: A thoughtful gift for baby showers or birthdays, this unique toy is sure to delight both kids and parents alike.
Customizable Fun: Change colors or add accessories, enhancing your creation and making it uniquely yours!

Gauge & Sizing Notes

Don't skip the gauge swatch! Ensuring the correct tension is vital for your baby elephant crochet project; it guarantees the finished toy maintains its adorable proportions and sturdy shape. A suggested gauge to aim for is approximately 4×4 inches (10×10 cm), which typically equates to about 8 single crochets by 8 rows; however, this can vary based on your yarn choice and hook size. If you desire a larger elephant, simply increase your starting magic ring or chain by multiples of 6 to adjust the size according to your preference. If your swatch is too small, try going up a hook size to achieve the perfect fit for your charming baby elephant crochet. Happy crafting!

Step-by-Step Pattern for Whimsical Crochet Baby Elephant Toy

Row 1: Head Start with Magic Ring
Begin by creating a magic ring and work 6 sc into the ring (6 sts). Pull tight to close the ring. Your work should form a small circle. Continue by increasing in each stitch around: 2 sc in each stitch (12 sts). This round establishes the rounded shape of the head for your baby elephant crochet.

Row 2: Continue to Shape the Head
In this round, work (1 sc, inc) around for a total of 18 stitches (18 sts). The head should be rounding out nicely at this point. For the next round, repeat the sequence (2 sc, inc) for a total of 24 stitches (24 sts). Your work should start to cup as we build the elephant's adorably large head.

Row 3: Adding Depth to the Head
Next, continue with 3 rounds of sc in each stitch (24 sts) to form the body of the head. This will give your baby elephant concrete structure. After those rounds, begin tapering the head by working (3 sc, dec) for a total of 18 stitches (18 sts). Your head should appear fuller and start to take shape.

Row 4: Completing the Head
For the next round, complete (2 sc, dec) around (12 sts). The head should start to feel compact, making it ready for the next step. Stuff lightly with fiberfill to give it a soft but stable structure before moving on to attach the trunk.

Row 5: Trunk Creation
To make the trunk, chain 4, then work 1 sc in the 2nd chain from the hook (1 sc), 2 sc in next chain (2 sc), and 1 sc in last chain (4 sts). Slip stitch into the head's base and secure it tightly; this will give your amigurumi elephant a charming trunk.

Row 6: Body Start
To create the body, work another magic ring and insert 6 sc into the ring (6 sts). Just like with the head, pull tightly. In the next round, increase to 12 stitches (12 sts) as you shape the body to ensure it is comfortably proportioned to the head.

Row 7: Shape the Body
In this round, work (1 sc, inc) to achieve 18 stitches (18 sts). The body should begin to widen. Continue increasing by working (2 sc, inc) for a total of 24 stitches (24 sts). Your work should be taking on a sturdy, plump form fitting for your baby elephant crochet toy!

Row 8: Building Up the Body
Next, work 3 rounds of sc in each stitch (24 sts) to build height in the body of your elephant. At the end of those rounds, decrease around by working (2 sc, dec) for 18 stitches (18 sts). The slight taper reinforces the form for a cuddly elephant body.

Row 9: Legs Construction
For each leg, start with a magic ring and work 6 sc into the ring (6 sts). On the following round, increase to 12 stitches (12 sts). After this, work 4 rounds of sc in each stitch (12 sts). This creates sturdy legs to support the weight of your whimsical creation.

Row 10: Arms Creation
Similar to the legs, create the arms using a magic ring and work 6 sc (6 sts). Increase to 12 stitches in the next round (12 sts) and work 2 rounds of sc in each stitch (12 sts). These will provide your baby elephant crochet toy with adorable little arms to complete the look!

Row 11: Assembly of Parts
Sew the head securely to the body using a yarn needle. Make sure to center the trunk appropriately. Attach the legs and arms in equal distances apart, positioning them carefully to ensure your elephant can stand comfortably. Your work should start looking like a charming baby elephant!

Row 12: Ears Creation
For each ear, ch 15, then sc in the 2nd ch from hook, hdc in the next 2 chains, dc in 4 chains, hdc in the next 2 chains, and sc in the last 4 chains (15 sts). Fold and attach the ears to the sides of the head for a cute effect, ensuring they are even.

Row 13: Finishing Touches
Embellish your baby elephant crochet toy by adding safety eyes in front of the ears. Finally, weave in any loose ends with a yarn needle, and give your creation a gentle final fluff to accentuate its plushness. Your adorable baby elephant is now complete and ready for hugs!

Care Instructions for Baby Elephant Crochet

  • Machine Washing: Use a gentle cycle with cold water to preserve the soft plush texture, always placing your baby elephant crochet in a laundry bag to prevent snagging.

  • Hand Washing: For best results, hand wash in cold water with mild detergent, avoiding agitation to keep the fibers intact and prevent felting.

  • Drying/Blocking: Lay flat to dry, reshaping your baby elephant crochet to maintain its adorable structure and softness, ensuring that it dries completely before giving it to little ones.

  • Storage: Store in a cool, dry place away from direct sunlight to protect colors and fibers, keeping your beloved elephant safe for many cuddles in the future.

Expert Tips for Baby Elephant Crochet

  • Consistent Tension: Maintain even tension throughout your project to ensure the finished toy holds its shape and remains robust for playtime.

  • Count Stitches: Regularly count your stitches, especially during increases and the magic ring phase, to prevent gaps or uneven areas in your baby elephant crochet.

  • Secure Assembly: When attaching the trunk and other pieces, sew securely and check positioning—this prevents them from flopping and enhances stability.

  • Final Fluffing: After finishing, gently fluff your toy and adjust any stuffing for a soft, cuddly finish that is inviting for little hands.

  • Weave In Ends: Always weave in loose yarn ends neatly with a yarn needle to keep your creation looking polished and to prevent unraveling during use.

What to Pair with the Cute Baby Elephant

As you delight in creating this lovable toy, why not cultivate an entire collection that brings even more joy to playtime?

  • Cuddly Crochet Blanket: A soft blanket made from the same plush yarn would create a cozy backdrop for your adorable elephant to nestle into.

  • Matching Baby Elephant Rattle: A simple rattling toy in the shape of your elephant can enhance sensory play for tiny hands, coordinating beautifully with your main project.

  • Plush Animal Friends: Craft other amigurumi animals, like a bunny or a lion, to build a whimsical safari set, perfect for imaginative play.

  • Whimsical Baby Mobile: Create a mobile featuring your baby elephant and other crocheted friends to hang above a crib, adorning the nursery with charm.

  • Elephant-Themed Baby Accessories: Consider making crochet bibs or booties to complete a themed baby gift set, perfect for the little ones in your life.

Baby Elephant Crochet Variations

Embrace the opportunity to make this baby elephant crochet pattern uniquely yours—let your creativity roam free!

  • Yarn Weight Swaps: Try using a lighter DK weight for a smaller, dainty elephant that's perfect for on-the-go cuddles.

  • Fiber Alternatives: Substitute cotton yarn for a breathable option; this is ideal for warm climates and adds a lovely texture.

  • Color-Blocking: Combine multiple colors in fun sections to create a patchwork elephant that bursts with personality and charm.

  • Accessories Addition: Adorn your elephant with a bow or party hat—these delightful details can turn it into a festive toy for any occasion.

  • Size Adjustments: Use thicker yarn to create a grand Baby Elephant that becomes an eye-catching statement piece in any child's room.

  • Texture Enhancements: Consider adding pom-poms to the ends of the arms and legs for a whimsical touch that invites little hands to play.

  • Embroidered Patterns: Personalize by embroidering tiny hearts or stars on the body; a touch that transforms this cheerful toy into an even more special keepsake.

  • Border Variations: Add a scalloped edge or ruffled border around the elephant's body for a playful finishing touch that enhances its already endearing factor.

Whimsical Crochet Baby Elephant Toy FAQs

What yarn can I substitute for this project?
Absolutely! You can substitute the 100% polyester plush yarn with an acrylic or cotton yarn if you're looking for a different texture. However, keep in mind that plush yarn will give the softest finish, perfect for a cuddle buddy.

How can I adjust the size of the baby elephant?
If you want a larger elephant, consider using a thicker yarn and a larger hook. Conversely, using a sport weight yarn with a smaller hook will create a mini version of this adorable baby elephant crochet toy. Just remember to maintain your stitch count to keep the proportions!

Why is my elephant's trunk flopping or looking uneven?
Don't panic! If the trunk is flopping, it might not be secured tightly enough to the head. Make sure to sew it on securely and check that it’s centered. If it appears uneven, you can adjust its position by carefully stitching it again to achieve the right alignment.

How do I avoid gaps while crocheting the magic ring?
To prevent gaps, ensure you're pulling the magic ring tight when you start your stitches. Also, remember to count your stitches as you go. If you notice gaps, you can go back and cinch those areas a bit tighter when you weave in your ends.

What hook size should I use for this pattern?
For the whimsical crochet baby elephant toy, I recommend using a 3.5mm (US E/4) hook. This size is perfect for working with bulky or plush yarn, allowing for smooth stitches that will create a sturdy and defined shape.

How can I fix dropped stitches in my work?
It’s an easy fix! Simply pull the yarn just below the dropped stitch and use your hook to pull it up through the loop. For future projects, counting your stitches regularly will help catch any mistakes early on. Happy crocheting!

Filed Under: Uncategorized

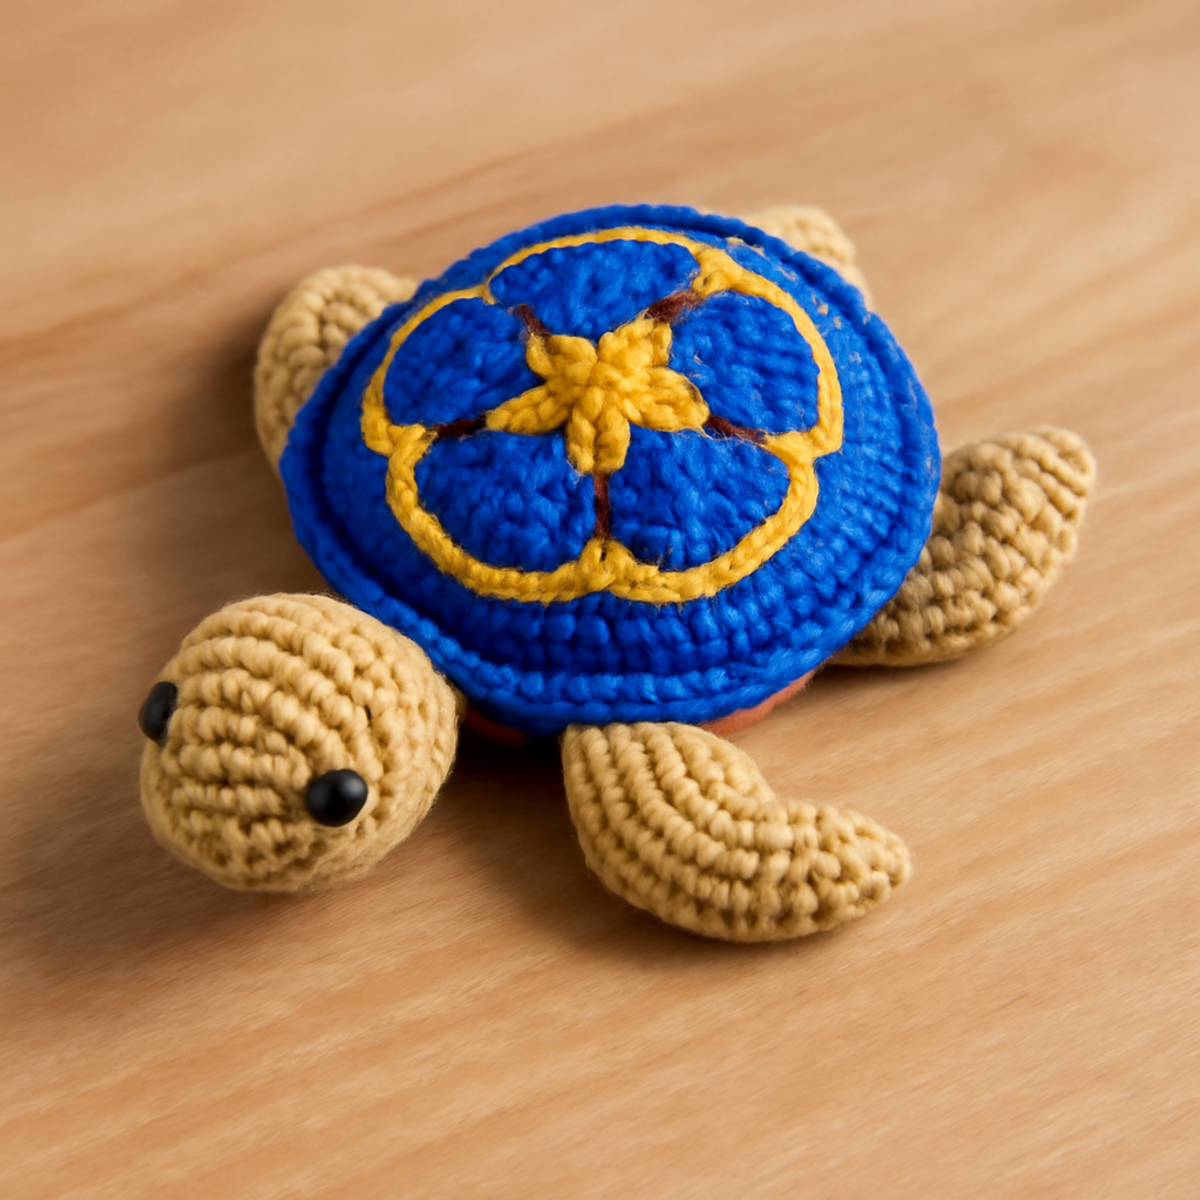
Adorable Crochet Sea Turtle Amigurumi: A Charming Guide

August 23, 2026 by Publisher Leave a Comment

Adorable Crochet Sea Turtle Amigurumi: A Charming Guide

When the sun starts to set and the gentle waves whisper sweet melodies, there’s no better way to capture that coastal magic than through your crochet hook. Enter the world of adorable amigurumi sea turtles—a project that invites you to bring a bit of the ocean straight into your home. These charming crochet sea turtles are perfect for both beginners and those with some experience under their belts. Not only are they quick to create, but they offer an exciting opportunity to personalize with colors that reflect your aesthetic. Imagine gifting these playful critters for baby showers or birthdays; they're sure to bring smiles all around! Grab your yarn, and let’s dive into this delightful project together—I can’t wait to see the unique turtles you’ll conjure!

Crochet Sea Turtle Materials & Tools

  • Medium Weight Yarn – Approximately 200–300 yards will suffice to create four cute turtles; consider using acrylic or cotton blends for softness and structure.
  • 4.0mm to 5.0mm (G to H) Hook – This size will help you achieve the perfect stitch tension for your crochet sea turtle project.
  • Safety Eyes – Add small black safety eyes for adorable detailing on your turtles' faces.
  • Stitch Markers – Use these to track your rounds and stay organized while crafting your charming amigurumi.
  • Embroidery Thread – Optional for adding personalized details or embellishments to give each turtle its own unique character.

Why Create Crochet Sea Turtles?

Endless Fun: This crochet sea turtle project combines whimsy and creativity, making it a delightful escape for your crafting hours.

Easy to Master: With simple stitches and manageable shapes, even beginners will find success quickly, boosting their confidence in crocheting.

Personalization Potential: Customize colors to match your home decor or gift receiver's taste, making each turtle uniquely charming.

Perfect for All Occasions: These adorable turtles are not only great for personal projects but also make thoughtful gifts for baby showers, birthdays, or special moments.

Aesthetic Appeal: Their cheerful design adds a playful touch to beach-themed rooms or nurseries, instantly brightening up any space.

Gauge & Sizing Notes

Don’t skip the gauge swatch! Checking your tension is vital for ensuring that your adorable crochet sea turtles turn out just right—after all, nobody wants their little creations to be too big or too small. Aim for a standard gauge of approximately 4×4 inches (10×10 cm) to get a good fit, although adjusting may be needed depending on your yarn and hook size. If you wish to make your turtles larger, simply increase your starting chain or round in multiples of 6. And remember, if your swatch ends up too small, try going up a hook size to maintain that delightful softness in your crochet sea turtle project!

Step-by-Step Pattern for crochet sea turtle

Row 1 (or Round 1): Create the Magic Circle
Start by making a magic circle. Inside the circle, crochet 6 single crochets (sc). Pull the tail tight to close the circle, and your work should begin to form a small round base. This is the foundation for your crochet sea turtle's body. (6 sts)

Round 2: Increase the Body
In this round, work 2 single crochets (inc) in each stitch around. This will help the turtle's body grow larger and rounder. After this step, your circle should appear more pronounced and will start to cup slightly. (12 sts)

Round 3: More Increases
Continue to build the body of your crochet sea turtle by working 1 single crochet (sc) in the first stitch, followed by an increase (2 sc in the next stitch). Repeat this pattern around. You should notice an even rounding as the turtle starts taking shape. (18 sts)

Round 4: Keep Increasing
For this round, crochet 2 single crochets (sc) in the first stitch, then 1 single crochet in the next 2 stitches. Repeat this sequence all the way around. The body should have a distinct rounded shape now, becoming more defined. (24 sts)

Round 5: Pattern for the Shell
To begin the shell, switch to a smooth decorative stitch. Work 1 double crochet (dc) in each stitch around. This adds depth and texture to your turtle's shell. Your work should feel and look elevated and vibrant. (24 sts)

Round 6: Shell Texture
Now we’re adding more character to the shell! Create a popcorn stitch by working 5 double crochets (dc) in the same stitch, then pull the last loop through the first stitch you made. This round adds some beautiful dimension to your crochet sea turtle. Continue around for texture. (24 sts)

Step 7: Create the Limbs
Now, let’s make the turtle's limbs! Chain 10 stitches (ch), then turn and work 1 single crochet in each stitch back to the base, leaving a few stitches to attach to your turtle. Each leg will provide a sturdy foundation for your finished sea turtle. (4 legs total)

Step 8: Assembly of the Turtle
Using slip stitches (sl st), attach each limb securely to the sides of your crochet sea turtle's body. Space them evenly to maintain balance. As you do this, ensure the limbs are securely positioned for an authentic look and feel.

Step 9: Adding the Eyes
Position your black safety eyes on the head of the crochet sea turtle, approximately 2 rows above where the limbs are attached. Secure them firmly and watch your turtle's personality come to life! Adjusting their placement can really enhance the charm of your creation.

Step 10: Final Touches and Embellishments
For unique personalization, you can sew small details with embroidery thread, like patterns or expressions on the turtle's shell. This last step allows your crochet sea turtle to reflect your creativity and gives it that special charm that makes it one-of-a-kind.

Variations & Substitutions for Crochet Sea Turtle

Inviting you to add your own touch, these sweet sea turtles can become even more delightful with a few simple tweaks.

  • Yarn Weight: Experiment with lightweight yarn for smaller turtles or bulky yarn for larger ones, giving you versatile options in size.

  • Fiber Alternatives: Use cotton yarn for an eco-friendly touch or a soft acrylic for added snuggles. Each fiber offers a unique look and feel.

  • Color Combinations: Try a color-blocking technique with contrasting shades for the body and shell, creating a fun visual effect. Imagine a coral shell with turquoise limbs—adorable!

  • Textured Shells: Incorporate texture with different stitches like shells or clusters for an interesting shell design. This adds dimension and personality to your turtle.

  • Accessory Embellishments: Sew on tiny hats, bows, or scarves to create personalized characters. A turtle in a beanie is too cute to resist!

  • Size Customization: Change your hook size to alter the overall dimensions of your turtles. A single adjustment can transform your creation from a tiny buddy to a statement piece.

  • Holiday Themes: Infuse seasonal spirit by crafting turtles in holiday colors or patterns. A festive turtle could make for a whimsical table centerpiece or gift!

Each of these ideas not only embraces creativity but also allows your crochet sea turtles to truly reflect your personality and style. Dive in and let your imagination swim!

What to Make after Charming Amigurumi Sea Turtles?

As you bask in the joy of creating these delightful sea turtles, consider crafting a charming ensemble that complements their whimsical nature.

  • Ocean Waves Blanket: A cozy blanket featuring wave patterns can set the perfect backdrop for your turtles, creating a coastal retreat feel. Picture snuggling under this soft creation while surrounded by your turtles’ playful charm.

  • Coral Reef Pillow: A vibrant pillow mimicking coral shapes could enhance your beach-themed decor, tying in beautifully with the sea turtles' vibrant hues. It’s another chance to explore bold colors that breathe life into any room.

  • Tropical Plant Decor: Create little amigurumi plants, like potted succulents or palm leaves, to complete your oceanic display and bring nature indoors. Their green tones will beautifully contrast against your sea turtles.

  • Sea Shell Keychain: Crafting a miniature sea shell keychain can make for sweet gifts! It's a fun way to share your love for the ocean and adds a whimsical touch to everyday items.

  • Beach Bag: A handy crochet bag designed with beach motifs will make a fabulous accessory for outings, complementing your sea turtles’ joyful spirit while being practical for carrying your projects.

How to Wash and Care for Your Crochet Sea Turtle

Machine Washing: If you choose to machine wash your crochet sea turtle, use a gentle cycle in cold water to avoid any damage. Always place your turtles in a laundry bag to minimize agitation.

Hand Washing: For a more delicate approach, hand wash your crochet sea turtle in lukewarm water with mild soap. Gently swish the water, avoiding any twisting or wringing to protect the stitches.

Drying/Blocking: After washing, lay your crochet sea turtle flat on a clean towel to dry. Reshape it gently to maintain its form while avoiding direct sunlight, which could fade the colors.

Storage: When not on display, store your crochet sea turtles in a cool, dry place. Keep them away from direct sunlight to preserve their vibrant colors and maintain the integrity of your lovingly crafted project.

Expert Tips for Crochet Sea Turtles

  • Tension Matters: Keep your tension consistent throughout your project to ensure a balanced and even finish. This will help your crochet sea turtle have a charming structure that's soft but not too stiff.

  • Count Carefully: It’s easy to lose track of your stitches, especially on the shell. Count your stitches frequently to keep each turtle’s body size uniform and avoid any wobbliness.

  • Finish with Flair: For a polished look, consider lightly steaming your finished turtles. This helps shape them beautifully, enhancing their adorable features without flattening them out.

  • Secure Eyes: When attaching safety eyes, ensure they’re positioned correctly above the limbs and secured well. This detail brings your crochet sea turtle to life and captures their playful personality!

  • Personalize Wisely: Adding embroidery details gives each turtle a unique character, but be cautious with placement. Keep embellishments balanced to maintain that harmonious coastal charm!

Charming Amigurumi Sea Turtles FAQs

Can I use a different yarn than what's suggested?
Absolutely! While medium weight yarn, like acrylic or cotton, works best for this crochet sea turtle pattern, you can swap it for different yarn types. Just keep in mind that changing the yarn weight can affect the final size and texture, so you may need to adjust your hook size accordingly for the best results.

How do I make my turtle bigger or smaller?
Don't panic! To change the size of your crochet sea turtle, you can simply adjust your hook size or the number of rounds you crochet. Using a thicker hook will create larger turtles, while a smaller hook will yield smaller turtles. Just be sure to maintain consistent tension throughout for a lovely finished piece.

Why is my turtle curling at the edges?
Curling can happen if your tension is too tight or if there’s a discrepancy in your stitch counts. To fix this, first check your stitch count to ensure you haven’t missed any increases. If that looks fine, consider loosening your tension a bit as you continue. Lightly steaming or blocking your finished turtles can also help flatten those edges!

What size hook should I use for this project?
For the charming amigurumi sea turtles, I recommend using a 4.0mm to 5.0mm (G to H) hook. This size helps achieve the right stitch tension for a soft yet structured finish, perfect for those cozy little turtles.

How do I fix a dropped stitch in my turtle?
It's an easy fix! If you notice a dropped stitch in your crochet sea turtle, simply use a crochet hook to pick it back up through the loop where it dropped. If it’s a larger issue, don’t hesitate to unravel a few stitches back to the last finished round and re-crochet those sections. Keeping your count consistent will help minimize dropped stitches in the future!

Filed Under: Uncategorized

Charming Kitty Basket Crochet: Cozy & Beginner-Friendly Delight

August 23, 2026 by Publisher Leave a Comment

Charming Kitty Basket Crochet: Cozy & Beginner-Friendly Delight

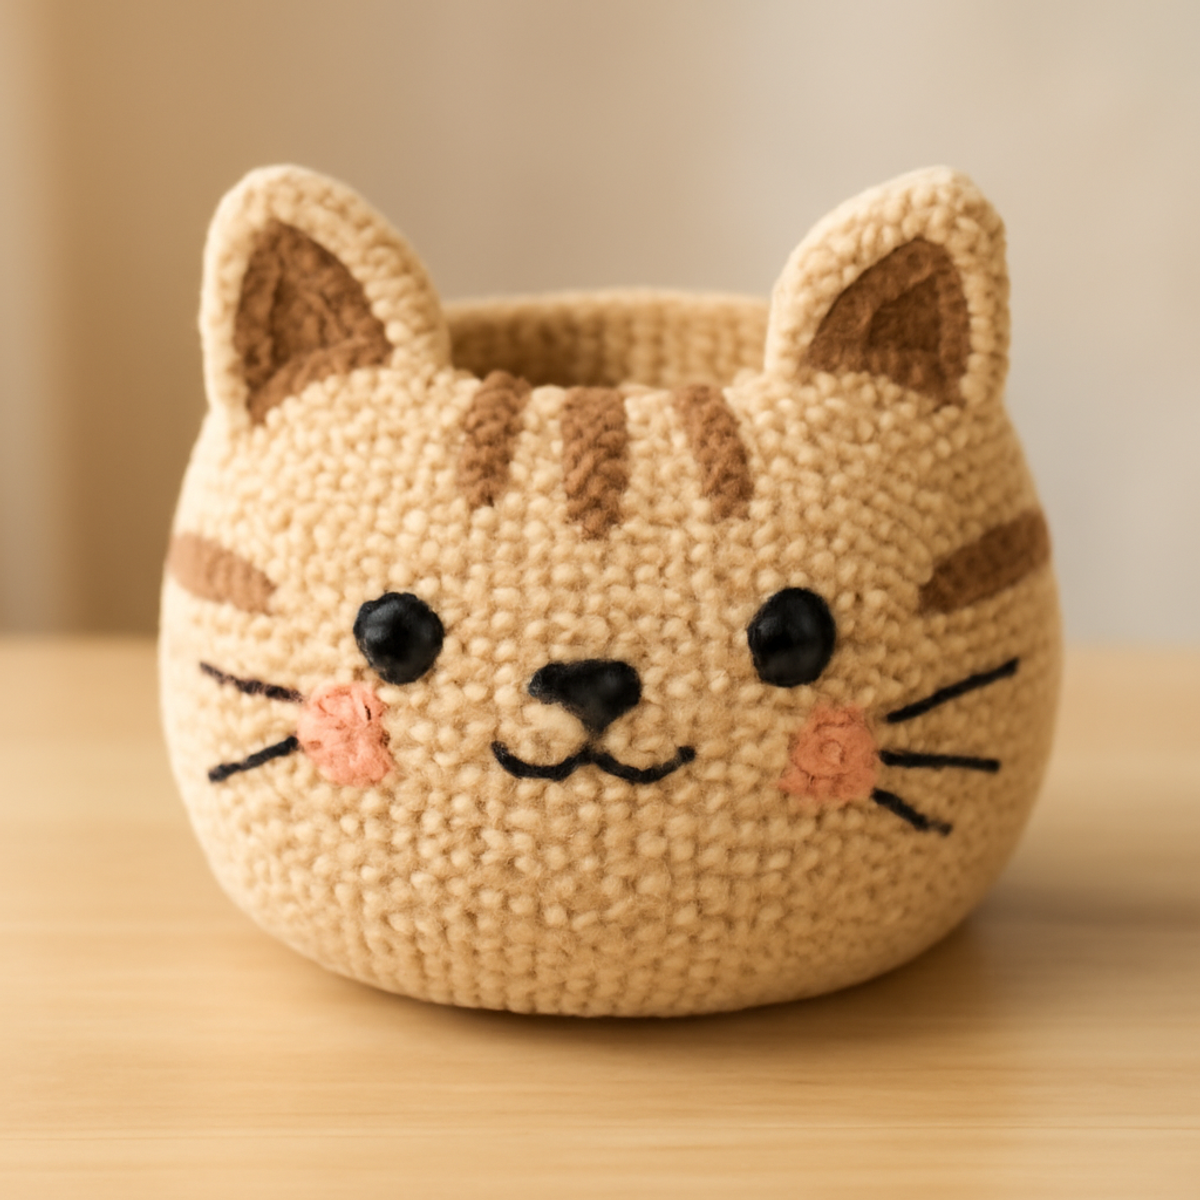
As the sunlight spills into my crafting nook, I can’t help but feel drawn to a project brimming with charm—the Dreamy Yarn Kitty Basket crochet pattern! This delightful creation not only brightens up any space but also serves a practicality that every home can appreciate. I love how the soft, plush texture invites both experienced and novice crafters to dive into this fun adventure. This kitty basket crochet project works up quickly, making it an ideal gift for little ones, as its cuddly design also acts as a playful toy holder. Plus, with endless customization options, you can easily adapt colors and sizes to suit any décor or personality. I'm excited to guide you through this enchanting journey of stitches and creativity—let's get started and bring your cozy kitty basket to life!

Kitty Basket Crochet Materials & Tools

  • Plush or Chenille Yarn – Approximately 150-200 yards of Bulky (5) or Super Bulky (6) yarn for that soft, inviting texture.
  • 4.5 mm (G/6) Hook – This hook size is perfect for achieving the right tension while working on your kitty basket.
  • Safety Eyes (8 mm) – Add adorable, expressive eyes to your kitty basket for that delightful animal charm.
  • Polyester Stuffing – Use this to give your basket a cuddly shape and structure, making it perfect for holding items.
  • Yarn Needle – Essential for assembling and weaving in ends, ensuring your basket looks neat and finished.
  • Scissors – A handy tool to snip your yarn and finish all those cute touches on your kitty basket crochet project.

Why Is This Kitty Basket So Special?

Charming Aesthetic: The kitty basket's adorable design transforms any space into a whimsical retreat, making it an excellent conversation starter.
Functional Storage: Beyond its cuteness, it serves as a playful toy holder, perfect for organizing small items around the house.
Beginner-Friendly: With simple crochet techniques involved, this project welcomes newcomers while keeping seasoned crafters engaged.
Quick Project: Finishing up in just a few sessions, it’s a perfect gift idea or a satisfying weekend project that brings cheer and utility.
Customization Galore: Easily personalize colors and sizes to fit your unique home decor, ensuring every kitty basket feels special and one-of-a-kind.

Gauge & Sizing Notes

Don't skip the gauge swatch! Checking your crochet gauge for the Dreamy Yarn Kitty Basket is essential to ensure your adorable creation holds its shape when stuffed. A general guideline suggests a tension swatch of approximately 4×4 inches (10×10 cm) should yield around 8 single crochets by 8 rows. If your gauge doesn't match, don’t worry; if your swatch is too small, simply go up a hook size to loosen your tension, or if it's too large, try going down a hook size for a snugger fit. To make this kitty basket crochet larger or smaller, adjust your starting chain in multiples of 6 for a wider base while keeping the same increase pattern. Happy crocheting!

Step-by-Step Pattern for Dreamy Yarn Kitty Basket

Row 1: Create the Base
Begin by making a magic ring and ch 1. Work 6 sc into the ring, pulling it tight to form the circle (6 sts). Your work should create a small, snug base.

Row 2: Increase the Base
In this row, work 2 sc in each stitch around for a total of 12 sts (12 sts). The newly formed circle should lie flat and be slightly wider than the previous row.

Row 3: Expand the Base
Now, work 1 sc in the first stitch, 2 sc in the next, and repeat this pattern all the way around (18 sts). You should notice a lovely curvature beginning to take shape.

Row 4: Continue Increasing
For this row, work 1 sc in the first 2 stitches, then 2 sc in the next stitch all around (24 sts). The base will start widening to accommodate the sides of your kitty basket crochet project.

Row 5-10: Build the Sides
In the following rows, simply work 1 sc in each stitch around for 6 rows (24 sts each). Your basket should be taking on a cylindrical shape—this is where it starts to rise!

Row 11: Prepare for the Top
Now, we’ll begin to decrease slightly. Work 1 sc in the first 2 stitches, then 1 dec (1 sc in next 2 sts, skip next st) all around (18 sts). Your work should remain even but start to taper slightly.

Row 12: Shape the Top
Continue with the decreasing by working 1 sc in the first stitch, then 1 dec all around (12 sts). The top of your kitty basket should start to narrow, giving it a charming form.

Row 13: Final Decrease
For this row, work 1 dec around. You should have 6 stitches remaining (6 sts). Your kitty basket should begin to look quite adorable at this point!

Row 14: Closing Off
Insert your polyester stuffing into the body for structure. Now, sl st in each of the remaining 6 sts, then fasten off and weave in the ends. The base of your kitty basket is ready for decorating!

Step 1: Attach Ears
Using your yarn needle, sew two ear triangles made from small squares folded into triangles to the top of your basket. Position them symmetrically, and your kitty basket crochet is one step closer to completion!

Step 2: Add Facial Features
Embellish your kitty basket by sewing on safety eyes and using yarn to create a cute nose and whiskers. Adjust the expressions to give your kitty basket character—every basket can have its unique charm!

Step 3: Finishing Touches
For a polished look, consider adding an edging around the top with sc or dc stitches. This creates a neat finish, enhancing the cute aesthetics of your Dreamy Yarn Kitty Basket.

What to Pair with the Dreamy Yarn Kitty Basket

As you complete your charming kitty basket, consider bringing even more warmth and whimsy to your space with these delightful matching projects.

  • Cuddly Toy Mouse: Create an adorable yarn mouse that can live happily in your kitty basket for extra playfulness. This small project uses the same techniques and gives your basket a delightful companion.

  • Fluffy Blanket: Whip up a cozy throw that complements the softness of the kitty basket. Imagine wrapping yourself in warmth while your furry friend snuggles beside it!

  • Playful Cat Pouch: A small pouch that mimics the kitty basket, perfect for holding little treasures or crafting supplies. Its playful design will echo the charm of your original project.

  • Whimsical Wall Hanging: Create a decorative wall piece featuring yarn leaves or flowers that match the colors of your kitty basket. This pairing adds a touch of artistry to your decor while being visually cohesive.

  • Cute Matching Coasters: Design some coasters in similar hues to protect your surfaces while tying the whole aesthetic together. These simple crochet squares add charm and practicality to your space, ensuring nothing distracts from your lovely kitty basket crochet.

Expert Tips for Kitty Basket Crochet

  • Tension Matters: Keep your tension even throughout the project to ensure the structure holds its shape, especially when stuffing it.

  • Count Carefully: Accurate stitch counting is essential, as it helps maintain proportions and avoids any awkwardly shaped features.

  • Seam Neatly: When assembling parts, use a yarn needle to sew edges together snugly for a clean finish. This enhances the overall appearance of your kitty basket.

  • Block for Perfection: If desired, gently steam-block finished pieces before assembly to refine shapes and make them look polished.

  • Stay Organized: Keep track of your row counts and stitch patterns on a paper or app to prevent any future confusion during your kitty basket crochet journey.

Care Instructions for Kitty Basket Crochet

  • Machine Washing: Use cold water and a gentle cycle to maintain the integrity of your kitty basket crochet without causing felting or pilling. Avoid any harsh detergents to protect the plush texture.
  • Hand Washing: If you prefer, hand wash in cold water with mild soap, gently pressing the basket to clean it without agitating, which could distort its shape.
  • Drying/Blocking: After washing, lay your kitty basket flat on a clean towel and reshape it gently. Avoid hanging as it may stretch; instead, let it air dry completely.
  • Storage: When not in use, store your kitty basket in a cool, dry place. Stuffing it lightly with tissue paper can help maintain its shape and keep it looking fabulous!

Variations & Substitutions for Kitty Basket Crochet

Embrace your creativity and let your imagination run wild as you explore ways to customize your kitty basket!

  • Color Swaps: Change the main color to grey or cream for a more sophisticated kitty look. A soft pastel can also create a serene vibe.

  • Yarn Choice: Experiment with cotton for a sturdier basket or choose a multi-colored yarn to add a playful burst of color. Each fiber brings a unique touch!

  • Size Alteration: Adjust the yarn weight and hook size to craft a larger toy holder or a smaller decorative basket, catering to your storage needs. Size can completely change the character of your creation!

  • Facial Expression: Give your kitty basket a unique personality by modifying facial features—try different shapes for whiskers or add fun accessories like bows or glasses!

  • Textured Edging: Incorporate a textured border using puff stitches or scallops for a decorative finish. This playful touch can elevate your basket's charm!

  • Playful Pom-Pom: Attach a fluffy pom-pom on top to mimic a playful kitty tail. This fun addition adds whimsy and tactile appeal!

  • Fringed Fun: Create fringe around the top edge for an eye-catching boho look. It can add not only fun but also vibrant movement to your basket.

  • Lined Interior: Consider adding a removable fabric lining to the interior for a more polished finish. It’s also an opportunity to use your favorite prints for that extra flair!

Dreamy Yarn Kitty Basket FAQs

Can I use a different type of yarn for my kitty basket crochet?
Absolutely! While the pattern suggests plush or chenille yarn for a soft feel, you can substitute it with cotton or wool yarn. Just make sure to adjust your hook size accordingly based on the yarn weight you choose to maintain the overall shape and structure.

What if my kitty basket is curling at the edges?
Don't panic! Curling often happens when the tension is too tight or the stitches are too few. I recommend checking your tension and ensuring you have the correct number of stitches in each round. If necessary, try adding a few more stitches to help your edges lie flat.

How can I make my kitty basket bigger or smaller?
It's easy to adjust the size of your kitty basket! To increase its dimensions, use a thicker yarn or a larger hook. If you want a smaller basket, opt for a lighter yarn and a smaller hook size. Just remember to adjust your stitch counts accordingly to maintain the shape!

What should I do if I've dropped a stitch?
It happens to all of us! Don't worry; it's an easy fix. Simply locate the dropped stitch, pick it back up with your hook, and work it back into the correct row. If it's already a few rows down, you can use a small crochet hook or a yarn needle to weave it back into place carefully.

Which hook size should I use for this pattern?
The recommended hook size for the Dreamy Yarn Kitty Basket is 4.5 mm (G/6). This size allows you to get a nice tight tension, providing structure for the basket without any gaps. If you opt for a different yarn, make sure to check the yarn label for the best hook size recommendation!

Why does my basket have uneven sides?
Uneven sides may occur if your stitch count varies from row to row. To remedy this, double-check your stitch counts at the end of each round, and keep your tension consistent throughout the project. Taking your time and counting your stitches will yield a beautifully crafted kitty basket!

Filed Under: Uncategorized

Quick No-Sew Plush Turtle Crochet for Cozy Cuddles

August 23, 2026 by Publisher Leave a Comment

Quick No-Sew Plush Turtle Crochet for Cozy Cuddles

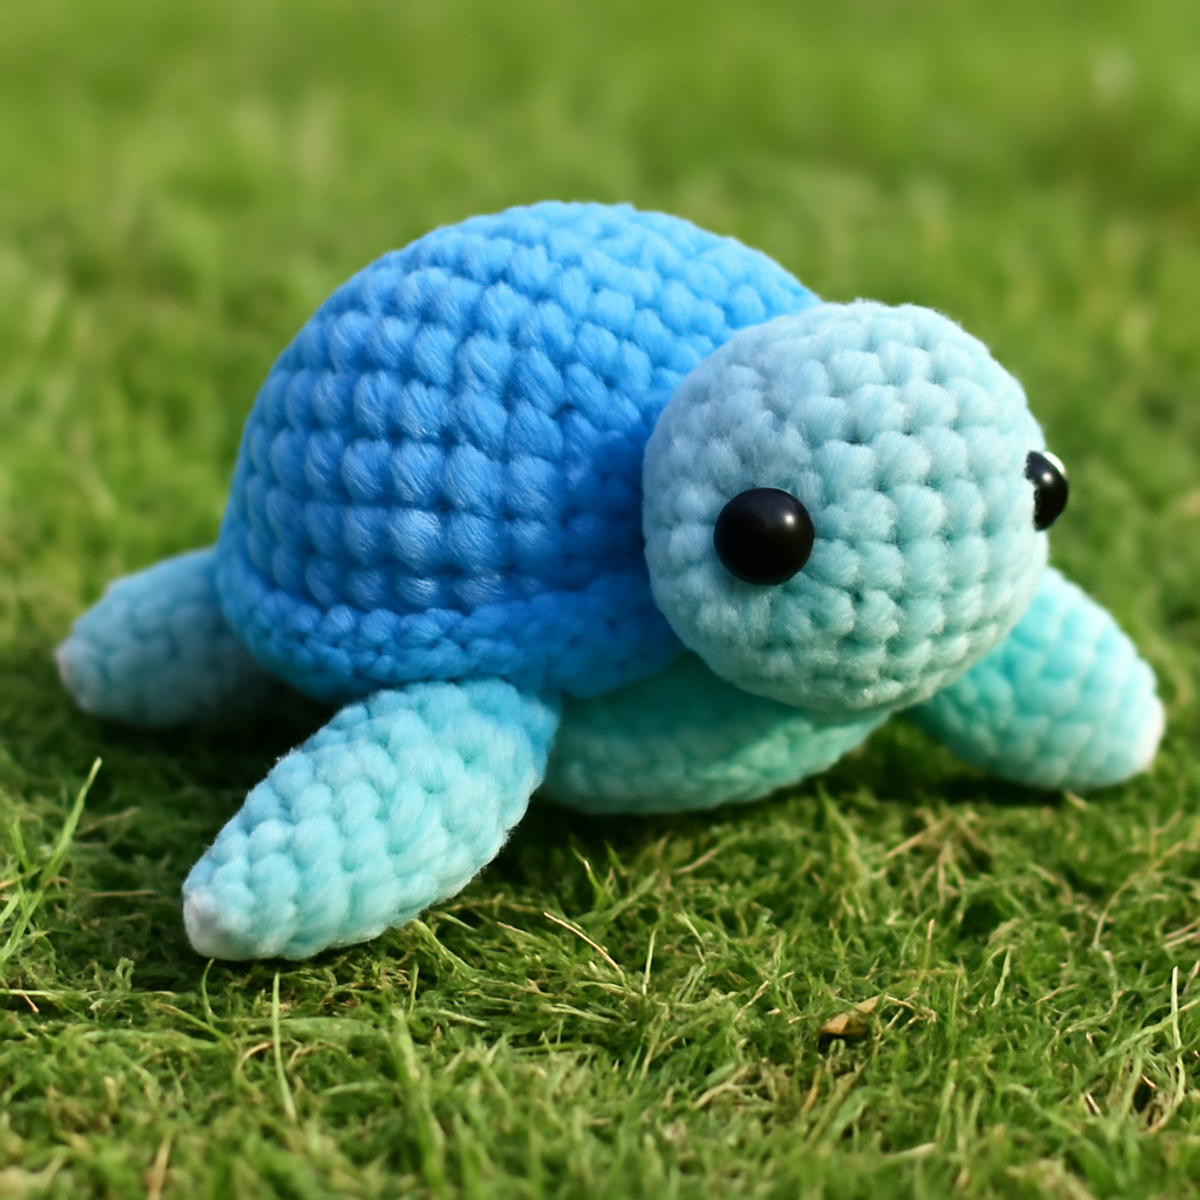
As I sifted through my yarn stash, the soft, plush texture of a bulky yarn caught my eye, whispering of possibilities. Today, I'm excited to share my newest project: a quick and easy plush turtle crochet pattern that is all about joy and creativity! This adorable turtle isn't just a delightful companion; its simple no-sew design makes it perfect for beginners while providing seasoned crafters with a quick win in less than an hour. Not only will you enhance your crochet skills, but you'll also have a charming, squishy friend to brighten your home. So grab your hook, cozy up, and let’s dive into making this whimsical plush turtle that everyone will love!

Plush Turtle Crochet Materials & Tools

  • Bulky Plush Yarn – Approximately 100-150 yards of soft, polyester yarn will give your plush turtle its cuddly appeal.
  • 5.0 mm (H-8) Hook – This size is recommended to achieve the ideal density for your project.
  • 12mm Safety Eyes – Add a pair of these for a cute and playful expression on your turtle's face.
  • Stitch Markers – Helpful for keeping track of rounds as you crochet in the round.

Why Choose This Plush Turtle Crochet?

Endearing Design: This adorable turtle features a whimsical aesthetic that’s perfect for both children and adults, adding charm to any space.
Quick Project: Complete this delightful plush turtle in under an hour, providing instant gratification and a finished piece to enjoy.
No-Sew Simplicity: Thanks to its clever no-sew construction, this pattern is incredibly beginner-friendly, making it an ideal project for all skill levels.
Soft and Cuddly Texture: Crafted from plush yarn, your finished turtle will be irresistibly soft, perfect for squeezing and cuddling.
Creative Customization: With endless color options and embellishment ideas, you can make each turtle uniquely yours, ensuring that no two are alike!

Gauge & Sizing Notes

Don't skip the gauge swatch when working on your plush turtle crochet! Checking your tension is vital for ensuring your adorable turtle maintains its shape and squishiness. Aim for a gauge of approximately 4×4 inches (10×10 cm) to yield a snug, rounded finish, but remember, everyone's tension varies! If your swatch is too small, try going up a hook size, or if it's too large, switch to a smaller hook. To make this plush turtle crochet larger or smaller, adjust your starting chain by using multiples of 6, plus 2 for a smooth finish. Happy crocheting, and watch your turtle come to life!

Step-by-Step Pattern for Quick and Easy Plush Turtle Amigurumi

Row 1: Starting the Shell
Begin your plush turtle crochet by making a magic ring (or ch 2) and work 6 sc into the ring. Pull the ring tight to close. This creates the foundation of your turtle's shell. Your work should start to curl into a small circle (6 sts).

Row 2: Increasing the Shell
In this row, work 2 sc in each stitch around to increase the size of the shell. You’ll want to keep your tension consistent for an even structure. At the end of the round, you should have 12 total stitches (12 sts).

Row 3: Continuing Increases
Now, work 1 sc in the first stitch, 2 sc in the next stitch and repeat this pattern around. This will continue to widen your turtle's shell gradually. Count your stitches to ensure your increases are accurate (18 sts).

Row 4: Building the Shape
For this round, crochet 1 sc in the first 2 sts, 2 sc in the next stitch and repeat around. This will create a nice dome shape for your turtle's back, which should begin to decline slightly at the edges (24 sts).

Row 5: Completing the Shell
Now, work 1 sc in the first 3 sts, 2 sc in the next stitch for this row. This continues to round out the shell. Your plush turtle crochet project should be taking shape, with a larger diameter now (30 sts).

Step 6: Flippers (Make 4)
To create the flippers, start with a ch of 10. In the 2nd ch from the hook, work 1 sc, then continue with 1 sc in each ch across. Your flipper should be flat and straight, measuring about 3 inches long (9 sts).

Step 7: Shaping the Flippers
For the next row, work 1 ch, then turn your flipper, and work 1 sc in each sts across. This creates a textured edge that adds a little character. Repeat this round once more for added thickness (9 sts). Leave a long tail for sewing.

Step 8: Creating the Head
Ch 2 and work 6 sc into the first chain to start the turtle's head. It will be smaller than the shell but rounded. Your work should look like a tiny circle (6 sts).

Row 9: Shaping the Head
For this round, work 1 sc in the first stitch, 2 sc in the next stitch around. This helps round out the head more. Count carefully to ensure accuracy as you crochet (9 sts).

Row 10: Finishing the Head
Continue to work 1 sc in the first 2 stitches, 2 sc in the next stitch around. Your plush turtle's head should now have the desired shape and size in proportion to the body (12 sts).

Step 11: Assembly
Begin attaching the head to the shell by using the long tail. Use a yarn needle to sew it securely onto the top of the shell, making sure it aligns with the overall look of your plush turtle crochet.

Step 12: Attaching the Flippers
Position each flipper to the sides of the turtle’s body, using the yarn tail from each flipper to sew them in place. Ensure they are evenly spaced for a balanced look.

Step 13: Final Touches
Attach the 12mm safety eyes to the head for that extra cuteness factor! Secure them tightly in place. Finally, finish by doing a slip stitch around the bottom edge of the shell for a polished finish.

Step 14: Cleanup and Enjoy
Weave in any remaining yarn ends from assembly and enjoy your adorable plush turtle crochet! Fluff and shape slightly if needed, making sure it’s ready for cozy cuddles.

How to Wash and Care for Your Plush Turtle Crochet

  • Hand Washing: Gently wash your plush turtle crochet in lukewarm water with mild detergent. Avoid scrubbing or twisting to maintain its soft shape and texture.

  • Drying: Lay your plush turtle flat on a clean towel to dry. Keep it out of direct sunlight to prevent fading, ensuring it stays as delightful as the day you made it.

  • Storage: Store your plush turtle in a cool, dry place away from direct sunlight. Use a breathable bag to protect it from dust while letting it breathe.

  • Avoid Agitation: To prevent pilling or distortion of its shape, avoid machine washing or drying. Treat your plush turtle with love for long-lasting cuddles!

What to Pair with Quick and Easy Plush Turtle Amigurumi

Create a delightful collection that complements your new cuddly companion while exploring your creativity!

  • Cozy Plush Blanket: A soft, textured blanket enhances your turtle’s charm, perfect for snuggling together on chilly evenings.
  • Mini Plush Fish: These charming little creatures can swim alongside your turtle, adding a playful under-the-sea theme to your decor.
  • Fluffy Baby Toadstools: Crochet adorable toadstools to create a whimsical habitat for your plush turtle and enhance its playful aesthetic.
  • Crochet Storage Basket: A cozy basket made with the same bulky yarn serves as a lovely home for your turtle and other small treasures.
  • Matching Plush Bunny: Create a sweet bunny companion that harmonizes beautifully with your plush turtle, bringing even more joy to your crafting experience.

Expert Tips for Plush Turtle Crochet

  • Maintain Tension: Consistent tension is key to achieving a smooth, even texture. Avoid tightening your stitches to prevent gaps in your plush turtle crochet.

  • Count Carefully: Always check your stitch count after each round, especially when increasing. Losing track can lead to an uneven shell shape that's hard to fix later.

  • Use Stitch Markers: Placing stitch markers at the beginning of each round helps you keep track, so you won't accidentally twist your project or skip a stitch.

  • Smooth Edges: Finish your turtle with a snug slip stitch around the edges for a clean look. This tiny detail adds a polished finish to your lovely creation.

  • Shape and Fluff: After completing your plush turtle, gently shape the shell and flippers to ensure they stand out. A little fluffing can transform your work into a cozy cuddly companion!

Plush Turtle Crochet Variations & Substitutions

There are countless ways to make this plush turtle truly yours, and I can't wait to see what creative ideas you dream up!

  • Yarn Weight Swap: Experiment with lighter or heavier yarns to create a mini or super-sized turtle, changing its cuddly vibe. This allows for a fun exploration of texture and size!

  • Fiber Alternatives: Try using cotton yarn for a more structured turtle, perfect for playtime or as a decorative piece. The sturdiness will surprise you, making it versatile for a range of settings.

  • Color Blocked Shell: Use two contrasting colors for the shell, crocheting half in one color and half in another. This modern twist will give your turtle a unique flair that stands out beautifully.

  • Embellished Features: Add small felt pieces or stitched patterns to the shell to create a playful motif. Think flowers, stars, or even little waves, which can turn your turtle into a decorative masterpiece.

  • Sizing Adjustments: Alter the size of your hook to make your turtle smaller or larger. A smaller hook can give you a neat finish for tiny turtles, while a larger one adds substantial charm.

  • Textured Borders: Enhance the edges of the shell with a fun border, like a puff stitch or scalloped finish. It adds a lovely textured detail that can make your plush turtle pop in any setting.

  • Fluttering Flippers: Try adding a fringed or ruffled edge to the flippers for added whimsy. It’s an easy way to introduce motion, making your turtle appear playful and lively!

  • Personalized Accessories: Fashion a small bow or a tiny hat for your turtle as a playful accessory. Little touches like these truly bring personality to your project, making it special and memorable.

Quick and Easy Plush Turtle Amigurumi FAQs

Can I use a different yarn weight than bulky for my plush turtle crochet?
Absolutely! While bulky yarn gives a lovely squishy texture, you can opt for a medium-weight yarn if you prefer. Just keep in mind that you may need to adjust your hook size and possibly the stitch count to keep the turtle’s size proportional.

How can I make my plush turtle crochet larger?
To increase the size of your plush turtle, simply switch to a larger hook or thicker yarn. Alternatively, you can add more sc stitches in each increase round for a broader shell. Remember to adjust your stitch count consistently to maintain its shape!

Why is my plush turtle’s shell curling?
Don’t panic! Curling can happen if your tension is too tight or if you’ve skipped stitches in your increases. Make sure to check your stitch count and relax your tension. Gently blocking the finished shell can also help smooth it out if needed.

How do I fix a dropped stitch in my plush turtle crochet?
It's an easy fix! If you notice a dropped stitch, simply pull the working yarn gently to create a loop at the stitch level. Use your crochet hook to re-insert the loop through the dropped stitch and secure it. This will maintain your turtle’s integrity!

What size hook should I use for this pattern?
I recommend using a 5.0 mm (H-8) crochet hook for the best results with bulky yarn. This size is perfect to achieve the desired density without making your plush turtle too stiff or too floppy.

Can I add my own embellishments or details to the turtle?
Absolutely! Personalizing your plush turtle crochet with bows, different colored shells, or even little accessories adds a unique touch. Let your creativity shine and make each turtle a reflection of your artistic spirit!

Filed Under: Uncategorized

Crochet Sleepy Mouse: Adorable Amigurumi for Cozy Spaces

August 23, 2026 by Publisher Leave a Comment

Crochet Sleepy Mouse: Adorable Amigurumi for Cozy Spaces

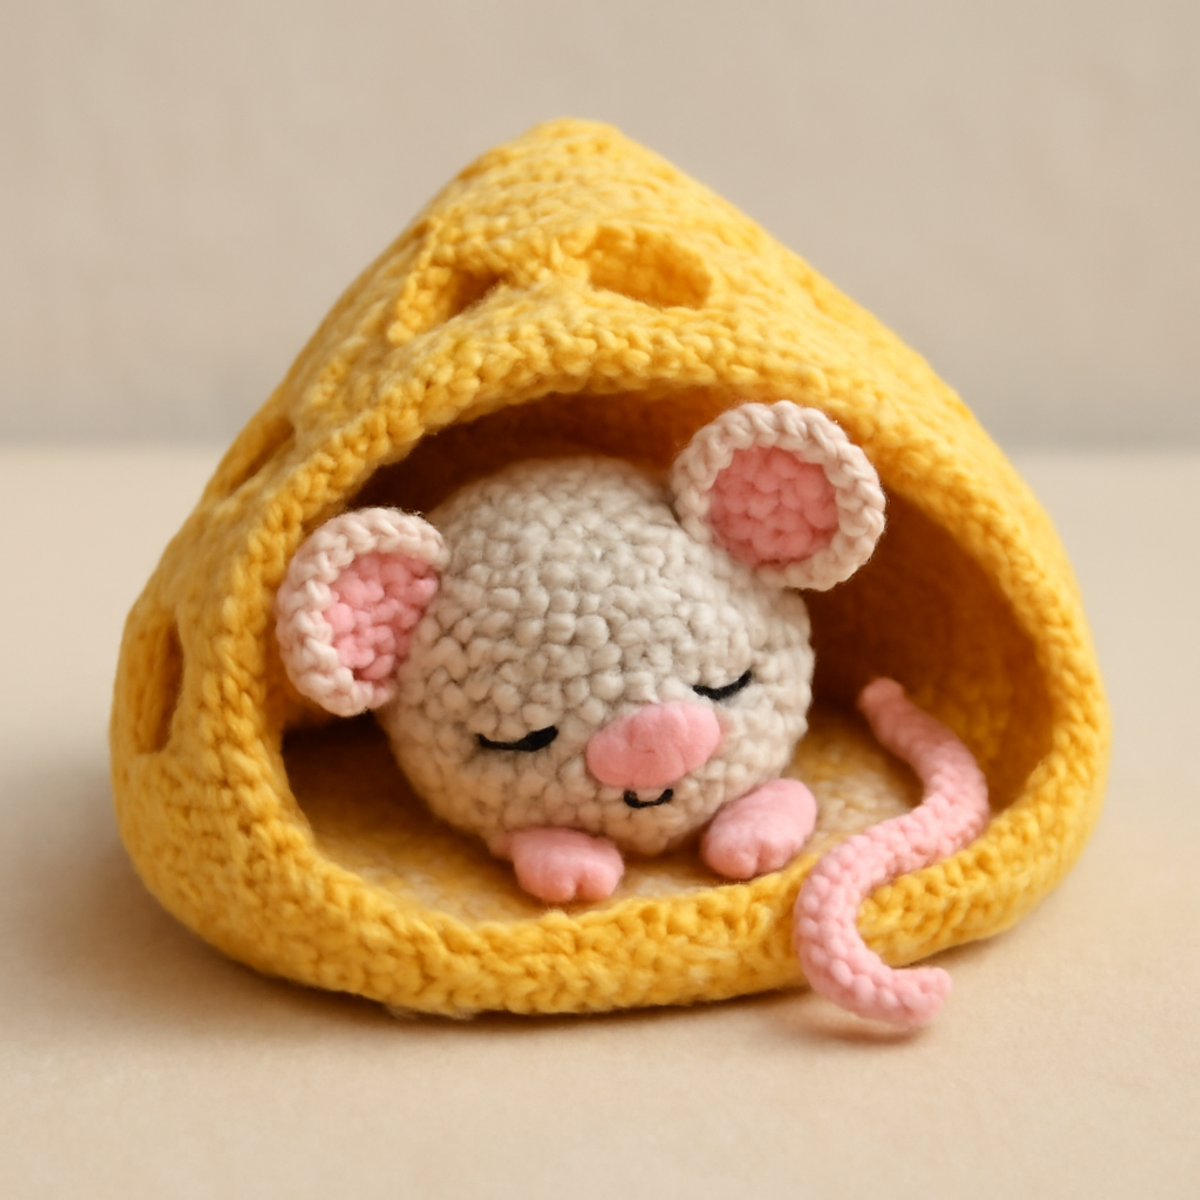
There's something undeniably heartwarming about cozy little creatures nestled in charming spaces, and our crochet sleepy mouse is no exception! This whimsical pattern presents a delightful project that will not only please your crafty hands but also capture the imaginations of anyone who encounters it. Perfect for both beginners and seasoned crafters, this adorable design features a sleepy mouse tucked away in a playful cheese house, making it an enchanting decoration or a memorable gift. You'll appreciate how quickly it works up, allowing you to showcase your crochet skills while creating a huggable character that inspires storytelling. So gather your yarn—this cozy project awaits, ready to add a sprinkle of joy to your home or a loved one's day!

Crochet Sleepy Mouse Materials & Tools

  • Yarn

    • Lightweight Plush or Chenille Yarn – Choose a category 3 yarn; you'll need approximately 150-200 yards for this cozy project.
    • Cream Yarn – Perfect for the mouse's body, creating that adorable base color.
    • Light Pink Yarn – Great for accents like the mouse's ears and nose.
    • Yellow Yarn – Ideal for crafting the playful cheese house.
  • Tools & Notions

    • 2.5 mm (US B/1) Crochet Hook – The specified hook size ensures precise stitching for your crochet sleepy mouse.
    • 6 mm Safety Eyes – Essential for giving your mouse its adorable gaze!
    • Polyester Stuffing – Use this to ensure your mouse is plush and huggable.
    • Yarn Needle – Handy for stitching all your pieces together neatly.
    • Scissors – Needed for trimming those pesky yarn ends.

Why crochet a sleepy mouse today?

Adorable Design: This charming pattern is perfect for bringing joy to any child's room, providing an imaginative companion.

Quick & Easy: Crafted from simple stitches, you can whip up your masterpiece in no time, delighting friends and family with a lovely handmade gift.

Plush & Cozy: The soft texture of the yarn creates a deliciously squishy effect, ideal for little hands that love to hug and cuddle.

Versatile Options: Feel free to explore color variations or switch up your yarn choice for larger versions, making every creation truly unique!

Perfect for Storytelling: This delightful amigurumi will surely spark the imagination of children, becoming a cherished character in their playful narratives.

How to Check Your Gauge for Crochet Sleepy Mouse

Don't skip the gauge swatch! Ensuring your crochet tension is just right is key to crafting the perfect sleepy mouse in cheese house. Typically, a tension swatch of about 4×4 inches (10×10 cm) should yield approximately 12 single crochets by 14 rows, though your results may vary based on yarn and hook choice. If your gauge swatch is too small, try going up a hook size; if it's too big, consider using a smaller hook. To adjust sizing, remember to make your starting chain or round in multiples of 6 to tailor your plush creation to your desired dimensions. Happy crocheting!

Step-by-Step Pattern for crochet sleepy mouse

Row 1: Magic Ring and First Round
Start with a magic ring; crochet 6 sc into the ring. Pull the tail to close the ring, ensuring a snug beginning. Your first round creates a small circle, perfect for the mouse's head. Remember, your work should look like a tiny puckered circle at this point. (6 sts)

Row 2: Increase Round
In this round, make 2 inc in each stitch around for a fuller head. This will give your crochet sleepy mouse a round, plump appearance. Carefully mark your first stitch to keep track of your rounds. By the end, you should have a circle that starts to take shape nicely. (12 sts)

Row 3: More Increases
Continue working in the round, creating 1 sc in the first stitch, then 1 inc in the next stitch; repeat around. This combination will start to widen the head and add dimension. Keep an eye on your tension so it remains even, ensuring a smooth finish for your adorable mouse. (18 sts)

Row 4: Shape the Mouse Head
This time, crochet 2 sc in the first two stitches, followed by 1 sc in the next stitch; repeat around. You are enhancing the size of the head further while maintaining a lovely round shape. Your work should still be smooth and cohesive, with the perfect plumpness of the head emerging. (24 sts)

Row 5: Begin Decreases
Now it's time to start reducing the head slightly. Crochet 1 sc for the first 4 stitches, then 1 dec; repeat around. This subtle decrease will begin to taper the shape, forming a charming character that is both recognizable and cozy. Your work should feel nice and firm, ready to be stuffed later. (20 sts)

Row 6: Final Decrease Round
In this round, create 1 sc in the first 3 stitches, followed by 1 dec; repeat around. This step is crucial for tapering off the top of the head while keeping the overall shape smooth. Your sleepy mouse will start to show its character, with a lovely rounded top finally emerging. (16 sts)

Row 7: Closing the Head
Finish the head by crocheting 1 sc in 2 stitches and then 1 dec; repeat around. This final shaping will prepare you for adding stuffing soon. The head should feel rounded and firm, displaying the classic plump character that makes your crochet sleepy mouse so adorable. (12 sts)

Step 8: Body Creation
Transition to the body by making 6 sc in the next round, working in to attach it to the head. Continue with 1 sc in each stitch around to create a seamless connection. The body should begin to elongate and widen, creating a cozy space for cuddling. (6 sts)

Step 9: Building the Body
Crochet 1 inc in each stitch around for a fuller body. This will create a soft, squishy form, perfect for resting. As you work, your crochet sleepy mouse should begin to take on more character, presenting a plush shape filled with cozy charm. (12 sts)

Step 10: Continue the Body
Now, create 2 sc in the first stitch and 1 sc in the next stitch; repeat. This will help the body expand further, establishing a rounder form. Keep your tension even, ensuring a soft body that will invite hugs and create a huggable toy at the end. (18 sts)

Step 11: Solid Body Formation
Repeat the last action but add a round without increasing, simply using 1 sc in each stitch. This will provide a solid base for your crochet sleepy mouse while maintaining its inviting shape. The body should feel plush and be ready for stuffing soon. (18 sts)

Step 12: Assembling Parts
Finish off the body by adding another round of 1 sc for stabilization, then bind off. You will later connect the head to the body, which will complete your crochet sleepy mouse. Take care to ensure the stitches are tight for a lovely finish that aligns perfectly! (18 sts)

How to Wash and Care for Your Crochet Sleepy Mouse

Machine Washing: Use a gentle cycle with cold water to maintain the softness of your crochet sleepy mouse while preventing felting or pilling.

Hand Washing: For extra care, soak it in cold water with a mild detergent, gently swirling to clean, then rinse thoroughly without agitating.

Drying/Blocking: Lay your crochet sleepy mouse flat on a clean towel to dry, reshaping it gently to keep its adorable form intact and prevent stretching.

Storage: Keep it in a cool, dry place, away from direct sunlight to preserve the vibrant colors and plush texture for years of cuddly companionship.

Crochet Sleepy Mouse Variations & Substitutions

Feel free to let your creativity shine as you customize this charming crochet pattern to suit your style!

  • Yarn Substitutions: Consider using acrylic yarn for an easy-care option that maintains soft warmth.
  • Color Play: Dive into a whimsical world of colors! Use pastel blues or greens for a seasonal twist on your sleepy mouse.
  • Larger Size: Swap to worsted weight yarn to create a bigger version of your crochet sleepy mouse, perfect for display.
  • Animal Variants: Try crafting a sleepy bunny in a carrot-shaped house for a different, adorable character that children will love.
  • Textured Accents: Add a cozy pom-pom on top of the cheese house to enhance the playful aspect and texture of your creation.
  • Fringe Fun: Incorporate fringe around the base for a unique touch that adds flair while providing a lovely sensory experience.
  • Seasonal Themes: Create a Halloween version with orange and black yarn or a Christmas edition with red and green accents.
  • Larger Ears: Experiment with oversized ears for your mouse to create an exaggerated, cuter version that's sure to capture hearts!

What to Pair with Sleepy Mouse in Cheese House?

Crafting a cozy cutie like this enchanting mouse opens the door to delightful companion pieces that complement its whimsical charm.

  • Cheese Slice Pillow: This playful pillow mimics the cheese theme; its soft embrace adds a cheerful touch to any child's room.
  • Amigurumi Picnic Basket: Create a tiny basket filled with fruit; it can serve as a charming backdrop for your sleepy mouse's adventures.
  • Cozy Blanket: A lightweight blanket using leftover yarn will create the perfect spot for your crochet sleepy mouse to snuggle up.
  • Miniature Garlic Knot: Add a touch of whimsy with a cute garlic knot, perfect for your mouse's cozy kitchen scene and creating storytelling possibilities.
  • Flower Pot Pal: Craft a small flower pot with a tiny flower; it enhances the playful setting around your charming mouse in the cheese house.

Expert Tips for Crochet Sleepy Mouse

  • Mind Your Tension: Consistent tension is key; too tight leads to a firm feel while loose stitches may sag, so find your balance as you crochet.

  • Track Your Rounds: Use a stitch marker to keep track of your rounds, ensuring you don't lose count and maintain the shape of your adorable mouse.

  • Proper Stuffing: Firm yet soft stuffing is essential; avoid overstuffing to maintain the character’s shape while keeping it huggable and cuddly.

  • Count Carefully: Losing a stitch can affect your finished shape, so always count your stitches after each round to catch any mistakes early.

  • Secure Finishing: When assembling, tightly secure all parts to avoid any wobbling; a neat finish will make your crochet sleepy mouse truly standout!

Crochet Sleepy Mouse FAQs

Can I use a different yarn for the crochet sleepy mouse?
Absolutely! While a lightweight plush or chenille yarn is recommended for the best squishy effect, you can experiment with other yarns like worsted weight. Just remember that switching to a heavier yarn will yield a larger mouse and may require adjusting your hook size accordingly.

What if my crochet sleepy mouse is turning out bigger or smaller than expected?
Don't panic! Sizing can often depend on your tension. If your work is smaller, try using a larger hook or crocheting a bit looser. If it's larger, consider using a smaller hook or checking your stitch count. Always keep a gauge swatch handy to ensure the right fit.

Why is my work curling while crocheting the mouse?
This is a common issue, often caused by tight tension. I recommend checking your grip and making sure you're not pulling the yarn too tight. You can also relax your stitches as you work, allowing for a smoother finish. If the curling persists, you might want to try a foundation chain that’s a bit looser.

How do I fix dropped stitches?
It's an easy fix! Gently pull the yarn to unravel a few stitches back to where the drop occurred, then use your crochet hook to reinsert the missed stitch. Take your time—if you’re unsure, just refer back to the row below to trace the correct sequence.

What hook sizes work best for this project?
For the crochet sleepy mouse, a 2.5 mm (US B/1) hook is specified, which enhances tightness and stability. However, if you’re using a different yarn weight, adjust your hook size to maintain your desired tension. It's sometimes beneficial to experiment with a larger size to achieve a more relaxed stitch if you find your finish is too dense.

How can I make my crochet sleepy mouse more durable for play?
To ensure your creation stands the test of time, use a tighter tension and secure all parts firmly during assembly. Additionally, consider opting for safety eyes and high-quality stuffing to maintain its shape and integrity, giving your mouse a huggable yet sturdy personality!

Filed Under: Uncategorized

Charming Lip Balm Holder: Quick & Cute Crochet Project

August 23, 2026 by Publisher Leave a Comment

Charming Lip Balm Holder: Quick & Cute Crochet Project

As I rummaged through my bag for my favorite lip balm, it struck me just how often things go missing in that chaotic abyss. That’s when I decided to crochet a cute and practical lip balm holder to keep it secured on my keychain! This beginner-friendly project is a wonderful way to showcase your growing crochet skills while adding a touch of charm to your everyday essentials. Not only will it save you from that frantic search, but it also offers endless customization options—making it a heartfelt gift for friends and family. With a few simple stitches, you’ll create a delightful accessory that combines style with functionality, and trust me, you'll love how easy it is to whip up. Let’s dive into this cozy crafting adventure together!

Lip Balm Holder Materials & Tools

  • Cotton Yarn – Choose a pastel shade in light DK weight; approximately 50-75 yards will work perfectly.
  • 3.5mm (E) Hook – This size is ideal for creating a cozy and snug fit for your lip balm holder.
  • Yarn Needle – Great for weaving in those ends and tidying up your project.
  • Scissors – Keep these handy for cutting your yarn cleanly as you go.
  • Sturdy Metal Keyring – Essential for attaching your adorable lip balm holder to your keychain and making it easy to carry!

Why Love This Lip Balm Holder?

Style & Functionality: This lip balm holder is an adorable way to keep your favorite balm within reach, ensuring you’ll never lose it again.

Beginner-Friendly: The pattern is perfect for novices looking to expand their crochet skills, using simple stitches to achieve a lovely design.

Customizable Delight: Add your personal touch with color combinations or embellishments, making each piece truly one-of-a-kind.

Portable & Practical: Its compact size makes it ideal for a keychain, allowing for easy access while adding a dash of charm to your keys.

Soft & Durable: Crafted with cotton yarn, this holder is both cozy and sturdy, ensuring your lip balm stays safe for everyday use.

Gauge & Sizing Notes

Don't skip the gauge swatch! Checking your tension is crucial for ensuring your crochet lip balm holder fits snugly around your lip balm without being too loose. A good general guideline is to aim for a 4×4 inch (10×10 cm) square to match the standard measurements of 16 single crochets by 18 rows. If you want to adjust the size, to make the holder taller or shorter, simply increase or decrease the number of rounds in the tube body section accordingly. If your tension doesn’t match, and your swatch is too small, try going up a hook size. This way, you’ll create the perfect cozy enclosure for your lip balm!

Step-by-Step Pattern for lip balm holder

Row 1: Start with a Magic Ring
Begin by creating a magic ring. Work 8 single crochets (sc) into the ring, pulling it snug to close. This forms the base of your lip balm holder. As you complete this row, your work should form a small circle, ready for additional rounds (8 sts).

Row 2: Increase Round
For the second row, chain 1 and then make 2 single crochets (sc) in each stitch around to increase the size. You will double the stitch count in this row, so you should have a total of 16 stitches at the end, making the base wider (16 sts). Your circle will start to flatten out.

Row 3: Maintaining the Base
In Row 3, chain 1 and then work 1 single crochet (sc) in each stitch around without any increases. This will help maintain a flat base while allowing your lip balm holder to sit stable. After completing this round, you should have a total of 16 stitches again (16 sts).

Row 4: Continue Building
Now, for Row 4, chain 1 and again work 1 single crochet (sc) in each stitch around. This is another maintenance round that keeps the base diameter consistent. Your holder will begin to take shape, and it should still measure roughly the same size at this point (16 sts).

Row 5: Begin the Tube Body
Transitioning into the tube body, for Row 5, chain 1 and continue with 1 single crochet (sc) in each stitch around. This will create the vertical sides of your lip balm holder. Repeat this for several rows (typically 8-10) until the height comfortably fits your lip balm, maintaining 16 stitches per round (16 sts).

Row 6: Defining the Top Edging
For the top edging in Row 6, chain 1 and work 1 single crochet (sc) in each stitch around. This establishes a neat finish for your lip balm holder as you prepare to close off the top. Your work will remain consistent with 16 stitches in this row as well (16 sts).

Step 7: Create the Keyring Loop
Next, we’ll create the keyring loop. Chain 12 and slip stitch (sl st) back into the same stitch you just completed. This small loop will attach your lip balm holder to the keyring, giving it practicality. After this step, your holder will have a functional top loop ready for attaching (1 loop).

Step 8: Final Touches
To finish, slip stitch around the top for a clean edge, then fasten off and weave in any loose ends with your yarn needle. This final step ensures everything is secure and tidy. Once completed, your adorable lip balm holder will be ready to show off on your keychain!

Care Instructions for Your Lip Balm Holder

Machine Washing: Use cold water on a gentle cycle to avoid agitation, which can cause felting or pilling. This keeps your lip balm holder in great shape for everyday use.

Hand Washing: For best results, hand wash with mild detergent and cold water. Gently squeeze to clean, ensuring the yarn stays vibrant and soft without distortion.

Drying/Blocking: Lay your lip balm holder flat to dry, away from direct sunlight. This helps maintain its shape and prevents any unwanted stretching or curling.

Storage: Keep your lip balm holder in a cool, dry place when not in use. Proper storage keeps the yarn fibers intact and ready for your next adventure!

What to Pair with the Cute and Practical Lip Balm Holder

Creating a matching set elevates your crochet game and adds a touch of whimsical charm to your everyday essentials.

  • Charming Keychain Purse: This petite purse is perfect for keeping your essentials close. Its whimsical design adds functional flair alongside your lip balm holder.

  • Colorful Flower Hair Clip: Whip up this adorable accessory to bring harmony to your look; the same floral detail creates a lovely, cohesive aesthetic.

  • Crochet Tote Bag: Craft a stylish tote in complementary shades to hold your lip balm holder. It’s a wonderful way to showcase your unique crochet style.

  • Matching Wristlet: Create a handy wristlet bag using the same yarn. The coordinated look is not only practical but oh-so-adorable!

  • Decorative Plant Hanger: Elevate your space with a crochet plant hanger in matching colors. This adds a cozy touch while drawing the eye back to your crafty skills.

Expert Tips for the Lip Balm Holder

  • Check Tension: Maintain a consistent tension throughout your work to ensure the lip balm holder fits snugly. Loose stitches may lead to a larger opening, making your balm prone to slipping out.

  • Count Your Stitches: Regularly count your stitches after each row. It's easy to lose count, especially in rounds, but keeping track helps avoid errors that might affect the holder's shape.

  • Secure the Edges: When defining the top edging, ensure slip stitches are tight but not too tight. This prevents the top from curling, giving your lip balm holder a polished finish.

  • Weave Ends Properly: Don’t forget to weave in your loose ends neatly. This not only tidies your project but also enhances durability, especially since the lip balm holder will see frequent use.

  • Test Fit as You Go: Keep your lip balm handy to check the fit periodically. Adjust stitch counts if necessary to ensure it sits comfortably within your handmade holder.

Lip Balm Holder Variations & Substitutions

Explore the lovely ways to tweak your crochet lip balm holder, inviting your creativity to shine through in every stitch!

  • Yarn Alternatives: Swap cotton for acrylic yarn for a softer feel and added warmth, perfect for cozying up your lip balm holder.
  • Color Combinations: Use variegated yarns for a playful twist, bringing a vibrant pop of color to each holder. Every row will surprise you with delightful patterns!
  • Size Adjustments: Easily alter the height of the tube body to fit different lip balm sizes, allowing you to customize for your favorite products. This tweak can also create matching holders for different occasions!
  • Decorative Elements: Attach decorative beads or charms to the keyring to elevate your holder into a mini work of art, showcasing your crafting personality.
  • Textured Edging: Try a scalloped or shell stitch for the top edging to give an extra touch of charm and whimsy to your holder. It adds visual interest and an inviting texture!
  • Floral Designs: Experiment with different flower appliqués or motifs for a unique top embellishment. You could even create seasonal themes for a playful variety!
  • Fringe Fun: Add a small fringe along the bottom edge for a bohemian flair, providing a lovely movement to your finished piece. It’s an unexpected twist that’s sure to draw attention!
  • Keyring Size: Select larger or themed keyrings to personalize the look further, making your lip balm holder not only functional but also a statement accessory.

Cute and Practical Crochet Lip Balm Holder FAQs

Can I substitute different yarn types for my lip balm holder?
Absolutely! While cotton yarn gives a lovely finish, you could try acrylic or bamboo yarn for a different texture. Just be sure they're a similar weight to maintain the holder's size and shape.

How can I adjust the size of my lip balm holder?
If you want to make it bigger or smaller, consider adding or reducing the number of rows in the tube body. I recommend checking the fit of your lip balm often as you work to ensure it will fit snugly, adjusting stitch counts as necessary.

Why is my work curling at the edges?
Don't panic! Curling can occur with single crochet projects if your tension is too loose. Making the slip stitches a bit tighter when defining the edge can help mitigate this issue. Checking your tension consistently throughout the project is also a good practice.

What hook size should I use for this lip balm holder?
A 3.5 mm (E) crochet hook is ideal for this lip balm holder, as it creates a tightly woven fabric that's durable and maintains the holder's structure while fitting your lip balm perfectly.

How do I fix dropped stitches in my lip balm holder?
It's an easy fix! Simply use your yarn needle to pick up the dropped stitch, then crochet it back into place to maintain the integrity of your work. Don’t forget to double-check your stitch count afterward to keep everything even.

Filed Under: Uncategorized

Whimsical Crochet Flower Coasters to Brighten Your Home

August 23, 2026 by Publisher Leave a Comment

Whimsical Crochet Flower Coasters to Brighten Your Home

While sipping my morning tea, I can't help but notice the vibrant, flower-shaped coasters under my mug, instantly lifting my spirits. These delightful crochet flower coasters are not just a charming addition to my decor; they also offer the perfect blend of utility and aesthetics, making each stitch a joy. As you work through this intermediate-level pattern, you'll learn to create whimsical blooms that protect your surfaces while adding a splash of color to any space. With their soft yet structured texture, these coasters make for a fantastic stash-buster project and can easily be customized with your favorite shades. So gather your yarn and let’s bring a touch of nature into your home—your creative journey awaits!

Crochet Flower Coasters Materials & Tools

  • Medium-Weight Cotton Yarn – Choose soft pink, coral, dark blue, and cream for vibrant, flower-shaped coasters; an estimated 150-200 yards per color should work well.
  • 4.0 mm (G-6) Crochet Hook – This size provides the ideal stitch definition to bring your floral coasters to life.
  • Scissors – Handy for cutting your yarn after completing each coaster.
  • Tapestry Needle – Use it for weaving in ends for a polished finish.

With these materials at hand, you’re ready to embark on your delightful journey of creating lovely crochet flower coasters!

Why Make Crochet Flower Coasters?

Vibrant Colors ensure your coasters bring a cheerful pop to any table setting, perfect for brightening up your home. Easy-to-Follow Instructions guide you step-by-step through crafting each whimsical bloom, making this pattern great for intermediates. Functional Beauty not only protects your surfaces but also adds aesthetic appeal, making them perfect gifts. Unique Customizations allow you to personalize with colors or motifs, creating pieces that reflect your style. Enjoy the journey of creating these charming coasters that combine creativity and practicality!

How to Check Your Gauge for Crochet Flower Coasters

Don't skip the gauge swatch! For your crochet flower coasters, checking your tension is essential to ensure each coaster turns out beautifully uniform and functional. While an exact gauge isn't specified, aim for a general guideline of 4×4 inches (10×10 cm) to equate to approximately 5-6 double crochets in width per round. If you find your tension is tighter or looser than this, adjust your hook size accordingly; for instance, if your swatch is too small, try using a larger hook. To modify your coaster size, you can alter the starting chain and work in multiples of 8, allowing for flexibility to create coasters that fit your personal aesthetic or tableware needs!

Step-by-Step Pattern for Crochet Flower Coasters

Row 1: Begin with the Magic Ring
Start by making a magic ring. Chain (ch) 1, then work 8 single crochet (sc) stitches into the ring. Pull the ring tight to close and ensure your stitches are evenly spaced. At the end of this round, you should have 8 sc. Your work should lay flat in a circular shape, ready for the next round (8 sts).

Round 2: Forming the Base
In this round, you'll increase the number of stitches to create a foundation for your petals. Work 2 single crochet (sc) into each stitch from the previous round. As you complete this round, you should notice the base expanding while remaining flat. This round will result in a total of 16 stitches (16 sts).

Round 3: Creating Petals
For this round, you'll start forming the petals. To do this, chain (ch) 3 to begin a double crochet (dc), then make 2 dc in the same stitch. Skip the next stitch, and in the following stitch, repeat your petal formation (3 dc total) to create the flower shape. Continue this pattern around; you should have 8 petals at the end of the round (8 petals).

Round 4: Connecting the Petals
In this round, you'll highlight the petals. Slip stitch (sl st) into the first petal to connect it. Chain (ch) 3 and make 2 double crochet (dc) in the same petal stitch to enhance the petal shape. Continue this by skipping the next petal and connecting in the following one. Do this around until all petals are connected, maintaining the rounded look (8 petals connected).

Step 5: Edging the Coaster
Now, it’s time to add a lovely contrasting edge to your crochet flower coasters. Choose a different color yarn, then attach it by slip stitching (sl st) in any stitch of the last round. Work a round of single crochet (sc) evenly around the coaster, placing 2 sc in each petal tip for a decorative touch. Finish with a slip stitch to close the round, creating a beautiful finish to your coasters (around 48 sts).

Step 6: Weaving in Ends
Once you've completed your crochet flower coasters, take your tapestry needle and carefully weave in any loose yarn ends. This step not only gives your coasters a polished look but also ensures durability when you place your lovely flowers on the table. Your coasters should now be complete, showcasing charming blooms ready to add beauty to your home decor!

Expert Tips for Crochet Flower Coasters

  • Consistent Tension: Keep your tension uniform throughout the project to ensure all coasters match in size and shape. This is especially important for the petals.

  • Counting Stitches: Regularly count your stitches after each round to avoid miscounts. This helps keep your flower coasters symmetrical and true to your design.

  • Practice Piece: If you’re unsure about the petal size, make a practice coaster first. This allows you to adjust your technique and yarn tension before starting on the final pieces.

  • Blocking Benefits: Don't skip blocking! It can greatly enhance the petal shapes and give your crochet flower coasters a neat, finished look.

  • Weaving In Ends: Ensure all loose yarn ends are woven in after finishing your coasters. This step is vital for durability and maintaining the charm of your crochet flower coasters.

Care Instructions for Crochet Flower Coasters

  • Machine Washing: Use cold water on a gentle cycle to wash your crochet flower coasters; this helps prevent felting and protects their vibrant colors.

  • Hand Washing: For a more delicate approach, gently hand wash with mild detergent and cold water, avoiding any agitation that could cause pilling.

  • Drying/Blocking: Lay your coasters flat to dry, reshaping as necessary. Blocking will help enhance the petal shapes, adding a professional touch to your crochet flower coasters.

  • Storage: Store your coasters in a cool, dry place away from direct sunlight to maintain their colors and shape, ensuring they’re always ready to brighten your home!

Crochet Flower Coasters Variations & Substitutions

Embrace your creativity and customize your flower coasters to reflect your unique style, transforming this pattern into a personal masterpiece!

  • Yarn Weight Swap: Try a lighter DK yarn for a more delicate lace-like texture, perfect for airy blooms.

  • Fiber Alternatives: Substitute cotton with bamboo or linen yarn, giving your coasters a soft sheen and different drape.

  • Color Play: Experiment with pastel shades for a soft aesthetic or go bold with vibrant colors for a cheerful pop.

  • Size Adjustment: Increase the number of petals or use a larger crochet hook to create oversized coasters, making a statement piece.

  • Personal Motifs: Incorporate small crochet initials or motifs in the center of each coaster for a personal touch that showcases your creativity.

  • Textured Edges: Add fringe or a scalloped border around the coaster’s edge to create a playful detail that enhances its whimsical charm.

  • Dual-Sided Coasters: Make your coasters reversible by crocheting different designs on each side, offering versatility for any decor.

  • Seasonal Themes: Change colors and motifs with the seasons, using warm tones for autumn or pastel shades for spring, keeping your decor fresh and inviting.

What to Pair with Petal-Perfect Flower Coasters

As you embrace the colorful whimsy of your coasters, consider adding to your crochet collection with these delightful creations.

  • Blossom Bouquet Pillow: This charming pillow can echo the floral vibes, perfect for snuggling up your space with cozy blooms.

  • Flower Power Mug Rug: A larger, matching rug can protect your tables and keep the cheerful theme flowing wherever you sip your tea.

  • Garden Party Basket: Use the same vibrant colors to crochet a small basket, ideal for holding your yarn or displaying fresh flowers.

  • Petal-Embellished Towel: Crafting a matching kitchen towel with flower motifs creates a cohesive and inviting aesthetic for your home.

  • Charming Flower Garland: String your coasters’ colors into a delightful garland, enhancing not just one space but creating joy throughout your entire home.

Crochet Flower Coasters FAQs

Can I substitute yarn types for the crochet flower coasters?
Absolutely! While medium-weight cotton yarn is recommended for its durability and detailing, you can experiment with other fibers like bamboo or acrylic. Just make sure to check your gauge and adjust your hook size if needed to ensure your coasters maintain their intended shape and feel.

How can I adjust the size of my crochet flower coasters?
No problem! You can make your coasters bigger or smaller by altering the number of petals or changing your hook size. For a larger coaster, try increasing the diameter of the base by adding more single crochet stitches in the foundation rounds. Just remember to keep track of your stitch count for consistency!

Why is my work curling at the edges?
Don’t panic! Curling can happen if your tension is too tight or if the stitches are uneven. Check your gauge and ensure you’re working your stitches consistently. If you find you're pulling too tightly, try relaxing your grip on the yarn. Blocking your finished coasters can also help flatten them out beautifully!

How do I fix dropped stitches in my crochet flower coasters?
It’s an easy fix! If you notice a dropped stitch, carefully pull your work back to the point before the drop occurred, then rework that section. Depending on the stitch, you may need to just add a stitch back in or adjust multiple stitches. Staying calm and working slowly will help you get back on track!

What size hook should I use for these crochet flower coasters?
I recommend a 4.0 mm (G-6) crochet hook. This size allows for the perfect stitch definition and ensures your coasters have the delicate detailing needed to showcase those whimsical flower shapes. If you decide to change your yarn type, you may want to adjust the hook size accordingly.

What can I do if my coasters are too stiff or too floppy?
If your coasters feel too stiff, try using a larger hook size in your next piece, which will allow for looser stitches. On the other hand, if they are floppy, consider going down a hook size or using a stiffer yarn like cotton, which can provide better structure.

Filed Under: Uncategorized

Whimsical Flipping Sid Coaster: Fun Crochet Project for Home

August 23, 2026 by Publisher Leave a Comment

Whimsical Flipping Sid Coaster: Fun Crochet Project for Home

As I settled into my cozy corner with a cup of steaming tea, I couldn't help but feel that my surfaces deserved a sprinkle of charm and personality. That’s when I decided to whip up the Flipping Sid Coaster—a delightful project that not only protects your tables but also adds a whimsical touch to your daily rituals. This intermediate-level crochet pattern stands out with its playful design sure to put a smile on your guests' faces. Plus, its dense fabric absorbs moisture and shields your precious surfaces from heat! If you're looking to combine creativity and practicality in your fiber arts journey, this coaster is perfect for you. So grab your yarn and get ready to bring Sid to life—your home will thank you!

Flipping Sid Coaster Materials & Tools

  • Worsted Weight Yarn – Approximately 150-200 yards of medium-weight cotton blend yarn will make Sid pop with color.
  • 4.0mm (G/6) Hook – This size ensures a sturdy yet flexible finish, perfect for creating the playful curves of the coaster.
  • Safety Eyes – Add whimsical charm with these for facial features; attach them securely after creating eye sockets.
  • Buttons or Fabric Markers – Consider these embellishments for extra detailing; they can add even more personality to your Flipping Sid Coaster!

Why Is the Flipping Sid Coaster Special?

Uniquely Playful Design: The Flipping Sid Coaster features a cartoonish style that infuses fun into your home decor, making it an excellent conversation starter.

Functional & Protective: Not only does this coaster add charm, but its thick stitches provide a sturdy barrier against heat and moisture, ensuring your surfaces remain unscathed.

Intermediate Skill Boost: This project offers a wonderful opportunity to sharpen your crochet skills, allowing you to experiment with various stitches and shaping techniques.

Customizable Colors: Feel free to match your coaster to any season or occasion by choosing vibrant yarn colors or textures, making it a truly personalized piece.

Plush Texture: The finished coaster boasts a delightful plush feel, providing an enjoyable tactile experience every time you place your cup down.

Gauge & Sizing Notes

Don't skip the gauge swatch! Checking your tension is essential for the Flipping Sid Coaster to ensure it turns out just right—especially since it requires a dappled mix of stitches to maintain its whimsical shape. For a good fit, aim for a standard gauge of approximately 4×4 inches (10×10 cm) equating to about 18 single crochets and 12 rows; however, always adapt based on your own crochet method. If you wish to make your coaster larger or smaller, adjust your starting chains in multiples of 6; this will help in scaling the project effectively. If your swatch is too tight, simply switch to a larger hook size to achieve the desired dimensions!

Step-by-Step Pattern for Flipping Sid Coaster

Row 1: Begin the Body
Start with a magic circle and work 6 sc into the circle, pulling the circle tight to close. This forms the base of your Flipping Sid Coaster. Your work should appear compact and circular at this stage (6 sts).

Row 2: Increase Rounds
In the next round, perform an inc in each stitch around for a total of 12 sts. To do this, crochet 2 sc in each of the 6 original stitches. Your work will begin to widen, creating a sturdy base for the body (12 sts).

Row 3: Continuing Increases
For this round, alternate between 1 sc and inc in the next stitch around. You'll work your way through a combination of single and increased stitches, ending with a stitch count of 18. Your coaster should be taking on a bit of structure and shape (18 sts).

Row 4: More Increases
This round, increase again with 2 sc in the first stitch, then 2 sc in the next stitch. Continue this pattern around until you reach a total of 24 stitches. Your Flipping Sid Coaster is now expanding to form its playful body (24 sts).

Row 5: Shape the Body
For this round, crochet 2 sc in the first stitch, then 1 sc in the next 3 stitches, repeating this sequence around. You’ll finish with a total of 30 stitches. The work should have a nice curvature forming as it continues to grow (30 sts).

Row 6: Transition to Head
Begin to taper the coaster's head by working 1 dec (decrease) followed by 1 sc in the next 4 stitches, repeating around. Your count will decrease to 24 stitches, and the shape will start to narrow towards the top (24 sts).

Row 7: Continuing to Taper
Now, work 1 dec and 1 sc in the next 3 stitches, repeating around. You will have a stitch count of 18. At this point, the Flipping Sid Coaster should be beginning to form its delightful head (18 sts).

Row 8: Finish Tapering
For this final tapering round, crochet 1 dec followed by 1 sc in the next 2 stitches, repeating around and decreasing to a total of 12 stitches. Your coaster head should now be noticeably more defined, giving Sid his charming character (12 sts).

Step 9: Features Assembly
With the body complete, attach safety eyes to create Sid’s face. Secure them firmly after creating small eye sockets with contrasting yarn. Position them evenly for a whimsical look. The face now adds life to your Flipping Sid Coaster!

Step 10: Legs
For the legs, make 4 small pieces: crochet 6 sc in a magic circle, then close and fasten off. Attach each leg securely to the base of the coaster, placing them symmetrically to ensure stability. Sid’s legs will give functionality as well!

Step 11: Creating the Tail
For Sid's fluffy tail, chain 10 and sl st back into the first chain. This creates a cute, bouncy tail that completes the Flipping Sid Coaster. Attach it securely to the back of the coaster to maintain its playful essence.

Step 12: Edging
Finally, to finish your coaster, add a round of sl sts around the edge for a neat finish. This will tidy up your Flipping Sid Coaster and enhance its durability, completing your delightful project with a final touch!

How to Wash and Care for Your Flipping Sid Coaster

  • Machine Washing: Use cold water on a gentle cycle for your Flipping Sid Coaster, avoiding agitation to prevent any unwanted pilling or felting.

  • Hand Washing: For extra care, gently hand wash in cool water with a mild detergent, ensuring not to wring or twist to maintain its plush shape.

  • Drying/Blocking: Lay your coaster flat on a clean towel to air dry, reshaping it as needed. Avoid direct sunlight to prevent fading and ensure the texture remains intact.

  • Storage: Store your coaster in a dry, flat location away from damp places to keep its whimsical charm and prevent any unwanted distortions or damage.

Flipping Sid Coaster Variations

Invite a splash of creativity into your crochet journey! Explore these delightful variations to bring your Flipping Sid Coaster to life in unique ways.

  • Seasonal Colors: Use vibrant shades like pastel for spring or warm browns for autumn, making it a cozy seasonal companion.

  • Fiber Alternatives: Swap the cotton blend for a soft bamboo yarn; it introduces a delightful sheen and a different texture for Sid's playful personality.

  • Size Adjustments: Scale your coaster by reducing the stitch counts or increasing to create larger placemats—perfect for family gatherings or solo tea time!

  • Facial Feature Twists: Customize Sid’s eyes and snout using different colors or adding unique embellishments. Create various expressions for a fun, quirky collection.

  • Add a Pom-Pom Tail: Instead of a chain tail, try a fluffy pom-pom! This delightful twist adds extra whimsy and charm to your coaster.

  • Fringed Edges: Give Sid a bit of flair by adding fringe around the edges—an easy way to incorporate texture without altering the design much.

  • Textured Borders: Experiment with different stitches for the edging to add dimension. A shell stitch or crab stitch would elevate Sid's delightful appeal even further.

  • Contrasting Backing: Use a contrasting color for the backside of the coaster to create a reversible design—perfect for a quick mood change in your dining decor!

What to Pair with Flipping Sid Coaster

As you embrace the playful spirit of your new creation, let’s explore delightful projects that can enhance your cozy corner with whimsical charm.

  • Matching Mug Rug: Create a delightful rug that cradles your favorite mug, echoing Sid's playful design.

  • Quirky Table Runner: A longer piece featuring various cartoon characters will create a fun accent for any coffee table.

  • Charming Coaster Set: Whip up a few more coasters in different shapes to surprise your guests with delightful options.

  • Cheerful Drink Sleeves: These can be made to match, keeping your hands cozy while enjoying warm beverages.

  • Animated Keychain: Turn your leftover yarn into a mini-Sid to brighten your keys, mixing usability with spirit!

Let your crocheting journey continue, as the Flipping Sid Coaster inspires a colorful collection of cozy, fun accessories!

Expert Tips for the Flipping Sid Coaster

  • Consistent Tension: Maintain an even tension throughout your work to achieve a smooth and consistent look in your coaster, preventing uneven areas.

  • Stitch Counting: Regularly count your stitches, especially when forming Sid's features, to ensure your coaster maintains its playful character and symmetry.

  • Mindful Decreases: Be cautious when making decreases during shaping; losing a stitch can alter the intended design, so double-check your counts.

  • Gentle Blocking: Consider gently blocking your finished coaster to enhance its shape, but avoid flattening any textured elements for the plush finish.

  • Secure Features: When attaching safety eyes and legs, make sure they are securely fastened to withstand use and maintain your Flipping Sid Coaster’s charm!

Flipping Sid Coaster FAQs

Can I substitute a different yarn for the Flipping Sid Coaster?
Absolutely! If you want to use a different yarn, look for another worsted weight that matches the recommended gauge. Acrylic could work well for a durable finish, or you might try a cotton blend for similar absorbency.

How can I adjust the size of the Flipping Sid Coaster?
To make your coaster larger or smaller, you can adjust the number of stitches in the initial magic circle and follow the pattern with more or fewer increases accordingly. Just remember to maintain the proportions to keep Sid's playful character!

Why is my Flipping Sid Coaster curling at the edges?
Don’t panic! Curling can often happen due to tight tension or an incorrect hook size. Make sure to check your gauge and loosen up your tension, or scale up your hook size slightly to help flatten those edges.

What hook size is best for the Flipping Sid Coaster?
The pattern suggests a 4.0 mm (G/6) hook for a sturdy and flexible finish. If you find it too loose or too tight, feel free to adjust! Just remember that changing the hook size might affect your gauge, so keep an eye on that.

I’ve dropped a stitch while crocheting the Flipping Sid Coaster—what should I do?
It happens to the best of us! If you drop a stitch, simply pull the yarn back to the row above where you lost it and reinsert the hook into the stitch. Gently tug to get that stitch back in place, and carry on with your fun crochet project!

Filed Under: Uncategorized

  • « Previous Page
  • 1
  • …
  • 20
  • 21
  • 22
  • 23
  • 24
  • …
  • 41
  • Next Page »

Recent Posts

  • Chic Crochet Watch Band Pattern: Scalloped Elegance
  • Vibrant Crochet Granny Square: A Floral Delight to Create
  • Pocket Otter Crochet: Your Adorable Amigurumi Companion
  • Cozy Up with This Festive Crochet Tree Cozy Pattern
  • Chic Crochet Babydoll Dress: A Timeless Pattern for Spring

Recent Comments

No comments to show.
Fast Crochet Patterns Logo

Welcome to Fast Crochet Patterns, your curated editorial blog for modern, handmade aesthetics. Discover an elegant collection of contemporary designs and carefully crafted tutorials—where every beautiful pattern is completely free to inspire your next creation.

Join the Studio

Subscribe for our latest free patterns and warm, minimal crochet inspiration delivered to your inbox.


Collections

  • Accessories
  • Amigurumi
  • Baby
  • Bags

More Patterns

  • Cardigan
  • Dress
  • Flowers
  • Granny Square

Information

  • About
  • Contact
  • Privacy Policy
  • Terms Of Use
  • Disclaimer

© 2026 Fast Crochet Patterns. All rights reserved.