
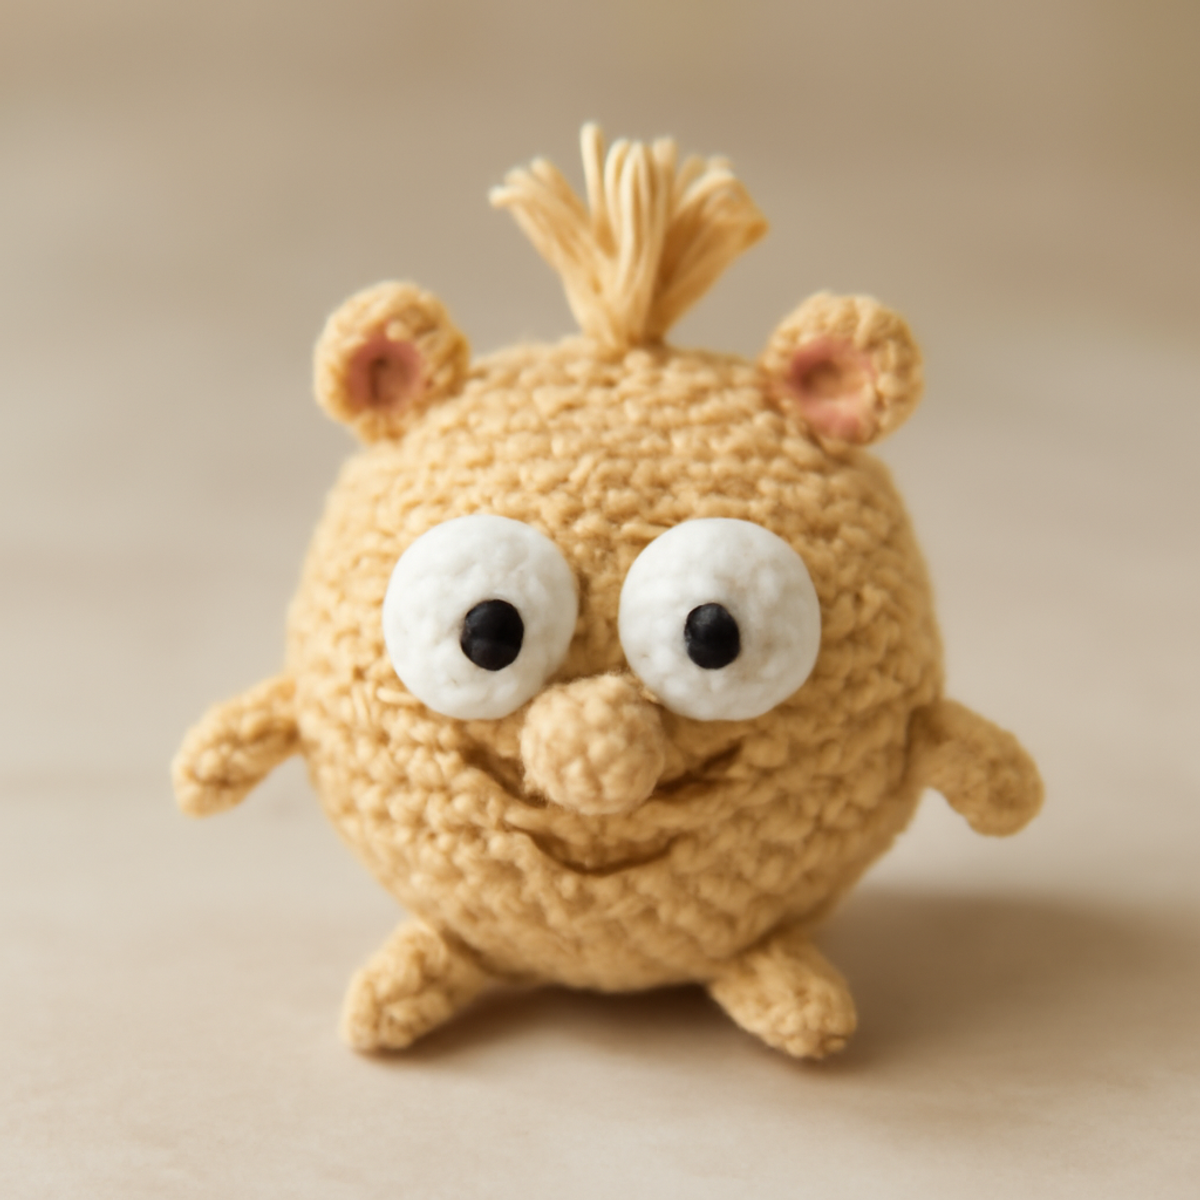
As I nestled into my favorite cozy corner with a cup of tea, the soft yarn slipped through my fingers, igniting a sense of delight and creativity that only crafting can bring. Today, I'm excited to share my crochet mouse pattern—a whimsical amigurumi toy that perfectly merges charm and playfulness. With its adorable features and inviting texture, this project is not only beginner-friendly, but also quick to whip up, making it ideal for last-minute gifts or a delightful addition to any toy collection. Plus, the customization options let you explore colors and accessories that resonate with your creative spirit. Get ready to create your very own adorable crochet mouse that will surely bring smiles and cuddles!
Whimsical Amigurumi Mouse Materials & Tools
- Medium Weight Yarn (Acrylic Blend) – Approximately 100-150 yards in a soft beige for the main body, giving your crochet mouse its cozy appearance.
- 4.0mm (G) Hook – The ideal size for creating tight stitches that prevent stuffing from peeking out of your finished crochet mouse project.
- Two Small White Buttons – Use these for the eyes to add a playful and charming touch to your mouse.
- Additional Yarn in Pink – Perfect for adding finishing touches like the ears, allowing for delightful customization possibilities.
- Stitch Marker – A handy tool to help keep track of your rounds, ensuring a tidy and organized project as you work on your crochet mouse pattern.
Why is this crochet mouse a must-make?
Adorable Charm: The whimsical design of this mouse captivates both young and old, making it a fantastic gift or playful decoration.
Beginner-Friendly: With straightforward shapes and stitches, it's perfect for those new to crocheting while still offering experienced crafters a satisfying challenge.
Quick Creation: This pattern is relatively quick to complete, allowing you to craft multiple mice in no time at all.
Texture Appeal: The soft, plush fabric makes it an irresistible cuddle buddy, ensuring kids and adults alike will love it.
Endless Customization: Personalize your mouse with color swaps, accessories, and even different animal forms, unleashing your creativity!
Gauge & Sizing Notes
Don't skip the gauge swatch! For your crochet mouse pattern, checking your tension is crucial to ensure that your whimsical amigurumi mouse turns out just the right size. While a standard gauge might typically be around 4×4 inches (10×10 cm) equating to 15 single crochets by 16 rows, it’s always best to make a tension swatch to verify your own measurements. To make this charming mouse bigger, increase your starting chain in multiples of 6 for the body, and adjust your rounds accordingly if you're altering the size. If your swatch is too small, simply opt for a larger hook size to achieve that perfect fit and plush texture. Happy crocheting!
Step-by-Step Pattern for Whimsical Amigurumi Mouse
Row 1: Start the Body
Begin with a magic circle and work 6 sc into the circle to form the base of your crochet mouse. Pull the tail to tighten the circle, and join with a sl st to the first sc. Your work should form a small ring with 6 sts (6 sts).
Row 2: Increase Round
Ch 1, then make 2 sc in each st around to increase the size of the body. You will need to count your stitches as you go to ensure an even shape. After this round, your mouse body should have expanded to 12 sts (12 sts).
Row 3: Continue Increasing
Ch 1, then sc in the next st, 2 sc in the following st; repeat from * to * around. This will give your crochet mouse a gentle widening shape. After completing this round, you should have a total of 18 sts (18 sts).
Row 4: More Body
Ch 1, then sc in the next 2 sts, 2 sc in the following st; repeat from * to * around. Your crochet mouse should continue to grow and take on a rounded form. At the end of this round, your stitch count should be 24 sts (24 sts).
Row 5: Straight Body Round
Ch 1, and then sc in each st around without increasing. This round will help to establish the sides of the body, making it taller. By the end of this round, the total should remain 24 sts (24 sts).
Row 6: Begin Decreasing for Head
Ch 1, sc in the next 2 sts, dec; repeat from * to * around. This marks the beginning of the head shaping for your whimsical amigurumi mouse. You should have 18 sts remaining at the end of this round (18 sts).
Row 7: Continue Shaping Head
Ch 1, sc in the next st, dec; repeat from * to * around. This helps contour the head further, allowing your crochet mouse to take a defined shape. You will end with 12 sts after this round (12 sts).
Row 8: Final Head Round
Ch 1, dec around until you have a small opening left. Your work should be cozy and firm at this point, preparing for the stuffing. The final stitch count here should be 6 sts (6 sts).
Step 2: Create the Ears
Using your pink yarn, make a magic circle, and work 6 sc into it. Tighten the circle and join with a sl st to finish. You'll need two of these for both ears, each providing a cute character to your crochet mouse (6 sts).
Step 3: Crochet the Limbs
For each limb, make a magic circle with 4 sc in it. Pull tight and join with a sl st. You’ll create four limbs in total, which should be small and stubby to fit your mouse design (4 sts each, 4 total limbs).
Step 4: Assemble the Mouse
Once all pieces are made, stuff the body, head, and limbs with soft stuffing. Attach each limb to the body securely using a sl st for stability. Your whimsical mouse should be taking shape beautifully at this point.
Step 5: Add Facial Features
Sew the small white buttons onto the head for the eyes, placing them symmetrically. Use leftover yarn to embroider a small mouth beneath the buttons. This gives your crochet mouse its playful expression.
Step 6: Finishing Touches
Add a tuft of yarn at the top of the head for a charming detail, and sew in any loose ends. Your whimsical amigurumi mouse is now complete and ready to bring smiles and cuddles, showcasing your creative effort!
Crochet Mouse Pattern Variations
Embrace your creativity with this crochet mouse pattern and let your imagination run wild!
-
Yarn Weight Swaps: Experiment with a lighter weight yarn for a daintier mouse or a bulky yarn for a cuddly giant.
Create a little friend to match the season, making it a delightful project for all ages. -
Fiber Alternatives: Swap acrylic for cotton yarn for a breathable option that’s perfect for warmer weather, enhancing the toy’s cuddle-factor.
Cotton lends a different texture, inviting a softer, plush feel—the kind that begs to be held. -
Color Blocking: Combine two or more colors for a charming patchwork effect, using contrasting hues through the body, ears, or limbs.
Watch how these joyful combinations bring your crochet mouse to life in a new and vibrant way! -
Accessory Additions: Try adding a tiny scarf or a bowtie for personalized touches, turning each mouse into a unique little character.
These little details not only add charm but also become conversation starters for friends and family! -
Size Variations: Adjust hook size or yarn thickness to create a mini version perfect for travel or a large, huggable toy for snuggling.
A tiny mouse would make a great keychain, while a larger version could be a standout decoration in a child’s room. -
Different Animal Forms: Alter the basic structure to craft variations like a whimsical bunny or a cheeky bear by changing the ear shapes.
This approach allows you to create a whole ensemble of adorable friends to share in the warmth and love. -
Textural Modifications: Enhance the texture with playful elements like adding pom-poms or fringed ears for an extra fun twist.
This transformation invites a tactile experience that enriches the playfulness of your crochet creations. -
Interactive Features: Consider adding crinkly material inside for a fun sound element or a little rattle, making it more enticing for little ones.
These engaging details turn your simple mouse into an interactive delight that sparks curiosity and joy.
What to Pair with Whimsical Amigurumi Mouse
Crafting a delightful companion offers endless possibilities to expand your crochet adventure while wrapping your space with cozy charm.
- Charming Amigurumi Bunny: Add a playful bunny to your collection, featuring similar body shapes and color choices to complement your mouse toy beautifully.
- Festive Mini Scarves: Create tiny scarves in cheerful colors, perfect for accessorizing your crochet mouse, inviting whimsical flair to playtime.
- Adorable Toy Storage Bag: Crochet a cute bag to store your new mouse and other toys, designed to match in both color and style for a cohesive look.
- Sweet Amigurumi Cheese: Make a little cheese prop to accompany your mouse, ensuring a delightful theme that sparks imagination and storytelling.
- Cozy Amigurumi Blanket: Whip up a soft blanket using the same yarn for a matching crochet experience; it's perfect for snuggling and adding warmth during play.
Expert Tips for Your Crochet Mouse
-
Track Your Stitches: Use a stitch marker to keep accurate track of your rounds and avoid losing count as you create your crochet mouse pattern.
-
Check Tension: If your stitches feel too loose, try using a smaller hook size to maintain a tight texture and ensure no stuffing shows through.
-
Secure Finishing: When sewing on the limbs and facial features, take extra care to knot your yarn securely to prevent any parts from loosening over time.
-
Avoid Twists: Always check that your foundation chain isn't twisted before beginning your first row. This will help maintain the intended shape of your crochet mouse.
-
Even Stuffing: As you stuff your pieces, do so incrementally and evenly to provide a plush but firm feel, ensuring your crochet mouse holds its shape beautifully.
-
Final Touch Check: Before considering your project complete, look over your mouse for any loose ends that may need to be secured to keep everything neat and tidy.
How to Wash and Care for Your Crochet Mouse
-
Machine Washing: If needed, wash your crochet mouse on a gentle cycle in cold water to prevent any potential wear. Place it inside a mesh laundry bag for extra protection.
-
Hand Washing: For a more delicate approach, submerge your mouse in cold water with a mild detergent, gently pressing to clean without agitation—this helps maintain its shape and appearance.
-
Drying/Blocking: Always lay your crochet mouse flat to dry in its natural shape. Avoid hanging, as this may distort its adorable form.
-
Storage: Store your crochet mouse in a cool, dry place away from direct sunlight to keep its colors vibrant. Consider a breathable storage bag to prevent dust accumulation while still allowing airflow.
Whimsical Amigurumi Mouse FAQs
Can I use a different yarn weight for this crochet mouse pattern?
Absolutely! While the pattern is designed for medium weight yarn, you can use a lighter or heavier yarn. Just remember to adjust your hook size accordingly to ensure your stitches remain tight—this helps keep any stuffing from showing through.
How do I resize the whimsical mouse to make it bigger or smaller?
If you’d like a larger mouse, simply use a bulkier yarn and a corresponding larger hook. For a smaller version, opt for a lighter yarn and a smaller hook. Be sure to adjust your stitch count as necessary to maintain proportion!
What should I do if my crochet mouse is curling at the edges?
Don't panic! Curling often happens when your tension is too tight. I recommend trying a larger hook size to ease your tension, or practice relaxing your grip while you stitch. Also, make sure to follow the pattern's increases and decreases carefully to keep everything in line.
Why do my stitches look uneven on the mouse's body?
Uneven stitches can result from inconsistent tension. To improve this, consider using a stitch marker to help track your rounds, and remember to check your gauge as you go. It’s all about finding that perfect rhythm!
What size hook should I use for this pattern?
The pattern suggests a 4.0 mm (G) hook, which is perfect for achieving the tight stitches needed for soft toys. If you find your fabric is too loose or too tight, feel free to experiment with a slightly different hook size to get the best results.
How can I fix a dropped stitch in my finished mouse toy?
It's an easy fix! Gently pull the surrounding stitches to loosen the dropped stitch, and use a crochet hook to pull the missed yarn back up through the fabric. If you're unsure, you can always use a small needle and thread to weave in the loose yarn for a polished look.

Leave a Reply