
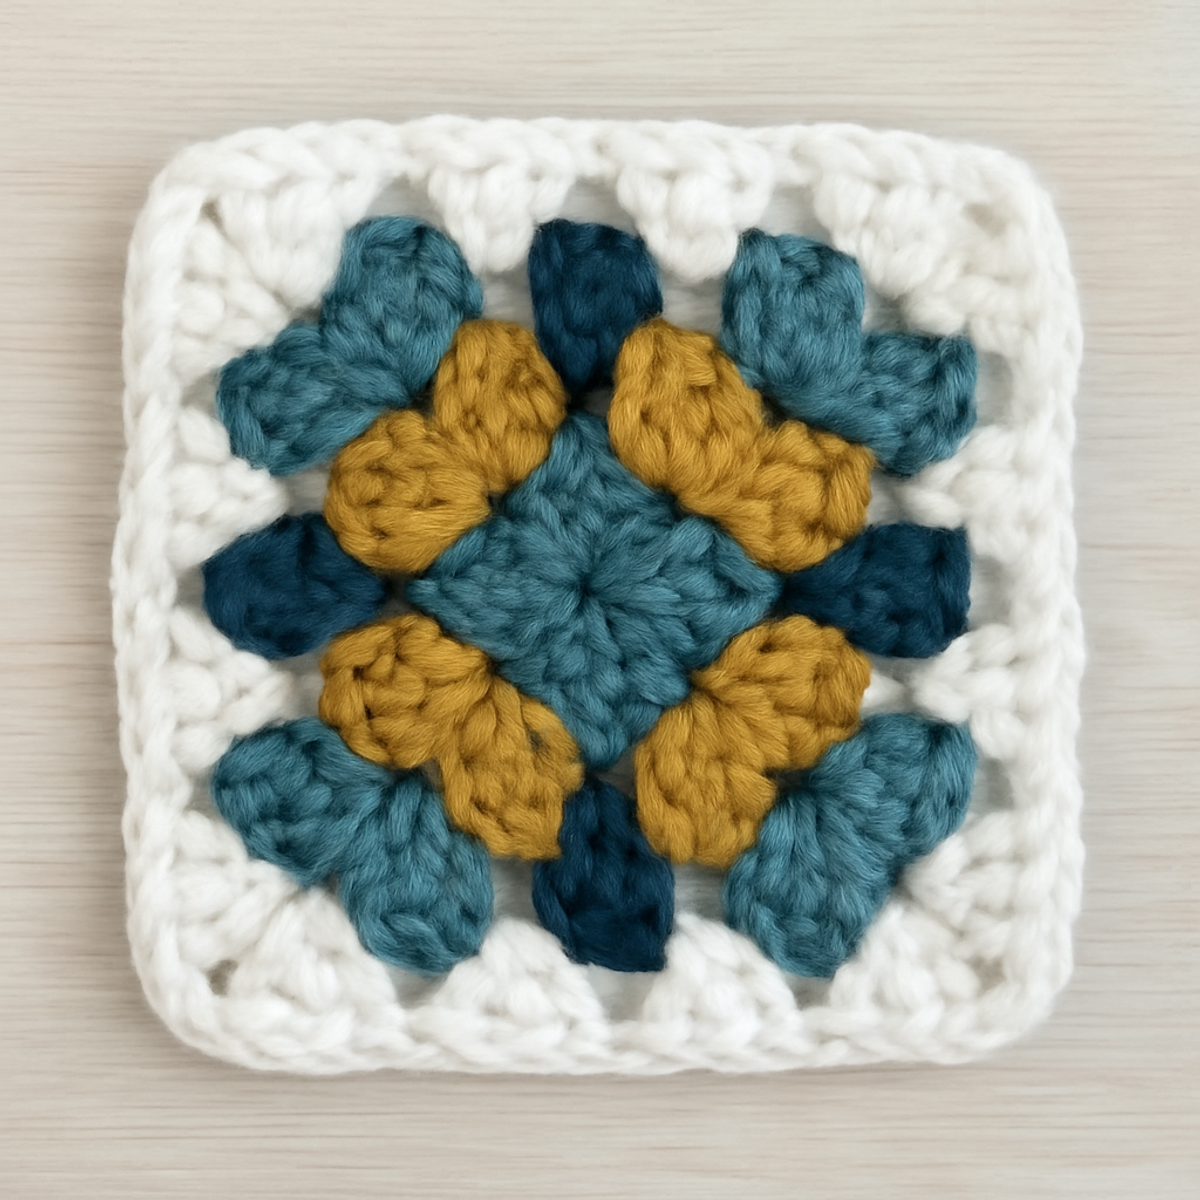
As I sat wrapped in my favorite blanket, I couldn’t help but admire the classic granny squares that contribute to its cozy embrace. The crochet granny square has become a beloved staple for crafters of all levels, blending vintage charm with modern flair. This pattern isn’t just a joyful nod to nostalgia; it’s an incredibly versatile choice for everything from vibrant blankets to chic bags. You’ll appreciate how easily the squares join together, creating a seamless project that’s perfect for customization. Whether you’re a beginner learning the ropes or a seasoned pro looking to experiment with colors and sizes, this classic design makes for a truly fulfilling crafting experience. So, let’s dive into the wonderful world of granny squares and ignite your creativity as you stitch your way to something beautiful!
Crochet Granny Square Materials & Tools
- Medium Weight Yarn (Category 4) – Choose 100% acrylic or a cotton blend for softness and durability, with an estimated 150-200 yards needed for several squares.
- 5.0mm (H/8) Hook – Ideal for achieving a balanced tension in your crochet granny square.
- Stitch Markers – Use these to keep track of your rounds for a more organized project.
- Yarn Needle – Essential for weaving in ends and finishing your squares beautifully.
Why Choose the Crochet Granny Square?
Timeless Appeal: The crochet granny square is a beloved classic that effortlessly marries vintage charm with modern aesthetics, making it perfect for any project.
Versatile Designs: Use these squares to create everything from cozy blankets to stylish bags, showcasing your unique flair.
Easy Construction: With basic stitches in a satisfying pattern, this project is perfect for beginners and experienced crafters alike.
Creative Color Play: Mix and match colors for a personalized touch that suits any season or decor style, giving each piece a special flair.
Quick to Make: The repetitive format allows for speedy progress, so you can whip up projects in no time.
Cozy Texture: The combination of double crochets and cluster motifs gives each square a wonderfully soft and inviting texture that elevates any item.
Gauge & Sizing Notes
Don't skip the gauge swatch! Achieving the correct tension is essential for your crochet granny square project, as it ensures your squares are uniform and will join seamlessly. While a standard gauge might be around 4×4 inches (10×10 cm), typically showing 12 double crochets by 8 rows, refer to your swatch to see what works best for your yarn and hook. To enlarge your squares, simply increase your starting chain in multiples of 3, which will help you maintain the square's shape. If you find your swatch is too small, don’t fret—just try going up a hook size to achieve that cozy and perfect fit in your crochet granny squares!
Step-by-Step Pattern for Cozy Crochet Granny Square
Row 1 (or Round 1): Start the Foundation
Begin by making a slip knot and chaining 4 (ch 4), then join the last chain to the first with a slip stitch (sl st) to form a ring. Inside this ring, work 8 double crochets (dc) spaced evenly. As you crochet, you should see the stitches creating a circular shape. Close the round with a sl st in the top of the first dc to complete your foundation (8 sts).
Round 2: Create the First Rounds of Clusters
Chain 3 (ch 3) to count as your first dc, then work 2 more dc into the same stitch to form your first cluster. Chain 1 (ch 1), skip the next dc, and into the following stitch, work 3 dc, followed by another ch 1. Repeat this pattern around, ensuring you have 4 clusters total, separated by chain spaces. Close this round with a sl st into the top of the ch 3 (4 clusters, 4 ch spaces).
Round 3: Expanding the Square
Begin with a ch 3 (counts as dc), then crochet 2 more dc into the first chain space (ch sp) from the previous round to form a cluster. In each subsequent ch sp, repeat 3 dc and ch 1, checking that you have 4 clusters around again. After reaching the final ch sp, transition to the next round by joining with a sl st into the top of the ch 3 (4 clusters, 8 sts plus 4 ch spaces).
Round 4: Forming the Edge
Ch 1 (counts as sc) and then work 3 dc in the first ch sp, followed by a ch 1. In each corner ch sp, repeat this pattern, delivering two clusters of 3 dc separated by a ch 1 between corners. Connect the last cluster with a sl st to the first sc for a polished edge. You should have a solid, square shape starting to emerge at this stage (8 corner clusters total).
Round 5: Finishing Touches
For the final round, start with a ch 1 and then sc evenly along each side of the square, making sure to include a sc in each cluster peak and between corner clusters. This completed round will give a nice, consistent finish to your crochet granny square. Don’t forget to join with a sl st at the end of this round (12 sc across sides).
Step 6: Assembly and Weaving Ends
Once you’ve completed all rounds, use your yarn needle to weave in any loose ends. If desired, lightly block your square to even out the stitches and showcase the textured finish. Your cozy crochet granny square is now ready to be joined with others or used in a variety of home projects. Enjoy your beautiful creation!
What to Pair with Classic Granny Square
As you bask in the warmth of your crochet journey, consider crafting complementary pieces that elevate your cozy aesthetic.
-
Granny Square Pillow: Create a chic pillow cover to bring your granny squares to the living room, adding a dash of homemade charm. It’s a delightful way to showcase your favorite colors.
-
Matching Tote Bag: Stitch together a stylish tote bag using leftover squares or new ones in coordinating hues. Perfect for trips to the farmer’s market or a cozy day at the café!
-
Cozy Blanket: The ultimate pairing, turn your squares into a soft, colorful blanket that wraps you in nostalgia, making it a perfect companion for chilly nights.
-
Accent Coasters: Craft smaller coasters from your granny square scraps, adding a touch of warmth and charm to your coffee table. They’re practical and delightful conversation starters!
-
Scarves or Shawls: Pair your squares with simple stitches to form a unique scarf or shawl, ready to keep you warm while showcasing your creativity.
Each of these projects flows beautifully from your crochet granny square, allowing you to fill your space with love and warmth!
How to Wash and Care for Your Crochet Granny Square
-
Machine Washing: Use cold water on a gentle cycle to preserve the texture and color of your crochet granny square while preventing any felting.
-
Hand Washing: For extra care, hand wash in cold water using a mild detergent, gently pressing the square to remove dirt without wringing, which maintains its shape.
-
Drying/Blocking: Lay your squares flat to dry away from direct sunlight; this helps maintain their beautiful form and texture while preventing any distortion.
-
Storage: Store completed squares in a cool, dry place, ideally in breathable bags to avoid moisture buildup, helping your crochet granny square remain fresh until it's ready to be used.
Crochet Granny Square Variations
Dive into an ocean of creativity by customizing your crochet granny square, allowing your unique style to shine through!
- Yarn Substitutions: Swap your medium-weight yarn for a worsted cotton for a lighter, summer-ready feel, perfect for warm-weather projects.
- Color Blocking: Try alternating distinct color blocks in each round. This playful approach can create a vibrant, eye-catching effect that truly stands out.
- Sizing Adjustments: Experiment with larger hooks or additional rounds to make an oversized version, transforming your square into a cozy cushion cover.
- Fiber Alternatives: Use soft bamboo yarn instead of acrylic for a heavenly softness and natural sheen that’s perfect for chic home decor.
- Texture Modifications: Add a final border of shell stitches for a lovely, wavy edge, offering a whimsical touch to your traditional granny square.
- Miniature Versions: Create smaller squares to use as cute coasters or decorative appliqués by simply reducing the number of rounds.
- Fringe Fun: Attach a playful fringe around the edges of your squares for added flair, making them both functional and fabulous.
- Themed Colors: Choose a seasonal color scheme—think deep reds and golds for autumn, or pastel pinks and greens for spring—to bring your crochet granny squares to life in harmony with the changing seasons.
Expert Tips for Crochet Granny Squares
-
Tension Matters: Ensure consistent tension by holding your yarn the same way throughout the project to maintain even square shapes, which is vital for seamless joining.
-
Count Your Stitches: Regularly check your stitch count, especially during each round, to prevent errors that could distort the size and shape of your crochet granny square.
-
Block for Perfection: Lightly block your completed squares to even out stitches and enhance the overall presentation, transforming them into beautiful, polished pieces.
-
Seamless Joining: When attaching squares, align your stitches carefully and use a yarn needle to help weave in ends smoothly for a clean look.
-
Keep Notes: Jot down your color combinations or stitch counts to avoid confusion, especially if you plan to make multiple squares for larger projects.
Crochet Granny Square FAQs
Can I substitute the yarn for my crochet granny square project?
Absolutely! While I recommend using a medium-weight yarn (Category 4) like 100% acrylic or a cotton blend for softness and durability, you can experiment with other fibers. Just remember that varying yarn types might affect gauge and texture, so be sure to check your tension before diving into your project.
How can I adjust the size of my crochet granny squares?
Don't panic! You can easily make your squares bigger or smaller by adjusting your hook size or the number of rounds. For larger squares, upsize to a 6.0mm (J) hook and add more rounds. For smaller squares, use a smaller hook and reduce the rounds—just ensure you maintain consistency in your stitch tension.
Why is my crochet granny square curling up?
It's common for squares to curl at first, but don’t worry, it’s an easy fix! This often happens due to tight stitches or inconsistent tension. To remedy this, try lightly blocking your square once it's finished. You can also check your gauge and relax your grip on the yarn while crocheting, which should help smooth things out.
What hook size should I be using for my crochet granny square?
I recommend using a 5mm (H/8) crochet hook, as it’s ideal for balancing tension with medium-weight yarn. This size will help create the plush texture that granny squares are known for. However, feel free to adjust based on your personal crochet style and desired fabric density!
How do I fix dropped stitches in my crochet granny square?
If you notice any dropped stitches, don’t fret! The easiest way to fix them is to carefully unravel a few stitches back to the point just before the drop and re-crochet the missed stitches. Make sure to keep an eye on your tension as you go to avoid future mishaps. Taking a moment to count your stitches regularly can help prevent drops, too!
Can I use color-changing yarn for my crochet granny squares?
Absolutely! Using color-changing yarn can add a fun twist to your crochet granny squares. Just keep in mind that the color transitions may affect your overall design, so plan your color placements accordingly. Mixing solid colors with variegated yarn can create stunning visual effects—get creative!

Leave a Reply