Fast Crochet Patterns

  • Home
  • Contact
  • Patterns
    • Amigurumi
    • Granny Square
    • Flowers
    • Baby
    • Dress
    • Bags
    • Cardigan
    • Accessories
menu icon
go to homepage
  • Home
  • Contact
  • Patterns
    • Amigurumi
    • Granny Square
    • Flowers
    • Baby
    • Dress
    • Bags
    • Cardigan
    • Accessories
search icon
Homepage link
  • Home
  • Contact
  • Patterns
    • Amigurumi
    • Granny Square
    • Flowers
    • Baby
    • Dress
    • Bags
    • Cardigan
    • Accessories
×

Cozy Baby Cocoon Crochet: Cuddle Up Your Little One

August 22, 2026 by Publisher Leave a Comment

Cozy Baby Cocoon Crochet: Cuddle Up Your Little One

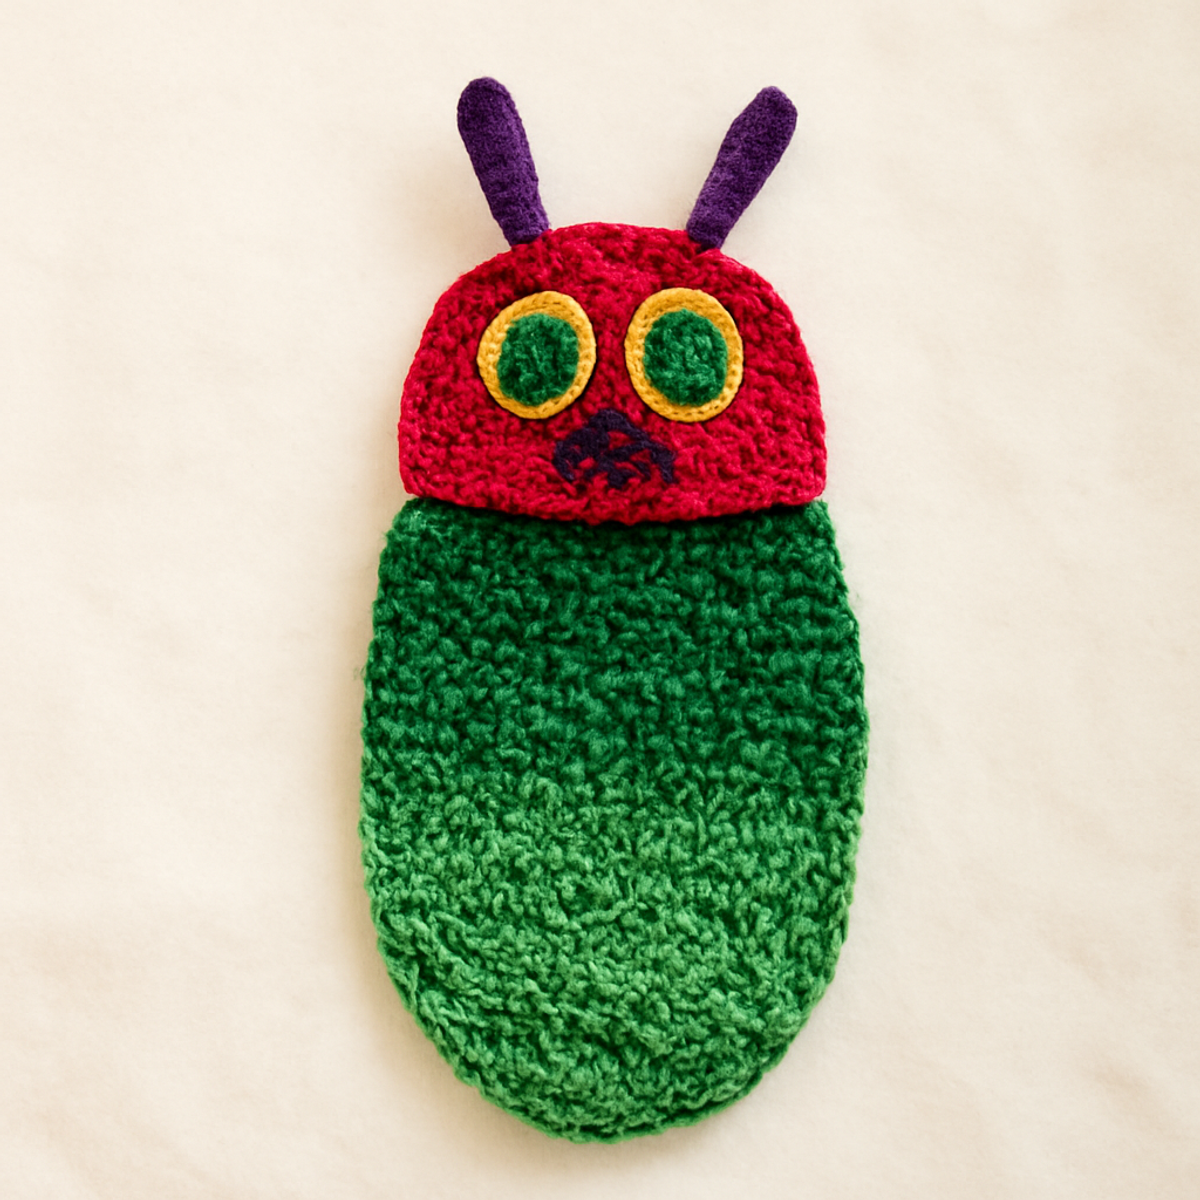
As I cozy up with my yarn, the softness of the worsted weight spreads through my fingers, sparking inspiration for a delightful new project. Enter the 'Cuddly Caterpillar Cocoon,' a whimsical baby cocoon crochet that transforms simple stitches into a charming masterpiece for newborns. This pattern is not only beginner-friendly but also works up quickly, making it a fantastic option for last-minute gifts. Imagine the warmth it provides as little ones snuggle inside, or the adorable photos parents will treasure as they capture those precious moments. With its playful design and vibrant colors, this cocoon will surely bring smiles and warmth to your crochet journey. So, grab your hook and let’s dive into creating something special that your little ones (and the parents!) will adore!

Baby Cocoon Crochet Materials & Tools

  • Medium Weight Yarn – Approximately 200-300 yards of acrylic or cotton blend for a snug and soft finish.
  • 5.5mm (I-9) Crochet Hook – Ideal for achieving the perfect tension to keep your baby cocoon crochet warm and cozy.
  • Yarn Needle – Great for weaving in ends smoothly for a polished look.
  • Safety Eyes (optional) – Use these to give your cocoon’s hat character, adding whimsy to the delightful design.

Why Choose This Baby Cocoon Crochet?

Beginner-Friendly: This pattern is perfect for newcomers, featuring simple stitches that you can master quickly, ensuring a successful crafting experience.
Whimsical Design: The adorable caterpillar shape immediately captures the essence of childhood, making it perfect for playful photo sessions.
Soft & Cozy: Crafted from soft acrylic or cotton yarn, the cocoon wraps little ones in warmth, creating a snug environment for peaceful naps.
Fast & Fun: Work it up in no time! It's an excellent choice for those last-minute baby gifts, saving you time while spreading joy.
Endless Customization: With vibrant yarn color options, you can easily put your unique spin on this piece or even experiment with different creature designs!

Gauge & Sizing Notes

Don't skip the gauge swatch! Ensuring your tension is just right is crucial for the baby cocoon crochet project to fit snugly and look delightful. A good guideline to follow for crochet is to aim for a tension swatch of 4×4 inches (10×10 cm), which might result in a specific stich count, depending on your individual tension, so be sure to check this! To size your cocoon larger or smaller, you can adjust your starting chain in multiples of 2 or 4, depending on the desired width. If your swatch is too small, try going up a hook size; conversely, if it’s too large, consider using a smaller hook to achieve that warm, cozy fit for your little one. Happy crocheting!

Step-by-Step Pattern for Cuddly Caterpillar Cocoon

Row 1: Begin the Cocoon Base
Start by chaining 80 (or as desired for width) using the worsted weight yarn. In the second chain from the hook, work a single crochet (sc) in each chain across. Your work should be flat and even, with a total of 79 sts at the end of this row (79 sts).

Row 2: Increase for Curvature
Ch 1, turn your work. In the same stitch, make 2 sc (inc). Then, sc in each stitch across until the last stitch, where you'll do an inc again. This will create a slight curve that will help form the cocoon shape. You should have a total of 81 sts now (81 sts).

Row 3: Continue Increasing
Ch 1, turn your work. Make 2 sc in the first stitch (inc) and sc in each stitch across, performing another inc in the last stitch. The piece should start to take on a rounded shape, showing the delightful transformation of your baby cocoon crochet. Here, your stitch count will be 83 (83 sts).

Row 4: Forming the Body Shape
Ch 1, turn. Sc in each stitch across without any increases this time. This will create the body of the cocoon, providing a smooth, even base. Your fabric should be lying flat and beginning to resemble a cup shape as you work, maintaining 83 sts throughout.

Row 5: Add Texture with HDC
Ch 1, turn. Now switch to half double crochet (hdc) for added texture; hdc in each stitch across. This change will create a luxurious feel to your baby cocoon crochet as you progress. At the end of this row, you will still have 83 hdc sts in total (83 sts).

Row 6: Continue with HDC
Ch 1, turn. Repeat the hdc across, keeping your tension even and comfortable. As the rows build up the cocoon, ensure to monitor the width so it comfortably wraps around a baby. You should still count 83 hdc sts as you finish this row.

Row 7: Begin Decreasing for Tapering
Ch 1, turn your work. Start decreasing by hdc in the first two stitches, then hdc in each stitch across until the last two stitches, where you'll do another decrease (dec). This will gradually shape the cocoon's end, maintaining a snug fit. Your total at the end of this row will be 81 hdc sts (81 sts).

Row 8: Continue Tapering
Ch 1, turn. Hdc dec in the first two stitches, then work hdc across, dec again at the end of the row. This decreases will continue to taper the cocoon shape towards the top, wrapping up the cozy feel. You will have 79 hdc sts at the end (79 sts).

Row 9: Final Tapering
Ch 1, turn. Repeat the decrease process: hdc dec in the first two stitches, then hdc across, finishing with a decrease at the end. Your baby cocoon crochet should be forming a snug shape now, with a total of 77 hdc sts remaining (77 sts).

Step 10: Creating the Hat
Using a contrasting color yarn, ch 4 and join into a ring with a sl st. Work 12 dc into the ring to form the base of the hat. This round will be a focal point of your cocoon ensemble, ensuring it not only looks adorable but is also functional. At this point, you will have 12 dc sts (12 sts).

Step 11: Build the Hat
Ch 3 (counts as 1st dc), then dc in each stitch around, increasing in each stitch (2 dc in each). This will give the hat a fuller look, so it sits nicely on the cocoon. You should have 24 dc sts at the end of this round (24 sts).

Step 12: Finalize the Hat
Ch 3, dc in the first stitch, then dc across, working in each stitch. Continue this pattern without further increases until your hat reaches about 4-5 inches in height. Your delightful caterpillar hat should now take shape comfortably with no increase, maintaining the 24 dc sts (24 sts).

Step 13: Attach the Hat
Position the completed hat onto the top of the cocoon. Using a sl st, securely attach the hat to the cocoon to ensure they stay together. This final assembly step is crucial to create the adorable caterpillar look so parents can enjoy using it for photography.

Step 14: Decorative Details
Optionally, you may sew on two safety eyes to the front of the hat, and embroider a cute smile or facial features. Adding these fun touches elevates the aesthetic of your baby cocoon crochet, making it even more irresistible and charming. Your project is nearly complete!

Step 15: Finishing Touches
Weave in any loose ends with your yarn needle for a clean finish. If desired, block the cocoon to shape it nicely and enhance its overall look. Your Cuddly Caterpillar Cocoon is ready to bring smiles and warmth to little ones and their parents alike!

How to Wash and Care for Your Baby Cocoon Crochet

  • Machine Washing: Use cold water and a gentle cycle to keep your baby cocoon crochet looking fantastic. Avoid agitation to prevent felting or pilling, ensuring it stays soft and cozy.

  • Hand Washing: For extra care, hand wash your cocoon in cold water with a mild detergent. Gently squeeze the fabric without twisting to preserve its shape and texture.

  • Drying/Blocking: After washing, lay the cocoon flat on a clean surface or drying rack to maintain its beautiful shape. Avoid hanging, which can stretch out your lovely piece.

  • Storage: Store your baby cocoon crochet in a cool, dry place, away from direct sunlight. This helps maintain vibrant colors and prevents damage from dust or moths.

Expert Tips for Baby Cocoon Crochet

  • Mind Your Tension: Consistent tension is key! A slightly tighter tension will provide warmth and comfort for the little ones, so check as you go.

  • Count Every Stitch: Losing count can lead to uneven edges. Use stitch markers or a note to keep track and help maintain your stitch count throughout.

  • Block Your Work: After finishing, blocking the cocoon helps shape it beautifully and enhances the texture, ensuring a polished look for your adorable baby cocoon crochet.

  • Avoid Dropping Stitches: Pay close attention to your stitches, especially when transitioning from crochet to assembly. Dropping the first or last stitch can affect the final design.

  • Embrace Personal Flair: Don’t hesitate to customize colors and add embellishments like safety eyes or embroidery. This makes your baby cocoon crochet unique and charming!

Baby Cocoon Crochet Variations

Embrace your creativity and transform this charming pattern into your own unique masterpiece!

  • Yarn Weight Swap: Use chunky yarn for a cozier cocoon, creating an even softer, snugger fit for the little one. This will be perfect for cooler climates!

  • Color Combinations: Experiment with vibrant colors; consider a bright green body with a contrasting blue hat for a playful twist that stands out beautifully in photos.

  • Fiber Alternatives: Opt for natural cotton for breathability. This swap provides a delightful softness while being gentle on delicate skin.

  • Add Texture: Incorporate bobbles or clusters along the cocoon's body for a fun and playful texture that engages little fingers during playtime.

  • Shape Modification: Instead of a caterpillar, try transforming the cocoon into a butterfly! Use different stitch techniques to accentuate the wings and make it truly enchanting.

  • Sizing Adjustments: Adjust the starting chain for a larger cocoon, accommodating older babies and extending the project's usability.

  • Decorative Edging: Add a scalloped or shell stitch border to the edge of the cocoon for a pretty finish that adds a touch of elegance.

  • Fun Embellishments: Attach cute pom-poms or fringe to the hat to enhance the playful nature of your design, making it perfect for whimsical photoshoots.

What to Pair with Cuddly Caterpillar Cocoon?

As you create your charming cocoon, consider extending its whimsy with delightful matching projects that evoke warmth and playfulness.

  • Charming Caterpillar Hat: This adorable companion hat, mimicking the cocoon design, keeps little heads warm and adds to your photo sessions. The cheerful and colorful look will make for delightful memories captured in photos.

  • Cuddly Booties: Create sweet booties that complement the cocoon. They’ll keep tiny toes snug and offer an extra layer of charm. These booties can also be personalized with fun colors or even little antennae!

  • Playful Blanket: A cozy blanket in similar colors can tie your set together beautifully. It becomes a soft backdrop for those precious photos and offers additional warmth during playtime.

  • Matching Toy: Crochet a playful caterpillar toy in vibrant hues to complete the set. Not only does it enhance the whimsy of your baby cocoon crochet, but it also gives newborns a delightful snuggle buddy.

  • Colorful Bib: Craft a sweet bib adorned with coordinating colors and patterns to keep meal times mess-free and stylish. This small addition brings functionality to cuteness, comforting parents while enhancing the visual appeal.

Cuddly Caterpillar Cocoon FAQs

Can I use a different yarn weight than medium weight?
Absolutely! While medium weight yarn is suggested for the baby cocoon crochet project, you can use a lighter or heavier weight. Just keep in mind that the thickness of the yarn will affect the final size and warmth of the cocoon.

How can I adjust the size of the cocoon?
If you want to make your cocoon bigger or smaller, you can adjust the starting chain. For a larger cocoon, simply chain more stitches in the beginning. To make it smaller, chain fewer. Don’t forget to maintain the same stitch pattern and increases as outlined in the pattern for best results!

Why is my work curling at the edges?
Don’t panic! Curling can occur if your tension is too loose or if you’re using the wrong hook size. Make sure to keep an even tension throughout your work. If you suspect a hook size issue, try switching to a slightly smaller hook for tighter stitches.

What if I drop a stitch while crocheting?
It's an easy fix! Just carefully pick up the stitch with your hook and pull the working yarn to secure it. If multiple stitches are affected, it's best to unravel back to the last completed row and redo the stitches for a neat finish.

What hook size should I use for this baby cocoon crochet?
The recommended hook size for this pattern is a 5.5 mm (I-9) crochet hook. This size works well to achieve a cozy, snug fit for the cocoon. If you find your tension is too loose or tight, feel free to experiment with a different hook size until you’re comfortable!

Can I customize the color and design of the cocoon?
Absolutely! This project is perfect for customization. You can swap out the yarn colors for the body and hat to create unique looks, like a blue body with a yellow hat. Feel free to get creative with embellishments or even change the shape to something like a butterfly!
Filed Under: Uncategorized

Charming Baby Converse Crochet Booties for Tiny Toes

August 22, 2026 by Publisher Leave a Comment

Charming Baby Converse Crochet Booties for Tiny Toes

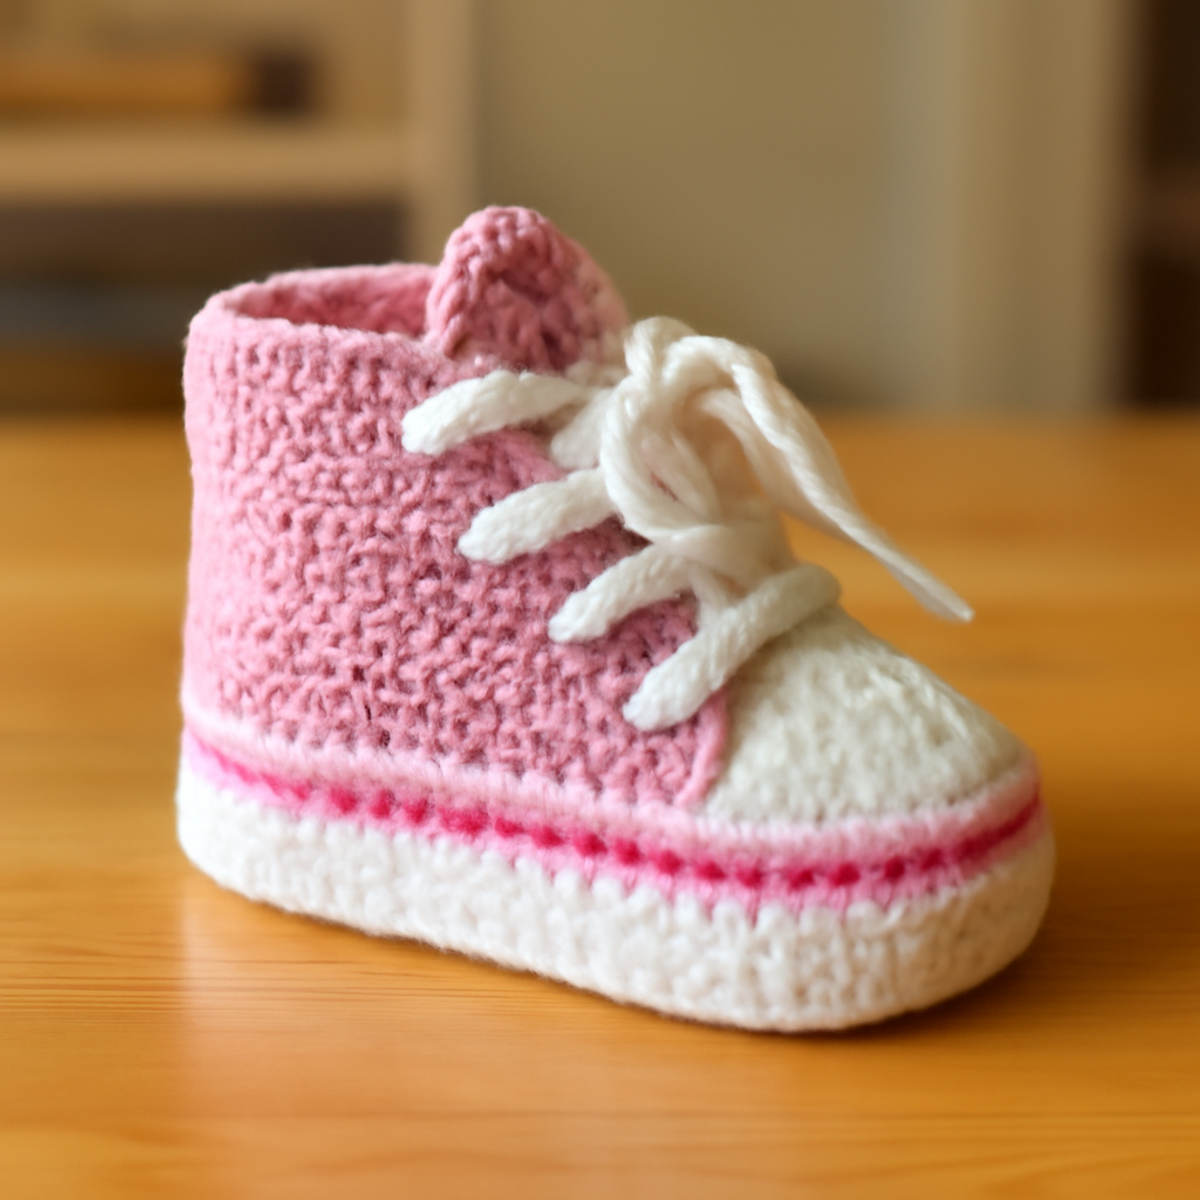
As I was rummaging through my stash the other day, I stumbled upon the softest cotton yarn in cheerful pastel colors, and instantly felt the urge to whip up something cute: Baby Converse Crochet Booties! These adorable little shoes not only add a trendy touch to any stylish baby wardrobe but also serve a practical purpose for their tiny feet. This intermediate-level project allows you to flex your skills in working in the round and changing colors while fully unleashing your creativity. Plus, the satisfaction that comes from crafting a unique, personalized gift or keepsake is truly rewarding. With endless possibilities for customization, you can create matching sets that will melt hearts! So, grab your hook and let's embark on this delightful crochet journey together!

Baby Converse Crochet Materials & Tools

Dive into the delightful world of crochet with these essential supplies!

Yarn

  • Light Worsted Weight Yarn (Category 3 or 4) – Aim for about 50-100 yards in soft cotton or acrylic for cozy comfort.
  • White Yarn – Perfect for creating those charming laces!

Tools & Notions

  • 4.0mm (G) or 5.0mm (H) Hook – Ideal for achieving tight, sturdy stitches in your baby converse crochet project.
  • Stitch Markers (optional) – Helpful for keeping track of rounds, though not strictly necessary.
  • Safety Eyes (optional) – Use these for a more finished look if desired.

Gather these materials and tools, and let the magic of creating adorable baby converse crochet booties begin!

Why Choose Baby Converse Crochet Booties?

Adorable Design: These playful booties combine style and functionality, perfect for any infant's wardrobe!

Intermediate Skill Level: This project encourages you to advance your skills with techniques like changing colors and working in the round.

Personalized Creativity: Enjoy the freedom to adjust colors and add unique embellishments, ensuring each pair is one-of-a-kind!

Soft & Comfortable: Made with lightweight cotton or acrylic yarn, these shoes offer optimal breathability and comfort for your little ones.

Perfect Gift: Create a thoughtful gift that parents will cherish, making these booties an unforgettable addition to any baby shower!

Gauge & Sizing Notes

Don't skip the gauge swatch! Ensuring the correct tension in your baby converse crochet is vital for achieving the perfect fit for your little one's feet. While specific measurements may vary, a general guideline is to aim for a tension swatch of 4×4 inches (10×10 cm) with 18 single crochets by 20 rows. If you find that your tension is too tight, consider moving up a hook size; if too loose, go down a size. To adjust the size of your booties, increase your starting chain in multiples of 6 or add extra rounds as needed for a roomier fit. Creating these adorable baby converse crochet booties should be a joyful process, so feel free to experiment!

Step-by-Step Pattern for Baby Converse Crochet

Row 1: Create the Sole
Start by making a magic ring and work 6 sc into it (6 sts). Pull the ring tight to secure. Next, increase by adding 2 sc in each stitch around. Continue this pattern for the next round, creating a total of 12 sts (your work should lie flat and form a small circle).

Row 2: Expand the Sole
For the next row, continue by working 1 sc in the first stitch, then inc in the following stitch. Repeat this pattern around the circle, resulting in 18 sts for this round (your work should start to have a slight oval shape).

Row 3: Shape the Sole
In this round, you'll work a sc in each of the first two stitches, followed by an inc in the next stitch. Continue this pattern around, increasing to a total of 24 sts (the oval should become more prominent as you go).

Row 4: Build the Height
Now, switch to working in spirals without joining. Work 1 sc in each stitch around for a total of 6 rounds until the height reaches about 1.5 inches (this creates the sides of your baby converse crochet).

Row 5: Create the Toe Area
To form the toe, work 1 sc in the next 12 sts, then chain 3 and skip 3 stitches. Sc in the next 6 stitches and chain 3 again to skip another 3 stitches. Join with a sl st to complete this round (ensure your work has a tread-like opening for the toe).

Row 6: Form the Opening
In this round, work around the toe area by making sc in the existing sc stitches and creating a base for the tongue. When you reach the chain spaces, work 1 hdc in each chain space (this gives structure to your opening).

Step 7: Create the Tongue
For the tongue, ch 8, then turn and sc in each stitch back towards your starting chain. After reaching the end, fold it down and attach it to the top of the opening with sl sts (this adds a cute, finished look).

Step 8: Add Stripes and Borders
Using your contrast color, make 2-3 rounds of sc around the top edge of the booties. You can change colors every row for a striped effect, creating 1-2 rounds of each color (this will make your baby converse crochet truly pop).

Step 9: Finish with Laces
For the laces, ch 60 with your white yarn and weave it through the created eyelets, adjusting to your desired length. Tie in a bow to complete the charming look of your baby converse crochet!

Expert Tips for Baby Converse Crochet

Consistent Tension: Maintain even tension throughout to ensure your baby converse crochet booties have a uniform shape; tight stitches create sturdiness, and loose stitches might lead to an irregular fit.

Count Your Stitches: Use a stitch marker to mark the beginning of each round. This helps avoid confusion and ensures an accurate stitch count, preventing the common mistake of losing track.

Block for Perfection: After completing your booties, consider blocking them to achieve a polished look. This will enhance their shape and structure, giving them a professional finish.

Avoid Last Stitch Drops: Be careful not to drop the last stitch when you transition to the next round. Always double-check to ensure every stitch is securely in place.

Customize with Care: If experimenting with colors or yarn types, be mindful of how they affect the stitch tension. Each yarn behaves differently, so adjust your tension as needed to keep the quality consistent.

What to Pair with Baby Converse Crochet Booties?

Create an enchanting ensemble for your little one by crafting pieces that complement these adorable booties perfectly!

  • Matching Hat: A cozy beanie in the same color scheme will keep tiny heads warm and stylish. They’ll look delightful together for family photos!

  • Baby Blanket: Whip up a soft blanket using similar yarn to wrap your baby in warmth, ensuring that their cute outfit has the perfect backdrop.

  • Mini Bunting: Adorn their nursery with a colorful bunting made from leftover yarn. It adds a playful touch to the space while showcasing your crochet flair.

  • Cuddle Toy: Craft a small, charming plush that matches the color of the booties. It’s a sweet gift for your baby to cuddle, creating a lovely keepsake.

  • Playful Socks: Pair the booties with soft socks for added warmth—choose a fun contrasting color to create a whimsical look!

How to Wash and Care for Your Baby Converse Crochet

Machine Washing: Wash your baby converse crochet booties in cold water on a gentle cycle to preserve their shape and color; avoid agitation to prevent any felting or pilling.

Hand Washing: For extra care, gently hand wash your booties in cold water with a mild detergent, squeezing out water without wringing to maintain their soft structure.

Drying/Blocking: Lay your finished booties flat to dry away from direct sunlight; consider blocking to help them retain their adorable shape for those tiny toes.

Storage: Store your baby converse crochet booties in a cool, dry place to prevent moisture and dust buildup, ensuring they stay fresh and ready for wear!

Baby Converse Crochet Variations

Embrace the joy of personalization and bring your unique flair to these charming booties!

  • Yarn Swaps: Try using cotton for breathability or opt for acrylic for durability; both will make delightful shoes. The choice of yarn can transform the look and feel of your booties entirely.

  • Color Combinations: Use bold colors for a playful, vibrant feel, or select pastels for a soft, subtle elegance. Experimenting with color schemes allows you to tailor the shoes to match any outfit perfectly.

  • Variegated Yarn: Incorporate a variegated yarn to create a fun, multicolored effect throughout the shoes. Each pair will have its unique pattern—perfect for making a statement!

  • Lacing Styles: Adjust the lacing with different techniques, such as braids or ribbon laces, to add a personal touch. Changing the lacing method can entirely transform the look!

  • Size Adjustments: Easily make larger boots by using a bigger hook size or adding rounds to accommodate your growing baby's feet. This adaptability makes your booties usable for a longer time.

  • Textured Edges: Add a decorative border or fringe along the opening for extra flair and texture, making the booties even more enticing!

  • Embellished Finishing: Sew on cute decorative buttons or felt shapes for a whimsical touch that perfectly matches your baby’s personality. Small details like these create unforgettable keepsakes.

  • Different Sole Designs: Experiment with different sole shapes—like a round or heart-shaped base—to truly make this project your own. The sky's the limit when it comes to creativity!

Adorable Baby Converse Crochet Booties FAQs

Can I substitute the yarn for something else?
Absolutely! You can use any lightweight cotton or acrylic yarn in a similar weight if you want to swap. Just ensure the yarn maintains a breathable and soft texture for comfort!

How can I adjust the size of the baby converse crochet booties?
Don't panic! To make larger booties, you can simply use a bigger hook or add extra rounds while working the sides. For smaller sizes, try using a smaller hook or omit a few rounds in the height. Just remember to check your gauge from the start!

Why is my crochet work curling at the edges?
It's an easy fix! Curling often happens when the tension is too tight or when your stitches are uneven. Make sure to use consistent tension and check that each stitch is being made correctly. If you find that it’s still curling, try blocking the finished booties for a smoother edge.

What hook size should I use for this pattern?
The recommended hook sizes are 4.0 mm (G) or 5.0 mm (H) for this baby converse crochet project. Choosing between them depends on your tension; if you’re a tighter crocheter, go for the larger size to ensure your stitches aren’t too tight.

How do I fix dropped stitches in my crochet?
If you find a dropped stitch in your work, gently pull the yarn from above the stitch and insert it back into the correct position. You can use a yarn needle to weave the end through the stitches to secure it. Just take your time, and it will blend in beautifully!

What should I do if I run out of yarn mid-project?
No worries! If you run out of yarn, you can always substitute with a similar color or texture from your stash. Just remember to keep an eye on stitch tension when switching to ensure the quality remains consistent throughout your project.

Filed Under: Uncategorized

Charming Crochet Tea Cup: Quick Amigurumi Delight

August 22, 2026 by Publisher Leave a Comment

Charming Crochet Tea Cup: Quick Amigurumi Delight

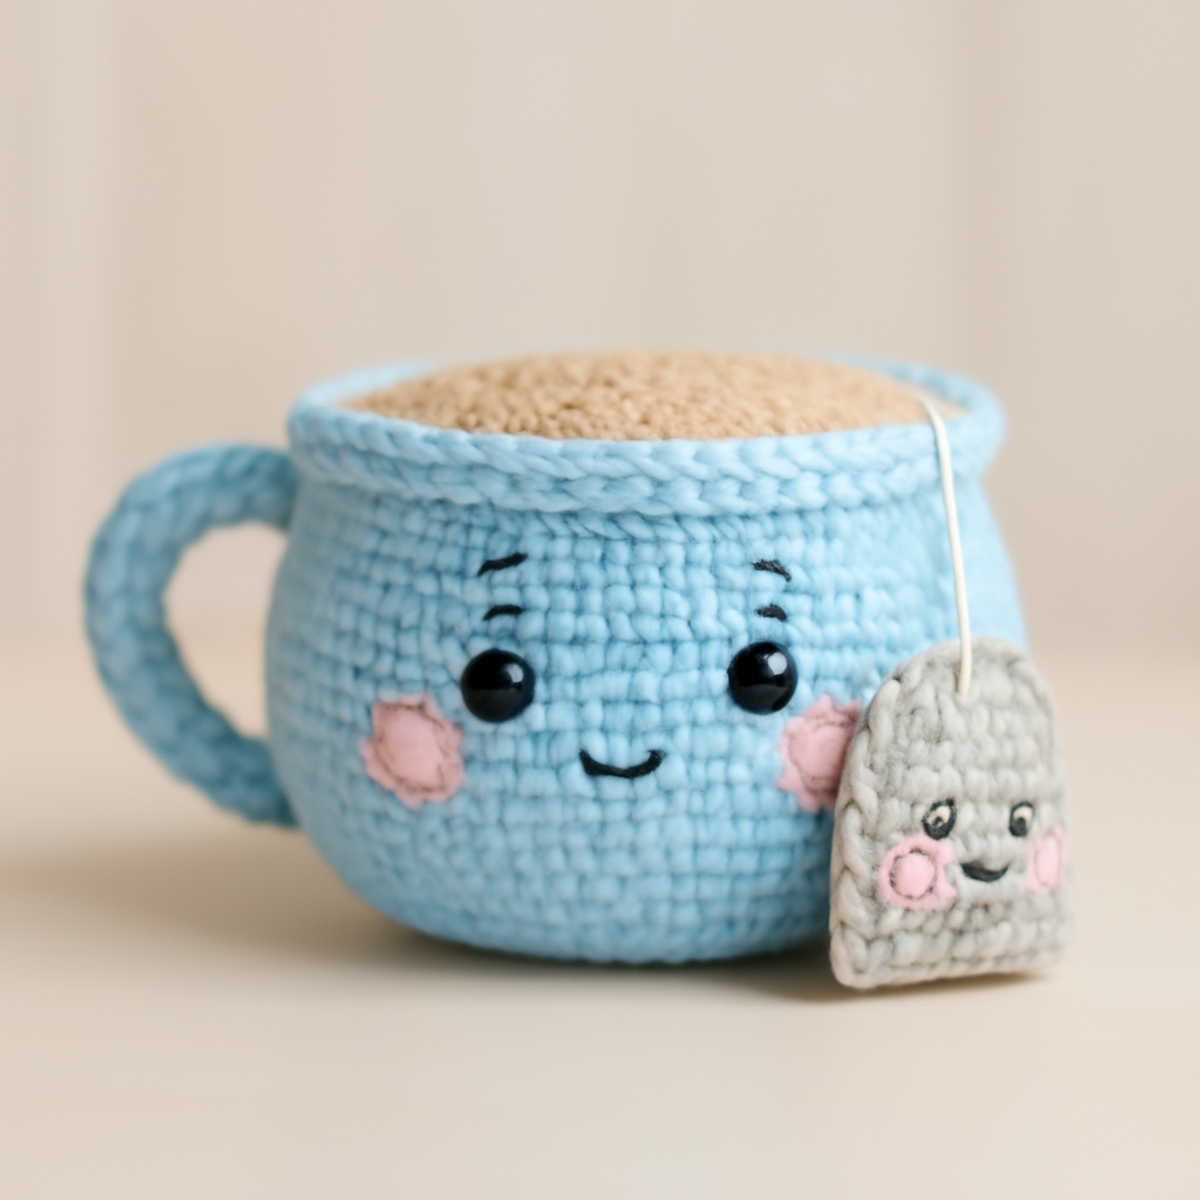
As I sifted through my yarn stash, a whimsical idea brewed—what if I could create a cheerful crochet tea cup that captures the playful spirit of my favorite beverage? This crochet tea cup is not only adorable but also a delightful project perfect for intermediate crafters looking to add a touch of charm to their home decor. With the option to personalize colors and features, it becomes an instant favorite gift for tea lovers, ensuring that each stitch reflects your unique flair. Plus, its quick assembly makes it an ideal stash-buster! If you're ready to fill your space with warmth and character or surprise a friend with a handmade treasure, let’s dive into crafting this kawaii crochet tea cup together.

Crochet Tea Cup Materials & Tools

  • Medium Weight Yarn – Approximately 200 yards of an acrylic or cotton blend will provide durability and softness for your cute creation.
  • 3.5 mm (E) Crochet Hook – Ideal for crafting the body of the crochet tea cup for a neat finish.
  • 2.5 mm (B) Crochet Hook – Perfect for those delicate details and the smaller parts of your tea cup.
  • 8 mm Safety Eyes (optional) – Add playful character to your tea cup with these adorable eyes for a whimsical touch.
  • Yarn Needle – A handy tool for sewing all your pieces together with ease.
  • Contrasting Yarn – Consider using a different shade for the tea bag to add visual interest.
  • Small White String – Use for the tea bag tag to enhance your crochet tea cup's charm.

Why Make a Crochet Tea Cup?

Irresistibly Cute: This crochet tea cup boasts a playful amigurumi style, making it an adorable addition to your decor or gift collection.

Quick Assembly: The straightforward construction allows for a speedy creation process, perfect for those who want to whip up a project in no time.

Customizable Colors: Experiment with vibrant yarns to personalize your tea cup’s appearance, letting your creativity shine through.

Perfect Gift: Ideal for tea lovers, this charming piece serves as a thoughtful present that shows you care.

Warm Texture: The soft, squishy feel of medium weight yarn enhances its inviting look, making it an appealing decorative touch in any cozy space.

Gauge & Sizing Notes

Don't skip the gauge swatch! It's crucial for your crochet tea cup project to ensure the final piece comes out just right. A typical crochet gauge for amigurumi is about 4×4 inches (10×10 cm), which roughly translates to 18 single crochets by 20 rows. If your tension doesn’t align, consider adjusting your hook size; if your swatch is too small, simply go up a hook size. To change the size of your crochet tea cup, you can modify the starting chain or increase your stitch count in multiples of 6 to make it larger or decrease as needed for a mini version. Happy crocheting!

Step-by-Step Pattern for Kawaii Crochet Tea Cup

Row 1: Start the Cup Body
Begin with a magic circle and work 6 sc into the ring. Pull the tail to tighten the circle, making sure your stitches are snug. This forms the foundation of your crochet tea cup. Your work should be a small circle with 6 stitches (6 sts).

Row 2: Increase Round
Next, work 2 sc in each stitch around to increase the size of the cup. You will have 12 stitches total after this round. Your tea cup should now be slightly larger, with 12 visible sc stitches forming a neat ring (12 sts).

Row 3: Double Increase Round
Continue by working 1 sc in the first stitch, then 2 sc in the next. Repeat this sequence around, which will create even more volume in your cup. You’ll have 18 stitches at the end of this round, and your work should begin to take shape (18 sts).

Row 4: Additional Increase Round
In this round, work 1 sc in each of the first 2 stitches, then increase by adding 2 sc in the following stitch. Continue this pattern until the end, bringing your stitch count to 24. At this point, the cup body should be curving upward (24 sts).

Row 5-8: Build the Body
For the next four rounds, simply work 1 sc in each stitch around without increasing. These rounds will allow the body of your crochet tea cup to gain height, creating a solid structure. Your piece should maintain a cylindrical shape over these four rounds (24 sts each round).

Row 9: Start the Cup Handle
To create the handle, switch to a new section of your yarn. Chain 6, then work 1 sc in the second chain from the hook. Continue with 4 more sc down the chain, totaling 5 sc. When finished, your handle should be a small row of 5 saturated stitches (5 sts).

Row 10: Attach the Handle
Align the handle to the side of the cup and attach it using sl st through both the handle and cup body. Make sure it’s secure and shaped nicely. Your crochet tea cup should now have its charming handle attached, adding to its whimsical appeal.

Row 11: Create the Tea Surface
To form the tea surface, make a flat circle using tan yarn. Start with a magic circle and work 6 sc in the circle, then increase each round until you reach 24 stitches, mirroring the cup's shape. This will ensure a snug fit on top of the cup (24 sts).

Row 12: Finish the Cup Decoration
Stitch the tea surface onto the top of the cup body with sl st to secure it firmly. This layer adds character while presenting a delightful ‘tea’ look. Your cup should now have its top layer, creating an appealing finish that stands out.

Step 1: Create the Tea Bag
For the tea bag, chain 15 and turn. Work 1 sc in each chain back to form a small rectangle. Fold this piece in half and secure the sides with sc, leaving the top open for stuffing. It should resemble a small tea bag pouch ready for embellishing.

Step 2: Embellish & Attach the Tea Bag
Embroider a small face or design on the front of your tea bag, then thread through a long piece of yarn for the tag. Attach the bag securely by looping its string over the cup rim and fastening it with sl st to ensure it hangs correctly.

How to Wash and Care for Your Crochet Tea Cup

Machine Washing: Use cold water on a gentle cycle to protect your crochet tea cup. Avoid agitation to prevent felting or pilling.

Hand Washing: For extra care, hand wash in lukewarm water using mild detergent. Gently press out excess water without wringing.

Drying/Blocking: Lay your crochet tea cup flat on a clean towel to dry, reshaping it as necessary. Avoid hanging as this may distort its charming shape.

Storage: Store your finished crochet tea cup in a cool, dry place. Keep it away from direct sunlight to maintain its vibrant colors and softness.

Crochet Tea Cup Variations & Substitutions

Unleash your creativity and make this crochet tea cup truly your own with these fun ideas and swaps!

  • Yarn Weight Swaps: Use a lighter or heavier yarn to create a larger or smaller cup, adjusting the hook size accordingly for a delightful new dimension.

  • Color Blocking: Combine complementary colors in sections for a playful vibe, making your tea cup even more eye-catching and whimsical—think a bright pink body and a sunny yellow handle!

  • Mix Fiber Types: Try substituting cotton for acrylic for a softer touch, or opt for a fuzzy yarn like chenille to give your cup a huggable, plush feel.

  • Textured Finishes: Add fun embellishments such as a fluffy pom-pom on top, or introduce fringe at the rim for a boho flair that gives your tea cup a unique personality.

  • Personalized Embellishments: Integrate small decorative elements like beads or charms on the tea bag or handle, making your tea cup not just cute, but also a delightful surprise.

  • Size Adjustments: Scale your project for larger gatherings! Use a bulkier yarn and size up your hooks to create a family-sized tea cup that's perfect for group crafting sessions or decor.

  • Playful Patterns: Experiment with variegated yarn to add a dash of randomness, bringing unexpected color twists to your crochet creation that will keep each cup unique!

  • Alternative Teas: For the tea surface, consider using a deeper color for a "strong tea" vibe or even a sparkly yarn if you're in a festive mood, transforming your cup into a dazzling centerpiece.

What to Pair with Kawaii Crochet Tea Cup?

Embrace the joy of crafting by creating delightful companions to your adorable tea cup, enhancing your home decor and gifting options.

  • Crochet Coaster Set: Craft matching coasters to protect your surfaces while adding a pop of color beneath your tea cup.

  • Amigurumi Tea Bag: Create a whimsical tea bag to accompany your cup, making it a complete set that brings a smile.

  • Cute Crochet Spoon: Design a tiny decorative spoon to rest next to your tea cup, completing a charming tea time scene.

  • Whimsical Sugar Bowl: Pair your tea cup with a mini sugar bowl, perfect for a functional yet playful twist on your decor.

  • Charming Teapot: If you're feeling ambitious, crochet a delightful teapot to create an entire amigurumi tea party for display.

Expert Tips for Your Crochet Tea Cup

  • Mind Your Tension: Maintaining even tension is crucial for a neat finish. Keep your stitches consistent, especially for facial details on your crochet tea cup.

  • Count Carefully: As you work through the cup body rows, count your stitches diligently. Losing count can lead to uneven sizing, so keep a marker or note handy.

  • Secure the Handle: When attaching the cup handle with slip stitches, ensure it’s firmly secured. A loose handle may unravel or detach later, ruining your adorable creation.

  • Flatten the Tea Surface: Before stitching the tea surface onto the cup, check its fit. A snug placement not only enhances the look but also keeps everything in place.

  • Don’t Rush the Assembly: Take your time when attaching the tea bag. A carefully secured bag will prevent any future mishaps, ensuring your crochet tea cup stays charming and intact.

Kawaii Crochet Tea Cup FAQs

Can I substitute yarn types for this crochet tea cup?
Absolutely! You can swap acrylic for cotton if you prefer a softer texture. Just make sure to choose a medium weight yarn to maintain the overall appearance and structure of your cute tea cup.

How can I adjust the size of my crochet tea cup?
If you want a larger or smaller cup, you can alter the stitch count when starting the magic circle or adjust your hook size. Just remember that changing the hook size may also affect your tension, so keep an eye on your gauge as you go.

What should I do if my work is curling?
Don't panic! Curling often happens when your stitches are too tight or there's uneven tension. Try relaxing your grip and ensuring your stitches are even. If it persists, consider working with a larger hook for a looser gauge.

How do I fix a dropped stitch?
It's an easy fix! If you notice a dropped stitch, simply use your yarn needle to weave the yarn back through the original stitch spot, making sure to secure it tightly. This will help keep your crochet tea cup's shape intact.

What size hook should I use for the details on my tea cup?
For details, such as the tea bag and face features, use a smaller 2.5 mm (B) hook. This will allow you to achieve the precision needed for those charming accents without compromising the overall look.

How do I ensure my stitches stay uniform throughout my project?
Counting your rounds and maintaining consistent tension is key! Take your time and occasionally check your work to ensure you’re on track. If your stitches start feeling too loose or tight, adjust as needed.

Filed Under: Uncategorized

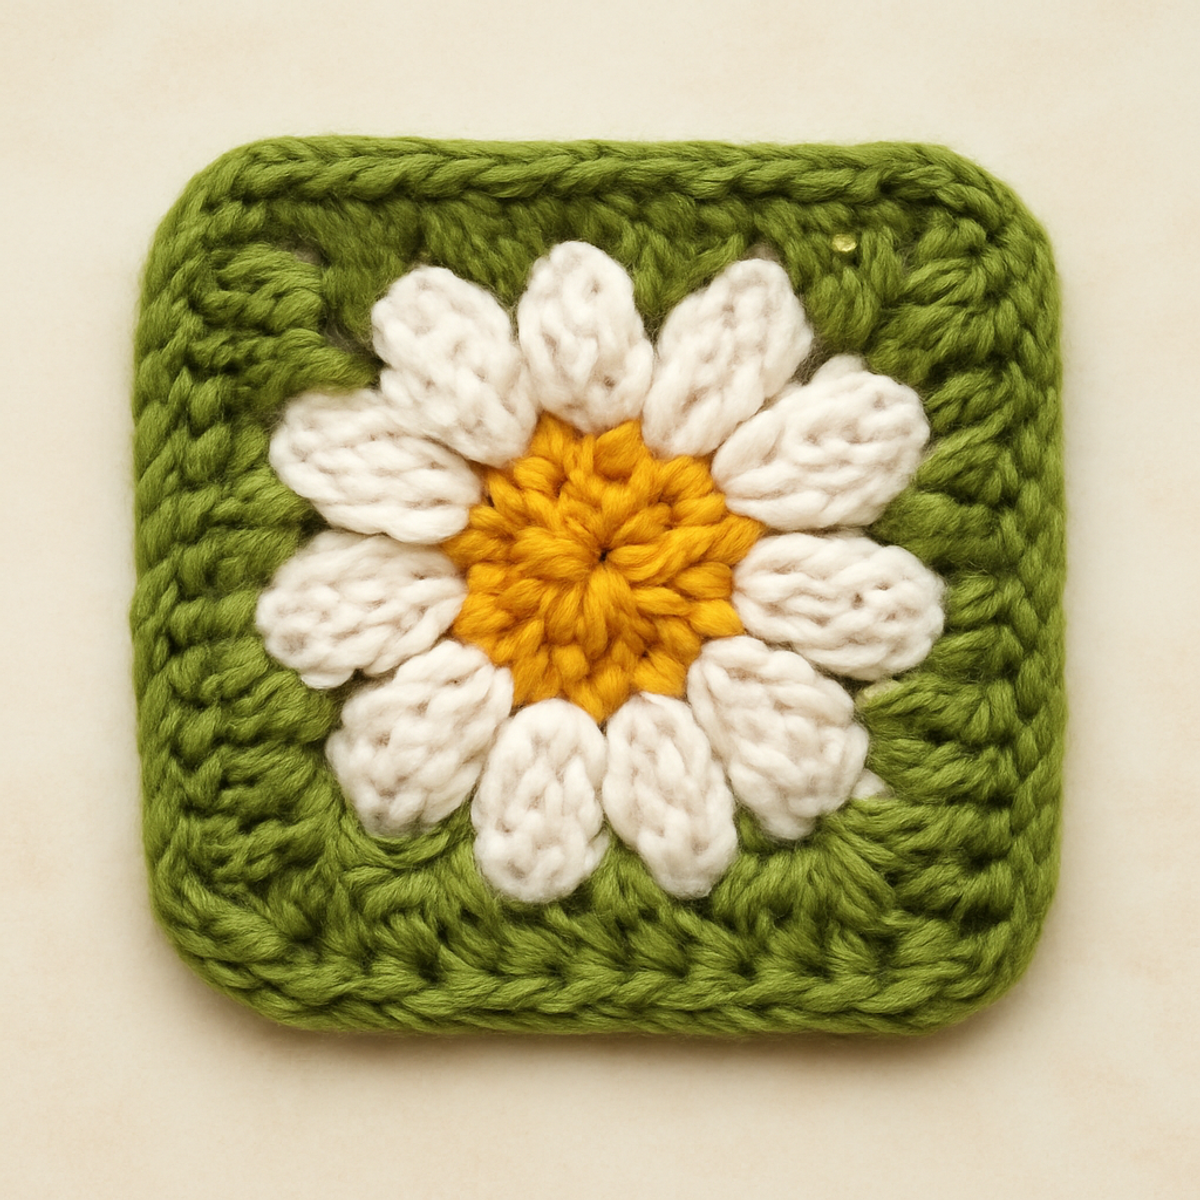
Charming Daisy Granny Square: A Flower-Inspired Crochet Delight

August 22, 2026 by Publisher Leave a Comment

Charming Daisy Granny Square: A Flower-Inspired Crochet Delight

Crafting a vibrant Daisy Granny Square is like welcoming spring right into your home, bringing a floral delight with each stitch. This crochet pattern isn’t just visually stunning; it serves as a fantastic way to explore floral motifs while enhancing your granny square skills. Designed for intermediate crafters, the Daisy Granny Square works up beautifully into colorful blankets, bright throw pillows, or charming standalone pieces that add a cozy touch to any space. You'll love the satisfaction of creating a layered design that not only showcases your creativity but also brightens up your surroundings. Plus, it’s an excellent stash-buster, making it a perfect project for all those yarn scraps. Are you ready to create your own floral masterpiece? Let's dive into this delightful crafting journey together!

Daisy Granny Square Materials & Tools

Get ready to bring floral cheer to your crochet projects!

Yarn

  • Worsted Weight Yarn – Approximately 200 yards in creamy white for the petals, bright golden yellow for the center, and rich green for the border will be needed for a few squares.

Tools & Notions

  • 5.0mm (H-8) Hook – This is the recommended size to achieve perfect stitches for your daisy granny square.
  • Stitch Markers – Helpful for tracking your rounds and keeping your work organized.
  • Yarn Needle – Perfect for weaving in ends and completing your project with a polished finish.

Embrace your creativity with this lovely floral project!

Why Choose the Daisy Granny Square?

Vibrant Aesthetic: The Daisy Granny Square bursts with cheerful colors, perfectly brightening any space it adorns.

Layered Techniques: Its combination of floral motifs with granny square construction makes it a delightful challenge for intermediate crocheters looking to expand their skills.

Versatile Project: Use it for versatile applications—blankets, throw pillows, or as standalone decor pieces, showcasing your creativity wherever you place it.

Soft & Tactile: The final fabric is medium-density, soft to the touch, and beautifully drapes, adding a cozy feel to your projects.

Easy Customization: Explore endless personalization options, from changing flower colors to varying sizes, ensuring your Daisy Granny Square truly reflects your unique style!

Gauge & Sizing Notes

Don't skip the gauge swatch when crafting your charming Daisy Granny Square! Ensuring your tension is just right is essential for achieving the beautiful petal shapes that this project is known for. A good general guideline for this pattern is to aim for a tension swatch of about 4×4 inches (10×10 cm), which might typically yield around 12 double crochets by 8 rows. If you find that your measurements differ, you can easily adjust the size of your square by increasing your starting chain in multiples of 6 + 2 for larger squares, or decreasing it for smaller ones. If your swatch is too small, simply try switching to a larger hook size, and if it’s too big, consider going down a hook size. Happy crocheting!

Step-by-Step Pattern for Daisy Granny Square

Row 1: Foundation Round
Begin by creating a magic ring. Chain 3 (counts as 1 dc), and work 11 dc into the ring, then pull the ring tight. Join with a sl st in the top of the initial ch 3. Your work should appear as a frilly circle of double crochets (12 sts).

Row 2: Petal Round
Chain 3 (counts as 1 dc), and in the same stitch, work 2 dc to create a cluster, followed by 3 ch. Slip stitch in the next stitch and repeat the pattern: 3 dc in the next stitch, 3 ch, sl st in next stitch. Continue until you have 6 petals formed (6 petals completed).

Row 3: Center and Petal Attach
Join the yellow yarn with a sl st in any ch-3 space. Chain 1, then work 4 sc in that same space for the center. Slip stitch into the center of each petal by working 1 sc into the ch-3 spaces. Your square will display a lovely flower-shaped motif (6 sc total).

Row 4: Transition to the Green Border
Change to the green yarn. In the same ch-3 space, chain 1, then sc around each flower petal, creating a firm connection. Work 3 sc in the corners for a nice curve. Continue this all the way around, ensuring every edge is defined. You should have a total of 24 sc (24 sts).

Row 5: Finalizing the Square
To finish your daisy granny square, slip stitch into the first sc to complete the round. Now, for the second round of green, repeat: ch 1, sc in each st, increasing with 2 sc in each corner as you go around. This reinforces the shape and provides structure (36 sts).

Step 6: Finishing Touches
Once your round is complete, slip stitch to the first sc to secure the border. Cut the yarn, leaving a long tail for weaving in. Use the yarn needle to weave in all ends, ensuring your Daisy Granny Square is neat and tidy. Block your square to ensure it lays flat and showcases its vibrant petal design perfectly.

Daisy Granny Square Variations & Substitutions

Embrace your creative spirit by customizing your Daisy Granny Square with delightful variations that reflect your unique style!

  • Color Alternatives: Swap the classic creamy white petals for soft pastel hues or bold jewel tones to create an eye-catching square.

  • Yarn Substitutions: Try cotton yarn for a more breathable square, perfect for warmer climates and adding texture to your floral display.

  • Oversized Square: Use a larger hook to create a bigger version of the daisy granny square, transforming it into a striking throw pillow or a cheerful wall hanging.

  • Contrasting Petals: Pair vibrant colors for petals and centers to create a striking geometric design that adds visual interest to your decor.

  • Textured Borders: Add a fun twist by crocheting a frilly or scalloped border with the green yarn to give your square a playful finish.

  • Fringe Addition: Incorporate a fringe along the edges for a bohemian vibe, bringing movement and character to your floral piece.

  • Size Adjustments: Experiment with different yarn weights to produce squares of varying dimensions, allowing for customization based on your project needs.

  • Layered Flowers: Create a multilayered effect by adding multiple rows of petals in gradually lighter shades, giving your square a beautiful depth and dimension.

What to Pair with Daisy Granny Square

Imagine cozy afternoons spent crafting a delightful collection that echoes the warmth and brightness of your Daisy Granny Square!

  • Charming Coasters: Create matching coasters that reflect the same floral motifs, adding harmony to your table decor.

  • Floral Throw Pillow: Use your squares to craft a throw pillow, adding softness and color to your living space while showcasing your handiwork.

  • Vintage Blanket: Join several Daisy Granny Squares to form a blanket that radiates a playful elegance, perfect for snuggling under during chilly evenings.

  • Garden Bag: Design a cute tote bag adorned with Daisy Granny Squares for trips to the farmer’s market, combining functionality with floral cheer.

Let your imagination blossom as you explore these delightful pairings!

Care Instructions for Your Daisy Granny Square

Machine Washing: Use cold water and a gentle cycle to preserve the vibrant colors of your daisy granny square; avoid agitation to prevent felting or pilling.

Hand Washing: For delicate care, hand wash in cool water with a mild detergent. Swish gently and avoid rubbing to keep your floral details intact.

Drying/Blocking: Lay your completed square flat to dry and reshape as needed. Blocking is key to achieving the perfect flatness and showcasing the daisy design beautifully.

Storage: Store your finished daisy granny square in a cool, dry place away from direct sunlight to prevent fading, ensuring its cheerful colors remain vibrant for years to come.

Expert Tips for Daisy Granny Square

  • Consistent Tension: Maintain even tension throughout your work to ensure all petals are uniform in shape. This enhances the overall aesthetic of the daisy granny square.

  • Accurate Stitch Counting: Regularly count your stitches, especially in the initial rounds. This prevents misalignments in your floral pattern and sets a strong foundation.

  • Blocking Matters: After finishing, block your square to make it lay flat. This step is crucial, especially when using multiple colors, ensuring crisp edges and defined shapes.

  • Track Your Rounds: Use stitch markers to help track rounds and prevent losing count in complex sections. This simple tool can save you from frustration later!

  • Weaving in Ends: When finishing, weave in ends neatly with a yarn needle for a polished look. Ensure you secure the yarn well to avoid unraveling.

  • Experimenting with Sizes: Consider trying a larger hook or yarn for an oversized daisy granny square. This adaptation can create a stunning statement piece for your home!

Daisy Granny Square FAQs

Can I substitute yarn for my Daisy Granny Square?
Absolutely! While worsted weight yarn (size 4) is recommended, you can swap in any similar weight yarn. Just be mindful of the texture and drape, as different fibers can affect the final look and feel. For instance, if you prefer a lighter option, you might try cotton, but remember it may change the overall softness and structure.

How do I make my Daisy Granny Square bigger or smaller?
To adjust the size of your square, you can use a larger crochet hook for a more relaxed gauge, or switch to a heavier yarn. Conversely, using a smaller hook will create tighter stitches and subsequently a smaller square. Keep an eye on your stitch consistency throughout the project to maintain the floral motifs.

Why is my work curling up at the edges?
Don’t panic! Curling edges often indicate that your tension is too tight, or that you may not have enough stitches in your rounds. Ensure you’re counting stitches accurately and consider blocking your square once finished to flatten it out beautifully.

What size crochet hook should I use for my Daisy Granny Square?
For this pattern, a 5.0 mm (H-8) crochet hook is recommended to achieve the best results. If you find your tension is looser or tighter than desired, feel free to experiment with a hook size up or down until you’re happy with the fabric's appearance.

How do I fix dropped stitches in my Daisy Granny Square?
If you discover a dropped stitch, don’t worry! You can often pick it back up by carefully working it back into the surrounding stitches with your hook. Focus on reestablishing the stitch count to keep the pattern intact, and check that your tension remains consistent on subsequent rows.

What can I do if my petals don’t look even?
If your petals aren’t turning out quite as you envisioned, first check your tension for consistency. Then, revisit your stitch count at each round to make sure you’re following the pattern accurately. Remember, practice makes perfect, so just keep at it, and your petals will bloom beautifully!

Filed Under: Uncategorized

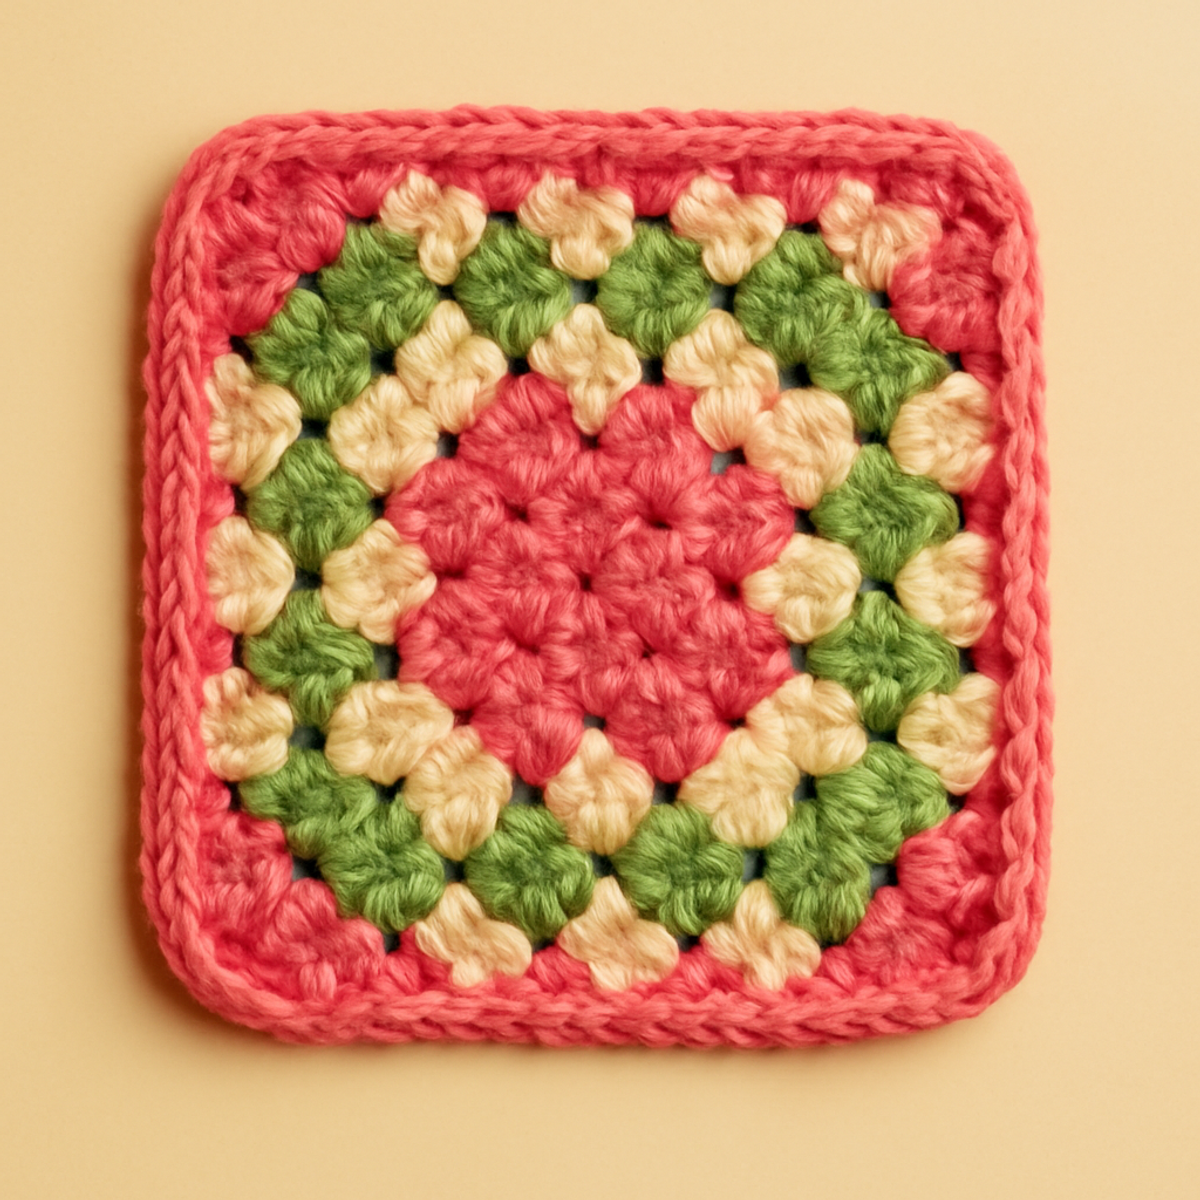
Vibrant Granny Square Crochet: A Colorful Beginner’s Joy

August 22, 2026 by Publisher Leave a Comment

Vibrant Granny Square Crochet: A Colorful Beginner's Joy

As I sift through my stash of vibrant yarns, I’m reminded of the joy that a single granny square can bring. Today, I’m excited to share the “Vibrant Garden Granny Square”—a delightful project that harmoniously blends a classic design with a modern twist. This granny square crochet pattern is perfect for both beginners eager to build their skills and seasoned crafters looking for a satisfying challenge. Not only does each square pop with color, adding a cheerful touch to any space, but the pattern is also incredibly versatile, perfect for creating beautiful blankets, stylish bags, or unique home decor. So, let your creativity bloom and discover the endless possibilities that await you in each stitch!

Vibrant Garden Granny Square Materials & Tools

  • Worsted Weight Yarn – Approximately 150-200 yards needed for a colorful granny square crochet project; acrylic or cotton is ideal for durability.
  • 5.0mm (H) Crochet Hook – The perfect size for creating the lovely motifs and maintaining a good tension in your stitches.
  • Stitch Markers – These are helpful for keeping track of rounds, especially for beginners learning new techniques.

Why Is This Granny Square Crochet Special?

Classic Design: This pattern embraces the timeless allure of granny squares while inviting creativity with modern color combos.
User-Friendly: Beginners will appreciate the well-structured instructions, while experts can enjoy the beautiful complexity of the motifs.
Versatile Use: From cozy blankets to chic bags, the potential for this granny square is boundless!
Textured Finish: Expect a delightful balance of softness and sturdiness in your finished piece, making it a dream to touch and behold.
Quick Satisfaction: With just a few rounds, you’ll see your project come to life, encouraging those "just one more square" moments.

How to Check Your Gauge for Vibrant Garden Granny Square

Don't skip the gauge swatch! Checking your crochet gauge is essential to ensure your Vibrant Garden Granny Square turns out the perfect size. A typical guideline is to aim for a 4×4 inch (10×10 cm) square with approximately 12 double crochets by 8 rows; however, this may vary depending on your crochet tension and yarn choice. If you want to adjust the size of your square, simply increase your starting chain in multiples of 3 to make the square wider or narrower. If your swatch is too small, try going up a hook size to achieve that cozy feel we all love in granny square crochet projects.

Step-by-Step Pattern for Vibrant Garden Granny Square

Round 1: Forming the Ring
Start by making a slip knot and chaining 4. Join with a slip stitch (sl st) to the first chain to form a ring. Inside this ring, work 3 double crochets (dc) to create your first cluster. Then, work (2 dc) into the ring, followed by (3 dc) x 2 around the ring. Your work should start to cup slightly as you complete this round for a total of 12 stitches (12 sts).

Round 2: Expanding the Floral Motif
Chain 3 (this acts as your first dc) and then work 2 dc in the same ring. Next, in the next chain-2 space from the previous round, work (3 dc) to form a corner. Repeat this in each of the chain spaces around, ensuring to finish the round with a slip stitch to the top of the starting chain. At this point, you’ll have 36 stitches (36 sts), and your square should begin to lay flat.

Round 3: Elevating the Texture
Begin this round with a chain 3, representing your first dc. In the same stitch, work 2 dc. Next, in each chain-2 corner space, work (2 dc) to enhance the textured appeal of your granny square crochet. This round will begin giving more volume and structure. Complete the round with a slip stitch in the top of the starting chain, resulting in 48 stitches (48 sts), and the piece should feel more defined.

Round 4: Creating the Final Shape
Start with a chain 3, then work 2 dc in the first stitch. In each corner, instead of continuing the previous corner stitches, alternate between (1 sc) and (3 dc) to amplify the corners while creating a beautiful finish. Join with a sl st at the end of the round to seal your work. You should now have a wonderful balance of texture and structure, measuring approximately 6 to 8 inches per side.

Step 5: Finishing Touch with a Border
For a polished look, you’ll be adding a simple single crochet (sc) border around the entire square. Start with a slip knot, then sc evenly into each stitch around. In each corner, work 3 sc to ensure your border lays flat. After reaching back to your starting point, finish off with a slip stitch. This final touch not only frames your granny square crochet piece beautifully but also enhances its sturdiness.

What to Pair with Vibrant Garden Granny Square

As you enjoy the colorful artistry of your granny square crochet, why not extend that joy into a matching ensemble?

  • Cozy Throw Blanket: Use multiple granny squares for a delightful blanket that transforms any space into a cozy retreat.
  • Charming Pillow Covers: Craft pillow covers from your granny squares to add vibrant accents to your living room or bedroom.
  • Stylish Market Bag: Combine your granny squares to create a practical yet chic bag perfect for your next market run or beach day.
  • Colorful Coasters: Use smaller granny squares to make cheerful coasters, spreading warmth and color around your home.
  • Playful Baby Blanket: Join smaller squares into a whimsical baby blanket, a perfect gift for little ones filled with vibrant joy.

Expert Tips for Granny Square Crochet

  • Maintain Even Tension: Use a tension guide or keep practicing to watch for changes in yarn thickness, ensuring consistent results throughout your granny square crochet.

  • Count Stitches Carefully: Always double-check your stitch count after each round to prevent inadvertent increases or decreases, which can alter your square's size.

  • Block with Care: Gently block your completed squares to help them lay flat and maintain their beautiful shape, especially after finishing your cozy granny square crochet.

  • Stitch Markers Are Your Friends: If you're new to crochet, use stitch markers to keep track of your rounds and any corner spaces, simplifying the process and enhancing your success.

  • Take Your Time: Enjoy the journey! Crocheting should be a relaxing experience, so don’t rush it. Each square is a small victory in your crafting adventure.

How to Wash and Care for Your Granny Square Crochet

Machine Washing: Use cold water on a gentle cycle to protect the vibrant colors and prevent any shrinkage or felting in your granny square crochet; always place the square in a laundry bag.

Hand Washing: For extra care, hand wash your crochet square in cool water with a mild detergent; gently squeeze to remove excess water without wringing or twisting.

Drying/Blocking: Lay your granny square flat on a clean, dry towel to air dry; this helps maintain its shape and texture while avoiding any distortion from hanging.

Storage: Store your finished granny squares in a cool, dry place away from direct sunlight; this will help keep the colors vibrant and the fibers in great condition for years to come.

Granny Square Crochet Variations Made Easy

Let your creativity flow as you explore unique twists on this classic design to make it all your own!

  • Yarn Weight Swaps: Switching to chunky yarn will produce a larger, cozier square, perfect for quick projects or warmer throws. Embrace the plush texture that chunky yarn offers; it’s sure to make a statement.

  • Fiber Alternatives: Try cotton yarn for a softer feel and cooler touch, making it ideal for summer projects. Cotton is lightweight and breathable, allowing for versatile use in various climates.

  • Pastel Palette Twist: Opt for pastel shades instead of bold colors for a gentle, serene aesthetic. The soft hues can create a calming effect, perfect for light and airy spaces.

  • Color-Blocking Fun: Use contrasting colors for each round to create a vibrant color-block effect. This not only enhances visual interest but also adds a modern flair to the traditional granny square design.

  • Textured Borders: Adding a fluffy pom-pom or a playful fringe along the edges can add personality and charm. These finishing touches transform any square into a delightful standout piece.

  • Size Adjustments: Customize the square by adding or removing rounds, allowing you to create different sizes that appeal to various projects. A larger square can become a cozy cushion cover, while a smaller version might be perfect for a trendy coaster.

  • Festive Colors: Incorporate seasonal colors for holidays, such as rich reds and greens for Christmas or vibrant pastels for spring. This not only celebrates the festivities but adds a personal touch to your decor.

  • Border Variations: Experiment with different border stitches, like shell or scallop edges, to give your granny square a finishing touch that reflects your unique style. The right border can elevate your piece from lovely to utterly stunning!

Vibrant Garden Granny Square FAQs

Can I use a different yarn weight for this granny square crochet pattern?
Absolutely! While Worsted weight yarn is recommended for this pattern, you can certainly experiment with thicker or thinner yarns. Just keep in mind that using a different weight may change the size of your finished square. If you opt for a lighter weight, you might need to adjust your hook size and stitch count accordingly.

How can I make my granny square larger or smaller?
No problem! To increase the size, simply add more rounds of double crochets. You can also use a larger hook or thicker yarn. If you want a smaller square, reduce the number of rounds or experiment with a smaller hook. Just remember to keep your tension consistent to maintain an even shape!

Why is my granny square curling at the edges?
Don’t panic! Curling is a common issue, especially if your tension is too tight. To fix this, try loosening your grip while crocheting and ensure you’re not missing stitches. After completing the square, blocking it can also help flatten the edges for a more polished look.

What's the best hook size to use for this granny square?
For the Vibrant Garden Granny Square, a 5 mm (H/8) crochet hook is ideal to create the defined stitches and beautiful texture. If you find your stitches too tight or too loose, feel free to adjust accordingly. Just remember that changing hook sizes can impact the square's final measurements.

How do I fix a dropped stitch in my granny square?
It’s an easy fix! First, don’t panic. You can simply identify the dropped stitch and use a smaller crochet hook to pull it back up through the stitches of the previous rounds. If you’ve progressed quite a bit, you might need to unravel a few rounds to fix the drop, but with patience, you can restore your square to its lovely state!

Filed Under: Uncategorized

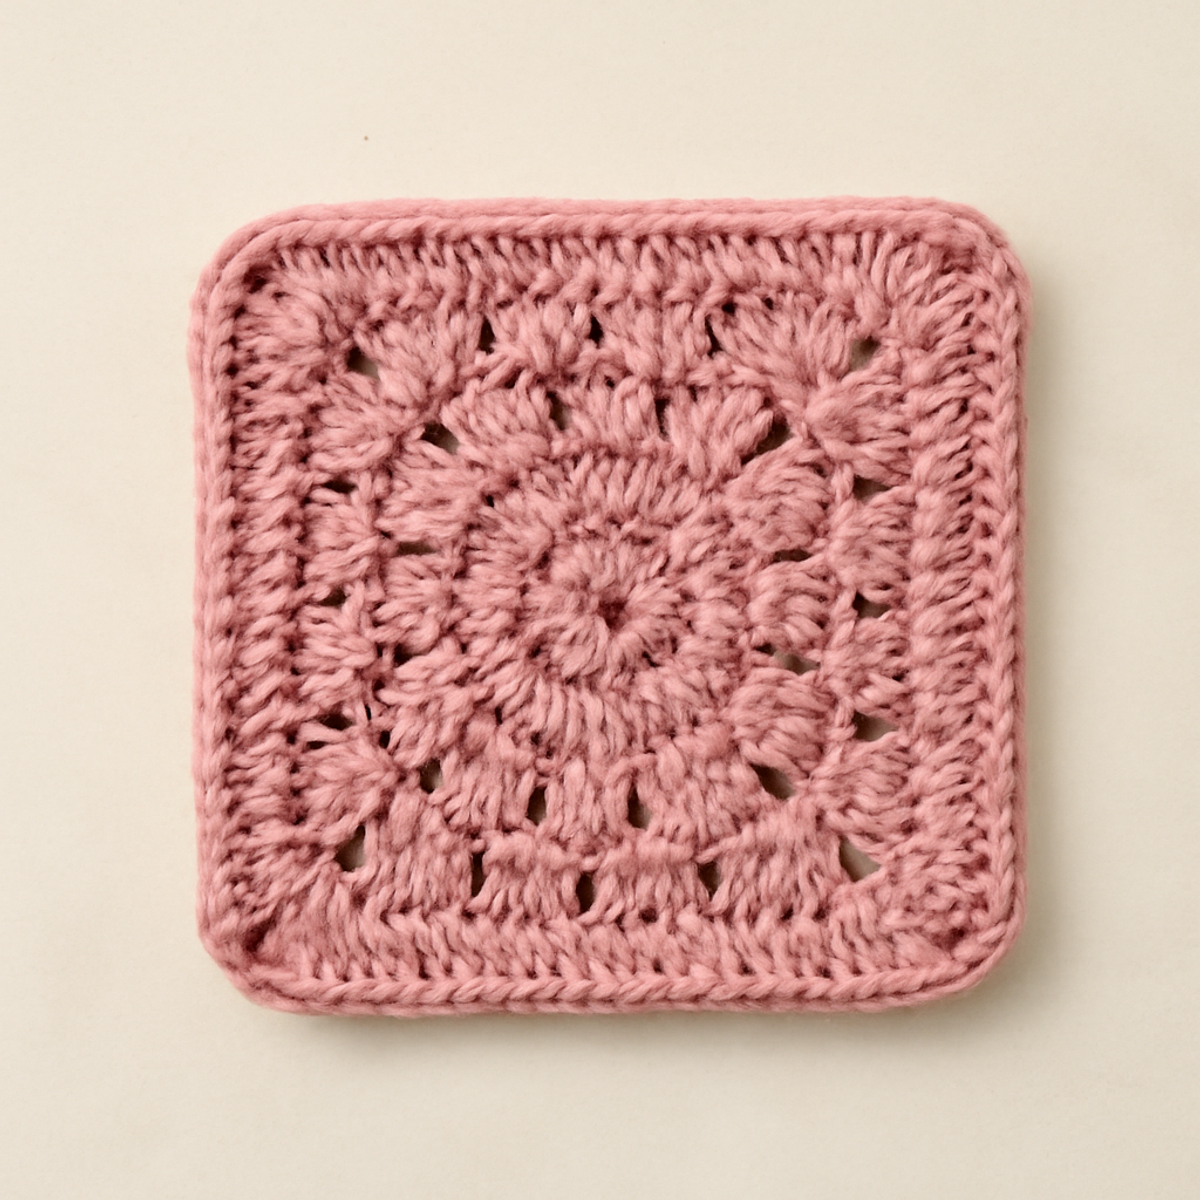
Cozy Granny Square Crochet: Quick & Charming Designs

August 22, 2026 by Publisher Leave a Comment

Cozy Granny Square Crochet: Quick & Charming Designs

There’s something undeniably comforting about the rhythmic click of a crochet hook meeting soft yarn, transporting me back to sunlit afternoons spent discovering new stitches. Today, I'm thrilled to share a pattern that embodies the magic of crochet—the Charming Pink Granny Square. This classic granny square crochet project is not just a pastime; it’s an invitation to unleash your creativity and explore endless possibilities. Perfect for beginners and seasoned crafters alike, each square works up quickly and can be customized to fit your unique style. With its timeless design, you’ll not only gain valuable crafting skills but also create cozy blankets, chic cushion covers, or trendy bags that reflect your personality. Let’s dive into this delightful journey and discover how your crochet hook can transform simple yarn into the heart of your next cherished project!

Charming Pink Granny Square Materials & Tools

  • Medium Weight Yarn (Worsted, 4-ply) – You'll need approximately 100-150 yards to create several granny square crochet pieces, keeping designs cozy and vibrant.
  • 4.0 mm (G/6) Hook – This size is perfect for achieving the right tension and stitch definition essential for your granny squares.
  • Scissors – Handy for cutting yarn and trimming any excess when finishing your projects.
  • Yarn Needle – Great for weaving in ends and securing your beautiful granny squares for a polished look.

Why Embrace the Granny Square Crochet?

Endless Creativity: The granny square crochet is a gateway to infinite design possibilities, allowing you to play with colors and patterns.

Beginner-Friendly: Perfect for novices, it teaches essential stitches in an approachable way, promoting confidence as you grow your skills.

Quick Projects: Each square works up rapidly, making it ideal for last-minute gifts or cozy additions to your home.

Versatile Applications: From blankets to bags, the options are endless, letting you customize each piece to suit your unique style.

Timeless Aesthetic: This pattern beautifully blends traditional charm with modern flair, ensuring your creations remain stylishly relevant for years to come.

Gauge & Sizing Notes

Don't skip the gauge swatch! Checking your tension is crucial for ensuring your Charming Pink Granny Square crochet project turns out just right. A common guideline for granny square crochet is to achieve a gauge of 4×4 inches (10×10 cm) measuring approximately 12 double crochets by 6 rows. If you find your square is smaller than this, try using a larger hook size to loosen your stitches. To adjust the size of your granny square, increase your starting chain in multiples of 3 for wider squares or decrease for a smaller square. Remember, the joy of crochet comes from making it uniquely yours, so don’t hesitate to experiment!

Step-by-Step Pattern for Charming Pink Granny Square

Row 1: Magic Ring & Initial Cluster
Begin by creating a magic ring. Chain 3 (counts as your first double crochet), then work 2 dc into the ring. Next, ch 2, and make 3 more dc into the ring. Repeat this process until you have four groups of 3 dc and end with a ch 2. Pull the ring tight and join with a sl st to the top of the initial ch 3 (12 sts).

Round 2: Expanding the Clusters
Slip stitch into the first ch-2 space of the previous round. Chain 3, then work 2 dc, ch 2, and 3 dc all into the same space. Move to the next ch-2 space and repeat the same cluster (3 dc, ch 2, 3 dc) for a total of four corner clusters. After finishing, join with a sl st to the top of the chain 3 (24 sts).

Round 3: Additional Round of Clusters
Slip stitch into the first ch-2 space again. Start with a chain 3, then 2 dc into the same space, followed by a ch 2 and 3 dc in the corner space. Now, for the sides, in the next space between clusters, work 3 dc. Continue alternating corners and sides around the square, joining with a sl st to complete the round (36 sts).

Round 4: Corner Adjustments & Edging
Moving forward, slip stitch into the corner ch-2 space. Again, chain 3 and work 2 dc, ch 2, 3 dc to form the corners. When you reach the side spaces, insert 3 dc between the corner clusters. Repeat around until you return to the start, and join with a sl st (48 sts). Your granny square crochet should now start to take shape!

Step 5: Finalizing the Square
To finish, slip stitch to the corner space. Chain 1 and sc in the same space, then sc around the entire square. In the corners, work (sc, ch 1, sc) to maintain the shape. When you reach the starting point, join with a sl st. Cut the yarn and weave in ends using your yarn needle to ensure a clean finish. Your Charming Pink Granny Square should now be complete, ready for various projects!

What to Pair with Charming Pink Granny Square

Crafting a matching collection can elevate your crochet journey, transforming everyday items into a beautiful ensemble.

  • Cozy Blanket: Create a stunning throw that brings warmth and vibrancy, perfectly utilizing those charming granny squares.
  • Matching Cushion Covers: Pair your squares with chic cushion covers to bring a cohesive aesthetic to your living space.
  • Stylish Tote Bag: Turn your granny square into a trendy bag, a practical yet stylish accessory for your everyday adventures.
  • Charming Coasters: Quick and functional, these coasters can beautifully tie your room together, showcasing the whimsy of your granny squares.
  • Colorful Bunting: Craft a delightful garland that allows you to celebrate with vibrant color combinations pulled from your squares.

Each of these ideas invites you to explore creativity while continuing your journey with granny square crochet!

Expert Tips for Granny Square Crochet

  • Count Carefully: Always count your stitches at the end of each round. Losing count can lead to uneven sides or an incorrect shape.

  • Check Tension: If your squares are coming out too tight or too loose, try using a larger hook or relaxing your grip on the yarn. Consistent tension is key to harmonious granny square crochet.

  • Block for Perfection: Gently block your finished squares to achieve crisp edges and an even shape. This will elevate the overall look and ensure they fit perfectly in your project.

  • Secure Your Ends: Remember to weave in any loose ends as you go along. This prevents unraveling and gives your finished piece a neat appearance.

  • Practice Patience: If you make a mistake, don’t be discouraged. Simply frog the stitches and try again! Embrace the journey of learning with granny square crochet.

Granny Square Crochet Variations

Explore the magic of customization by transforming your granny squares into something uniquely yours!

  • Yarn Substitutions: Swap medium weight yarn for cotton for a breathable summer touch. Ideal for warm weather projects!

  • Color-Blocking Magic: Create bold contrasts by using two or more colors in each square, embracing artistic flair with every stitch.

  • Bulky Twist: Opt for bulky yarn for a cozier, thicker square that works up quickly, perfect for snuggly blankets and winter wear.

  • Sizing Adjustments: Change your hook size or add more rounds to enlarge your squares, enabling endless project possibilities and personalized sizes.

  • Textural Touch: Incorporate fun textures by adding a pom-pom or fringe around the edges for a whimsical finish that speaks to your style.

  • Rainbow Effect: Craft a series of squares in a gradient, blending colors like a rainbow. This beautiful visual will add cheerful charm to any project.

  • Decorative Borders: Enhance your squares with a decorative border in a contrasting color to frame your work beautifully, elevating the overall design.

  • Mixed Fiber Adventure: Explore using a blend of fibers such as bamboo or wool to experience varying textures and drape that bring your squares to life.

How to Wash and Care for Your Granny Square Crochet

Machine Washing: Use cold water and a gentle cycle to preserve the integrity of your granny square crochet. Avoid agitation to prevent pilling and felting of the yarn.

Hand Washing: For a more delicate approach, hand wash your finished project in cold water. Gently swish the piece without wringing it out, which helps maintain its shape and texture.

Drying/Blocking: Lay your granny square flat on a clean towel to air dry. Avoid hanging, as this can distort its shape. Blocking your square will enhance its crisp edges and overall appearance.

Storage: Keep your finished squares in a cool, dry place, ideally in a cotton or linen bag. This helps protect your beautiful creations from dust and moisture, keeping them fresh for your next project.

Charming Pink Granny Square FAQs

Can I use a different type of yarn than medium weight for my granny square crochet?
Absolutely! While medium weight (worsted, 4-ply) yarn is ideal for a soft yet structured finish, you can experiment with other types, like cotton for a summer-friendly square or bulky yarn for a cozier effect. Just remember to adjust your hook size accordingly for the best results!

How do I make my granny square bigger or smaller?
Don't panic! To increase the size, simply add more rounds following the same cluster pattern. For a smaller square, you can reduce the number of rounds or use a smaller hook, but keep in mind that the final look may change slightly with your adjustments.

Why is my granny square curling at the edges?
This is a common issue for beginners! It usually results from working too tightly or not having enough stitches in each round. Try loosening your grip on the yarn or using a larger hook to achieve a more relaxed tension. Remember, practice makes perfect!

What’s the best hook size to use for granny square crochet?
For the Charming Pink Granny Square, I recommend a 4.0 mm (G/6) hook, as it strikes a great balance for most worsted weight yarns. If you're using a different yarn type, you might want to adjust your hook size accordingly to maintain an even tension.

How do I fix dropped stitches in my granny square?
It's an easy fix! Just grab your yarn needle and carefully pull the dropped stitch back up, then secure it in place by weaving it back through the surrounding stitches. You can also crochet a small chain to close gaps if needed.

What if my stitches don’t seem to match the pattern’s dimensions?
First, check your gauge—this is crucial for ensuring your squares turn out correctly. If they’re significantly different, try adjusting your tension or using a hook size that best matches your yarn. Consistency is key in crochet, so keep practicing!

Filed Under: Uncategorized

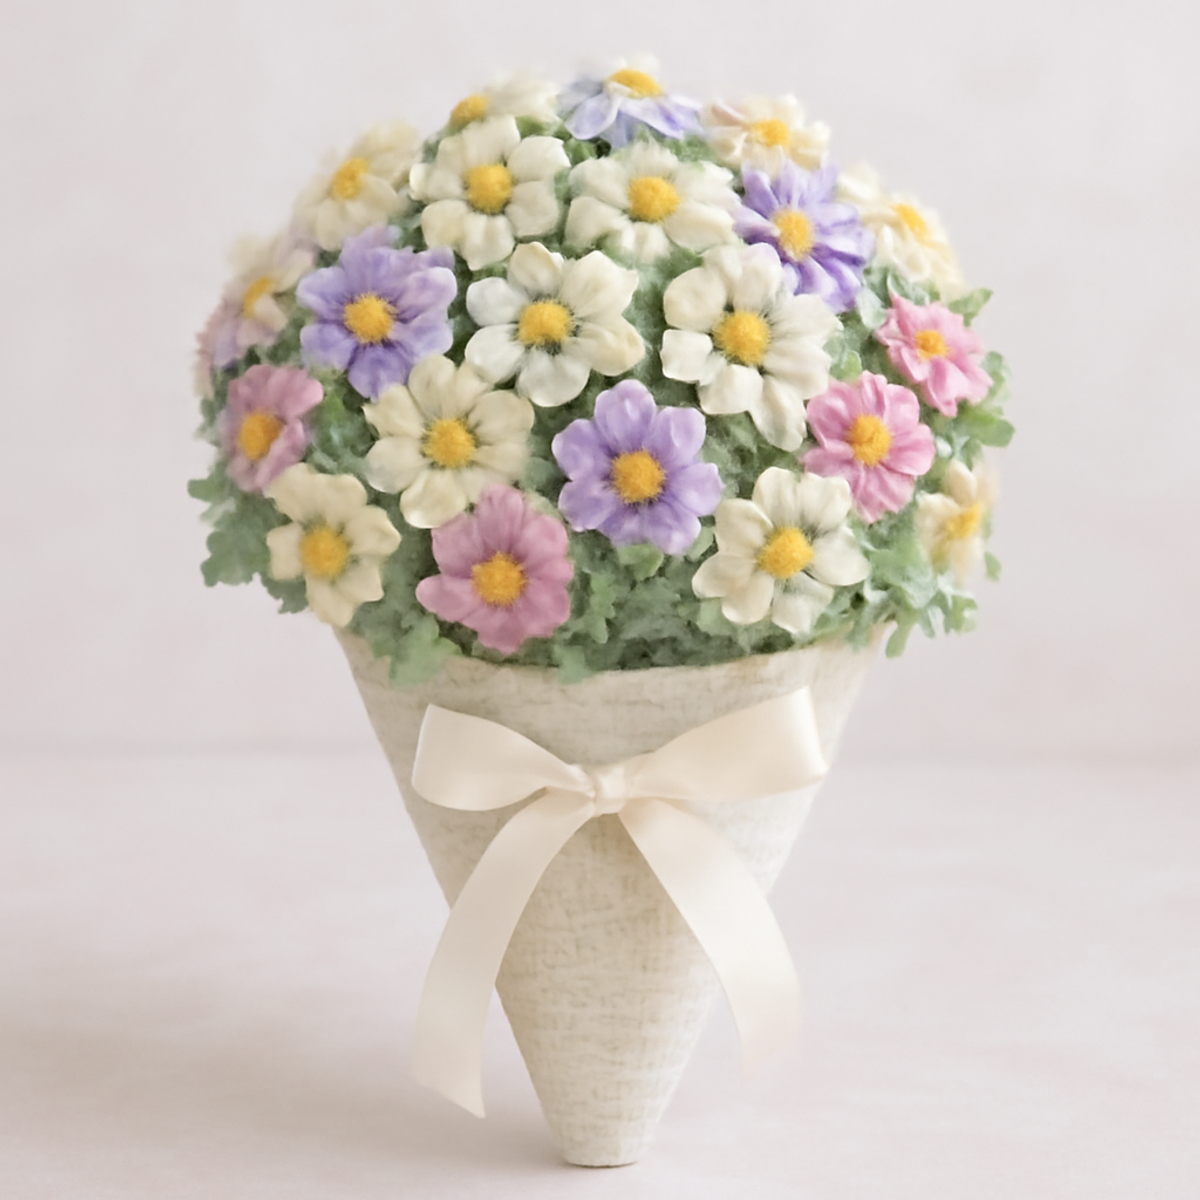
Charming Daisy Bouquet Crochet for Seasonal Decor Delight

August 22, 2026 by Publisher Leave a Comment

Charming Daisy Bouquet Crochet for Seasonal Decor Delight

As I sat on my cozy couch, the gentle light filtering through the window, I couldn’t help but be captivated by the vibrant colors of the yarn I'm about to transform into a stunning daisy bouquet crochet piece. The Charming Daisy Bouquet Blanket is more than just a decorative item; it’s a delightful project that beautifully merges intricate floral details with functional design. Perfect for those with a bit of crochet experience, this pattern not only enhances your skills but also offers a fantastic way to create a warm atmosphere in your home. With its lively textures and cheerful blooms, it makes for a thoughtful gift that’s sure to brighten anyone’s day. So grab your 5.0 mm hook and let’s dive into this joyful crafting adventure together!

Daisy Bouquet Crochet Materials & Tools

  • Worsted Weight Yarn – Use a soft acrylic or cotton blend for durability and to achieve a cozy feel; approximately 500-700 yards needed for your daisy bouquet crochet project.
  • 5.0mm (H-8) Hook – This hook size allows for clean and tight stitch formation, perfect for the intricate details of the bouquet.
  • Stitch Markers – Helpful to keep track of your rounds, especially when transitioning between the base and floral components.
  • Tapestry Needle – Essential for weaving in ends and finishing your project with a professional touch.
  • Safety Eyes (optional) – If you desire a toy-like effect for your bouquet, these can add fun charm to your creation.

Why is the daisy bouquet crochet special?

Unique Design: This pattern features an enchanting floral motif, combining the beauty of daisies with functional decor. Skill Enhancement: A perfect project for intermediate crocheters, it helps refine techniques while creating something stunning. Vibrant Colors: The lively palette evokes warmth and joy, making it a standout centerpiece. Versatile Decor: Adapt it for any season by switching up colors or flower types. Thoughtful Gift: Create a heartfelt present that's both practical and delightful, sure to bring smiles.

Gauge & Sizing Notes

Don't skip the gauge swatch! Checking your tension is crucial for the Charming Daisy Bouquet crochet project, as it ensures your creation has the right dimensions and structure to showcase those beautiful floral details. A general guideline is to aim for a crochet gauge of 14 stitches and 8 rows in a 4×4 inch (10×10 cm) swatch, but doing a test swatch with your yarn is always best. If your swatch isn't matching this size, adjust by going up or down a hook size accordingly. To make your bouquet larger, simply increase your starting chain or initial rounds in multiples of 4 to accommodate your sizing adjustments for this delightful daisy bouquet crochet pattern. Happy crafting!

Step-by-Step Pattern for daisy bouquet crochet

Row 1: Base Construction
Ch 4 and join to form a ring. Work 8 sc into the ring to create the base of your daisy bouquet crochet. Pull the tail to tighten the ring, ensuring a neat start. Your work should lay flat, and you’ll have 8 stitches (8 sts).

Row 2: Increase Round
Ch 1, then work 2 sc in each stitch around (16 sts). This will give your base a wider opening. Keep an eye on your piece; it should start to curve slightly upwards, forming the cone shape of the bouquet.

Row 3: Cone Shaping
Ch 1, sc in next stitch, inc in next stitch, repeat from * to * around (24 sts). This round will continue to widen your base while maintaining a structured shape. Your work should resemble a cup at this stage, easily holding its form.

Row 4: Taller Cone
Ch 1, sc in next 2 stitches, inc in next stitch, repeat from * to * around (32 sts). As you proceed, ensure the structure is stable and your stitches are tidy. The base should be achieving a good height for your daisy bouquet crochet piece.

Row 5: Final Cone Round
Ch 1, sc in next 3 stitches, inc in next stitch, repeat from * to * around (40 sts). The base should now feel quite sturdy, providing a solid foundation to support the blooms of the bouquet.

Row 6: Joining the Top
Ch 3 (counts as dc), dc in the next stitch and each stitch around (40 sts). This round reinforces the opening while creating a neat edge. You should see a lovely transition into the floral section, where your work is flattening at the top.

Row 7: Flower Petals – First Flower
Join a new color for the first flower. Ch 4, then in the same space, work 2 dc, ch 2, 2 dc. This creates the first petal. Skip the next 2 stitches and slip stitch to the next stitch to secure your flower petal (1 flower made).

Row 8: Additional Petals
Repeat Row 7 for each petal, creating a total of 5 petals for the first flower. After finishing the petals, the flower should appear full, blooming beautifully from the top of your daisy bouquet crochet.

Row 9: Flower Assembly
Finish off the flower and weave in ends. Attach a new yarn color to start the next flower in the same manner. Ensure each flower is distinct, enhancing the vibrant look of your bouquet.

Step 10: Adding Foliage
Using green yarn, create 3 sc in the same stitch where a flower is attached, then add 2 hdc in the next stitch (for leaves). This adds depth and richness to the overall daisy bouquet crochet project.

Step 11: Final Assembly
Once all flowers and foliage are complete, arrange them on the bouquet base and sew securely with a tapestry needle. The arrangement should feel balanced with vibrant colors popping against the green.

Step 12: Finishing Touches
Make a bow using your ribbon and attach it to the base of the bouquet to secure everything in place. The completed daisy bouquet crochet now stands as a charming decorative piece, ready to brighten any room!

Daisy Bouquet Crochet Variations

Feel free to unleash your creativity as you personalize your daisy bouquet crochet project!

  • Color Changes: Choose seasonal colors, like warm oranges for autumn or icy blues for winter, to match the vibe.

  • Flower Types: Introduce different flower shapes by experimenting with various stitches, like scalloped edges for a fresh look. Your bouquet will become a vibrant medley with delightful diversity.

  • Size Adjustments: Opt for thicker yarn and a larger hook for a bold statement or use finer yarn with a smaller hook for a charming, compact display.

  • Textured Touches: Add fun elements like soft pom-poms or fringes for a lively twist. These details elevate the visual interest and texture of your bouquet.

  • Contrasting Ribbon: Play with ribbon colors that complement your flowers for added flair. A bold ribbon can create a stunning contrast, making your piece stand out beautifully.

  • Mixed Yarn Blends: Combine different fibers within the same color palette, such as cotton and acrylic, to achieve a unique texture and sheen. This thoughtful pairing enhances the overall aesthetic.

  • Floral Layering: Create dimension by layering multiple blooms with varying heights. It allows for a dynamic arrangement that draws the eye.

  • Edge Borders: Incorporate a decorative border around the bottom of the base for a polished finish. A scalloped edge can add a whimsical touch to the entire piece.

How to Wash and Care for Your Daisy Bouquet Crochet

Machine Washing: Use cold water on a gentle cycle, avoiding any vigorous agitation to prevent felting or pilling of your daisy bouquet crochet masterpiece.

Hand Washing: If you prefer, gently hand wash in cool water. Use a mild detergent and avoid twisting or wringing to maintain the shape of your floral arrangement.

Drying/Blocking: Lay your finished piece flat on a clean towel to dry, reshaping as necessary. This helps enhance the flower shapes while preventing deformation.

Storage: Keep your daisy bouquet crochet in a cool, dry place away from direct sunlight. Consider storing it in a breathable bag to maintain its vibrant colors and texture.

Expert Tips for Daisy Bouquet Crochet

  • Maintain Tension: Consistent tension throughout the project is crucial for achieving the desired shape and look. Regularly check your gauge to avoid any surprises.

  • Use Stitch Markers: These handy tools help you keep track of your rounds, especially when shifting from the base to the floral section of your daisy bouquet crochet.

  • Count Carefully: Miscounts can lead to uneven layers; take your time and count each stitch as you go to ensure precision in your floral arrangement.

  • Post-Production Blocking: Don't skip this step! Blocking your finished piece enhances the flower shapes and helps flatten any bumps, giving your bouquet a polished finish.

  • Secure Weaving: When finishing, ensure all ends are woven in securely to maintain the integrity of your daisy bouquet crochet and avoid any unraveling.

What to Pair with Charming Daisy Bouquet Blanket

As you craft your delightful daisy bouquet crochet, consider building a harmonious set that enhances your blooming home ambiance.

  • Matching Pillows: Create cozy pillows adorned with the same floral stitch, perfect for snuggling up with your blanket.

  • Blooming Coasters: Small, cheerful coasters that mimic the daisy pattern will keep your surfaces bright and charming.

  • Floral Garland: A whimsical crochet garland of daisies and leaves to hang across your mantel or a wall, tying the decor together beautifully.

  • Spring Table Runner: Add a touch of elegance to your dining area with a table runner featuring floral motifs that mirror your bouquet's aesthetic.

  • Charming Tote Bag: Craft a tote that showcases the daisy design, making it both functional and stylish for your next crafting adventure.

Each of these projects perfectly complements your daisy bouquet crochet, offering a joyful crafting journey full of warmth and creativity!

Daisy Bouquet Crochet FAQs

Can I use a different yarn than what's recommended?
Absolutely! While the pattern suggests a medium (Worsted, Category 4) acrylic or cotton blend, you can certainly substitute it with another yarn. Just make sure to check the gauge, as a different weight may change the final look and feel of your daisy bouquet crochet.

How can I adjust the size of my daisy bouquet crochet?
Don't panic! You can easily modify the size by changing your yarn weight and hook size. Using a thicker yarn with a larger hook will create a more substantial piece, while lighter yarn and a smaller hook will yield a more delicate bouquet. Experimenting with these variables allows you to create a size that perfectly suits your space.

Why is my work curling at the edges?
This is a common issue! Curling often occurs when stitches are too tight or when there's an imbalance in stitch types. To fix this, consider loosening your tension and using stitch markers for better stitch placement. If you've already completed the piece, blocking after finishing can also help flatten it out beautifully.

What hook size should I use for the daisy bouquet crochet?
For this project, a 5.0 mm (H-8) hook is recommended, as it allows for neat and tight stitches. However, if you find your stitches are too tight or too loose, feel free to size up or down a hook for a more comfortable crocheting experience!

How do I fix dropped stitches in my floral arrangement?
It's an easy fix! Gently pull the loose yarn until the dropped stitch is at the right level. Use a tapestry needle to reinsert the yarn back through the affected stitch in the same row. If you're unsure, revisiting the row and picking up the dropped stitch with the hook can help you avoid gaps in your lovely daisies.

Can I customize the flowers to use different types?
Of course! Feel free to experiment with various flower shapes and stitch techniques to create a more personalized bouquet. Try adjusting petal shapes or using diverse stitch patterns to give each flower its unique charm in your daisy bouquet crochet project!

Filed Under: Uncategorized

Blooms of Joy: Crochet Bouquet Blanket for Cozy Decor

August 22, 2026 by Publisher Leave a Comment

Blooms of Joy: Crochet Bouquet Blanket for Cozy Decor

As the sun shines brighter and the flowers bloom, I can't help but indulge in the joy of spring and its vibrant colors. This crochet bouquet blanket captures that essence perfectly, transforming a cozy accessory into an enchanting statement piece for your home. With a delightful lavender center, surrounded by whimsical floral embellishments, this project is not only a feast for the eyes but is also functional—keeping you warm while adding a pop of charm to your decor. What’s wonderful about this crochet bouquet blanket is that it caters to your creativity, allowing you to showcase your skills while crafting a unique gift for your loved ones. So, if you're ready to elevate your crochet game and create something truly special, let’s dive into this beautiful pattern together!

Crochet Bouquet Blanket Materials & Tools

  • Worsted Weight Yarn – Approximately 800-1000 yards for this cheerful crochet bouquet blanket in your choice of pastel shades.
  • 5.0-6.0 mm (H-J) Hook – Use this size to ensure a soft and manageable texture perfect for creating that inviting finish.
  • Stitch Markers – Essential for tracking rounds as you craft your beautiful floral motifs and ensure the blanket stays in shape.
  • Yarn Needle – A handy tool for weaving in ends and finishing your crochet bouquet blanket with precision.

Why Love the Crochet Bouquet Blanket?

Stunning Visual Appeal: This crochet bouquet blanket features a whimsical lavender center embellished with charming floral motifs, making it a gorgeous focal point in any room.

Soft & Plush Texture: Crafted using half double crochet and puff stitches, this blanket provides a soft, inviting texture that’s perfect for snuggling.

Functional Art Piece: Not only does it keep you warm, but its unique design also adds a stylish touch to your home decor, striking the perfect balance between comfort and artistry.

Ideal Gift Option: This blanket is a delightful and unforgettable gift for special occasions, showcasing your thoughtfulness and creativity.

Customizable Design: Explore your artistic side by changing colors and adding seasonal themes, allowing you to tailor this project for any personal style or occasion.

Gauge & Sizing Notes

Don't skip the gauge swatch! Ensuring your tension is accurate is crucial for achieving the desired size and texture in your stunning crochet bouquet blanket. A standard gauge for this project is roughly 4×4 inches (10×10 cm), which you can gauge with the half double crochet stitch; aim for about 14 hdc by 8 rows. If you'd like to make your blanket larger, simply increase your starting chain in multiples of 6 + 2 for increased width, maintaining the same floral motifs. If your swatch turns out smaller, consider going up a hook size to adjust your tension appropriately. Happy crocheting!

Step-by-Step Pattern for Crochet Bouquet Blanket

Row 1: Center Creation
Begin by making a magic ring (or ch 4, join), then work 12 dc into the ring. Pull the loop tight and join with a sl st to the top of the first dc. Ensure it forms a flat circle; your work should start to be round and closed. (12 sts)

Row 2: Expanding Center
Ch 3 (counts as first dc), make 1 dc in the same st (inc). 2 dc in each st around, joining with a sl st to the top of the first dc. This round shapes the base and expands the center beautifully; it should resemble a larger circle now. (24 sts)

Row 3: Floral Base
Ch 3, dc in next st, 2 dc in next st (inc), continue around. This establishes a nice floral base and starts adding lovely curves to your crochet bouquet blanket. Finish by joining with a sl st to the top of the first dc. (36 sts)

Row 4: Body Transition
Ch 1, hdc in each st around. This will give the foundation for the plush texture of the blanket, transitioning smoothly from the floral center. By now, it should feel cushy and soft to the touch. Join with a sl st to the beginning hdc. (36 sts)

Row 5: Beginning the Lavender Body
Ch 2 (counts as first hdc), hdc in the same st and each st around. This round establishes the lavender body of your crochet bouquet blanket. Focus on maintaining even tension to ensure a cozy drape. Join with a sl st to the top of the beginning hdc. (36 sts)

Row 6: Adding More Lavender
Ch 2, hdc in next 2 sts, inc in next st repeat around. This will continue to add a subtle floral effect while increasing the size of the blanket. Your piece will begin to grow nicely, enhancing that inviting texture. Join with a sl st. (48 sts)

Row 7: Completing the Body
Ch 2, hdc in next 3 sts, inc in next st work around. This round builds on the earlier hue, enlarging the body while maintaining softness. Your crochet bouquet blanket should have a rounded edge and smooth flow now. Join with a sl st. (60 sts)

Row 8: Final Lavender Round
Ch 2, hdc in next 4 sts, inc in next st all around. This round completes the main lavender section, creating ample space for that playful floral border. It should look full and plush, ready for those delightful embellishments. Join with a sl st. (72 sts)

Step 9: Starting the Floral Border
Switch to your chosen flower color and ch 1. Popcorn stitch in the next st, ch 1. Skip next 2 sts. Repeat this around to form cheerful bobble flowers. Each flower should stand out, giving your crochet bouquet blanket a whimsical charm. Join with a sl st.

Step 10: Finishing the Edging
With the floral border completed, switch back to lavender (or your chosen border color). Sc in each ch 1 space, and sl st in each popcorn stitch. Last round solidifies the floral look while providing a cute scalloped edge. The blanket is almost complete! Join and finish off.

Step 11: Assembly (if needed)
If your crochet bouquet blanket was made in sections, align the pieces, whip stitch or sl st whip join the edges, ensuring structures are seamless. Blocking is recommended here to even out waves and pits formed during stitching.

Step 12: Final Touches
Weave in all loose ends securely and consider lightly steaming to block, guiding the blanket into its final shape. Your stunning crochet bouquet blanket is finished, perfectly adding warmth and elegance to any space!

Care Instructions for Crochet Bouquet Blanket

  • Machine Washing: Use cold water on a gentle cycle to avoid agitation. This will help preserve the integrity of your crochet bouquet blanket while keeping it clean and fresh.

  • Hand Washing: For delicate care, hand wash your blanket in cold water with mild detergent. Gently squeeze to remove excess water without wringing, ensuring the floral motifs stay intact.

  • Drying/Blocking: Lay your blanket flat to dry on a clean surface, reshaping the edges as needed. Blocking the finished piece will help set its final shape, enhancing its plush texture.

  • Storage: Store the crochet bouquet blanket folded in a dry, cool place. Consider placing it in a breathable bag to keep it safe from dust while allowing air circulation.

What to Pair with Beautiful Bouquet Crochet Blanket

Create a wonderfully cohesive collection that transforms your space and showcases your creative flair!

  • Matching Floral Pillows: Add cozy accents to your sofa with pillows showcasing the same lovely floral motifs, for a harmonious look.
  • Whimsical Coasters: Protect your surfaces with coasters featuring mini versions of the flowers; functional yet charming in every way.
  • Charming Basket: Craft a lovely storage basket in complementary colors to hold your yarn, completing your decor with a touch of whimsy.
  • Bright Table Runner: Create a festive table runner inspired by the blanket's design to brighten up your dining or coffee table.
  • Sweet Gifts Set: Pair the blanket with a crocheted mug cozy and matching coffee cup; it's a delightful gift that radiates warmth and love.

Crochet Bouquet Blanket Variations

Embrace your creativity by customizing this crochet bouquet blanket to reflect your personal style and unique flair.

  • Color Changes: Experiment with different pastel shades like mint green or blush pink to create a fresh feel.
  • Yarn Substitutions: Swap acrylic for cotton for a lighter, breathable blanket perfect for warmer months.
  • Gradient Yarn: Use gradient yarn to provide a beautiful color transition throughout the blanket, adding depth and intrigue.
  • Larger Size: Increase the diameter to create a larger throw, or even use it as a bedspread for a cozy ambiance.
  • Seasonal Themes: Craft roses in seasonal colors to celebrate different occasions, making it festive year-round.
  • Texture Additions: Enhance the blanket's ambiance by adding textured elements, such as pom-poms or fringes along the edges.
  • Fringe Edging: Create an eye-catching fringe finish around the edge, adding a whimsical touch to this piece.
  • Border Modifications: Experiment with different crochet border styles, like scalloped or shell stitches, to infuse personality into your design.

Let your imagination bloom as you put your spin on this enchanting crochet bouquet blanket!

Expert Tips for Crochet Bouquet Blanket

  • Track Your Rounds: Keeping a close count will prevent losing your place as the blanket expands, helping avoid frustration and ensuring an even finish.

  • Consistent Tension: Maintain an even tension throughout your work to prevent puckering. Blocking the finished piece will help set its shape beautifully.

  • Practice Puff Stitches: Before attaching the roses, practice creating puff stitches separately to gain confidence with this technique, ensuring they look stunning on your crochet bouquet blanket.

  • Seam with Care: If your blanket is made in sections, take your time to seam them together carefully, so your design remains seamless and polished.

  • Weave Ends Securely: Don’t forget to secure all loose ends as you finish off; this will enhance the blanket's durability and overall appeal, showcasing your craftsmanship.

Crochet Bouquet Blanket FAQs

Can I substitute yarn for this crochet bouquet blanket?
Absolutely! You can swap out worsted-weight acrylic with cotton for a different texture. Just ensure the weight matches so your gauge stays consistent; this will help maintain the overall look and feel of your beautiful design.

How can I adjust the size of the crochet bouquet blanket?
If you want to make it bigger, simply add more rounds to the main body before starting the floral border. For a smaller version, you can omit some rounds or use a lighter yarn with a smaller hook size to maintain that plush texture. Just keep an eye on your stitch count for uniformity!

Why is my crochet bouquet blanket curling at the edges?
Don't panic! Curling often happens due to inconsistent tension or gauge. Make sure you are maintaining an even tension throughout your work. Blocking the blanket after completion will help set its shape beautifully, eliminating those pesky curls.

What size hook should I use for the crochet bouquet blanket?
For this project, a hook size between 5.0 and 6.0 mm (H-J) is recommended. This size is perfect for achieving that soft, manageable texture while allowing you to easily manipulate the stitches required for the floral designs.

How do I fix dropped stitches in my crochet bouquet blanket?
It's an easy fix! Simply use a crochet hook to reach down to where you dropped the stitch and pull the working yarn through to create the missing stitch. Be gentle, as this will help maintain the overall integrity of your work. If you're unsure, practice on a swatch first!

Can I mix different colors for the floral motifs?
Absolutely! Feel free to express your creativity by using different colors for the roses. Mixing pastel shades or even adding vibrant hues will give your crochet bouquet blanket a unique twist, tailored to fit any season or personal style!

Filed Under: Uncategorized

Adorable Amigurumi Frogs: A Fun, Easy Crochet Project

August 22, 2026 by Publisher Leave a Comment

Adorable Amigurumi Frogs: A Fun, Easy Crochet Project

There's something undeniably charming about a collection of whimsical amigurumi frogs hopping into your home! I've been enchanted by the joy these little critters bring, and creating them is a delightful adventure for crocheters of all skill levels. Perfect for beginners and more experienced crafters alike, this playful crochet project allows you to express your creativity while producing unique companions that add a splash of color to any room. Not only do these frogs make memorable gifts for kids and animal lovers, but their cuddly texture and cheerful appearance will surely brighten anyone's day. With a lightweight yarn that's easy to handle, you'll find the crafting process as enjoyable as the end result. Are you ready to dive into this crochet journey and let your imagination leap to life?

Amigurumi Frogs Materials & Tools

Get ready to hop into crafting with these delightful materials for your amigurumi frogs!

Yarn

  • Worsted Weight Yarn – Approximately 100-150 yards of 100% acrylic offers vibrant color and softness ideal for your frogs.

Tools & Notions

  • 4.0-5.0mm (G/H) Crochet Hook – This size is perfect for ensuring your stitches are snug yet comfortable.
  • Safety Eyes (10-12mm) – Use these to bring your frogs to life with personality and charm!
  • Stuffing Material – Choose soft stuffing to ensure your frogs are cuddly and huggable.

Why Make Amigurumi Frogs?

Endearing Companions: Amigurumi frogs are not just cute; they bring a smile to everyone who sees them, making them perfect for home decor or thoughtful gifts.

Beginner-Friendly: This project is crafted with simple stitches like single crochet, making it an excellent choice for those just starting their crochet adventure.

Colorful Creations: Use vibrant, worsted weight yarn to create frogs that pop in any space, adding a playful touch to your surroundings.

Customizable Designs: Enjoy personalizing each frog with unique colors, expressions, and accessories, so every creation tells its own story.

Joyful Crafting Experience: Both the process and the finished product offer a satisfying way to express your creativity and bring joy to your loved ones.

Gauge & Sizing Notes

Don't skip the gauge swatch! Checking your tension is vital for ensuring your adorable amigurumi frogs turn out just the right size—too loose or too tight can change the entire look. As a general guideline, aim for a gauge of 4×4 inch (10×10 cm) to roughly achieve 16 single crochets by 20 rows. If your swatch is smaller, consider going up a hook size; if it's larger, try a smaller hook. To adjust the size of your frogs, simply increase your starting chain or rounds in multiples of 6 to make them wider, or skip a few rounds for a petite version. Happy crocheting with your amigurumi frogs!

Step-by-Step Pattern for Amigurumi Frogs

Row 1: Create the Body Base
Begin your amigurumi frogs by making a magic ring and working 6 sc into it (6 sts). Pull the magic ring tight to close. This initial round sets the foundation for your frog’s body. Your work should resemble a small pouch, ready for more rounds.

Row 2: Increase for Bulbous Shape
In Round 2, crochet 2 sc in each stitch around (12 sts). This increase creates the rounded, bulbous shape of your frog’s body. As you work, your piece should start to round out into a small dome, forming the main structure.

Row 3: Continue Shaping the Body
For Round 3, work 1 sc in the next stitch, inc repeating around (18 sts). This step helps expand the body slightly, maintaining a lovely curvature while keeping it even. Your amigurumi frogs should appear more pronounced and stable at this stage.

Row 4: Adding More Rounds
In Round 4, crochet 1 sc in the next 2 stitches, inc around (24 sts). Continue shaping the body while ensuring there's enough space for stuffing later. Your work will appear wider now, setting the stage for the playful design.

Row 5: Build Up the Height
Work Round 5 by crocheting 1 sc in each stitch around (24 sts). This round keeps the shape consistent and helps develop the frog’s body height. You should notice it looking fuller and more playful as you add bulk to the height.

Row 6: Start the Decrease
In Round 6, crochet 1 sc in the next 2 stitches, dec around (18 sts). This decrease begins tapering the body towards the top, enhancing the characteristic shape of your amigurumi frogs. The top should start to close up slightly.

Row 7: Finish the Body
Continue with Round 7, working 1 sc in the next stitch, dec around (12 sts). This tapering creates a distinct finish to the body, making it wonderfully rounded while leaving space for stuffing. The shape should now look like the top of a frog.

Row 8: Complete Body Closure
For Round 8, finish by crocheting 6 dec (6 sts). This final round secures the body shape and keeps the stuffing from escaping. Your amigurumi frogs shouldn’t feel too stuffed yet—just firm enough to hold the form.

Step 1: Create the Legs
To craft the legs, make a magic ring and crochet 4 sc into it (4 sts). This sets the foundation for a cute, tucked-away frog leg. Your work should look small and circular, representing the starting point for each limb.

Step 2: Shape the Legs
Round 2 of the leg involves working 2 sc in each stitch around (8 sts). This round gives your amigurumi frogs a nice bulk to the limbs, which will be attached later. Once complete, it should resemble a little pouch shape.

Step 3: Define the Leg Length
For Round 3, work 1 sc in each stitch around (8 sts). This round will lengthen the leg, making it more frog-like. You should see the legs taking shape while remaining snug and cute.

Step 4: Finish the Legs Off
In Round 4, crochet 4 dec (4 sts) to close off your leg pieces. Fasten off, leaving a long tail for sewing. Repeat this for the second leg. At this point, the legs should appear rounded and compact, making them charming additions to your frogs.

Step 5: Create the Eyes
To make the eyes, create a magic ring and crochet 6 sc (6 sts) into it. These small circles will give your amigurumi frogs personality. They should resemble tiny buttons, ready to be adorned on the face.

Step 6: Shape the Eyes
Work Round 2 for the eyes, crocheting 2 sc in each stitch around (12 sts). This adds a bit of dimension to the eyes, making them pop against the frog’s body. They should now look round and cute, perfect for your finished frog.

Step 7: Assemble the Frog
Using the long tail, sew on the legs securely to the body, positioning them where desired. This process adds character and stability to your amigurumi frogs, ensuring they look balanced and lively. Your frog should now have lovely limbs!

Step 8: Attach the Eyes
Sew the eyes onto the face securely and embellish them with safety eyes or additional stitching for detail. Position them to give each amigurumi frog its unique expression. After this step, your frogs will finally look alive and ready to play!

Amigurumi Frogs: Creative Customizations

There's so much joy in making these charming amigurumi frogs your own! Let your imagination leap as you explore fun variations to personalize your creations.

  • Yarn Weight Swaps: Experiment with lighter or heavier yarns to create frogs of varying sizes, from petite pals to large, huggable companions. Adjusting the yarn weight adds a playful twist and can help your frogs stand out among other special creations.

  • Fiber Alternatives: Consider using cotton yarn instead of acrylic for a more textured finish. The natural fibers provide a different feel, making them perfect for warmer weather or adding an artisanal touch that elevates the overall aesthetic.

  • Color-Blocking Fun: Try color-blocking your frogs by working in sections of contrasting hues. Imagine a vibrant green frog with blue limbs and a yellow belly—such a delightful way to give personality!

  • Dynamic Eye Shapes: Experiment with different sizes and shapes for the eyes—perhaps oversized button eyes for a cuter effect or sleek safety eyes for a more polished look. Each choice delivers its own unique expression that can bring your frogs to life.

  • Whimsical Accessories: Add charm by crocheting tiny hats, scarves, or little bowties for your amigurumi frogs. Personalized accessories not only enhance their cuteness but also tell a little story about each character's personality.

  • Textured Additions: Introduce texture by adding a fringe or pom-poms to your frogs. These delightful embellishments create fun visual interest and distinction among your adorable creations.

  • Size Variations: Adjust the stitch counts and rows to create frogs in different dimensions. What about a family of frogs in different heights? You can craft them in assorted sizes to hop around together, adding whimsy to your decor.

  • Playful Patterns: Use self-striping or variegated yarns to create unique patterns on your frogs. This allows for spontaneous designs that can spark joy and inspire further creativity with each stitch.

Expert Tips for Amigurumi Frogs

Watch Your Tension: Ensure that your tension is consistent throughout your project. This prevents discrepancies in stitch sizes, leading to a smoother finish for your amigurumi frogs.

Count Your Stitches: Keep track of your stitch counts after each round. Losing count can lead to misshaped bodies, so marking your rounds can streamline your crafting process.

Space Your Increases: Pay attention to evenly spacing your increases. This will help maintain the intended shape for your frogs and avoid any lopsided or uneven forms.

Secure Assemblies: When sewing on limbs and eyes, make sure to secure them tightly. Loose attachments can lead to detachment or wobbling, diminishing the charm of your amigurumi frogs.

Final Touches: Don't skip blocking! It can greatly enhance the overall look by shaping the limbs and ensuring your pieces maintain uniformity.

Care Instructions for Amigurumi Frogs

Machine Washing: Use cold water on a gentle cycle if needed. Always place your amigurumi frogs in a mesh laundry bag to prevent snagging or damage during the wash.

Hand Washing: For the best care, gently hand wash your frogs in cold water with mild soap. Avoid agitating the fabric to prevent any unwanted felting or pilling.

Drying/Blocking: Lay your amigurumi frogs flat on a clean, dry towel to retain their shape while drying. Never wring them out; let them air dry naturally to maintain their cheerful forms.

Storage: Store your amigurumi frogs in a cool, dry place, away from direct sunlight to keep their colors vibrant and prevent any fading over time. Treat these delightful creations with care, so they can continue to bring joy to your home!

What to Pair with Whimsical Amigurumi Frogs?

Imagine creating a charming ensemble to showcase your playful amigurumi frogs and bring a whimsical touch to your home!

  • Crochet Lily Pads: These vibrant green pads provide a perfect backdrop for your frogs, enhancing their playful charm.
    With an easy pattern, you can create soft, supportive lily pads that make your frogs feel right at home!

  • Amigurumi Bugs: Craft delightful bugs like ladybugs or dragonflies for your frogs to interact with.
    These tiny pals add elements of fun and storytelling, sparking joy in the hearts of everyone who sees them!

  • Miniature Flowers: Brightly colored flowers can be crocheted to complement your frogs beautifully.
    Use them as delightful decorations or gifts, enhancing the cheerful ambiance of your creations.

  • Decorative Baskets: Create cute baskets to hold your frogs or other small amigurumi companions.
    Not only are they practical, but they also add to the rustic charm of your whimsical collection.

  • Crochet Frog Costumes: Design tiny hats or tiny accessories for your frogs to wear!
    Personalizing them with little outfits will give each frog a unique character, making your crafting experience even more enjoyable.

Amigurumi Frogs FAQs

Can I use a different yarn weight for my amigurumi frogs?
Absolutely! While worsted weight yarn is recommended for this project, you can experiment with other yarn weights. Just remember that using a lighter yarn will result in smaller frogs, while a heavier weight will make larger ones. Adjust your hook size accordingly to ensure your stitches remain consistent.

How do I make my amigurumi frogs bigger or smaller?
To adjust the size of your amigurumi frogs, you can change the yarn weight and corresponding hook size. For instance, if you switch to bulky yarn and a larger hook, the finished product will be more substantial. Alternatively, you can modify the number of rounds in the body and limbs to create frogs of various dimensions.

Why is my crochet work curling?
Don't panic! Curling can happen for a few reasons, especially with amigurumi projects. It’s often due to tight stitches or not using enough increases. Make sure your tension is even and check your stitch counts. If your piece curls, you may also try using a larger hook to help relax the fabric.

What should I do if I accidentally drop a stitch?
It’s an easy fix! Just use a small crochet hook or a knitting needle to pick the dropped stitch back up. Gently pull on the loop to reinsert it into your work, and then continue crocheting. If you find that the dropped stitch affects the shape, consider reinforcing the area with a few extra stitches.

What hook size should I use for making amigurumi frogs?
For this project, a 4.0-5.0 mm crochet hook (G/H size) works best. This size allows for tight enough stitches to keep your stuffing from showing while still being comfy to handle. If you’re using a different yarn weight, be sure to adjust the hook size accordingly to match the yarn’s gauge.

Filed Under: Uncategorized

Charming Crochet Chicken Plush: Whimsical Amigurumi Delight

August 22, 2026 by Publisher Leave a Comment

Charming Crochet Chicken Plush: Whimsical Amigurumi Delight

Sitting comfortably with my yarn and hook, I couldn't help but smile at the thought of crafting Mama Mabel, the adorable crochet chicken plush. This whimsical design not only adds a delightful touch to any home décor but also doubles as a playful companion for kids. Perfect for those with intermediate to advanced amigurumi skills, this project is an exciting opportunity to dive into the world of crochet chicken plush making. One of the joys of this pattern is its versatility; you can personalize it with your favorite colors and embellishments to create a cherished keepsake. Plus, the soft, cuddly texture will surely make it a beloved plaything. So grab your materials, and let’s get those stitches flying as we bring Mama Mabel to life!

Crochet Chicken Plush Materials & Tools

Yarn

  • Medium Weight (Worsted) Yarn – About 100-200 yards of soft acrylic or cotton is ideal for crafting your crochet chicken plush.

Tools & Notions

  • 4.0 mm (G-6) Hook – Perfect for achieving the tight stitches needed for plush toys.
  • Stitch Markers – Essential for keeping track of rounds while crocheting in the round.
  • Safety Eyes (black beads) – Use for giving your chicken an adorable and playful gaze.
  • Tapestry Needle – Handy for weaving in ends and securing parts after assembly.

Let's get started on creating your charming Mama Mabel, the crochet chicken plush!

Why Make Your Own Crochet Chicken Plush?

Endearing Design: The Mama Mabel crochet chicken plush is crafted to be both whimsical and charming, perfect for adding character to any space.
Interactive Crafting: Enjoy the hands-on experience of making a playful companion that children will adore.
Versatile Aesthetics: Personalize your plush with vibrant or pastel shades for a unique touch that suits any decor style.
Cozy Comfort: Made from soft yarn, this plush creates a comforting texture that invites cuddles and joy.
Advanced Techniques: Dive into intermediate amigurumi skills, enhancing your crochet expertise while creating something special.

How to Check Your Gauge for Crochet Chicken Plush

Don't skip the gauge swatch! It's crucial for creating your crochet chicken plush with the right dimensions and a delightful, plush feel. Aim for a tension of about 4×4 inches (10×10 cm) that results in approximately 12 single crochets and 10 rows. To make this charming chicken plush larger, start by adjusting your initial chain in multiples of 6. If your tension isn't matching the gauge, you may need to adjust your hook size; if your swatch is too small, simply go up a hook size. Remember, achieving the right crochet gauge ensures your Mama Mabel will be perfectly cuddly and charming!

Step-by-Step Pattern for Crochet Chicken Plush

Row 1: Magic Circle and Initial Stitches
Start with a magic ring, and work 6 single crochets (sc) into the ring. Pull the ring tight to close. This forms the foundation of your crochet chicken plush's body. You should see a small circle with 6 tight stitches. Remember to use a stitch marker to keep track of the beginning of your rounds. (6 sts)

Row 2: Increasing the Body
In this round, make 2 single crochets (sc) in each stitch around for an increase. Your work should start to cup, creating the bottom shape of the chicken plush. Continue this round until you have 12 stitches. Keep your tension even for a neat appearance. (12 sts)

Row 3: Further Increases
Continue building your crochet chicken plush by making 1 single crochet (sc) in the first stitch, then 2 single crochets (sc) in the next. Repeat around the circle to increase the size. You should feel your plush expanding as you work. This round brings you to 18 stitches. (18 sts)

Row 4: Expand Further
In this round, you will do 1 single crochet (sc) in the next 2 stitches and then 2 single crochets (sc) in the following stitch. This will continue to increase the body, creating a rounded shape. Your crochet chicken plush should seem more pronounced now, totaling 24 stitches. (24 sts)

Rows 5-8: Body Forming
For the next four rows (5 to 8), simply work 1 single crochet (sc) in each stitch around without increasing. This gives your chicken plush its height but maintains the wide belly. Your project should remain consistent and rounded, measuring about 12 inches tall. (24 sts each row)

Row 9: Decreasing
Now we’ll create the neck by decreasing. In this round, make 1 single crochet (sc) in the first 2 stitches, then a decrease (dec: 2 sc together). Repeat around to shape the neck of your crochet chicken plush beautifully. You should have 18 stitches remaining. (18 sts)

Row 10: Neck Continuation
Continue working in the same manner as the last row by making 1 single crochet (sc) in the first stitch and a decrease (dec) in the next. This rounds out the neck for your plush. Your piece should feel snug, tapering down to 12 stitches. (12 sts)

Row 11: Head Start
Work a magic ring again and crochet 6 single crochets (sc) into the ring for the head. This will be attached to the neck you just created. Pull the ring tightly and place a stitch marker to define the first stitch of this new round (6 sts).

Row 12: Building the Head
Increase the head by making 2 single crochets (sc) in each stitch around. Your cute chicken's head should begin to round out nicely, gaining a fullness that mirrors its body. After this round, you'll have 12 stitches for the head. (12 sts)

Row 13: Finalizing the Head Shape
This round consists of 1 single crochet (sc) in the first stitch and 2 single crochet (sc) in the next. Repeat around to grow the head to 18 stitches. The head shape should begin to feel rounded and prominent, establishing the playful character of your crochet chicken plush. (18 sts)

Step 14: Adding Features
Before finishing your crochet chicken plush, securely attach safety eyes to the head. Choose a position that gives your plush a joyful expression. Adjust as needed to ensure they are symmetrical, enhancing the cuteness of Mama Mabel.

Step 15: Creating the Comb
Using red yarn, create a small comb using puff stitches. Start with a magic ring and work 4 puff stitches (puff, ch 1) into the ring to form the desired shape. Attach the comb to the top of your chicken's head by sewing it securely. It should stand as a whimsical feature.

Step 16: Crafting the Eggs
For the eggs, make small rounds using white yarn. Begin with a magic ring and work 4 single crochets (sc) into the ring. Fill lightly with fiberfill for added volume before closing. When complete, set the eggs around your crochet chicken plush for a charming interactive finish.

Expert Tips for Crochet Chicken Plush

Consistent Tension: Maintain even tension throughout to ensure your crochet chicken plush retains its shape and exhibits a smooth finish.

Use Stitch Markers: Place stitch markers at the beginning of each round to help keep track of your progress, preventing losing count and confusion in your pattern.

Block Your Work: Lightly block your finished plush to smooth out any irregularities. This is especially helpful around the body and head shaping areas for a polished final result.

Secure Features Properly: Ensure that safety eyes and the comb are securely attached to avoid mishaps during playtime and to enhance the overall charm of your crochet chicken plush.

Fill Eggs Lightly: When crafting the eggs, fill them lightly with fiberfill to avoid bulging. This keeps them looking adorable and proportionate next to Mama Mabel.

How to Wash and Care for Your Crochet Chicken Plush

Machine Washing: Use a gentle cycle with cold water to avoid damaging the plush texture of your crochet chicken plush. Always place it in a mesh laundry bag for extra protection.

Hand Washing: For best results, hand wash in cool water with mild soap. Gently squeeze without agitating to maintain its shape and prevent felting or pilling.

Drying/Blocking: Lay your crochet chicken plush flat on a clean towel to dry. Avoid hanging, as this may stretch the fabric. Blocking can also help restore its shape after washing.

Storage: Keep your crochet chicken plush in a cool, dry place to prevent any moisture damage. Ensure it’s stored in a breathable bag to keep dust at bay, preserving its delightful charm.

Variations & Substitutions for Crochet Chicken Plush

Embrace your creativity and personalize your crochet chicken plush in delightful ways that will truly make it shine!

  • Yarn Color Swaps: Experiment with pastel shades for a soft vibe or bold hues for a playful twist—find your perfect palette!

  • Chunky Yarn Option: Use chunky yarn to create a larger version of Mama Mabel; enjoy a plush that’s extra cuddly and eye-catching. The thick texture will also enhance its whimsical charm.

  • Fiber Alternatives: Consider bamboo or hemp yarn for an eco-friendly option, adding an earthy touch to your plush. These natural fibers will bring unique textures and hues to life.

  • Miniature Versions: Scale down the pattern to create adorable keychains or ornaments, perfect for gifts or stocking stuffers! They’ll add a charming accent wherever they hang.

  • Color-Blocking: Use multiple colors to create delightful color-block sections; let your imagination run wild as you craft a truly unique chicken plush.

  • Adding Texture: Incorporate fringe around the bottom of your plush for a playful detail or explore using bobble stitches for added dimension. It adds a wonderful tactile experience!

  • Size Adjustments: For a small toy version, reduce the hook size and use a finer yarn to create a dainty plush that is perfect for tiny hands.

  • Embellishments: Add small floral appliqués or ribbons for personalization, transforming Mama Mabel into a truly bespoke creation that echoes your unique style!

What to Pair with Mama Mabel: The Adorable Crochet Chicken

Imagine completing your whimsical chicken with delightful accessories that enhance its charm and create a cohesive theme in your space.

  • Crochet Eggs: Create a set of soft, plush eggs to nestle beside Mama Mabel, adding a playful touch perfect for any room.
  • Farmhouse Style Basket: Crochet a cute, decorative basket using the same yarn to store your crochet chicken plush and its eggs together.
  • Sunny Sunflower Coasters: These bright coasters will bring a sunny vibe, pairing beautifully with your chicken plush’s whimsical aesthetic.
  • Mini Chicken Keychain: Craft a smaller version of Mama Mabel as an adorable keychain, extending the charm of your plush into everyday items.
  • Fluffy Chicks: Add a few vibrant, mini chicks to the scene, complementing Mama Mabel and filling your space with warmth and playfulness.

As you venture into these projects, enjoy the journey of creating a lovely crochet chicken plush collection that sparks joy!

Mama Mabel: The Adorable Crochet Chicken FAQs

Can I substitute yarn for this crochet chicken plush?
Absolutely! While the pattern suggests using medium weight (worsted) acrylic or cotton yarn, you can substitute it with any similar weight fiber. Just keep in mind that different fibers may alter the final texture and drape, so each substitution brings its unique charm.

How do I make my crochet chicken plush larger or smaller?
If you'd like to resize your plush, simply adjust your hook size or yarn weight! Using a larger hook or bulkier yarn will create a bigger plush, while a smaller hook or lighter yarn will yield a more petite version. Ensure you adjust your stuffing accordingly if you pick a different size.

Why is my work curling?
Don't panic! Curling often occurs due to inconsistent tension. Make sure you maintain even tension as you work to keep your crochet stitches neat. If you’re still experiencing curling issues, consider checking your gauge or blocking the finished piece—this can help smooth out any imperfections.

How do I fix dropped stitches on my crochet chicken plush?
It's an easy fix! If you notice a dropped stitch, locate the stitch below and carefully work it back into place. You can use your tapestry needle to weave it back into the row above or crochet another stitch to cover the gap. The plush's texture will help disguise small errors, so no need to worry!

What hook size should I use for this project?
For the Mama Mabel crochet chicken plush, a 4.0 mm (G-6) crochet hook is recommended. This size is ideal for achieving tight stitches that will give your plush its desired fullness. If you're using a different yarn, you might need to adjust the hook size accordingly—just remember to keep checking your gauge!

Filed Under: Uncategorized

  • « Previous Page
  • 1
  • …
  • 29
  • 30
  • 31
  • 32
  • 33
  • …
  • 38
  • Next Page »

Recent Posts

  • Chic Crochet Watch Band Pattern: Scalloped Elegance
  • Vibrant Crochet Granny Square: A Floral Delight to Create
  • Pocket Otter Crochet: Your Adorable Amigurumi Companion
  • Cozy Up with This Festive Crochet Tree Cozy Pattern
  • Chic Crochet Babydoll Dress: A Timeless Pattern for Spring

Recent Comments

No comments to show.
Fast Crochet Patterns Logo

Welcome to Fast Crochet Patterns, your curated editorial blog for modern, handmade aesthetics. Discover an elegant collection of contemporary designs and carefully crafted tutorials—where every beautiful pattern is completely free to inspire your next creation.

Join the Studio

Subscribe for our latest free patterns and warm, minimal crochet inspiration delivered to your inbox.


Collections

  • Accessories
  • Amigurumi
  • Baby
  • Bags

More Patterns

  • Cardigan
  • Dress
  • Flowers
  • Granny Square

Information

  • About
  • Contact
  • Privacy Policy
  • Terms Of Use
  • Disclaimer

© 2026 Fast Crochet Patterns. All rights reserved.