Fast Crochet Patterns

  • Home
  • Contact
  • Patterns
    • Amigurumi
    • Granny Square
    • Flowers
    • Baby
    • Dress
    • Bags
    • Cardigan
    • Accessories
menu icon
go to homepage
  • Home
  • Contact
  • Patterns
    • Amigurumi
    • Granny Square
    • Flowers
    • Baby
    • Dress
    • Bags
    • Cardigan
    • Accessories
search icon
Homepage link
  • Home
  • Contact
  • Patterns
    • Amigurumi
    • Granny Square
    • Flowers
    • Baby
    • Dress
    • Bags
    • Cardigan
    • Accessories
×

Whimsical Hedgehog Coaster Crochet: A Cozy DIY Delight

August 23, 2026 by Publisher Leave a Comment

Whimsical Hedgehog Coaster Crochet: A Cozy DIY Delight

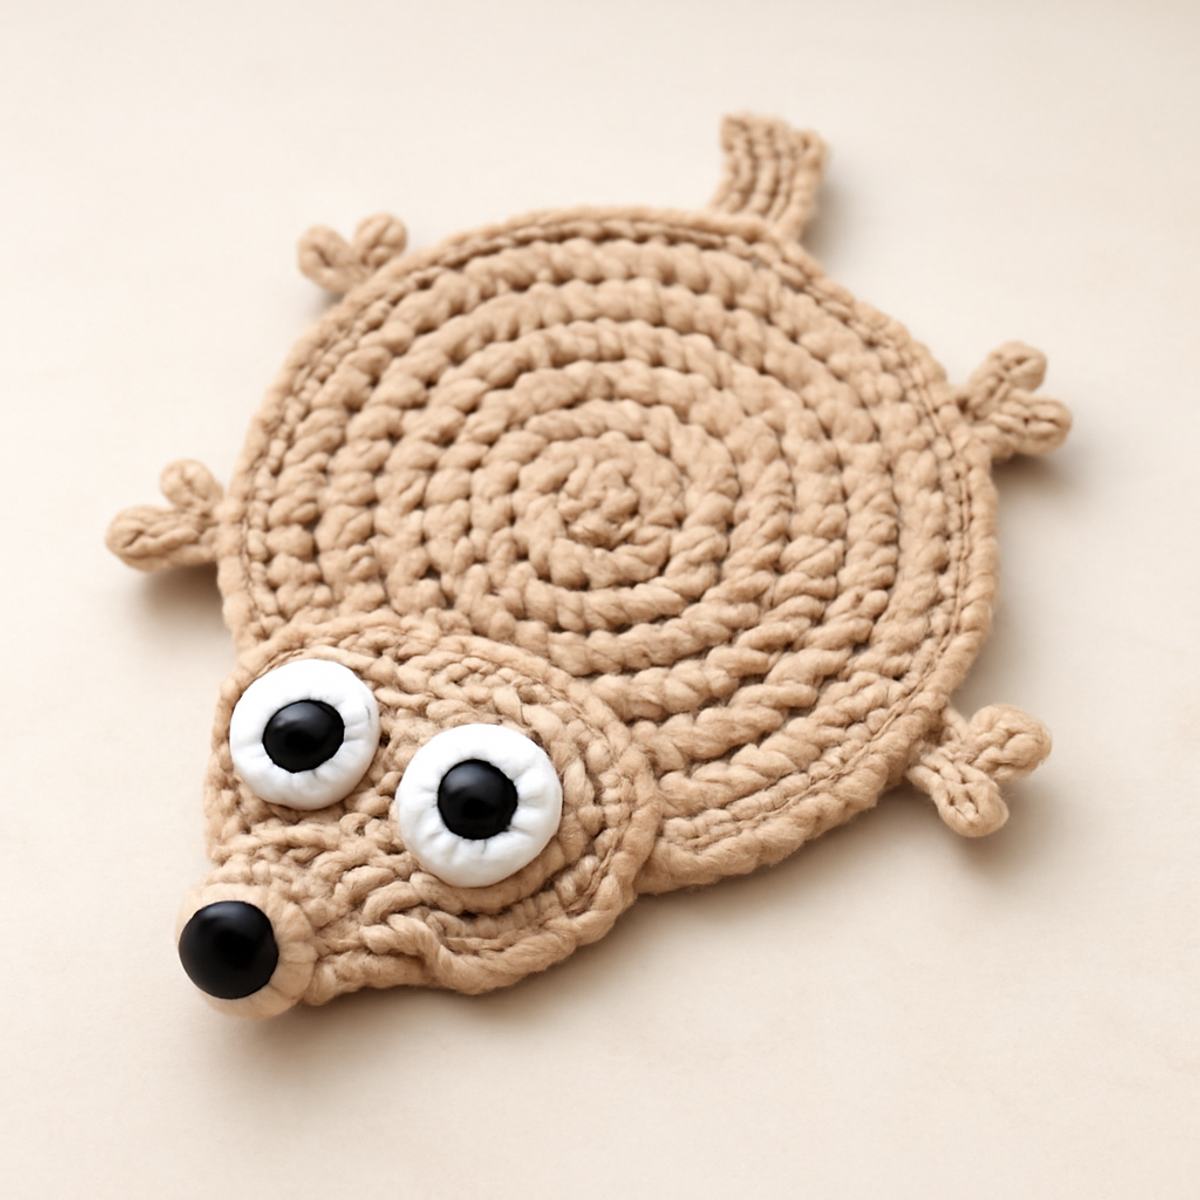
As I settled into my cozy corner with a cup of tea, I couldn’t help but be charmed by the thought of creating my very own hedgehog coaster. This delightful project is not only practical but also brings a whimsical touch to any coffee table. The hedgehog coaster crochet pattern combines simple stitches with a playful design, making it an approachable and fun craft for all levels. Whether you’re a seasoned pro or just starting out, the straightforward techniques ensure a smooth journey to creating this adorable piece. Plus, once finished, this quirky coaster will serve its purpose while adding character and warmth to your home decor. Ready to bring a little charm to your space? Let’s get those stitches going!

Hedgehog Coaster Crochet Materials & Tools

  • Worsted Weight Yarn – Choose a natural beige color for that classic coaster look; you'll need approximately 50-100 yards to complete the hedgehog coaster crochet.
  • 4.0 mm (G/6) Hook – This standard size is perfect for achieving the best texture with worsted weight yarn.
  • Stitch Marker – A handy tool to track your rounds and maintain accurate stitch counts.
  • Darning Needle – Essential for weaving in ends and giving your finished coaster a polished look.

Why Choose the Hedgehog Coaster Crochet?

Creative Design: This hedgehog coaster brings a playful aesthetic to your home decor, making it a charming conversation starter.
Simple Stitches: With easy-to-follow techniques like single crochet and increases, it's perfect for beginners and those honing their skills.
Functional Art: Not only is it a delightful decorative piece but also a practical accessory, providing a soft, sturdy base for your favorite drinks.
Customizable Options: Get creative! Use different colors or yarn types to make it truly your own.
Quick to Make: This cozy project can be completed in no time, perfect for last-minute gifts or a relaxing afternoon craft session.

Gauge & Sizing Notes

Don't skip the gauge swatch! Ensuring the correct tension for your hedgehog coaster crochet is crucial, as it directly affects the finished size and functionality of your coaster. A general guideline to follow is to aim for a gauge that results in a fabric that feels firm yet flexible—consider a 4×4 inch (10×10 cm) swatch made with a 4.0 mm (G/6) hook. If you want to modify the dimensions of your coaster, you can easily adjust the starting chain in multiples of 10 to make it larger or smaller. If your swatch is too small, simply go up a hook size or adjust your yarn tension for a more comfortable fit. Happy crocheting!

Step-by-Step Pattern for hedgehog coaster crochet

Row 1: Magic Ring & Initial Round
Begin with a magic ring; ch 1. Work 10 dc into the ring to form a flat circle. Pull the tail to close the ring tightly. Join with a sl st to the top of the first dc. Your work should form a round shape, beginning to take on a whimsical look (10 sts).

Row 2: Increasing the Body
Ch 1 (does not count as a stitch). In the first st, inc (2 dc) and in each st around. Join with a sl st. At this stage, your circle should expand considerably, creating the base for your hedgehog's body (20 sts).

Row 3: Continue Increasing
Ch 1. *Dc in the first st, inc in the next st; repeat from * around. Join with a sl st. You should notice the shape starting to dome slightly, indicating you're building the body and adding dimension (30 sts).

Row 4: Final Body Round
Ch 1. *Dc in the first two sts, inc in the next st; repeat from * around. Join with a sl st. Your coaster now should look fuller and rounder, setting the foundation for the hedgehog's charming shape (40 sts).

Row 5: Creating the Head
Ch 1. *Dc in the first three sts, inc in the next st; repeat from * around. Join with a sl st. The work should now start narrowing slightly at the top, defining the hedgehog's head shape while maintaining the joyful body (50 sts).

Row 6: Finishing the Head Shape
Ch 1. *Dc in the first four sts, inc in the next st; repeat from * around. Join with a sl st. Your work should resemble a dome now, accentuating the head and preparing for features like eyes (60 sts).

Step 7: Ears Creation
For the ears, ch 1 and turn your work. Hdc (half double crochet) in the next four sts. In the last st, ch 1 and turn your work. Repeat this process until you create two small ear shapes. These will be attached later for added cuteness in your hedgehog coaster crochet.

Step 8: Adding Eyes
Using contrasting yarn, attach yarn to the head's surface for the eyes. You can use a simple black sc (single crochet) or beads instead for features that pop. This finishing touch adds character and liveliness to your hedgehog coaster crochet!

Step 9: Assembly of Ears
Using the darning needle, sew each ear onto the top edges of the hedgehog's head. Position them slightly apart for a cute and whimsical appearance. Your coaster should begin to resemble a sweet little hedgehog, full of charm.

Step 10: Edging with Reverse Single Crochet
Finally, to neatly finish the hedgehog coaster crochet, use a reverse sc (single crochet) around the outer edge. This gives a polished look while providing structure. Your coaster is now complete and showcases a delightful hedgehog ready to adorn your table!

How to Wash and Care for Your Hedgehog Coaster Crochet

  • Machine Washing: Use cold water on a gentle cycle to protect your hedgehog coaster crochet from felting or pilling. Place it inside a mesh laundry bag for extra protection.

  • Hand Washing: For a more careful method, gently wash your coaster by hand using cold water and mild detergent. Avoid strenuous agitation to maintain its shape and texture.

  • Drying/Blocking: Lay your hedgehog coaster flat to dry on a clean towel, reshaping it if necessary. This prevents distortion and helps maintain its adorable form.

  • Storage: Keep your coaster in a cool, dry place when not in use. Avoid stacking it under heavy items, which could lead to unwanted creases or flattening.

Expert Tips for Hedgehog Coaster Crochet

  • Consistent Gauge: Always check your tension with a swatch before beginning. Maintaining a consistent gauge throughout the hedgehog coaster crochet ensures your finished piece is the perfect size.

  • Accurate Stitch Count: Use a stitch marker to keep track of your stitches, especially during increases. Miscounting can lead to an uneven shape.

  • Blocking for Shape: Once your coaster is complete, blocking will improve its shape and smooth out any uneven stitches, ensuring a polished look that enhances its charm.

  • Secure Ends: Use your darning needle to weave in ends thoroughly. A tidy finish not only looks better but also adds durability, especially for a functional item like a coaster.

  • Embroidery Skills: Consider adding decorative embellishments or stitching details for the eyes. Creative touches can elevate your hedgehog coaster crochet, making it uniquely yours!

Hedgehog Coaster Crochet Variations

Embrace your creative side and bring a personal touch to your hedgehog coaster crochet with these delightful customization ideas!

  • Color Pop: Use vibrant or pastel yarn colors. Create a lively palette to complement your home decor or gift it with a personal flair.

  • Cotton Yarn: Substitute acrylic with cotton yarn for added absorbency. This is especially useful if you plan on using it for warm beverages.

  • Size Adjustment: Change the yarn weight or hook size for a different coaster size. A larger hook and thicker yarn will create a more generous hedgehog to bask in.

  • Textured Ears: Experiment with different stitches for the ears. A bobble or shell stitch would lend a lovely texture, making your hedgehog even more whimsical.

  • Button Eyes: Add personality with buttons or beads instead of simple stitches for the eyes. This gives your coaster a charming and unique character.

  • Fringed Edging: Try a fringed border instead of reverse single crochet. This eclectic touch will make your coaster a standout piece in any setting.

  • Themed Collections: Craft coasters in different animal shapes! Create a collection with matching designs for a fun and cohesive look at your next gathering.

  • Personalized Embellishments: Add stitched initials or fun designs to personalize your coaster further. It could serve as a perfect gift or a memorable piece in your home!

What to Pair with Hedgehog Coaster Crochet?

As you craft your whimsical hedgehog coaster, let your imagination wander to creating delightful companions that enhance its playful charm.

  • Charming Cup Cozy: A cozy to match your coaster not only warms your drinks but also adds a splash of whimsy to your tea time.
  • Adorable Animal Coasters: Create a matching set of coasters in different animal shapes to evoke a playful theme at your coffee table.
  • Cuddle-Up Mug Rug: This larger piece can cradle your tea kettle or coffee carafe, making the perfect addition to your cozy corner.
  • Whimsical Wall Hanging: Use remnants of your yarn to craft a fun wall decoration, drawing inspiration from your hedgehog's adorable features.
  • Mini Hedgehog Amigurumi: Turn your leftover yarn into a tiny hedgehog friend that will add a touch of personality and charm to your crochet collection.

Hedgehog Coaster Crochet FAQs

Can I use a different type of yarn for my hedgehog coaster crochet?
Absolutely! While worsted weight yarn is suggested, you can experiment with different fibers like cotton for better absorbency, especially if you plan to use the coaster for hot beverages. Just keep in mind that different yarn weights may result in a different finished size.

How can I adjust the size of my hedgehog coaster crochet?
If you'd like a larger or smaller coaster, consider using a thicker or thinner yarn along with an appropriately sized hook. Alternatively, you can increase or decrease the number of rounds in the pattern to customize the dimensions while retaining the playful design.

Why is my hedgehog coaster crochet curling at the edges?
Don't panic! Curling is often a sign of inconsistent tension. To fix this, I recommend blocking your finished piece by gently dampening it and laying it flat to dry in the desired shape. This should help smooth out any curls and improve the overall look.

What size crochet hook should I use for this pattern?
The recommended size is a 4.0 mm (G/6) hook, which works well with worsted weight yarn. If you choose a different yarn weight, make sure to adjust your hook size accordingly for the right tension and texture.

How do I fix a dropped stitch in my hedgehog coaster crochet?
It's an easy fix! Just pull the yarn gently to reveal the dropped stitch, then use your hook to scoop it back up into the row. Take your time, and remember to keep your tension consistent to avoid this happening again in the future.

Can I add embellishments to personalize my coaster?
Absolutely! You can sew on buttons or use decorative stitches for the eyes to add a unique touch to your hedgehog coaster crochet. Let your creativity shine – the more personal touches, the better!
Filed Under: Uncategorized

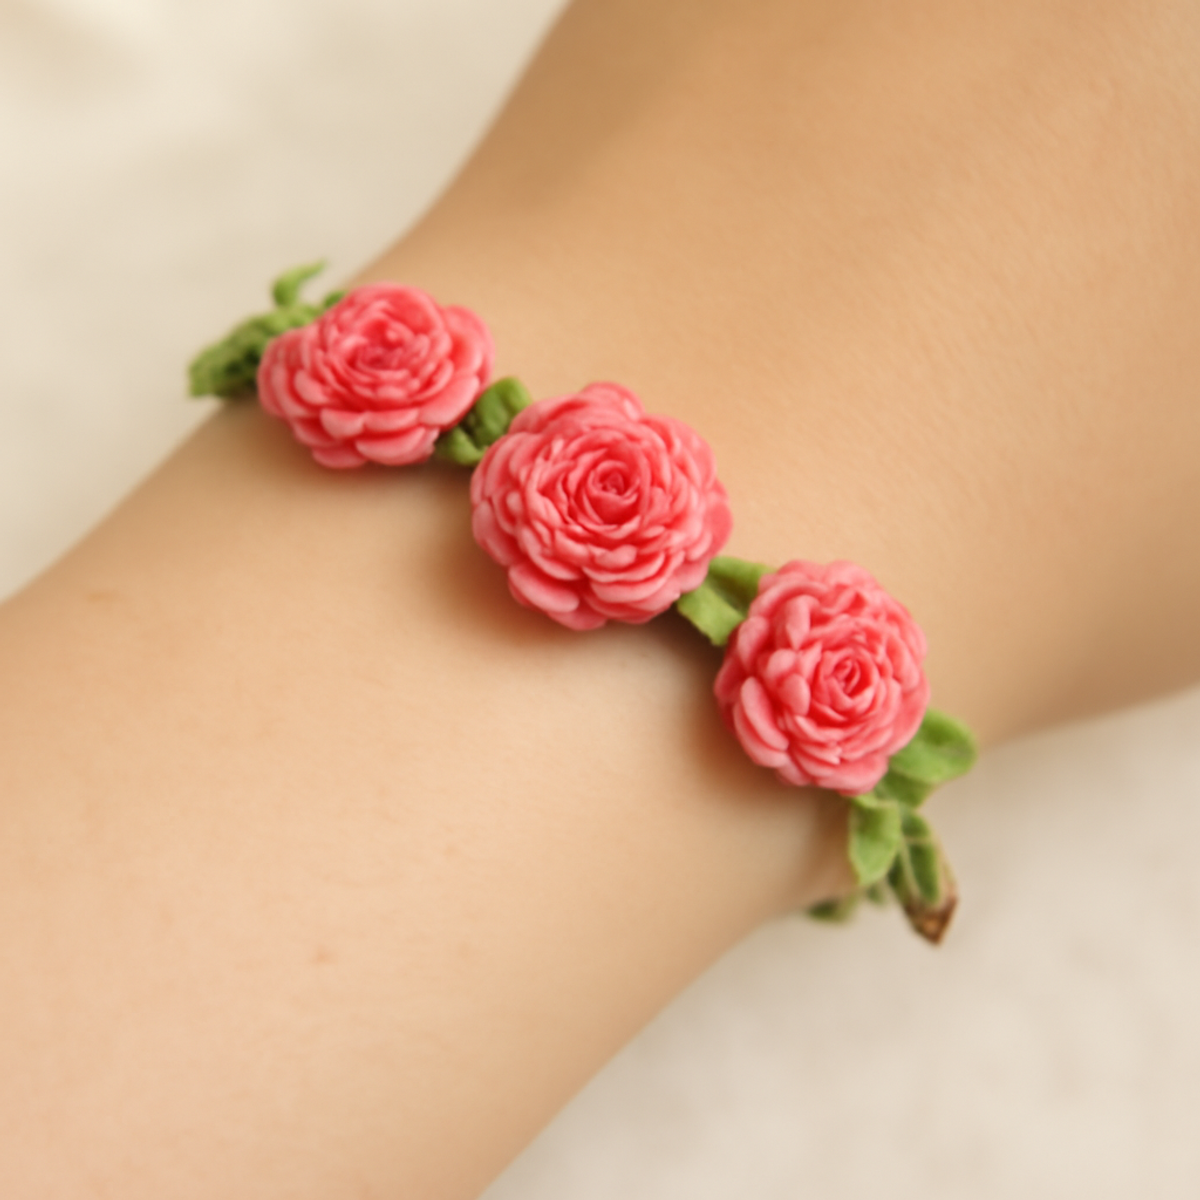
Charming Crochet Rose Bracelet: A Touch of Floral Elegance

August 23, 2026 by Publisher Leave a Comment

Charming Crochet Rose Bracelet: A Touch of Floral Elegance

As I sat on my cozy couch, richly textured yarn slipping through my fingers, the thought of crafting a delightful crochet rose bracelet brought a smile to my face. This charming accessory, adorned with intricate rose motifs and leaves, truly embodies nature-inspired elegance and is perfect for adding a romantic touch to both casual and semi-formal outfits. Not only is this crochet rose bracelet a beautiful statement piece, but it also offers the joy of creating something unique with your own hands. Whether you're an intermediate crocheter or looking to refine your floral techniques, you’ll find satisfaction in both the process and the stunning result. With quick construction and the chance to personalize colors and textures, this project is sure to spark your creativity. Ready to bring your floral dreams to life? Let’s dive into the details and start making some magic!

Crochet Rose Bracelet Materials & Tools

  • Size 20 Cotton Thread – A fine yarn perfect for detailed crochet work that enhances the elegance of your project.
  • 100% Cotton Yarn – Offers both durability and softness, making your bracelet comfortable to wear.
  • 45-60 Yards of Yarn – This estimated yardage allows enough material for multiple roses and leaves on your bracelet.
  • 2.0 mm (USA size 0) Hook – Ideal for working with the fine thread and achieving delicate stitches for your floral design.
  • Scissors – Essential for cutting yarn cleanly as you work through your project.
  • Yarn Needle – Use this to weave in ends neatly, leaving your finished piece polished and refined.
  • Lobster Clasp – Adds functionality to your bracelet by providing a secure closure.
  • Jump Rings – Necessary for connecting the clasp and the yarn, ensuring your bracelet holds together beautifully.
  • Extender Chain (5-7 cm / 2-3 in) – Offers a customizable fit, allowing your crochet rose bracelet to adjust comfortably.

Why Choose a Crochet Rose Bracelet?

Stunning Floral Design: This bracelet showcases intricate rose motifs and leaves, making it an exquisite accessory for any floral enthusiast.
Intermediate-Friendly: While it requires essential crochet skills, it's perfect for those wanting to expand their technique repertoire with floral designs.
Versatile Style: Its charming aesthetic easily complements various outfits, from casual day wear to chic evening attire.
Personalization Options: Craft your unique piece by experimenting with colors and yarn textures, adding your personal touch to each bracelet.
Satisfying Project: Enjoy the fulfillment of creating a beautiful accessory that’s wearable art, crafted with love and care.

Gauge & Sizing Notes

Don't skip the gauge swatch! Ensuring your crochet rose bracelet fits comfortably and displays your beautiful floral designs perfectly starts with checking your tension. A general guideline for this delicate project is to aim for a gauge of 6 double crochets per inch (2.5 cm) in width. To adjust the size of your bracelet, simply increase your starting chain by multiples of 2 if you want a longer piece. If you find that your swatch is too small, don’t worry—just go up a hook size to achieve the tension needed for a lovely fit. Happy crafting, and may your floral elegance shine!

Step-by-Step Pattern for crochet rose bracelet

Row 1: Start the Magic Ring
Begin by creating a magic ring. In the ring, crochet 6 single crochet (sc) to form the foundation of your rose. Pull the tail to tighten the ring. This initial round sets the base for your floral design, and your work should start to gather into a small circle (6 sts).

Row 2: Build the Petals
In this round, work 2 double crochet (dc) in each sc from the previous row to create the first layer of petals. As you crochet, the petals will begin to form and flare outwards, giving your rose texture and dimension. At the end of the round, you’ll have a total of 12 sts.

Row 3: Continue Petal Formation
Next, you’ll create the final petal layer. Work 1 dc in the first stitch, then 2 dc in the next stitch. Repeat this pattern around, alternating between a single and doubled stitch efficiently. Your rose should start to deepen in layers, showcasing an inviting floral structure (18 sts).

Row 4: Create the Inner Center
To finish the rose's body, work a row of slip stitches (sl st) all the way around the edge to give it a neat finish. This will not only secure the last round but also create a lovely, defined edge for the rose. Your completed work should have a firm shape (18 sts).

Row 5: Fasten Off and Prepare Leaves
After you finish the rose, cut the yarn, leaving a long tail for future assembly. Carefully pull through the loop to secure your work. You’ll now switch to making leaves for the crochet rose bracelet, enhancing the floral elegance of your project.

Row 6: Leaf Foundation
Chain 8 to create the foundation of your leaf. Start from the second chain from the hook and work 1 half double crochet (hdc) in each of the next 6 chains. In the last chain, make 3 dc to form the tip of the leaf, then return down the other side of the leaf with 1 hdc and 1 sc, finishing with a slip stitch (1 leaf).

Row 7: Second Leaf
Repeat Row 6 to create a second leaf, ensuring to leave a long tail for attaching. The leaves should show a gentle curve, resembling a natural leaf shape. Each leaf will contribute to the overall aesthetic of your crochet rose bracelet.

Step 8: Arrange Flowers and Leaves
Now that you have your roses and leaves, arrange them in your desired pattern on a flat surface. Consider alternating between the roses and leaves to create a balanced look. This visual arrangement will help guide your assembly, enhancing the charm of your crochet rose bracelet.

Step 9: Crochet the Bracelet Base
To create the bracelet base, chain 30 for a snug fit. Adjust the length based on your wrist size. Once finished, sl st into the first chain to form a loop, ensuring the bracelet will connect seamlessly with the flowers and leaves.

Step 10: Attach Roses and Leaves
Begin attaching your roses and leaves to the bracelet base. Use the long tails from your finished roses and leaves to sew them onto the chain. Space them evenly, alternating for a beautiful composition. This step is where your artistic vision comes to life in the crochet rose bracelet.

Step 11: Attach Clasp and Finishing Touches
Finally, attach a lobster clasp to one end of the bracelet and a jump ring to the other. You may also add an extender chain for comfort and adjustments. Weave in any remaining ends with a yarn needle for a polished finish, completing your crochet rose bracelet perfectly.

What to Pair with Floral Elegance: Crochet Rose Bracelet

As you immerse yourself in the art of crafting, envision a delightful matching set to enhance the beauty of your crochet rose bracelet.

  • Floral Anklet: A cute companion piece that wraps delicate flowers around your ankle, creating a harmonious look for warm days.
  • Charming Earrings: Crochet floral earrings that sway gently, echoing the elegance of your bracelet with a playful, lightweight touch.
  • Sweet Hair Clips: Adorn your hair with crochet roses attached to clips, providing a cohesive floral theme that elevates your entire outfit.
  • Elegant Brooch: Create a matching brooch using similar motifs, allowing you to wear your floral artistry in varied ways throughout your wardrobe.
  • Delicate Necklace: Incorporate the same rose motifs into a slender necklace, perfect for layering and completing your romantic aesthetic.

Imagine strutting with these matching pieces, enveloped in the enchantment of your craft.

crochet rose bracelet Variations

Explore delightful ways to personalize your crochet rose bracelet, allowing your unique creativity to shine through!

  • Color Swaps: Choose bold reds for a vibrant look or soft pastels for a gentle touch, letting each rose reflect your style.

  • Yarn Alternatives: Experiment with silk blends to achieve a lustrous finish, offering luxurious softness and an upscale feel for your bracelet.

  • Larger Flora: Create oversized roses and leaves for a dramatic statement piece. This allows your crochet rose bracelet to become a stunning focal point.

  • Texture Additions: Incorporate playful pom-poms or delicate fringe to embellish your bracelet, inviting texture that enhances visual interest.

  • Charming Beads: String beads or charms between flowers for a whimsical flair, adding sparkle and personal meaning to your crochet design.

  • Adjustable Sizing: Modify the bracelet length based on your wrist measurements, ensuring a comfortable and personalized fit for every wearer.

  • Embellished Edges: Add a decorative border stitch around the bracelet for a polished finish and a touch of character. This little detail can elevate your piece beautifully.

Care Instructions for Crochet Rose Bracelet

  • Washing: Gently hand wash your crochet rose bracelet in cold water with mild soap. Avoid agitation to prevent any felting or distortion of the intricate flower designs.
  • Drying: Lay the bracelet flat on a clean, dry towel to air dry. This method maintains the shape of the flowers and prevents stretching or misshaping.
  • Storage: Store your finished crochet rose bracelet in a cool, dry place, away from direct sunlight. Consider placing it in a fabric pouch to protect it from dust and abrasion.
  • Blocking: If desired, lightly block the flowers and leaves using a steam iron on a low setting. This helps enhance the delicate shapes and details of your crochet rose bracelet.

Expert Tips for the Crochet Rose Bracelet

  • Consistent Tension: Maintain even tension throughout your project to prevent uneven petal sizes. This is crucial for achieving the beautiful floral look of your crochet rose bracelet.
  • Count Regularly: Count your stitches at the end of each round, especially when assembling the floral motifs. This helps you maintain symmetry and balance in your design.
  • Secure Ends: Remember to weave in your ends properly to avoid unraveling. Use a yarn needle to tuck in any loose threads for a polished and professional finish.
  • Consider Blocking: After finishing, gently block your roses and leaves to enhance their shape and visual integrity. Blocking allows your delicate details to stand out beautifully.
  • Take Your Time: Enjoy the process! Don’t rush through the assembly of the bracelet. Taking your time helps in creating a more thoughtfully crafted crochet rose bracelet.

Crochet Rose Bracelet FAQs

Can I substitute yarn for the crochet rose bracelet?
Absolutely! You can experiment with different yarn types to achieve unique looks. For instance, using a silk blend can add a beautiful sheen, while a thicker yarn may give you a sturdier bracelet, but keep in mind that gauge may change with thickness adjustments.

How do I make the crochet rose bracelet larger or smaller?
To adjust the size of your bracelet, simply change the number of chains in the base. For a larger fit, increase the chain count to your desired length, while a smaller fit can be achieved by reducing the number of chains. Don’t forget to alter the size of the extender chain if you plan to use one!

My crochet roses are curling; what should I do?
Don’t panic! Curling is common with delicate stitches. I recommend blocking your roses gently to help them lay flat. You can use steam from an iron or simply dampen them lightly and shape them as they dry.

What hook size should I use for the crochet rose bracelet?
For this project, a 2.0 mm (USA size 0) hook is recommended, which is perfect for working with size 20 cotton thread. Using the correct hook size is vital to achieving the delicate details of your floral design while ensuring your stitches remain consistent.

How can I fix dropped stitches while working on my crochet project?
It’s an easy fix! Simply locate the dropped stitch and reinsert your hook into the stitch below, then carefully pull the yarn back through, making sure to follow your pattern once you’re back on track. Don’t give up; it happens to everyone!

What should I do if my yarn is tangling as I work?
Tangling can be frustrating! Try keeping your yarn on a cake holder or in a yarn bowl to help it unwind smoothly as you crochet. If it does tangle, gently pull apart the knots without forcing the yarn, to prevent any breakage.

Filed Under: Uncategorized

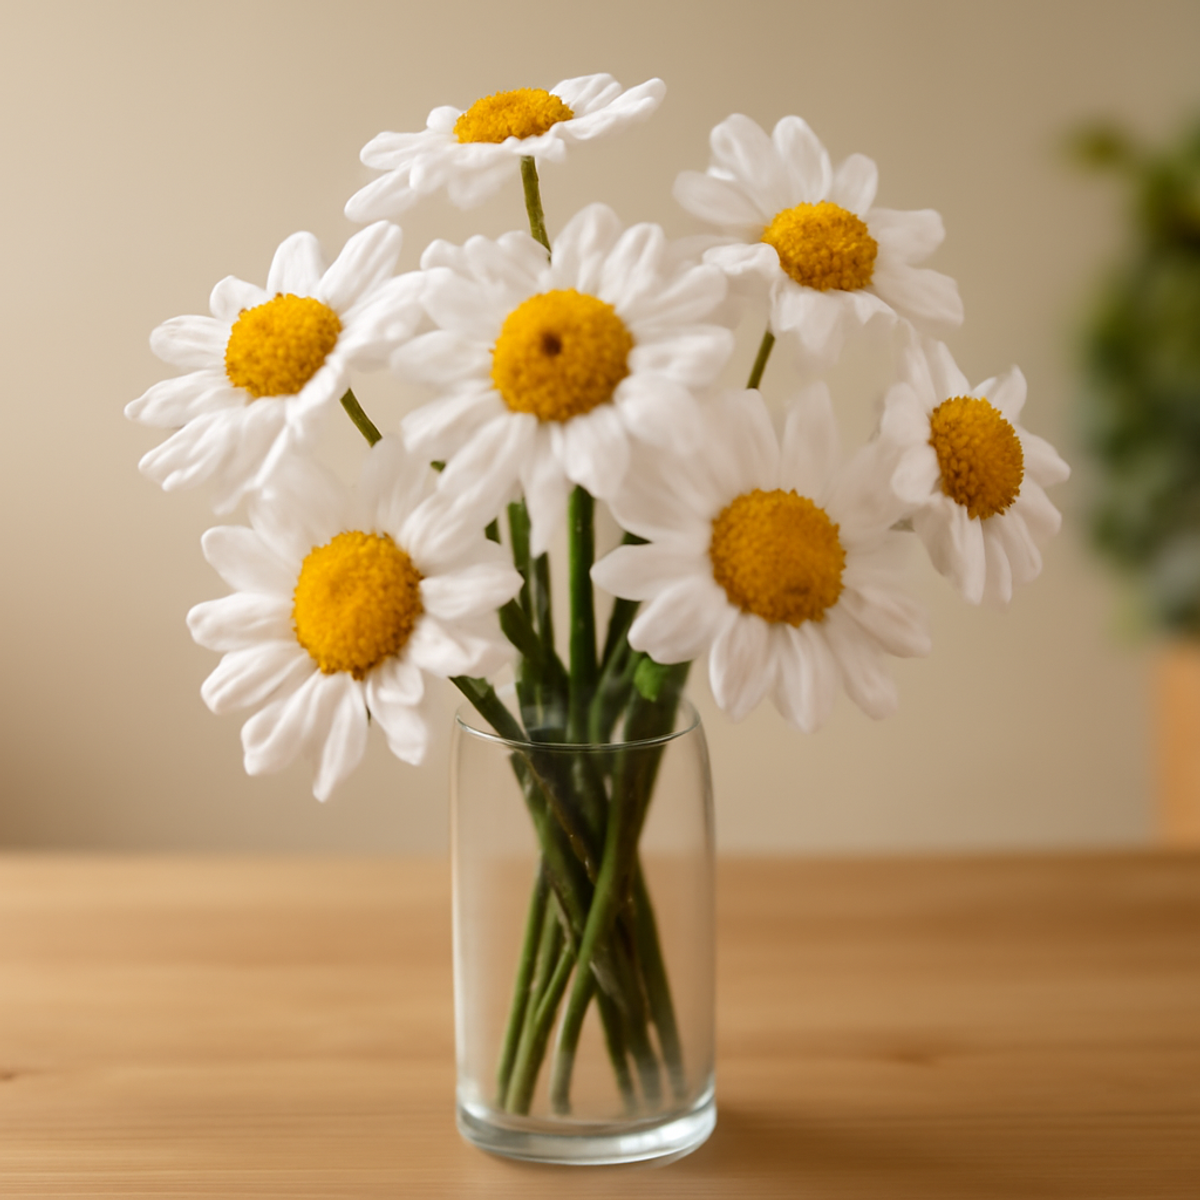
Charming Crochet Daisy Bouquet: A Year-Round Delight

August 23, 2026 by Publisher Leave a Comment

Charming Crochet Daisy Bouquet: A Year-Round Delight

There’s something truly magical about crafting a bouquet that will never fade! With my 'Sunny Daisies: A Crochet Bouquet' pattern, you can bring a touch of perennial springiness into your home décor. This delightful crochet daisy bouquet not only allows you to explore your creativity but also offers the joy of customizing colors to match any space. Plus, the satisfaction of creating a beautiful, handmade gift for someone special adds an extra layer of warmth. This intermediate-level project combines fun techniques with the loveliness of floral design, making it a perfect stash-buster for your yarn collection. So, grab your hook, choose your colors, and let’s start stitching these cheerful daisies that brighten your world year-round!

Crochet Daisy Bouquet Materials & Tools

  • Medium-Weight Cotton Blend Yarn – You'll need about 200-300 yards of white for the petals, 100 yards of yellow for the centers, and 100 yards of green for the stems to create your vibrant crochet daisy bouquet.
  • 3.5 mm (E/4) Hook – This size is perfect for achieving a nice, sturdy texture in your flowers' petals and centers.
  • Yarn Needle – Essential for sewing pieces together, ensuring your bouquet holds its charming form beautifully.
  • Floral Wire – Consider using this for the stems to add extra stability and keep your daisies standing tall.
  • Stitch Marker – A handy tool to help you keep track of your rounds, making the assembly process smoother and more enjoyable.

Why Make a Crochet Daisy Bouquet?

Timeless Beauty: This crochet daisy bouquet is designed to brighten your home year-round, providing vibrant charm without the worry of wilting.

Creative Freedom: You’ll love the ability to tailor the colors of your daisies, allowing you to match any aesthetic or seasonal décor.

Satisfying Craft: Each stitch is a chance to express your creativity, and crafting this bouquet will leave you feeling accomplished and proud.

Ideal for Gifting: Handmade gifts have a special meaning, and this bouquet is a heartfelt offering that your loved ones will cherish.

Stash-Friendly: With minimal yarn requirements, this project is a fabulous way to use up those leftover skeins from previous projects!

Gauge & Sizing Notes

Don't skip the gauge swatch! Ensuring your tension is just right is crucial for creating a delightful crochet daisy bouquet that holds its beautiful shape. For this project, aim for a standard gauge that closely reflects your techniques but remember, specifics can vary; a general guideline is a 4×4 inch (10×10 cm) square should yield around 14 double crochets by 8 rows. If you want to adjust the size of your daisies, consider altering your starting chain in multiples of 6 + 2 for wider petals or changing your hook size. If your swatch turns out too small, simply go up a hook size to achieve the cozy, plump look you'll love in your bouquet!

Step-by-Step Pattern for Crochet Daisy Bouquet

Row 1: Flower Center
Start by making a magic ring. Ch 3 (counts as first dc), then work 11 dc into the ring. Pull the tail to close the ring, then join with a sl st in the top of the ch 3. Your flower center should have a rounded, textured look (12 sts total).

Row 2: Petal Formation
Ch 4, then work 1 dc into the 4th ch from the hook. Ch 2, sl st into the same st to form the first petal. Repeat this process for a total of 6 petals around the flower center; your petals should stick out, creating a lovely daisy shape (6 petals total).

Row 3: Petal Enhancement
To add depth to the petals, work into each petal: sl st into the base of a petal, then ch 3, and 2 hdc into the same petal space. Repeat for all petals to create a fuller look. Your petals should now have a gentle curve and texture (12 hdc total).

Row 4: Stems
Using green yarn, ch 12. Starting from the 2nd ch from the hook, work 1 sc in each ch until you reach the end. This forms a sturdy stem. Once complete, your stem should be about 11 inches long, offering a nice contrast to the daisy head.

Step 5: Attaching Flower to Stem
Position the flower head on top of the stem. Using a yarn needle and the floral wire, sew the base of the flower securely to the top of the stem. Ensure the connection is firm, as this will help your daisy bouquet stand gracefully.

Step 6: Finishing Touches
Weave in any loose ends using a yarn needle to keep your crochet daisy bouquet neat. For added stability, wrap the bottom of each daisy stem with additional floral wire, allowing you to shape the bouquet as desired. Your daisies should now stand upright and proud!

Variations & Substitutions for Crochet Daisy Bouquet

Explore the delightful possibilities of customizing your crochet daisy bouquet! Let your imagination bloom by adding unique personal touches to your project.

  • Yarn Colors: Experiment with pastel shades like pink or lavender for the petals, creating a whimsical, colorful bouquet that suits your personal style.

  • Yarn Weight: Use a lighter or heavier yarn to adjust the size of your daisies. A heavier yarn may create stout flowers, while a lighter yarn results in delicate blooms.

  • Fiber Alternatives: Swap the cotton blend for acrylic yarn, providing a different texture and a more vibrant color palette for your finished daisies.

  • Embellishments: Add beads or metallic threads into your yarn for the centers of the flowers. This simple twist brings a touch of glam and sophistication to your bouquet.

  • Mixed Blooms: Combine your daisies with other crochet flowers, like tulips or roses, for a stunning mixed bouquet that showcases your diverse crochet skills.

  • Texture Modification: Enhance your petals by adding a decorative border or crochet fringe along the edges. This added detail creates a delightful texture contrast!

  • Size Adjustments: Make your daisies larger or smaller by altering your hook size. A larger hook will give a looser, airy flower, while a smaller hook will create more compact blooms.

  • Color-Blocking: Create petals with two-tone colors by changing yarn midway through each petal round. This technique adds a playful, modern twist to the classic daisy design.

Expert Tips for Crochet Daisy Bouquet

  • Consistent Tension: Maintain even tension while crocheting your petals. Inconsistent stitches can lead to a misshapen flower, so practice ensuring uniformity.

  • Diligent Stitch Counting: Always count your stitches as you work through your pattern. This helps avoid misalignment and ensures your crochet daisy bouquet has a beautiful, balanced shape.

  • Blocking for Flare: After assembling your daisies, consider blocking them. This technique enhances the petals' shape and gives them a lovely, flared-out appearance.

  • Secure Finishing: When weaving in ends, make sure to hide them carefully to maintain a polished look. This small detail makes a big difference in the appearance of your finished bouquet.

  • Floral Wire Stability: Incorporate floral wire effectively into the stems. This added support ensures your daisies stand tall and proud, showcasing your beautiful handiwork!

Care Instructions for Crochet Daisy Bouquet

Machine Washing: Always use cold water on a gentle cycle to prevent any damage to your crochet daisy bouquet. Avoid agitation, as it could result in felting or pilling.

Hand Washing: For delicate care, gently hand wash in cold water with mild detergent. Swish it around softly to keep the texture intact, then rinse thoroughly.

Drying/Blocking: Lay your crochet bouquet flat on a clean, dry towel to dry. To enhance the shape of the petals, consider blocking them gently as they dry.

Storage: When not in use, store your daisy bouquet in a cool, dry place away from direct sunlight. This will keep it looking fresh and preserve its beauty for years to come.

What to Pair with Sunny Daisies: A Crochet Bouquet

Imagine the joy of stitching together a matching ensemble that complements your lovely crochet daisy bouquet, adding even more charm to your home décor!

  • Crochet Vase Cover: Create a cozy, textured sleeve for your vase to enhance the overall aesthetic and match your daisies’ color palette.

  • Matching Coasters: Craft coasters in the same vibrant colors as your bouquet, bringing a cohesive and cheerful feel to your table settings.

  • Floral Wall Hangings: Design some crochet flower wall art that echoes the shapes of your daisies, creating a delightful theme in your space.

  • Charming Flower Pot: Crochet a decorative cover for your potted plants to tie in with your daisy bouquet while offering a lovely contrast against nature.

  • Petal Embellished Pillows: Add crochet petals to pillow covers for a whimsical touch, echoing the vibrant, soft feel of your bouquet in your living area.

By pairing these delightful projects with your crochet daisy bouquet, you’ll continue your crafting journey while bringing a cohesive, inviting charm to your home!

Sunny Daisies: A Crochet Bouquet FAQs

Can I use a different yarn than a medium-weight cotton blend?
Absolutely! If you want to swap yarns, just be mindful of the weight. You can use acrylic or another cotton type, but ensure it has a similar weight to maintain the shape of your crochet daisy bouquet. Just check your gauge first to make adjustments in hook size if needed.

How can I make my crochet daisy bouquet bigger or smaller?
To adjust the size, you can use a thicker yarn and a larger hook for bigger flowers or a thinner yarn with a smaller hook to create smaller daisies. Alternatively, you can increase or decrease the number of double crochets and petals to customize size as well. Just remember to keep the proportions in mind for balance!

Why is my daisy work curling up?
Don't panic! Curling can happen, usually due to tight stitches. Make sure to relax your tension; you want it snug but not too tight. If you've finished and there’s still curling, blocking your daisies can help. Give those petals a lovely flare by lightly wetting them and shaping them as they dry.

What should I do if I drop a stitch while crocheting the petals?
It’s an easy fix! If you drop a stitch, simply pick it up using your yarn needle and pull the working yarn through the stitch. You can also undo a few stitches back and re-crochet the petal if necessary. Keeping your tension consistent will help prevent this from happening in the first place.

What hook size should I use?
For the 'Sunny Daisies: A Crochet Bouquet,' a 3.5 mm (E/4) hook works beautifully. However, if you substitute yarn types or weights, consider adjusting the hook size accordingly. Using the right hook will help you achieve that lovely texture and sturdy feel for your flowers.

How do I keep my crochet pieces together when assembling?
I recommend using a yarn needle and floral wire for added stability when attaching the flower centers to the stems. Make sure you sew securely to keep everything in place, ensuring your crochet daisy bouquet stands tall and looks magnificent!

Filed Under: Uncategorized

Vibrant Crochet Bracelets: Floral Designs for Every Occasion

August 23, 2026 by Publisher Leave a Comment

Vibrant Crochet Bracelets: Floral Designs for Every Occasion

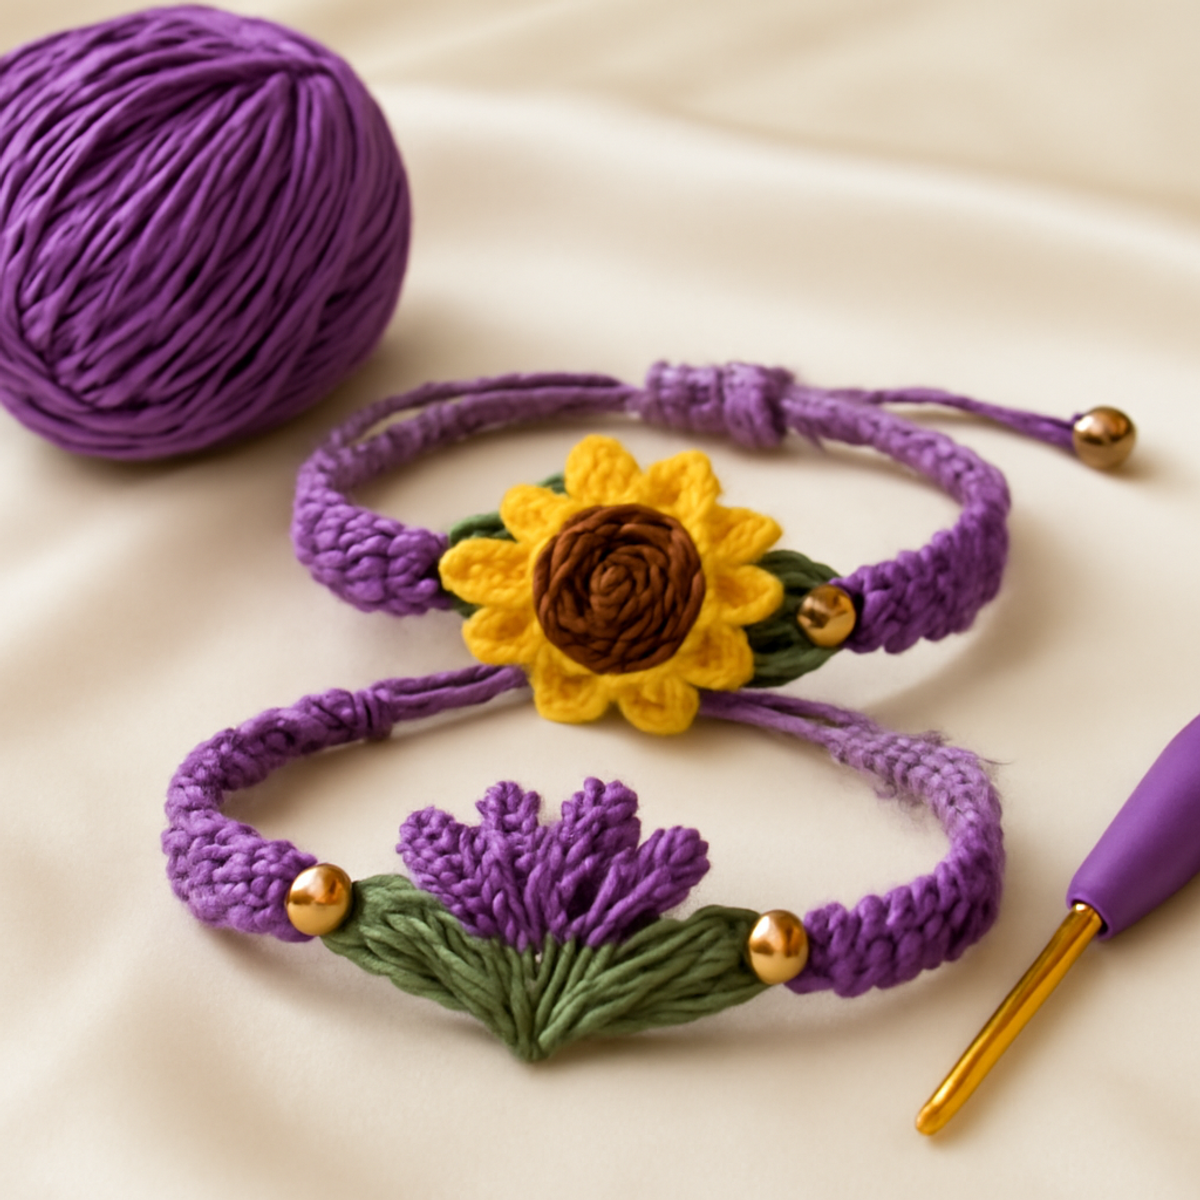
As I sat in my cozy nook, soft yarn dancing between my fingers, the idea for these Sunflower & Lavender crochet bracelets blossomed. Not only do they infuse vibrant floral charm into any outfit, but they also allow for creative expression that feels personal and rewarding. This crochet bracelets pattern is designed for those ready to tackle an engaging project, incorporating a delightful mix of stitches that bring to life cheerful sunflowers and elegant lavender blooms. With their adjustable nature, these lovely accessories fit comfortably on a variety of wrist sizes, making them thoughtful gifts that speak from the heart. Easy to customize and perfect for both beginners looking for a challenge and seasoned crafters, I can't wait for you to unravel the joy of bringing these sunny designs to life—let's stitch some memories together!

Crochet Bracelets Materials & Tools

Yarn

  • Medium Weight (Worsted) Yarn – Ideal for achieving vibrant floral designs, using approximately 50-75 yards for this project.
  • Cotton or Cotton-Blend Yarn – Offers durability and comfort, perfect for those cozy, wearable treasures.

Tools & Notions

  • 2.5mm Crochet Hook – The perfect size for creating intricate flower details and ensuring a snug fit.
  • Decorative Beads – Enhance the design and secure the adjustable portions—choose colors that complement your yarn!

Why Crochet Bracelets Are a Must-Try?

Uniqueness shines in every stitch, as these crochet bracelets feature a delightful combination of playful sunflowers and sophisticated lavender designs. Intermediate Level makes them perfect for those looking to grow their skills while crafting something beautiful. Adjustable Fit ensures these accessories can be personalized to suit any wrist size, adding a thoughtful touch to gifts. Eye-Catching Colors draw attention, allowing you to showcase vibrant hues that can elevate an outfit. Lastly, Endless Customization options beckon you to experiment, turning this project into a truly unique expression of your creativity!

Gauge & Sizing Notes

Don't skip the gauge swatch! Ensuring that your tension matches is crucial for creating perfectly fitting crochet bracelets. A good rule of thumb is to crochet a sample swatch using your 2.5mm hook; while your specific gauge may vary, aim for a balanced measurement that provides enough flexibility for the floral details without becoming too tight. If your swatch seems too small, simply go up a hook size, or if it's too loose, consider going down a size. To adjust the final size of your bracelets, add or reduce your foundation chain in multiples of 5 to achieve your desired fit. Happy crafting with your beautiful crochet bracelets!

Step-by-Step Pattern for Sunflower & Lavender Crochet Bracelets

Row 1: Foundation Chain
Start by making a foundation chain that fits snugly around your wrist. Chain (ch) 20-25 stitches, depending on your wrist size. This will serve as the base for your crochet bracelets. Make sure your chain is not too tight; it should have a bit of give for comfort.

Row 2: Establishing the Base
Join with a slip stitch (sl st) to the first chain to form a ring. Work a row of single crochet (sc) into each chain across, placing 20-25 (sc) in total. Your work should feel firm and smooth as you complete this round.

Round 3: Begin Sunflower Petals
For the sunflower bracelet, after completing the single crochet round, begin the petal section. Chain (ch) 3, then work 2 double crochet (dc) into the same stitch for the first petal. Skip the next stitch and repeat this pattern all the way around, making 10 petals total. Your work should start to form a ruffled edge as you create the petals.

Round 4: Finishing Sunflower Center
To create the sunflower center, use a contrasting yarn color. In the first petal stitch, work 5 slip stitches (sl st) to form a compact center. Continue this round until each petal base has a slip stitch in it, resulting in a cute, tight sunflower center. Your bracelet's texture should begin to get layered and dimensional.

Row 5: Lavender Detailing
Switch to a lavender-themed design for the second bracelet. After creating the foundation chain, work slip stitches (sl st) into the base of each sc from the previous round. Create small loops to mimic lavender blooms, adding 10 total. This creates an airy effect. Your work should look delicate and flowing.

Row 6: Adding Beads
Choose decorative beads that complement your yarn colors. After the last round, thread a bead onto your working yarn and slip stitch it into the side of the bracelet. Secure each bead with a sc, placing them evenly around the bracelet's edge. This will enhance the floral design while adding functionality.

Step 7: Border & Assembly
Finish your crochet bracelets by adding a simple border. Create 1 round of single crochet (sc) around the entire edge, ensuring stability and a polished look. At the end of this round, sew in any loose ends and adjust the lace’s length by tying knots. The final dimension should be about 6-8 inches, adaptable to various wrist sizes.

How to Wash and Care for Your Crochet Bracelets

Hand Washing: Gently hand wash your crochet bracelets in cold water using a mild detergent to preserve the vibrant colors and floral details without causing any damage.

Avoid Agitation: Be sure to avoid agitating the bracelets as this may lead to felting or pilling, particularly in delicate areas like the flower embellishments.

Drying/Blocking: Lay your crochet bracelets flat on a clean, dry towel to air dry, reshaping them into their original form. This will help maintain their soft, flexible drape.

Storage: Store your crochet bracelets in a cool, dry place away from direct sunlight to prevent fading and ensure they retain their beauty for years to come.

What to Pair with Sunflower & Lavender Crochet Bracelets?

As you craft these enchanting bracelets, consider extending your floral theme to create a matching set that radiates warmth and charm.

  • Floral Necklace: A simple yet striking design that incorporates the same flower motifs to create a harmonious jewelry ensemble.
  • Matching Earrings: Small crochet flowers that dangle elegantly, echoing the vibrant aesthetics of your bracelets for an exquisite look.
  • Cozy Headband: Use the same yarn and stitches to build a lovely headband adorned with flower details, completing your nature-inspired look.
  • Sunflower & Lavender Bag Charm: Create a lightweight charm reminiscent of your bracelets to add a pop of color to your favorite tote.
  • Chic Anklet: Transform your floral designs into a playful anklet, continuing the whimsy of your crochet creations while embracing warmer days.

Crochet Bracelets: Customize to Your Heart's Content

Embrace the joy of creativity as you add your personal touch to these delightful crochet bracelets!

  • Color Combinations: Experiment with pastel shades for a soft, delicate appearance or vibrant, contrasting colors for a striking effect. Let your imagination run wild!

  • Flower Patterns: Incorporate different floral designs like charming roses or playful daisies, adding unique flair to each bracelet. The possibilities are endless!

  • Bead Alternatives: Try using metallic or wooden beads to enhance the natural aesthetic of your bracelets. They can elevate the overall look, adding extra personality.

  • Size Adjustments: Customize the size by increasing or decreasing the foundation chain length and the number of rounds in the floral motifs. Make it truly yours!

  • Textural Embellishments: Add playful pom-poms or whimsical fringe for a fun twist on your bracelets. Texture can transform the entire vibe of your composition.

  • Layering Styles: Create layered looks by making multiple bracelets in complementary colors and patterns. Stack them for beautiful visual impact and a boho-chic style.

  • Border Variations: Finish with a decorative border of scallops or picots for an extra touch of elegance. Play around with different finishing techniques for diverse looks.

  • Seasonal Themes: Change the floral elements to reflect the seasons—think autumn leaves or winter snowflakes. Celebrate nature's beauty all year round!

Expert Tips for Crochet Bracelets

  • Watch Your Tension: Pay close attention to your tension when crafting the flower details. Uneven tension can distort shapes, leading to an inconsistent look.

  • Count Your Stitches: Count stitches carefully, especially when creating decorative elements. This ensures evenness and symmetry across the entire bracelet.

  • Consider Blocking: Lightly blocking your finished bracelets with steam or a damp cloth helps them maintain their shape and fresh appearance.

  • Secure Your Beads: When adding decorative beads, ensure they are secured with a single crochet (sc) stitch to prevent them from slipping or moving.

  • Adjust for Fit: While tying the knots to adjust length, double-check the fit around your wrist. The bracelet should be snug yet comfortable, perfect for any occasion.

  • Practice Before Finalizing: If you're new to the stitches, practice on a separate swatch before starting on your crochet bracelets to build confidence in your technique.

Sunflower & Lavender Crochet Bracelets FAQs

Can I substitute my yarn for a different fiber type?
Absolutely! While the pattern is designed with cotton or cotton-blend yarn in mind, you can definitely use an acrylic yarn instead. Just be mindful of the drape as acrylic tends to be less flexible than cotton.

What if my bracelet is too tight or too loose?
Don't panic! If your bracelet is too tight, simply add more chains to your foundation chain next time or adjust the knotting technique to create more length. Conversely, if it’s too loose, you can decrease the chain length and make sure to keep tension consistent throughout your work.

Why is my crochet work curling at the edges?
This can happen for a couple of reasons, primarily uneven tension or the stitch pattern being too tight. I recommend checking your tension while working on the flower designs. If needed, gently block your finished project with steam to help flatten any curled edges.

What hook size should I use for this pattern?
The ideal hook size for crafting these crochet bracelets is a 2.5mm crochet hook, as it allows for intricate detailing and a snug fit. If you prefer a looser gauge for flexibility, you could experiment with a slightly larger hook, but be sure to adjust your stitch counts accordingly!

I’m having trouble with dropped stitches while making the floral details. How can I fix this?
It's an easy fix! If you notice a dropped stitch, gently pull the yarn to unravel back to where the stitch was missed. Then, reinsert your hook into that spot and complete the stitch again, ensuring that your tension remains consistent. Counting your stitches can help prevent this issue in the first place!

Can I customize the sizing of the bracelet further than just adjusting the chain length?
Yes, definitely! To make your crochet bracelets larger or smaller, you can adjust both the number of chains in the foundation and the number of rounds in each floral motif. Just remember to keep the overall design balanced to maintain that beautiful vibe!

Filed Under: Uncategorized

Cozy Crochet Baby Shoes: Beginner-Friendly & Adorable!

August 23, 2026 by Publisher Leave a Comment

Cozy Crochet Baby Shoes: Beginner-Friendly & Adorable!

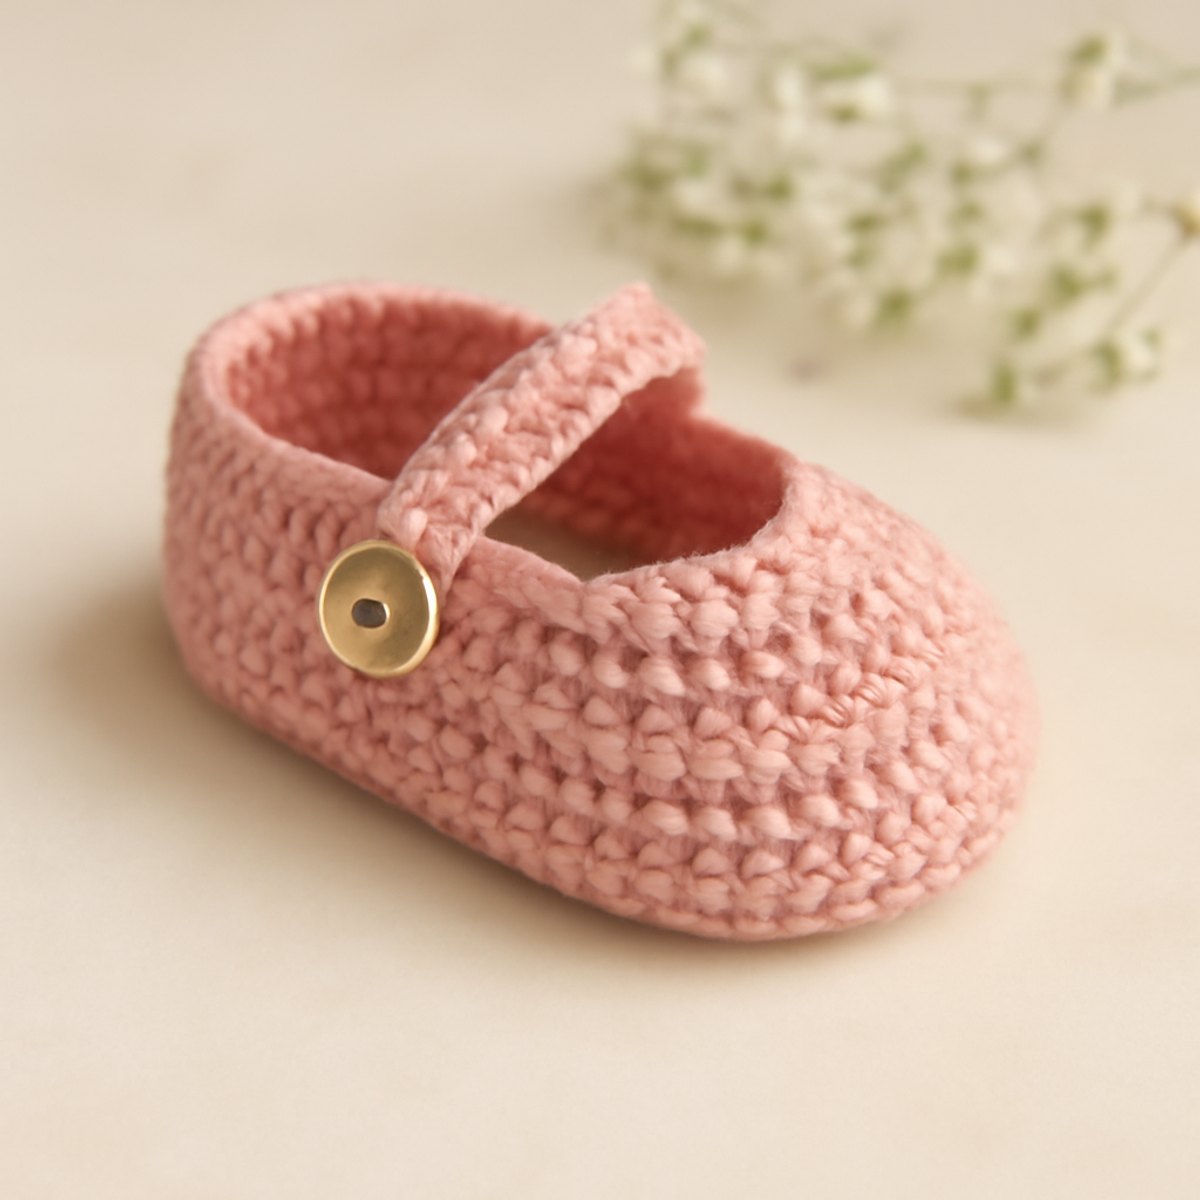
As I settled into my favorite corner with a soft ball of baby yarn, the idea of crafting playful crochet baby shoes sparked a warm sense of joy. These adorable little shoes are perfect for those tiny feet just starting to take on the world! With a beginner-friendly pattern, you can create something truly special that not only feels delightful to stitch but also adds a dash of elegance to any baby outfit. These crochet baby shoes boast an irresistible softness and security that makes them a cherished gift for baby showers or a lovely keepsake for your little one. If you’re ready to embark on a crochet journey that blends creativity and practicality, let’s dive in and whip up these charming shoes together!

Crochet Baby Shoes Materials & Tools

Yarn

  • Soft Baby Yarn (DK Weight) – Approximately 100-150 yards will keep these shoes cozy and comfortable for tiny feet.

Tools & Notions

  • 3.0 mm (D) Crochet Hook – This size is perfect for working up those sweet crochet baby shoes with ease.
  • Scissors – Essential for trimming yarn as you finish your project.
  • Stitch Marker – Helps keep track of your rounds, ensuring accuracy in your crochet work.
  • Button (optional) – A decorative option to elevate the style of your cute crochet baby shoes.
  • Safety Pin or Needle – Useful for securing the strap, adding functionality to the design.

Gather these materials, and let's create some enchanting shoes that will delight both you and the little one in your life!

Why Are These Crochet Baby Shoes Special?

Beginner-Friendly: Perfect for those new to crochet, this pattern guides you through each step with ease, ensuring a rewarding experience.

Adorable Design: The sweet style combines aesthetic appeal with practicality, making these shoes not just cute but functional too!

Cozy Comfort: Crafted from soft baby yarn, these shoes provide gentle comfort for tiny feet, making them an ideal choice for everyday wear.

Endless Customization: From color changes to fun embellishments, there are countless ways to make these shoes uniquely yours, ensuring they fit your baby's personality perfectly!

Memorable Gift: These shoes are a lovely item for baby showers or a meaningful keepsake for your little one, celebrating early milestones in style.

Gauge & Sizing Notes

Don't skip the gauge swatch! It's essential for crafting perfect crochet baby shoes that fit snugly on tiny feet. While an exact gauge doesn't have to be set in stone, a general guideline is to aim for about 4×4 inches (10×10 cm) to equal approximately 14 single crochets by 8 rows. If your tension doesn’t match this, don’t worry! To adjust the size, you can increase your starting chain in multiples of 3 for wider shoes or decrease for a tighter fit. If your swatch is too small, simply go up a hook size to loosen your tension. Happy crocheting!

Step-by-Step Pattern for Crochet Baby Shoes

Row 1: Foundation Chain
Ch 12. This initial foundation chain will form the base of your crochet baby shoes. Ensure your chain is not too tight; it should lay flat without curling. At this stage, it’s crucial to maintain an even tension as your work begins.

Row 2: Sole Creation
In the second chain from the hook, work 1 sc, then sc across the chain until you reach the end (11 sc). Your work should sit flat, presenting a clean and smooth edge, as this will form the sole of your adorable crochet baby shoes.

Row 3: Building the Sole Width
Ch 1, turn your work, and sc in each stitch across (11 sc). This row will create a sturdy foundation as you start to build the width of the sole. You’ll notice the fabric beginning to shape nicely, which is essential for the comfort of your baby shoes.

Row 4: Sole Length Adjustment
Ch 1, turn, and work 2 sc in the first stitch, then sc in the next 9 sts, and inc in the last stitch (13 sc). By increasing at the ends, you’re shaping the sole while adding a little room for growth as those tiny feet start to move.

Row 5: Completing the Sole
Ch 1, turn, sc in each stitch across (13 sc). At this point, the sole should feel secure and sturdy, providing a cozy groundwork for your little one’s feet. It’s also a great time to check your stitch count to keep everything even.

Row 6: Transition to Toe Shape
Ch 1, turn, and work 1 sc in the first 2 stitches, then dec, sc in the next 8 sts, and dec (11 sc). This step begins to refine the shoe’s shape as you transition toward the toe area, creating a rounded finish that will snugly hug your baby’s foot.

Row 7: Shaping the Foot Area
Ch 1, turn, sc in each stitch across (11 sc). You’ll see your work starting to cup or curl slightly, shaping nicely to contour the design of your crochet baby shoes. This is an exciting stage as your project takes form in a cute way!

Step 8: Create the Upper
Ch 1, turn, and work 1 sc in the first 2 stitches, then inc, sc in the next 6 sts, and inc (13 sc). The upper will add style and comfort to your baby shoes, providing a snug fit that will keep them securely on little feet.

Step 9: Finalize the Upper Design
Ch 1, turn, sc in each stitch across (13 sc). This completes the upper portion where your crochet baby shoes start to exhibit their unique style. Be mindful of the stitch count to maintain an even look throughout this section.

Step 10: Prepare for Assembly
Ch 1, turn, and work 1 sc in the first 3 stitches, then dec, sc in the next 7 sts, and dec (11 sc). You're now ready to prepare the shoes for the straps, making sure they have the optimal shape for easy wear and removal.

Step 11: Creating the Strap
Ch 1 and work 15 sc in a chain row. This strap will add both functionality and charm to your crochet baby shoes. Ensure this piece is long enough to comfortably secure the shoe while allowing adjustment for a perfect fit on your baby’s foot.

Step 12: Assembly of the Shoes
Position the straps on the upper, joining the ends securely with a sl st, and weave in any remaining yarn tails to finish. Once assembled, your adorable crochet baby shoes are ready for little feet to flaunt their cozy style.

Crochet Baby Shoes Variations & Substitutions

Embrace your creativity with these delightful crochet baby shoes, and add your personal touch to this charming project!

  • Yarn Weight Swap: Consider using sport weight yarn for a lighter shoe that’s perfect for warmer weather.
  • Color Variations: Opt for pastel yellows or soft greens to create a unisex style; they will add a fresh twist.
  • Striped Pattern: Incorporate stripes using contrasting colors for a fun and playful design that children will love.
  • Embellishments: Add a decorative bow or a cute flower embellishment to the strap for an extra layer of charm and adorableness.
  • Different Sizes: Adjust the foundation chain length for a custom fit, ensuring these shoes grow with your little one.
  • Textured Edges: Introduce a simple textured border or a scalloped edge to elevate the design and create a more polished finish.
  • Fringed Decor: Adding small fringe details along the strap could make these shoes even cuter and enhance their playful quality.
  • Personalized Touch: Consider crocheting the baby’s initials as a lovely touch that transforms these shoes into a truly special keepsake.

How to Wash and Care for Your Crochet Baby Shoes

Machine Washing: Use cold water and a gentle cycle to wash your crochet baby shoes. This helps maintain their softness while preventing any potential felting or pilling.

Hand Washing: For a more delicate approach, lightly hand wash your crochet baby shoes in cool water with mild detergent. Gently squeeze to remove excess water without wringing or agitating the yarn.

Drying/Blocking: Lay your shoes flat on a clean towel to dry, reshaping them as needed. Avoid hanging to prevent stretching, ensuring they keep their adorable form for little feet.

Storage: Store in a cool, dry place away from direct sunlight to preserve color and softness, making sure these lovely crochet baby shoes remain a cherished gift for years to come.

What to Pair with Adorable Crochet Baby Shoes?

As you stitch these delightful crochet baby shoes, consider adding more charming accessories to create an inviting baby ensemble.

  • Matching Baby Hat: A cozy, topped-off piece to keep little heads warm, complementing the same color and yarn texture.
  • Cute Baby Blanket: Wrap up your little one in a warm hug that matches the soft aesthetic of the shoes. The blanket will be both functional and stylish, ensuring comfort during nap times.
  • Handmade Baby Booties: Another playful footwear option that can feature fun patterns or colors, ideal for coordination with the shoes. Perfect for mix and match days!
  • Charming Baby Rattle: Craft a sweet, soft rattle using the same yarn for a cohesive baby gift set that brings joy and playtime imagination.
  • Stylish Cardigans: A snug little cardigan to layer over outfits adds warmth and complements the practicality of those crochet baby shoes beautifully.

Consider these project pairings to round out your crafting adventure while keeping your little ones cozy and chic!

Expert Tips for Crochet Baby Shoes

Check Your Gauge: Always measure your gauge before starting; the tension can significantly affect the final size of your crochet baby shoes.

Use a Stitch Marker: To maintain accuracy, place a stitch marker at the beginning of each round to prevent losing count, especially during transitions.

Keep Tension Even: Ensure your stitches are consistent throughout the project. Loose or tight stitches can lead to an improper fit and an uneven appearance.

Tight Cast-Off: Use tight cast-off techniques at the end of rows to prevent any loose stitches that may unravel over time.

Block Your Work: After finishing, blocking the shoes helps shape them properly, giving a more polished and professional finish.

Avoid Common Mistakes: Be mindful of losing the first or last stitch while counting; always double-check your counts for smooth progress.

Crochet Baby Shoes FAQs

Can I use a different yarn than the recommended soft baby yarn?
Absolutely! You can replace the soft baby yarn with a different DK-weight yarn, such as cotton or acrylic. Just be sure to check your gauge and adjust your hook size if necessary to achieve similar dimensions.

How can I make the crochet baby shoes bigger or smaller?
Adjusting the size is quite easy! To make them larger, add stitches to your foundation chain or increase the number of rounds in the sole and upper sections. Conversely, for smaller shoes, reduce your foundation chain length and stitch counts accordingly.

My crochet baby shoes are curling at the edges. What should I do?
Don't panic! Curling is often a sign of tension issues. Make sure you’re maintaining even tension throughout your project. If the curling persists, try blocking the finished shoes by wetting them and shaping them flat; it'll help eliminate the curl.

What hook size should I use if I don’t have a 3.0 mm crochet hook?
If you don't have a 3.0 mm hook, you can use a 2.75 mm or 3.25 mm hook as a substitute. Just be mindful that this may affect the size and fit of your crochet baby shoes, so checking your gauge is vital!

Why did I drop stitches while crocheting the upper?
It happens to the best of us! Dropping stitches can happen due to uneven tension or losing count. I recommend checking your stitch count as you go, and if you drop a stitch, don’t worry—simply pick it back up with your hook and carry on with your project!

How do I add decorative elements like bows or flowers to the baby shoes?
Adding embellishments is a wonderful way to personalize your crochet baby shoes! Simply crochet the embellishments separately and sew them onto the shoes using a darning needle. You can find numerous patterns for cute bows or flowers online that would beautifully complement your design!

Filed Under: Uncategorized

Quick Crochet Baby Hat with Adorable Bear Ears

August 23, 2026 by Publisher Leave a Comment

Quick Crochet Baby Hat with Adorable Bear Ears

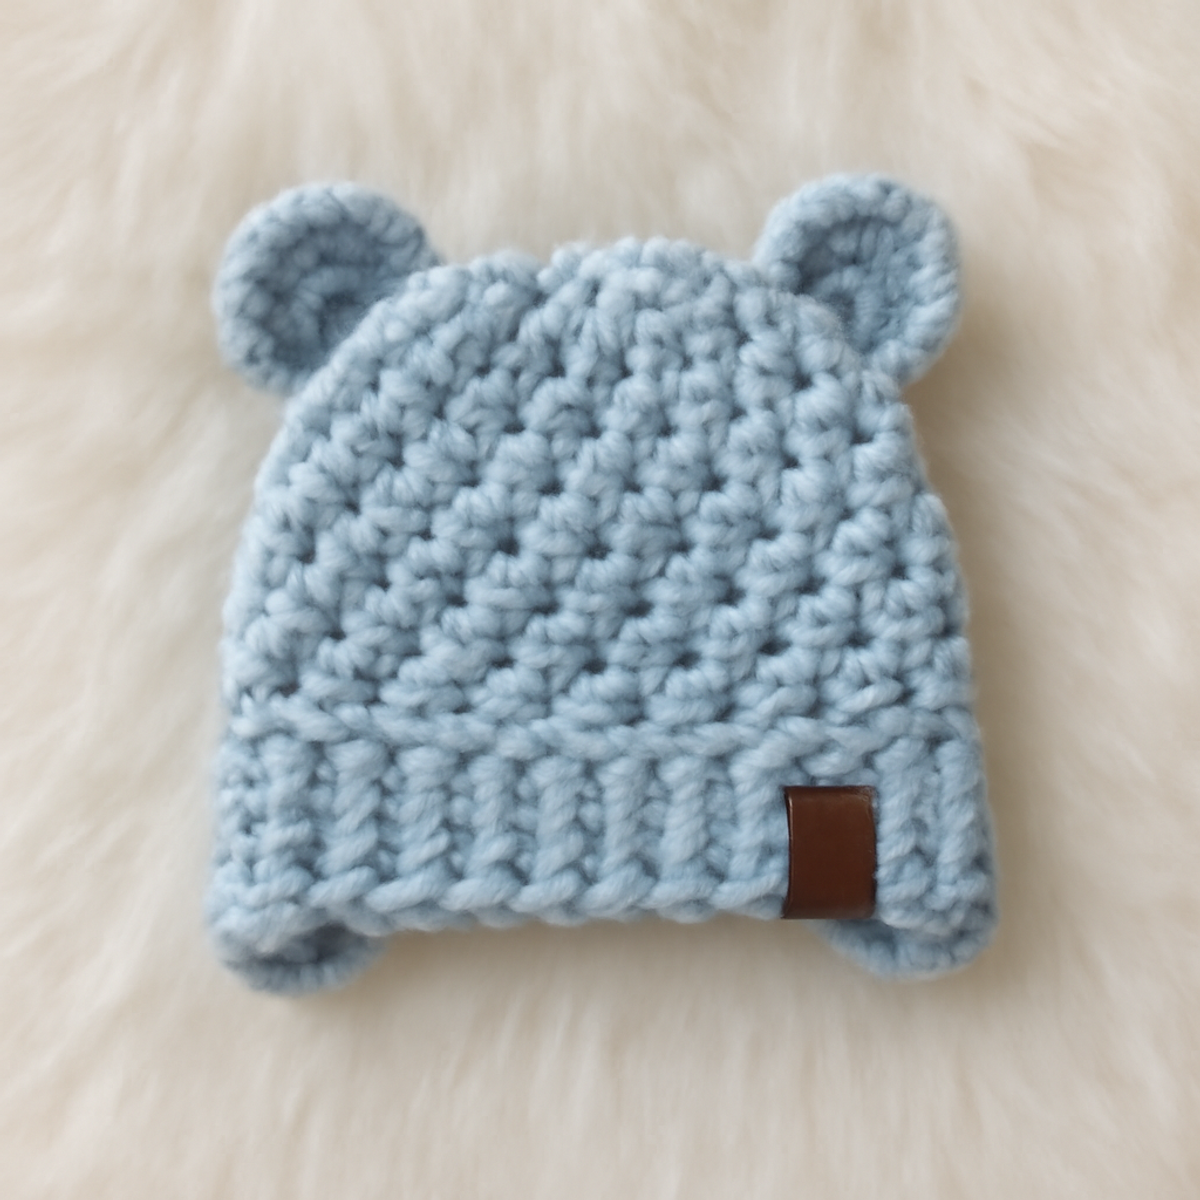
As I nestled into my favorite cozy corner with a steaming cup of tea, I found myself in need of a delightful project to fill my afternoon. That’s when the idea of this Quick & Cute Bear Ears Baby Hat struck me—what better way to embrace the chillier months than to create an adorable accessory for little ones? This crochet baby hat is not only practical but also carries an enchanting charm with its playful bear ears, making it a perfect gift or keepsake. Best of all, it works up in about thirty minutes, so you can whip up several in a jiffy! With its soft, chunky texture and cozy fit, this hat keeps babies snug while adding a whimsical touch to any outfit. Let's dive into this delightful pattern, and soon you'll be making cute hats that will surely warm hearts as well as heads!

Crochet Baby Hat Materials & Tools

  • Bulky Weight Yarn (5) – Approximately 80-100 yards will suffice for one hat; choose a soft acrylic or cotton blend to suit delicate baby skin.

  • 6.5mm (K-10.5) Hook – This size is perfect for the chunky texture illustrated in the design, enabling easy and quick stitches.

  • Small Leather Tags/Embellishments – Consider adding these for a polished finish, giving your crochet baby hat that professional touch.

  • Scissors & Yarn Needle – Essential for cutting yarn and weaving in ends to keep your project tidy.

  • Stitch Markers – Helpful for tracking your rounds, ensuring accuracy, particularly with increases.

These materials will empower you to create an adorable crochet baby hat that is both cozy and charming for your little one!

Why Will You Adore This Crochet Baby Hat?

Simplicity at Its Best: The pattern is easily approachable for beginners, making it perfect for those new to crochet.

Adorable Aesthetic: With charming bear ears, this hat is sure to elicit smiles and joy, perfect for photos and special occasions!

Quick to Create: You can whip them up in about thirty minutes, ideal for last-minute gifts or cozy additions to your baby wardrobe.

Cozy & Warm: The use of bulky yarn ensures a plush texture, keeping little ones warm without feeling heavy.

Versatile Styling: Create various color combinations and sizes, making it a fantastic option for all baby outfits and seasonal styles!

Perfect for Gifting: These delightful hats are ideal for baby showers or holidays, offering a thoughtful and handmade touch that parents will cherish.

Gauge & Sizing Notes

Don't skip the gauge swatch! Ensuring your tension is just right is essential for the crochet baby hat to fit snugly and comfortably on your little one’s head. Generally, a tension swatch of 4×4 inches (10×10 cm) should yield about 12 single crochets by 10 rows; however, checking your own gauge with the yarn and hook size used is always wise. If you'd like to make this hat larger or smaller, simply adjust the starting round by increasing or decreasing the number of magic circle stitches by multiples of 10 for a closer fit. If your swatch is smaller than expected, try using a larger hook size to obtain the desired dimensions!

Step-by-Step Pattern for Quick Crochet Baby Hat with Adorable Bear Ears

Row 1: Starting the Crown
Begin by creating a magic circle. Work 10 single crochet (sc) stitches into the magic circle, pulling the circle tight to secure the stitches. This will form the crown of your crochet baby hat. Your work should feel compact, and you should have 10 stitches in total.

Round 2: Increasing the Base
Join with a slip stitch (sl st) to the first sc, then chain 1. In this round, make 2 single crochets (sc) in each stitch around (20 sc). Your hat will start to widen, giving it a lovely rounded shape. At the end of this round, you should have 20 stitches.

Round 3: Continue to Expand
Join with a sl st to the first sc, then chain 1. In this round, work (1 sc in the first stitch, 2 sc in the next) around (30 sc). This increase will add more circumference to your crochet baby hat, ensuring it fits comfortably. Your work should start to look like a small bowl.

Round 4: Further Expansion
Join with a sl st to the first sc, chain 1. For this round, work (1 sc in the first two stitches, 2 sc in the next) around (40 sc). Continue expanding the base of the hat, maintaining a smooth curve towards the edges. You'll now have 40 stitches.

Rounds 5-8: Building the Body
Join with a sl st to the first sc, then chain 1. For the next four rounds, simply work 1 single crochet (sc) in each stitch around without any increases (40 sc). Your crochet baby hat will begin to rise, reaching the length needed for a snug fit.

Round 9: Starting the Bear Ears
Join with a sl st to the first sc, chain 1. To create the bear ears, work 5 double crochets (dc) in the first stitch, then skip 3 stitches and join with a sl st in the next stitch. Repeat this for the other side, finishing with 2 bear ears. Your hat will take on an adorable shape.

Row 10: Edging the Brim
Slip stitch (sl st) into the top of the first ear to secure, then chain 1. Work 1 sc in each stitch around the hat, including around the bear ears, to create a clean, finished edge (40 sc). Your crochet baby hat will have a charming and polished look, perfect for gifting.

Crochet Baby Hat Variations & Substitutions

Embrace your creativity and customize this charming crochet baby hat to suit your little one's personality!

  • Yarn Weight Swaps: Try a worsted weight (4) yarn for a lighter hat perfect for spring days. Adjust your hook size accordingly for the best results.

  • Fiber Alternatives: Use a cotton blend instead of acrylic for a breathable option in warmer months, keeping your baby cool and comfortable.

  • Color Blocking: Mix and match colors for a vibrant effect by changing yarn every few rows. This playful twist will surely add a unique flair to your design.

  • Size Adjustments: Tailor the size by altering the number of stitches in the magic circle. Add more stitches for larger sizes suitable for toddlers.

  • Textured Ears: Incorporate a textured stitch like popcorn or cluster stitches for the bear ears, creating a fun visual dimension that stands out.

  • Fringe Finishing Touch: Add playful fringe along the brim for a touch of whimsy—just cut pieces of yarn, fold them over, and secure them tightly.

  • Pom-Pom Delight: Top off your crochet baby hat with a fluffy pom-pom for an extra dose of cuteness. It’s a quick finishing detail that adds charm!

  • Decorative Border: Enhance the brim with a simple shell or scalloped border for a polished look that gives your hat a professional touch.

Let these variations inspire your personal spin on this adorable crochet baby hat!

Expert Tips for Crochet Baby Hat

  • Keep Tension Even: Consistent tension ensures a uniform fit across the hat. Looser stitches can lead to a larger, misshapen hat; practice makes perfect!

  • Count Your Stitches: Regularly checking your stitch count every few rounds is vital, especially after increases. This helps maintain the intended dimensions for a snug crochet baby hat.

  • Block Before Gifting: Consider blocking the finished hat to enhance its shape and texture. This simple step gives it a polished finish, ensuring the ears hold their charming look.

  • Use Stitch Markers: Place stitch markers at the beginning of each round or where increases occur. This will help you keep track of your progress, preventing mistakes and lost stitches.

  • Avoid Twisted Chains: When starting your magic circle, make sure your foundation chain isn't twisted. A twist can lead to an awkward fit, so take a moment to double-check!

What to Pair with Quick & Cute Bear Ears Baby Hat

As you settle into your crafting rhythm, consider creating a delightful ensemble to match this charming baby hat.

  • Matching Booties: A pair of cozy booties in the same yarn adds an adorable touch for a complete look.
    Make those little toes just as snug and stylish as their head!

  • Playful Blanket: A soft baby blanket featuring the same colors will beautifully complement the hat while keeping baby warm.
    This cocoon of comfort is perfect for wrapping up your little one!

  • Sweet Headbands: Crocheted headbands adorned with bear ears or matching colors are a super cute addition that makes a lovely set.
    They bring extra charm to those fun photo moments!

  • Charming Cardigans: A simple, textured cardigan in a similar yarn can pair perfectly, providing a cozy layer for outdoor adventures.
    Imagine your little one bundled up, radiating warmth and charm!

  • Colorful Bows: Create vibrant bows to clip onto outfits, matching the hat's aesthetic and adding flair to any look.
    These delightful accents will elevate any outfit while staying playful!

How to Wash and Care for Your Crochet Baby Hat

Machine Washing: Use cold water on a gentle cycle to prevent any agitation that could lead to felting or pilling the yarn of your crochet baby hat.

Hand Washing: For better care, immerse the hat in cold water mixed with a mild detergent. Gently agitate, ensuring it's lovingly cleaned without damaging the soft texture.

Drying/Blocking: Lay the crochet baby hat flat to dry on a clean towel. Avoid hanging, as it could distort the shape, especially around the adorable bear ears.

Storage: Keep the hat in a cool, dry place, ideally in a breathable cotton bag. This helps maintain its shape and softness while preventing dust accumulation.

Quick Crochet Baby Hat with Adorable Bear Ears FAQs

Can I use a different yarn weight instead of bulky?
Absolutely! While bulky yarn gives it a cozy feel, you can opt for a worsted weight (4) yarn for a lighter hat. Just keep in mind that you'll need to adjust the hook size and may need to modify the stitch count to achieve the right size for your crochet baby hat.

How do I make the crochet baby hat larger or smaller?
To resize the hat, simply adjust the number of stitches in your magic circle. For larger sizes, start with more stitches, and for smaller sizes, reduce the initial stitches. This way, you can create a hat that perfectly fits the intended little one!

Why is my work curling at the edges?
Don't panic! Curling often occurs if your tension is too tight or if you’re using a yarn that’s too stiff. Check your tension; loosening it when creating those rounds could help! Additionally, adding a few rounds of single crochet around the brim can also help to flatten it out.

What if I drop a stitch while crocheting?
It’s an easy fix! If you notice a dropped stitch, gently pull on the yarn to create some slack, and use your hook to grab the yarn from below the dropped stitch, bringing it back up to the working row. Always try to keep your tension consistent to help prevent this from happening in the future.

What hook size is best for this yarn?
For the bulky weight (5) yarn used in this crochet baby hat, a 6.5 mm (K-10.5) hook is ideal. This size lets you crochet comfortably while producing the plush texture that keeps your little one warm and cozy!

Can I embellish my crochet baby hat?
Absolutely! Adding embellishments such as small leather tags, fabric flowers, or cute buttons can give your hat a personal touch. Just ensure that any embellishments are securely attached and safe for babies to wear!

Filed Under: Uncategorized

Cozy Crochet Fox Pattern: Cuddle Your New Plush Friend

August 23, 2026 by Publisher Leave a Comment

Cozy Crochet Fox Pattern: Cuddle Your New Plush Friend

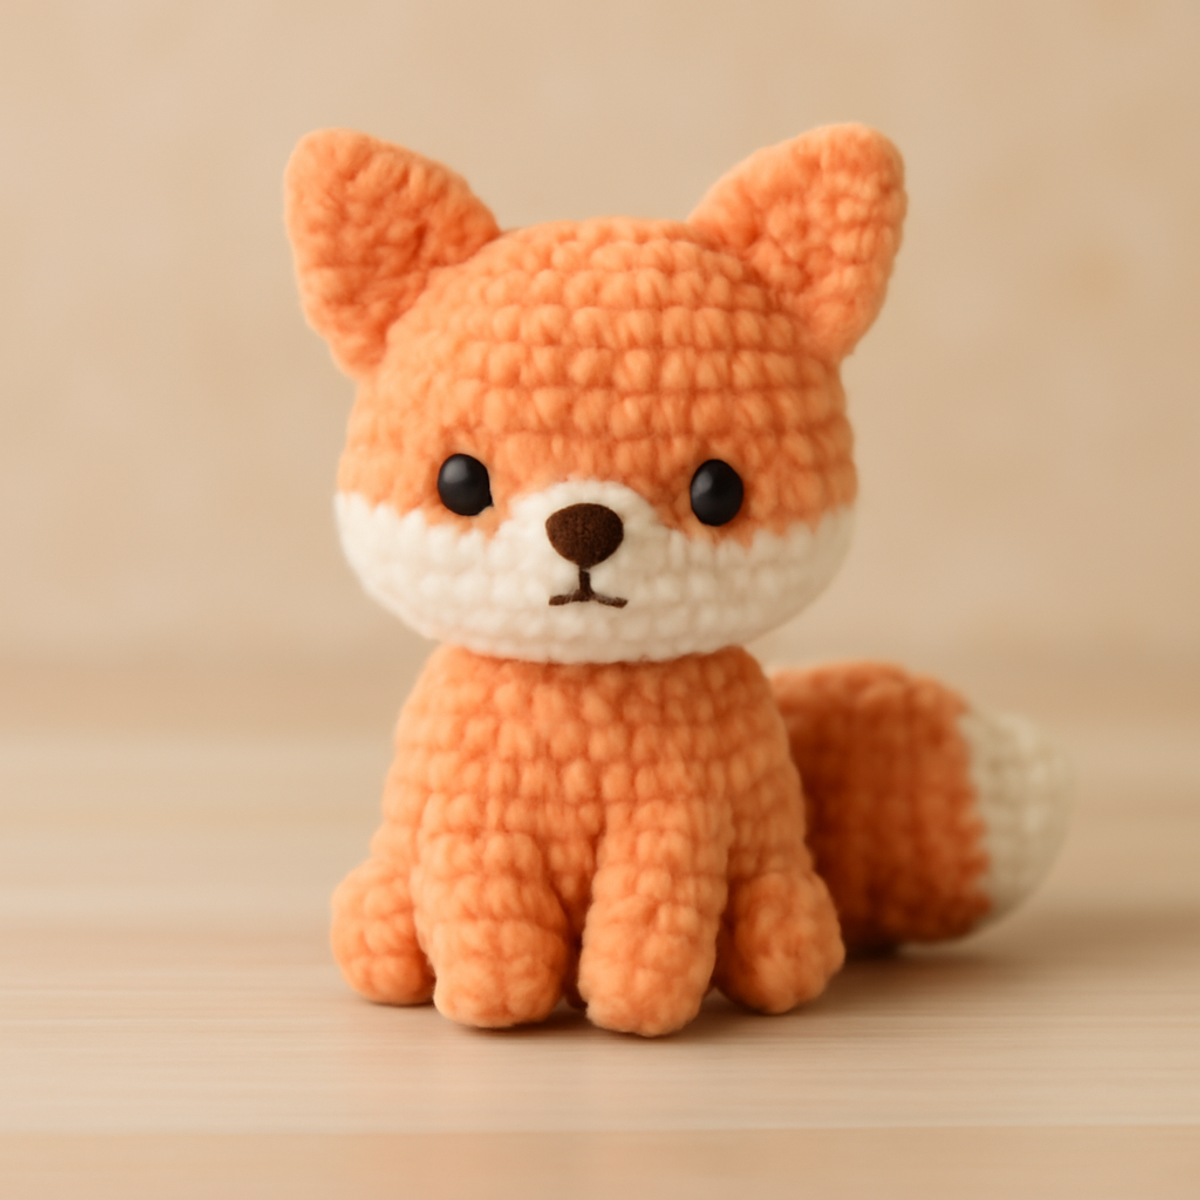
As I settled into my favorite crochet nook, the soft feel of plush yarn slid through my fingers, inspiring me to create something adorable. Today, I’m excited to share my crochet fox pattern, a delightful project perfect for both beginners and intermediates eager to dip their hooks into amigurumi. Not only does this charming little fox boast a cuddly texture and playful appearance, but its simple construction makes it a joy to create. Plus, you’ll love the opportunity to add your unique flair with embellishments like safety eyes and embroidered facial features. Imagine gifting this whimsical toy as a nursery decoration or charming collectible; it’s bound to bring smiles all around! Ready to start stitching up your own lovable fox? Let’s dive in!

Cozy Crochet Fox Materials & Tools

  • Plush or Chenille Yarn – Choose yarn in peach, orange, white, and brown for that soft texture essential for your crochet fox pattern; you'll need approximately 150-200 yards total based on desired size.
  • 4.0mm (G) Crochet Hook – This hook size is perfect for achieving tight stitches to ensure stuffing doesn't show through your stitches.
  • 10mm Safety Eyes – These add whimsical character to your fox; make sure to sew them securely for safety.
  • Polyester Stuffing – Use this to give your fox a cuddly, squishy surface that little hands will love.
  • Scissors – A sharp pair is essential for cutting yarn and finishing your cute plush toy.

Why is this crochet fox pattern special?

Adorable charm: The finished fox toy captures hearts with its playful look and friendly smile, making it irresistible for both kids and collectors.

Beginner-Friendly: Combining simple stitches with easy assembly, even novice crocheters can successfully create this delightful project without getting overwhelmed.

Plush Texture: Crafted from soft chenille yarn, this fox has a cozy feel, perfect for cuddling and snuggling.

Endless Customization: Change up the colors or add fun accessories to make your fox unique, allowing for creativity in every stitch.

Quirky Gift: Ideal for any occasion, this fox makes a whimsical gift or charming nursery decoration that brings joy to any space.

Gauge & Sizing Notes

Don't skip the gauge swatch! Checking your tension is essential for this crochet fox pattern to ensure you achieve the desired size and cuddly texture. Generally, aim for a gauge of 4×4 inches (10×10 cm) to help keep everything consistent. If you want to tweak your fox's dimensions, consider adjusting your starting chain in multiples of 6; for example, to make a rounder body, simply add an extra 6 stitches. If your tension is not matching the gauge, and your swatch is coming out too small, try going up a hook size to loosen your stitches a bit. This way, you'll create a perfect plush companion!

Step-by-Step Pattern for crochet fox pattern

Row 1: Magic Ring Setup
Start with a magic ring (or adjustable loop) and work 6 single crochet (sc) stitches into it, ensuring to pull the yarn tail to tighten the ring. This forms the beginning of your crochet fox's head. Your work should start to curl into a small circle. (6 sts)

Row 2: Increasing for Shape
In this round, do an increase by placing 2 sc in each stitch around. This will help your head to expand and form a soft round shape. Make sure to count your stitches as you go along, keeping them tight so the stuffing doesn’t show. (12 sts)

Row 3: Continuing to Increase
Round 3 will involve doing 1 sc in the first stitch, followed by an increase (2 sc in the next stitch). Repeat this pattern for the entire round. You should notice your work widening, continuing to build a round head for your crochet fox. (18 sts)

Row 4: More Shaping
For Round 4, work 1 sc in the first two stitches, followed by an increase. Repeat across until you complete the round. This gradual increase helps maintain a smooth shape, essential for your fox's head. Your round should feel fuller now. (24 sts)

Row 5: Starting to Form the Face
In Round 5, make 1 sc in the first three stitches, followed by an increase. Continue this to the end of the round for a nice rounded form. You should see the head beginning to take a lovely shape. (30 sts)

Row 6: Begin Decreasing
To start shaping the fox's head, Round 6 will feature 1 sc in the first four stitches, followed by a decrease (dec). This helps to narrow the top of the head while maintaining a smooth curve. Your work will begin to gather. (24 sts)

Row 7: Continuing Decrease
For Round 7, work 1 sc in the first three stitches, then a decrease. Repeat this pattern until you've made it around the round. The head should be starting to look more defined and rounded for your adorable fox. (18 sts)

Row 8: Final Shaping
Complete Round 8 by placing 1 sc in the first two stitches followed by a decrease. Continue this pattern to finish the head. Pinch your work slightly to check the depth; it should be starting to look more fox-like. (12 sts)

Row 9: Adding Safety Eyes
Before closing up the head, insert your safety eyes between the 9th and 10th rounds, spaced appropriately to form the face. Now is your chance to personalize your crochet fox by adjusting placement and stance!

Row 10: Final Decrease and Stuffing
Round 10 involves doing a decrease all the way around. Before your last stitch, stuff the head firmly with polyester stuffing, giving it a nice shape. Ensure it’s rounded yet firm to the touch for a cuddly feel. (6 sts)

Step 2: Transition to Body
Next, we will be creating the body of your fox. To do this, chain 1 and crochet 6 sc into the base of the head. This transition links the head and body seamlessly, guiding your work down. (6 sts)

Row 12: Building the Body
For Round 12, increase each stitch by 2 sc around. This will create a wider body for the plush toy, enhancing its cuddly appearance. The shape should resemble the beginning of a small dome. (12 sts)

Row 13: Continuing the Body
In Round 13, make 1 sc in the first stitch followed by an increase, repeating until the end of the round. By now, the body of your toy is taking form and should be puffy and inviting! (18 sts)

Row 14-15: Establishing Form
In the next two rounds (14 and 15), sc in each stitch around. This will help establish the body size, providing stability and the squishiness desired in your crochet fox pattern. (24 sts for Round 14, 24 sts for Round 15)

Step 3: Legs
Now let’s move on to create the four legs. To start the legs, chain 1 and crochet into the body’s bottom with 6 sc in a single round, establishing a sturdy base. (6 sts)

Row 17: Shaping the Legs
For Round 17, increase by adding 2 sc into each stitch around. As you work, keep your tension even to ensure the legs don’t become loose. Your legs should appear nice and chunky! (12 sts)

Row 18: Continuing Legs
In Round 18, sc 1 in each stitch around again for a stable structure. With each stitch, you’ll be creating a nice hold for the legs, ensuring they remain sturdy on this cuddly fox. (12 sts)

Step 4: The Tail
To create the tail, chain 1, and work 6 sc into a magic ring, following the same method as you did for the head. This will form the base before adding fluff. (6 sts)

Row 20: Fluffy Tail
For Round 20, do an increase of 2 sc in each stitch around. This round will ensure the tail looks nice and fluffy once you stuff it. Your tail should begin to take shape, becoming a perfect little addition to your fox! (12 sts)

Row 21-22: Completing the Tail
In the next two rounds (21 and 22), continue with sc in each stitch, thoroughly stuffing as you go. Your tail should look wonderfully plush, complementing the rest of the body. (18 sts for Round 21, 18 sts for Round 22)

Step 5: Ears Assembly
For the ears, chain 1 and create a magic ring with 6 sc in the ring. This will form the base for your fox's adorable ears. (6 sts)

Row 24: Shaping Ears
In Round 24, do an increase of 2 sc in every stitch around. As you shape the ears, they should begin to flare out, giving your fox a cutely expressive look. (12 sts)

Row 25-26: Final Ear Touches
For the next two rounds (25 and 26), alternate between 1 sc in each stitch and an increase to give the ears a well-defined shape while making sure they stay securely attached. (18 sts for Round 25, 18 sts for Round 26)

Step 6: Final Assembly
Now it’s time to assemble your cute crochet fox! Start by sewing the legs securely to the body, ensuring they are spaced evenly. Next, attach the head to the body and sew on the ears, ensuring they have a friendly lift.

Step 7: Embellishments
Finish your cozy crochet fox pattern by embroidering the facial features like the nose and mouth. This final touch gives your fox its charming personality and truly completes your adorable project!

What to Pair with Your Crochet Fox Pattern

Imagine wrapping your cozy fox in a delightful array of matching accessories that enhance the playful charm of your creation.

  • Plush Rabbit Toy: Create a cuddly rabbit to accompany your fox, using similar yarn to maintain that heartwarming aesthetic.

  • Whimsical Blanket: A vibrant crochet blanket makes the perfect backdrop for your fox, providing warmth and a cozy spot for playtime.

  • Matching Hat: Design a tiny hat for your fox, using leftover yarn for a customizable touch that showcases your creativity.

  • Charming Storage Basket: Crochet a small basket in complementary colors to keep your fox’s friends organized, adding a decorative touch to any room.

  • Sweet Baby Booties: Pair your fox with adorable booties made from the same soft yarn, perfect for little ones and their cuddly companion.

Expert Tips for Your Crochet Fox Pattern

  • Keep Even Tension: Maintain consistent tension throughout your work to help the plush fabric hold its shape, ensuring a cuddly and visually appealing fox.

  • Count Your Stitches: Regularly count your stitches, especially on the head and body rounds. This prevents discrepancies that could alter the fox's proportions.

  • Secure Assembly: As you sew the legs, head, and ears, ensure they are firmly attached. This durability is important, especially for your fox being a toy for play.

  • Insert Safety Eyes Early: Position your safety eyes before closing the head. Adjust the placement if needed, as these embellishments bring your crochet fox to life.

  • Stuff Firmly: When stuffing, aim for a rounded yet firm feel to help maintain the plush look of your crochet fox pattern, making it snuggly and durable.

Crochet Fox Pattern Variations

Want to add a personal touch to your crochet fox? Let’s explore some fun and creative ideas!

  • Color Swaps: Change the color palette to create different fox species, like a gray or arctic fox. Play with combinations like toasty browns or icy whites for unique personalities!

  • Yarn Alternatives: Try cotton yarn for a firmer feel or bamboo for a silky touch. Each fiber will transform your fox's appearance and texture, making it truly yours.

  • Size Adjustments: Alter the finished size by adjusting your hook or yarn weight. A bulkier yarn with a larger hook could result in a cuddly giant, while a smaller weight offers a delicate mini fox.

  • Accessory Love: Adorn your fox with knitted or crocheted hats, scarves, or even tiny sweaters. Seasonal themes can sprinkle delightful character, making your fox suitable for any time of year.

  • Textured Enhancements: Add fun embellishments like pom-poms on the tail, fringes on the ears, or a stylish border around the base for added flair. Each option brings a new level of charm!

  • Whimsical Features: Go beyond safety eyes by experimenting with embroidered or felted features. A different nose shape or expressive eyebrows can give your fox even more personality!

  • Ribbon or Bow: Attach a cute ribbon or bow around the neck for a sweet finishing touch. This simple addition can elevate your fox to a celebratory gift or keepsake.

  • Grouped Scene: Consider crafting a family of foxes in various sizes and colors for a playful display! This creates a lively group that will surely delight anyone who sees them.

How to Wash and Care for Your Crochet Fox

Machine Washing: Use a gentle cycle in cold water to keep your crochet fox looking fresh without risking felting or pilling. Always place it in a mesh laundry bag for extra protection.

Hand Washing: If you prefer, wash your crochet fox by hand in cold water with a mild detergent. Gently press to remove dirt, ensuring not to agitate, which helps maintain its lovely shape.

Drying/Blocking: After washing, lay your crochet fox flat on a clean, dry towel to dry. Avoid hanging, as this can distort its adorable form and keep it looking plush.

Storage: Store your crochet fox in a cool, dry place, away from direct sunlight and moisture. This keeps it safe and ready for cuddles anytime, while preserving the quality of your crochet fox pattern.

Cozy Crochet Fox FAQs

Can I substitute yarn types for this crochet fox pattern?
Absolutely! While plush or chenille yarn is recommended for its soft texture, you can experiment with other yarns like cotton for a firmer option or wool for added warmth. Just be mindful that different yarns may affect the final size and overall feel of your fox.

What size hook should I use for the crochet fox pattern?
I recommend using a 4.0 mm crochet hook (US size G) to achieve tight stitches that prevent stuffing from showing through. However, if you decide to use a different yarn weight, consider adjusting your hook size accordingly to match the recommended tension for that yarn.

How can I make my fox bigger or smaller?
Great question! To alter the size of your crochet fox, you can use a different yarn weight or hook size. For a larger fox, opt for bulkier yarn and a larger hook. Conversely, if you want a smaller fox, use a lighter yarn and a smaller hook. Just remember to adjust your stitch counts to maintain the shape as you go!

Why is my crocheted fox’s body curling?
Don't panic! Curling can often result from uneven tension or using a hook that's too small for your yarn. Make sure you're maintaining consistent tension, and check that your hook size matches the recommended gauge for your yarn. A quick check of your stitch count can also help identify any inconsistencies.

What should I do if I drop a stitch while working on the fox?
It's an easy fix! If you notice a dropped stitch, carefully pull the yarn back to the last complete row, and reinsert your hook into the dropped stitch. You can then work to fix it by crocheting back to the previous row, ensuring everything stays neat and secure.

How do I attach the safety eyes correctly?
When placing the safety eyes, do so before closing up the head. I recommend positioning them between the 9th and 10th rounds since this spot provides an adorable placement for the facial features. Ensure they are spaced evenly for a balanced look, and secure them tightly for safety!

Filed Under: Uncategorized

Cute Pocket Capybara Crochet: A No-Sew Amigurumi Project

August 23, 2026 by Publisher Leave a Comment

Cute Pocket Capybara Crochet: A No-Sew Amigurumi Project

As I sat with my yarn and hook, a spark of whimsy took hold: the urge to create a pocket capybara crochet companion! This delightful amigurumi is more than just a cute little character; it’s a pocket-sized bundle of joy that will warm your heart and perhaps even earn the title of “best gift ever.” Perfect for beginners and those with a bit of experience, the straightforward construction means no sewing is required—making this project an easy, cozy endeavor. Not only will you master the basics of amigurumi while crafting, but you’ll also unleash your creativity through unique color combinations and fun finishing touches. Ready to dive into this adorable adventure and bring your own pocket capybara to life? Let's get crocheting!

Pocket Capybara Crochet Materials & Tools

  • Worsted Weight Yarn – Approximately 100-150 yards of tan yarn for the body, plus about 20 yards of darker brown yarn for accents.
  • 4.0mm (G) Crochet Hook – Recommended size to achieve the perfect gauge for this pocket capybara crochet project.
  • Safety Eyes (12mm) – Optional, but these add delightful character to your capybara; choose any color to express its personality!
  • Stitch Marker – Handy for tracking rounds, especially useful during the increasing and decreasing stages.
  • Fiber Fill – Essential for stuffing, giving your capybara its cuddly shape without overstuffing.

Why Will You Adore This Capybara?

Whimsical Design: The playful charm of this pocket capybara crochet project brings a smile to your face, making it a delightful addition to any crafting session.
No-Sew Construction: With no sewing required, beginners will find this pattern easy to follow, allowing you to focus on enjoying the creative process.
Portable Size: Measuring about 4 inches long, this cute companion is perfect for on-the-go cuddles or as a charming decoration for your home.
Creative Freedom: Experiment with colors and accessories, like little scarves, to personalize your capybara and make it truly your own!
Skill Builder: This project enhances your amigurumi skills while providing a fun and satisfying crafting experience that you’ll want to repeat.

How to Check Your Gauge for Pocket Capybara Crochet

Don't skip the gauge swatch! Checking your tension is crucial for the pocket capybara crochet project to ensure that your adorable amigurumi turns out just the right size. A general guideline suggests aiming for about 6 stitches per inch (2.5 cm) in single crochet. If you find that your swatch is smaller than expected, try using a larger hook size; if it’s too loose, consider going down a hook size. To alter the final size of your capybara, adjust your starting chain or increase your stitches in multiples of 6. This way, you can create a pocket capybara that’s perfectly tailored for cuddles!

Step-by-Step Pattern for Pocket Capybara Crochet

Row 1: Magic Ring Base
Start by creating a magic ring. Work 6 single crochets (sc) into the ring and pull it tight to close. Your work should start to curl slightly as you form the base of the pocket capybara crochet. Remember to use a stitch marker to keep track of your first stitch in subsequent rounds (6 sts).

Row 2: Increasing the Base
In the next round, make 2 single crochets in each stitch around (inc). Continue counting as you go, ensuring your circle remains flat and even. By the end of this round, you should have a total of 12 stitches, and your work will begin to form a small circular base (12 sts).

Row 3: Building Up the Body
For this round, work 1 single crochet in the first stitch, then inc in the next; repeat this pattern around. This gradual increase will shape the capybara as it grows taller. By completing this round, you will have 18 stitches, with the base starting to rise (18 sts).

Row 4: Continuing the Body Shape
Now, work 2 single crochets in the first stitch followed by 1 single crochet in each of the next 2 stitches, repeating this sequence for the round. Your pocket capybara crochet should begin to take on a more cylindrical shape by now, measuring around 2 inches tall (24 sts).

Row 5-8: Elevating the Body
For rounds 5 through 8, you will be crocheting 1 single crochet in each stitch around without any increases. This will form the main body of the capybara, giving it a nice height. After completing round 8, you should have a total of 24 stitches (24 sts).

Row 9: Shape the Head
For this round, start reducing by working 1 single crochet in each of the first 2 stitches followed by a decrease over the next two stitches (dec). This will help to taper the shape towards the head of your pocket capybara crochet. You should end up with 18 stitches (18 sts).

Row 10: Finishing the Head
In the next round, work 1 single crochet in each of the first 3 stitches, followed by a decrease. Repeat around. This round continues to shape the head of the capybara; the top should start to taper off as the stitches decrease to a total of 12 (12 sts).

Row 11: Preparing for Stuffing
Work 1 single crochet in each of the first 2 stitches, and then work a decrease; repeat this pattern. This will help to form a snug head for your pocket capybara crochet, and you’ll end up with 8 stitches, making it easier to stuff later on (8 sts).

Final Round: Closing the Head
For the last round, work a simple decrease in each stitch around until the opening is completely closed. Pull tightly and fasten off. Give your completed head a gentle stuffing that maintains softness while ensuring the shape remains as you work on the ears and feet next (4 sts).

Step 12: Ears
To create the ears, begin with a magic ring and crochet 6 single crochets into it. In the following round, make 2 single crochets in each stitch to form small, rounded ears. After this round, fasten off, leaving a long tail for sewing, but remember we’re minimizing sewing for the pocket capybara crochet, so keep it simple (12 sts).

Step 13: Feet
For each foot, start with a magic ring and crochet 5 single crochets. Next, work a round of increasing stitches (inc) to form a wider base. After 2 rounds, fasten off and leave a tail to attach, keeping in line with our no-sew goal (10 sts per foot).

Step 14: Assembling the Capybara
Attach the ears by inserting the long tail at the top of the head and securing them with a few stitches. Next, position the feet evenly along the bottom and work the yarn tail through to attach securely beneath the body. Remember to keep your yarn tension relaxed to ensure a smooth finish.

Step 15: Final Details
Using the darker brown yarn, create small stitches for nostrils and then add safety eyes if desired. Secure the eyes and nose tightly—these small features bring your pocket capybara crochet to life, giving it character and charm. Enjoy your cuddly creation!

How to Wash and Care for Your Pocket Capybara

  • Machine Washing: Use cold water on a gentle cycle and place your pocket capybara crochet in a garment bag to protect its shape and features during the wash.

  • Hand Washing: If preferred, gently hand wash using cold water and mild detergent. Avoid agitation to keep your capybara intact and looking cute!

  • Drying/Blocking: Lay your amigurumi flat on a towel to dry, shaping it gently to preserve its adorable form without stretching or altering the stitches.

  • Storage: Store your pocket capybara crochet in a cool, dry place, preferably in a dust-free container to prevent any unwanted fuzz or pet hair from settling on your cuddly creation.

What to Pair with Pocket Capybara Crochet?

As you create this whimsical companion, consider crafting matching items for a delightful ensemble that showcases your amigurumi skills.

  • Amigurumi Friends: Create a small collection of adorable animal characters to keep your capybara company. Each friend brings a unique charm.

  • Cozy Tiny Blanket: A mini blanket crocheted in soft, coordinating colors adds warmth and comfort, perfect for snuggling with your new capybara.

  • Miniature Bow Ties: Crocheting little bow ties in vibrant shades can personalize your capybara, making it an extra special gift or display piece.

  • Cute Keychain: Transform your crochet skills into a pocket capybara keychain for a playful way to carry your creation wherever you go.

  • Colorful Amigurumi Accessories: Craft small hats or scarves to dress up your capybara, giving it a one-of-a-kind flair that reflects your creative touch.

Pocket Capybara Crochet Customizations

Let your imagination run wild as you explore these delightful variations for your pocket capybara crochet project!

  • Color Variations: Experiment with shades of grey or white for a unique capybara look, each choice bringing its own charm.

  • Accessory Additions: Adding a tiny scarf or bow will give your capybara an adorable personality and a touch of flair. Personalize it to make it uniquely yours!

  • Size Adjustments: Use a larger hook or heavier yarn to create a bigger version, or downsize with lace weight yarn for a mini capybara friend. It's a wonderful way to customize your project based on preference!

  • Texture Enhancements: Incorporate a fluffy yarn for a cozy texture or add pom-poms for extra cuteness—your pocket capybara will always look more delightful!

  • Eye Color Changes: Alter the color of your safety eyes to create unique expressions and give your capybara its own charming character. The little details bring it to life!

  • Funky Fringes: Introduce fringes or tassels around the neck, transforming simple into spectacular! Create a whimsical look that stands out on any shelf.

  • Mixed Yarn Types: Combine cotton and acrylic yarn for intriguing textures, resulting in a fun and vibrant capybara that's both cuddly and eye-catching.

  • Embellishments: Get creative with felt or fabric to make little accessories like hats or glasses, taking your capybara crochet to a whole new level of charm! Each piece will be a wonderful conversation starter.

Expert Tips for Pocket Capybara Crochet

  • Consistent Tension: Keep your tension even throughout your work to ensure a uniform shape and prevent stuffing from showing through, enhancing the overall look of your pocket capybara crochet.

  • Track Your Rounds: Use a stitch marker to keep track of your rounds, especially during increases and decreases; this helps maintain your stitch count and shape accuracy.

  • Gradual Stuffing: Stuff your capybara slowly and gradually. This allows you to achieve a pleasing roundness without overstuffing, which can distort the proportions of your pocket capybara crochet.

  • Secure Details: For safety eyes and nostrils, secure them tightly. This will ensure features don’t come loose, adding character while keeping your project safe to cuddle.

  • Count Twice: Before finishing a round, always double-check your stitch count. Losing count can lead to uneven shapes, and this simple habit can save you from frustrating corrections later on.

Pocket Capybara Crochet FAQs

Can I substitute yarn for my Pocket Capybara crochet?
Absolutely! You can easily swap out the worsted weight yarn for another type, such as acrylic or cotton. Just be mindful of the recommended yarn weight, as it affects the final size and texture. If you choose lighter yarn, your capybara will be smaller, so you might consider adjusting your hook size accordingly.

How can I adjust the size of my Pocket Capybara crochet?
If you want to create a bigger or smaller capybara, you can alter the yarn weight or hook size. Using a bulkier yarn with a larger hook will yield a larger plushie, while a finer yarn with a smaller hook will give you a petite version. Just remember to adjust your stitch count if you change the yarn type significantly.

My Pocket Capybara crochet work is curling. What should I do?
Don’t panic! Curling is often due to tight tension or not working in the round correctly. Check your stitch tension and try to keep it consistent throughout. If you find your stitches are unnaturally tight, consider switching to a hook one size larger to see if it helps your project lay flat.

How do I fix dropped stitches in my Pocket Capybara crochet?
It's an easy fix! If you drop a stitch, simply locate the missing loop and gently pull it back through your most recent row of stitches. You can also use a small crochet hook or a tapestry needle to pull the yarn back into place. Always double-check your stitch count afterward to keep your shape uniform.

What hook size should I use for the Pocket Capybara crochet?
For this project, I recommend a 4.0mm (G) crochet hook. This size works best with worsted weight yarn to achieve the pocket capybara's desired density and plushness. If you opt for lighter yarn, consider using a smaller hook to maintain a tight stitch structure.

Can I use different colors for my Pocket Capybara crochet?
Absolutely! One of the best parts about this project is the creative freedom you have. You can use any yarn color you like—pastels for a soft look or bold hues for a whimsical twist! Just ensure to keep some darker accents for the defining features, and let your creativity shine!

Filed Under: Uncategorized

Whimsical Ice Cream Cookie Turtle Amigurumi to Cuddle

August 23, 2026 by Publisher Leave a Comment

Whimsical Ice Cream Cookie Turtle Amigurumi to Cuddle

As I nestled into my favorite chair with a soft skein of plush yarn, the whimsical idea of an Ice Cream Cookie Turtle began to take shape. This delightful amigurumi project isn't just about creating a cuddly toy; it’s about infusing your space with charm and personality. Intermediate crafters will find this pattern a rewarding challenge, offering the joy of a fast finish and an adorable desk companion that brightens your day. With its soft, squishy texture and playful colors, this turtle brings a smile to both kids and adults alike. So let’s dive into the world of crochet and let your creativity swirl like sprinkles on top. Are you ready to bring this adorable creature to life?

Ice Cream Cookie Turtle Materials & Tools

Get ready to craft this delightful plushie with these essential supplies!

Yarn

  • Plush or Chenille Yarn – Approximately 150-200 yards total in white (for the turtle), brown (for the cookie), and dark brown or black (for cookie chips).

Tools & Notions

  • 5.0 mm (H/8 US) Crochet Hook – Perfect for achieving that soft, cuddly texture needed for the ice cream cookie turtle.
  • 14 mm Safety Eyes – These add charm to your turtle while ensuring safety for younger crafters.
  • Yarn Needle – Ideal for sewing and weaving in ends to give your project a polished finish.
  • Scissors – Necessary for cutting threads and yarn neatly as you work.

Why Make an Ice Cream Cookie Turtle?

Irresistible Charm: The playful design of the Ice Cream Cookie Turtle makes it an eye-catching addition to any space, elevating decor with its whimsical aesthetic.
Cozy Texture: Crafted with plush yarn, this cuddly toy invites touch and will quickly become a beloved companion.
Fun Challenge: As an intermediate project, it offers a rewarding opportunity to enhance your skills while creating a unique masterpiece.
Quick Satisfaction: With a fast finish, you'll relish the joy of completing this charming turtle in no time.
Customizable Delight: Personalize your turtle through color choices and expressions, making it truly one-of-a-kind!

How to Check Your Gauge for Ice Cream Cookie Turtle

Don't skip the gauge swatch! Checking your tension is crucial for your Ice Cream Cookie Turtle to ensure it turns out cozy and cuddly. A general guideline is to achieve a gauge of approximately 4×4 inches (10×10 cm) = 12 single crochets by 14 rows; however, this may vary based on your personal crochet style. If you'd like to make your turtle larger, you can adjust your starting chain or rounds by multiples of 6. If your swatch is smaller than desired, simply try going up a hook size for looser stitches. Remember, consistent measurements help create that delightful plush look you want!

Step-by-Step Pattern for Ice Cream Cookie Turtle

Round 1: Start the Body
Begin by making a magic ring. Work 6 sc into the ring, pulling it tight to close the circle. This forms the base of your ice cream cookie turtle's body. Ensure your stitches are snug; it will start to cinch inwards as you work. Remember to count your stitches to maintain the shape (6 sts).

Round 2: Increase for Roundness
In this round, 2 sc in each stitch around to create a fuller shape. The turtle's body should start rounding out nicely. Keeping your tension consistent is crucial here for a mushroom-like silhouette that's plump and adorable (12 sts).

Round 3: Continue Increasing
Make 1 sc in the first stitch, then inc in the next (2 sc in the following stitch). Repeat this pattern for the entire round to continue shaping the turtle. Your work should begin to change its form to that of a rounded base, essential for your adorable ice cream cookie turtle (18 sts).

Round 4: Stabilizing the Body
This round involves mixing single crochet and increases. Work 1 sc in the first two stitches, then inc in the next. Repeat this until you close the round. The turtle's body will feel more substantial, ready for the next rounds, with every stitch contributing to its sturdy structure (24 sts).

Rounds 5-9: Building Height
For these rounds, simply sc in each stitch around with no increases. This step focuses on elongating the turtle's body; keep going until you reach approximately 4 inches in height. Your ice cream cookie turtle should be taking delightful shape as it becomes a cuddly toy (24 sts each round).

Round 10: Preparing to Shape the Head
Transition to the head by working 1 sc in each of the next 12 stitches; this will create the front part of your ice cream cookie turtle. Visualize the head forming: keep your stitches tight, ensuring it narrows just nicely, leading into the next section (12 sts).

Round 11: Sculpting the Head
Now, make 1 sc in the first stitch, then inc in the next. Repeat this pattern so that your head takes shape with a delightful curvature. This round will give a lovely swelling to your turtle’s features, making it oh-so-cuddly (18 sts).

Round 12: Adding Safety Eyes
Work 1 sc in each stitch for the next round and at this stage, place your safety eyes about 6 stitches apart. Position them between the head and body, ensuring they rest securely for a cheerful face on your ice cream cookie turtle. Continue to sc around (18 sts).

Round 13: Completing the Head
For this final round of the head, make 1 sc in the first two stitches and dec in the next to sculpt the turtle’s sweet face more. Your turtle should start to taper gracefully into a defined neck. Ensure each stitch pulls tightly to form a beautiful head (12 sts).

Step 14: Creating the Legs
Prepare to create the legs: start with a magic ring and sc 6 stitches into the ring. Repeat rounds of single crochet, alternating increasing to keep them sturdy, and complete four legs total. Your turtle will soon have playful limbs to support it on its adorable adventure (6 sts).

Step 15: Making the Shell
Starting with another magic ring, crochet 6 sc just like you did previously, and work increases for the shell. Use your brown yarn and crochet by continuing to increase around, creating a textured top that perfectly mimics cookies (6-24 sts).

Step 16: Assembly
Now it's time to assemble your ice cream cookie turtle! Attach the head and legs to the main body using a yarn needle, ensuring all parts are secure. Take care to center everything, and feel free to customize how you position its limbs for a whimsical effect.

Step 17: Final Touches and Finishing
Weave in all loose ends to ensure a tidy finish. Lightly block your finished ice cream cookie turtle if desired, enhancing its soft, plush appearance. Your delightful plush toy is now ready to brighten any space with its charm!

Expert Tips for Ice Cream Cookie Turtle

  • Maintain Tension: Regularly check your tension while crocheting to avoid uneven stitches that can affect your turtle’s final look. A relaxed grip often results in better consistency.
  • Count Stitches: Keep an eye on your stitch count to prevent gaps or holes, especially when increasing—lose count, and your delightful ice cream cookie turtle may not come together as envisioned.
  • Secure Assemblies: When attaching pieces, ensure each segment is securely connected. Use a firm but gentle grip while sewing to maintain shape without distortion.
  • Weave Ends Thoroughly: Neatly weave in all loose ends for a polished appearance. This prevents fraying and ensures your cuddly creation remains intact for years of enjoyment.
  • Consider Blocking: Lightly block your finished piece to enhance its plush texture. This can really bring out the aesthetics of your ice cream cookie turtle, making it even more charming!

Care Instructions for Ice Cream Cookie Turtle

Machine Washing: Use a gentle cycle with cold water to protect the soft texture of your ice cream cookie turtle. Avoid agitation, as it can cause pilling or felting.

Hand Washing: When possible, hand wash your turtle in cold water with mild soap. Gently squeeze the toy to clean it without twisting, which could distort its shape.

Drying/Blocking: Lay your ice cream cookie turtle flat on a clean towel to dry. Avoid hanging, as this could stretch its adorable limbs. Lightly block if desired to enhance its plush look.

Storage: Store your turtle in a cool, dry place, away from direct sunlight to maintain its vibrant colors and cuddliness for years to come.

Ice Cream Cookie Turtle Variations

Embrace the joy of customization with these delightful twists for your Ice Cream Cookie Turtle!

  • Color Swaps: Experiment with vibrant colors for the turtle's body and shell to match your decor or personal taste. Consider a pastel palette for a soft, enchanting look.

  • Yarn Alternatives: Swap plush yarn for cotton for a more structured finish, creating a chic look that still delights. Cotton provides a sleek, less floppy aesthetic.

  • Size Adjustments: Use thicker yarn to make a larger turtle, or lighter yarn for a mini version. Each size brings its own charm and occasion!

  • Texture Additions: Add a playful pom-pom to the top of the shell or incorporate fringe along the edges for whimsical flair. These touches add a playful energy to your creation.

  • Variations on Cookie Chips: Use buttons or felt pieces for cookie chips instead of yarn. Create different shapes for each chip, adding a touch of fun and creativity.

  • Facial Expressions: Get creative with facial features! Embrace needle felting for expressive eyes or a cheerful smile, giving your turtle personality and character.

  • Borders and Accents: Frame the turtle’s shell with a contrasting border in a vibrant color, creating visual interest and enhancing the overall design of your amigurumi.

  • Arm and Leg Styles: Mix up the arm and leg designs by varying the length or adding unique patterns. Make them longer for a quirky look or shorter for a snugger fit.

What to Make after Ice Cream Cookie Turtle?

As you complete your delightful Ice Cream Cookie Turtle, why not continue the fun with matching projects that add to your whimsical world?

  • Turtle Accessory Pouch: Create a soft pouch that mimics the turtle's shell, perfect for storing crochet supplies or secret treasures.
  • Sweet Treat Keychain: Whip up a mini crochet keychain styled like a cookie, bringing a sweet touch to your daily essentials. A handy companion for your turtle!
  • Snack Buddy Blanket: Design a small, colorful blanket featuring ice cream motifs, offering extra coziness during playtime or naptime.
  • Plush Cookie Coaster: Crochet whimsical coasters shaped like the turtle’s cookie base, adding a playful touch to your drinkware.
  • Amigurumi Friend: Craft a tiny amigurumi ice cream cone to accompany your turtle, enhancing its charm and creating a delightful duo!

Ice Cream Cookie Turtle FAQs

Can I use a different type of yarn for the Ice Cream Cookie Turtle?
Absolutely! While plush or chenille yarn gives an adorable cuddly feel, you can use any worsted or medium weight yarn. Just keep in mind that different yarns will change the texture and squishiness of your turtle, so choose one that suits your aesthetic!

How do I make my turtle bigger or smaller?
To adjust the size of your Ice Cream Cookie Turtle, simply change the yarn weight. Using thicker yarn will yield a larger turtle, while a lighter weight gives you a smaller version. Just remember to adjust your hook size accordingly for best results!

Why does my work keep curling up?
Don’t panic! Curling often happens if your stitches are too tight or if there's a tension inconsistency. Make sure your tension is even throughout and that you're not pulling the yarn too tight, especially around increases. If necessary, take a step back and loosen your grip a bit!

What hook size should I use for the Ice Cream Cookie Turtle?
For this project, a 5.0 mm (H/8 US) hook is recommended. It's perfect for achieving the desired plush texture while allowing the stitches to remain defined yet cuddly. If you find your stitches are too loose or too tight, feel free to experiment with a hook size one step up or down.

What should I do if I’ve dropped a stitch?
It's an easy fix! Simply thread your yarn needle through the stitch below the dropped one and pull it back up to the current row. If you're having trouble, take a moment to go back a few stitches, as it's often easier to catch it before moving too far along. Don't worry—this happens to everyone!

How can I ensure my turtle's eyes stay in place?
When attaching safety eyes, make sure to securely fasten them through the fabric. You can reinforce their placement by adding a bit of glue to the back before securing them in place. This way, they’ll stay put even with plenty of cuddles and playtime!

Filed Under: Uncategorized

Cozy Granny Square Crochet Pattern for Beginners

August 23, 2026 by Publisher Leave a Comment

Cozy Granny Square Crochet Pattern for Beginners

As I sat on a cozy afternoon, a crochet hook in one hand and soft yarn in the other, I found myself enchanted by the simplicity and charm of the granny square. This classic granny square crochet pattern is not only a warm introduction to the world of crafting but also a canvas for your creative spirit. With its beginner-friendly techniques, you'll be able to create beautiful squares that can evolve into stunning blankets, trendy bags, or delightful coasters. Imagine the joy of mastering this versatile motif, unlocking endless possibilities for future projects! Whether you’re adding a personal touch to your home or gifting handmade treasures, this crochet adventure is waiting for you. Let’s dive in and stitch together something gorgeous!

Granny Square Crochet Materials & Tools

Yarn

  • Medium-Weight Yarn – Use worsted weight (size 4); approximately 150-200 yards will make multiple granny squares.

Tools & Notions

  • 6mm (J) Crochet Hook – Perfect for achieving a balance of sturdiness and drape in your granny square crochet project.
  • Scissors – Essential for cutting yarn cleanly as you finish each square.
  • Tapestry Needle – Ideal for weaving in ends and ensuring a polished look in your finished squares.
  • Stitch Markers – Helpful for keeping track of your rounds, especially as you work on more intricate patterns.

Why Choose This Granny Square Pattern?

Beginner-Friendly: This pattern is perfect for those just starting their crochet journey, utilizing essential stitches that build your skills without overwhelming you.

Timeless Aesthetic: The classic design evokes a cozy charm that seamlessly fits into various decor styles, making it a delightful addition to any project.

Versatile Applications: Use your granny squares to create everything from blankets to bags — the possibilities are as endless as your creativity!

Enjoyable Process: The rhythmic repetition of rounds makes for a meditative crafting experience, letting you immerse yourself in the joy of crocheting.

Quick Results: With just a few rounds, you’ll be amazed at how quickly each square comes together, providing an instant sense of accomplishment.

Gauge & Sizing Notes

Don’t skip the gauge swatch! Checking your crochet gauge is essential to ensure your charming granny square crochet project turns out just the way you envision. A standard gauge measurement is often around 4×4 inches (10×10 cm); however, it’s crucial to verify your own tension, as individual styles may differ. If your swatch is too small, simply try going up a hook size. To make your granny square larger, increase your starting chain in multiples of 3 for each round. Enjoy the process of adjusting size, and remember: each stitch brings you closer to your cozy creation!

Step-by-Step Pattern for Cozy Granny Square Crochet

Round 1: Starting the Magic Ring
Begin by creating a magic ring. Chain 3 (this counts as your first dc) and work 2 dc into the ring. Chain 2 to create a corner, then repeat the process for a total of 4 corners (3 dc, chain 2 for each). After completing the corners, join with a slip stitch to the top of the chain 3, forming your first round (12 sts + 4 corner chains).

Round 2: Expanding the Square
Chain 3 (counts as your first dc). In the same corner space, work 2 dc, then chain 2. In the next space between the corners, work 1 dc. Repeat the sequence of (2 dc, chain 2) in each corner and (1 dc) in each space until you have reached the starting point. Join with a slip stitch to the top of the initial chain 3, completing this round (24 sts + 4 corner chains).

Round 3: Adding More Height
Start with a chain 3 (counts as your first dc). In each corner space, work 2 dc, chain 2, and 2 dc. In the spaces between corners, place 1 dc in each space along the sides. Continue repeating this pattern until you reach the beginning chain. Finish by joining with a slip stitch to the top of the chain 3, increasing the stitch count (36 sts + 4 corner chains).

Round 4: Continue Building
Chain 3 to begin. In each corner, work 2 dc, chain 2, and 2 dc. Add 2 dc in each space between corners, expanding the size of the granny square. This round will have more stitches between corners, allowing for further expansion and symmetry. Once you've made it back to the starting point, slip stitch to the top of the chain 3 to close the round (48 sts + 4 corner chains).

Round 5: Final Rounds for Size
For this round, repeat the previous pattern — chain 3, then in each corner, work 2 dc, chain 2, and 2 dc. In the spaces between corners, place 3 dc this time to increase the size and openness. Maintain an eye on the square's shape; your work should start to flatten nicely. Complete the round with a slip stitch to close (60 sts + 4 corner chains).

Step 6: Finishing Touches
To finish your cozy granny square crochet, weave in any loose ends with a tapestry needle for a polished look. If desired, block the square to even out the dimensions, enhancing the beautiful texture. Your finished granny square should measure approximately 10 inches by 10 inches, showcasing the timeless charm and versatility of crochet projects!

Expert Tips for Granny Square Crochet

Maintain Relaxed Tension: Keep your grip on the yarn relaxed to avoid tight stitches that can warp the shape of your granny square.

Track Your Progress: Use stitch markers to indicate the start of each round, helping you keep count and prevent any missed stitches.

Count Carefully: Double-check your stitch count at the end of each round to ensure your square stays flat and symmetrical, avoiding common mistakes.

Weave Ends Neatly: When you've finished your squares, take the time to weave in ends thoroughly with a tapestry needle for a polished finish.

Consider Blocking: Blocking your finished granny square enhances its shape and texture, making it a delightful focal point in your cozy projects!

Granny Square Crochet Variations

Embrace the creative journey by personalizing your granny square project with simple variations that reflect your unique style.

  • Yarn Substitutions: Swap to cotton or a cotton blend for a breathable, lightweight feel, perfect for summer projects.

  • Color Blocking: Choose complementary colors for each round, creating a striking visual contrast that adds depth to your design.

  • Size Adjustments: Add more rounds to increase the square's size, making it ideally suited for larger applications like a cozy lap blanket.

  • Texture Enhancements: Incorporate a decorative border in a contrasting color, giving a satisfying finish and additional flair to your granny square.

  • Bulky Yarn Option: Try a soft, bulky yarn for a cozier, more cushioned square, perfect for chilly evenings or as a warm gift.

  • Variegated Yarn: Use variegated yarn for a playful, vibrant look that creates a lively, dynamic pattern throughout your square.

  • Fringe Detail: Add fringes at the corners of your granny square for a boho chic vibe, giving your piece a fun, playful touch.

  • Mixed Square Sizes: Combine small and large squares to create a visually engaging layout in your crochet project, showcasing your creativity.

How to Wash and Care for Your Granny Square Crochet

Machine Washing: Use cold water on a gentle cycle to maintain your granny square crochet’s integrity. Avoid harsh agitation to prevent any felting or pilling.

Hand Washing: If you prefer a more delicate touch, soak your granny square in a basin of cold water with a mild detergent, gently swishing it around before rinsing.

Drying/Blocking: Lay your square flat to dry on a clean, dry towel. Consider blocking it after washing to enhance its shape and showcase the design beautifully.

Storage: Store your finished granny squares in a cool, dry place, away from direct sunlight, to preserve their vibrant colors and avoid any dust accumulation.

What to Pair with Your Granny Square Crochet?

As you bask in the joy of creating these charming motifs, let your imagination roam free and consider these delightful additions to your crochet repertoire.

  • Colorful Coasters: Perfect for showcasing your squares, these bright coasters will add a cheerful pop to your coffee table.
  • Cozy Blanket: Combine multiple granny squares to create a lovely blanket, enveloping you in warmth and comfort. Imagine curling up with it during chilly nights!
  • Stylish Bag: Use your granny squares to craft a unique tote or handbag that showcases your color choices and crochet skills alike.
  • Festive Bunting: Connect several small squares to make a whimsical garland, adding charm and warmth to any celebration.
  • Decorative Pillow Cover: Transform a square or two into a beautiful pillow cover, perfect for bringing texture and color to your living space.

Cozy Granny Square Crochet Pattern FAQs

Can I use a different type of yarn instead of cotton?
Absolutely! While cotton is a popular choice for granny squares due to its durability and drape, you can experiment with acrylic or wool blends. Just keep in mind that different fibers may alter the final texture and drape of your square.

How can I make my granny square bigger?
Don’t panic! To increase the size, simply add more rounds following the established pattern. You can also increase the number of double crochets in the corner spaces and the spaces between corners to enhance the overall size while maintaining your square's shape.

Why is my granny square curling at the edges?
If your square is curling, it's often a sign that your tension is a bit too tight. Make sure to maintain a relaxed grip on your yarn. Blocking the finished square can also help flatten the edges and enhance its overall appearance—don’t skip this step!

What's the best hook size for granny square crochet?
For this project, I recommend using a 6mm (J) crochet hook. This size works well with medium-weight yarn, providing a nice balance of sturdiness and drape that enhances the classic granny square look.

What should I do if I accidentally skip a stitch?
It’s an easy fix! If you notice that you’ve skipped a stitch, simply go back and find the point where you went off track. You can usually add in a stitch without unraveling too much. Remember to keep an eye on your stitch count for that flat, beautifully crafted square!

How do I weave in the ends properly once I’m done?
For a polished look, thread your tapestry needle with the yarn end and weave it through the stitches on the reverse side of your square. Make sure to go back and forth to secure it properly, and trim off any excess yarn. This step will help ensure your beautiful creation lasts!

Filed Under: Uncategorized

  • « Previous Page
  • 1
  • …
  • 21
  • 22
  • 23
  • 24
  • 25
  • …
  • 38
  • Next Page »

Recent Posts

  • Chic Crochet Watch Band Pattern: Scalloped Elegance
  • Vibrant Crochet Granny Square: A Floral Delight to Create
  • Pocket Otter Crochet: Your Adorable Amigurumi Companion
  • Cozy Up with This Festive Crochet Tree Cozy Pattern
  • Chic Crochet Babydoll Dress: A Timeless Pattern for Spring

Recent Comments

No comments to show.
Fast Crochet Patterns Logo

Welcome to Fast Crochet Patterns, your curated editorial blog for modern, handmade aesthetics. Discover an elegant collection of contemporary designs and carefully crafted tutorials—where every beautiful pattern is completely free to inspire your next creation.

Join the Studio

Subscribe for our latest free patterns and warm, minimal crochet inspiration delivered to your inbox.


Collections

  • Accessories
  • Amigurumi
  • Baby
  • Bags

More Patterns

  • Cardigan
  • Dress
  • Flowers
  • Granny Square

Information

  • About
  • Contact
  • Privacy Policy
  • Terms Of Use
  • Disclaimer

© 2026 Fast Crochet Patterns. All rights reserved.