Fast Crochet Patterns

  • Home
  • Contact
  • Patterns
    • Amigurumi
    • Granny Square
    • Flowers
    • Baby
    • Dress
    • Bags
    • Cardigan
    • Accessories
menu icon
go to homepage
  • Home
  • Contact
  • Patterns
    • Amigurumi
    • Granny Square
    • Flowers
    • Baby
    • Dress
    • Bags
    • Cardigan
    • Accessories
search icon
Homepage link
  • Home
  • Contact
  • Patterns
    • Amigurumi
    • Granny Square
    • Flowers
    • Baby
    • Dress
    • Bags
    • Cardigan
    • Accessories
×

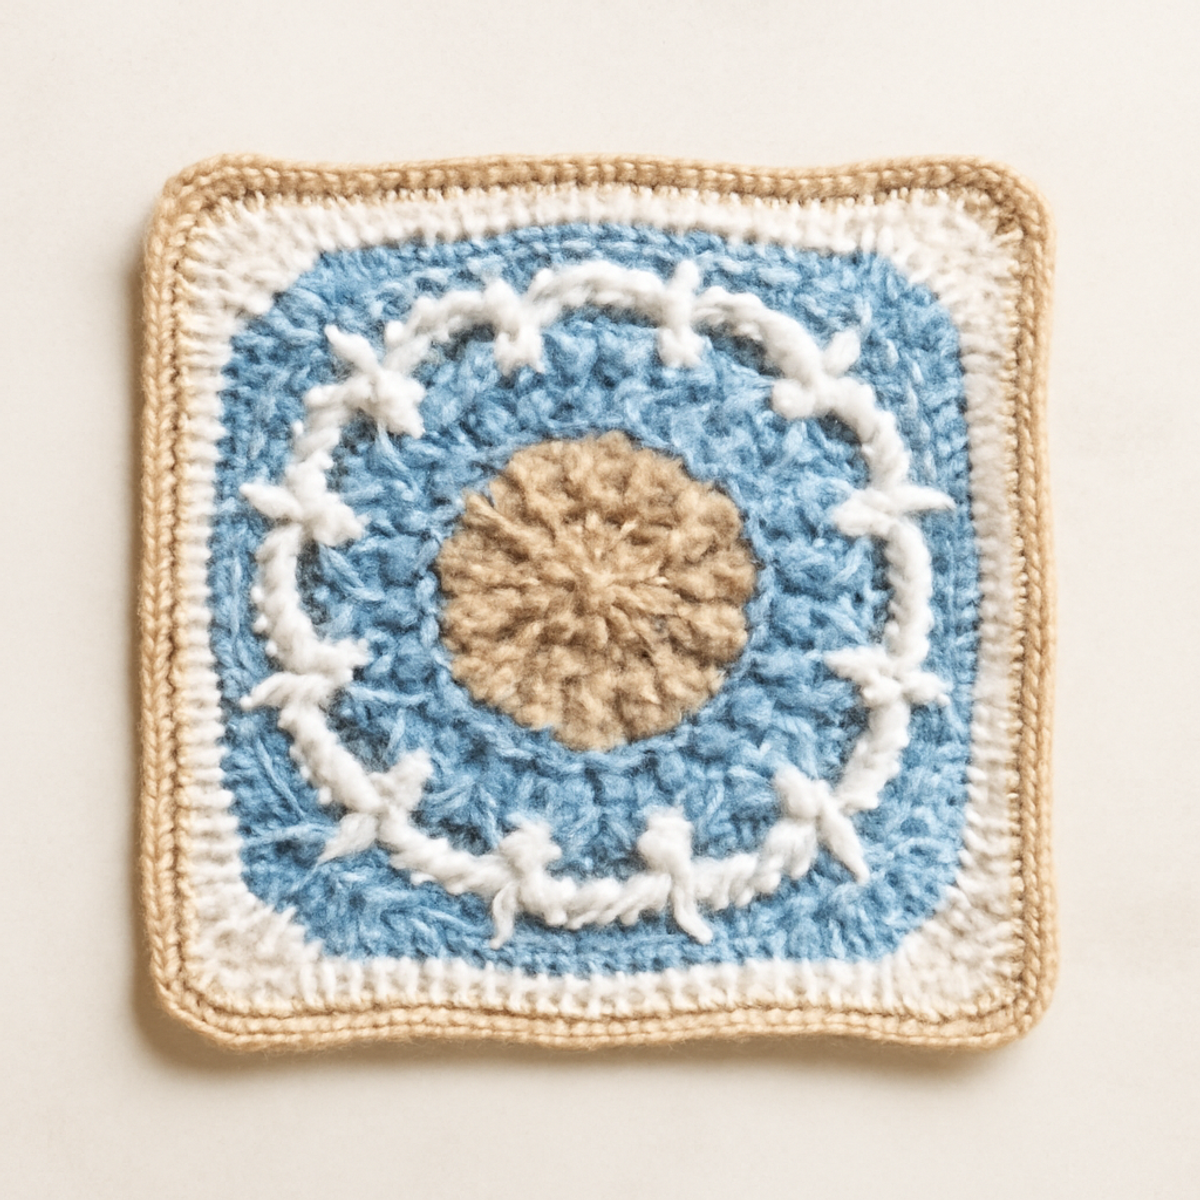
Cozy Beginner Crochet Square with Floral Motif Delight

September 1, 2026 by Publisher Leave a Comment

Cozy Beginner Crochet Square with Floral Motif Delight

As I sat surrounded by my favorite yarns, the soft fibers slipping through my fingers, I felt an urge to create something that would brighten my home. Enter the Wooly Flower Crochet Square! This beginner crochet square is perfect for anyone looking to infuse a touch of vibrant floral charm into their décor while honing essential crochet skills. With its adaptable colors and playful stitch combinations, you’ll not only make a delightful piece but also gain confidence in your crafting abilities. Plus, the cozy texture makes it a pleasure to use, whether you're making a charming cushion or a stunning wall hanging. Let’s dive into this simple yet engaging project—I can’t wait to see the beautiful creations you’ll make!

Wooly Flower Crochet Square Materials & Tools

  • Yarn

    • Medium Worsted Weight Yarn (4) – This type provides the sturdiness you need for a beautiful beginner crochet square.
    • Acrylic or Cotton-Blend Yarn – Both options offer durability and ease of care, making them perfect for home décor items.
  • Tools & Notions

    • 5.0mm (H-8) Hook – Ideal for achieving a soft and cozy drape while creating your floral square.
    • Stitch Markers – Helpful for keeping track of rounds during your crochet journey.
  • Yardage

    • 200–250 yards of Yarn – This is an estimated amount needed to complete your vibrant crochet square.

Why Is This Crochet Square Special?

Beginner-Friendly: Designed specifically for those new to crochet, this square offers a low-stress experience while learning basic techniques.
Floral Charm: The stunning flower motif brings a burst of nature and color, perfect for adding warmth to your living space.
Textured Layers: Enjoy the cozy drape and thick fabric, resulting from multiple stitches that create delightful dimensions.
Customizable Options: Mix and match colors or adjust the size to suit your aesthetic preferences and home décor needs.
Engaging Process: Each round builds your crochet skills progressively, keeping you motivated as you watch your project come to life!

Gauge & Sizing Notes

Don't skip the gauge swatch! Ensuring your tension is correct is essential for achieving the desired size and shape of your Wooly Flower Crochet Square. A general guideline to consider is a 4×4 inch (10×10 cm) square equals approximately 14 double crochets by 8 rows. If you want to make your square larger, consider adjusting your starting chain in multiples of 4 to increase its width. Conversely, if your swatch is smaller than expected, simply try going up a hook size or adjusting your tension. By checking your crochet gauge, you’ll secure a beautiful, consistent result for your beginner crochet square, making it a joy to display or gift!

Step-by-Step Pattern for Wooly Flower Crochet Square

Row 1: Start with Center Flower
Begin your Wooly Flower Crochet Square by creating a magic ring. Work 8 single crochets (sc) into the ring and pull it tight to close. Slip stitch (sl st) into the first sc to join. Your center should form a small circle, and the stitches should be snug, creating a solid base for your floral motif (8 sts).

Row 2: Forming the Petals
Chain (ch) 3 to begin Row 2, then double crochet (dc) into the same stitch. Next, create 2 more dc in the next stitch, followed by a chain 2 and sl st to the same stitch to form your first petal. Repeat from * to * for a total of 4 petals around the circle. The petals will start to spread out, providing a lovely, floral shape (4 petals).

Row 3: Expanding the Flower
For this round, slip stitch into the next petal's chain 2 space to join. Chain 3, then make 2 double crochets (dc) in the same space. In each subsequent petal's chain space, repeat this action for a total of 4 petals. This round enhances your square’s lovely flower design, causing the petals to become more pronounced and raise (12 dc total).

Row 4: Adding Dimension with Popcorn Stitches
Slip stitch to the next petal chain space to start Row 4. Chain 3 and then make 4 double crochets (dc) into the same chain space for a popcorn stitch. Slip stitch to the top of the first dc to finish this popcorn stitch. Repeat this for each petal space around, resulting in a lovely dimension to your plush beginner crochet square (4 popcorns).

Row 5: Creating the Square Shape
After finishing the popcorns, slip stitch to the first petal’s space and chain 1. In the next space, work 2 single crochets (sc) to begin forming the edges of the square. Continue in this pattern of 2 sc in each chain space around until you return to your starting point, shaping the square's corners nicely while holding its floral form (20 sts).

Step 6: Finishing the Edges
To complete your Wooly Flower Crochet Square, slip stitch to the beginning of the round. Next, work a round of single crochet (sc) in a contrasting color to define the borders. Make sure to place 3 sc in each corner to maintain the square shape. This finishing round will stabilize your piece and provide a beautiful contrast to your floral motif (32 sts).

Step 7: Final Touches
Once you have completed the border round, fasten off and leave a long tail for sewing in ends. Gently block your square to help open up the stitches and enhance the floral details. Your lovely Wooly Flower Crochet Square is now ready to brighten up any space or be used as a delightful gift!

What to Pair with Wooly Flower Crochet Square?

Create a cozy collection of matching accents that will brighten your home and elevate your crafting journey.

  • Floral Cushion Covers: Add a pair of these delightful cushions for a cohesive, inviting look on your sofa or bed. Their soft, textured surfaces frame your crochet squares beautifully.

  • Charming Mug Cozies: Make delightful cozies for your favorite mugs that carry the same floral motif, perfect for your morning coffee or tea rituals. Imagine the warmth radiating from this charming combination!

  • Cheerful Wall Hanging: Craft a fabric wall hanging that showcases your crochet square as a stunning focal point, enhancing the ambience of your living space with its vibrant charm.

  • Chic Blanket: Use multiple squares to create a cozy throw blanket, wrapping yourself in floral delight during those chilly evenings. It’s a perfect way to highlight your crochet skills.

  • Matching Headband: Design a cute headband that complements the square’s beautiful patterns, making a lovely accessory to showcase your crafting skills. You’ll feel stylish and connected to your work!

Variations & Substitutions for Beginner Crochet Square

Explore the delightful ways you can personalize this crochet square and let your creativity shine!

  • Color Swaps: Choose pastel shades for a soft finish or vibrant colors to make your square pop. Think of the cheerful blooms of spring—each color choice tells its own story.

  • Yarn Variations: Swap the acrylic yarn for a cotton blend for a breezy, summery feel. Alternatively, pick a bulky yarn to create a cozy square more quickly, perfect for spontaneous weekend projects.

  • Size Adjustments: Adjust your square's dimensions by adding rounds or using a larger hook. A bigger square could serve as an eye-catching centerpiece for your coffee table!

  • Alternate Stitch Patterns: Introduce fun stitches like shells or clusters to your pattern for unique textures. Each stitch variation adds rhythm, enhancing the overall charm of your finished piece.

  • Adding Texture: Incorporate a playful pom-pom or fringe to the corners for added whimsy. These little extras are like sprinkles on a cake, making your square extra special.

  • Border Techniques: Experiment with various border designs, such as scalloped edges or picot bind-offs, to further frame your floral motif. You’ll find a new dimension of creativity each time you finish!

  • Thematic Combinations: Combine this square with others through color-blocking or joining them together for a larger project, like a cozy throw or a delightful wall hanging. Why stop at just one when a whole collection can bloom?

How to Wash and Care for Your Wooly Flower Crochet Square

Machine Washing: Use cold water on a gentle cycle to prevent any felting or pilling of the fibers, ensuring your beginner crochet square remains vibrant and beautiful.

Hand Washing: For extra care, hand wash in cold water with mild soap, gently agitating without scrubbing, to maintain its lovely texture and shape.

Drying/Blocking: Lay flat to dry on a clean towel, reshaping as necessary to highlight the intricate details of the floral motif once your square is complete.

Storage: Store your crochet square in a cool, dry place away from direct sunlight to protect the colors and fibers, keeping it fresh for your home décor or gifting needs.

Expert Tips for Your Crochet Square

  • Consistent Tension: Keep your tension even throughout the project to ensure the square maintains its shape and looks polished.

  • Count Regularly: After each round, count your stitches to avoid any miscounts, which can lead to an uneven shape in your beginner crochet square.

  • Use Stitch Markers: Place stitch markers at the beginning of each round to help track where you started, reducing confusion as you work.

  • Master Blocking: Block your square after finishing to open up your stitches, revealing the intricate floral details beautifully and making them pop.

  • Check Corner Stitches: When working the border, pay attention to the corners by placing three single crochets in each to maintain that perfect square shape.

Wooly Flower Crochet Square FAQs

Can I use a different yarn than what’s recommended?
Absolutely! You can substitute acrylic yarn for a cotton-blend or vice versa. Just keep in mind that different fibers may affect the drape and texture of your beginner crochet square, so it's a good idea to check your gauge before starting.

How do I adjust the size of my crochet square?
To make your Wooly Flower Crochet Square larger or smaller, you can add or reduce the number of rounds, respectively. Alternatively, using a larger hook size will give you a more extensive square. Just remember to keep your tension consistent!

Why is my crochet square curling at the edges?
Don't panic! This common issue can usually be fixed by blocking your square after finishing. Properly stretching it out can help reveal its charming floral details while laying it flat will maintain its shape.

What hook size should I use?
For the Wooly Flower Crochet Square, a 5 mm (H-8) hook is ideal. This size will help you achieve the intended cozy drape and texture, but feel free to experiment with a larger hook if you want a looser, bigger result!

What if I drop a stitch while working my square?
It’s an easy fix! Simply pick up the dropped stitch with your hook and pull it back up through the loops. If you notice multiple stitches dropped, carefully unravel a few rows until you reach a point where you can fix it effectively.
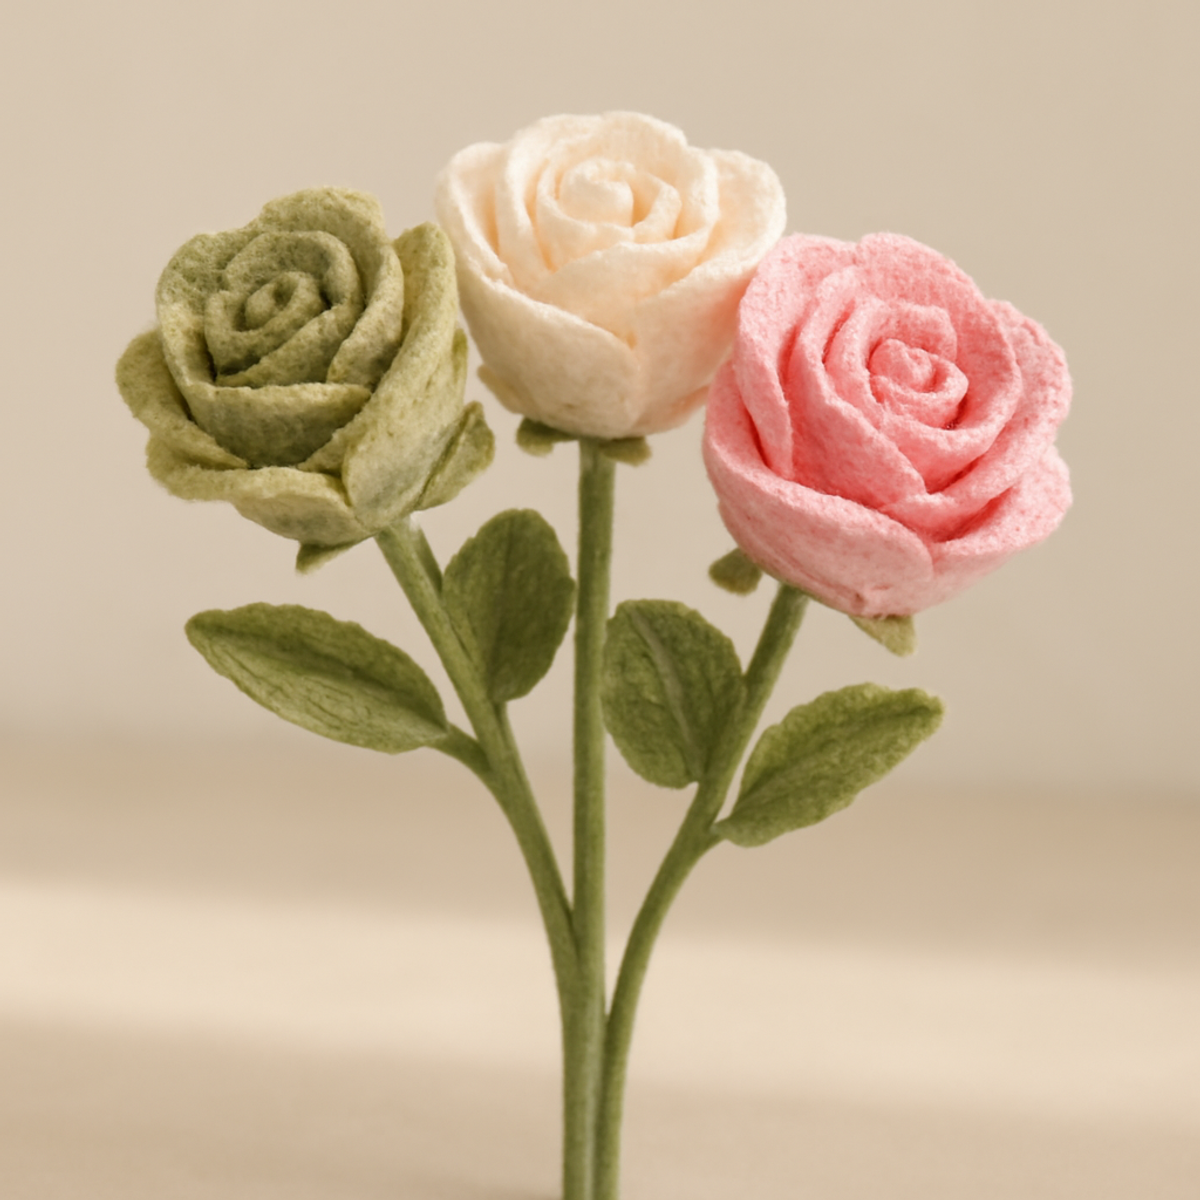
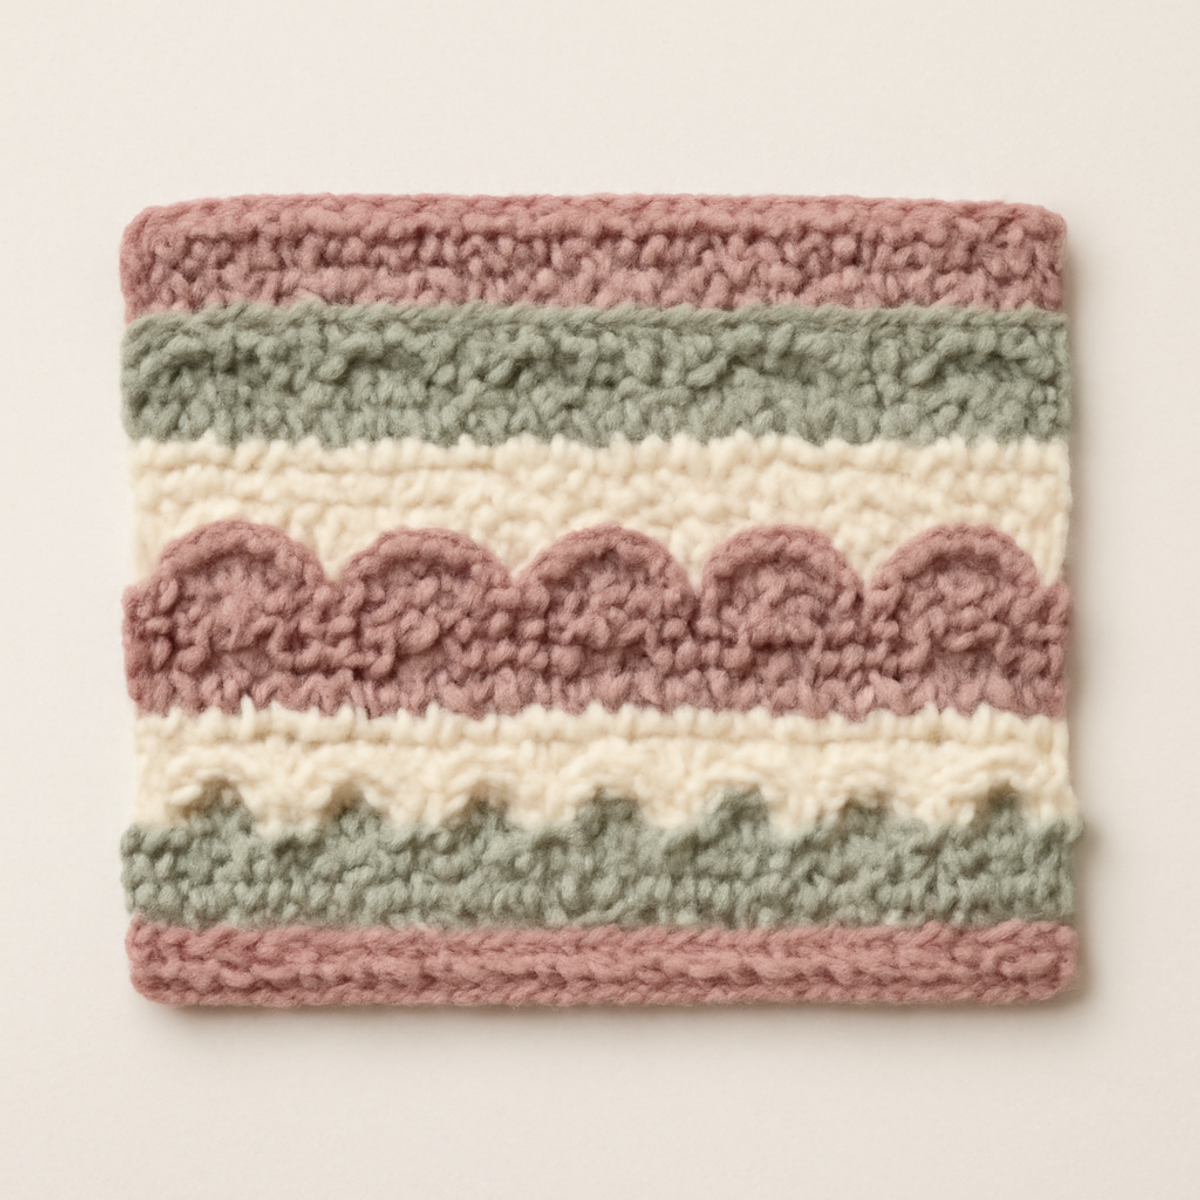
Filed Under: Uncategorized

Charming Crochet Flower Bouquet for Whimsical Decor

August 25, 2026 by Publisher Leave a Comment

Charming Crochet Flower Bouquet for Whimsical Decor

As I sat in my cozy nook with yarn spilling around me, I couldn't help but marvel at the beauty of flowers—forever blooming yet always fading. This inspired me to create my “Whimsical Crochet Rose Bouquet.” This delightful project embodies the charm of a crochet flower bouquet that won’t wilt or need watering but will fill your space with joy and elegance for years to come. Perfect for crafters at an intermediate level, this pattern is not just visually stunning, but it’s also a versatile way to adorn your home or gift to a loved one. You'll appreciate the structured yet soft texture of these roses, and with some creativity, you can personalize the bouquet to reflect your unique style! Let’s pick up those hooks and bring a splash of handmade whimsy into our lives!

Crochet Flower Bouquet Materials & Tools

  • Medium Weight Yarn – Choose cotton or a cotton blend for a soft and sturdy structure; about 20-30 yards per color is estimated for each flower.
  • 4.0mm (G) Hook – This size is ideal for creating the detailed stitches necessary for your crochet flower bouquet.
  • Stitch Markers – Use these to keep track of your rounds, ensuring consistency in your projects.
  • Embroidery Thread (optional) – Add some detailing to your petals for an enhanced aesthetic appeal.

Why Choose This Crochet Flower Bouquet?

Timeless Beauty: This crochet flower bouquet captures the elegance of nature while providing a forever blooming option that won’t fade!

Versatile Decor: Perfect for brightening any space, this bouquet makes for eye-catching home decor or thoughtful gifts for loved ones.

Intermediate Skill: Designed for crafters looking to elevate their skills, it combines a variety of intricate stitches for a rewarding challenge.

Personalization Potential: unleash your creativity by experimenting with different yarn colors or flower types, making each bouquet uniquely yours.

Soft & Structured Texture: The combination of yarn and technique offers a pleasing texture, ensuring your blooms stand out in any arrangement!

Gauge & Sizing Notes

Don't skip the gauge swatch! Checking your crochet gauge is essential for ensuring that your stunning crochet flower bouquet turns out as envisioned. A typical guideline for this project is to achieve a tension swatch of approximately 4×4 inches (10×10 cm), which might translate into around 12 double crochets by 8 rows. If you find your tension is tighter than suggested, you might want to try using a larger hook size. To adjust the size of your flowers or bouquet, consider increasing your initial chain in multiples of 6, so you can customize the final look to fit your decor needs beautifully. Embrace the joy of crafting and let your crochet flower bouquet bloom in your unique style!

Step-by-Step Pattern for Whimsical Crochet Rose Bouquet

Row 1: Magic Ring and Center Petal
Start by creating a magic ring. Chain 3 (counts as 1 dc), then work 11 double crochets (dc) into the ring. Pull the tail to close the ring tightly. Join with a slip stitch (sl st) to the top of the first dc. Your round should now have 12 dc, forming a solid center for your crochet flower bouquet (12 sts).

Round 2: First Layer of Petals
Ch 2 (counts as first hdc), then work 1 hdc in the same stitch. Now, *2 hdc in the next stitch; 1 hdc in the following stitch; repeat from * around for a total of 18 stitches. Join with a sl st at the top of the first hdc. Your work will start to flair out, creating the first layer of petals (18 sts).

Round 3: Second Layer of Petals
Ch 3 (counts as 1 dc), work 1 dc in the same stitch, then *2 dc in the next stitch; 1 dc in each of the following 2 stitches; repeat from * around. Join with a sl st to the top of the first dc. The petals should be more pronounced, contributing to the overall beauty of the crochet flower bouquet (30 sts).

Round 4: Adding Depth to Petals
Ch 2 (counts as 1 hdc), work 1 hdc in the same stitch. Then, *2 hdc in the next stitch; 1 hdc in each of the next 3 stitches; repeat from * around, joining with a sl st. This round creates a lovely depth to the petals, giving your bouquet a more layered and textured look (42 sts).

Row 5: Shape the Petals
Ch 1, then work 1 sc in the same stitch. Now, *dec over the next 2 stitches; 1 sc in the next 5 stitches; repeat from * around, and join with a sl st. The petals will start to curl gently, giving them a more blooming appearance suitable for a crochet flower bouquet (30 sts).

Row 6: Finalizing the Rose
Ch 1, sc in the same stitch. Work *inc in the next stitch; sc in each of the next 2 stitches; repeat from * around to reinforce the petal shape. Join with a sl st. By now, your flower should appear full and lush, embodying the essence of a rose in your bouquet (42 sts).

Step 7: Creating the Leaves
For the leaves, make a foundation of 10 ch. In the second ch from the hook, work 1 sc; then *1 hdc in the next stitch; 1 dc in the next 2 stitches; 1 hdc in the following stitch; 1 sc. Do not cut the yarn; you will create a second leaf even after this step, enhancing your crochet flower bouquet (5 leaves total).

Step 8: Assembly of the Bouquet
Using the yarn tails from your roses, attach them securely to the stems you’ve prepared. Position the leaves at the base of each flower for a natural look. Wrap additional yarn around the base for stability. This assembly brings life to your crochet flower bouquet, making it ready for display!

How to Wash and Care for Your Crochet Flower Bouquet

  • Machine Washing: Use a gentle cycle with cold water to maintain the integrity of your crochet flower bouquet. This helps prevent any felting or distortion of your delicate petals.

  • Hand Washing: For more careful cleaning, immerse your bouquet in cool water with mild detergent. Gently swish without agitating, and avoid wringing to preserve shape and texture.

  • Drying/Blocking: After washing, lay your crochet flower bouquet flat on a clean towel to dry. This prevents stretching, allowing the petals to keep their beautiful form.

  • Storage: Keep your bouquet in a cool, dry place away from direct sunlight to avoid fading. Dust occasionally to maintain its charm and vibrancy!

What to Pair with Whimsical Crochet Rose Bouquet?

As you bask in the joy of crafting your lovely floral arrangement, consider enhancing its charm with delightful complementary pieces that resonate with its beauty.

  • Crochet Vase Cover: Create a cozy home for your bouquet by adorning a simple vase with intricate crochet lace. This pairing adds a touch of elegance and cohesion to your decor.

  • Floral Garland: Craft a whimsical garland featuring miniature flowers to hang above your bouquet. This brings a whimsical vibe that flows effortlessly throughout your space.

  • Crochet Leaf Coasters: Complement your bouquet with coasters styled like leaves. Not only are they practical, but they also echo the natural beauty of your crochet flower bouquet.

  • Crochet Wall Hanging: A textured wall hanging with floral elements can frame your bouquet beautifully, completing the enchanting atmosphere of your room.

  • Matching Crochet Pillows: Whip up pillows featuring the same floral motifs or colors used in your bouquet. These cozy companions enhance the overall aesthetic while inviting comfort into your space.

Crochet Flower Bouquet Variations

Embrace the possibility of customizing your crochet flower bouquet, bringing your unique vision to life!

  • Yarn Weight Swaps: Experiment with lighter or heavier yarn for different textures. A bulky yarn creates fluffy blooms that stand out beautifully.

  • Fiber Alternatives: Try using acrylic yarn for vibrant hues and easy care, or a bamboo blend for a lovely drape and shine.

  • Color-Blocking Ideas: Combine contrasting colors in each flower for a playful effect. Think vibrant orange petals with deep purple leaves for a bold statement.

  • Mixing Flower Types: Create a mixed bouquet by incorporating delicate daisies or tulips alongside your roses. This adds variety and a more dynamic arrangement.

  • Upgraded Leaves: Crochet leaves with a deeper green tone or add a contrasting edge. This enhances depth and makes the flowers pop!

  • Texture Changes: Add pom-poms at the flower centers for a whimsical touch or incorporate fringe on the leaves to give movement and flow to your bouquet.

  • Sizing Adjustments: To create an oversized bouquet, simply increase the number of flowers and make longer stems for a dramatic presentation.

  • Decorative Borders: Finish your bouquet with a simple crochet lace trim around the base. This delicate detail adds an elegant finishing touch to your masterpiece.

Expert Tips for Crochet Flower Bouquet

  • Consistent Tension: Maintain even tension throughout your project; this ensures your petals are uniform and beautifully shaped, enhancing the crochet flower bouquet’s overall appearance.

  • Track Your Stitches: Use stitch markers wisely! Place them at the end of each round to avoid losing your count and to help keep your progress organized.

  • Blocking Blooms: Lightly block your finished petals to achieve a defined shape. This step adds finesse, helping your roses to stand proud in the crochet flower bouquet.

  • Avoid Stitch Loss: Be cautious not to skip the first or last stitch of each round—this common mistake can distort the shape of your flower. Always double-check at the edges!

  • Secure Assembly: Ensure the leaves and stems are neatly attached. A secure assembly not only enhances the look but also preserves the structure of your crochet flower bouquet.

Whimsical Crochet Rose Bouquet FAQs

Can I use a different type of yarn for this crochet flower bouquet?
Absolutely! While the pattern recommends medium-weight cotton or a cotton blend, you can substitute with acrylic yarn for a more budget-friendly option. Just be sure to check your gauge, as yarn density can vary.

How can I adjust the size of my crochet flower bouquet?
If you’d like to make larger roses, increase your yarn weight or simply add more rounds to each flower while ensuring you maintain consistent tension. For smaller blooms, use a lighter yarn and hook size or skip a few rounds.

Why is my rose curling instead of staying flat?
Don’t panic! Curling can happen if the tension is too tight or if the rounds are not worked correctly. Check to ensure you’re not losing stitches inadvertently. If it persists, try gently blocking your flower after completing it to encourage it to hold its shape.

What hook size should I use for this project?
The pattern suggests a 4.0 mm (US size G) hook, which is perfect for achieving the detailed stitches required. A different hook size can alter your gauge, so if you decide to use a different yarn, adjust your hook size accordingly to maintain the structure of your blooms.

How do I fix a dropped stitch in my crochet flower bouquet?
It's an easy fix! Simply pick up the dropped stitch and work it back into your project, then continue crocheting as per the pattern. If it’s difficult to identify, don’t hesitate to undo a few stitches gently to get back on track.

Can I add other flowers to my bouquet for a unique look?
Absolutely! Mixing in different flowers like daisies or tulips can create a delightful variety in your bouquet. Just remember to adjust the leaf shapes and sizes accordingly for a cohesive design!

Filed Under: Uncategorized

Charming Crochet Border Ideas for a Cozy Finish

August 25, 2026 by Publisher Leave a Comment

Charming Crochet Border Ideas for a Cozy Finish

As I sat wrapped in my favorite crochet blanket, I couldn’t help but admire how a simple border transforms an ordinary piece into a cherished keepsake. Today, I’m excited to share some delightful crochet border ideas, perfect for elevating your handmade blankets into works of art. Whether you’re a beginner or a seasoned crafter, these versatile border styles will not only add a polished finish but also allow your personal flair to shine through. With options ranging from minimalist single crochet to the intricate shell and picot borders, you’ll have the chance to practice various stitches while creating something truly one-of-a-kind. Plus, they’re designed to complement any yarn color or blanket design, making them a fantastic way to use up your stash. So grab your hook, and let’s explore the world of crochet borders that will make your blankets even cozier!

Crochet Border Ideas Materials & Tools

  • Medium-Weight Yarn – Opt for worsted weight in pastel colors like soft pink, sage green, creamy white, and dusty rose; approximately 200–300 yards of each color is recommended for sufficient coverage.
  • 5.0mm (H) Hook – Perfect for the various stitches utilized in the crochet border ideas, providing a smooth experience for beginners and seasoned crafters alike.
  • 5.5mm (I) Hook – A great alternative hook size to experiment with slightly different stitches and texture variations for your borders.
  • Stitch Markers – Handy for tracking your rounds or rows, keeping your crochet projects organized as you create beautiful borders around your blankets.

Why Try These Crochet Border Ideas?

Charming Borders enhance the beauty of your blankets by adding a personalized touch that truly stands out. Beginner-Friendly options make it easy for crafters of all skill levels to dive in and experiment. Versatile Styles mean you can mix and match borders with various blanket designs, from baby blankets to chic throws. Texture Variation in styles like Shell and Puff creates unique surfaces that are both eye-catching and cozy. Finally, Endless Customization allows you to play with colors and yarn types, ensuring your project reflects your personal style!

Gauge & Sizing Notes

Don't skip the gauge swatch! Correct tension is crucial for these crochet border ideas, as it ensures your borders lay flat and look polished. A common guideline for checking your gauge is to create a tension swatch of 4×4 inches (10×10 cm) to measure your stitches. If you want your border to fit a larger blanket, increase your starting chain by multiples of 6 for decorative borders, or adjust the number of stitches accordingly for simpler styles. If your tension doesn’t match, and your swatch is too tight, simply switch to a larger hook size for a more relaxed stitch. This little preparation can make a big difference in achieving the perfect finish!

Step-by-Step Pattern for Crochet Blanket Borders

Row 1: Single Crochet Border
Start by joining your yarn with a slip stitch to any corner of your blanket. Chain 1, then work single crochet (sc) stitches evenly along the edge. Place 3 sc in each corner stitch to maintain shape, ensuring a smooth transition at each corner. Continue this process until you return to the starting point, making sure to count 60–80 sc stitches around the blanket edge (total will vary based on blanket size).

Row 2: Half Double Crochet Border
Begin your Half Double Crochet (hdc) border by rejoining your yarn in an arbitrary corner. Chain 2 to start, then work hdc evenly across the edge, placing 2 hdc in each corner stitch for roundness. This border will create a slightly taller edge than single crochet. Continue to hdc around the blanket, maintaining consistency, until you return to the starting point, totaling approximately 60–80 hdc stitches (depending on the blanket size).

Row 3: Shell Stitch Border
For the Shell Stitch Border, attach yarn to any corner and chain 3 to start. Work 5 double crochet (dc) into the same stitch for the first shell. Skip 2 stitches, then in the next stitch, create another shell (5 dc). Repeat this pattern, placing shells across the edge, ensuring to add a shell in each corner for a decorative flare. You should have about 12–16 shells, depending on the size of your blanket.

Row 4: Picot Border
To create the Picot Border, join yarn on an edge and chain 3 to start. Work a single crochet (sc) in the next stitch. Chain 3 again, then slip stitch back into the first chain to form a picot. Repeat this pattern along the edge with single crochets in between each picot for a delicate touch, adding a picot in each corner. You should have approximately 36–48 sc and picots combined, creating a lovely textured finish.

Row 5: Puff Stitch Border
Begin the Puff Stitch Border by attaching yarn at a corner. Chain 1 and work a puff stitch (yo, insert hook, yo, pull up a loop, repeat twice) into the same stitch, then pull all loops through the final loop on the hook. Chain 1, skip one stitch, and repeat across the edge. This adds a beautiful texture. Don’t forget to place a puff stitch in each corner, resulting in about 20–25 puff stitches around the entire blanket (depending on size).

Row 6: Crab Stitch Border
For the Crab Stitch Border, join yarn in a corner and chain 1. Work reverse single crochet (or crab stitch) across the edge by inserting the hook from front to back. This creates a unique twist that adds depth to your border. Continue this stitch to the next corner and place 3 crab stitches in the corner stitch for neatness. You should have approximately 50–60 crab stitches all around, seamlessly finishing your beautiful blanket.

Expert Tips for Crochet Borders

  • Watch Your Tension: Ensure your tension is consistent across different stitch techniques. This will help maintain a uniform look throughout your crochet border ideas.

  • Count Stitches: Regularly count your stitches, especially when working intricate designs like the Shell or Picot Borders. This prevents any irregular edges from occurring.

  • Block Your Work: For plush borders like the Puff Stitch, consider lightly steaming or pinning your work to block it. This helps in achieving a polished finish that showcases your craftsmanship.

  • Use Stitch Markers: Employ stitch markers to keep track of your rounds or rows. They can be a lifesaver, preventing lost counts and ensuring each corner looks fabulous.

  • Avoid Twists: Be mindful of the foundation chain when starting your border. Twisting it can lead to uneven edges, so make sure it’s laid flat before you begin.

What to Pair with Versatile Crochet Blanket Borders?

Creating a beautiful matching set can enhance your crafting experience and allow your creativity to flow even further.

  • Cozy Crochet Pillow Covers: Add charming softness to your space with coordinating pillow covers that use the same yarn and stitch theme as your blanket borders.

A well-designed pillow cover not only adds extra comfort to your relaxing nook but also carries the aesthetic of your borders into another beloved item.

  • Warm Crochet Throw: Why stop at just a blanket? Create a lovely matching throw, perhaps with a different border style, for a dynamic look.

This complementary piece can serve as both a decorative item and an extra layer of warmth during chilly nights on the couch.

  • Charming Crochet Coasters: Use your leftover yarn to craft cute coasters that echo the color palette of your blanket borders.

Every sip of coffee or tea will be a reminder of your cozy creations, keeping your crafting magic alive in day-to-day life.

  • Stylish Crochet Basket: Organize your yarn or miscellaneous items in a crochet basket designed with a border that matches your blanket.

A beautiful basket not only tidies up your space but also showcases your skills, blending art with functionality seamlessly.

  • Decorative Crochet Wall Hanging: Create a wall hanging that incorporates similar border techniques, bringing your crochet journey into your home decor.

This art piece will not only celebrate your crafting journey but also add character to any room, inviting warmth and charm wherever it’s displayed.

How to Wash and Care for Your Crochet Blanket Borders

  • Machine Washing: Wash in cold water on a delicate cycle to prevent felting or pilling. This gentle approach ensures your crochet border ideas retain their shape and texture.

  • Hand Washing: For extra care, soak your blanket in cold water mixed with a mild detergent. Gently agitate to clean, avoiding any harsh scrubbing that could distort your beautiful borders.

  • Drying/Blocking: Lay your finished project flat to dry, reshaping any edges as needed. Blocking may help achieve a professional finish for intricate borders, so consider pinning them in place until fully dry.

  • Storage: Keep your crochet blankets in a cool, dry place, ideally folded rather than hung, to maintain their shape. Avoid storing in direct sunlight to preserve the yarn's colors and texture.

Crochet Border Ideas for Customization

As you embark on your crochet journey, let your creativity flow and explore ways to make your blanket borders uniquely yours!

  • Yarn Substitutions: Switch to cotton for a breathable summer aesthetic, or use plush yarn for a cozy winter finish.

  • Color Contrasts: Bright jewel tones will add vibrancy, creating cheerful borders that pop against your blanket design.

  • Textured Touches: Experiment with adding fringe to your edges for a playful, bohemian flair that beautifully dances with movement.

  • Larger Borders: Scale up your border by increasing the number of rows or stitches for a bolder, more dramatic finish.

  • Playful Pom-Poms: Incorporate pom-poms at each corner for a whimsical look that invites a touch of fun into your crochet creations.

  • Multi-Colored Borders: Try color-blocking by alternating yarn colors within your border for an eye-catching and personalized effect.

  • Mixed Stitch Techniques: Combine different stitch styles within a single border; perhaps a shell stitch followed by a picot for added interest.

  • Use of Beads: Incorporate beads into your border for a hint of sparkle, transforming the edges into a charming detail that catches the eye.

Versatile Crochet Blanket Borders FAQs

Can I substitute yarn types for the borders?
Absolutely! While the suggested medium-weight yarn works beautifully, you can experiment with different fibers. For a breathable summer blanket, try a soft cotton yarn, or use a plush yarn for a cozy winter finish. Just keep in mind that the texture and drape may vary, so adjust your stitch count accordingly!

What if my blanket border turns out bigger or smaller than expected?
Don't panic! If you want to make your border larger, simply increase the number of rows or stitches in your chosen border technique. Conversely, if it’s too big, you can frog back and reduce the number of rounds. Remember, practice makes perfect!

Why is my work curling at the edges?
Curling edges can be frustrating, but it's usually an easy fix! Ensure your tension is consistent while working through your border. Additionally, trying a border with a taller stitch, like the Half Double Crochet or Puff Stitch, may help level out those pesky curls.

What hook size should I use for these border techniques?
I recommend starting with a size H (5 mm) or I (5.5 mm) crochet hook, as they work nicely with the medium-weight yarn. However, if you're looking to create a different texture or drape, feel free to try a hook size up or down to see how it affects your work!

How do I fix dropped stitches in my border?
It's easy to lose track of stitches, but fixing them is simple! When you notice a dropped stitch, gently unravel back to that point, ensuring you maintain the proper tension. Rework the missing stitches carefully, and don't forget to count them to keep your border neat!

Can I mix and match different border techniques?
Absolutely! Mixing different crochet border ideas can create stunning results. Feel free to combine simpler styles like the Single Crochet Border with more decorative options like the Shell or Picot Borders for a unique and personalized touch to your blanket!

Filed Under: Uncategorized

Charming Crochet Jellyfish Ornaments: Whimsy for Any Space

August 25, 2026 by Publisher Leave a Comment

Charming Crochet Jellyfish Ornaments: Whimsy for Any Space

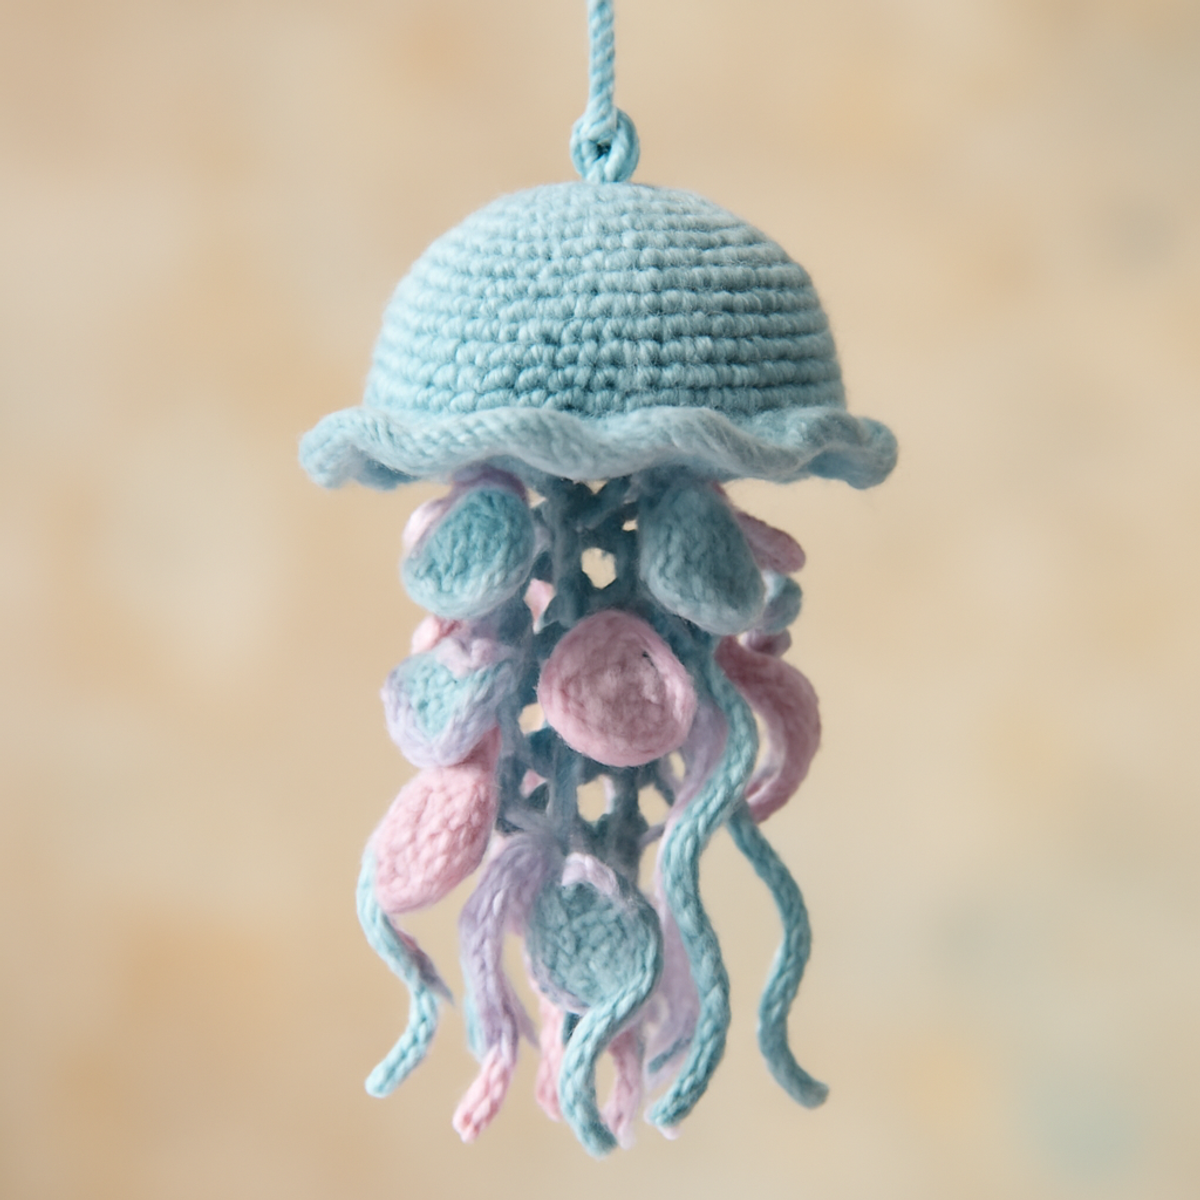
There’s something wonderfully whimsical about the gentle sway of a jellyfish, and now you can capture that charm in your home with these delightful crochet jellyfish ornaments. Perfect for brightening up a nursery, adding a coastal touch to your decor, or creating an unforgettable handmade gift, this project is sure to inspire smiles. Designed for crafters of all skill levels, the pattern allows you to experiment with fun stitches while crafting a stunning piece that makes a captivating statement. With their soft pastel colors and playful design, these ornaments are not only visually appealing but also surprisingly easy to make, making them a fantastic option for your next crochet adventure. Let’s dive into the world of whimsical crochet as we create these charming jellyfish together!

Crochet Jellyfish Ornaments Materials & Tools

To create your enchanting jellyfish ornaments, here’s what you’ll need:

Yarn

  • Worsted Weight Yarn – Aim for a cotton or acrylic blend for softness and structure; each jellyfish will need approximately 100-150 yards.

Tools & Notions

  • 4.0mm (G/6) Hook – This size ensures a tight fabric that’s perfect for stuffing and embellishments.
  • Stitch Markers – Helpful for keeping track of rounds and avoiding any confusion during construction.
  • Yarn Needle – Ideal for weaving in ends and attaching your tentacles securely to the cap.
  • Decorative Beads – Add a playful touch to your jellyfish ornaments; make sure to secure them well!

With these materials, you’re all set to dive into creating your delightful crochet jellyfish ornaments!

Why Make Crochet Jellyfish Ornaments?

Delightful decor: These crochet jellyfish ornaments bring a whimsical charm that brightens any space, making them perfect for nurseries or coastal-themed settings.
Accessible for all: Designed for crafters of varying skill levels, this pattern combines fun stitches to create a rewarding experience.
Playful texture: The ruffled edges and dangling tentacles create movement, adding visual interest to your home decor.
Versatile colors: Personalize each jellyfish with bold or pastel hues, making them unique for any occasion or style.
Quick creation: This project is surprisingly simple, allowing you to whip up these charming ornaments in no time!

How to Check Your Gauge for Crochet Jellyfish Ornaments

Don't skip the gauge swatch! Ensuring you have the right tension is crucial for the delightful sizes and shapes of your crochet jellyfish ornaments. Aim for a standard gauge of approximately 4×4 inches (10×10 cm) to match the recommended yarn weight and hook size. To create larger jellyfish, you can easily adjust your starting chain by adding multiples of 6, while for smaller ornaments, simply subtract from the initial count. If your tension swatch turns out too small, don't worry—try going up a hook size to achieve your desired dimensions. This way, your charming ornaments will turn out just right for any cozy space!

Step-by-Step Pattern for Crochet Jellyfish Ornaments

Row 1: Create the Cap
Start by making a magic ring. Work 6 sc into the ring, pulling it tightly. Join with a sl st to the first sc (6 sts). Your work should appear as a small circular shape.

Round 2: Increase the Cap
Ch 1, then work 2 sc into each stitch around (12 sts). Join with a sl st to the first sc. The cap should begin to broaden as you create a smooth, rounded base.

Round 3: Continue to Expand
Ch 1, sc in the next stitch, inc in the next stitch; repeat from * to * around (18 sts). This should give your cap a gentle cup shape, ready for more texture.

Round 4: Further Increases
Ch 1, sc in the next 2 stitches, inc in the next stitch; repeat from * to * around (24 sts). As you work, your jellyfish cap will become noticeably larger and start to ruffle slightly.

Round 5: Forming the Ruffle
Ch 1, sc in the next 3 stitches, inc in the next stitch; repeat from * to * around (30 sts). The edges should begin to ruffle, enhancing the jellyfish aesthetic.

Round 6: Final Cap Ruffle
Ch 1, sc in the next 4 stitches, inc in the next stitch; repeat from * to * around (36 sts). You should see beautiful ruffled edges forming as your piece takes shape.

Step 1: Create Tentacles
Ch 30 for the first tentacle, then work 1 hdc in the 3rd ch from the hook. Continue with 1 hdc in each ch to the end, ensuring a soft drape (29 hdc). Make 4 additional tentacles in the same manner.

Step 2: Add Texture to Tentacles
For each tentacle, create a scalloped finish by working 5 dc in the same stitch, skip 2 stitches, sl st in the next repeatedly along the length of the tentacles. This will add delightful texture and movement.

Step 3: Assembly
Position the tentacles evenly under the cap. Use a yarn needle to securely sew each tentacle to the cap's underside, ensuring they hang gracefully. Adjust their placement for an appealing look.

Step 4: Add Decorative Beads
To embellish your crochet jellyfish ornaments, thread some decorative beads onto the tentacles. Secure them firmly, spacing them evenly to create an enchanting visual effect as they dangle.

Step 5: Finishing Touches
Check all connections and weave in any loose yarn ends. You can block your crochet jellyfish ornaments gently to enhance their shape without overstretching the delicate edges. Your charming jellyfish is now complete!

Crochet Jellyfish Ornaments Variations

Feel free to dive into your creativity and customize these crochet jellyfish ornaments—there's a whole ocean of possibilities waiting for you!

  • Yarn Swaps: Try a cotton yarn for a more textured finish. The added structure gives a richer look while maintaining softness.

  • Color Blocking: Alternate shades to create stripes on the jellyfish cap. This playful twist adds a unique depth to your design and personal flair.

  • Texture Additions: Add pom-poms or fringe to the tentacles for a fun dimensional effect. The playful details will make your jellyfish stand out beautifully!

  • Larger Sizes: Scale up the pattern to create giant jellyfish for impressive decor. These eye-catching pieces become a stunning focal point in any room.

  • Tiny Versions: Make mini jellyfish for delicate embellishments or charming gift toppers. These little wonders are cute accents that pack a big visual punch!

  • Fiber Alternatives: Use bamboo or a soft wool blend for a different texture and sheen. This can enhance the overall aesthetic and make each jellyfish feel unique.

  • Bead Customizations: Experiment with different bead shapes and colors to adorn your tentacles. Unique beads can add a touch of personalization and whimsy to each jellyfish.

  • Innovative Edges: Incorporate lace or scalloped edges on the cap for a fancy finish. These details can elevate your ornaments, making them feel extra special and enchanting!

What to Pair with Crochet Jellyfish Ornaments?

Embrace your crochet creativity and continue the whimsical journey by crafting complementary treasures to enhance your jellyfish display.

  • Matching Jellyfish Garland: Create a playful garland of jellyfish ornaments to hang across a room, bringing added whimsy and color.
  • Coastal-Themed Wall Hanging: Use similar stitches to create a wall hanging featuring shells and waves, perfectly pairing with the jellyfish's aquatic vibe.
  • Crochet Coral Reef: A vibrant coral piece using bright yarn adds texture and a beautiful underwater ambiance to your decoration.
  • Soft Pastel Sea Creatures: Crochet adorable sea turtles or starfish in matching pastel colors; these will beautifully harmonize with your jellyfish ornaments.
  • Beaded Keychains: Turn excess yarn into small, beaded keychains that mimic jellyfish; they can serve as delightful gifts for friends.

Expert Tips for Crochet Jellyfish Ornaments

  • Maintain Tension: Consistent tension is key to ensuring your jellyfish cap and tentacles connect perfectly. Check your tension as you go to avoid gaps.

  • Count Your Stitches: Keep track of your stitches to prevent losing count, especially during the ruffle rounds. Using stitch markers can help you stay on track.

  • Secure Tentacles: When attaching the tentacles, ensure they are sewn on tightly to avoid any mishaps. Loosely attached tentacles can result in an unbalanced ornament.

  • Block with Care: Blocking can enhance the shape of your jellyfish, but be cautious—avoid overstretching delicate parts like ruffled edges to maintain their charm.

  • Check Bead Security: After adding decorative beads, give them a gentle tug to ensure they're secured well. You don’t want them falling off during handling.

These tips will help you create stunning crochet jellyfish ornaments with ease and confidence!

How to Wash and Care for Your Crochet Jellyfish Ornaments

Machine Washing: If necessary, place your crochet jellyfish ornaments in a mesh laundry bag to protect their shape, and use cold water on a gentle cycle to prevent any damage.

Hand Washing: For the best care, gently hand wash your ornaments in cold water with a mild detergent. Avoid agitating them too much to prevent felting or pilling of the yarn.

Drying/Blocking: After washing, lay your crochet jellyfish ornaments flat on a clean, dry towel to maintain their shape. Avoid hanging them to prevent stretching, and allow them to air dry completely.

Storage: Store your jellyfish ornaments in a cool, dry place away from direct sunlight to preserve their colors. Use breathable containers to prevent moisture buildup and keep them looking their best.

Crochet Jellyfish Ornaments FAQs

Can I use different types of yarn for these crochet jellyfish ornaments?
Absolutely! While worsted-weight cotton or acrylic blend yarn is recommended for softness and structure, you can experiment with other yarn types. Just keep in mind that different yarns may alter the final look and feel of your ornaments.

What if I want to make my jellyfish ornaments bigger or smaller?
Don’t panic! To adjust the size, you can either increase the number of rounds in the cap or use a thicker yarn and larger hook for a bigger jellyfish. Conversely, switching to a lighter weight yarn and reducing the number of rounds will create a smaller version.

Why is my jellyfish cap curling at the edges?
This can happen if your tension is too loose or if the stitches are not uniform. I recommend checking your gauge and ensuring that you’re maintaining consistent tension throughout. You can use blocking techniques to gently reshape the edges if needed.

How do I fix dropped stitches in my crochet work?
It’s an easy fix! Carefully pull the last row of stitches back to the dropped stitch, then use your yarn needle to weave the working yarn back through the loops. Just be patient and follow the stitches back to avoid creating any extra holes in your fabric.

What hook size should I use for these ornaments?
For the crochet jellyfish ornaments, a 4.0 mm (G/6) hook is ideal to maintain tight stitches, which is important for the structural integrity of the piece. If your work feels too loose or floppy, consider using a smaller hook for better results.

Filed Under: Uncategorized

Whimsical Crochet Cat Bag: A Delightfully Fun Project

August 25, 2026 by Publisher Leave a Comment

Whimsical Crochet Cat Bag: A Delightfully Fun Project

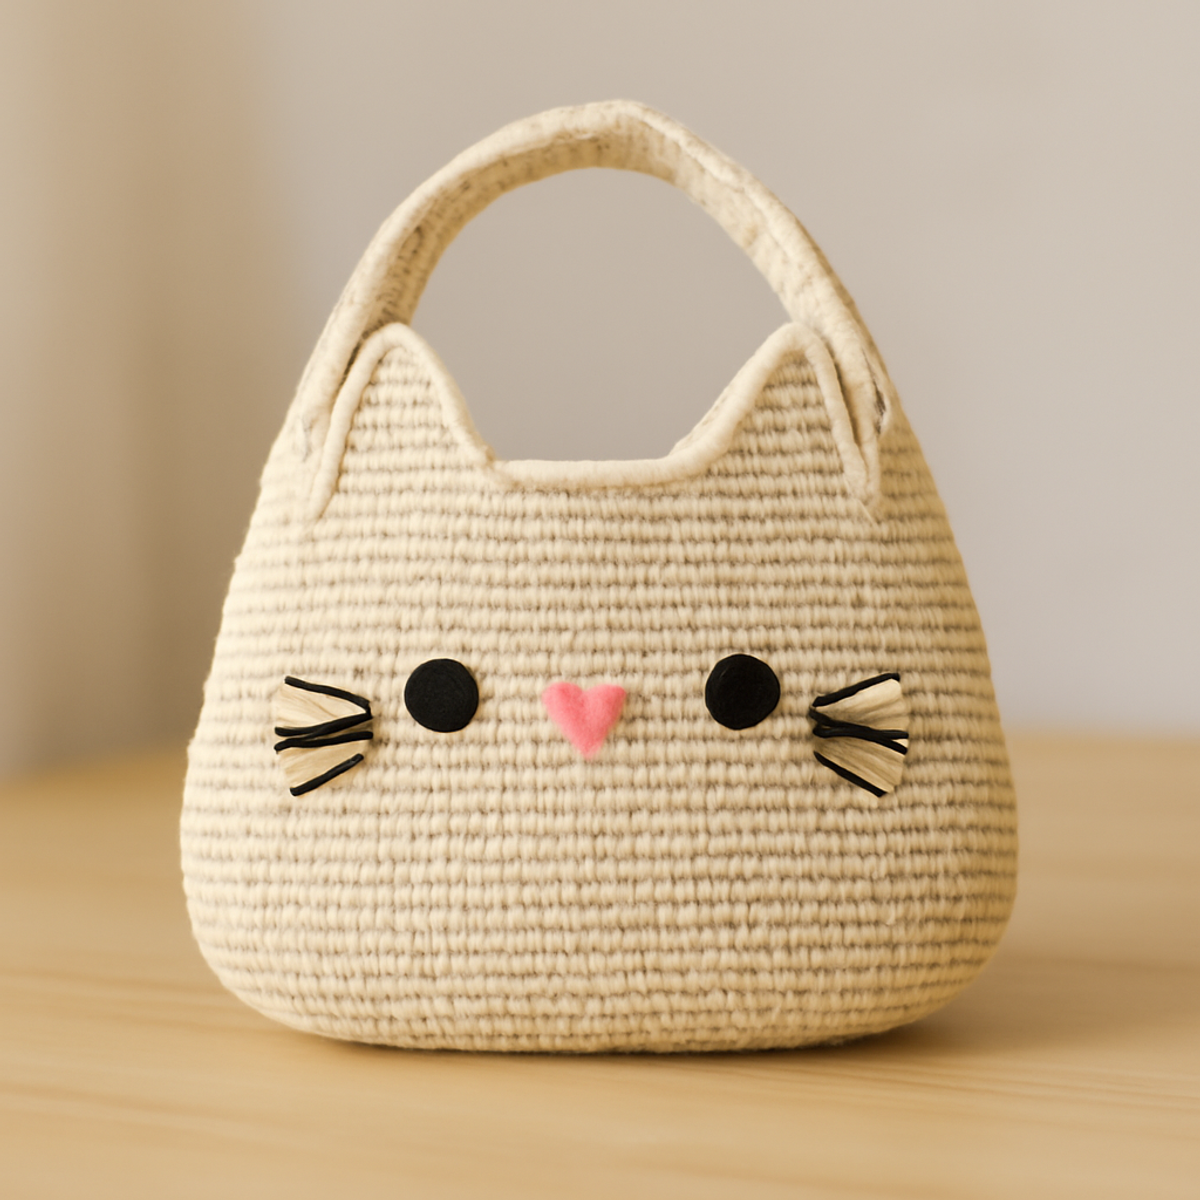
As I sat on my favorite couch, the soft yarn slipping through my fingers, the idea for a crochet cat bag began to take shape—just the kind of whimsical project that sparks joy! This delightful Whimsical Cat Tote is perfect for intermediate crocheters looking to blend a playful theme with everyday functionality. Not only does this cute handbag serve as a unique accessory, but it also offers a fantastic opportunity to practice crochet techniques while adding a touch of feline charm to any outfit. With its plush yet structured feel and light-weight cotton blend, this bag is a must-make for anyone who loves cozy, creative projects. Plus, it’s a great way to use up some of that yarn stash! Are you ready to unleash your inner crafter and bring this adorable cat bag to life? Let’s dive in!

Whimsical Cat Tote Materials & Tools

  • Yarn
    • Lightweight Cotton Blend Yarn – Approximately 150-200 yards (137-183 meters) in cream, pink, and black will beautifully bring your crochet cat bag to life.
  • Tools & Notions
    • 3.0 mm (US Size D) Hook – This size is ideal, but you may need to adjust based on your preferred gauge.
    • Safety Eyes – These will give your cat bag its charming expression.
    • Stitch Markers – Handy for keeping track of rounds as you crochet.
    • Button – A decorative button can help secure your bag's closure and add a personal touch if desired.

Why Choose a Crochet Cat Bag?

Playful Design: This crochet cat bag is not just a craft; it's a statement piece that adds a whimsical touch to any outfit. Functional Size: Measuring at 20 cm wide, it's perfect for carrying your essentials in style. Stitch Practice: The pattern incorporates useful crochet techniques that help enhance your skills, making it ideal for intermediate crafters. Customizable Options: Tailor the size, color, and embellishments to suit your personal style, ensuring no two bags are alike. Cozy Texture: Made from a lightweight cotton blend, this bag strikes the perfect balance between plush comfort and structure, making it both durable and delightful to use.

Gauge & Sizing Notes

Don't skip the gauge swatch! Ensuring your tension is correct is crucial for the success of your crochet cat bag, as it affects the bag's final size and shape. A standard gauge measurement is often around 4×4 inches (10×10 cm), resulting in approximately 14 single crochets by 8 rows, but remember to check your own swatch for accuracy. If you want to scale your crochet cat bag, simply adjust your starting chain in multiples of 6, plus any additional stitches needed for your initial chain. If your tension doesn’t match, no worries! If you find your swatch is too small, try going up a hook size to achieve the perfect fit for your whimsical creation!

Step-by-Step Pattern for Whimsical Crochet Cat Bag

Row 1: Foundation Chain
Begin by creating a foundation chain of 30 (ch 30) using your light-weight cotton blend yarn. Make sure your chain is not too tight, as this will help with the flexibility of the bag. Once completed, join the last chain to the first with a slip stitch (sl st) to form a circle, ensuring there are no twists. Your work should lie flat as a ring at this stage (30 sts).

Round 2: Establishing the Base
In this round, chain 1 (ch 1) and work single crochet (sc) into each chain around the ring. This will establish the base of the crochet cat bag, creating a solid foundation. Be sure to place a stitch marker at the beginning to track your rounds. At the end of this round, you should have 30 sc around (30 sts), and the base will feel dense and sturdy.

Round 3: Increasing for Shape
Start Round 3 with a ch 1 and sc in the first stitch. Then, work an increase (inc) by crocheting 2 sc in the next stitch. Repeat this pattern—1 sc followed by 2 sc in the next stitch—around the entire round. This will give your crochet cat bag a slight flaring shape at the bottom, making it functional and cute. You should finish with 45 sts after this round (45 sts).

Round 4-8: Building the Body
For Rounds 4 through 8, start each round with a ch 1, then crochet 1 sc in each stitch around. These rounds will build up the height of your bag. Remember to keep your tension consistent so that the stitches remain uniform in size. After Round 8, you should have a beautifully formed cylinder that feels thick and plush (45 sts for each round).

Round 9: Shaping the Top
In this round, begin with a ch 1 and sc in the first five stitches. Next, perform a decrease (dec) by crocheting two sc together in the following stitch. Repeat this pattern—5 sc followed by a dec—until you reach the end of the round. This will help shape the top opening of your cat bag, making it more functional for everyday use. You should have 36 sts left (36 sts).

Rounds 10-11: Stabilizing the Shape
Continue with Rounds 10 and 11 using the same approach as before: start with a ch 1 and sc in each stitch around. This adds stability to your bag while maintaining the desired shape and form. At the end of Round 11, count your stitches—there should still be 36 sts for each round. Your work should feel solid yet flexible at this point.

Round 12: Final Adjustments
Now for the last round! Begin with a ch 1, then sc in four stitches followed by another decrease. Work this pattern around the entire round. This last round will tighten the top of your cat bag for added security. By the end, you'll have 30 sts (30 sts), keeping it snug for added functionality.

Step 1: Creating Cat Ears
To create the adorable cat ears, begin with a separate piece. Make a slip knot and chain 9 (ch 9). Turn and work 1 sc into each chain across. For the next row, ch 1, turn, and work 2 sc in the first stitch, followed by 1 sc in the next 6 sts, and 2 sc in the last stitch. This will create a triangular ear shape. Finish off, leaving a long tail for sewing. Repeat for the second ear.

Step 2: Assembly
Position the ears at the top of the bag, about 2 inches apart. Using the long tails from the ears, sew them onto the bag securely, ensuring they sit upright. Grab your safety eyes and attach them below the ears to give your crochet cat bag a friendly face. You may want to add a few stitches using contrasting yarn for the nose and whiskers, adding to the whimsical charm of your creation.

Step 3: Strap Creation
To create the strap, chain 60 (ch 60) for a comfortable length. Turn your work and sc across each chain back to the other side. This simple strap, made entirely of sc, will offer a sturdy and supportive way to carry your finished crochet cat bag. Once completed, attach both ends of the strap securely to the sides of the bag.

Step 4: Finishing Touches
Finally, weave in all loose ends along the sides and inside the bag to create a polished look. Feel free to lightly block the bag to even out any tension irregularities. Your Whimsical Crochet Cat Bag is now completed and ready for use! Enjoy showcasing your charming new accessory!

Helpful Tricks for the Crochet Cat Bag

  • Consistent Tension: Maintain even tension throughout the project to ensure that each stitch is uniform in size, which is crucial for shaping your crochet cat bag correctly.
  • Regular Stitch Counts: Remember to count your stitches every few rounds, especially when establishing the base, to avoid accidental increases or decreases altering the bag's proportions.
  • Proper Blocking: If your yarn allows, lightly pre-block the completed pieces before assembly to help even out tension and ensure your bag retains its delightful shape.
  • Secure Attachments: When sewing on the cat ears and facial features, make sure to secure them tightly to prevent them from loosening with use, enhancing the bag's whimsical charm.
  • Weave Ends Carefully: Don’t rush the finishing touches! Weave in all loose ends thoroughly to create a polished look, eliminating the risk of unraveling.

How to Wash and Care for Your Crochet Cat Bag

Machine Washing: Use a gentle cycle with cold water to help maintain the shape and structure of your crochet cat bag. Avoid harsh agitation to prevent any felting or pilling.

Hand Washing: If you prefer, hand wash your bag in cold water with a mild detergent, gently pressing out dirt without scrubbing, which can help keep its playful design intact.

Drying/Blocking: Lay your crochet cat bag flat on a clean, dry towel to reshape and dry. Avoid hanging it up, as this could stretch the fabric and distort its charming features.

Storage: When not in use, store your crochet cat bag in a cool, dry place to maintain its freshness. Avoid folding to keep its shape intact for your next adventure.

What to Pair with Whimsical Cat Tote

Imagine the joy of surrounding your charming crochet cat bag with even more delightful creations that embody whimsy and functionality!

  • Matching Cat Pouch: A small pouch for coins or accessories, perfectly matching the cat bag's playful design.

  • Feline-themed Keychain: Create a cute cat keychain to add a touch of fun to your bag, complementing its whimsical nature.

  • Cozy Cat Blanket: Crocheting a plush blanket in similar colors will create a harmonious, cozy atmosphere for those chilly nights.

  • Playful Cat Coasters: Use leftover yarn to craft quirky coasters, echoing the bag’s charm and keeping surfaces protected in style.

  • Charming Ear Hat: Complete your feline-themed look with a hat featuring adorable cat ears, perfect for playful outings while carrying your crochet cat bag!

Crochet Cat Bag Variations

Ready to add your personal touch to the charming crochet cat bag? Here are some fun and creative ideas to inspire your customization journey!

  • Yarn Color Switch: Try using vibrant or pastel shades for a lively twist that matches your style or seasonal inspiration.

  • Size Adjustment: Modify the foundation chain and the number of rows to create a larger tote or a cute miniature version for kids.

  • Different Textures: Integrate half double crochet stitches in sections to add a unique texture, elevating the overall look of your cat bag.

  • Embellished Features: Consider adding embroidered paws or facial expressions using contrasting yarn to enhance the whimsical nature of your creation.

  • Interchangeable Straps: Craft stylish straps with different colors or patterns to give your bag a fresh look anytime you feel like changing it up.

  • Fringe Details: Attach cheerful fringe at the base of the bag for an added playful vibe that dances with every movement.

  • Color-Blocking Fun: Choose two or three complementary colors to create sections along the bag, making it a fun and vibrant accessory.

  • Lined Interior: For a more polished look, line the inside of your bag with fabric to enhance durability while adding a pop of color.

Whimsical Crochet Cat Bag FAQs

Can I substitute yarn for my crochet cat bag?
Absolutely! While a lightweight cotton blend works best, you can use any 4-ply yarn you have on hand. Just be aware that different fiber contents, like acrylic or wool, might affect the bag's drape and durability. I recommend checking your gauge before starting!

How do I adjust the size of my crochet cat bag?
No worries—it's easy to customize! Simply modify the foundation chain length and add or reduce the number of rounds. For a larger tote, increase the starting chain; for a smaller purse, decrease it. Just remember to keep the proportions in mind to maintain the cat bag's shape!

Why is my crochet cat bag curling at the edges?
Don’t panic! Curling can happen if the tension is too tight or if you are using a hook that is too small. Be sure to relax your stitches and consider going up a hook size if necessary. Pre-blocking the finished pieces can also help it lay flat before assembly.

How do I fix dropped stitches in my crochet cat bag?
It’s an easy fix! You can simply use a crochet hook to pull the dropped stitch back up through the loop to restore it. Weave in any loose ends afterward to secure your work. Don’t hesitate to ask for help if you find yourself stuck, though—everyone's been there!

What hook size should I use for my crochet cat bag?
The ideal hook size is 3.0 mm (US size D). However, if your tension tends to be looser or tighter, feel free to adjust the hook size accordingly. Testing your gauge with a small swatch can help you achieve that perfect fit.

How can I ensure my stitches are uniform in my crochet cat bag?
To achieve a consistent look, make sure you're maintaining an even tension throughout your project. Count your stitches frequently, especially during the base construction. If you notice variation, take a moment to assess your grip on the yarn and the hook!

Filed Under: Uncategorized

Chic Crochet Tote Bag: Craft Your Floral Masterpiece

August 25, 2026 by Publisher Leave a Comment

Chic Crochet Tote Bag: Craft Your Floral Masterpiece

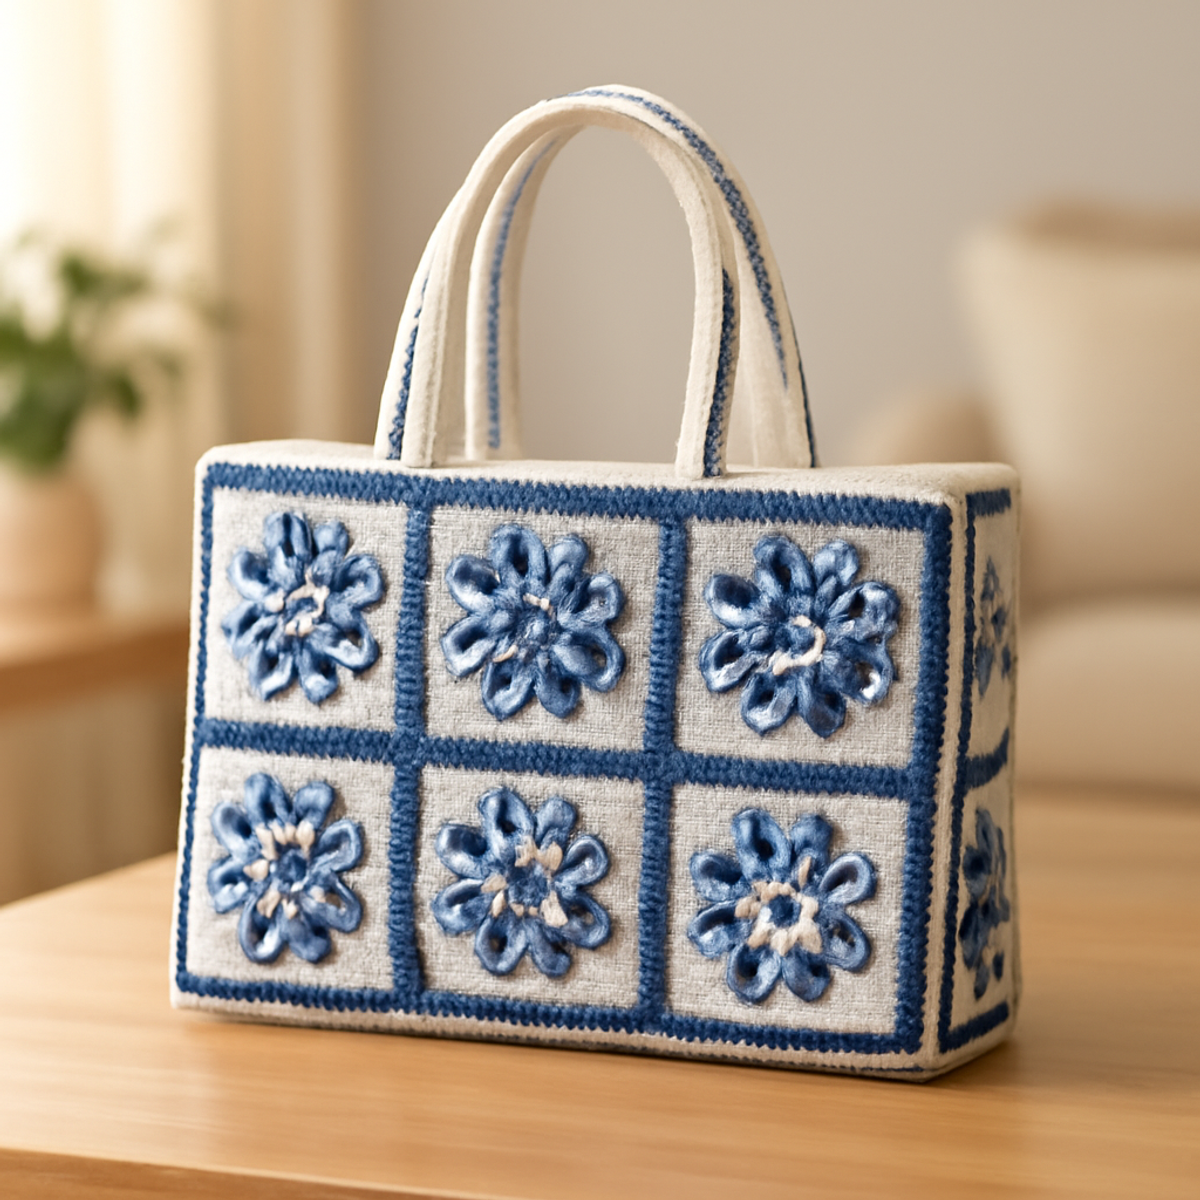
There's something special about a handmade bag that effortlessly combines style and utility—perfect for bustling market trips or leisurely coffee dates. In this post, I’m excited to share the pattern for a stunning crochet tote bag that showcases your skills with beautiful square motifs and a lovely floral design. Not only is this project accessible for those looking to hone their crochet techniques, but it also gives you the freedom to personalize your creation in colors that resonate with your unique aesthetic. Plus, the skills you gain here will elevate your stitching confidence for future projects! Get ready to dive into the world of cozy crafting and discover the joy that comes from every stitch of this chic crochet motif bag.

Chic Crochet Tote Bag Materials & Tools

Yarn

  • Medium Weight Yarn (Worsted, Weight #4) – You'll need approximately 300-400 yards total, divided among cream, light blue, and dark blue yarns for your crochet tote bag.
  • Cotton or Acrylic Yarn – Choose a blend that balances softness and durability for a long-lasting bag.

Tools & Notions

  • 5.0mm (H) Hook – This size is ideal for achieving the right stitch density and a beautiful drape.
  • Stitch Markers – Use these to keep track of your motif assembly for consistent results.
  • Yarn Needle – A must-have for sewing in ends and finishing your lovely crochet tote bag.

Get ready to dive into this delightful project and create something truly special!

Why Choose This Crochet Tote Bag?

Versatile Design: This chic crochet tote bag seamlessly transitions from casual outings to market trips, showcasing your unique style no matter the occasion.

Practice with Purpose: Dive deeper into crochet by mastering square motifs while creating an aesthetically pleasing bag that embodies functionality.

Personal Touch: Customize your creation by mixing and matching yarn colors to reflect your personality, ensuring no two bags are alike.

Skill Builder: As you work through this intermediate pattern, you'll enhance your crocheting skills, paving the way for even more complex projects in the future.

With every stitch, you’re not just crafting a tote; you're creating a lasting piece of art!

Gauge & Sizing Notes

Don't skip the gauge swatch! Checking your crochet tension is essential for achieving the perfect fit for your chic crochet tote bag. A general guideline you can follow is to aim for a gauge of about 4×4 inches (10×10 cm), typically resulting in 14 double crochets by 8 rows. If your initial swatch falls short, you can make this crochet tote bag larger by adjusting your starting chain in multiples of 4 to widen it. Conversely, if your gauge is too loose and the bag ends up too big, try decreasing your hook size to tighten your stitches. Remember, consistent tension helps maintain the beauty of your floral masterpiece!

Step-by-Step Pattern for Chic Crochet Tote Bag

Row 1: Create the First Motif
Start by chaining 4 and joining into a loop with a slip stitch (sl st). Then, chain 3 (counts as 1 dc) and work 3 dc into the loop, followed by a chain 2. Repeat the sequence of 3 dc and chain 2 into the loop three more times. Join with a sl st to the top of the initial chain 3. Your motif should have 4 clusters with chain spaces in between (16 sts).

Row 2: Finish the First Motif
To complete the first motif, place 2 sc into each chain 2 space, repeating this around the edge. After the final sc in the last chain space, join with a sl st to the first sc. This will give your square a more defined edge and create a lovely detailed border (24 sts).

Row 3: Repeat for Additional Motifs
Repeat Rows 1 and 2 to create a total of 24 square motifs. Use varying colors for an eye-catching design. As you work, ensure each motif is consistent in size; blocking the squares afterward can enhance their shape. The floral design will start to emerge with each completed motif.

Row 4: Assemble the Bag Sides
With your completed motifs, begin to join them in rows of 4 x 6. Align two squares side by side and use a sl st to join them through the back loops only. This will give your bag a sturdy seam while keeping the front clean and smooth. Continue joining squares until you have two large panels (48 squares total).

Row 5: Join Panels for the Bag Body
Position the two panels together with the right sides facing each other. Begin at the bottom and sl st around the edges, leaving the top open for the bag's opening. Make sure to stitch in each corner crisply to maintain the shape of your crochet tote bag (45 sts).

Row 6: Create the Handles
To make the handles, chain 80 (or desired length) and work in sc across the chain back to the starting point. This will create a firm strip for the handle. Assembling two handles, attach them to the top sides of the bag by sl st to the bag's edge, evenly spacing them out for balanced support.

Step 7: Add the Final Border
Switch to a contrasting color for your border. Start with a sl st in any corner and work around the edge of the bag in sc, placing 3 sc in each corner to maintain a neat finish. Join with a sl st after making your final rounds, ensuring the border is finished neatly and ties your crochet tote bag together beautifully. Your project is now ready to use!

Crochet Tote Bag Variations & Substitutions

Customizing your tote bag can transform it into a unique expression of your personal flair and creativity!

  • Color Block Twist: Play with bold color combinations by alternating square colors, creating a stunning visual effect that catches the eye.

  • Yarn Weight Swap: Opt for a lighter yarn, like DK (Weight #3), to create a delicately draped bag perfect for summer outings.

  • Fiber Change: Switch from cotton to bamboo yarn for a soft, luscious texture that feels heavenly against your skin.

  • Motif Sizing Adjustment: Resize your motifs by increasing or decreasing your chains, creating either a trendy large tote or an adorable mini version!

  • Textured Border: Add a fringe or pom-poms along the edges for a playful twist that takes your crochet tote bag from chic to boho.

  • Personalize with Pockets: Incorporate inner pockets by joining smaller motifs or simple rectangles, giving your tote extra functionality.

  • Stitch Variation: Explore different crochet stitches like bobbles or shells for your squares, adding dimension and interest to your bag's design.

  • Strap Style Change: Use a braided fabric strap or leather handles for a chic finish that elevates the entire look of your crochet tote bag.

How to Wash and Care for Your Crochet Tote Bag

Machine Washing: Use cold water on a gentle cycle to clean your crochet tote bag. This helps prevent stretching and maintains the integrity of your beautiful floral motifs.

Hand Washing: For a more delicate approach, hand wash your tote bag in cold water with mild detergent. Gently press to remove soap without wringing to avoid damage.

Drying/Blocking: Lay your crochet tote bag flat on a clean towel to dry. This method preserves its shape and prevents sagging, ensuring your handmade piece stays looking fresh.

Storage: Store your crochet tote bag in a cool, dry place. Avoid folding it to maintain the shape of those lovely square motifs and keep it ready for your next outing!

What to Pair with the Chic Crochet Tote Bag?

Embark on your next crafting adventure with projects that harmonize beautifully with your chic crochet tote bag, enhancing your cozy collection.

  • Floral Keychain: Create a charming keychain using leftover yarn. This little accessory adds a pop of color and character to your bag.

  • Matching Coin Purse: A small coin purse makes the perfect companion, keeping your essentials organized while showcasing similar motifs.

  • Cozy Blanket: Utilize the same square motifs from your tote to craft a stunning blanket, transforming your space into a warm sanctuary.

  • Stylish Napkin Set: Whip up a set of beautiful napkins that feature coordinating colors; they elevate any picnic or café outing.

  • Chic Flower Brooch: Fashion a floral pin that can adorn your bag or any outfit, offering a touch of handmade charm wherever you go.

Expert Tips for Your Crochet Tote Bag

  • Consistent Tension: Maintain even tension while crocheting to ensure that all square motifs are uniform in size. Loose stitches can lead to misshaping.

  • Count Your Stitches: Regularly count your stitches in each motif. Keeping track helps prevent errors and ensures symmetry across your designs.

  • Block Before Assembly: Blocking your finished square motifs enhances their shape and definition. This step is crucial for achieving a polished look in your crochet tote bag.

  • Secure Your Ends: When finishing each motif, don’t forget to weave in the ends carefully. This will prevent fraying and give your bag a cleaner finish.

  • Join Squares Neatly: When joining motifs, use slip stitches through the back loops only for a clean look and sturdy construction. This will ensure your bag holds its shape beautifully.

Chic Crochet Tote Bag FAQs

Can I substitute the yarn for different fiber types?
Absolutely! While this crochet tote bag works beautifully with cotton or acrylic, feel free to explore other fibers like linen or bamboo. Just ensure the weight remains consistent (Medium Weight #4) for best results!

How can I make the crochet tote bag bigger or smaller?
To adjust the size of your bag, simply modify the number of square motifs you create. For a larger bag, increase the number of motifs or the size of your handle. To downsize, decrease the motif count and consider using a smaller hook for tighter stitches.

Why is my work curling at the edges?
Don't panic! Curling often happens due to tight tension or incorrect stitch count. First, check that you're maintaining consistent tension throughout your project. Blocking your finished motifs before assembly can also help flatten the edges.

What hook size should I use for this project?
I recommend using a 5.0mm (H) crochet hook for this crochet tote bag. This size is perfect for achieving the stitch density needed for your floral motifs and maintaining the right drape for your bag.

How do I fix dropped stitches in my crochet tote bag?
It's an easy fix! If you notice a dropped stitch, use a yarn needle to bring the yarn back through the correct loops, or crochet over it if you catch it early enough. Just be sure to secure it properly to avoid unraveling later.

Can I use just one color for the entire crochet tote bag?
Certainly! While mixing colors adds charm, a single color can create a stunningly sophisticated look. Choose a color that resonates with you, and feel free to play with different textures for depth!

Filed Under: Uncategorized

Quick No-Sew Plush Turtle Crochet for Cuddly Joy

August 25, 2026 by Publisher Leave a Comment

Quick No-Sew Plush Turtle Crochet for Cuddly Joy

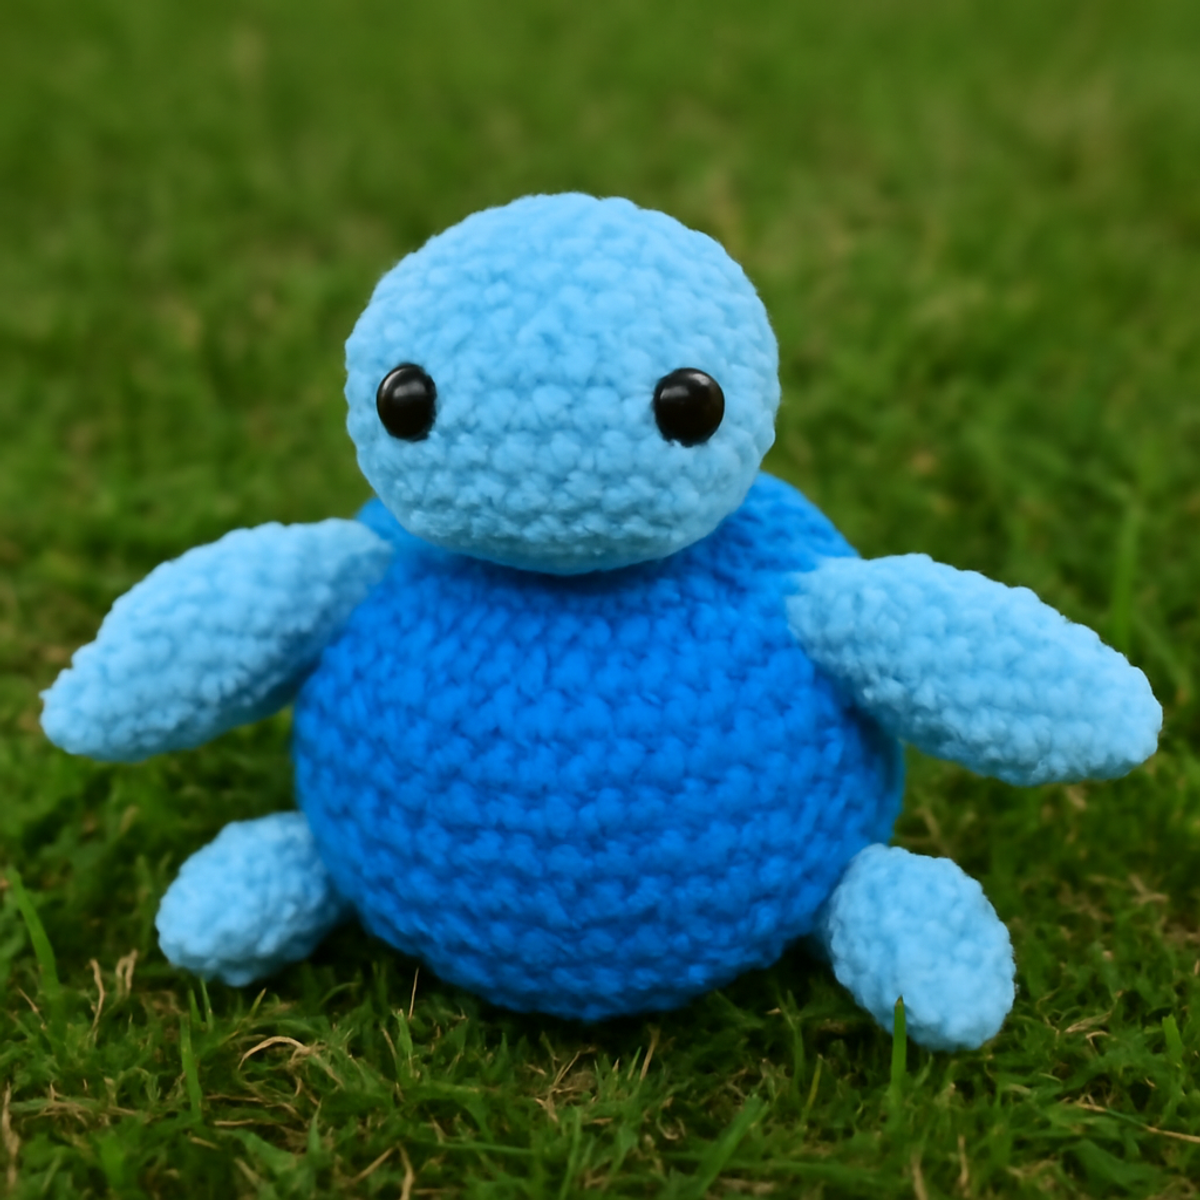
As I watched the sun glisten on our backyard grass, I couldn’t help but smile at the sight of my latest crochet creation—a plush turtle that's perfect for cuddles! This plush turtle crochet pattern comes with an irresistible charm that's sure to capture hearts of all ages, making it an ideal gift or whimsical decor. What I love most about this project is the no-sew technique, making it incredibly beginner-friendly and perfect for those last-minute gifts. Plus, you can whip it up in just about an hour, giving you that instant crafting gratification. Imagine the soft, velvety texture of yarn gliding through your fingers as you create a delightful companion to snuggle with or gift someone special. Ready to dive into the world of crochet with this adorable turtle? Let’s get started!

Plush Turtle Crochet Materials & Tools

  • Plush, Velvety Yarn – Use about 100 yards of medium weight (Category 4) yarn in various shades of blue for a charming look.
  • 5.0 mm (H-8) Hook – This size works well with the yarn type, making it perfect for your plush turtle crochet project.
  • 12 mm Safety Eyes – These will give your turtle its adorable gaze; adjust placement for a unique expression!
  • Stitch Marker – Helpful for tracking rounds, especially useful in this no-sew pattern.

Why Crochet a Plush Turtle Today?

Quick Completion: You’ll love that this plush turtle crochet project can be finished in just an hour, making it ideal for those moments when you need a delightful gift in a pinch.

Beginner-Friendly: Thanks to its no-sew construction, crafters of any skill level can easily whip up this adorable turtle, ensuring a rewarding crafting experience.

Super Soft Texture: The plush velvety yarn not only offers a squishy quality but also creates a cuddly friend that’s perfect for little hands or as a charming decor piece.

Customizable Design: Feel free to experiment with color gradients or add personal touches like embroidered features to truly make this turtle your own!

Heartwarming Gift: Whether for children or adults, this whimsical turtle is sure to bring smiles, making it a heartfelt gift for any occasion.

Gauge & Sizing Notes

Don't skip the gauge swatch! Ensuring your tension is just right for the plush turtle crochet is key to achieving a beautifully proportioned toy. A good guideline for gauge is to create a tension swatch of 4×4 inches (10×10 cm) to check for consistency in your stitches, as this will affect the final size and appearance of your turtle. If you find your plush turtle is coming out too small or too large, you can adjust the starting chain in multiples of 6 to achieve the desired width. Remember, if your tension is too tight, simply go up a hook size to create the perfect cuddly contours for your adorable creation!

Step-by-Step Pattern for plush turtle crochet

Row 1: Start the Body
Begin with a magic circle and work 6 sc into the circle (6 sts). Pull tight to close the circle. Your work should be snug and round, resembling the start of the turtle's shell. This initial round sets the foundation for building the plush turtle's body.

Row 2: Increase the Shell
In this round, work 2 sc in each stitch around (12 sts). Make sure to keep the stitches tight and even, as this will help create a smooth surface for your plush turtle crochet. By the end of this round, your shell should begin to take shape.

Row 3: Continue to Build
For this round, work (sc in the next stitch, inc in the following stitch) around (18 sts). This alternating increase helps your turtle's shell become flared and more domed. Your work should be maintaining a rounded appearance as you continue to build height.

Row 4: Shape the Shell Further
Now, work (sc in the next 2 stitches, inc in the next) around (24 sts). The turtle’s shell should look fuller and more prominent. Pay attention to your stitch tension, as consistent tension will keep your plush turtle crochet looking neat and appealing.

Row 5: Establish the Base
In this round, work (sc in the next 3 stitches, inc in the next) around (30 sts). This is the last increase round, and your plush turtle should be growing nicely! Ensure the base remains flat, preparing for the finalized shape of your turtle.

Row 6-8: Build the Height
For rounds 6 to 8, work 1 sc in each stitch around (30 sts for each round). Your plush turtle crochet should feel nice and solid here, with the shell's height developing. These rounds will form the rounded shape needed for the turtle's upper body.

Row 9: Begin the Flippers
Next, create the flippers. Work 12 sc in the next 12 stitches (12 sts) and join by sl st. Fasten off, leaving a long tail for assembly. Your flipper portion should be distinct, slightly sticking out from the shell’s curvature.

Step 2: Attach Flippers
Position your flippers to the sides of the turtle's body and use sl st to attach them for a seamless look. This step is vital for your plush turtle crochet, giving it those adorable, functional arms that make it perfect for cuddling.

Step 3: Create the Head
To form the head, start another magic circle and work 6 sc (6 sts). Pull tight. The head will be slightly smaller than the body, maintaining that plush turtle's charm. This creates a cute, rounded head to top your lovely creation.

Step 4: Increase the Head
In the next round, work 2 sc in each stitch around (12 sts). This round rounds out the head, making sure it can attach neatly to the turtle's body without gaps.

Step 5: Shape the Head
Follow by working (sc in the next stitch, inc in the next stitch) around (18 sts). This gradual increase continues shaping the head and preparing it for attachment. You should see a pleasing curvature resembling the turtle's head.

Step 6: Complete the Head
For the final head round, work 24 sts evenly around (24 sts). Now the head is finished, looking delightful! Align it with the body to check visual balance, ensuring that your plush turtle crochet looks perfectly proportioned.

Step 7: Attach the Head
Use sl st to secure the head to the body. Be sure the safety eyes are positioned before you fasten it completely. The attachment should feel secure but still allow the head some mobility for added charm.

Step 8: Final Touches
If desired, use leftover yarn to create embroidered features or add playful elements. This is your chance to personalize your plush turtle crochet, truly making it a unique creation that sparkles with your personal touch!

How to Wash and Care for Your Plush Turtle

Machine Washing: Use cold water on a gentle cycle to avoid agitation, which can lead to felting and pilling—keeping your plush turtle crochet looking its best!

Hand Washing: For a more tender touch, hand wash using a mild detergent in cold water. Avoid scrubbing to maintain the soft, inviting texture of your plush turtle.

Drying/Blocking: Always lay your turtle flat to dry away from direct sunlight. This prevents any distortion and helps maintain the plush finish of your creation.

Storage: When not in use, store your plush turtle crochet in a cool, dry place. Avoid crushing it to preserve its lovely shape and soft feel for snuggles in the future.

Expert Tips for Plush Turtle Crochet

  • Tension Matters: Maintaining even tension in your stitches is crucial for creating a uniform look, especially for plush items like your turtle.

  • Count Wisely: Keep track of your stitches, particularly when transitioning between sections, to prevent losing your place in this fun plush turtle crochet project.

  • Light Blocking: Lightly steam block your work to enhance the plush texture without losing your turtle's cute shape; it helps bring your creation to life!

  • Secure Eyes: When attaching safety eyes, ensure they are placed before securing the head to the body; adjust for the perfect expression!

  • Finishing Touches: Get creative with remaining yarn! Add embroidered features or playful embellishments to personalize your plush turtle crochet and make it truly yours.

What to Pair with Your Plush Turtle Crochet

As you bask in the joy of crafting your plush turtle, consider extending the whimsy and coziness with these delightful pairings.

  • Snuggly Plush Blanket: Create a cozy companion that enhances the comfort of your turtle; perfect for an afternoon cuddle.
  • Cute Crochet Starfish: Add a splash of color to your ocean-themed decor with an adorable starfish to accompany your turtle.
  • Charming Ocean Waves Pillow: This pillow not only complements your plush turtle but also brings an aesthetic touch to your crafting space.
  • Colorful Coral Reef Set: Craft a vibrant mini coral reef, using the same yarn shades to create a playful underwater scene.
  • Matching Plush Fish: Whip up a delightful fish friend using your leftover yarn, perfect for even more imaginative play or decor!

Plush Turtle Crochet Variations

Embrace your creativity by customizing your plush turtle crochet to make it uniquely yours!

  • Yarn Weight Swaps: Choose a lighter or heavier yarn for different sizes and textures; experiment with a bulky yarn for a cuddly giant turtle.

  • Fiber Alternatives: Opt for a cotton yarn for a firmer texture, or bamboo yarn for a silky smooth finish that feels fantastic in hand.

  • Gradient Effects: Mix light and dark shades of blue to create a stunning ombre shell, adding depth and personality to your plush turtle.

  • Embellished Features: Get playful by adding embroidered eyes or a sweet bowtie, enhancing your turtle’s character and making it truly special.

  • Size Adjustments: Adjust the turtle's size by increasing or decreasing the number of rounds; a smaller version could be a charming keychain or a larger one makes a great pillow.

  • Textured Additions: Consider adding fringed flippers or a decorative border around the shell to elevate the design and provide a tactile experience.

  • Color Blocking: Use contrasting colors to section the shell and flippers, creating a vibrant turtle that stands out in any decor or playroom.

  • Pom-Pom Tail: Add an adorable pom-pom as a tail for an extra layer of whimsy, giving your plush turtle an even more playful vibe!

No-Sew Plush Turtle FAQs

Can I substitute yarn brands or types for my plush turtle crochet project?
Absolutely! While it's best to use a medium weight (Category 4) plush yarn for soft texture, you can try substituting it with cotton for a firmer finish. Just keep in mind that different fibers may affect the overall squishiness and drape of your turtle.

How can I make my plush turtle larger or smaller?
Don't panic! To adjust the size of your plush turtle crochet, simply increase or decrease the number of rounds in the shell. More rounds will lead to a larger turtle, while fewer rounds will give you a smaller one. Just remember to maintain even tension to keep its shape!

Why is my work curling, and how do I fix it?
If your plush turtle crochet is curling, it might be due to tight stitches or improper tension. Try gently blocking your work with steam to help smooth it out. Lightly stretching your fabric as you block can also enhance its appearance and reduce curling.

What hook size should I use for my plush turtle crochet?
For this project, a 5.0 mm (H-8) hook is recommended. This size works great with medium weight yarn to create the squishy, soft texture of the turtle. If you're using a different yarn weight, you may need to adjust your hook size accordingly, so always check your yarn label for guidance!

How do I fix dropped stitches in my plush turtle crochet?
It's an easy fix! Simply grab your yarn needle or hook to lift the dropped stitch back up to the proper loop. Make sure to catch the working yarn to bring it back into place. Counting stitches consistently can help you avoid this common hiccup while crafting!

What if I don’t have safety eyes?
No worries! If you can’t find safety eyes, you can always embroider the eyes with yarn or use felt to create cute eyes. This allows you to customize the turtle’s expression while also ensuring it’s safe and suitable for any age!

Filed Under: Uncategorized

Beginner Coffee Cup Cozy Crochet: Quick & Cozy Project

August 25, 2026 by Publisher Leave a Comment

Beginner Coffee Cup Cozy Crochet: Quick & Cozy Project

Every coffee lover knows the joy of cradling a warm cup in their hands, and what better way to enhance that experience than with a crochet coffee cup cozy? This project is perfect for beginners eager to embark on their crocheting journey while creating a delightful accessory that adds a personal touch to their daily routine. The coffee cup cozy crochet pattern not only protects your hands from hot cups but also allows you to showcase your unique style with endless color combinations and stitch variations. With its simple construction, this cozy promises a quick satisfaction that is perfect for handmade gifts or for cozying up with your favorite brew. So, grab your favorite yarn and hook, and let’s get stitching—your new go-to coffee companion awaits!

Coffee Cup Cozy Crochet Materials & Tools

  • Yarn

    • Worsted Weight Cotton Yarn – Use 100% cotton for excellent insulation and durability, approximately 50-100 yards based on desired size.
  • Hook

    • 4.5 mm (Size 7 US) Hook – This size is ideal for creating the cozy's soft and flexible texture.
  • Notions

    • Wooden Button – A stylish choice for closure, offering easy buttoning and unbuttoning.
    • Yarn Needle – Essential for weaving in ends and securing your cozy.
    • Scissors – Handy for cutting yarn cleanly after your project is finished.

Get ready to enjoy crafting this delightful coffee cup cozy crochet project that adds a personal touch to your coffee routine!

Why Choose This Coffee Cup Cozy?

Quick Craft: Perfect for beginner crafters, this cozy requires minimal skill and time, allowing you to see quick results while honing your crochet skills.

Charming Design: The stylish look of the cozy adds flair to your coffee routine, making it a standout accessory that reflects your personality.

Practical Use: Function meets form as this cozy protects your hands from hot cups while also preventing spills, enhancing your overall coffee experience.

Endless Customization: With options to play with color choices and decorative elements, you can create a truly one-of-a-kind cozy tailored to your tastes.

Soft and Flexible Texture: Utilizing cotton yarn, the cozy offers a wonderful tactile quality while keeping the cup insulated, ensuring your hands stay comfortable.

Gauge & Sizing Notes

Don't skip the gauge swatch! Checking your tension is essential for ensuring your coffee cup cozy fits perfectly around your favorite takeaway cup. While specific gauge measurements may vary, a general guideline is to aim for about 14 half double crochets across a 4×4 inch (10×10 cm) swatch. If your cozy isn't quite fitting as you'd like, adjust your starting chain, making sure to add or subtract in multiples of 4 to achieve the desired size. If you find that your swatch is too small, simply go up a hook size to loosen your tension. Happy crocheting, and enjoy crafting your perfect coffee cup cozy!

Step-by-Step Pattern for coffee cup cozy crochet

Row 1: Foundation Chains
Begin by chaining a length that wraps comfortably around your coffee cup, aiming for 28-34 chains. This starting chain will form the base of your cozy, so make sure it has a slight overlap to ensure a snug fit. Check that your foundation chain is even and free of twists.

Row 2: Half Double Crochet in First Row
In the second chain from your hook, work a half double crochet (hdc) into each chain across. This first row introduces a sturdy foundation for your cozy. When finished, you should have completed 27-33 hdc depending on your starting chain length, and your work should start to form a neat, flat fabric.

Row 3: Continuing Half Double Crochets
For the next several rows, continue working hdc in each stitch across until your piece reaches about 3-4 inches in height, depending on the cup size. Remember to maintain consistent tension; your cozy should feel snug but not overly tight. After completing the specified rows, the cozy should begin to show height.

Row 4: Adding Texture with Stitches
To enhance the texture of your cozy, consider working front post or back post half double crochet stitches (fp/hdc or bp/hdc) in this round. This variation adds depth and visual interest to your coffee cup cozy crochet project while keeping it functional. Complete your row with the same stitch count (27-33 sts) as before.

Row 5: Button Loop Creation
To make the button loop, chain 5 after your last hdc of the previous row, then sl st back into the same stitch to form a loop. This will allow your cozy to button securely. Continue to work hdc in each remaining stitch for that row, ensuring to end with the correct stitch count.

Row 6: Finishing the Body
In this final row of the body, transition back to regular hdc for a neat finish. Complete the row, ensuring that your cozy is consistent in height and shape, maintaining a pleasant aesthetic. Fasten off, leaving a tail for sewing in the button later. Your cozy should now easily wrap around a standard takeaway cup.

Step 7: Button Attachment
Sew the wooden button securely to the opposite side of the button loop you created earlier. Make sure the button is positioned so that it aligns well with the loop when wrapped around the cup, allowing for easy buttoning and unbuttoning. Ensure your button is secure, as it will be used frequently.

Step 8: Weaving in Ends
Using your yarn needle, weave in any remaining ends from your coffee cup cozy crochet. This final touch will help secure your stitches and create a polished look. Take your time to ensure all ends are neatly tucked away, giving your cozy a professional finish.

Step 9: Assembly & Final Touches
Wrap your cozy around your coffee cup to admire your creation! If desired, lightly block the cozy to even out any uneven stitches. Once satisfied with the shape and finish, your coffee cup cozy is ready for use, adding a splash of color and comfort to your daily coffee ritual!

How to Wash and Care for Your Coffee Cup Cozy

Machine Washing: When washing, opt for cold water on a gentle cycle to maintain the cozy's shape and avoid any felting.

Hand Washing: For a more careful approach, hand wash your cozy in lukewarm water with mild detergent. Gently agitate to prevent pilling.

Drying/Blocking: Lay your cozy flat to dry after washing, reshaping it as needed. Proper drying helps retain the crochet's lovely texture without distortion.

Storage: Store your coffee cup cozy crochet in a dry, cool place to maintain its freshness and color, ready for your next coffee ritual!

Coffee Cup Cozy Crochet Variations

Invite your creativity to shine by exploring delightful ways to customize this cozy project, making each piece uniquely yours.

  • Color Swaps: Brighten up your cozy with vibrant colors or soft pastels. Variegated yarn can bring a fun twist to the design, making it a true reflection of your personality.

  • Yarn Alternatives: Switch to acrylic yarn for an affordable option or bamboo yarn to embrace sustainability. Each fiber offers a different feel and look, allowing you to adjust your cozy's texture and appearance.

  • Size Adjustments: Change the starting chain length for larger or smaller cups. Adjusting the dimensions can result in a snug fit for any takeaway cup size—perfect for coffee adventures!

  • Decorative Elements: Enhance your cozy by adding crochet flowers, decorative buttons, or personalized tags. These lovely details turn a simple cozy into a cherished gift or keepsake.

  • Textured Stitches: Experiment with different stitches like popcorn or shell stitches to give your cozy a playful twist. The added dimension will make it visually appealing and your hands will appreciate the charming texture.

  • Embellishments: Consider accessorizing with pom-poms or tassels. Adding a little flair not only boosts the cozy’s charm but also creates a lovely conversation starter when you enjoy your cup.

  • Layering Techniques: Create a double-layered cozy for extra insulation by working two separate cozies and stitching them together. This whimsical approach brightens cold mornings and chilly coffee breaks.

  • Custom Fit: Work in different heights by adjusting the number of rows for taller or shorter cozies, ensuring every sip is accompanied by comfort. A cozy that's made to match any specific cup brings intentionality to your crafting.

Expert Tips for Coffee Cup Cozy Crochet

  • Consistent Tension: Keep your tension even throughout the project. This ensures a snug fit around the cup, preventing gaps and ensuring warmth.

  • Frequent Counting: Count your stitches every few rows to stay on track. It helps avoid an unintentional increase or decrease in height, keeping your cozy beautifully even.

  • Closing Technique: When fastening off, leave a long tail to weave in neatly. It provides a more polished finish and secures your final stitches effectively.

  • Blocking Tips: If your stitches look uneven, consider lightly blocking your cozy. It helps shape the fabric and creates a neater appearance, enhancing your coffee cup cozy crochet.

  • Button Placement: Position your button carefully for effortless fastening. Ensure it aligns perfectly with the button loop for smooth use and functionality.

What to Pair with Warm Cups: Beginner Coffee Cup Cozy

Imagine the comfort of a cozy multi-project set that perfectly complements your sipping experience, inviting warmth into your crafting routine.

  • Matching Mug Rug: Create a charming rug for your mug to rest on, adding a cozy touch to your table while protecting surfaces. It's a practical addition that ties your coffee cup cozy crochet project together beautifully.
  • Charming Coasters: Crochet a set of coasters in complementary colors, enhancing the aesthetic of your coffee breaks while safeguarding your furniture from drips and spills.
  • Stylish Coffee Sleeves: Experiment with a variety of stitches to craft more sleeves that fit different cup sizes, showing off your growing skills and allowing for gift-giving.
  • Simple Coffee Scented Sachets: Sew some fabric pouches filled with coffee grounds or beans; they pair well with your cozy for the ultimate coffee lover’s gift.
  • Wrist Warmers: Use the same yarn to create stylish wrist warmers, keeping your hands warm while enjoying a steaming cup of your favorite brew.

Beginner Coffee Cup Cozy Crochet FAQs

Can I use a different type of yarn for this coffee cup cozy crochet project?
Absolutely! While the pattern suggests worsted weight cotton yarn for insulation and durability, you can use acrylic yarn if you prefer a more budget-friendly option. Just be mindful that acrylic may not provide the same insulating capabilities as cotton.

How can I adjust the size of the coffee cup cozy?
It's super easy to customize! Simply modify the beginning chain length based on the cup size. For larger cups, add more chains—aim for between 30 and 36 chains—while for smaller cups, reduce the initial count to around 24-28 chains. Measure your cup to find the perfect fit.

Why is my cozy curling at the edges?
Don't panic! Curling can occur if your tension is too tight or if the stitches are uneven. Try loosening your grip on the yarn as you work or adjusting your hook size to achieve a more relaxed stitch. This little adjustment can help smooth things out beautifully.

What is the best hook size for this pattern?
The pattern recommends a 4.5 mm hook (size 7 US), which is perfect for achieving a soft, flexible texture. However, if you're finding that your stitches are too tight or too loose, you might want to try a size larger or smaller until you find the perfect combination that works for you!

How do I fix dropped stitches in my cozy?
Fixing a dropped stitch is an easy fix! If you notice a dropped stitch, simply yarn over with your hook and pull it through your loop to bring the stitch back up. If you're worried about unevenness later, you can always weave in ends when you finish—no one will know!

Filed Under: Uncategorized

Whimsical Crochet Bouquet Blanket for Cozy Decor

August 25, 2026 by Publisher Leave a Comment

Whimsical Crochet Bouquet Blanket for Cozy Decor

As I curled up on my couch, a wave of warmth spread through me—a feeling only a soft crochet blanket can offer, especially one as beautiful as the Crochet Bouquet Blanket. This enchanting project blends playful florals with cozy comfort, making it a perfect piece for both decor and snuggling up on chilly evenings. Not only is crafting this blanket a delightful journey of creativity, but it also results in a stunning throw or baby blanket to treasure. With its unique flower border, this pattern adds a touch of whimsy to any space, while the opportunity to play with vibrant yarn colors can brighten your home. If you’re ready to embrace the joy of crochet and add a romantic touch to your collection, let’s dive into crafting this lovely, functional masterpiece together!

Crochet Bouquet Blanket Materials & Tools

  • Yarn

    • Medium Weight Yarn (Category 4) – Approximately 800 to 1000 yards of 100% acrylic yarn is ideal for softness and durability in lavender for the main blanket, and shades of pink for the roses, plus green for the leaves.
  • Tools & Notions

    • 5.0 mm (H-8) Crochet Hook – Recommended for crafting the main blanket for a comfortable stitch size.
    • 4.0 mm (G-6) Crochet Hook – Smaller hook for detailing the roses; helps in achieving intricate shapes.
    • Tapestry Needle – Essential for weaving in ends, ensuring a neat finish to your crochet bouquet blanket.
    • Scissors – For cutting yarn at the desired lengths when needed.
    • Stitch Markers – Useful for tracking rounds in the spiral section, maintaining stitch counts for consistency.

Why Choose the Crochet Bouquet Blanket?

Unique Design: This blanket features a charming flower border that instantly elevates any decor style while providing a cozy atmosphere.
Intermediate Challenge: Perfect for crafters looking to refine their skills, it incorporates intricate stitches and flower-making techniques for rewarding growth.
Functional Beauty: Not just a stunning piece, it serves as a practical throw or baby blanket, making it a lovely addition to your home.
Colorful Options: Enjoy the freedom to experiment with various yarn colors, allowing you to make a personalized statement that reflects your style.
Tactile Appeal: Its delightful drape and soft texture invite touch, promising a comforting experience whether decorating or snuggling.
Customizable Sizes: Adjust the dimensions to fit any space, ensuring your Crochet Bouquet Blanket is uniquely suited to your needs.

Gauge & Sizing Notes

Don't skip the gauge swatch! Checking your crochet tension is essential for achieving the perfect size in your Crochet Bouquet Blanket. A standard guideline is to aim for a gauge that measures 4×4 inches (10×10 cm) with approximately 14 double crochets by 8 rows; however, be sure to check to ensure it matches your unique way of crocheting! If you find your swatch is smaller than expected, try increasing your hook size for a looser fit. To customize the size of your blanket, simply adjust your starting chain in multiples of 6 + 2 to make it wider or narrower as desired. Happy stitching!

Step-by-Step Pattern for crochet bouquet blanket

Row 1: Begin the Body
Start with a foundation chain of 100 ch, then join to form a ring with a sl st, being careful not to twist. Round 1: Ch 1, work 100 sc evenly around. Your work should be flat and smooth as you secure the ring. At the end, you should have 100 sts.

Round 2: Create Spiral Texture
For Round 2, ch 1, then work 1 hdc in the first stitch, 2 hdc in the next around (totaling 150 sts). This will give your crochet bouquet blanket its gentle spiral effect. By the end, the work should begin to curl slightly upward.

Round 3: Maintain Spiral with Increase
Ch 1, now work 1 hdc in the first, 1 hdc in the second, 2 hdc in the third around. Continue this pattern all the way around until complete, resulting in 200 hdc (100 increases total). Your blanket should be growing spaciously and have a lovely texture.

Round 4: Begin Flower Border Preparation
Switch to the flower border by starting with a ch 1. Work 1 sc in the first stitch, then 1 hdc in the next, 2 dc in the following, 1 hdc, and 1 sc in the last stitch. Repeat this pattern around to give the edge a decorative touch (100 total stitches). Your work will begin to distinguish the border from the main body.

Step 5: Crochet the Flowers
To make the roses, with the smaller hook, start with a magic circle. Work 6 dc into the circle and tighten it (6 dc). Then, in Round 2, ch 2 and work 2 dc in each dc from the previous round for a total of 12 dc. Your rose should start to take shape, giving a lovely flat base.

Step 6: Shape the Rose Petals
Round 3 begins with a ch 2, then work 1 dc in the first, 2 dc in the second, and repeat around (18 dc total). Your flower will appear fuller, emphasizing the layers of petals. Continue shaping until the flower has a soft, rounded appearance, setting the stage for the cozy crochet bouquet blanket.

Step 7: Attach Rose to Blanket
To secure the rose to your crochet bouquet blanket, position it at the desired spot along the border. Use a tapestry needle to sew the base of the rose down with small stitches. Ensure it is securely fastened, and your flowers should gently sprout along the edges of your beautiful blanket.

Step 8: Add Leaves for Detail
Using the green yarn, create leaves by chaining 5, join with a sl st to form a small loop. Work 5 sc in the loop to fill it out, then finish by attaching it next to each rose. Repeat for multiple leaves. Your crochet bouquet blanket will radiate a fresh, garden-like feel with these additions.

Step 9: Final Edging
Finish your blanket by working a round of sc around the entire edge. Ch 1, then 1 sc in each stitch, ensuring that the last row is neat and even. This will beautifully frame your crochet bouquet blanket and provide a polished look. The final touch will make all your careful work shine.

Crochet Bouquet Blanket Variations

Embrace the freedom to enhance your crochet project with a few delightful twists that reflect your unique style!

  • Yarn Weight Changes: Swap medium-weight yarn for bulky (Category 5) to create an oversized, plush blanket that's perfect for extra warmth.

  • Fiber Alternatives: Experiment with cotton yarn for a breathable option, making your crochet bouquet blanket ideal for warmer climates or summer picnics.

  • Color Play: Instead of lavender and pink, consider a bold teal with sunny yellow for a vibrant, cheerful look that can brighten up any space.

  • Size Adjustments: Make it a cozy lap blanket by reducing the foundation chain to 80 stitches, ensuring your crochet bouquet blanket fits snugly on your lap.

  • Flower Variety: Replace roses with daisies or sunflowers for a fresh take, using a similar stitch technique to capture their whimsical charm.

  • Textured Accents: Add bobbles or puff stitches to the main body for additional texture, creating visual interest and dimension in your cozy blanket.

  • Fringe Finishing Touches: Consider adding a fringed edge instead of a border for a fun, bohemian vibe, making your crochet bouquet blanket truly stand out.

  • Pom-Pom Fun: Attach small pom-poms to the flower centers or corners for a playful touch that delights the senses and adds a youthful spirit.

What to Pair with Crochet Bouquet Blanket?

The magic of crafting doesn't stop at the Crochet Bouquet Blanket—let's continue your creative journey with delightful projects that harmonize beautifully!

  • Flower Pillow Covers: Create pillows that mirror the floral theme to enhance your cozy decor with matching colors.

  • Warm Knit Wrap: A light wrap in complementary hues offers layered warmth, perfect for those chilly evenings snuggled up with your blanket.

  • Crochet Coasters: Whimsical floral coasters can bring charm to your setup, making tea time feel even cozier while keeping surfaces safe.

  • Matching Market Tote: A stylish tote featuring crochet flowers lets you carry your essentials while showcasing your lovely crafting skills.

  • Embroidered Wall Hanging: Pair it with embroidered decor that reflects the blanket’s colors, creating a cohesive aesthetic throughout your space.

Expert Tips for Crochet Bouquet Blanket

  • Maintain Tension: Consistent tension is crucial; avoid looser or tighter stitches for an even finish. Practice with swatches if necessary to find your rhythm.

  • Count Carefully: Keep track of your stitch counts, especially in the spiral sections. Using stitch markers can help ensure you don’t lose count or accidentally drop a stitch.

  • Use a Blocking Technique: Lightly block your finished blanket to enhance the flower shapes and edges, giving your crochet bouquet blanket a polished, professional look.

  • Secure Your Flowers: When attaching roses, ensure they are securely fastened; this prevents them from coming loose or shifting over time.

  • Final Touch Edging: Add a round of single crochet stitches around the blanket’s edge for a neat and tidy finish that frames your beautiful project perfectly.

Care Instructions for Crochet Bouquet Blanket

Washing: Use cold water on a gentle cycle to prevent felting or pilling, ensuring your crochet bouquet blanket maintains its vibrant colors and soft texture.

Hand Washing: For best care, consider hand washing in cold water using mild detergent. Gently press water out without twisting to keep the blanket's shape intact.

Drying/Blocking: Lay flat to dry on a clean towel, reshaping as needed. This prevents stretching while enhancing the flower shapes, giving your crochet bouquet blanket a polished finish.

Storage: Store the blanket in a cool, dry place. Avoid folding it to prevent creases and preserve the lovely floral design when it's not in use.

Crochet Bouquet Blanket FAQs

Can I substitute materials for the crochet bouquet blanket?
Absolutely! While I recommend using medium-weight acrylic yarn, you can experiment with cotton yarn for a lighter feel or a blend for added texture. Just be sure to check your gauge to maintain the blanket’s dimensions and drape.

How can I adjust the size of my crochet bouquet blanket?
If you'd like to make a larger blanket, simply add more chains to your foundation chain. For a smaller version, reduce the chain length. Keep in mind that adjusting the starting size will affect your total yarn requirements, so have a bit extra on hand just to be safe!

Why is my crocheted blanket curling at the edges?
Don’t panic! Curling is often due to tension differences or the type of stitches used. Ensure your tension is consistent throughout and try blocking the finished piece lightly to help flatten the edges.

What size crochet hook should I use for the crochet bouquet blanket?
For the main body of the blanket, a 5.0 mm (H-8) hook is recommended, while a smaller 4.0 mm (G-6) hook is best for crafting the roses. Using the right hook sizes is vital for achieving the perfect texture and shape!

How do I fix a dropped stitch in my crochet bouquet blanket?
It’s an easy fix! Simply pick up the dropped stitch with a yarn needle or your crochet hook, and carefully work it back into the surrounding stitches. If you're not sure, make a small knot to secure it if necessary.

Can I mix different yarn types in the crochet bouquet blanket?
Yes, you can mix different yarn types, but I recommend using yarns with similar weights and textures to ensure a cohesive look and feel. Experimenting with your yarn combinations can add a delightful twist to your floral masterpiece!

Filed Under: Uncategorized

Charming Sushi Mug Coasters: Quick Make for Fun Decor!

August 25, 2026 by Publisher Leave a Comment

Charming Sushi Mug Coasters: Quick Make for Fun Decor!

There’s something about cozy afternoons that begs for a touch of charm, especially when paired with a warm mug of your favorite beverage. Enter the delightful sushi mug coasters—a fun crochet project that invites creativity and whimsy into your home. Perfect for all skill levels, from hopeful beginners to seasoned artisans, these coasters not only protect your surfaces from pesky moisture but also add a playful flair to any kitchen or coffee table setting. Made with easy-to-source worsted weight yarn, they come together quickly and are a fantastic way to explore vibrant colors and textures. Whether you're crafting for yourself or putting together the perfect gift for a sushi lover, these coasters are sure to inspire smiles all around. Let’s dive into the stitches and start making something that’s both functional and full of personality!

Sushi Mug Coasters Materials & Tools

Yarn

  • Worsted Weight Yarn – A blend of cotton or acrylic works best for durability and easy cleaning; choose vibrant colors for a sushi-inspired design.
  • Estimated Yardage – Each coaster requires approximately 30-50 yards, depending on your chosen colors.

Tools & Notions

  • 4.0 mm (G-6) Hook – This size helps achieve the tight stitches necessary for creating durable coasters.
  • Yarn Needle – Essential for weaving in ends to finish your coasters securely.
  • Stitch Markers – Use these to keep track of rounds, especially while switching colors in your sushi mug coasters project.

Why Choose Sushi Mug Coasters?

Fun & Playful Design: These charming coasters bring a delightful sushi theme into your home, adding a smile to every sip.

Quick & Easy Crochet: Designed for all skill levels, this pattern is perfect for new crafters looking to build confidence while enjoying a whimsical project.

Durable & Functional: With tight stitches and durable yarn, these coasters protect your surfaces while showcasing your creativity.

Customizable Creations: Feel free to experiment with color variations and personalized touches, turning each coaster into a unique piece of art.

Perfect Gift Idea: Ideal for sushi enthusiasts or anyone who loves quirky decor, these coasters make thoughtful gifts that are sure to impress.

How to Check Your Gauge for Sushi Mug Coasters

Don't skip the gauge swatch! It's essential to ensure your tension is just right, especially for the sushi mug coasters, to maintain their flat and even shape. A good starting point for your crochet gauge is to create a tension swatch, aiming for about 4×4 inches (10×10 cm) where you should see approximately 12 single crochets and 12 rows. If your coasters turn out smaller than this, simply increase your initial chain or rounds by multiples of 6 for a larger size. Conversely, if your swatch is too big, try using a smaller hook size to tighten your stitches. Ensuring the right gauge will guarantee that your sushi mug coasters are as delightful and functional as you envision!

Step-by-Step Pattern for Sushi Mug Coasters

Row 1: Begin with Magic Ring
Start by creating a magic ring. Ch 2, then work 12 sc into the ring to form the base of your sushi mug coasters. Pull the tail to close the ring tightly. This initial ring sets the foundation for your coaster, and you should see a small circle forming at the center. (12 sts)

Row 2: Increase Round
In this round, we will increase the stitches for a wider base. Work 2 sc in each stitch around (inc) to build up the size. As you go along, your work should begin to flatten out, creating a larger circle perfect for a coaster. (24 sts)

Row 3: Alternate Color & Continue Increasing
Change to your next color (e.g., pink for fish) and ch 2 to start the new round. Now work 1 sc in the first stitch, 2 sc in the next (inc) around. This alternating increase gives your coaster a gentle shape and adds a fun visual element. (36 sts)

Row 4: Circle with Texture
Continue with the same color by working in the back loops only (blo). Sc in each stitch around. This technique will create a nice texture on the outer edge, while your work should remain flat and round. (36 sts)

Row 5: Switch Colors for Sushi Elements
Change to a new color (e.g., green for avocado) and ch 2. Work 2 sc in the first stitch, sc in the next 5 stitches around. This round emphasizes the fun elements of your sushi mug coasters while keeping the fabric flat and consistent in tension. (42 sts)

Row 6: Final Sushi Layer
With the same color, continue by sc around without increasing. This will help to define the sushi elements you are creating. Your coaster should be expanding outward while maintaining a neat circular shape. (42 sts)

Step 7: Edging the Coaster
Switch to black yarn for the final border. Sl st in each stitch around, creating a neat finish that frames your sushi mug coasters beautifully. Ensure that the edge lies flat and tight without any sudden bumps, giving your coasters a polished look. (42 sts)

Step 8: Weave in Ends
Finally, use a yarn needle to weave in any loose ends in your sushi mug coasters carefully. This step is crucial for both aesthetics and durability, as it ensures that your coasters last through countless coffee breaks and charming moments.

Sushi Mug Coasters Variations

Feel free to let your creativity shine as you customize your sushi mug coasters with these delightful ideas!

  • Yarn Weight Swap: Try using DK weight for a lighter, delicate look. This will yield thinner coasters, perfect for small cups.

  • Fiber Alternatives: Substitute cotton yarn with bamboo fiber for a softer, more eco-friendly option that adds a bit of sheen.

  • Color Blocking: Create coasters with a solid color background and contrasting sushi elements for a modern twist that catches the eye.

  • Size Adjustments: Scale your coasters up to make larger trivets—fantastic for serving dishes or hot pots during family dinners.

  • Added Embellishments: Incorporate tiny glass beads for texture or a pop of shine. These little touches can elevate your coasters into true works of art.

  • Personalized Patterns: Embroider initials or favorite symbols onto the coasters to make them uniquely yours or a thoughtful gift.

  • Textured Edges: Experiment with fringe or picot edges for an unexpected, playful flair. These little additions can showcase your style!

  • Themed Coaster Sets: Create a matching set with different sushi types like nigiri, maki, and sashimi for a fun and cohesive look on your dining table.

Expert Tips for Sushi Mug Coasters

Check Your Tension: Maintaining even tension is crucial. Loose stitches can cause uneven surfaces, so keep your stitches snug while crocheting.

Use Stitch Markers: To avoid losing count, place stitch markers at the beginning of each round, especially when changing colors for your sushi mug coasters.

Block for Shape: After completing your coasters, blocking will help shape them nicely. This process enhances their overall appearance and firmness.

Weave in Ends Securely: Make sure to weave in all yarn ends thoroughly. This prevents unraveling and ensures your coasters are durable for daily use.

Count Carefully: When increasing stitches, double-check your count at the end of each round. Missing an increase can affect the flatness of your coasters.

What to Pair with Sushi Mug Coasters?

Every cozy crafting session deserves a little extra charm—let's explore delightful creations that complement your whimsical coasters beautifully!

  • Matching Placemats: Create vibrant placemats to coordinate with your sushi mug coasters, enhancing your dining area’s playful aesthetic.

  • Charming Trivets: Craft trivets in similar sushi themes to protect surfaces while adding a cohesive, festive touch to your kitchen.

  • Sushi-Themed Dishcloths: Make whimsical dishcloths that echo the colors of your coasters for a cohesive, fun kitchen decor look. They’ll delight any sushi lover!

  • Cute Keychains: Transform leftover yarn into adorable sushi-inspired keychains; these small projects are great for gifts and use up your stash creatively.

  • Colorful Mug Rugs: Instead of just coasters, design larger mug rugs; they offer more surface coverage and bring the playful sushi theme to life on any table.

Care Instructions for Sushi Mug Coasters

Machine Washing: Use cold water on a gentle cycle to clean your sushi mug coasters, avoiding any agitation to keep them looking fresh and untouched.

Hand Washing: For a gentle clean, soak in cold water with mild detergent. Rinse thoroughly and avoid scrubbing to prevent felting or pilling.

Drying/Blocking: Lay your coasters flat to dry, reshaping them as necessary. This will help maintain their vibrant colors and neat circular form.

Storage: Store in a cool, dry place away from direct sunlight to keep the colors of your sushi mug coasters bright and vibrant.

Sushi Mug Coasters FAQs

Can I use a different type of yarn for the sushi mug coasters?
Absolutely! While a worsted weight cotton or acrylic blend is recommended for durability, you can experiment with other yarn types. Just keep in mind that the texture and absorbency may vary, so be sure to maintain gauge for the best results.

How can I make the coasters bigger or smaller?
If you'd like to adjust the size of your sushi mug coasters, you can add or reduce the number of increased stitches in each round. For larger coasters, increase more stitches in each round; for smaller coasters, decrease the number of increases or stop increasing sooner. Remember to adjust your yarn quantity accordingly!

Why is my work curling at the edges?
Don't panic! Curling can often happen if your stitches are too loose. To fix this, ensure you’re crocheting with tight stitches, and consider using a slightly smaller hook size. If you’ve finished and they’re still curling, blocking can help flatten them out and improve the overall shape.

What size hook should I use for this pattern?
For the sushi mug coasters, a 4.0 mm (G-6) crochet hook is ideal to achieve the tight stitches needed for durability. If you're finding your coasters are too loose or tight, don’t hesitate to adjust by trying a hook size smaller or larger to find what works best for you.

How do I fix dropped stitches?
It's an easy fix! Simply identify the dropped stitch and pull the working yarn back up to the last completed round. Use your yarn needle to weave the stitch back into place securely. If you find this challenging during the project, consider using stitch markers to help keep track of your stitches as you go.

Can I add embellishments to my sushi mug coasters?
Yes! Feel free to customize your coasters further by adding embellishments like beads, embroidery, or personal touches such as initials. This will not only enhance your sushi mug coasters but also make them more unique and truly one-of-a-kind!

Filed Under: Uncategorized

  • « Previous Page
  • 1
  • …
  • 10
  • 11
  • 12
  • 13
  • 14
  • …
  • 38
  • Next Page »

Recent Posts

  • Chic Crochet Watch Band Pattern: Scalloped Elegance
  • Vibrant Crochet Granny Square: A Floral Delight to Create
  • Pocket Otter Crochet: Your Adorable Amigurumi Companion
  • Cozy Up with This Festive Crochet Tree Cozy Pattern
  • Chic Crochet Babydoll Dress: A Timeless Pattern for Spring

Recent Comments

No comments to show.
Fast Crochet Patterns Logo

Welcome to Fast Crochet Patterns, your curated editorial blog for modern, handmade aesthetics. Discover an elegant collection of contemporary designs and carefully crafted tutorials—where every beautiful pattern is completely free to inspire your next creation.

Join the Studio

Subscribe for our latest free patterns and warm, minimal crochet inspiration delivered to your inbox.


Collections

  • Accessories
  • Amigurumi
  • Baby
  • Bags

More Patterns

  • Cardigan
  • Dress
  • Flowers
  • Granny Square

Information

  • About
  • Contact
  • Privacy Policy
  • Terms Of Use
  • Disclaimer

© 2026 Fast Crochet Patterns. All rights reserved.