Fast Crochet Patterns

  • Home
  • Contact
  • Patterns
    • Amigurumi
    • Granny Square
    • Flowers
    • Baby
    • Dress
    • Bags
    • Cardigan
    • Accessories
menu icon
go to homepage
  • Home
  • Contact
  • Patterns
    • Amigurumi
    • Granny Square
    • Flowers
    • Baby
    • Dress
    • Bags
    • Cardigan
    • Accessories
search icon
Homepage link
  • Home
  • Contact
  • Patterns
    • Amigurumi
    • Granny Square
    • Flowers
    • Baby
    • Dress
    • Bags
    • Cardigan
    • Accessories
×

Charming Baby Cardigan Crochet: Cozy Pastel Stripes Made Easy

August 24, 2026 by Publisher Leave a Comment

Charming Baby Cardigan Crochet: Cozy Pastel Stripes Made Easy

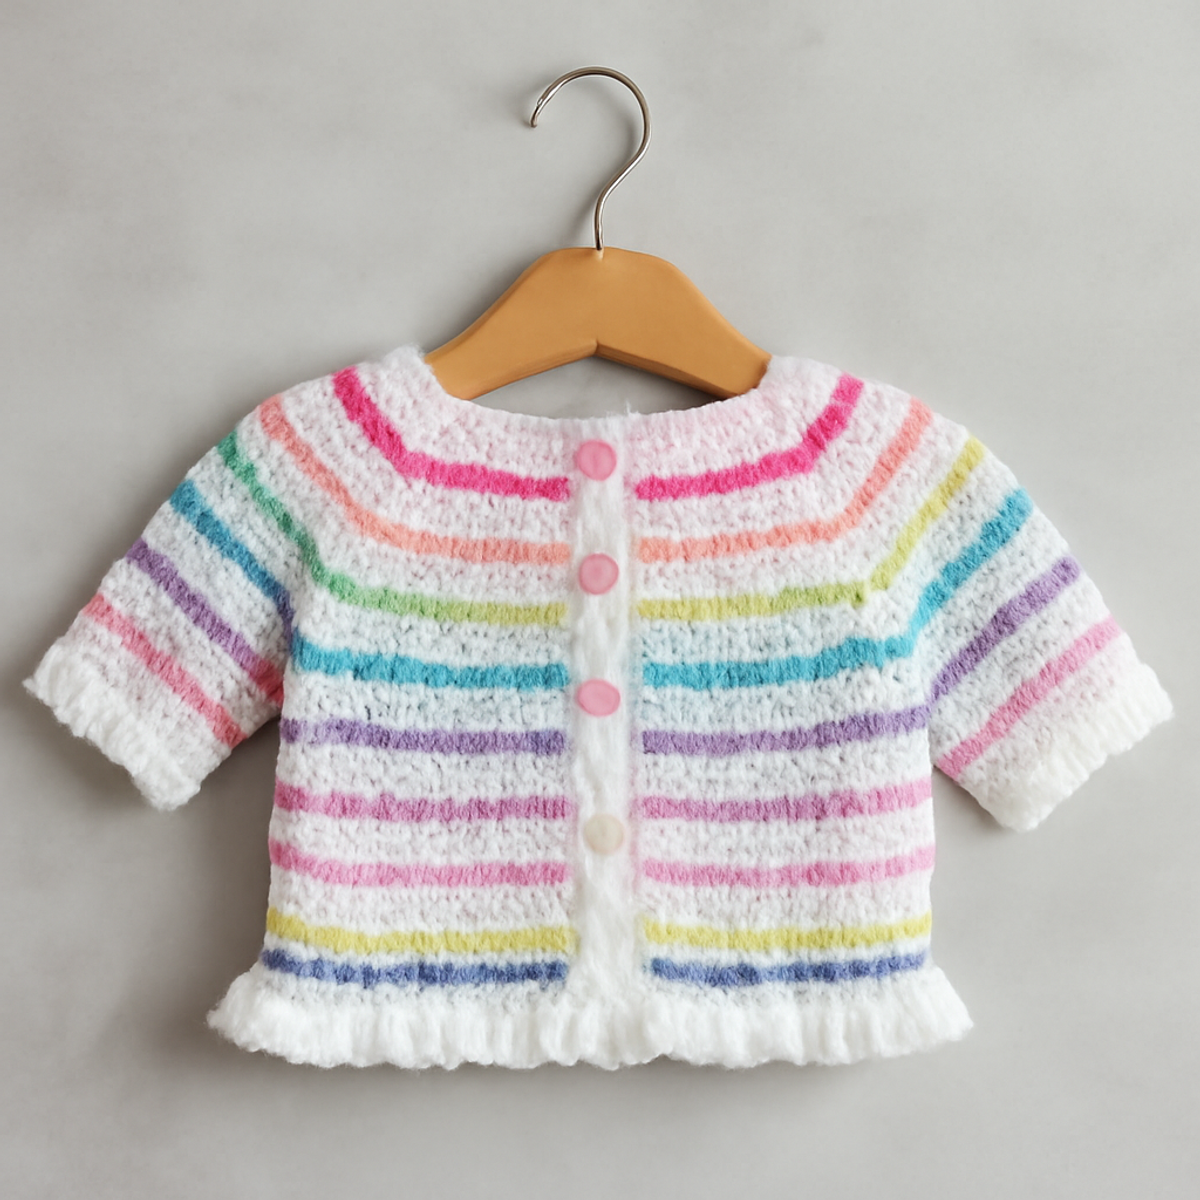
There's something magical about stitching together tiny garments that will keep little ones warm and stylish. In today’s post, I’m thrilled to share the delightful pattern for the Pastel Stripes Baby Cardigan, a charming baby cardigan crochet project that’s perfect for both beginners and those with a bit more experience. Not only does this cardigan offer a splash of color with its vibrant stripes, but it also combines comfort and functionality for any occasion. Just imagine the joy of gifting this playful creation at a baby shower or celebrating a special milestone! With its lightweight design, this cardigan is a fantastic quick project that uses just 400-500 yards of yarn, making it an excellent stash-buster. So grab your hook and let’s dive into crafting this lovely piece that’s sure to be a cherished addition to any baby’s wardrobe!

Baby Cardigan Crochet Materials & Tools

  • Lightweight Cotton Yarn (DK weight) – Use approximately 400-500 yards to achieve the charming pastel stripes for the baby cardigan.
  • 4.0 mm (G) or 5.0 mm (H) Hook – This size is essential for achieving the right tension and a lovely drape in your stitches.
  • Three Pink Buttons – These cute accents will serve as closures, adding an adorable touch to the design.

Why Choose This Baby Cardigan Pattern?

Charming design: The Pastel Stripes Baby Cardigan features vibrant colors and delightful ruffles, perfect for adding a touch of whimsy to any baby outfit.

Ideal for all skill levels: Whether you’re just starting or have some crochet under your belt, this pattern is designed to be approachable yet engaging.

Soft and lightweight: Crafted from lightweight cotton yarn, this cardigan is cozy against delicate skin, making it a perfect layer for milder weather.

Quick and satisfying: With a yarn requirement of only 400-500 yards, it's a fantastic stash-buster and a quick win for your crafting queue.

Customizable options: Feel free to switch colors or add unique embellishments to make this cardigan a truly personal gift that will be cherished.

Gauge & Sizing Notes

Don't skip the gauge swatch! Ensuring you achieve the correct tension is crucial for crafting your perfect baby cardigan crochet. A good rule of thumb is to aim for a gauge of about 4×4 inches (10×10 cm) to equate roughly to 14 double crochets by 8 rows, though individual results may vary. If you find your tension is tighter or looser, adjusting your hook size can help; going up a hook size will loosen your stitches, while a smaller hook will tighten them. To create a larger or smaller cardigan, adjust your foundation chain in multiples of 4, adding or subtracting to fit your desired width. Happy crocheting!

Step-by-Step Pattern for Pastel Stripes Baby Cardigan

Row 1: Foundation Chain
Begin by making a foundation chain of 60 chain stitches (ch). This will form the base of the baby cardigan crochet. Be sure to keep your tension consistent; the chain should lay flat but not too tight. This foundation will provide the necessary width for the cardigan, and your work is complete when you have a nice, even length.

Row 2: First Row of Stitches
Turn your work and start the first row with a single crochet (sc) in the second chain from the hook. Continue working sc across the chain until you reach the end, resulting in a total of 59 stitches. Your first row will create a sturdy base for the cardigan; it should feel flat and firm to the touch.

Row 3: Adding Color Stripes
For the third row, switch to your first color and begin with a chain (ch) 1 to turn. Work a sc in the first stitch and continue with sc across the row. Change to the second color after completing 20 stitches, carrying the first color along. Your work should start to show the vibrant stripes creating a playful look.

Row 4: Repeat Color Rows
Continue the pattern by alternating colors for the next rows. For Row 4, work 20 sc in the new color, then switch back to the original color. Repeat this for a total of 6 color changes, ensuring the last row ends with the original color. By this step, you’ll see a lovely striped pattern forming, ideal for a baby cardigan.

Row 5: Shaping the Body
Now, it's time to shape the body of the cardigan. For Row 7, work 1 hdc (half double crochet) in each stitch across for a total of 59 stitches. This will provide extra elasticity and drape, essential for the cozy feel of your baby cardigan. You should notice your work starting to curve under, giving shape to the piece.

Step 6: Creating Armholes
To form the armholes, decrease two stitches at each end for Rows 8-11. Work 1 hdc across, then decrease (hdc 2 together) at both ends (55 sts total). This step shapes the cardigan, making it easier for little arms to fit comfortably into the sleeves, and your work should begin to resemble a garment.

Step 7: Making Sleeves
For the sleeves, create two separate pieces by chaining 30 for each sleeve. Work in rows of sc for 10 rows. You will have 29 stitches by the end of each sleeve, which will complement the cardigan perfectly. The sleeves will add warmth and style, making the overall cardigan more visually appealing.

Step 8: Assembly of the Cardigan
Place the body piece flat and sew each sleeve onto the armholes you created earlier, ensuring the seams align. Use sc to attach the sleeves securely to the cardigan. By now, your adorable baby cardigan crochet piece is starting to come together, showcasing its cheerful design.

Step 9: Adding Ruffle Edging
To finish off the edges, work a row of dc (double crochet) around the entire perimeter, including the sleeve edges. Create 3 dc in each corner to maintain shaping. This ruffle will sprinkle a lovely touch of whimsy on your cardigan, giving it a professional finish while ensuring comfort for any baby.

Step 10: Final Touches
Lastly, sew on three pink buttons on the front for closure and ensure all seams are hidden. Lightly block your cardigan to help shape it and enhance drape. The completed Pastel Stripes Baby Cardigan should be warm, soft, and full of character, ready to be gifted or loved by a little one!

What to Pair with the Pastel Stripes Baby Cardigan

As you finish this charming creation, envision the joy of adding delightful companions to complete the cozy ensemble.

  • Matching Booties: Little feet deserve just as much love! Create sweet booties that mimic the cardigan's pastel stripes for a coordinated look.

  • Adorable Hat: A small hat with playful ruffles can complete the outfit, keeping the baby warm while echoing the charming design of your cardigan.

  • Cute Blanket: Snuggle time is a must! Craft a soft blanket using the same yarn, creating a lovely gift set perfect for any baby occasion.

  • Sweet Infant Hat and Mittens Set: Ensure warmth with a hat and mittens set that mirrors the cardigan's stripes, perfect for those chilly outings.

  • Personalized Bib: Create a matching bib using leftover yarn, adding a personal touch while keeping mealtime messes stylish.

Expert Tips for Baby Cardigan Crochet

  • Gauge Swatch: Always check your gauge by crocheting a small swatch. This ensures your baby cardigan crochet fits the intended dimensions perfectly.

  • Color Changing: Pay close attention while changing colors; carry the yarn neatly along the side to maintain a clean finish and avoid tangles.

  • Count Stitches: Keep an eye on your stitch count throughout each row. Losing track can lead to uneven edges or an off-balanced shape.

  • Seam Precision: When attaching sleeves, sew carefully and ensure seams align to create a polished look. This small detail makes a big difference in the final product.

  • Final Blocking: Don’t skip blocking! Lightly block your cardigan to enhance drape and achieve that professional finish, making your creation truly stand out.

Baby Cardigan Crochet Variations

There's joy in making this pattern your own—add personal touches to create a truly unique piece for your little one!

  • Yarn Substitutions: Opt for a blend of cotton and bamboo for a softer texture and a luxurious drape.

  • Color Play: Try bold primary colors for a lively twist, or pastel earth tones for a more subdued look. The choice impacts the cardigan's personality!

  • Length Adjustments: Lengthen the body or sleeves by adding extra rows; customize it to fit your baby perfectly. Each extra row enhances the cozy feel, making it practical for growth.

  • Texture Mods: Introduce a fun texture by adding a bobble stitch to the stripes for playful bumps throughout the design. This adds both visual interest and a tactile element that babies will love!

  • Adding Tassels: Finish the bottom edges with tiny tassels or fringe for a whimsical touch that elevates the overall charm of your cardigan. It’s like adding little bursts of joy!

  • Button Variations: Incorporate colorful buttons or themed ones, like animals or flowers, for a lively embellishment. This small detail can reflect your baby’s unique personality!

  • Embroidery Embellishments: Personalize with small embroidered motifs, like hearts or stars, to make it a true keepsake treasure. Just a few stitches can proudly display your love and creativity.

  • Fringed Edges: Consider adding a playful fringe along the edges for a stylish boho twist. Your baby cardigan will feel vibrant and absolutely delightful!

Care Instructions for Baby Cardigan Crochet

  • Machine Washing: Use cold water on a gentle cycle to preserve the vibrant pastels and avoid agitation that can lead to pilling or felting. Take care of your beautiful baby cardigan crochet piece!

  • Hand Washing: If preferred, gently hand wash in cold water using mild soap, avoiding vigorous scrubbing. Rinse thoroughly and carefully squeeze out excess water without twisting to maintain the cardigan's shape.

  • Drying/Blocking: Lay the cardigan flat on a clean, dry towel to reshape. Always avoid hanging it up to dry, as that can alter its structure. A light blocking can also enhance drape.

  • Storage: Store the cardigan in a cool, dry place, ideally folded. Avoid hanging it in a way that may stretch out the fabric, ensuring it remains in perfect condition for your little one.

Pastel Stripes Baby Cardigan FAQs

Can I substitute the cotton yarn with acrylic?
Absolutely! While the pattern is designed for lightweight cotton yarn, you can substitute with acrylic for a softer feel and easier care. Just keep in mind that the drape may change slightly, so be sure to check your gauge.

How can I make the cardigan smaller or larger?
Don't panic! To adjust the size, simply alter the number of foundation chain stitches at the start. For a larger size, add more chains, keeping in mind that you’ll also need to increase the stitch count in your subsequent rows. Remember to check your gauge to maintain proportions!

Why is my work curling at the edges?
It’s a common issue, especially with lightweight yarns! This curling can often be fixed by blocking your finished piece. Lightly steam-blocking can help flatten those edges. Alternatively, make sure to use the right hook size; if it’s too small, the tension may be too tight.

What hook size should I use for the best results?
For the Pastel Stripes Baby Cardigan, a 4.0 mm (G) or 5.0 mm (H) hook is recommended to achieve that lovely drape. If you're unsure, try a gauge swatch; it’ll help you see what works best with your yarn choice!

How do I fix dropped stitches?
Oh no, dropped stitches can be frustrating! If it happens, don’t worry! Simply use a yarn needle to weave the dropped stitch back up to the last row, or if it’s a small drop, you can carefully crochet that stitch back in.

Can I add extra embellishments or personalization to my cardigan?
Absolutely! This pattern is a fantastic canvas for your creativity. Feel free to add embroidered designs or cute appliqués to make it uniquely yours. Just remember to ensure any added embellishments are securely attached for safety.
Filed Under: Uncategorized

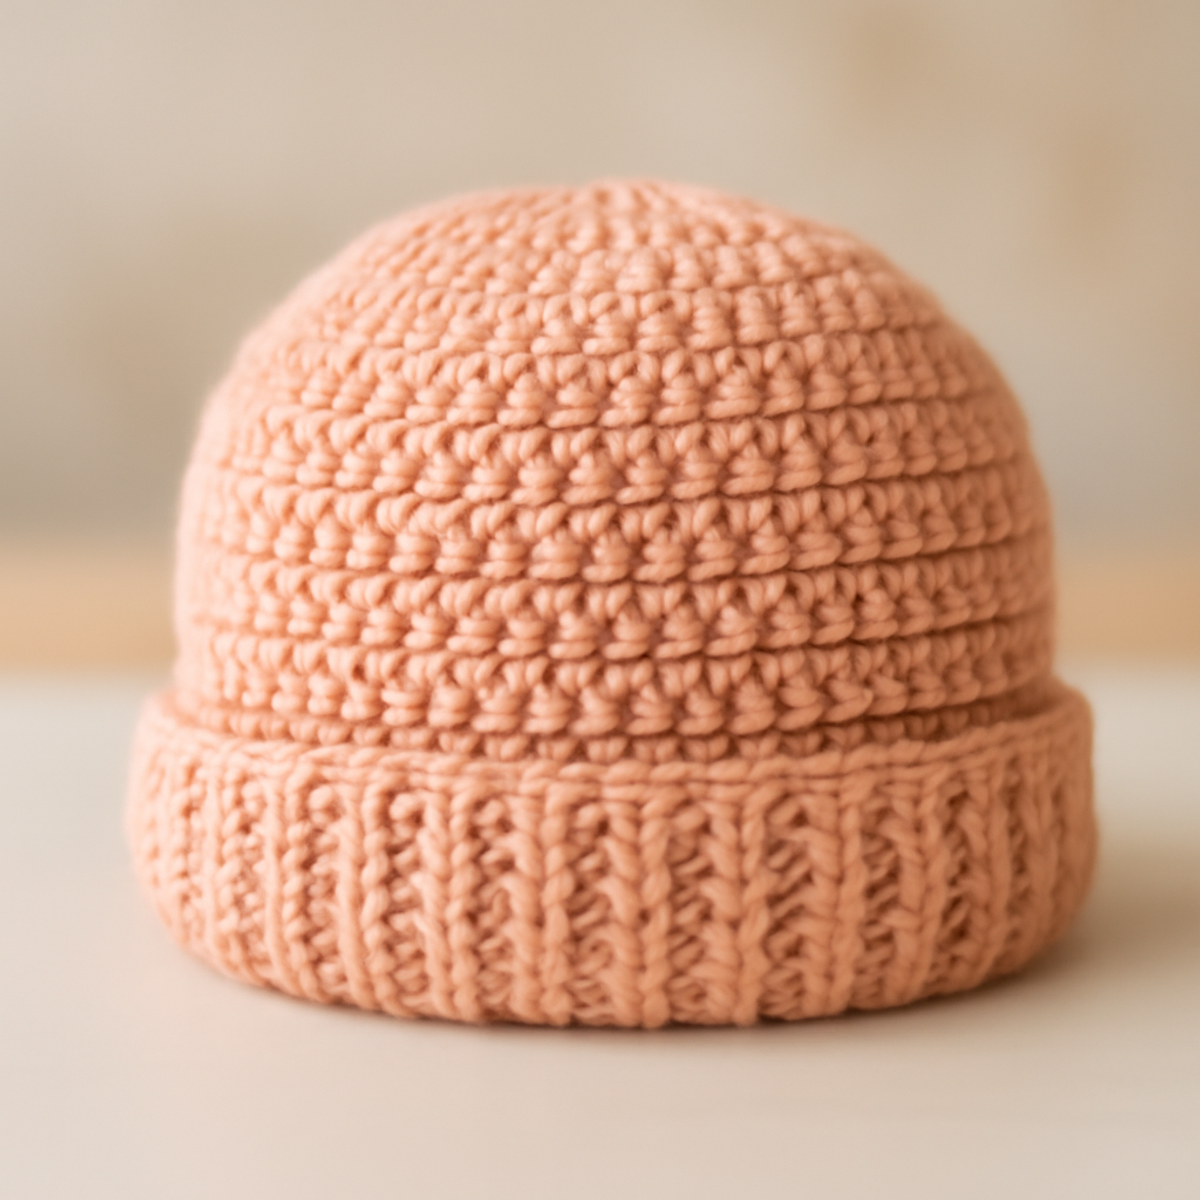
Cozy Crochet Baby Hat: Quick, Modern, and Stylish Design

August 24, 2026 by Publisher Leave a Comment

Cozy Crochet Baby Hat: Quick, Modern, and Stylish Design

As I nestled into my favorite chair, yarn in hand, visions of tiny tots sporting cozy crochet baby hats danced in my mind. Today, I'm excited to share 'The Cozy Baby Beanie: Timeless Design for Little Ones.' This sweet little beanie is a delightful project for both beginners and intermediate crafters, featuring clean lines and an adaptable style that can be customized for any occasion. With just 50 to 60 yards of soft, breathable yarn, you'll whip up a snug hat that's perfect for keeping little heads warm while showcasing your crafting finesse. Whether you're looking for a thoughtful gift or simply want to create something special for your own little one, this cozy accessory makes an enchanting addition to any baby's wardrobe. Grab your hook, and let's dive into this heartwarming journey of stitches and joy!

Cozy Crochet Baby Hat Materials & Tools

  • Yarn

    • DK or Worsted Weight Yarn – Use about 50 to 60 yards of soft, breathable fibers like cotton or acrylic for comfort against delicate skin.
  • Tools & Notions

    • 4.0mm (G) Crochet Hook – This size ensures a tight and uniform stitch, perfect for your crochet baby hat.
    • Yarn Needle – Essential for weaving in ends and finishing your cozy crochet baby hat beautifully.
    • Scissors – A must-have for trimming yarn as you complete your adorable project!

Why Choose This Crochet Baby Hat?

Easy to Make: This pattern is incredibly accessible, perfect for both beginners and those looking to refine their crochet skills.

Modern Aesthetic: Clean lines and a stylish design make this baby beanie suitable for any occasion, seamlessly fitting into a variety of outfits.

Customizable Colors: Experiment with a spectrum of colors to express your creativity. Whether you choose pastel shades or bold hues, the options are endless.

Comfortable Fit: Designed for snugness without being too tight, this beanie molds beautifully to an infant's head, ensuring comfort and warmth.

Quick Project: With just 50 to 60 yards of yarn needed, you'll find this beanie a quick and satisfying project to complete, making it ideal for last-minute gifts!

Gauge & Sizing Notes

Don't skip the gauge swatch! Checking your crochet gauge is vital when making the Cozy Crochet Baby Hat, as it ensures the beanie fits snugly and comfortably on little heads. A common guideline is to aim for a tension swatch measuring 4×4 inches (10×10 cm) that corresponds to your chosen yarn, allowing for the correct stitch count. To adjust the size of your baby hat, increase your starting chain in multiples of 6 for a larger fit or decrease it for a snugger style. If your swatch is smaller than desired, simply try going up a hook size to maintain that perfect cozy feel for your little one!

Step-by-Step Pattern for Cozy Crochet Baby Hat

Round 1: Starting the Crown
Begin by creating a magic ring. Work 10 single crochets (sc) into the ring. Pull the tail tight to close the ring. This forms the center of your cozy crochet baby hat, giving it a solid foundation. Your work should start to curl slightly as you stitch. (10 sts)

Round 2: Increasing for Shape
Ch 1 (does not count as a stitch), then in the same stitch, work 2 sc in each stitch around. This will create the necessary increases to help the hat form a rounded shape. At the end of the round, you should notice a fuller, circular appearance. (20 sts)

Round 3: Continue Increasing
Ch 1, sc in the first stitch, inc in the next stitch. Repeat from * to * around. This step introduces a gentle curve and expands the circumference of your crochet baby hat. Monitor your work as it begins to cup nicely around the edges. (30 sts)

Round 4: More Increases
Ch 1, sc in the first two stitches, inc in the next stitch. Repeat from * to * around. The goal is to keep building the base of the hat with each round, ensuring it will properly fit snugly on the baby's head. Your work should maintain a rounded shape. (40 sts)

Rounds 5-8: Straight Sides
Ch 1, sc in each stitch around for a total of 4 rounds. This will give structure to the body of your cozy crochet baby hat, creating height. The work will begin to lengthen, and you'll notice a distinct transition from the crown to the body. (40 sts each round)

Round 9: Creating the Brim
Ch 1, sc in each stitch around. This round serves as the initial finish to the body of the hat, setting up for the brim. Continue to check the dimensions, ensuring it remains comfortable but snug for a cozy fit. (40 sts)

Round 10: Finalizing the Brim
Ch 1, turn your work, and sc in each stitch across. This short row will create a folded brim, adding style and a finished look to your crochet baby hat. As you complete this round, gently fold the brim back to secure the warmth and comfort for little ones. (40 sts)

Finishing: Weaving in Ends
Once you've completed the rounds, fasten off your yarn and use a yarn needle to weave in any loose ends. This step is essential for finishing your cozy crochet baby hat, providing a neat, polished appearance. Your hat is now ready to be gifted or enjoyed!

How to Wash and Care for Your Crochet Baby Hat

Machine Washing: Use a gentle cycle in cold water to clean your crochet baby hat, helping to maintain its softness without risking felting or pilling.

Hand Washing: For a more delicate touch, soak your hat in cold water with mild detergent. Gently press, avoiding twisting or wringing, to protect the yarn fibers.

Drying/Blocking: Lay the crochet baby hat flat on a clean, dry towel to air dry. Avoid hanging to prevent stretching, and block it gently to restore its shape.

Storage: Keep your finished hat in a cool, dry place away from direct sunlight. This helps preserve its vibrant colors and soft texture, ensuring it’s ready for your little one!

Variations & Substitutions for Crochet Baby Hat

Embrace your creativity and personalize your crochet baby hat with these fun ideas!

  • Yarn Substitutions: Opt for bamboo or a cashmere blend for a luxurious feel, enhancing softness and warmth for delicate skin.

  • Size Adjustments: Easily modify the pattern to create hats for older children by adding rounds to the body. This way, everyone can enjoy the cozy design!

  • Color Blocked Style: Use different colors for each round or segment of the hat, creating a playful, vibrant look. It's an opportunity to mix and match your favorite shades!

  • Textured Addition: Incorporate a textured stitch, like bobbles or shells, in selected rounds for added visual interest. This makes your beanie a standout piece!

  • Pom-Pom Topper: Add a cheerful pom-pom on the crown for an adorable finishing touch. This little detail can bring a smile to anyone's face!

  • Fringed Brim: Instead of a simple folded brim, try adding fringe along the edge for a whimsical and playful twist that captures a bohemian spirit.

  • Contrasting Brim: Choose a complementary color yarn for the brim to create an eye-catching contrast. This small adjustment will elevate the overall charm of your crochet baby hat.

  • Larger Hook for Looser Fit: Switch to a larger crochet hook for a more relaxed shape, perfect for warmer weather or slightly older babies. Enjoy the breezy comfort of your cozy creation!

What to Pair with The Cozy Baby Beanie?

As you embark on this delightful crochet adventure, envision a charming collection of accessories that perfectly complement your sweet creation.

  • Matching Booties: Create adorable booties using the same yarn to keep tiny toes toasty and coordinate the outfit. They'll make perfect gifts to match the beanie!

  • Cozy Blanket: A soft, lightweight blanket will wrap babies in warmth, making it a lovely companion for the snug hat. The cohesive colors will tie the look together beautifully.

  • Headband: Craft a coordinating headband for older siblings or a playful take for infants. Choose a similar stitch pattern to maintain that charming aesthetic.

  • Personalized Pacifier Clip: Make a pacifier clip using leftovers from your yarn to ensure it matches the beanie. This thoughtful accessory combines function and style seamlessly.

  • Toddler Scarf: Extend your project with a simple scarf designed for an older sibling, using complementary colors for a beautiful cohesive look. Perfect for cozy outings!

Expert Tips for Your Crochet Baby Hat

  • Check Your Tension: Ensure your stitches are neither too tight nor too loose. Consistent tension will help the crochet baby hat fit properly.

  • Count Your Stitches: Losing count can lead to uneven shapes. Use a stitch marker to keep track of your rounds and verify your stitch count frequently.

  • Watch Your Edges: Be mindful not to drop the first or last stitch of each round. This can distort your hat's shape and make a snug fit difficult.

  • Block for Perfection: After finishing, block your crochet baby hat to enhance its shape and texture. This step ensures a polished look and a cozy feel against delicate skin.

  • Secure Loose Ends: Don’t forget to weave in ends carefully. Neat, finished edges will elevate your crochet baby hat and make it gift-ready!

Cozy Crochet Baby Hat FAQs

Can I substitute the yarn for this crochet baby hat?
Absolutely! While the pattern calls for DK or worsted weight yarn made of soft cotton or acrylic, you can explore other options such as bamboo or a cashmere blend for extra luxury. Just be sure to check your gauge for a proper fit!

How can I adjust the sizing if I want the baby hat to be bigger or smaller?
If you want to create a larger size, you can add extra rounds in the crown to increase the diameter before starting the straight rounds. For a smaller hat, reduce the number of increase rounds accordingly. Always compare the dimensions with the intended size to ensure a snug fit for your little one!

Why is my crochet baby hat curling at the edges?
Don't panic! Curling can often happen because of too tight of stitches or not enough increases in the crown. I recommend checking your tension and adding a few extra increase rounds if needed. Blocking the finished hat can also help flatten those edges.

What hook size should I use for this pattern?
The recommended hook size is 4.0 mm (G). Using the correct hook size is crucial for achieving the desired drape and fit of the hat, so sticking to this measure will ensure a cozy and comfortable finish for your little one.

How do I fix dropped stitches while working on the baby beanie?
It's an easy fix! Simply use your crochet hook to pick up the dropped stitch and pull the yarn back through. For future projects, keep an eye on your edges and count your stitches regularly to prevent this from happening again.

What if I want to personalize the baby hat with a design or embellishment?
Feel free to get creative! You can add embroidery or appliques after finishing the hat. Just make sure to use safe, baby-friendly materials and sew them securely for safety. Alternatively, you might also consider crocheting a small flower or other shape to attach to the hat for that extra touch of charm!

Filed Under: Uncategorized

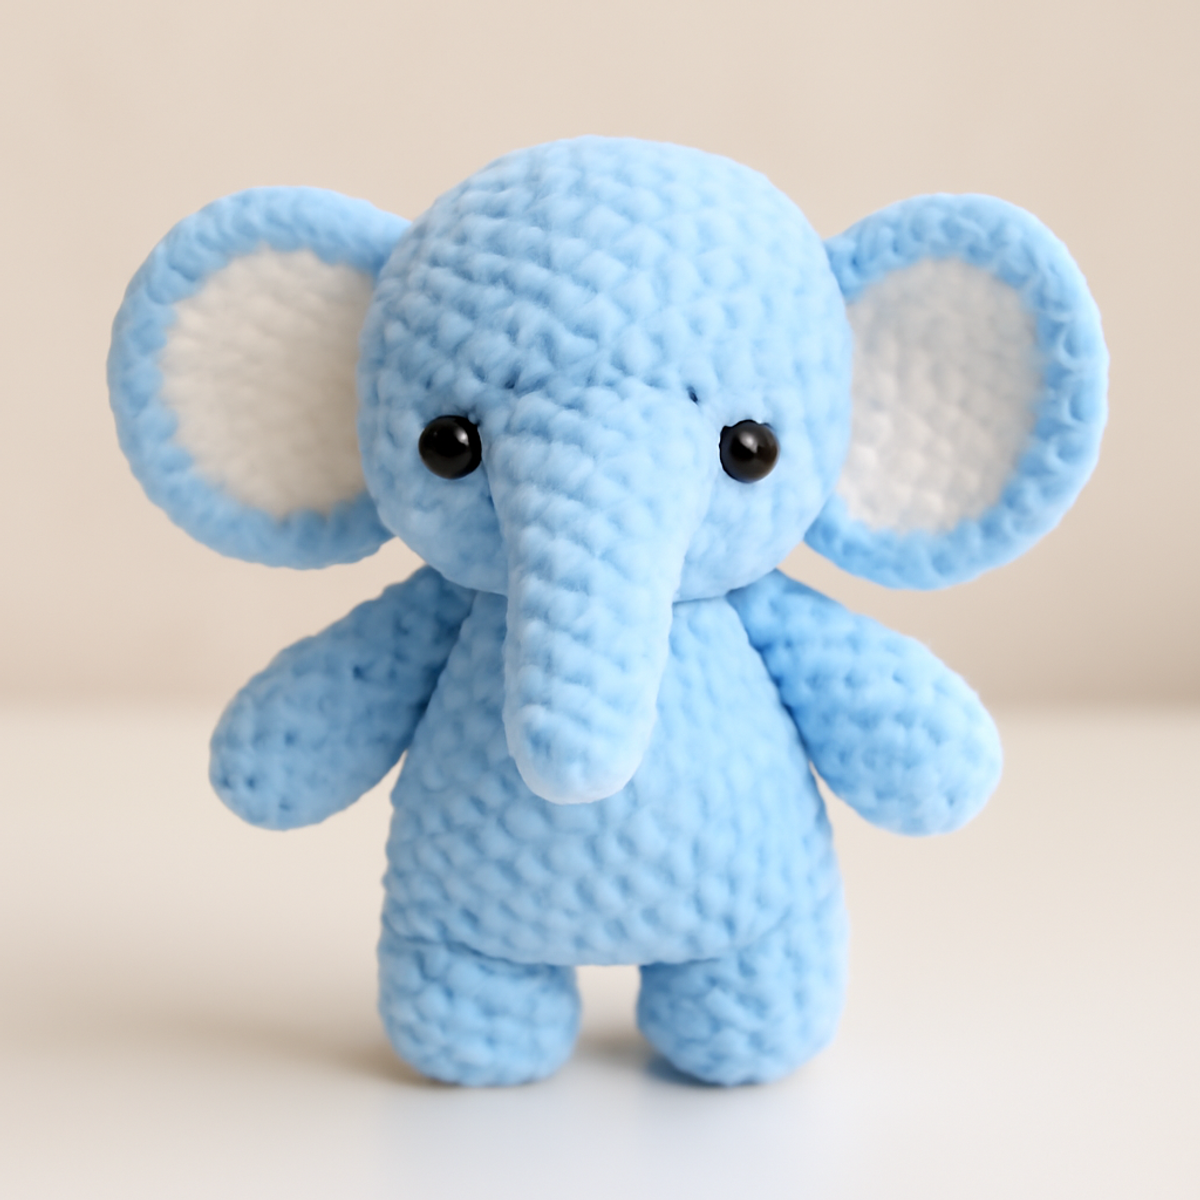
Charming Baby Elephant Crochet: A Delightful Amigurumi Project

August 24, 2026 by Publisher Leave a Comment

Charming Baby Elephant Crochet: A Delightful Amigurumi Project

There’s something truly delightful about the feeling of soft yarn slipping through my fingers as I begin a new project—especially when that project is an adorable baby elephant crochet. Crafting this charming amigurumi toy not only hones your crocheting skills but also results in a whimsical treasure that brings joy to children and adults alike. With its plump shape, plush texture, and endearing facial features, this little elephant is sure to capture hearts. Plus, you can personalize each creation by experimenting with colors and patterns, making every piece uniquely special. Get ready to embark on a cozy crafting adventure—let's stitch together a memorable friend that’s perfect for playtime or as a heartfelt gift!

Baby Elephant Crochet Materials & Tools

Yarn

  • Medium Weight Yarn – Approximately 100-150 yards in light blue and white for the body and inner ears.
  • Plush Yarn Option – If you prefer a softer texture, plush yarn is perfect for this baby elephant crochet project.

Tools & Notions

  • 8mm (L) Crochet Hook – Ideal for single crochet stitches forming the body and limbs.
  • 3.5mm (E) Crochet Hook – Use for crafting smaller parts like the trunk and ears to maintain detail.
  • Black Safety Eyes (8mm) – Essential for creating the adorable facial features of your little elephant.
  • Scissors – A must-have for cutting yarn and finishing your project neatly.
  • Yarn Needle – Necessary for sewing parts together and weaving in ends securely.

Choosing soft materials will enhance the comfort and safety for children, making this project a joyful addition to any collection!

Why Is This Baby Elephant Crochet Special?

Whimsical Design: This adorable amigurumi is perfect for bringing a touch of playfulness to your crochet collection.

Soft Plush Texture: The choice of plush yarn results in a cuddly finish that's inviting for children and adults alike.

Skill-Building Opportunity: While it's suited for intermediate to skilled crafters, this project provides a chance to refine your techniques and boost confidence.

Creative Personalization: You can easily infuse your style by customizing colors and patterns, creating a unique treasure each time.

A Heartfelt Gift: This baby elephant crochet serves as a thoughtful gift that’s sure to charm anyone lucky enough to receive it!

Gauge & Sizing Notes

Don't skip the gauge swatch! Checking your tension is crucial to ensure your baby elephant crochet turns out just right, especially with plush yarn that can stretch easily. A standard guideline is to aim for a 4×4 inch (10×10 cm) square to achieve the best results, although exact measurements can vary based on your personal tension. To adjust the size, if you’d like a larger elephant, simply increase your starting chain in multiples of 6 for the body. If your tension swatch is smaller than expected, consider using a larger hook size for a more relaxed stitch. Remember, finding the right gauge makes all the difference in your adorable creation!

Step-by-Step Pattern for baby elephant crochet

Row 1: Magic Ring Creation
Start by creating a magic ring (MR) and chain 1. Into the ring, work 6 single crochets (sc), pulling the ring tight to secure. Your work should begin forming a small circle. This will be the foundation of your baby elephant crochet head. Be sure to check that you have a snug tension for a clean finish. (6 sts)

Row 2: Building the Head
In this row, work 2 single crochets (sc) in each stitch around for a total of 12 stitches. This is your first increase row, which will help develop a rounded shape that looks adorable. After completing the row, your work should have a slightly puffy appearance. (12 sts)

Row 3: Continue Increasing
For this row, crochet 1 sc in the first stitch, then 2 sc in the next stitch, repeating this pattern around. This will help shape the head even further while gradually increasing your stitch count. Your baby elephant crochet should now measure wider and puffier than before. (18 sts)

Row 4: More Shaping
In this round, work 2 sc in the first stitch, followed by 1 sc in the next two stitches, and repeat this sequence around. This will maintain the rounded head shape while continuing to build your stitch count. Your work should feel comfortably full at this point. (24 sts)

Row 5: Transitioning to the Body
Now we'll begin forming the body. Work 1 sc in each stitch around for this row, which keeps the stitch count steady and provides a smooth transition from head to body. Your baby elephant crochet will start looking more defined and plush as you add more rounds like this. (24 sts)

Row 6: Body Expansion
For this row, crochet 1 sc in the first 2 stitches, followed by 2 sc in the next stitch, and repeat around. This continues to provide shape and volume to the body while adding that adorable round form. Your work should exhibit a clear separation between the head and body. (30 sts)

Row 7: Establishing the Body Base
Crochet 1 sc in each of the first 3 stitches, and then work 2 sc in the next stitch, repeating this pattern around. This is another increase round to further expand the body. Pay attention to the shaping, as your baby elephant crochet should start to plump up beautifully. (36 sts)

Rows 8-10: Forming the Body
For these three rows, simply work 1 sc in each stitch around without any increases. This establishes the body’s main structure, letting the previous shaping hold. Take your time as you crochet—this part is crucial for making the body plush and stable. The overall size should be increasing nicely at this point. (36 sts each)

Row 11: Attaching the Legs
Insert your hook into the bottom of the body to start the legs. Work 6 sc in the next 6 stitches, then slip stitch into the next one. This begins your journey to the legs, creating the final touches that hold your baby elephant crochet securely to the ground. (6 sts)

Row 12: Building the Front Legs
Continue creating the front leg by chaining 1 and working 6 sc into the last slip stitch from the previous row. This leg section should be sturdy and able to support the plush body. Notice how the leg is developing sturdily from the rest of the body. (6 sts)

Step 1: Shaping the Ears
To create the ears, start with your contrasting color yarn. Create a magic ring (MR) with 5 sc, then increase with 2 sc in each stitch for a total of 10 stitches in the next row. This will give a lovely ear shape that adds character to your baby elephant crochet. (10 sts)

Step 2: Crafting the Trunk
For the trunk, chain 1 and work 8 sc into the first stitch. This should create a small cylindrical shape. Keep your tension even so that the trunk will maintain its roundness, adding to the charm of your baby elephant crochet. (8 sts)

Step 3: Assembly
After completing all pieces, use a yarn needle to securely attach the trunk and ears onto the body. Ensure that everything is well-positioned and even—this completes your adorable baby elephant crochet. Finishing touches include securing the safety eyes and weaving in any loose ends for a polished look.

Baby Elephant Crochet Variations

Feel free to let your creativity soar with these customization ideas that will give your baby elephant crochet a unique flair!

  • Color Swaps: Experiment with different shades like pastel pink or lavender for a fresh twist on the original design. Vibrant colors can give your elephant a lively personality!

  • Yarn Alternatives: Consider using cotton yarn for a lighter, airy feel. It produces a sturdier finish, while plush yarn offers that irresistible cuddly texture. Both options are delightful!

  • Size Adjustments: Scale the design to create a mini version or a large plushie. Imagine a pair of elephants showcasing different sizes, perfect for snuggly playtime or display!

  • Inner Ears Design: Use a floral or patterned fabric for the inner ears to make them pop. It’s a charming detail that adds a unique touch to your baby elephant crochet.

  • Pom-Pom or Fringe: Add a playful pom-pom on the tail or fringe around the ears. These tiny embellishments bring fun and texture, making your project feel extra special.

  • Personalized Eyes: Instead of the standard safety eyes, embroider the eyes with colorful details or a sweet glimmer to infuse personality into your crafted companion.

  • Textured Borders: Create a scalloped or picot border around the elephant’s body. This simple addition can elevate the overall design, creating a sweet finishing touch!

  • Gift Tag Creation: Turn your baby elephant crochet into a gift by adding a personalized tag. It adds that loving touch, making it even more special as a present!

What to Pair with Adorable Amigurumi Baby Elephant

Creating matching pieces for your delightful toy can extend your crafting journey into a world of whimsical designs and playful aesthetics.

  • Gentle Plush Blanket: Wrap your little elephant in a cozy blanket that matches its soft hues, perfect for snuggles or playtime.
  • Mini Amigurumi Friends: Craft a tiny giraffe or lion to accompany your baby elephant crochet, expanding the enchanting animal kingdom.
  • Whimsical Toy Basket: Create a charming basket to store all the new toys you make, showcasing your crochet artistry while keeping everything tidy.
  • Colorful Playmat: Design a playful mat using the same yarn hues to create a delightful space for imaginative adventures.
  • Adorable Baby Booties: Pair your elephant with cute booties that echo its plush character, making delightful gifts for little ones.

Let your creativity run wild as you explore these fun pairings!

How to Wash and Care for Your Baby Elephant Crochet

Machine Washing: Use cold water on a gentle cycle to prevent any felting or stretching of your baby elephant crochet.

Hand Washing: If you prefer extra care, hand wash in cool water with mild detergent, gently squeezing without agitating the fibers.

Drying/Blocking: Lay your crochet elephant flat on a clean, dry towel to preserve its shape and plush texture as it dries.

Storage: Store in a cool, dry place away from direct sunlight to maintain its vibrant colors and softness.

Expert Tips for Baby Elephant Crochet

  • Consistent Tension: Maintain a firm yet even tension throughout your work, especially with plush yarn, to create a beautiful, consistent texture.

  • Track Your Stitches: Use stitch markers at the beginning of each round to avoid losing count, which is essential, especially when increasing for the head and body shape.

  • Secure Assembly: Make sure all parts, like the trunk and ears, are sewn on securely to ensure durability—this adorable baby elephant crochet is meant to be loved!

  • Position Carefully: When attaching limbs, check alignment and symmetry to keep your elephant looking perfectly charming from every angle.

  • Finish Neatly: Weave in all loose ends securely and tidy up your work, ensuring a polished look—final touches are what make your project shine!

Adorable Amigurumi Baby Elephant FAQs

Can I use a different yarn than what's suggested for the baby elephant crochet?
Absolutely! You can swap out the medium weight or plush yarn for any soft yarn. Just make sure to adjust your hook size accordingly. If you choose a lighter weight yarn, keep in mind the elephant may turn out smaller.

How can I adjust the size of my baby elephant crochet?
To make your adorable amigurumi larger, use a bulkier yarn and a larger crochet hook. Conversely, you can create a smaller version by using a finer yarn and a smaller hook. Just remember to maintain the same stitch count to keep the shapes balanced!

Why is my work curling when creating the elephant's body?
Don't panic! Curling often happens when the tightness of your stitches varies too much. I recommend checking your tension and ensuring it's consistent throughout the pattern. If it's still curling, try blocking the finished piece to help it lay flat.

What hook size should I use for the legs and trunk?
For the legs and trunk, I suggest using the 3.5mm crochet hook as mentioned in the pattern. This will help maintain detail in the smaller parts, giving your baby elephant crochet a tidy and polished look.

How do I fix dropped stitches while crocheting?
It's an easy fix! Simply pick up the loop of the dropped stitch with your crochet hook and work it back into place as you normally would. Don't forget to check your stitch count afterward to ensure everything’s even!

What can I do if I notice gaps between stitches?
If gaps appear, it may mean your tension is too loose or you’re not working into the correct stitch. Make sure your stitch tension is consistent, and consider using stitch markers to help guide you through your pattern. Keep practicing; you'll feel more comfortable with each stitch!

Filed Under: Uncategorized

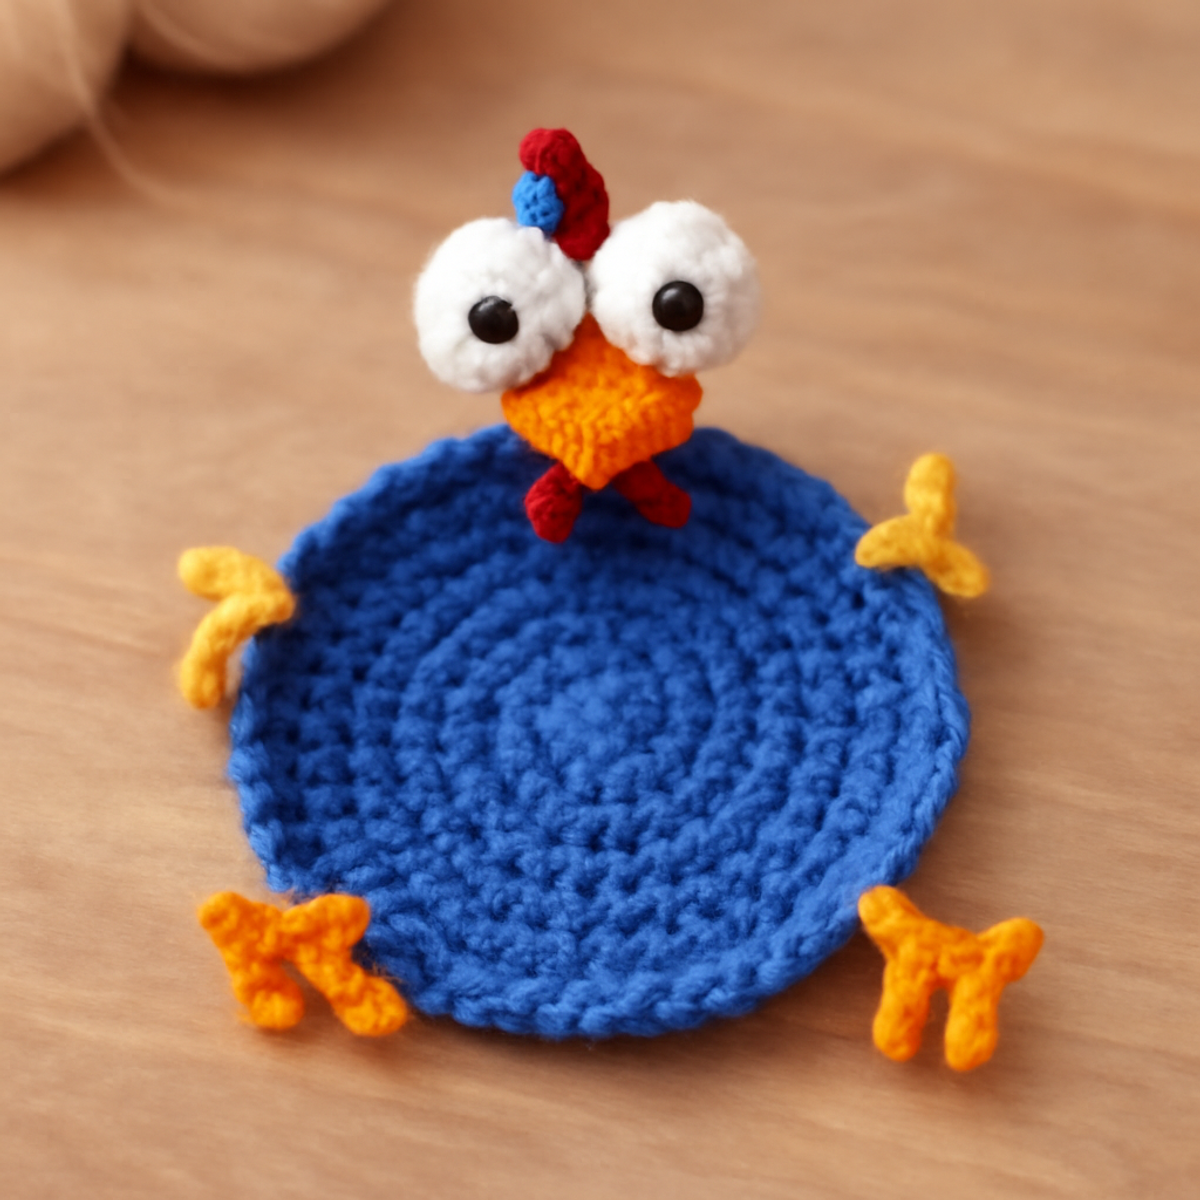
Funny Chicken Coaster: Cozy and Quirky Crochet Fun!

August 23, 2026 by Publisher Leave a Comment

Funny Chicken Coaster: Cozy and Quirky Crochet Fun!

As I settled into my favorite armchair with a cup of tea, I couldn’t help but think about how joyful it is to craft pieces that not only serve a purpose but also make us smile. Enter the delightful funny chicken coaster, a whimsical creation that effortlessly marries functionality with a playful flair. This charming coaster not only adds a touch of humor to your dining table but also protects surfaces from unsightly drink rings, making it a fantastic project for both beginners and seasoned crocheters. With just a bit of medium-weight cotton yarn and a dash of creativity, you’ll find that this coaster is the perfect quick craft for gifting or indulging in a cozy afternoon of stitching. Are you ready to fill your home with laughter and warmth as you create this delightful addition to your decor? Let’s dive into the cheerful world of the funny chicken coaster!

Funny Chicken Coaster Materials & Tools

  • Medium Weight Cotton Yarn – Approximately 50 to 75 yards for the main color, perfect for ensuring both texture and durability.
  • 3.5mm to 4.5mm (E7 to G7) Hook – Use a size in this range to create detailed stitches while maintaining a comfortable grip.
  • Stitch Marker – Helpful for keeping track of your rows, ensuring your funny chicken coaster maintains its round shape throughout.
  • Scissors – Essential for cutting yarn tails after your project is complete.
  • Tapestry Needle – Ideal for weaving in those pesky loose ends for a polished finish.

Why Make a Funny Chicken Coaster?

Joyful Crafting: This funny chicken coaster adds a splash of whimsy to your home decor while serving a practical purpose.

Quick and Easy: A perfect project for quick crafting sessions, making it ideal for last-minute gifts or a satisfying afternoon of creativity.

Beginner-Friendly: Designed for beginners and experienced crafters alike, it incorporates basic crochet techniques that are easy to follow.

Conversation Starter: Its playful design sparks joy and laughter, making it a delightful talking point during gatherings.

Unique Aesthetic: Bright colors and quirky details ensure this coaster stands out, infusing personality into your kitchen or living space.

Gauge & Sizing Notes

Don’t skip the gauge swatch! For your funny chicken coaster, checking your tension is essential to ensure that it turns out the right size and shape, perfect for supporting your favorite mug. A general guideline for gauge is aiming for 4×4 inches (10×10 cm) to equal approximately 24 single crochets and 30 rows. If you find your tension is too tight or too loose, you can adjust the sizing by increasing your starting chain in multiples of 6 for a wider coaster or decrease it for a smaller one. If your swatch is too small, simply try going up a hook size to achieve the desired effect. Happy crocheting!

Step-by-Step Pattern for funny chicken coaster

Row 1: Magic Ring Base
Begin by creating a magic ring. Work 6 single crochet (sc) stitches into the ring. Pull the tail to tighten the ring and secure it. This forms the foundation of your funny chicken coaster. After this row, you should have a tiny circle, and your work should lay flat (6 sts).

Row 2: Increase Round
In this round, make 2 single crochet (sc) in each stitch around. This will double your stitch count while expanding the base. Pay attention to your tension; it should feel snug but not tight. By the end of this row, your circle should be visibly growing (12 sts).

Row 3: Another Increase Round
For this round, work 1 single crochet (sc) in the first stitch, then 2 single crochet (sc) in the next stitch. Repeat this pattern around. The coaster will continue to widen, giving it a more substantial base. After completing this round, you should see it start to take shape (18 sts).

Row 4: Wider Base
Continue increasing by alternating 1 single crochet (sc) in the next 2 stitches, followed by 2 single crochet (sc) in the next. This will help form the base of your funny chicken coaster while keeping the round shape intact. Your work should appear more circular and fuller at this point (24 sts).

Row 5: Establishing Height
Now, work 1 single crochet (sc) in each stitch around without increasing. This round sets the groundwork for the height of your coaster. It should feel firm yet flexible, and maintain a nice round shape (24 sts).

Row 6: Begin Chicken Head
Switch to a contrasting yarn for the chicken’s head. Begin by crocheting in the next round with 1 single crochet (sc) in each stitch to manage the slope gently. This marks the start of your fun design and should be visibly different from the base color (24 sts).

Row 7: Creating the Chicken Head
Increase the round by working 1 single crochet (sc), then 1 increase for the next stitch around. This adds dimension and depth to the chicken’s head, creating a rounded appearance. After this round, your coaster should have a distinct head shape (30 sts).

Row 8: Detailing the Head
For this round, create 1 single crochet (sc) in the first 3 stitches, followed by an increase in the next stitch. Repeat this pattern. This will enhance the chicken’s head by making it more pronounced, while keeping the shape consistent (36 sts).

Step 9: Adding Facial Features
Now, switch to a smaller hook for the chicken’s beak. Crochet a small piece using 3 single crochet (sc) into a new magic ring, then chain 1 and sl st to close. Attach this beak to the front of the head using your tapestry needle, securing everything firmly.

Step 10: Finish with Embellishments
For the eyes, use white yarn to create 2 small rounds of 4 single crochet (sc) each. Attach black yarn to embroider pupils. Secure these features onto the head as well, giving your funny chicken coaster a charming expression. Your project should now boast a delightful, quirky look!

Step 11: Assembly of Parts
Now it’s time to assemble your funny chicken coaster. Attach the head to the base securely with sl st or whip stitch. Ensure it sits firmly and looks cute. The connection should feel stable and balanced, ready to rest under your favorite mug!

Step 12: Final Edging
To finish, consider adding a simple single crochet (sc) border around the edge of your coaster for a polished look. This will enhance durability and add a neat finish to the entire project. Your final product should measure about 5.5 inches across, combining whimsy and practicality delightfully!

Care Instructions for Funny Chicken Coaster

  • Machine Washing: If needed, place your funny chicken coaster in a mesh laundry bag and wash it on a gentle cycle with cold water to prevent any felting or distortion.

  • Hand Washing: For the best care, gently hand wash in cold water with mild detergent. Avoid vigorous agitation to maintain the integrity of the stitches.

  • Drying/Blocking: Lay your coaster flat on a towel to dry, reshaping it as necessary. Blocking can enhance its whimsical shape and ensure it lies flat.

  • Storage: Store in a cool, dry place away from direct sunlight. This will help preserve the colors and prevent dust buildup on your charming coaster.

Funny Chicken Coaster: Variations & Substitutions

Embrace your creativity and transform the funny chicken coaster into a personalized work of art that reflects your unique style!

  • Yarn Weight Swaps: Choose a lighter weight yarn for a more delicate coaster, perfect for tiny teacups or decorative purposes.

  • Color Blocking: Experiment with multiple colors! Create a vibrant rainbow chicken by incorporating different colors for the body, wings, and head. The playful contrasts will elevate the whimsical element of your design.

  • Abstract Chicken: For a modern twist, crochet the chicken in abstract shapes and colors, turning it from a traditional coaster into a funky art piece ideal for eclectic decor.

  • Textured Yarn: Use a boucle or textured yarn for a unique fluffy appearance. This variation adds a fun element to your coaster, inviting curious fingers to explore its surface.

  • Add a Pom-Pom: Attach a cheerful pom-pom to the top of the chicken's head for a whimsical flair. This small detail could bring extra joy and a pop of fun to your home.

  • Fringed Edges: Create a fringed border around the coaster for extra flair. This detail softens the overall look and adds a cozy texture to your piece.

  • Oversized Version: Make a larger chicken coaster by increasing the number of rounds. Not only does this create a bold statement piece, but it also adds practicality for larger mugs or serving dishes.

  • Seasonal Themes: Switch colors and patterns to match different holidays, such as using pastel shades for spring or warm tones for autumn, ensuring your coaster delights year-round.

Expert Tips for Your Funny Chicken Coaster

  • Watch Your Tension: Aim for a consistent crafting tension to keep your funny chicken coaster from becoming too loose or misshapen. Avoid stretching those stitches!

  • Count Stitches Carefully: Frequently check your stitch count, especially during increase rounds. Losing count can lead to an awkward shape that won't perform well as a coaster.

  • Secure Features Well: Make sure the head, beak, and eyes are attached firmly. Use a tapestry needle for extra security and to weave in any loose ends.

  • Try Blocking: Once assembled, consider blocking your coaster to enhance its shape and ensure it lies flat. This little step can make a big difference!

  • Final Edging Tip: Adding a final round of single crochet around the edge not only creates a polished finish but also adds durability to your funny chicken coaster.

What to Pair with Funny Chicken Coaster

As you delight in creating this whimsical piece, consider crafting more cheerful companions to enhance your cozy corner or kitchen table.

  • Charming Chicken Mug Hugger: Wrap your favorite mug in a delightful chicken cozy, adding a playful touch to your hot drinks. For a fun twist, use complementary yarn colors for a coordinated set.

  • Playful Chicken Placemats: Create matching placemats featuring playful chickens to brighten up your dining area. Their larger size can provide a whimsical touch beneath your funny chicken coaster.

  • Quirky Egg-Shaped Coasters: Try whipping up a batch of egg-shaped coasters to accompany your chicken; this playful duo is sure to inspire chuckles at your gatherings.

  • Fluffy Chicken Dishcloths: Crochet matching dishcloths using similar yarn, perfect for practical tasks while maintaining a fun aesthetic in your kitchen. These can tie the whole theme together beautifully.

  • Sunny Chicken Wall Hanging: Elevate your decor by crocheting a cheerful wall hanging featuring chickens or farm elements. Hang it near your coaster for a joyful ambiance.

Let these projects fuel your creativity and add layers of charm to your home, all while celebrating the joy of crochet with your funny chicken coaster!

Funny Chicken Coaster FAQs

Can I substitute different yarn for the funny chicken coaster?
Absolutely! While I recommend using medium weight cotton yarn for its durability and texture, you can substitute with a cotton blend or even acrylic yarn. Just keep in mind that the final look and feel may differ slightly, especially in terms of flexibility and sheen.

How can I adjust the size of my funny chicken coaster?
If you'd like to make your coaster larger or smaller, you can easily adjust the number of increase rounds. For a larger coaster, simply add more rounds in the initial base section. Conversely, for a smaller one, reduce the number of rounds before starting the head. I suggest keeping an eye on your tension so it stays round!

Why is my funny chicken coaster curling up?
Don’t panic! Curling often happens if the tension is too loose, particularly in the beginning rounds. Make sure to maintain a firm but not overly tight tension throughout your project. If it's already curled, blocking the coaster can help it lay flat and enhance its shape.

What hook size should I use for this project?
For the funny chicken coaster, a hook size between 3.5 mm to 4.5 mm (US E7 to G7) is recommended. This range helps create those lovely detailed stitches while ensuring that your hands stay comfortable during crafting. If you find your stitches are too tight, you might want to go up a hook size!

How do I fix a dropped stitch in my coaster?
It’s an easy fix! First, don’t worry—everyone has been there! Use your tapestry needle to carefully pull the dropped loop back up to the previous row. Then, crochet it back into place with a slip stitch or single crochet. This should help maintain the integrity of your design without affecting the overall appearance!

Filed Under: Uncategorized

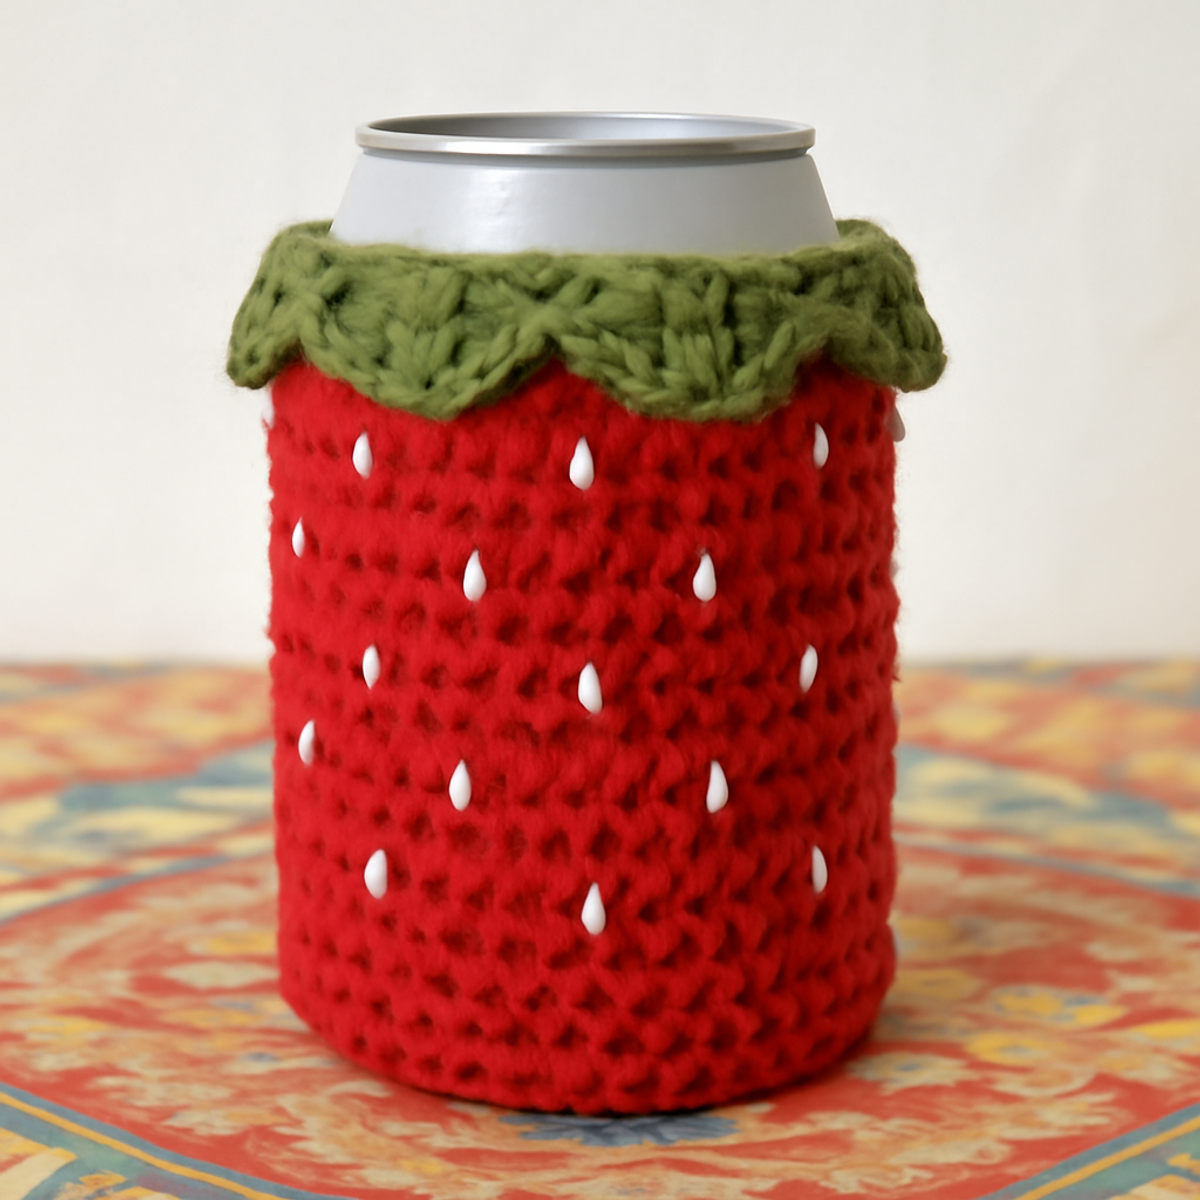
Cheerful Strawberry Can Cozy: Quick & Fun Crochet Project

August 23, 2026 by Publisher Leave a Comment

Cheerful Strawberry Can Cozy: Quick & Fun Crochet Project

As summer days heat up, there's nothing quite like sipping a cool drink while lounging in the sun. But let’s face it, condensation can be a real party pooper! That's where my cheerful strawberry can cozy comes in—a delightful blend of fun and functionality for both beginner and intermediate crocheters. This playful project not only adds a vibrant pop of color to your drinkware but also insulates your can, keeping your beverages refreshingly cool and your hands dry. With simple stitches and sweet details mimicking the beloved summer fruit, you'll find this cozy perfect for those BBQ get-togethers or lazy picnic afternoons. Ready to make a splash with your crochet skills? Let’s dive into the fun and colorful world of the strawberry can cozy!

Cheerful Strawberry Can Cozy Materials & Tools

  • Yarn

    • Medium Weight Yarn (Acrylic or Cotton Blend) – Approximately 100-150 yards in red for the body, white for the seeds, and green for the top edge.
  • Tools & Notions

    • 4.0mm to 5.0mm (G/6 to H/8) Hook – The perfect size for creating tight stitches to fit snugly around your can.
    • Stitch Markers – Helpful for keeping track of your rounds and ensuring consistent stitch placement.
    • Small Embellishments (optional) – Use these to mimic seeds on your strawberry design for added charm.

Why is this strawberry can cozy special?

Playful Design: This cheerful strawberry can cozy is designed to bring vibrant joy, making your drinks stand out at summer gatherings.

Easy for All: Whether you're a beginner or an intermediate crocheter, the straightforward stitches make this project enjoyable and stress-free.

Functional Beauty: It not only looks adorable, but it also effectively insulates your drinks, combating condensation and ensuring a crisp sip each time.

Quick to Make: Crafted swiftly in just a few hours, you can whip up several cozy variations for all your friends using different color schemes and embellishments.

Customization Ready: With options to modify size, yarn type, and colors, this project allows you to express your unique style while executing a practical design.

Gauge & Sizing Notes

Don't skip the gauge swatch! Checking your tension is crucial for the perfect fit of your cheerful strawberry can cozy. Aim for a standard crochet gauge of approximately 4×4 inches (10×10 cm), though this may vary depending on your unique crochet style and the yarn used. If you find your tension is off, you can adjust the starting chain by increasing in multiples of 6 for a wider cozy or decreasing for a snugger fit. If your swatch is too small, simply try going up a hook size; if it's too large, opt for a smaller hook. With proper gauge, your cozy will not only look vibrant but fit perfectly around your favorite drinks!

Step-by-Step Pattern for Cheerful Strawberry Can Cozy

Row 1: Begin the Body
Ch 4, join with a sl st to form a ring. In the ring, work 8 sc, making sure to pull the starting tail to close the hole tightly. Your cozy should have a small circle at this point, ready to grow as you continue to build the body. (8 sts)

Row 2: Increase for Body
Ch 1, 2 sc in each stitch around, marking the first stitch of the round. This will create a wider base for your strawberry can cozy. As you complete this row, you'll notice the circle expanding, giving it a nice rounded shape. (16 sts)

Row 3: Continue Body Increases
Ch 1, *sc in next stitch, 2 sc in next stitch; repeat from * around. This row will add more height and volume to your cozy while maintaining the playful round shape. By the end, you should feel the circumference increasing, making it fit snugly around a standard can. (24 sts)

Row 4: Establish Body Size
Ch 1, sc in each stitch around without any increases. This creates the main body of your strawberry can cozy, allowing it to develop its character. Keep your tension even so the fabric drapes nicely, and your cozy starts to take shape. (24 sts)

Row 5-10: Build the Body Height
Repeat Row 4 for 6 more rounds, maintaining consistent tension as you progress. The fabric should feel thicker, and the cozy height will begin to resemble a standard can. Check your progress periodically to ensure it fits well around your drink. (24 sts)

Row 11: Create Strawberry Seeds
Switch to white yarn. Ch 1, *sc in next 2 sts, sl st in next st; repeat from * around. This adds delightful little seeds to the cozy, giving it that quintessential strawberry look. By the end, your cozy will look vibrant and texturized. (24 sts)

Row 12: Transition to the Top Edge
Switch to green yarn. Ch 1, sc in each stitch around. This round begins to prepare the top edge for your scalloped ruffle. The green will provide a nice contrast to the berry red of your cozy as it comes to life. (24 sts)

Step 1: Create Scalloped Top Edge
Ch 3 (counts as dc), *dc in next stitch, ch 2, sl st in next stitch; repeat from * around. This scalloping will give your strawberry can cozy a charming finish that mirrors the curves of a strawberry. Adjust your tension here to keep the scallops airy and playful. (12 scallops)

Step 2: Finishing Touches
Fasten off, leaving a long tail for weaving in. Use a tapestry needle to carefully weave in any loose ends and make your cozy look polished. You can add optional embellishments to mimic seeds on the cozy to enhance its vibrant character!

Step 3: Final Assembly
Lightly block your cozy to even out any uneven stitches, making it ready for use. Check the overall height and width to ensure it fits snugly around your favorite beverage. Your cheerful strawberry can cozy is complete and ready to brighten up any summer gathering!

Variations & Substitutions for Strawberry Can Cozy

Discover the delightful potential of customizing this pattern to make it truly yours!

  • Yarn Substitutions: Opt for cotton yarn for improved insulation. This fiber choice will elevate the cozy’s functionality while maintaining its charm.

  • Color Alternatives: Experiment with vibrant hues like teal or lavender to create a whimsical twist. Bold colors can bring a fresh aesthetic to your summer gatherings.

  • Additional Embellishments: Attach small buttons or felt shapes to mimic seeds for an extra playful vibe. These little details can enhance the cozy's artistic flair.

  • Height Adjustments: Alter the number of rounds for the body to fit taller drinks or shorter cans. This allows you to tailor each cozy for different beverages, perfect for diverse occasions.

  • Textural Additions: Consider adding a pom-pom or fringe to the top edge for a fun finishing touch. These textures can make your cozy even more visually appealing!

  • Twisted Scallops: Instead of a classic scallop finish, try making multiple dc stitches in one stitch for chunkier ruffles. This bold change offers a different personality to your cozy.

  • Mixed Fiber Blend: Combine acrylic and cotton yarn for varied texture and performance. This mix can balance insulation and visual softness, giving your cozy a unique feel.

  • Festive Themes: Change colors and embellishments seasonally—for example, use orange for Halloween or red and green for Christmas! The cozy can adapt to your favorite holidays and celebrations.

What to Pair with Cheerful Strawberry Can Cozy?

Create your own sunny crafting experience by making delightful companions to your strawberry can cozy!

  • Fruity Picnic Blanket: A vibrant blanket in coordinating colors will set the perfect backdrop for your outdoor gatherings. Picture lounging on this cozy creation while sipping drinks with friends.

  • Matching Strawberries Coasters: Keep your surfaces safe and stylish with coasters mimicking the same fruity theme. They’re functional and will whisk you to summer vibes every time you set down your drink.

  • Playful Strawberries Keychain: Make adorable keychains using leftover yarn! They can brighten your day while also using your crochet expertise in detailed, cute designs.

  • Colorful Summer Tote Bag: Combine practicality with charm by whipping up a tote bag in colors that match your cozy. It’s the ideal carry-all for those trips to the market or beach.

  • Sunny Spiked Drink Sleeves: Create sleeves for extra drinkware in coordinating shades, perfect for all kinds of summer beverages. These creative pieces will elevate any outdoor party experience!

Expert Tips for Strawberry Can Cozy

  • Consistent Tension: Keep your tension even throughout the project to ensure your cozy fits snugly. Uneven stitches may lead to a loose or floppy cozy.

  • Count Your Stitches: Regularly count your stitches, especially when switching colors. This helps maintain the correct size and prevents inadvertently losing track during transitions.

  • Check for Gaps: As you crochet, look out for gaps between stitches, particularly in the body section. Adjust your tension to avoid these and create a smooth finish for your strawberry can cozy.

  • Weave Ends Carefully: After finishing, make sure to weave in all loose ends securely to prevent them from unraveling. A clean finish enhances the cozy's aesthetic and durability.

  • Consider Blocking: Lightly block your finished cozy to help even out any uneven stitches and enhance its structure. This minor step can make a major difference in your cozy's final appearance.

How to Wash and Care for Your Strawberry Can Cozy

  • Machine Washing: Use cold water on a gentle cycle to wash your strawberry can cozy. Avoid agitation to prevent felting or pilling, preserving that playful design.

  • Hand Washing: For a more delicate approach, gently hand wash your cozy in cold water with a mild detergent. This ensures the colors remain vibrant and the texture intact.

  • Drying/Blocking: Lay your cozy flat to dry, reshaping it gently to maintain its form. Avoid hanging to prevent stretching, keeping your cozy looking its best for summer events.

  • Storage: Store your strawberry can cozy in a cool, dry place, away from direct sunlight. This helps maintain its colors and structure, ready for your next picnic or BBQ!

Cheerful Strawberry Can Cozy FAQs

Can I use a different yarn weight besides medium weight?
Absolutely! While medium weight yarn is recommended for the strawberry can cozy, you can substitute it with a lighter weight like DK, but keep in mind that the final size may be smaller, so you might need to adjust your stitch count to achieve the desired fit.

How can I make the cozy larger or smaller to fit different can sizes?
To resize your cozy, you can adjust the initial stitch count in Row 1 by adding more stitches in increments of 8. For example, start with 12 or 16 stitches instead of 8 if you want a larger fit. Conversely, reduce the starting stitches for a smaller design.

Why is my cozy curling at the edges?
Don't panic! Curling can happen if the stitches are too tight or if there’s an inconsistency in tension across your rounds. I recommend checking your tension and possibly blocking your cozy after completion to help flatten the edges.

What size hook should I use for a snug fit?
For the cheerful strawberry can cozy, a 4.0mm to 5.0mm hook (G/6 to H/8 in US sizes) is ideal. If you're getting loose fabric, consider switching to a smaller hook size. Keep in mind that this will also affect your stitch definition and overall tightness of the cozy.

How do I fix a dropped stitch if I notice it halfway through?
It's an easy fix! Simply pull the yarn gently to create a loop with the dropped stitch and use your crochet hook to reinsert it where it belongs. If you're unsure, you can unravel back to the point where the drop occurred and re-crochet those stitches.

Can I add embellishments to my strawberry can cozy?
Definitely! Adding small buttons or yarn embellishments to mimic strawberry seeds is a fantastic way to personalize your cozy. Just ensure they're securely attached so they withstand use and washing. Happy crafting!

Filed Under: Uncategorized

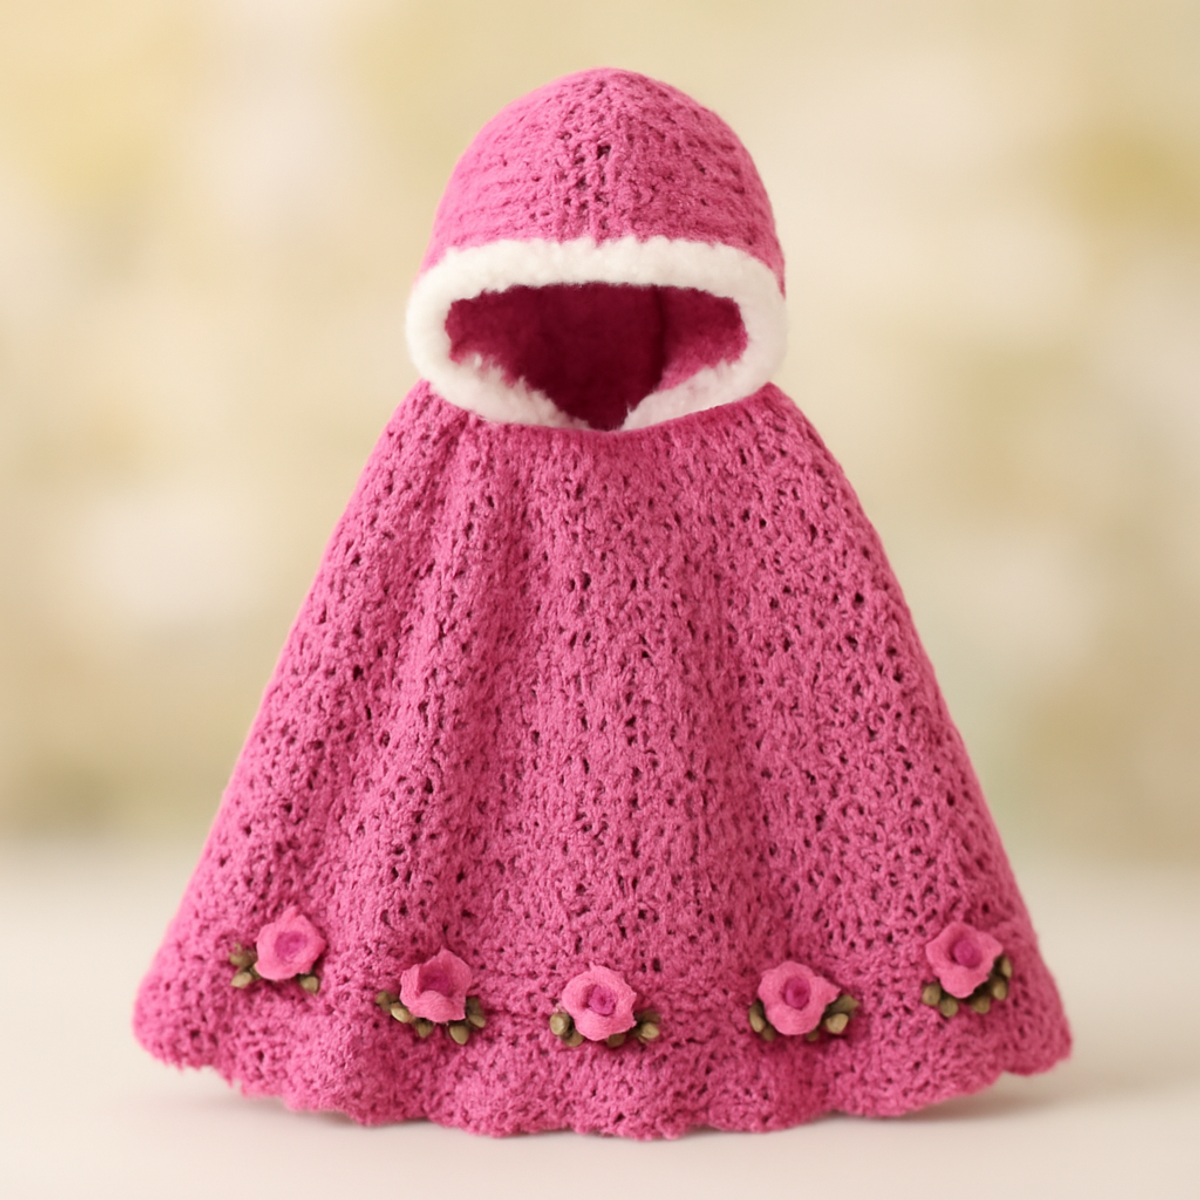
Charming Crochet Hooded Cape for Cozy Style Moments

August 23, 2026 by Publisher Leave a Comment

Charming Crochet Hooded Cape for Cozy Style Moments

As I wrapped myself in the soft, cozy fibers of my latest project, I couldn't help but feel that magical blend of warmth and whimsy—the same enchantment brought forth by the Charming Crochet Hooded Rose Cape. This delightful crochet hooded cape not only showcases elegant lacework and playful rose details but also fits seamlessly into your wardrobe, whether you're enjoying a casual evening indoors or dressing up for a festive gathering. Perfect for intermediate crocheters eager to expand their skills, this project is a treat for the fingers and the spirit alike. With its unique hood and fluffy fur trim, you'll find it works up quickly, making it an ideal stash-buster, too! Ready to dive into this charming pattern and bring a touch of romance to your crochet collection?

Crochet Hooded Cape Materials & Tools

  • Worsted Weight Yarn – Approximately 800-1000 grams of pink yarn will be needed to create the main body of the cape.
  • Faux Fur Yarn – An additional 100-200 grams of white fur yarn is suggested for the border detailing.
  • 6.0mm (J-10) Hook – A hook this size is perfect for the body of the crochet hooded cape.
  • Scissors – Essential for cutting yarn and finishing your project neatly.
  • Yarn Needle – Use this for weaving in ends and sewing on embellishments.
  • Stitch Markers – Handy for keeping track of stitch counts, especially in lacework.
  • Floral Button – A lovely addition for decorating the center of the roses on your cape.

Why Choose This Crochet Hooded Cape?

Whimsy and Warmth: This crochet hooded cape brings a playful elegance that’s perfect for all ages, combining whimsical design with practicality.
Intermediate Delight: Master different techniques like lace patterning and flower making while creating an eye-catching piece!
Versatile Beauty: Dress it up for festivities or enjoy a cozy night in—this cape suits any occasion!
Aesthetic Appeal: With its intricate lacework and charming rose details, it’s sure to be a standout in your wardrobe.
Quick and Cozy: You'll love how quickly it comes together, giving you more time to enjoy wearing this warm, stylish garment!

Gauge & Sizing Notes

Don't skip the gauge swatch! Checking your crochet tension is crucial for achieving the beautiful fit and design of your crochet hooded cape. Aim for a sample square of approximately 4×4 inches (10×10 cm) to ensure your stitches are consistent; if you're unsure, use a general guideline—about 14 double crochets for every 8 rows should work well. To make this cape wider, increase your starting chain in multiples of 4 + 2. If your swatch is too small, simply try going up a hook size; on the other hand, if it’s too large, move down a size for a perfect fit. With these adjustments, your stunning crochet hooded cape will be just right!

Step-by-Step Pattern for Charming Crochet Hooded Cape

Row 1: Foundation Chain
Start by making a foundation chain of 80 stitches (ch 80). This initial chain forms the base of your crochet hooded cape. Be sure to work the chain loosely enough to allow the stitches to have some stretch.

Row 2: Setting Up the Base
In the second row, work 1 double crochet (dc) in each chain stitch across. This will give you a total of 80 double crochets (80 dc). Your work should lie flat and create a sturdy foundation for the next rows of your cape.

Row 3: Begin the Lace Pattern
For Row 3, chain 3 (counts as 1 dc), skip the next stitch, and *dc in the next stitch, ch 1, skip 1 stitch; repeat from * to the end, finishing with a dc in the last stitch (40 lace loops). This row introduces the lace pattern that will add texture to your crochet hooded cape.

Row 4: Continuing the Lace
Chain 3 and turn your work. In this row, dc in the ch-1 spaces from the previous row (40 dc). As you work, you will notice the lace pattern beginning to emerge, creating beautiful open areas in your cape.

Row 5: Alternating Lace and Solid
Chain 3 and turn. For Row 5, *dc in the next dc, ch 1; repeat from * to the end, finishing with a dc in the top of the turning chain (80 sts). This row continues the lacy character of your crochet hooded cape while spacing the stitches evenly.

Row 6-12: Repeat the Lace Sequence
Continue repeating Rows 3 to 5 for a total of six times, maintaining the stitch count and the lace design (80 sts per row). Your work should show a lovely repetition of the lace pattern, providing an elegant flair as the body of the cape develops.

Row 13: Shaping the Hood
To transition into the hood, chain 60 to create a new foundation chain. This chain will serve as the base of the hood. Ensure that the stitches remain loose so that the fabric can drape nicely once completed.

Row 14-48: Building the Hood
For the hood, work in rows of dc, continuing until you complete 35 rounds. Remember to check that your work measures around 12-14 inches in height. The hood portion of your crochet hooded cape will come together beautifully with each round.

Step 1: Attaching the Hood
Attach the finished hood to the main body of the cape by aligning the top of the hood with the shoulders. Join with sl st, ensuring it fits comfortably. This step is vital in realizing the full design of your charming crochet hooded cape.

Step 2: Adding the Fur Trim
To finish, use the white faux fur yarn for the border detailing. Work a row of sc around the hem and the hood edges, creating a fluffy trim. Your work should now have a cozy, fluffy look that complements the overall design of this delightful crochet hooded cape.

Step 3: Floral Embellishments
Lastly, crochet separate floral roses and leaves to embellish the hem of your cape. Attach them using your yarn needle to give that signature touch. Enjoy the process of piecing everything together, making your unique, charming crochet hooded cape truly yours!

Crochet Hooded Cape Variations

Embrace your creativity and customize this crochet hooded cape with these fun, inspiring ideas!

  • Yarn Weight Swaps: Change to a lighter DK weight for a delicate, airy feel, ideal for springtime wear.
  • Fiber Alternatives: Experiment with cotton yarn instead of acrylic for a breathable, summer-friendly version of your cape.
  • Color Blocking: Use contrasting hues like lavender and teal to add a modern twist and showcase your personal style.
  • Size Adjustments: Alter the initial chain count to create a fitted or oversized aesthetic that suits your preference and body type.
  • Textured Borders: Swap the faux fur trim for a scalloped or picot edge for a touch of whimsy, elevating the overall look.
  • Floral Variations: Instead of roses, try charming daisies or sunflowers for fresh spring vibes, perfect for those who love a playful twist.
  • Pom-Pom Detailing: Add small pom-poms or tassels along the hood’s edge for a fun, youthful flair that captures attention.
  • Layering Options: Make the cape longer by increasing the total rows in both the body and the hood for an elegant, dramatic appearance.

What to Pair with Charming Crochet Hooded Rose Cape

As you revel in the creation of this charming crochet hooded cape, imagine expanding your artistic journey with delightful complementary pieces.

  • Matching Crochet Mittens: These cozy mittens can effortlessly mirror the intricate lacework, keeping your hands warm on chilly days.

  • Lace Crochet Scarf: With a similar lace pattern, this scarf will enhance the romantic vibe of your cape while offering additional warmth.

  • Floral Hair Accessories: Create matching hair clips or headbands embellished with roses, adding a whimsical touch to any outfit.

  • Crochet Boot Cuffs: Transform your footwear with whimsical boot cuffs that echo the cape's floral details and bring an extra layer of charm.

  • Oversized Crochet Bag: Pair your ensemble with a soft bag that features a complementary color to your cape, perfect for any occasion.

Crafting these additions ensures a full aesthetic that resonates with the lovely spirit of your new crochet hooded cape!

Care Instructions for Your Crochet Hooded Cape

Machine Washing: Use cold water on a gentle cycle if washing your crochet hooded cape by machine; this helps prevent felting and keeps the fibers looking fresh.

Hand Washing: For the best care, gently hand wash your cape in cool water, using a mild detergent. Avoid twisting or rubbing to maintain the integrity of the lace work and rose details.

Drying/Blocking: Lay your cape flat on a clean towel to dry, reshaping it as necessary. This method preserves the drape and beauty of the intricate patterns you’ve created.

Storage: Store your crochet hooded cape folded neatly in a cool, dry place. Avoid hanging it to prevent stretching, and consider using a garment bag for added protection from dust and pests.

Expert Tips for Your Crochet Hooded Cape

  • Consistent Tension: Maintain an even tension throughout the lace sections to ensure a uniform look and feel across the cape's body and floral motifs.
  • Use Stitch Markers: Place stitch markers at the end of each increasing row to avoid losing count—this helps keep your stitches accurate and prevents errors.
  • Gentle Blocking: After completing your crochet hooded cape, gently block it to help the lace patterns open up beautifully and improve the overall drape of the garment.
  • Check Your Gauge: Always check your gauge before starting to ensure your cape will fit as intended—this helps avoid surprises as you progress.
  • Secure Finishing: When sewing on embellishments like roses, ensure your stitches are secure to maintain their position and durability as you wear your stunning crochet hooded cape.

Charming Crochet Hooded Rose Cape FAQs

Can I substitute the worsted weight yarn with a different type of yarn?
Absolutely! While the pattern calls for worsted weight yarn, you can experiment with other fibers. Just make sure to check your gauge to ensure your finished crochet hooded cape maintains the proper size and drape.

How can I make my crochet hooded cape bigger or smaller?
To adjust the size, modify the initial foundation chain and increase or decrease the number of rounds accordingly. If you want a more fitted look, consider reducing the starting chain, while increasing it will result in a larger cape. Just remember to maintain the stitch pattern!

Why does my work keep curling up at the edges?
Don't panic! Curling is common, especially with lace patterns. It could be due to tight tension. I recommend blocking your work gently after completion to help flatten the edges and let the lace open up beautifully.

What hook size should I use for this project?
The pattern specifies using a 6mm (US J-10) crochet hook for the body of the crochet hooded cape. If you're using a different yarn, you might need to adjust the hook size to maintain the correct gauge—always check your gauge before starting!

How do I fix dropped stitches in my crochet?
It's an easy fix! If you notice a dropped stitch, just pull the working yarn gently from below the drop to create a new stitch. Insert your hook back into the last complete stitch above the drop, yarn over, and pull through both loops to secure it. You’ll be back on track in no time!

Is there a way to add more decorative elements to the cape?
Absolutely! Consider adding more floral embellishments or even contrasting colors to the border for added flair. You could create dainty daisies instead of roses or use a different color for the fur trim—get creative and make this stunning piece truly your own!

Filed Under: Uncategorized

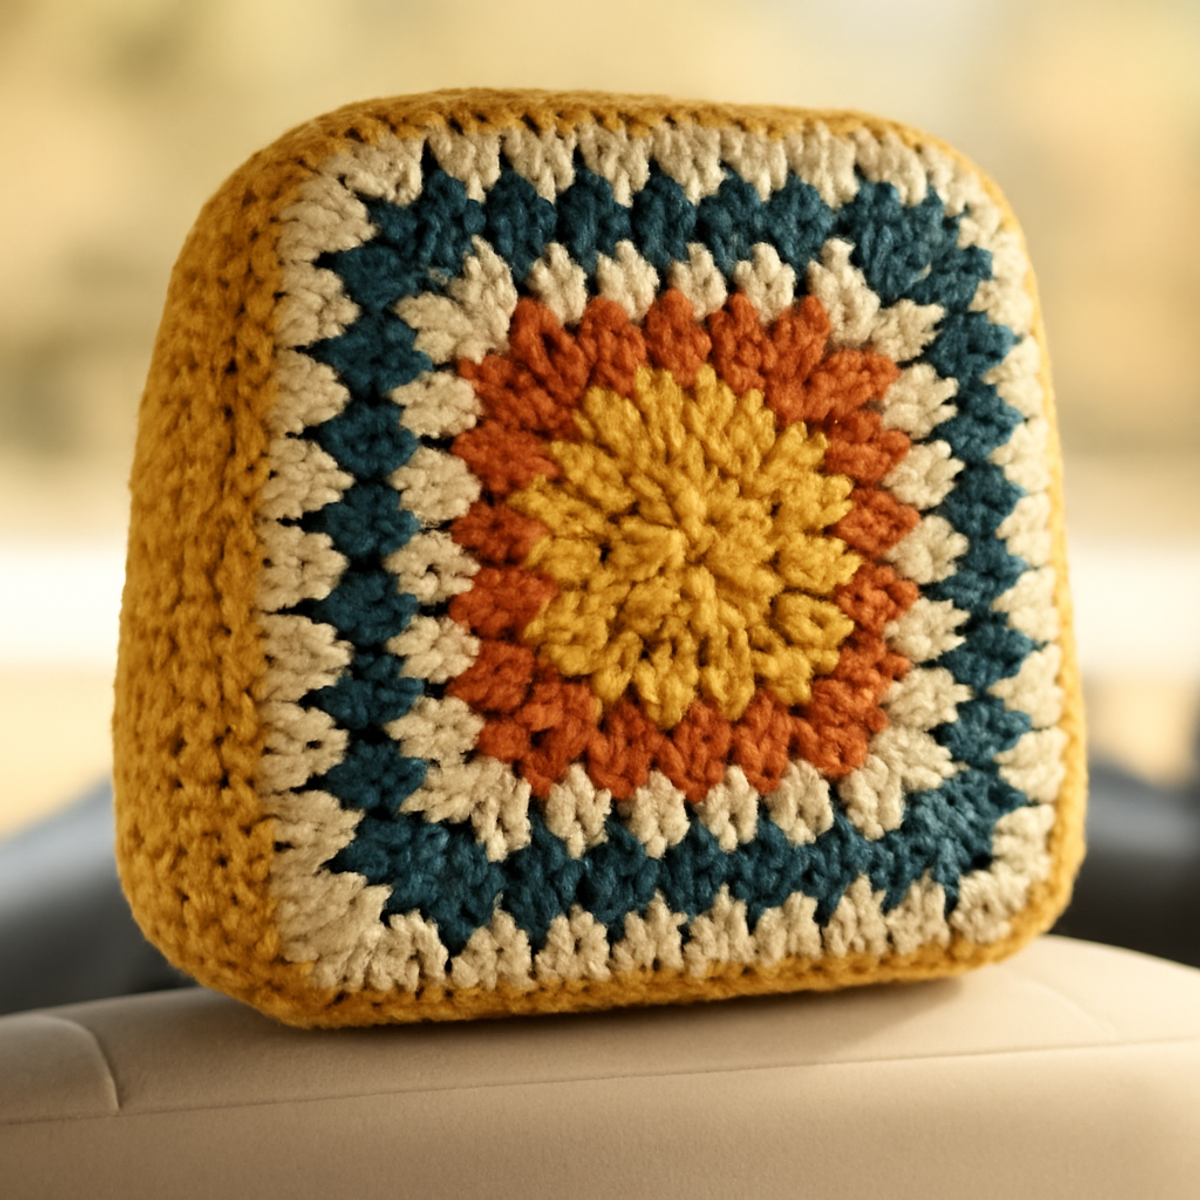
Cozy Crochet Headrest Cover for Your Car Decor

August 23, 2026 by Publisher Leave a Comment

Cozy Crochet Headrest Cover for Your Car Decor

As I settled into my car on a sunny afternoon, I couldn’t help but notice that my plain headrest was calling for a splash of color and warmth. That’s when the idea for a crochet headrest cover came to life. This cozy project not only elevates the aesthetic of your car’s interior but also serves the practical purpose of protecting your headrests from wear and tear. Designed for the adventurous intermediate crocheter, this Chic Granny Square Headrest Cover allows you to show off your favorite yarn while reimagining an often overlooked space. Plus, it’s a fantastic way to use up leftover yarn scraps and create a functional piece that enhances your driving experience. So, if you’re ready to transform your vehicle into a cozy retreat with vibrant textures and a satisfying sense of accomplishment, let’s dive into this delightful project and start making your own unique crochet headrest cover!

Crochet Headrest Cover Materials & Tools

  • Yarn

    • Bulky or Super Bulky Yarn (Weight 5-6) – Aim for about 150-250 yards, made from cotton or acrylic for durability and maintenance ease.
  • Tools & Notions

    • 6.5mm (K) or 9mm (M) Hook – Choose this size to create the thick, cozy texture of your crochet headrest cover.

Why Make a Crochet Headrest Cover?

Transformative Appeal: With its chic granny square design, this crochet headrest cover is a stunning way to revamp your car's interior. Cozy Texture: The purposeful blend of colors and stitches results in a warm, inviting feel that enhances your driving environment.

Functional Protection: Beyond aesthetics, this project protects your headrests from wear and tear, ensuring longevity and durability. Creative Outlet: Ideal for intermediate crocheters, it offers the chance to flaunt your yarn stash and creativity. Whether you choose playful pastels or bold hues, each cover becomes a personalized statement piece, making every journey more enjoyable!

Gauge & Sizing Notes

Don't skip the gauge swatch! Checking your tension is crucial for ensuring the fit of your crochet headrest cover. A solid guideline is to aim for a 4×4 inch (10×10 cm) square with approximately 12 double crochets and 8 rows. If you find that your tension is either too loose or too tight, adjusting the size is simple: to make your headrest cover larger, increase your starting chain in multiples of 4. Conversely, if your swatch is too small, try going up a hook size to achieve the desired measurements. Happy crocheting, and enjoy every stitch of your cozy crochet headrest cover!

Step-by-Step Pattern for Crochet Headrest Cover

Row 1: Foundation Chain
Begin by making a slip knot, then ch 36 to create the foundation chain for your crochet headrest cover. This starting chain will form the width of your project. Ensure your chain is not too tight; it should lay flat and have a slight flexibility to accommodate the design.

Row 2: First Row of Single Crochet (sc)
Starting in the second ch from the hook, work 1 sc in each ch across, totaling 35 sc. This row will establish a solid base for your granny square pattern. After completing this row, your work should maintain a neat, even tension and lay flat.

Row 3: Begin Granny Square Motif
To start forming the granny square, ch 3 (counts as your first dc), then in the same stitch, work 2 dc (this counts as your first cluster). Skip 2 stitches, then work (3 dc in the next stitch, skip 2 stitches), repeating across. Finish the round with a sl st to the top of the ch 3. You should have 5 clusters.

Row 4: Next Round of Granny Square
Ch 3, work 2 dc in the same space, then (ch 1, working in the ch-1 space from the previous round, make 3 dc). Repeat from * to * for each corner, ensuring to create a proper square shape. At the end of this round, you should have 5 corners and 8 clusters.

Row 5: Building Up the Motif
Continue to grow your granny square by repeating the previous round. Ch 3 at the beginning, then cluster 3 dc into each ch-1 space from the previous round, creating the square pattern further. After this round, you should have a total of 8 clusters on each side of your crochet headrest cover.

Row 6: Check Your Size
Once you reach your desired dimensions (approximately 10–12 inches square), it's time to finish the last round of clusters. Ensure your work is flat and the edges are even. If necessary, adjust the clusters by adding or reducing stitches to achieve a consistent shape as you prepare for the edging.

Step 7: Edging
For a polished finish, work a round of sc around the entire piece. Start with a sc in each dc from previous rounds and 3 sc in each corner to maintain shape. This edging will not only secure the design but also prevent any unraveling. Your crochet headrest cover should now have that lovely, snug fit.

Step 8: Assembly
To finish, fold the cover to fit your headrest size, align the edges, and seam them together using a sl st or your preferred joining method. Ensure the fit is snug around the corners and that your work remains neat. After seaming, weave in any loose ends and block the piece if desired to help shape it. Enjoy the cozy, inviting feel of your completed crochet headrest cover!

What to Pair with Chic Granny Square Headrest Cover

Embrace the joy of crafting a cohesive style for your vehicle with these delightful projects that complement your crochet headrest cover beautifully.

  • Cozy Seat Cushion: Create a matching cushion to provide ultimate comfort while harmonizing with your headrest cover's colors and textures.

  • Vibrant Car Blanket: A colorful throw blanket can bring warmth and continuity to your car's interior, inviting snuggly road trips and weekend getaways.

  • Adorable Keychain: Craft a mini-granny square keychain to carry a piece of your cozy aesthetic everywhere you go, adding a fun touch to your keys.

  • Colorful Coasters: Make a set of coasters to protect your cup holders, using the same yarn to maintain a unified look throughout your vehicle.

  • Stylish Storage Bag: Crochet a storage bag for your essentials that matches your headrest cover, ensuring everything stays organized while showcasing your creativity.

Crochet Headrest Cover Variations

Explore delightful possibilities that allow you to personalize your crochet headrest cover and showcase your unique style.

  • Colorway Swaps: Experiment with soft pastels or bold hues to match your car’s interior vibe. Each color transforms the ambiance of your space.

  • Yarn Substitutes: Try fibers like bamboo or soft wool blends for added texture and comfort. Different yarns can completely change the overall feel of your project.

  • Size Adjustments: Customize the dimensions based on your vehicle’s headrest. Whether snug or oversized, adapting the size makes this cover truly yours.

  • Pattern Modifications: Incorporate adorable motifs like bobbles or puff stitches for extra flair. These additions create visual interest and charm in your design.

  • Textured Borders: Add a playful fringe or a sweet pom-pom edging for a whimsical touch. The added texture can elevate the cozy feel of your headrest cover.

  • Color Blocking: Mix and match multiple shades in a fun color-blocked design. This technique can brighten up your interior and make your piece a conversation starter.

  • Embellished Details: Personalize with embroidered initials or a cute design in the center. Small embellishments can make your crochet headrest cover a true piece of art.

  • Durability Enhancements: Consider incorporating a waterproof lining inside for those road trips. This modification not only protects but extends the life of your beautiful creation.

How to Wash and Care for Your Crochet Headrest Cover

Machine Washing: Use cold water on a gentle cycle to protect the integrity of your crochet headrest cover, avoiding any agitation that may lead to felting or distortion.

Hand Washing: For added care, consider hand washing in cold water with mild detergent. Gently immerse your cover, swirl it briefly, then rinse thoroughly before proceeding to drying.

Drying/Blocking: Lay your crochet headrest cover flat on a clean towel to dry, making sure to reshape it as needed. This will help maintain its form and keep those beautiful granny squares looking their best.

Storage: Keep your headrest cover in a cool, dry place and avoid folding it tightly to prevent creases. Proper storage will ensure its cozy allure remains intact for your driving adventures.

Expert Tips for Your Crochet Headrest Cover

  • Manage Your Tension: Keep an eye on your tension throughout the project. A loose crochet headrest cover might slip off, so practice consistent pressure in your stitches.

  • Count Carefully: Count your stitches at the end of each round to avoid missing any. It's easy to drop a stitch when switching between clusters, which can throw off your design.

  • Seam Neatly: When assembling your crochet headrest cover, ensure that the edges are aligned perfectly before seaming. A neat finish enhances the overall look and durability.

  • Color Change Technique: When switching colors, ensure a seamless transition by avoiding excessive pulling on the yarn. This prevents holes and maintains fluidity in your design.

  • Final Touches: Consider blocking the finished piece to define the edges. A polished look not only adds to the appearance but also helps it fit snugly on your headrest.

Crochet Headrest Cover FAQs

Can I substitute the yarn for this crochet headrest cover?
Absolutely! While the pattern recommends bulky or super bulky yarn, you're welcome to experiment with other fibers. If you use acrylic, that's a great option for durability, but you could also try a bamboo or wool blend for a different texture. Just be sure to adjust your sizing accordingly!

How can I make my headrest cover bigger or smaller?
Don’t panic! To resize your crochet headrest cover, add or subtract stitches in your foundation chain to achieve the desired width. For height, simply continue to add rounds of granny squares until you reach your preferred size. Remember to check your headrest dimensions beforehand for the best fit!

Why is my crochet headrest cover curling at the edges?
Curling can happen sometimes, but it's an easy fix! Check your tension and ensure you are maintaining consistent stitch size throughout your work. If curling persists, consider adding more border stitches or even blocking the finished piece to help it lay flat.

What size of hook should I use for this crochet headrest cover?
For this project, you can use a 6.5mm (K) or a 9mm (M) crochet hook. Choose the one that feels most comfortable for you! A larger hook can create a looser drape, while a smaller hook yields a denser piece, so pick based on your texture preference.

How do I fix a dropped stitch in my crochet headrest cover?
No worries, fixing dropped stitches is a common challenge! Just use a crochet hook to gently pull the dropped loop back up through the last completed row. You can chain it back up to stay in line with your pattern—it's a minor hiccup that will be barely noticeable!

What should I do if my yarn colors bleed when washing?
Great question! To prevent color bleeding, always wash your crochet headrest cover in cold water separately the first time. A little vinegar in the wash can help set the colors, but be cautious with bright or dark hues. If you're unsure, a test swatch is a wise move before washing your beautiful cover!

Filed Under: Uncategorized

Charming Crochet Frog Mug Hugger: Whimsical & Fun for All

August 23, 2026 by Publisher Leave a Comment

Charming Crochet Frog Mug Hugger: Whimsical & Fun for All

As I sat with my favorite warm mug in hand, I couldn't help but feel the need for a touch of charm to brighten my sipping routine. Enter the delightful crochet frog mug hugger, a whimsical project that combines functionality with a playful flair. Imagine wrapping your warm drink in the embrace of this adorable fellow, not only keeping your hands safe from the heat but also bringing an instant smile to your face. This project is perfect for crafters of all skill levels—especially beginners—and offers the added perk of being a wonderful gift for any frog enthusiast. So, let’s dive into the stitches and bring this cheerful character to life, making your tea or coffee moments just a little more special!

Crochet Frog Mug Hugger Materials & Tools

  • Worsted Weight Cotton Yarn – Approximately 40g of vibrant green for the main body; small amounts of white, black, and pink for eyes and tongue.
  • 3.5 mm (US E/4) Hook – Ideal for achieving the tight stitch desired for your crochet frog mug hugger.
  • Scissors – A must-have for trimming any yarn ends with precision.
  • Yarn Needle – Perfect for weaving in ends and assembling your adorable mug hugger.
  • Optional Stitch Markers – Helpful for keeping track of rounds, especially if you’re a beginner!

Why Will You Love This Pattern?

Whimsical Design: This crochet frog mug hugger is the perfect way to add a dash of charm to your kitchen décor, captivating everyone who sees it.
Perfect for Beginners: With straightforward rounds and basic stitches, this pattern welcomes newcomers into the crochet world with open arms.
Fun Customizations: Feel free to explore alternative colors or embellishments, allowing you to craft a unique piece that reflects your personality.
Functional & Fun: Not only is it a delightful accessory, but it also serves a practical purpose by protecting your hands from heat.
Quick Project: Complete this little gem in no time, making it an excellent choice for gifting or simply treating yourself.

How to Check Your Gauge for Crochet Frog Mug Hugger

Don't skip the gauge swatch! Ensuring that your tension is correct with the crochet frog mug hugger is key to achieving the perfect fit around your mug. A standard gauge measurement often ranges around 4×4 inches (10×10 cm), with approximately 14 single crochets by 8 rows being a helpful guideline. If you want to make your mug hugger larger, simply increase your starting chain in multiples of 6 to add extra width. Conversely, if your swatch is too small, relax your tension or consider going up a hook size for a looser gauge. Remember, perfecting your crochet gauge will bring your whimsical frog to life in all its charming glory!

Step-by-Step Pattern for crochet frog mug hugger

Row 1: Foundation Chain
Start by making a slip knot and chaining 10 (ch 10). This will serve as the foundation of your crochet frog mug hugger. Make sure your chain is not too tight; it should have a little give, allowing it to easily form the curves needed later.

Round 1: Creating the Base
Join with a slip stitch (sl st) to form a ring. To build the base, work 2 single crochets (sc) in each chain (20 sts total). Your work should begin to curve, forming a snug base for your mug hugger.

Round 2: Increasing the Diameter
In this round, work 1 sc in the next stitch, then 2 sc in the following stitch. Repeat this pattern around (30 sts total). This will gradually increase the size of the mug hugger, ensuring it fits snugly but not too tightly around your mug.

Round 3: Continuing the Base
For this round, work 1 sc in the first two stitches, then 2 sc in the next stitch. Repeat until the end of the round (40 sts total). Your work should begin to take a more pronounced shape, ready to embrace your mug snugly.

Round 4: Setting the Shape
Now, work 1 sc in the next three stitches, and then 2 sc in the next stitch. Continue this pattern around (50 sts total). At this point, the mug hugger should be visually rounded, representing the frog's belly as part of its quirky charm.

Row 5: Base Completion
For the final round of the base, work 1 sc in the next four stitches, followed by 2 sc in the next stitch (60 sts total). At the end of this round, your work should lay flat, forming a solid surface that will support the structure of the entire crochet frog mug hugger.

Step 6: Crafting the Eyes (Make 2)
Using the white yarn, create a magic ring (MR). Work 6 sc into the ring, then pull tight to close. Your eyes should be starting to form a small circle (6 sts). This will add a whimsical focal point to your frog mug hugger.

Step 7: Adding Pupils
Change to black yarn and make a slip stitch in the center of each eye. Work 1 sc in the same stitch, creating a small pupil (2 sts). This tiny detail brings your crochet frog to life, making it more expressive and fun.

Step 8: Making the Legs (Make 4)
Using the green yarn, create a magic ring and work 8 hdc (half double crochet) into the ring, then pull tight (8 sts). These legs will give your mug hugger some playful charm as they dangle on the edges of your mug.

Step 9: Curly Legs
For each leg, in the next row, work 1 dc (double crochet) in each stitch and then chain 5, slip stitch back into the first chain to create a curl. Repeat for all four legs. Your legs should start to form curly ends, adding to the froggy feel!

Step 10: Assembling the Frog
With all pieces complete, use your yarn needle to sew the eyes, tongue, and legs onto the body of the crochet frog mug hugger. Position everything so that it looks charming and playful, ensuring the eyes are centered and the legs hang evenly.

Step 11: Finishing Touches
Weave in any loose ends, blocking gently to set shape. Check that everything is securely attached and that your crochet frog mug hugger is ready to wrap around your favorite mug, showcasing its whimsical character.

How to Wash and Care for Your Crochet Frog Mug Hugger

Machine Washing: Use a gentle cycle in cold water to keep your crochet frog mug hugger looking vibrant. Avoid agitation, as it can cause pilling or felting.

Hand Washing: Gently hand wash your mug hugger in cold water with mild detergent. This method preserves the integrity of the stitches and the playful design.

Drying/Blocking: Lay your crochet frog mug hugger flat on a clean towel to dry. Avoid wringing it out to maintain its shape and whimsical character.

Storage: Store your mug hugger in a cool, dry place, away from direct sunlight. This helps prevent fading and keeps it ready for your cozy sipping moments.

What to Pair with the Crochet Frog Mug Hugger?

As you finish crafting your whimsical froggy friend, consider how you can expand the charm of your cozy corner.

  • Charming Coasters: Add a splash of fun with matching frog coasters, protecting your surfaces while keeping the theme alive. They'll brighten up any coffee table.

  • Frog-Themed Plant Hanger: Bring your love for frogs into your greenery with a playful plant hanger that dangles from the ceiling, adding whimsy to your decor. It's a touch of nature with a creative twist!

  • Crochet Frog Beanie: Create a cozy beanie adorned with frog features to keep your head warm and stylish! It’s perfect for outdoor adventures or simply staying snug inside.

  • Frog Keychain: A cute little keychain to carry your love for this charming creature wherever you go. It's a fantastic gift idea or a fun personal accessory!

  • Mini Frog Plushie: Craft a delightful mini frog plushie as a companion for your mug hugger, providing endless cuteness to your space or making a delightful gift.

Crochet Frog Mug Hugger Customizations

Embrace your creativity and let your crochet frog mug hugger reflect your unique style with these fun customization ideas!

  • Yarn Type: Switch to a cotton blend for a softer, lighter feel and enhanced moisture-wicking properties while enjoying your drink.

  • Color Variations: Experiment with alternative colors like soft tan or cheerful blue to create a totally new character, like a turtle or a whimsical fish.

  • Size Adjustment: Scale up the pattern for larger mugs or downsize for petite cups to perfectly fit every drinkware in your collection.

  • Embellished Eyes: Consider adding small buttons or embroidered details for the eyes, giving your mug hugger an extra touch of whimsy that catches the eye.

  • Added Texture: Introduce wool yarn for a cozy texture or fluffy chenille for a delightful, huggable feel that enhances the overall charm of the design.

  • Curly Legs Variation: Try varying the curliness of the legs; making them longer or shorter adds different personality to your froggy friend and keeps the design fresh.

  • Gorgeous Fringe: Attach a playful fringe around the base for a fun and unique twist, creating an artsy look that enhances your mug’s character.

  • Charming Border: Add a simple contrast color border around the edge for a finished look that beautifully frames your completed masterpiece.

Expert Tips for Your Crochet Frog Mug Hugger

  • Check Your Gauge: Regularly check your tension to ensure your stitches are consistent. This helps maintain the intended size for your mug hugger.

  • Count Stitches: At the end of each round, count your stitches. This prevents unexpected increases or decreases, keeping your crochet frog mug hugger snug and secure.

  • Block for Shape: After completing your project, gently block it to help set the shape. This can enhance the final appearance and ensure it fits well around your mug.

  • Secure Assembly: When attaching eyes, legs, and tongue, make sure everything is firmly stitched in place. A secure assembly will help your mug hugger withstand use and maintain its playful charm.

  • Avoid Tight Chains: When starting your foundation chain, keep it loose. A tight chain can lead to difficulties shaping the mug hugger later. Enjoy your crochet frog mug hugger journey!

Crochet Frog Mug Hugger FAQs

Can I use a different type of yarn for my crochet frog mug hugger?
Absolutely! While worsted weight cotton yarn is recommended, you can experiment with cotton blends or even acrylic yarn. Just be mindful that this might change the texture, so adjust your hook size accordingly to maintain the desired snug fit around your mug.

What if my mug hugger is too small?
Don't panic! If your crochet frog mug hugger doesn’t fit snugly around your mug, you may want to check your gauge. Sometimes using a larger hook or adding a few extra rounds can help increase the size. You could also simply go back and make additional increases in the base rounds.

Why is my work curling while I crochet?
Curling can be quite common, especially if your foundation chain is too tight! Check your tension when starting, and ensure that you’re counting your stitches as you go. If curling persists, consider blocking it gently once finished to help shape it.

What size hook should I use for this project?
For the crochet frog mug hugger, a 3.5 mm (US E/4) hook is recommended. This size works well with worsted weight cotton yarn to create a tight stitch pattern. However, if you find your stitches are far too loose or tight, feel free to adjust your hook size accordingly.

How can I prevent gaps when attaching the legs and eyes?
To avoid gaps, I recommend sewing the pieces on tightly and using a whip stitch or mattress stitch for assembly. Make sure to position everything securely, and don't hesitate to weave in the ends well to maintain the overall durability of your crochet froggy friend.

What should I do if I drop a stitch?
It’s an easy fix! Simply pull back to the dropped stitch and use your crochet hook to lift the strand back up, placing it back on your hook. If you notice several dropped stitches, you might want to slow down and recount your stitches at the end of each round to prevent future mishaps.

Filed Under: Uncategorized

Cozy Crochet Skull Square: Fun for Halloween crafting!

August 23, 2026 by Publisher Leave a Comment

Cozy Crochet Skull Square: Fun for Halloween crafting!

As the crisp autumn air settles in and Halloween decorations start to appear, I feel that familiar thrill of creative excitement. This crochet skull square is not just a whimsical addition to your craft repertoire; it's a delightful project that blends a playful spookiness with skill refinement. Suitable for both beginners and intermediate crocheters, this pattern invites you to explore basic stitches while crafting something that’s lively and unique. One of the standout perks is how quickly it comes together, making it perfect for last-minute decor or cozy winter blankets. Plus, you can easily unleash your creativity by experimenting with bright colors and engaging motifs. Let’s dive into this charming ghoulishly cute design and get those stitches rolling!

Crochet Skull Square Materials & Tools

  • Yarn
    • Worsted Weight Yarn – About 100-150 yards total will create your square, perfect for a sturdy yet cozy finish.
  • Fiber
    • Acrylic or Cotton Blend – Opt for a durable fiber that’s easy to care for and holds color brilliantly, enhancing your ghoulish design.
  • Hook
    • 5.0mm (H) Hook – Ideal for achieving a moderate tension that showcases your stitches beautifully in this crochet skull square.
  • Notions
    • Stitch Marker – Use this handy tool to keep track of your rounds, ensuring your design stays perfectly aligned.
    • Tapestry Needle – Essential for weaving in your ends, helping you achieve a polished finish for your project.

Why Will You Love This Crochet Skull Square?

Fun & Whimsical Design: This crochet skull square infuses a quirky charm into your projects, making it perfect for Halloween or year-round fun.
Quick Project: With its straightforward pattern, you'll be amazed at how fast you can create your own ghoulish square.
Skill Enhancement: Beginners will build confidence while intermediates can experiment with various stitch types to elevate their techniques.
Versatile Use: Whether as coasters, part of an afghan, or colorful decorations, this square adds character wherever it's placed.
Bold Color Exploration: The design allows for vibrant color combinations, inviting endless creativity to make each piece truly unique!

Gauge & Sizing Notes

Don't skip the gauge swatch! Ensuring your tension is just right is crucial for this crochet skull square, as it determines the final size and overall appearance of your project. A standard guideline to follow is to create a 4×4 inch (10×10 cm) tension swatch that captures your stitches accurately. If your swatch is too small, simply go up a hook size or adjust your yarn to achieve a looser tension. To scale your crochet skull square to your desired size, increase your starting chain or rounds in multiples of 6. By customizing your gauge and pattern, you'll create a perfectly fitting piece that showcases your creativity!

Step-by-Step Pattern for Crochet Skull Square

Row 1: Start the Skull Motif
Begin your crochet skull square by creating a magic circle. Inside this circle, work 7 double crochets (dc). Once complete, pull the tail of the circle to close it tightly. Your work should form a small, dense circle with a sturdy foundation for the skull design. Make sure to count your stitches to verify you have 7 dc (7 sts).

Row 2: Building the Skull Shape
Ch 3 (which counts as your first dc), then make 2 dc into each stitch around the circle, which creates increases that shape your skull. By the end of this row, you should have a total of 14 dc (14 sts). As you stitch, you’ll notice the work starting to cup, forming the basic outline for the skull motif.

Row 3: Enhance the Design
For this row, ch 3, then dc in the same stitch. Work 1 dc in the next stitch and 2 dc in the following stitch. Repeat this pattern around the row, alternating between 1 dc and 2 dc. You will end up with 21 dc (21 sts), and your work should now be beginning to take on a more defined skull shape.

Row 4: Creating Eye Socket Spaces
Ch 3 for the next row, then dc in the next stitch. Now, skip the next stitch to create the eye socket, then continue by working 2 dc in the next stitch. Repeat this around the row, skipping one stitch every few dc to create eye socket openings. At the end, you should have 30 dc (30 sts). Your work will have noticeable gaps where the eye sockets will be placed.

Row 5: Forming the Skull’s Mouth
This row continues to define the skull's features. Ch 3, then dc in the next three stitches. Next, skip 2 stitches to create a mouth gap, and make 2 dc in the following stitch. Repeat the pattern around, ensuring to space appropriately to maintain the shape. Your stitch count should now be 36 dc (36 sts), and your crochet skull square should be clearly visible.

Row 6: Transitioning to the Border
To add the border, ch 2 to start and then work a series of half double crochets (hdc) in each stitch around this row, which will create a solid edge. As you go, this will help maintain the squareness of your piece. At the end of the round, you should have a neatly finished round with 36 hdc (36 sts), and the edges should gradually appear more defined.

Step 7: Finalizing the Edge
For the last finishing round, ch 1 and work single crochet (sc) in each stitch around. This will give a clean, tidy finish to your crochet skull square. You can add increases in each corner if you’d like to maintain the square shape. At the finish, your border should have around 42 sc (42 sts). Your square is nearly complete and should now have a well-defined and charming shape ready for some festive flair!

What to Pair with Ghoulishly Cute Crochet Skull Square?

Imagine the cozy atmosphere you'll create as you stitch a delightful ensemble that brings your spooky theme to life.

  • Creepy Crawler Coasters: Perfect for sipping warm drinks, these coasters share the quirky skull motif while protecting your surfaces.

  • Sinister Skull Beanie: Wear your creativity! This hat complements the skull square effortlessly, adding warmth and whimsy to your festive look.

  • Spooky Skeleton Garland: String together multiple squares or skull motifs for a playful decoration that flutters in the autumn breeze.

  • Whimsical Witch Hat: This charming accessory pairs beautifully with the crochet skull square, making your Halloween outfit unforgettable.

  • Ghoulish Ghost Pillow: Add a soft touch to your decor; this pillow features friendly ghosts that balance the bold skull design with a playful flair.

Expert Tips for Crochet Skull Square

  • Tension Matters: Keep your tension consistent throughout the project to prevent distortion. A looser tension can cause the square to lose its shape.

  • Stitch Count: Regularly verify your stitch counts, especially during increases and transitions. Losing track can lead to uneven sections and a distorted final product.

  • Smooth Edges: When finishing with the single crochet border, pay attention to your tension to avoid a wavy edge. Making sc uniformly will give you a polished look.

  • Use a Stitch Marker: Keep track of your rounds with a stitch marker, especially during increases. This helps prevent losing count and keeps your rows aligned.

  • Block for Perfection: After completing your crochet skull square, block it to even out stitches and enhance its color vibrancy. This step is crucial for a stunning finish.

Care Instructions for Crochet Skull Square

Machine Washing: Use cold water on a gentle cycle to maintain the vibrant colors and prevent pilling. Avoid fabric softeners that can alter the texture.

Hand Washing: For a more delicate approach, soak in cold water with mild detergent. Gently swirl without agitation to preserve the shape of your crochet skull square.

Drying/Blocking: Lay the square flat to dry, reshaping as necessary to maintain its form. Blocking will enhance the texture and improve stitch definition beautifully.

Storage: Keep your finished piece in a cool, dry place away from direct sunlight to prevent fading and ensure longevity, ready for all your Halloween fun!

Crochet Skull Square Variations & Substitutions

Embrace the joy of personal expression by adding a unique twist to your crochet skull square!

  • Yarn Substitutions: Swap out acrylic for a cotton blend for a softer, breathable finish suitable for warmer climates.
  • Color Play: Mix in neon shades for an eye-catching design that screams fun—great for festive Halloween vibes!
  • Size Variations: To create larger squares, simply add more rounds and adjust stitch counts accordingly for cozy blankets.
  • Texture Arts: Incorporate bobble stitches to add depth to your skull design, enchanting the look and feel of your project.
  • Looped Edges: Add a playful touch with a fringe border, enhancing your crochet square’s character while inviting textures.
  • Pattern Contrast: Experiment with contrasting colors for the skull and background for a bold and striking visual impact that stands out.
  • Themed Embellishments: Consider attaching small crochet pumpkins or ghost appliqués to the corners for an extra playful Halloween touch.
  • Layering Technique: Combine two skull squares with a soft stuffing in between to make a spooky pillow—a fun addition to your decor!

Crochet Skull Square FAQs

Can I substitute yarn for this crochet skull square?
Absolutely! While worsted weight yarn (Category 4) is recommended, you can use other similar weight yarns, such as wool or acrylic, for their great stitch definition. Just be mindful of the texture and drape, as they might vary slightly.

How do I resize my crochet skull square to be larger or smaller?
Don't panic! To make your square larger, simply add more rounds and increase the number of stitches consistently. For smaller squares, reduce the stitch count in each round while ensuring it stays even. I recommend checking your gauge first to get the right size!

Why is my crochet skull square curling at the edges?
Curling can happen if your tension is too tight or if you are using a yarn that is too stiff. Try loosening your tension, or switch to a softer fiber blend. Blocking the finished square can also help smooth out those edges!

What hook size should I use for this pattern?
The recommended hook size for this crochet skull square is a 5mm (H-8). This size provides a nice balance between tightness and drape, allowing for beautiful stitch definition. If you notice your stitches are too tight or loose, feel free to adjust!

How do I fix dropped stitches in my crochet skull square?
It’s an easy fix! If you discover a dropped stitch, use your tapestry needle to carefully pull up the loose loop and reinsert it into the main fabric. For larger gaps, you may need to crochet back over that stitch with a small hook to secure it securely in place. Happy stitching!

Filed Under: Uncategorized

“Charming Floral Crochet Bracelet for a Whimsical Touch”

August 23, 2026 by Publisher Leave a Comment

"Charming Floral Crochet Bracelet for a Whimsical Touch"

As I sat on my favorite cozy chair, sunlight streaming through the window, the soft feel of my yarn whispered promises of creativity and joy. Today, I’m excited to share the pattern for this Charming Floral Crochet Bracelet—a project that effortlessly blends playful artistry with a feminine touch. With vibrant floral motifs, this floral crochet bracelet celebrates nature and serves as a delightful accessory for any spring or summer outfit. Suitable for those ready to level up their skills, this bracelet not only allows for customization of colors to match your wardrobe, but its lightweight texture ensures comfortable wear all day long. If you're ready to bring a little whimsy to your accessory game, let’s dive into the enchanting world of crochet!

Floral Crochet Bracelet Materials & Tools

For a successful creation of your floral crochet bracelet, gather the following supplies:

Yarn

  • Sport or DK Weight Yarn – Approximately 50-75 yards of a cotton or cotton-blend fiber is ideal for durability and shape retention.

Tools & Notions

  • 3.5mm (E) Crochet Hook – Perfect for detailed stitches and creating beautiful floral motifs.
  • Stitch Markers – Helpful for counting flower placements, though optional.
  • Yarn Needle – Essential for weaving in ends neatly after finishing your bracelet.

Get ready to bring your charming floral crochet bracelet to life and add a splash of whimsy to your accessory collection!

Why Will You Adore This Bracelet?

Stunning Floral Motifs: These intricate designs add a whimsical flair, perfect for casual outings or spring celebrations.
Skill Enhancement: A wonderful opportunity for intermediate crocheters to refine their techniques while creating something beautiful.
Vibrant Customization: Choose your favorite colors to create a unique piece that complements your style.
Comfortable Fit: The lightweight texture ensures you can wear this bracelet all day long without any fuss.
Artistic Expression: Enjoy the satisfaction of making a handcrafted accessory that showcases your creativity and love for crochet!

Gauge & Sizing Notes

Don't skip the gauge swatch! Checking your tension is crucial for your floral crochet bracelet to ensure it fits snugly and stays beautiful. A good guideline to keep in mind is that a 4×4 inch (10×10 cm) square typically equals around 14 double crochets by 8 rows, but it's always best to create your own swatch. To adjust the size of your bracelet, simply make your starting chain longer or shorter in multiples of 5 to accommodate the floral motifs. If your tension doesn’t match, and your swatch is too small, try going up a hook size for a looser fit—after all, a comfortable wrist is what you’re aiming for with this charming floral crochet bracelet!

Step-by-Step Pattern for Charming Floral Crochet Bracelet

Row 1: Create the Base Chain
Begin by chaining enough stitches to fit comfortably around your wrist, typically around 15-20 chains, depending on your desired length. Join the last chain to the first with a slip stitch (sl st) to form a loop. With the loop completed, work a round of single crochet (sc) into each back loop of the chain, ensuring a snug fit. Your foundation row should yield about 15-20 sts, depending on your chain length.

Round 2: Establish the Texture
Continuing from your base, now work in the round, placing one single crochet (sc) in each stitch around. This row adds texture and strength to your floral crochet bracelet. Remember to keep your tension even to ensure a lovely finish. At the end of this round, you will have the same stitch count as in the previous row (15-20 sts), creating a solid base that feels sturdy yet soft.

Row 3: Creating the Floral Motifs
Switch to your floral color yarn and begin creating the first flower. Start with a slip knot and ch 5, join with a sl st to form a ring. In the ring, work 2 double crochet (dc), 2 chains (ch), and another 2 dc to create the first petal. Repeat this process to form a total of 5 petals in the same ring. Your flower should appear fully rounded and fluffy, measuring about 2 inches across.

Row 4: Attaching the Flowers
With your first flower completed, use a slip stitch (sl st) to attach it securely to your base. Position it where you prefer, usually near the center, and finish by fastening off. Repeat Rows 3 and 4 to make 2-3 more flowers, spacing them evenly along the bracelet based on your design preference. Your floral crochet bracelet should begin to take shape with vibrant, eye-catching motifs.

Row 5: Adding Leaf Details
Between your floral motifs, create leaf shapes for added dimension. Start with a ch 5, then work 1 dc in the 3rd ch from the hook, 1 hdc in the next ch, and finish with a sl st in the last ch to form a triangle shape. Attach the leaf to your bracelet with a sl st and secure it between two flowers. After attaching several leaves, your charming floral crochet bracelet will showcase beautiful added details that highlight the flowers.

Step 6: Finishing Touches
Once all flowers and leaves are attached, take time to weave in any loose ends with a yarn needle. Gently block your floral crochet bracelet by wetting it and shaping it to ensure all elements lie flat and even. This final step enhances the bracelet’s overall aesthetic, allowing the floral motifs to pop beautifully. Your cozy, feminine accessory is now ready to wear, reflecting your creativity and love for crochet!

What to Pair with the Charming Floral Crochet Bracelet

Imagine layering your delicate crochet creations, enveloping yourself in a tapestry of vibrant colors and textures that radiate warmth and style.

  • Floral Headband: A matching headband adorned with flowers will beautifully frame your face and complete your ensemble.

  • Crochet Tote Bag: A lightweight tote accented with floral motifs offers a practical yet artistic way to carry your essentials while showcasing your crochet skills.

  • Petal Earrings: Create enchanting earrings featuring tiny flowers that mirror the bracelet's design, perfect for an eye-catching summer look.

  • Summer Scarf: A lightweight, floral-patterned scarf adds an artistic layer, making your outfit pop with color and elegance.

  • Matching Anklet: Stretch your creativity further by crafting an anklet that ties together the floral theme, perfect for breezy days at the beach.

How to Wash and Care for Your Floral Crochet Bracelet

Hand Washing: Use cold water and a mild detergent to gently clean your floral crochet bracelet. Avoid harsh scrubbing to maintain the delicate floral motifs.

Drying: Lay flat on a clean, dry towel to air dry. This prevents distortion and retains the bracelet's charming shape without causing any felting.

Storage: Keep your bracelet in a cool, dry place, ideally in a soft pouch or on a jewelry display to prevent any tangles or crushing of the flowers.

Blocking: If you notice any misshapen sections, gently block your bracelet using a damp cloth and shape it while flat. This enhances the overall appearance of your floral crochet bracelet.

Expert Tips for Crafting Your Bracelet

  • Consistent Tension: Ensure you're maintaining consistent tension throughout your work to keep the floral crochet bracelet snug and avoid distortion.

  • Count Your Stitches: Regularly count your stitches, especially when placing flowers, to maintain an even distribution and achieve a polished look.

  • Avoid Twisting: When creating your initial chain, be mindful not to twist it before joining—this common mistake can affect the bracelet's fit.

  • Secure Ends: Don’t forget to weave in all loose ends at the finish to ensure the bracelet remains tidy and intact for comfortable wear.

  • Gentle Blocking: Give your finished piece a gentle block to help the flowers bloom beautifully and preserve the overall shape of your charming bracelet.

Floral Crochet Bracelet Variations

Unlock your creativity and add a personal touch to this charming project!

  • Yarn Weight Switch: Try using a worsted weight yarn for a bolder bracelet that feels more substantial. The extra thickness adds personality and warmth.

  • Cotton vs. Acrylic: Experiment with soft acrylic yarn for a plush texture, or stick to cotton for a crisp look that retains its shape throughout wear. Each fiber brings unique charm!

  • Color Blocking: Use two contrasting colors to create a stunning visual effect. Alternate between floral motifs and solid colors for a bracelet that truly stands out during sunny outings.

  • Add Bead Centers: Incorporate beautiful beads in the center of your flowers for a sparkling twist. It’s a delightful way to elevate your accessory game!

  • Size Adjustment: To fit slimmer wrists, simply decrease the initial chain length. For a looser fit, increase the chain—flexibility means comfort!

  • Texture Boost: Introduce puff stitches to create a wavy texture in the flowers, adding dimension and intrigue to your floral motifs. It's a delightful surprise for the eye.

  • Fringe Play: Attach strands of fringe along the edge of the bracelet for a bohemian feel. This fun embellishment dances with movement, capturing attention effortlessly.

  • Border Detail: Finish with a scalloped border in a contrasting color for an elegant touch that beautifully frames the floral motifs. It gives your bracelet a polished, professional finish.

Charming Floral Crochet Bracelet FAQs

What type of yarn can I substitute if I don’t have cotton or a cotton-blend?
Absolutely! If you're out of cotton yarn, you can substitute with acrylic yarn, but keep in mind that it may alter the drape slightly. Consider a lighter DK weight acrylic that offers similar softness without compromising on the look of your floral crochet bracelet.

How can I adjust the bracelet size if I need it to be bigger or smaller?
Don't panic! To make your floral crochet bracelet larger, simply add extra chains to your initial base. For a smaller fit, reduce the number of chains. Just remember, this adjustment could also affect the number of floral motifs you can fit, so you might need to create fewer flowers for a balanced design.

Why does my work keep curling at the edges?
Curling edges are common, especially with intricate pieces! This can often be fixed by blocking your finished bracelet to help it lay flat. Additionally, ensuring your tension is consistent throughout your work can also reduce any unwanted curling effects.

What crochet hook size should I use for this project?
I recommend using a 3.5 mm (US size E) hook as stated in the pattern. This size allows for the detailed stitches required to bring your floral motifs to life. If you find the fabric too loose, consider switching to a smaller hook to achieve tighter stitches.

How do I fix a dropped stitch in my bracelet?
It's an easy fix! To repair a dropped stitch, locate the stitch and gently pull the yarn back up through the loop with your crochet hook. If more stitches are dropped, you may need to unravel a few rounds back to fix it properly. Take your time, and soon your charming floral crochet bracelet will be seamless!

Filed Under: Uncategorized

  • « Previous Page
  • 1
  • …
  • 15
  • 16
  • 17
  • 18
  • 19
  • …
  • 41
  • Next Page »

Recent Posts

  • Chic Crochet Watch Band Pattern: Scalloped Elegance
  • Vibrant Crochet Granny Square: A Floral Delight to Create
  • Pocket Otter Crochet: Your Adorable Amigurumi Companion
  • Cozy Up with This Festive Crochet Tree Cozy Pattern
  • Chic Crochet Babydoll Dress: A Timeless Pattern for Spring

Recent Comments

No comments to show.
Fast Crochet Patterns Logo

Welcome to Fast Crochet Patterns, your curated editorial blog for modern, handmade aesthetics. Discover an elegant collection of contemporary designs and carefully crafted tutorials—where every beautiful pattern is completely free to inspire your next creation.

Join the Studio

Subscribe for our latest free patterns and warm, minimal crochet inspiration delivered to your inbox.


Collections

  • Accessories
  • Amigurumi
  • Baby
  • Bags

More Patterns

  • Cardigan
  • Dress
  • Flowers
  • Granny Square

Information

  • About
  • Contact
  • Privacy Policy
  • Terms Of Use
  • Disclaimer

© 2026 Fast Crochet Patterns. All rights reserved.