Fast Crochet Patterns

  • Home
  • Contact
  • Patterns
    • Amigurumi
    • Granny Square
    • Flowers
    • Baby
    • Dress
    • Bags
    • Cardigan
    • Accessories
menu icon
go to homepage
  • Home
  • Contact
  • Patterns
    • Amigurumi
    • Granny Square
    • Flowers
    • Baby
    • Dress
    • Bags
    • Cardigan
    • Accessories
search icon
Homepage link
  • Home
  • Contact
  • Patterns
    • Amigurumi
    • Granny Square
    • Flowers
    • Baby
    • Dress
    • Bags
    • Cardigan
    • Accessories
×

Intricate Crochet Square Pattern: A Floral Delight for Crafters

September 1, 2026 by Publisher Leave a Comment

Intricate Crochet Square Pattern: A Floral Delight for Crafters

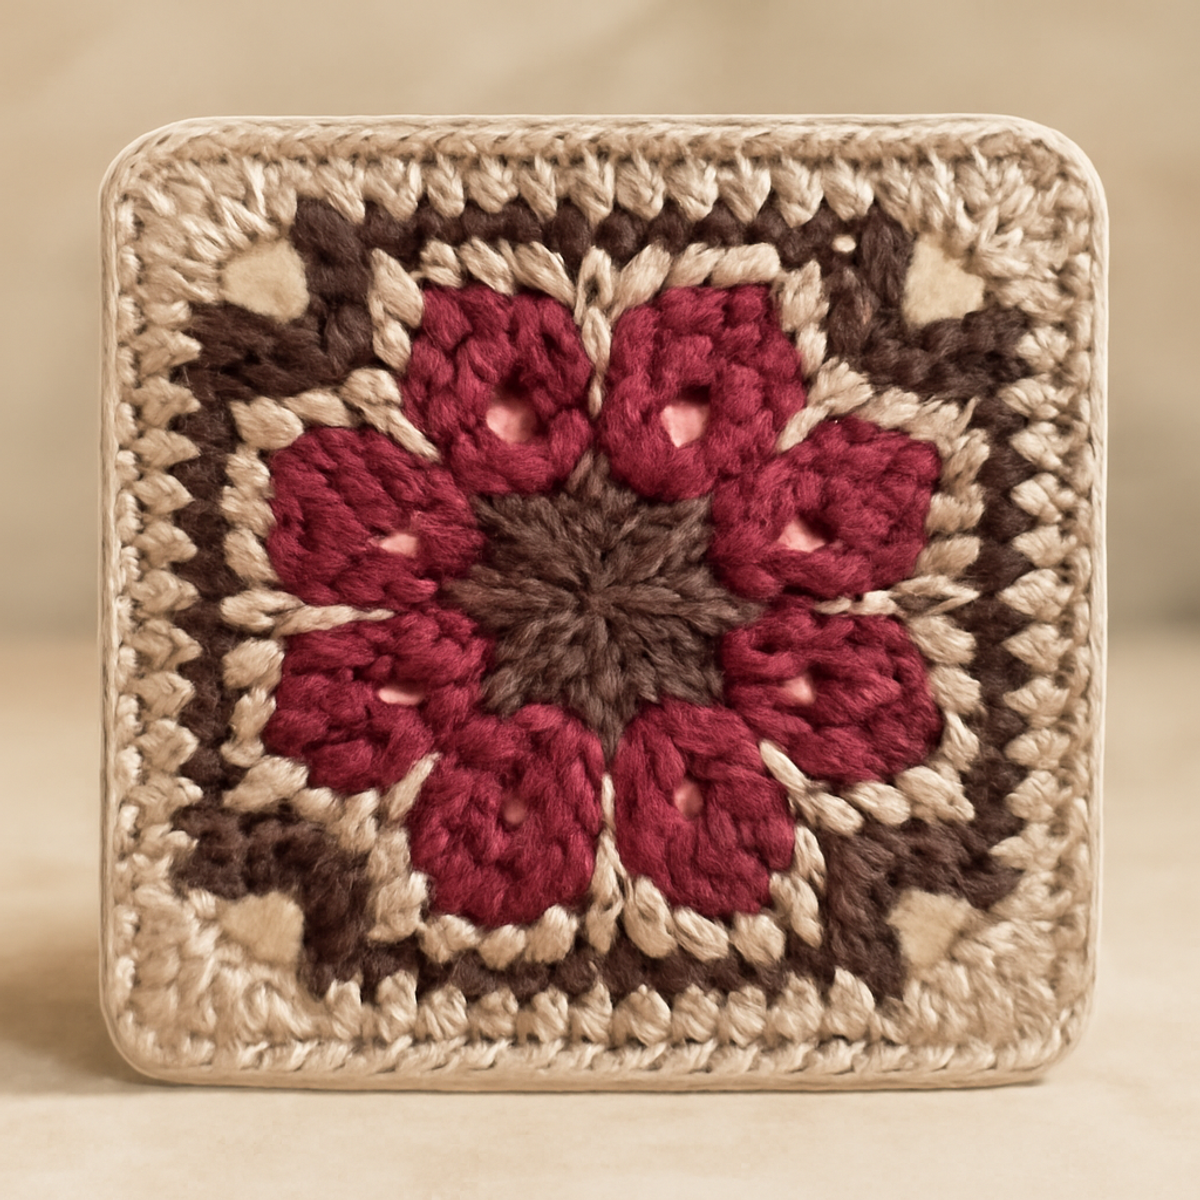
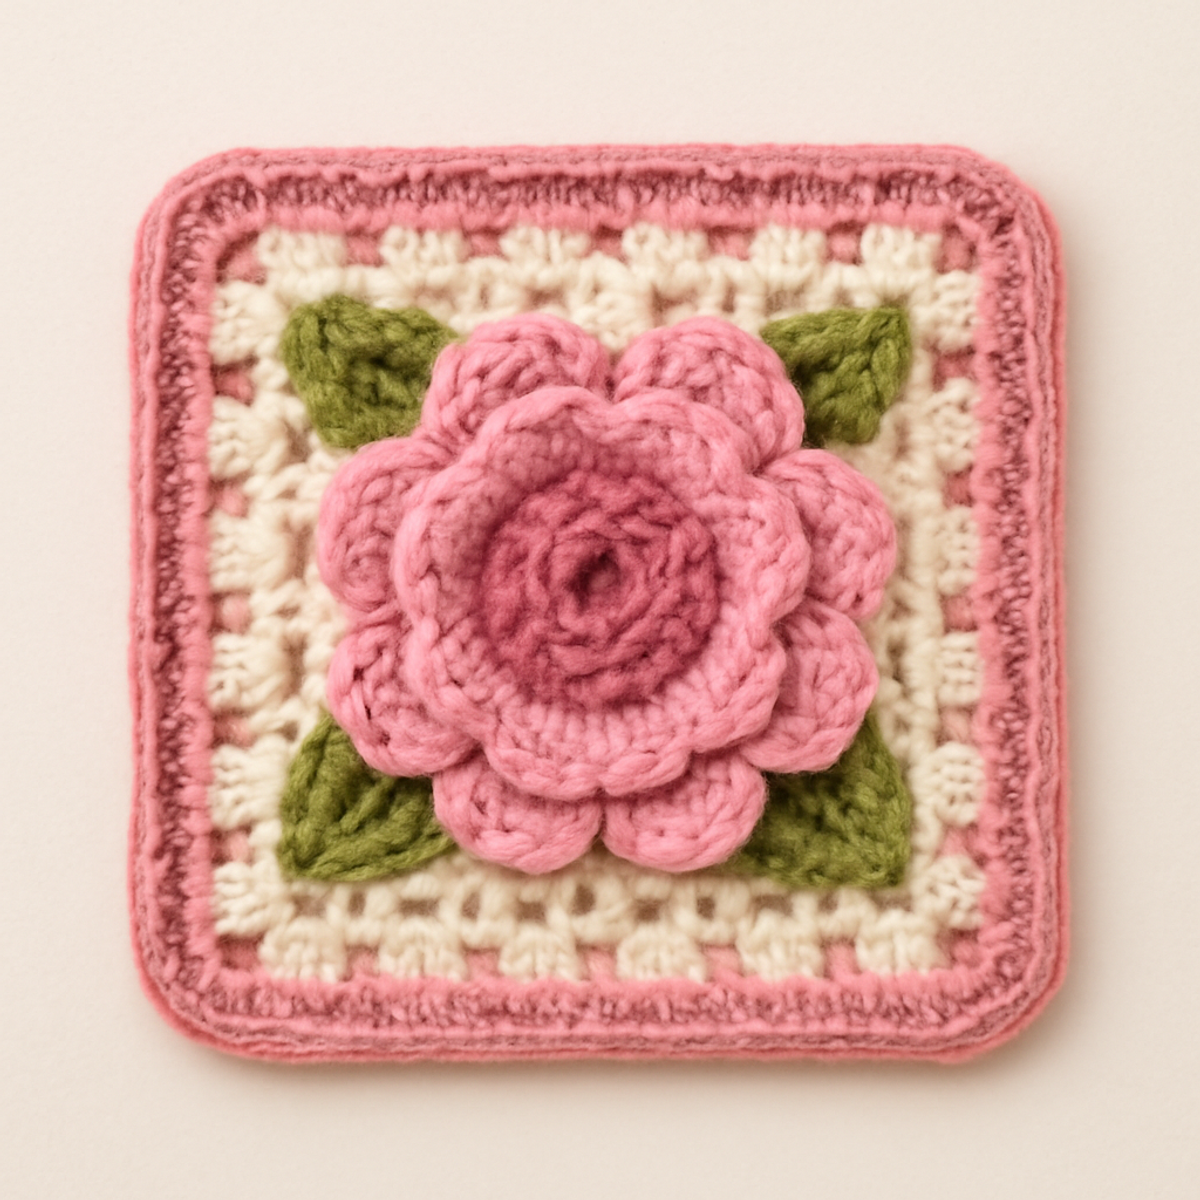
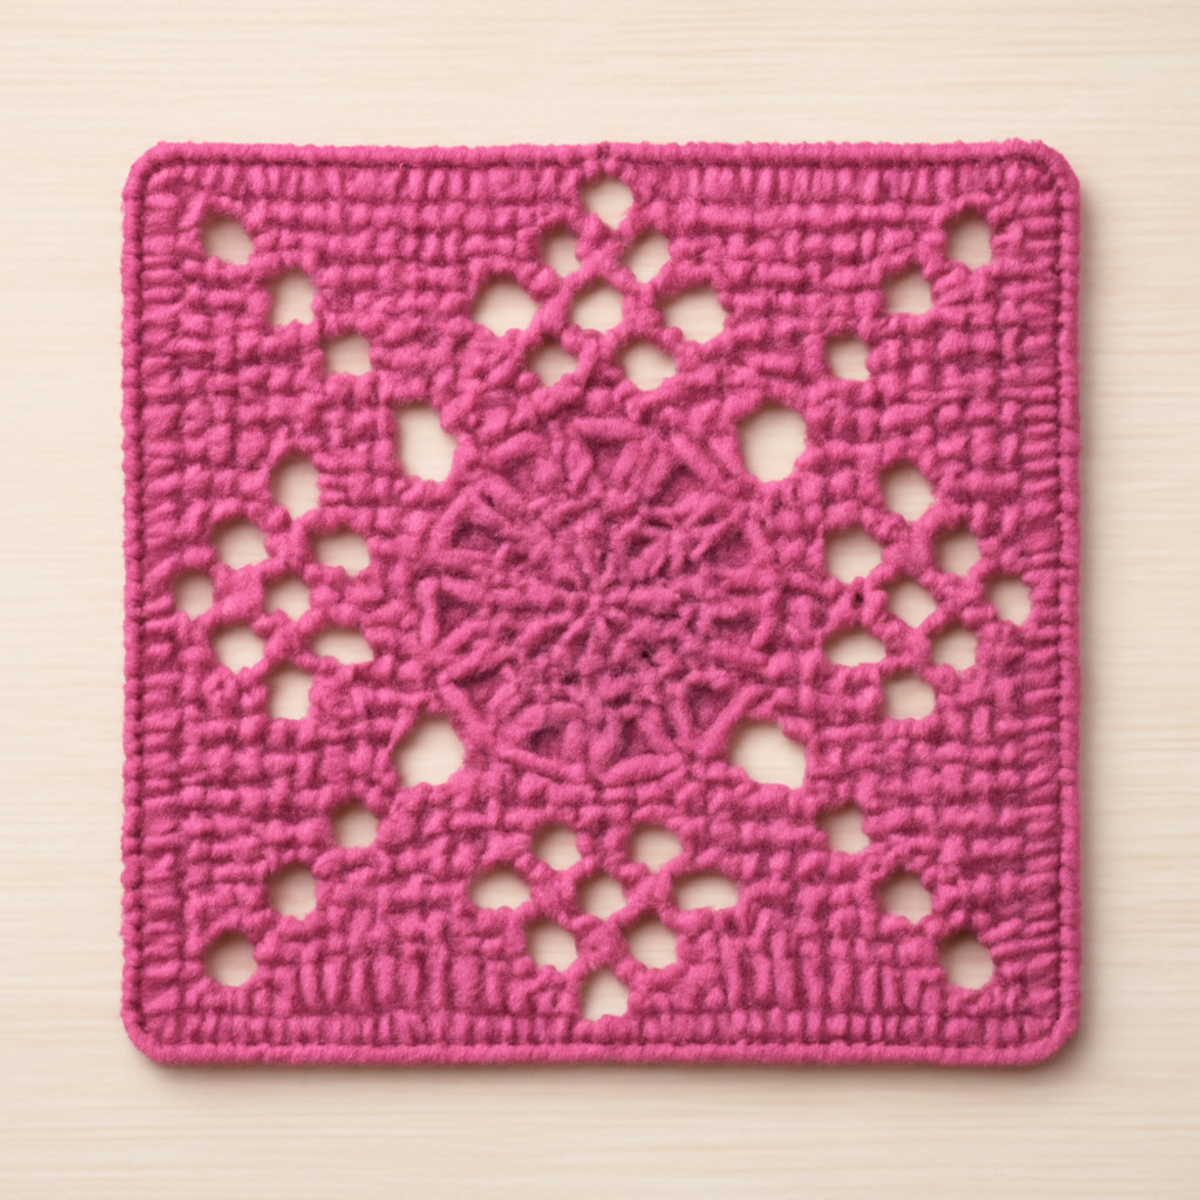
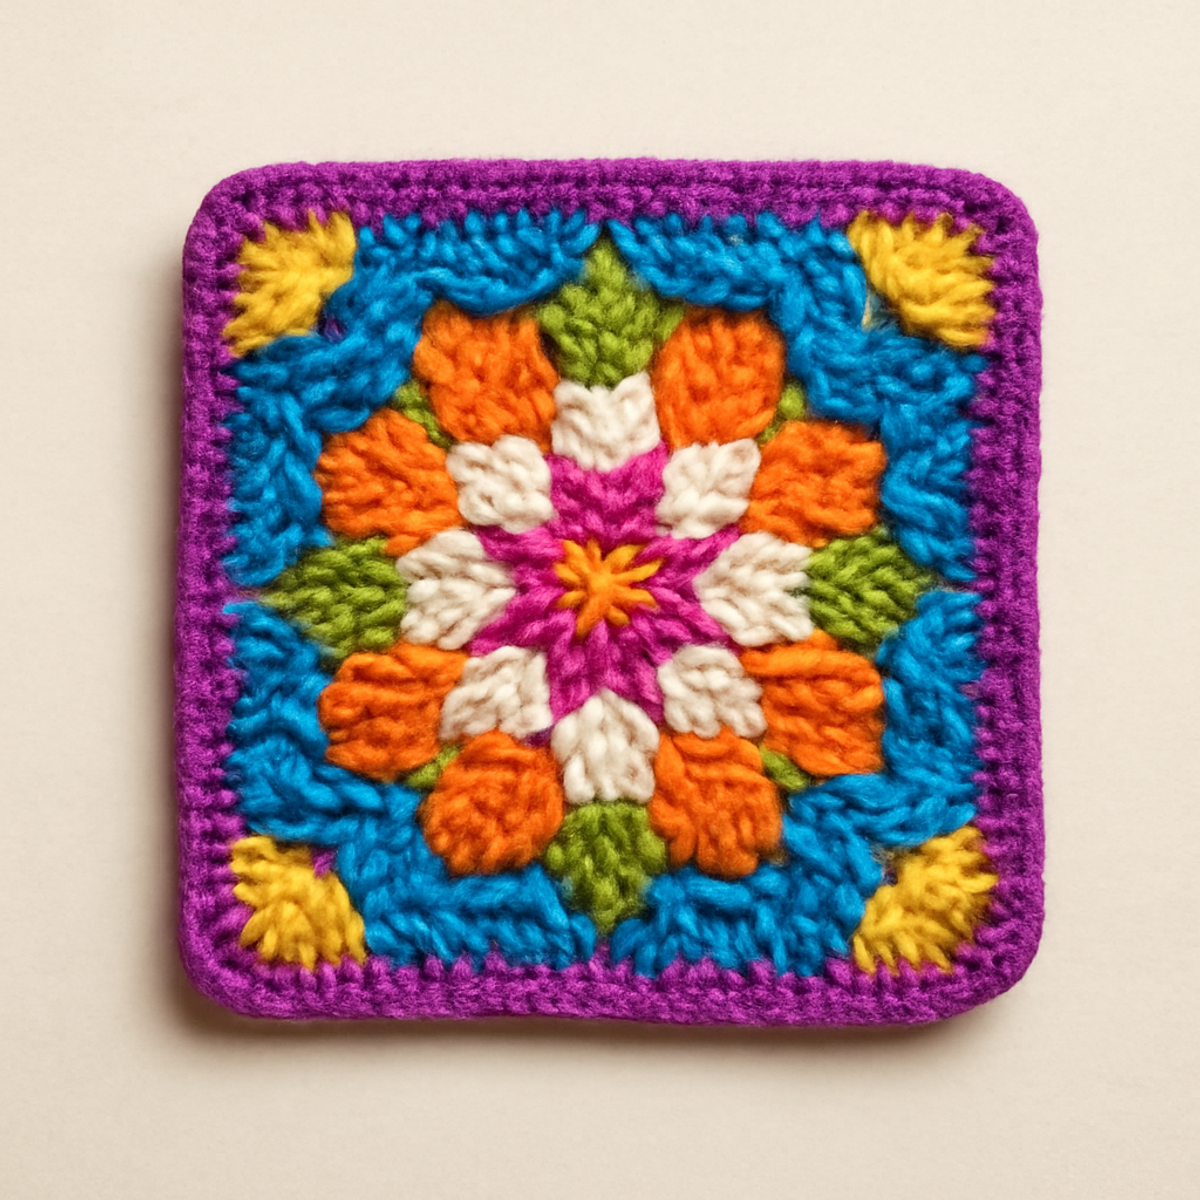
As I curled up on the couch with my crochet hook in hand, the soft embrace of medium-weight yarn welcomed me into a realm of creativity and calm. Today, I want to share with you the Intricate Floral Crochet Square pattern, a beautiful blend of geometric shapes and delicate floral motifs that elevates any crochet collection. This crochet square pattern not only provides an engaging challenge for those with intermediate skills, but it also offers the versatility to create stylish bags or cozy blankets that celebrate your unique style. With its charming pink hue and intricate design, you'll fall in love with the delightful drape of the finished piece—and the sense of accomplishment that comes with mastering a new technique. Let’s dive in and discover the joy of crafting something truly special together!

Intricate Floral Crochet Square Materials & Tools

  • Worsted Weight Yarn – Choose a soft cotton, bamboo, or acrylic fiber for a smooth and delightful finish; you'll need approximately 50 to 100 yards for your crochet square pattern.
  • 5.0mm (H-8) Crochet Hook – This size works perfectly for creating an openwork design, balancing firmness and drape.
  • Stitch Marker – Helpful for tracking round beginnings, ensuring consistency in your intricate stitches.
  • Scissors – To trim yarn ends neatly and maintain a tidy project.
  • Tapestry Needle – Ideal for weaving in ends and completing your crochet square to perfection.

Why is this crochet square pattern special?

Intricate Design: This crochet square pattern showcases a stunning blend of geometric shapes and floral motifs, making it a visual delight that pops in any project.

Engaging Challenge: Crafted for intermediate crafters, it offers a perfect opportunity to enhance your skills while having fun with different techniques.

Versatile Applications: Use these squares for stylish bags or cozy blankets, unlocking endless creative possibilities.

Charming Aesthetics: The vibrant pink hue adds a sophisticated touch, allowing your creations to stand out beautifully.

Delightful Drape: Enjoy a beautiful finished square that boasts a smooth texture and a lovely drape, ideal for showcasing your craftsmanship.

Customization Potential: There’s plenty of room for personal flair—play with colors and yarn types to make it uniquely yours!

Gauge & Sizing Notes

Don't skip the gauge swatch! For the Intricate Floral Crochet Square pattern, checking your gauge is essential to ensure your square comes out beautifully sized and drapes just right. A standard guideline is to aim for a 4×4 inch (10×10 cm) square using worsted weight yarn, resulting in about 16 double crochets by 8 rows. To tailor your crochet square pattern for different dimensions, adjust the starting chain in multiples of 4. If your swatch turns out too small, don't worry—simply try going up a hook size to relax your tension. Remember, finding the right tension swatch leads to better-fitting finished projects!

Step-by-Step Pattern for Intricate Floral Crochet Square

Row 1: Foundation Chain
Start by chaining 40 to create your foundation. After finishing the chain, join with a slip stitch (sl st) to form a ring, ensuring there are no twists. Your foundation should resemble a smooth loop, setting the stage for the rest of your crochet square pattern.

Row 2: Single Crochet Base
Ch 1 and work 40 single crochet (sc) into the center of the ring, placing your first sc into the same stitch where you joined. Join to the first sc with a sl st. Your round should have a solid feel now, forming a sturdy base to support the floral design.

Row 3: Establishing the Floral Motif
Start with a ch 3 (counts as first dc) and make 2 double crochets (dc) into the same stitch. Skip 2 sc, then in the next stitch, create a cluster of 3 dc (this forms the floral motif). Repeat this pattern around the square, joining with sl st at the top of the ch 3. You’ll have a lovely, intricate blooming effect.

Row 4: Chain Spaces and Openwork
Ch 2, then in the space between the clusters, work 1 dc, followed by ch 2. Repeat this in each space, maintaining the visual flow of the floral design. At the end of the round, make sure your work keeps an airy feel with visible openings (8 spaces formed).

Row 5: Connecting to the Final Design
Now, join with a sl st at the top of the first cluster. Ch 1, then sc in each ch 2 space from the previous row, adding a sc to each dc. This round adds structure, and you'll see your crochet square pattern coming to life, providing a robust foundation by anchoring the embellishments.

Row 6: Final Round for the Smooth Edge
Ch 1 and work 1 sc in each sc across the round. When you reach the corners, make 3 sc in the corner stitch for a rounded finish. Join with a sl st to the first sc. Your square should now exhibit a neat and tidy edge, preparing it for a polished look.

Step 2: Weaving in Ends
Finish by cutting the yarn, leaving a tail for weaving. Use the tapestry needle to weave in any loose ends expertly, ensuring a clean and professional finish to your intricate floral crochet square. Taking this time now gives your square a beautiful, refined appearance and highlights your crafting skills.

Expert Tips for Perfecting Your Crochet Square Pattern

  • Maintain Even Tension: Keep your stitch tension consistent throughout to prevent uneven areas, especially in the delicate openwork sections, ensuring a stunning finish.

  • Use a Stitch Marker: Place a stitch marker at the beginning of each round to help keep track of your progress and maintain the integrity of your crochet square pattern.

  • Count Your Stitches: Regularly count your stitches after each round to avoid losing count and ensure a perfect shape; it's easy to miss or accidentally add stitches in intricate patterns.

  • Gentle Blocking: If your square curls, gently block it after finishing. This not only flattens the edges but also helps the floral motifs to shine beautifully.

  • Secure Weaving: When weaving in ends, take the time to ensure each tail is perfectly secured. This step enhances the overall look of your crochet square and showcases your craftsmanship.

What to Pair with Intricate Floral Crochet Square?

As you celebrate the elegance of your crochet square pattern, let your creativity bloom with coordinating projects that echo its charm.

  • Charming Throw Pillow: Create a delightful throw pillow to complement your square's geometric shapes and floral motifs, adding a touch of comfort to your space.

  • Stylish Tote Bag: A matching tote bag can showcase the versatility of your crochet square, perfect for errands or casual outings, while highlighting your intricate stitch work.

  • Cozy Blanket: Turn several of these squares into a cozy blanket, weaving warmth and sophistication that will wrap you in beauty during chilly evenings.

  • Artful Wall Hanging: Bring your crochet artistry to the wall; connect multiple squares to create a stunning wall hanging that becomes a vibrant focal point in your decor.

  • Flower Embellished Headband: Convert your leftover yarn into a lovely headband adorned with petite floral designs, charmingly echoing the essence of your crochet square.

Each of these pairs adds depth and beauty to your crafting journey, allowing the joy of your intricate floral crochet square to flourish even further!

Crochet Square Pattern Variations

Embrace creativity and make this crochet square pattern uniquely yours with these delightful variations!

  • Color Swaps: Experiment with colors like lavender or turquoise to match your personal style or seasonal themes.

  • Yarn Substitutions: Try a merino wool or alpaca blend for added warmth—perfect for the colder months or cozy throws.

  • Size Adjustments: Change the hook size to create a larger or smaller square, allowing for different uses from coasters to cushions.

  • Texture Enhancements: Add fringe or a decorative border for a stylish flair that elevates your project even further.

  • Beaded Accents: Incorporate beads into the openwork sections for a touch of sparkle, giving your square a magical quality.

  • Striped Motifs: Create a striped version by alternating colors every few rows, enhancing the geometric design with playful color contrasts.

  • Mixing Fibers: Blend cotton with a bit of acrylic for a durability boost, achieving a lovely balance between softness and resilience.

  • Fringed Edges: Finish the edges with a fringe for a boho look; this playful detail brings a fresh vibe to your floral square.

Washing & Care Instructions for Intricate Floral Crochet Square

Machine Washing: Use cold water on a gentle cycle to maintain the integrity of your crochet square pattern. Avoid harsh agitation to prevent felting or pilling.

Hand Washing: For delicate care, hand wash your square in cold water with a mild detergent, gently pressing the fabric without wringing it out.

Drying/Blocking: Lay your crochet square flat on a clean, dry towel to dry, reshaping it to maintain its form. Gentle blocking can help accentuate floral motifs and smooth the edges.

Storage: Store your crochet square in a cool, dry place away from direct sunlight to prevent fading and maintain its beautiful pink hue.

Intricate Floral Crochet Square FAQs

Can I use a different type of yarn for this crochet square pattern?
Absolutely! You can substitute the medium (worsted weight) yarn with any soft cotton, bamboo, or acrylic fiber you love. Just ensure that it has a similar weight for the best results.

How can I adjust the size of my crochet square?
To make your square bigger or smaller, you can adjust your hook size. Using a larger hook will give you a looser gauge, resulting in a bigger square, while a smaller hook will tighten it up. You can also add or remove chains at the foundation to customize the dimensions.

Why is my work curling at the edges?
Don't panic! Curling often occurs in crochet due to tension issues or if the piece is too small. The easiest fix is to gently block your square after finishing. This helps flatten the edges and enhances the design, revealing those gorgeous floral motifs.

What hook size should I use for this pattern?
I recommend a 5.0mm (H-8) crochet hook for this project. It’s perfectly suited for creating the openwork design while ensuring your stitches are both firm and drapey.

How do I fix dropped stitches in my crochet square?
If you notice dropped stitches, don’t worry! You can easily fix them by picking up the dropped stitch with your hook and reworking it through the rows. If you find it too challenging, a slip stitch can help rejoin the fabric while maintaining the integrity of your design.
Filed Under: Uncategorized

Vibrant Crochet Square Pattern for Cozy Creations

September 1, 2026 by Publisher Leave a Comment

Vibrant Crochet Square Pattern for Cozy Creations

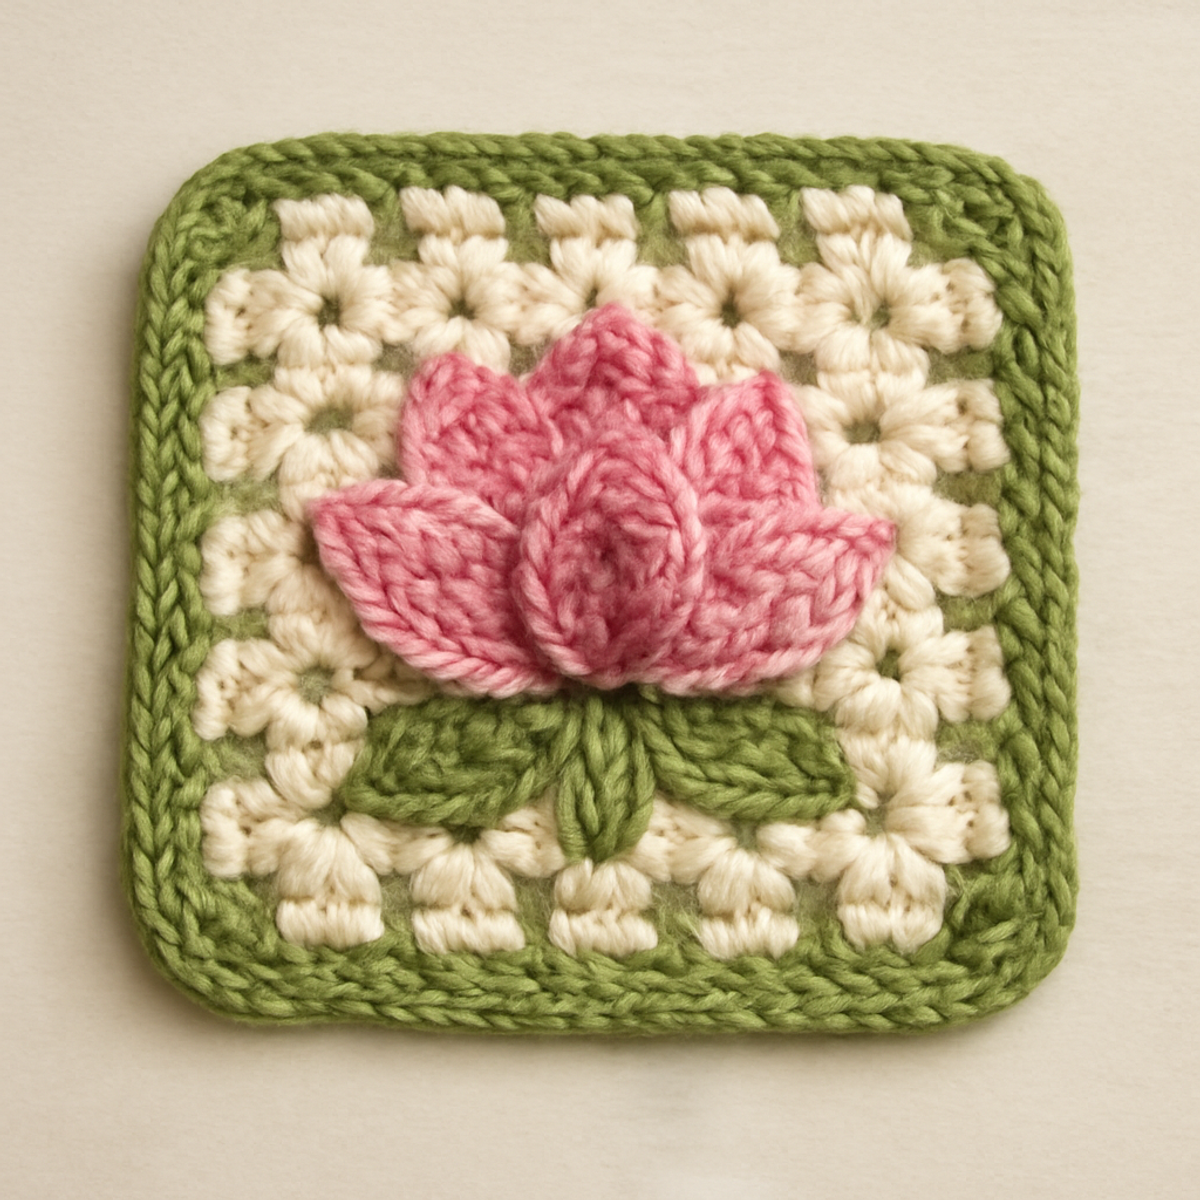
Feeling the yarn glide through my fingers as I create something unique fills me with joy, especially when crafting the vibrant floral crochet square. This crochet square pattern is not just a project; it's an opportunity for experienced beginners and intermediate crocheters to express their creativity through cheerful colors and intricate designs. With its lovely blend of floral and geometric elements, you’ll find that this square works up quickly and serves as a stunning centerpiece, whether for a cozy blanket, a chic bag, or decorative wall art. Plus, the soft, textured finish adds warmth to any space, making it the perfect addition to your fiber arts repertoire. Are you ready to dive into this delightful journey of stitches and color? Let's get started!

Vibrant Floral Crochet Square Materials & Tools

  • Worsted Weight Yarn – Choose 100% cotton or a cotton blend for durability, approximately 50-75 yards of each color depending on your project scope.
  • 4.0 mm (G-6) Hook – This size is ideal for achieving the detailed stitches in your crochet square pattern.
  • Stitch Markers – Use these handy tools to keep track of your rounds and prevent any confusion during your project.
  • Yarn Needle – Perfect for weaving in the ends once your vibrant floral crochet square is complete!

Why Is This Crochet Square Pattern Special?

Unique Design Elements: The vibrant floral motifs blend floral and geometric styles, creating a delightful visual that captures attention in any room.
Quick to Complete: This crochet square pattern works up quickly, making it perfect for crafters short on time who still want to create something beautiful.
Versatile Applications: Whether you’re crafting a cozy blanket or a chic bag, this square serves multiple purposes, elevating your projects with its colorful charm.
Soft & Textured Finish: The combination of stitches results in a dense yet soft drape, ensuring that your finished pieces are not only stylish but also comforting.
Room for Creativity: Adjust colors and size freely, allowing for a truly personalized touch that reflects your unique style and flair!

Gauge & Sizing Notes

Don't skip the gauge swatch! Ensuring the correct tension is vital for your vibrant floral crochet square to maintain its intended size and shape. A standard guideline to follow is to create a 4×4 inch (10×10 cm) swatch that yields approximately 12 double crochets and 8 rows. If your gauge is too loose or tight, you may need to adjust your hook size—if it’s too small, try going up a hook size. To make your square larger, increase your starting chain in multiples of 6 + 2; conversely, for a smaller square, decrease by the same multiples. Remember, these adjustments will help your crochet square pattern come out just right!

Step-by-Step Pattern for Vibrant Floral Crochet Square

Row 1: Begin the Magic Ring
Start with a magic ring. Chain 3 (counts as your first double crochet), then work 11 double crochets (dc) into the ring. Pull the tail to close the ring tightly, and join with a slip stitch (sl st) to the top of the initial chain 3. Your work should form a small circular base with a total of 12 stitches (12 sts).

Round 2: Create the Petals
Chain 3 (counts as dc), then work 1 dc, ch 2, 2 dc in the same stitch to create your first petal. Skip the next dc, and in the following stitch, repeat the petal pattern. Continue this pattern around, ending with a sl st in the top of the chain 3 from the beginning. You should have 6 petals formed with 12 double crochets in between (6 petals).

Round 3: Expand the Floral Design
Join a new color with a sl st to any ch 2 space from the previous round. Chain 1 (counts as sc) and work 2 sc, ch 2, 2 sc in the same space to form a corner. In each ch 2 space, repeat this pattern around the entire square, joining with a sl st to the first sc. Your work should start to take shape with a lovely frame, resulting in 24 total stitches (24 sts).

Round 4: Forming the Outer Round
Slip stitch into the next sc and chain 3 (counts as first dc), then work 1 dc, ch 1, 2 dc in each corner space. In between corners, work 2 double crochets in each sc. Join with a sl st to the top of your initial chain 3. Your square should begin to get larger with a total of 48 stitches (48 sts).

Round 5: Adding Texture with Cluster Stitches
Change colors again and join with a sl st in any ch 1 space. Chain 1 (counts as sc), then work a cluster of 3 dc into the same space. To finish the cluster, pull the last yarn over through all loops on the hook. Repeat this cluster in each ch 1 space while sc in chain corners, joining at the end with a sl st. You should notice a delightful texture as your work expands (16 clusters).

Round 6: Finalizing the Border
To form a solid border, change to a contrasting color and sc evenly around the entire square. In each corner, work 3 sc to round it off nicely. Finish with a sl st to the first sc. This round should enhance the shape and stabilize your crochet square pattern while resulting in a polished look with a total of 96 stitches (96 sts).

Step 7: Weave in Ends and Block
Once the vibrant floral crochet square is completed, weave in all ends using a yarn needle. Gently block your square to set its shape and help the colors pop. This last step is crucial for achieving that beautiful, crisp finish, making your finished square about 6×6 inches and ready for your next cozy creation!

What to Pair with Vibrant Floral Crochet Square

As you bask in the joy of your colorful creation, consider complementing your vibrant floral crochet square with additional cozy projects.

  • Cozy Blanket: Create a warm and inviting blanket using multiple squares for a stunning patchwork effect.
  • Chic Tote Bag: Design a matching bag to carry your essentials, showcasing the charming square as decorative flair.
  • Floral Pillows: Make cushion covers featuring the square motif, bringing a burst of color and comfort to your living space.
  • Wall Hanging: Craft a modern wall art piece by arranging your squares in an artistic display, adding personality to any room.
  • Playful Table Runner: Stitch together several squares to form a delightful table runner, perfect for brightening up meal times.

Each of these suggestions beautifully complements the cheerful essence of your crochet square pattern, inviting you to continue exploring the wonders of fiber arts.

Crochet Square Pattern Variations

Feeling the thrill of creativity is what makes crochet truly special, and personalizing your vibrant floral crochet square adds that unique touch!

  • Yarn Weight Swap: Experiment with lighter yarns, like DK weight, for a breezier square that’s perfect for layering.

  • Fiber Alternatives: Use an acrylic blend for a warm and soft finish, great for cozy items, while also being budget-friendly!

  • Color Blocking: Create stunning squares by alternating sections of colors, giving a contemporary twist to the vintage design with sharp contrast.

  • Larger Squares: Scale up your project by using a larger hook size and more yarn, transforming your square into a plush pillow or cozy blanket square.

  • Texture Additions: Incorporate fun elements like pom-poms or fringe along the edges for playful accents. These little details make your piece more dynamic!

  • Seasonal Themes: Change the color palette based on seasons—for example, earthy tones in autumn or pastels in spring will refresh your squares accordingly.

  • Mixed Stitch Techniques: Incorporate surface crochet or embroidery to create intricate patterns on top of the square, turning a simple project into a stunning masterpiece.

  • Shape Alteration: Try making hexagons or triangles instead of squares by adjusting your stitch count; this can lead to exciting new designs in your crochet projects.

Expert Tips for Crochet Square Success

  • Watch Your Tension: Keep your tension consistent throughout your work; loose stitches can create uneven edges and distort the shape of your crochet square pattern.

  • Count Wisely: Avoid losing count by checking each round as you finish. Use stitch markers to help you keep track of where you are in your pattern.

  • Secure First & Last Stitches: Make sure your first and last stitches are snugly made to avoid gaps. Tighten your magic ring properly to give your square a solid start.

  • Block Your Piece: After finishing, lightly block your crochet square to set its shape. This step enhances the texture and makes the colors stand out beautifully.

  • Take Breaks: If you're feeling frustrated, step away for a bit! A fresh perspective helps avoid common mistakes and keeps your crochet experience enjoyable.

How to Wash and Care for Your Crochet Square

Machine Washing: Use a gentle cycle with cold water to preserve the vibrant colors of your crochet square pattern and prevent any damage to the fibers.

Hand Washing: For delicate care, soak in cold water with a mild detergent, gently agitating with your hands to remove dirt without felting or pilling.

Drying/Blocking: Lay flat on a clean, dry towel to reshape your square, avoiding heat sources that can alter the texture or colors—this helps maintain its lovely form.

Storage: Keep your finished crochet square pattern in a dry, cool place, away from direct sunlight to prevent fading over time and ensure its beauty lasts for years to come.

Vibrant Floral Crochet Square FAQs

Can I substitute the yarn for this crochet square pattern?
Absolutely! While the recommended yarn is 100% cotton or a cotton blend, you can substitute with an acrylic blend for added warmth. Just be sure your chosen yarn is still worsted weight (category 4) to maintain the correct gauge.

How can I make my square larger or smaller?
If you want to resize your vibrant floral crochet square, adjusting the hook size is an easy fix! Using a larger hook will create a bigger square, while a smaller hook will tighten and shrink it. Alternatively, you can also switch to a thicker weight yarn for a larger size or a lighter weight yarn for a smaller finish.

Why is my work curling at the edges?
Don't panic! Curling can happen due to uneven tension or not enough stitches in the rounds. To remedy this, ensure your tension is consistent and try adding a few more stitches in your next round to help flatten it out. Blocking your finished square can also help it lay flat beautifully!

What size hook should I use for this crochet square pattern?
For the vibrant floral crochet square, a 4.0 mm (G-6) hook is recommended. This size allows you to achieve the detailed stitches necessary for the floral design while keeping your square neat and structured.

How do I fix dropped stitches in my square?
It's easier than you might think! Simply locate the dropped stitch—use a yarn needle or crochet hook to catch it again and pull it back through to the top row. Make sure to carefully weave in the ends to secure the stitch, so it doesn’t unravel further!

What do I do if my colors are not popping?
If your vibrant floral crochet square isn’t as colorful as you hoped, consider blocking your square lightly. This helps set the shape and enhance the colors. You can also try using brighter or more contrasting color combinations in your next square to really make it stand out!

Filed Under: Uncategorized

Charming Halloween Crochet Coaster Pattern for Beginners

September 1, 2026 by Publisher Leave a Comment

Charming Halloween Crochet Coaster Pattern for Beginners

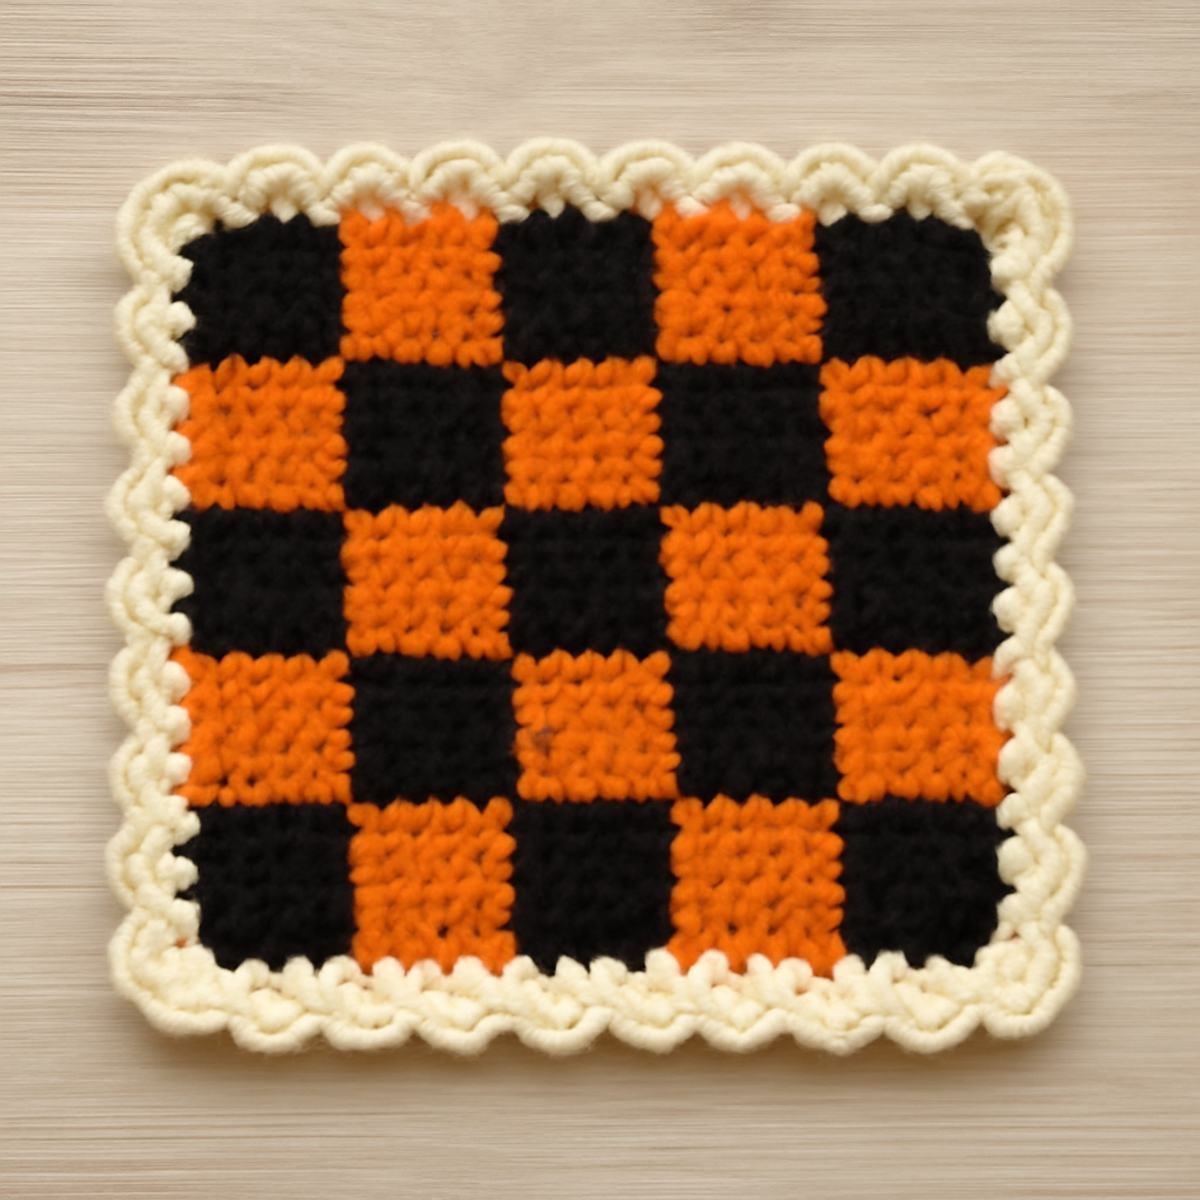
As the chill of autumn sets in, I'm reminded of cozy evenings filled with warmth—especially when I reach for my crochet hook and some delightful yarn. This Halloween-inspired crochet coaster pattern offers the perfect blend of charm and functionality, transforming your space into a seasonal haven. Designed for those with a little crochet experience, this project features a striking checkerboard of orange and black, making it an irresistible addition to your fall decor. Not only is it a practical piece to hold your favorite warming beverage, but it’s also an excellent way to refine your skills with colorwork and stitch definition. Whether you're crafting for yourself or whipping up festive gifts, you’ll appreciate the flexibility of this design. Are you ready to create a cozy touch of Halloween magic? Let’s get stitching!

Crochet Coaster Pattern Materials & Tools

Estimated supplies for a delightful project:

  • Worsted Weight Yarn – Approximately 150 yards total, with equal portions of black and orange, plus cream for the border.
  • 100% Acrylic Yarn – This type offers durability and lovely sheen, ideal for showcasing your crochet coaster pattern.
  • 5.0mm (H/8) Hook – Perfect size to achieve great stitch definition in your coaster design.
  • No Additional Notions Required – This project keeps it simple; no buttons or stitch markers needed for construction.

Why Choose This Crochet Coaster Pattern?

Delightful design: This Halloween crochet coaster offers a striking blend of orange and black, making it a festive centerpiece for your home decor. Skill-building: The pattern provides a fantastic opportunity to practice colorwork and stitch definition, enhancing your crocheting abilities. Versatile use: Whether for seasonal decor or everyday use, these coasters are both functional and aesthetic. Easy materials: With just a few basic supplies, including 100% acrylic yarn, you can create a durable piece that showcases your creativity. Customizable: Feel free to switch up the colors for different occasions or personalize it with embellishments, ensuring that your finished piece is uniquely yours. Get ready to enjoy every stitch!

Gauge & Sizing Notes

Don't skip the gauge swatch! Checking your tension is essential to ensure your crochet coaster pattern turns out the right size—especially since it measures approximately 8 inches square at completion. A general guideline for tension is to aim for 4×4 inches (10×10 cm) to equal 16 single crochets and 16 rows, but results may vary. If you want to make the coaster larger, adjust by increasing your starting chain in multiples of 2 to maintain the pattern's integrity. If your swatch is smaller than expected, simply try going up a hook size for better results. Enjoy crafting the perfect festive coaster!

Step-by-Step Pattern for Crochet Coaster Pattern

Row 1: Start the Checkerboard Base
Ch 26 to create the foundation chain for your crochet coaster pattern. In the second ch from the hook, make 1 sc. Continue to sc across the chain until the end, resulting in 25 sc (25 sts). Your work should appear flat and evenly spaced.

Row 2: First Color Change
Change to black yarn. Ch 1 and turn, then sc in the first stitch. For the checkerboard effect, alternate between 1 orange sc in the next stitch and 1 black sc in the following until you reach the end, ensuring the last stitch is black. You should now have a neat alternating pattern (25 sts).

Row 3: Continue the Pattern
Switch back to orange yarn. Ch 1 and turn your work. As before, sc in the first stitch, alternating the colors across the row. Remember the pattern: 1 orange, 1 black. Complete the row with orange ending; you’ll have a fresh, vibrant look for your coaster (25 sts).

Row 4: Repeat the Color Changes
Repeat the previous row by changing to black again. Ch 1 and turn, continuing to alternate with each sc. This will emphasize the checkerboard style of your crochet coaster, and after completing this row, take a moment to admire your work as it begins to pop with that Halloween spirit (25 sts).

Row 5: Finalize the Body
Continue adding rows in this new checkerboard pattern until you have a total of 8 rows. Finish with 1 last black row to frame your coaster. You should have a solid square piece, about 8 inches across, making a lovely base for drinks or decor.

Step 6: Create the Scalloped Border
To begin the border, switch to cream yarn. Ch 3 and dc in the same stitch. Then make 2 dc in each corner stitch, and 1 dc in each side stitch, creating a textured border. Join with a sl st to the first dc of the round, keeping a tidy finish around your coaster.

Step 7: Complete the Edging
Continue the scalloped border by making a 1-3-1 scallop at each corner (1 dc, ch 2, 1 dc) while placing 1 sc between each scallop along the straight edges. This will add a lovely finish to your Halloween coaster. After completing the entire border, join with a sl st and weave in any loose ends.

Step 8: Finishing Touches
To refine your crochet coaster pattern, block the finished piece to set the shape. This will enhance the texture and definition, helping your coaster lie flat and showcase its festive design beautifully. Let it dry completely before usage, and enjoy your functional and aesthetic creation!

Care Instructions for Your Crochet Coaster

Machine Washing: Use cold water on a gentle cycle to wash your crochet coaster pattern, avoiding agitation that could lead to felting or pilling.

Hand Washing: For delicate care, hand wash your coaster in cold water with mild detergent. Gently squeeze to remove dirt, but do not wring out the fabric.

Drying/Blocking: Lay flat on a clean, dry towel to reshape and allow to air dry completely. Avoid hanging, as this can cause stretching.

Storage: Keep your coasters in a cool, dry place. Store them flat to maintain their shape, and consider stacking with tissue paper in between to prevent creasing.

What to Pair with Halloween Crochet Coaster

As you conjure up festive vibes with your crochet coaster pattern, why not continue the creative spell with matching projects?

  • Spooky Mug Cozy: Keep your drinks warm and snug with a cozy that mirrors the coaster’s striking colors and texture.

  • Charming Ghost or Pumpkin Amigurumi: Add a playful touch to your seasonal decor. These little creatures will enchant any space, enhancing that Halloween spirit.

  • Autumn Table Runner: Create a beautiful table centerpiece that ties in the orange and black hues, inviting warmth at every gathering. Its lengthwise design echoes the coaster’s charm perfectly.

  • Matching Cloth Napkins: Elevate your dining experience with handcrafted napkins featuring the same colorway—perfect for fall feasts or Halloween parties.

Embrace the cozy atmosphere as you stitch together this festive collection!

Crochet Coaster Pattern Variations

As you embark on this cozy project, let your creativity shine by adding unique twists that suit your style and space.

  • Yarn Weight Swaps: Use a lighter yarn for a delicate, lacy effect, perfect for spring gatherings. Choose a DK weight for finer stitches.

  • Color Palette Play: Switch the spooky orange and black for soft pastels to create a charming springtime aesthetic. Imagine a baby blue and pale pink set gracing your table.

  • Sizing Adjustments: For a larger coaster, increase the chain foundation to 30 or 32 stitches. This allows for more expansive designs and holds larger mugs with ease.

  • Texture Modifications: Add a fun twist by incorporating a bobble stitch in the center of each square for an engaging texture that feels delightful to the touch.

  • Embellished Edges: Border your coaster with a playful fringe or pom-poms to enhance its character. This little detail can bring a whimsical feel to your seasonal celebrations.

  • Seasonal Themes: Create themed coasters for different holidays by using colors and motifs specific to each occasion, like reds and greens for Christmas or pastels for Easter.

  • Creative Color Blocking: Instead of a standard checkerboard, consider horizontal or vertical stripes for an unexpected yet stylish variation.

  • Layered Coasters: Opt for a double-layered coaster by working two coasters of the same base size, then whip stitch them together for added durability.

Expert Tips for Your Crochet Coaster

  • Maintain Tension: Keep a close watch on your tension when switching colors; consistent tension helps prevent puckering in your crochet coaster pattern.

  • Count Your Stitches: Always count your stitches after completing each row to ensure you maintain the intended square dimensions throughout the project.

  • Block Your Coaster: Take the time to block the finished piece to define its shape and enhance the textured border, allowing the design to truly shine.

  • Stay Focused: Avoid distractions while crocheting; it's easy to lose count or drop a stitch, which can affect the overall appearance of your coaster.

  • Use a Stitch Marker: Consider using a stitch marker to mark the beginning of each row. This can help you easily track your progress and maintain consistency.

Crochet Coaster Pattern FAQs

Can I substitute yarn? What if I don’t have worsted weight?
Absolutely! You can use a different yarn weight, but keep in mind it may change the final size of your coaster. If you opt for a lighter yarn, consider sizing down your hook to maintain a sturdy fabric. Just remember to adjust your starting chain and row counts as needed!

How do I adjust the size of my crochet coaster?
Don't panic! It’s easy to make your coaster bigger or smaller. You can simply increase or decrease the number of chains in your foundation row for width or add more rows for additional height. A smaller hook may also help achieve a denser fabric.

Why is my work curling, and how do I fix it?
Curling can occur if your tension is too tight or if you’re using the wrong hook size. I recommend checking your gauge first! If your stitches are consistent, blocking your finished coaster will help flatten it out and define the shape beautifully.

What size crochet hook should I use?
For this crochet coaster pattern, a 5.0mm (H/8) hook is ideal. This size helps achieve the stitch definition needed for both the checkerboard pattern and textured border. If you find it's too tight or loose with your yarn, feel free to adjust up or down slightly to match your tension.

What should I do if I drop a stitch while crocheting?
Don't worry, it's an easy fix! If you drop a stitch, simply use your crochet hook to pick it back up. Make sure to pull the yarn snugly to maintain even tension. If you've lost track of your stitch count, count them after every row to keep everything in line.

Can I add embellishments to my coaster?
Of course! Adding embroidery or other decorative touches can personalize your crochet coaster pattern and take it to the next level. Just make sure to keep the delicate nature of your stitches in mind, so they don’t overwhelm the main design. Happy decorating!

Filed Under: Uncategorized

Charming Spooky Crochet Square for a Cozy Halloween Decor

September 1, 2026 by Publisher Leave a Comment

Charming Spooky Crochet Square for a Cozy Halloween Decor

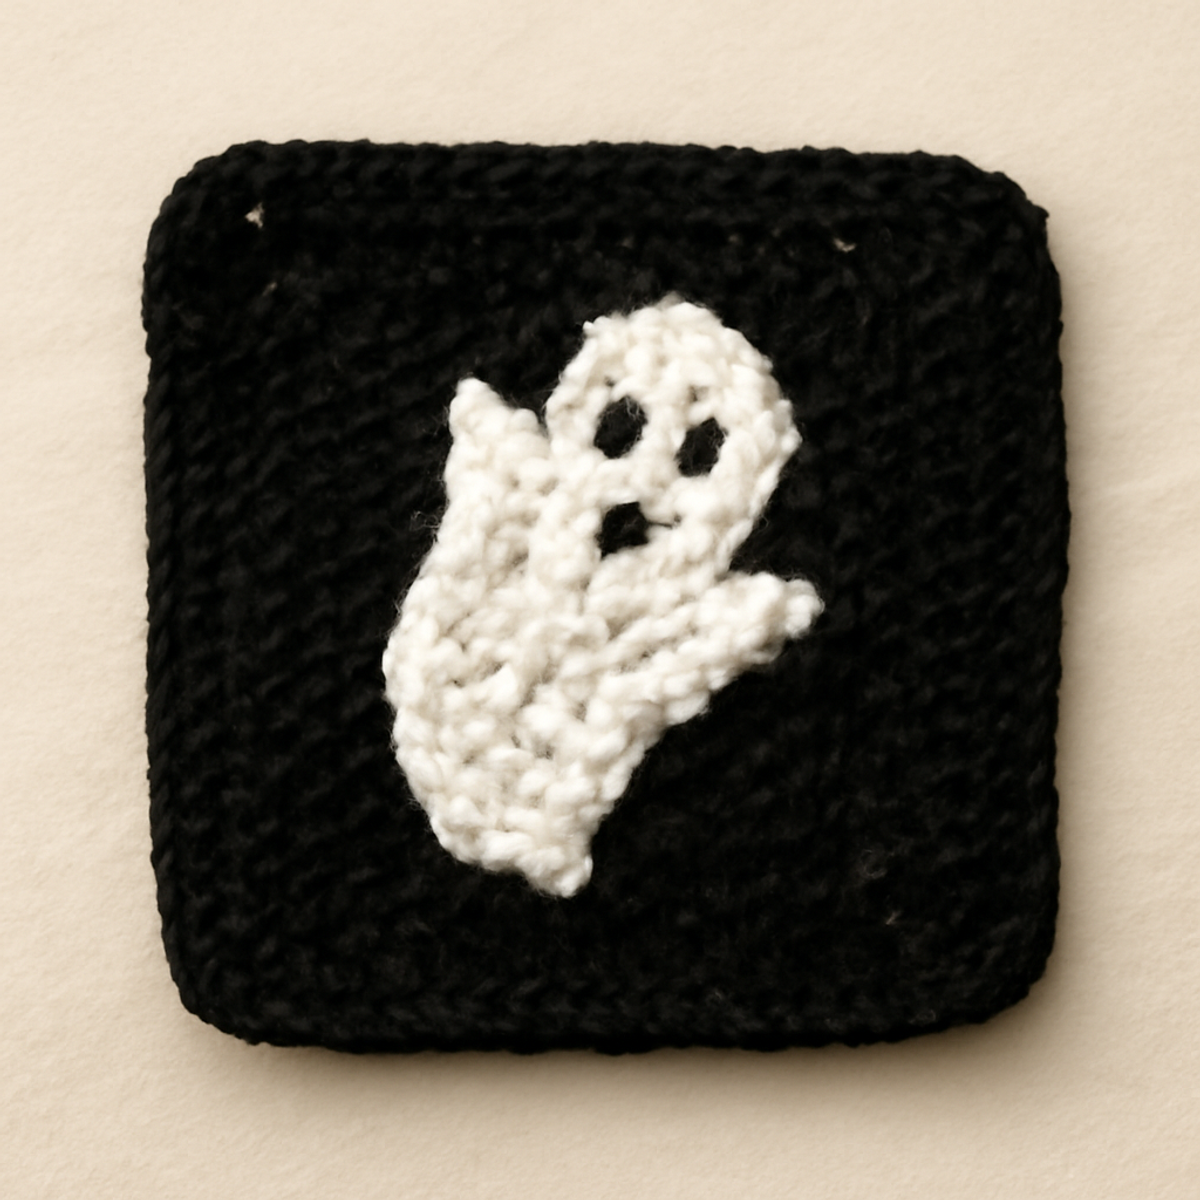
As the leaves begin to fall and the air turns crisp, a delightful urge to cozy up with yarn often strikes. This month, I’m excited to share my Spooky Ghost Granny Square – a whimsical crochet project that’s perfect for Halloween décor. Designed for beginners, this spooky crochet square offers a fun and easy way to add a festive flair to your home. Not only is it a joy to create, but it’s also incredibly versatile; use it as a charming coaster or stitch several together for a playful blanket that brightens your space. With its cheery colors and enchanting ghost design, you’ll find this project captures the spirit of the season while wrapping you in a warm sense of nostalgia. Ready to add some spooky charm to your crochet collection? Let’s dive into this clever little pattern!

Spooky Crochet Square Materials & Tools

Get ready to craft some Halloween magic!

Yarn

  • Medium Weight Yarn – Use a blend of acrylic or cotton in festive colors; you'll need approximately 100-150 yards per square.
  • White Yarn – Essential for the ghost design; any worsted weight will do wonderfully!

Tools & Notions

  • 5.0mm (H/8) Crochet Hook – This size is perfect for creating tight, charming stitches in your spooky crochet square.
  • Yarn Needle – Handy for weaving in those ends, ensuring a neat finish to your squares.

Enjoy crafting your spooky crochet square this Halloween!

Why Will You Love This Spooky Square?

Easily Accessible: Perfect for beginners, this spooky crochet square makes it simple and enjoyable to dive into crocheting without feeling overwhelmed.

Whimsical Design: The adorable ghost motif brings a festive touch that will charm your October décor, elevating the cozy vibe of your home.

Versatile Uses: Whether you use it as an individual coaster or piece them together for a cozy blanket, the design adapts beautifully to any project you imagine.

Bright Colors: The engaging palette not only captures the spirit of Halloween but also adds a pop of color that’s both fun and inviting.

Quick to Make: With straightforward stitches and minimal yardage, you can whip up several squares in no time, perfect for last-minute decorating or gifting!

Gauge & Sizing Notes

Don't skip the gauge swatch! Ensuring that your tension is accurate is key to creating a perfectly sized spooky crochet square. A general guideline is that a 4×4 inch (10×10 cm) square should have about 12 double crochets by 8 rows. If your swatch is larger or smaller, adjust your hook size; if it’s too small, try going up a hook size, and if it's too large, go down a size. To make your spooky crochet square larger, simply increase your starting chain in multiples of 3; for smaller squares, you can reduce the number of rounds on your granny shape. Keeping an eye on your measurements ensures each cozy project turns out just right!

Step-by-Step Pattern for Spooky Crochet Square

Row 1: Start with the Magic Circle
Begin your spooky crochet square by creating a magic circle. Chain 3 (this counts as your first double crochet), then work 11 double crochets (dc) into the circle. Pull the tail to tighten the circle, and slip stitch (sl st) into the top of the initial chain 3 to close the round. Your work should form a tight center with 12 dc total (12 sts).

Row 2: Establish the Granny Square Shape
Chain 3 (counts as first dc), then in the same stitch, work 2 more dc to create a cluster. Skip 2 stitches and make 3 dc in the next stitch. Repeat this pattern around: skip 2, 3 dc in the next, finishing with a sl st in the top of the starting chain. You should have 4 clusters of 3 dc each (4 clusters).

Row 3: Add the Ghost Design
To form the ghost, start with a slip knot on your white yarn. In any cluster, make 1 single crochet (sc), then 2 double crochets (dc) in the next stitch of the cluster. Follow by chaining 2, then slip stitching (sl st) into the same cluster. Repeat this across all clusters. Your work will now create an adorable ghost shape in the square (4 ghosts total).

Row 4: Form the Border
Switch to your desired edge color for a finished look. Chain 1 and make 1 sc in the first stitch. Work 3 sc in the space between each ghost. Continue around the square, ensuring tight stitches for a clean edge. End with a sl st in the first sc to close this round. Your spooky crochet square should now feature a beautiful, defined border (total edge stitches will vary).

Step 5: Finishing Touches
Weave in all loose ends with your yarn needle to ensure a neat finish. Lightly block your spooky crochet square if desired to enhance its shape and even out the stitches. Each square should measure approximately 6-8 inches in diameter. Now you're ready to use your charming spooky crochet square for Halloween décor or to gift to someone special!

Expert Tips for Your Spooky Square

  • Consistent Tension: Ensure that your tension remains even throughout your spooky crochet square to keep all squares uniform in size for a polished look.

  • Stitch Counting: Regularly count your stitches at the end of each round. This helps prevent missing stitches or accidentally adding extra, which can throw off your pattern.

  • Blocking Advantage: Lightly blocking your finished squares can help even out tight stitches, giving your spooky crochet square a crisp, professional appearance.

  • Secure Your Ends: Weaving in your loose ends thoroughly will keep your project looking tidy and enhance its durability, especially if you plan to use it frequently.

  • Mind the Magic Circle: When creating your magic circle, ensure it’s tight enough to hold your stitches, but not so tight that you struggle to crochet into it later.

Spooky Crochet Square Variations

Embrace your creativity and let your imagination run wild with these enchanting variations!

  • Color Swaps: Switch up the colors for a different season! Use pastel shades for spring, or vibrant hues for a bright summer twist.

  • Fiber Choices: Experiment with yarn types like cotton for a rustic touch or cozy acrylic for a softer feel. Each fiber adds its own charm!

  • Size Adjustments: Increase the number of rounds to create larger squares. A bigger size is ideal for blankets or throw pillows, making your cozy creations even cozier!

  • Expressive Ghosts: Give your ghosts personality by varying their expressions! Play with different stitch counts for eyes or add fun little features.

  • Textured Borders: Enhance your spooky crochet square with a unique border. Consider adding a ruffled edge or a playful fringe to elevate the project's charm.

  • Seasonal Themes: Change the ghost's body colors to match other holidays! Imagine a friendly ghost in orange for Halloween or a snowy white for winter décor.

  • Mix and Match: Combine your spooky squares with other themed squares for a delightful Halloween patchwork. This creates a unique and festive blanket that tells a story!

  • Mini Coasters: Create smaller versions for adorable coasters. These tiny squares can add a sprinkle of seasonal spirit to your kitchen or living room!

What to Pair with Spooky Ghost Granny Square?

As you indulge in the whimsical spirit of Halloween, consider expanding your crochet repertoire with complementary projects that enhance your festive décor.

  • Cozy Ghost Coasters: Create a matching set to keep your surfaces protected while adding a playful touch to your tables. These can be made using the same colors and style.

  • Festive Bunting: Craft a string of ghostly flags to hang and unify your space with festive vibes, instantly elevating your Halloween décor.

  • Charming Mini Pumpkins: Crocheting tiny pumpkins alongside your spooky crochet square brings a delightful autumnal feel, perfect for those cozy corners.

  • Eerie Blanket: Stitch multiple squares together for a warm, inviting throw that not only showcases your spooky crochet square but also brings comfort on chilly nights.

  • Whimsical Wall Hanging: Let your creativity soar by combining several squares into a playful wall display, celebrating the ephemeral spirit of Halloween throughout your home.

How to Wash and Care for Your Spooky Crochet Square

Machine Washing: Use cold water on a gentle cycle to preserve the beauty of your spooky crochet square. Avoid agitating to prevent any felting or pilling.

Hand Washing: For a more delicate approach, hand wash in cool water with a mild detergent. Gently squeeze to remove any excess water without wringing or twisting.

Drying/Blocking: Lay flat to dry on a clean, dry towel. This helps maintain the square's shape and ensures it looks its best when decorating your space.

Storage: When storing your spooky crochet square, fold it neatly in a cool, dry place to avoid creasing and to keep it fresh for future use!

Spooky Ghost Granny Square FAQs

Can I use a different yarn weight than medium?
Absolutely! You can use a lighter or heavier yarn, but keep in mind that it may affect the size and drape of your spooky crochet square. If you're using a thicker yarn, like bulky, consider adjusting your hook size to maintain your desired stitch definition and overall appearance.

How do I resize the granny square to make it bigger?
Don't panic! To make your spooky crochet square larger, you can simply add more rounds of double crochet after establishing the initial granny square shape. Just keep the pattern consistent with increasing rounds, ensuring that you maintain the same stitch counts and cluster patterns as you go.

Why is my work curling up instead of laying flat?
Ah, the classic curling issue! This usually occurs when the tension is too tight or if you’re missing crucial stitches. Try gently blocking your square by wetting it and laying it flat to dry, as this helps flatten out the edges. Also, keep an eye on your tension – consistent tension helps everything lay nicely!

What if I accidentally dropped a stitch while crocheting?
It’s an easy fix! Just take a deep breath and don’t worry. Turn your work upside down and carefully pull the yarn strand back through the dropped stitch using your crochet hook. Make sure to secure it properly as you work to prevent any future mishaps!

What hook size should I use for this pattern?
For the best results, I recommend a 5.0 mm (H/8) crochet hook. This hook size works well with medium weight yarn and allows for tight, even stitches, ensuring your spooky crochet square comes out looking neat and delightful!

Can I use cotton instead of acrylic for this project?
Absolutely! Cotton yarn is a great alternative and will give your spooky crochet square a unique texture. It’s also very durable and ideal for something that may get a bit of moisture if used as a coaster. Just ensure you’re mindful of your gauge, as cotton can behave slightly differently than acrylic.

Filed Under: Uncategorized

Whimsical Lavender Crochet Square for Cozy Spaces

September 1, 2026 by Publisher Leave a Comment

Whimsical Lavender Crochet Square for Cozy Spaces

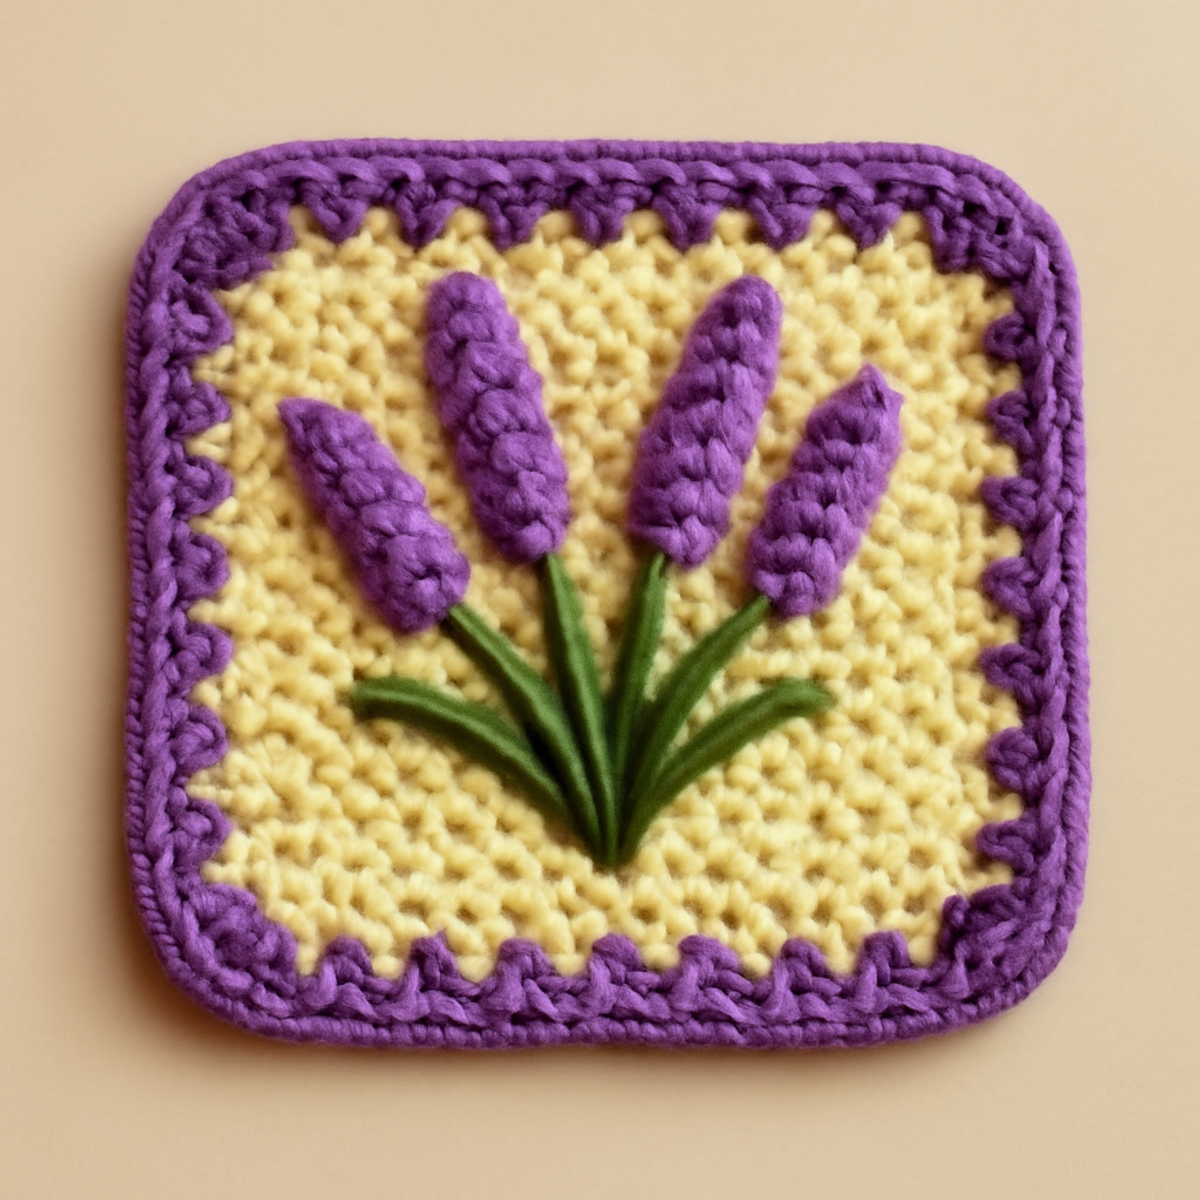
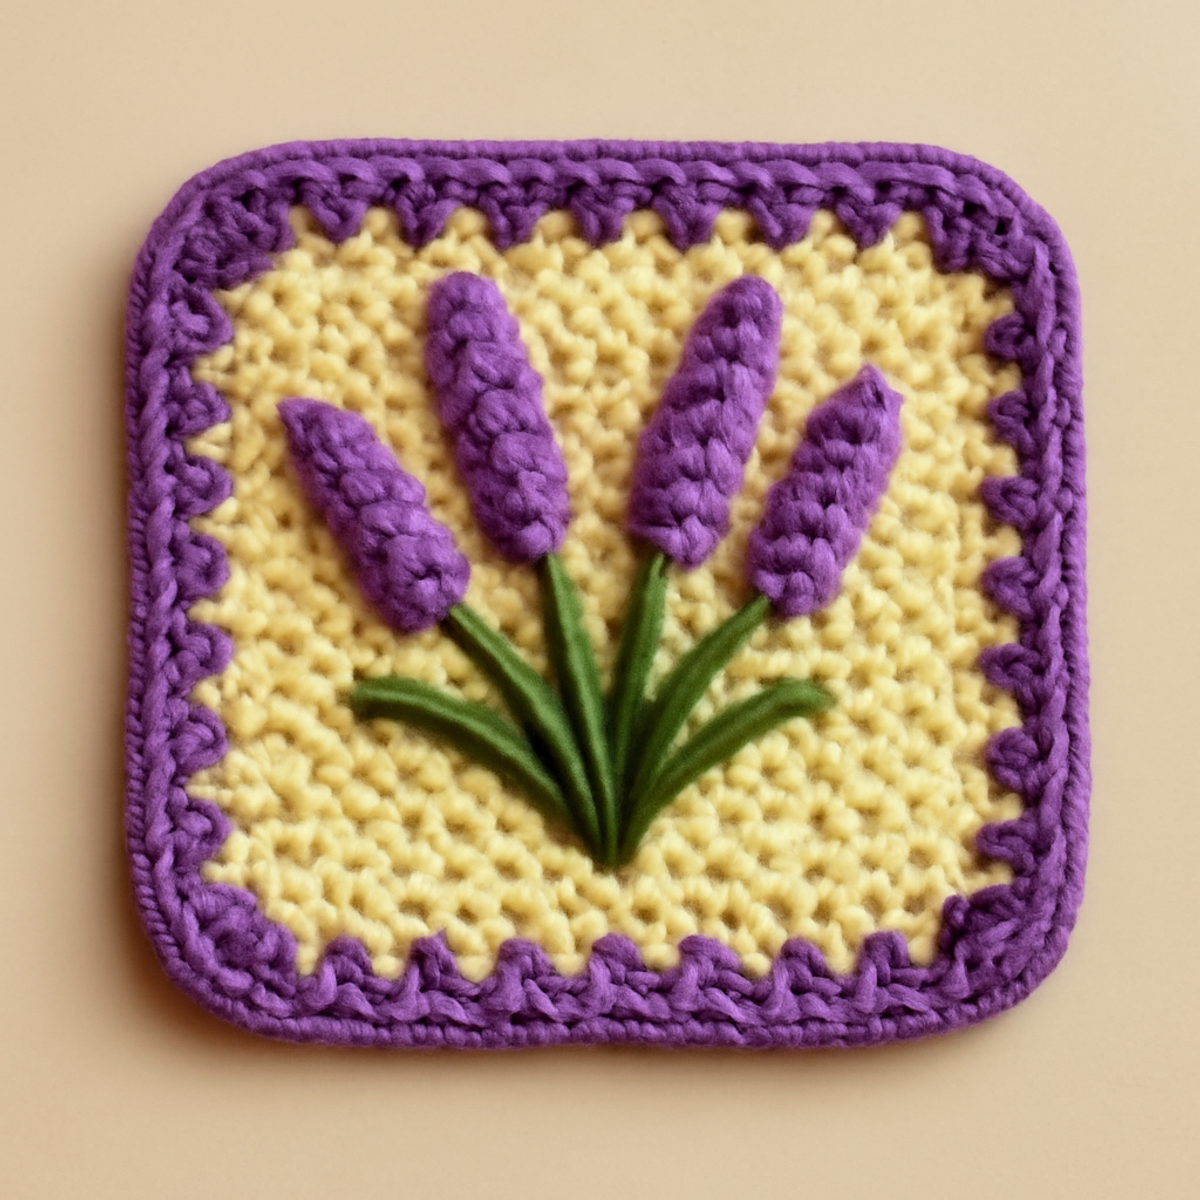
As I flipped through my yarn stash, the inviting hues of lavender and sunshine immediately sparked joy, urging me to create something delightful. Introducing the Blooming Lavender Motif Square—a charming piece that perfectly captures the whimsy of springtime blooms. This lavender crochet square not only enchants with its floral design but also allows you to level up your skills with various stitch techniques. It’s adaptable, whether you envision it as a standalone decorative square or as part of a larger, cozy blanket. Beyond its aesthetic appeal, working on this project is a fantastic opportunity to dive into your stash and experiment with color combinations—imagine using gradient yarns or playing with contrasting shades! This project is not only a joy to create but also a way to brighten any space. Are you ready to bring these lovely lavender flowers to life with just your hook and yarn? Let’s get started!

Blooming Lavender Motif Square Materials & Tools

  • Yarn:

    • Worsted Weight Yarn – Use a pastel yellow for the background, several shades of purple for the flowers, and green for the stems, totaling around 100 yards for this lavender crochet square.
  • Tools & Notions:

    • 4.5 mm (US 7) Crochet Hook – This size is perfect for achieving the right tension while creating your square.
    • Yarn Needle – Essential for weaving in ends to keep your project neat and tidy.
    • Stitch Markers – Helpful for tracking rounds, especially when working with clusters.

Why Choose the Lavender Crochet Square?

Charming Design: The whimsical floral motifs of this square bring a delightful touch of spring to your crochet projects, ensuring they stand out beautifully.
Skill Builder: Perfect for intermediate crocheters, this pattern encourages the practice of various stitch techniques, helping you enhance your skills along the way.
Versatile Use: Ideal as a standalone piece or part of a cozy blanket, its adaptability allows for endless creative possibilities.
Color Exploration: Dive into your stash and experiment! Play with gradient yarns or contrasting shades for a unique twist that reflects your personal style.
Soft Texture: Anticipate a lovely drape and medium density, making this square not just beautiful but also functional and enjoyable to work with.

Gauge & Sizing Notes

Don't skip the gauge swatch! Checking your tension is crucial for ensuring that your lavender crochet square turns out just right, both in size and appearance. Aim for a general guideline of 4×4 inch (10×10 cm) tension swatch that typically uses a worsted weight yarn with about 14 double crochets by 8 rows. If you want to adjust your square's size, simply increase your starting chain in multiples of 2 for width or add rounds for height. If you find your swatch is too small, don't fret—just go up a hook size to achieve a looser stitch. Happy crocheting!

Step-by-Step Pattern for Blooming Lavender Motif Square

Row 1: Foundation Chain
Begin by chaining 26. This foundation chain will serve as the starting point for your lavender crochet square. Ensure that each chain is made with a comfortable tension; it shouldn't be too tight. Once you've completed your chain, your work should lay flat and ready for the next step.

Row 2: First Row of Sc
In the second chain from the hook, make a single crochet (sc) in each stitch across the chain. You should have 25 sc by the end of this row. As you work, keep your tension consistent to maintain an even texture. Your initial rectangle will begin to take shape, and it should feel solid yet flexible at this stage.

Row 3: Forming the Square
Ch 1 and turn your work. In this row, sc in the first stitch and each subsequent stitch across, for a total of 25 sc again. The square is taking form, and as you finish, ensure your edges are rounded slightly, showing the foundation of your lavender crochet square starting to come together.

Row 4: Increase Row for Width
Ch 1 and turn. Now, sc in the first stitch, then place 2 sc in the second stitch to start increasing. Continue with 1 sc in the next 22 stitches, and 2 sc in the last stitch. You should have 27 stitches at the end of this row, which helps widen the square while adding dimension to your work.

Row 5: Lavender Flower Base
Ch 1 and turn. For this row, sc in the first 3 stitches, then place 5 cluster stitches (T) in the next stitch for the floral effect. To create a cluster stitch, yarn over, insert into the stitch, yarn over, pull through, yarn over, pull through two loops twice. Finish the row with 1 sc in each of the last few stitches, totaling 29 stitches.

Row 6: Creating the Flowers
Ch 1 and turn. Start by making 3 sc in the first stitch, then create 5 cluster stitches (T) in the same stitch as the previous row to deepen the floral texture. Make sure your clusters are plush and evenly spaced. At the end of this row, you should have a lovely buildup of lavender flowers.

Row 7: Adding Details
Ch 1 and turn. This time, sc in the first 4 stitches followed by 1 sc in each cluster from the previous row. For detail, sc in each flower cluster to help highlight the shape of the flowers. After this row, you should count 31 stitches, with a clear floral design prominently showing.

Row 8: Stems and Leaves
Ch 1 and turn. Sc in the first 3 stitches, then introduce green yarn for the lavender stems. Work 1 sc in the next 2 stitches to represent the stems. Your work will start to blend the flower design with greenery, creating a lovely pop against the lavender crochet square.

Row 9: Final Edge Preparation
Ch 1 and turn. This is your last main row before the border. Sc in the first 5 stitches, then place 3 sc in one stitch to create a peak effect. Continue sc across to the end of the row. You are setting the stage for your scalloped border, ensuring all edges are neat and tidy.

Step 10: Scalloped Border
For the final round, switch to a scalloped edging. Start with a sl st into the first sc of the previous row, then ch 3, skip the next stitch, and in the next stitch, work 5 dc (double crochet). Repeat this pattern to the corners, and then join with a sl st. Your lavender crochet square is beautifully framed with a charming scalloped edge now!

Step 11: Finishing Touches
To complete your lavender crochet square, weave in all loose ends with a yarn needle. Gently block your square to shape and define the stitches. Your final piece should measure approximately 6 inches square, showcasing the delightful lavender blooms and soft texture.

Expert Tips for the Lavender Crochet Square

  • Consistent Tension: Keep your stitches loose enough, especially with clusters, to avoid tightness that can make them difficult to work with.

  • Track Your Counting: Use stitch markers to prevent accidental increases or decreases in your rounds. This helps keep your lavender crochet square symmetrical and neat.

  • Block for Definition: After finishing, lightly block your square to define the stitch work and ensure it maintains its shape, resulting in a polished final look.

  • Mind the Edges: When creating the scalloped border, be mindful of your starting and ending stitches to ensure the border is evenly spaced and beautifully finished.

  • Practice Makes Perfect: Don’t hesitate to practice the cluster stitches separately until you feel confident. Mastery of this will enrich the floral details in your lavender crochet square.

What to Pair with the Blooming Lavender Motif Square?

As you embrace the charm of your lavender crochet square, envision pieces that can harmoniously surround it in cozy elegance.

  • Floral Coasters: A delightful addition to your home that captures the essence of spring while protecting surfaces from moisture.
  • Lavender Pillow: Create a plush accent pillow featuring the same floral motif for a cohesive look in your decor.
  • Matching Shawl: Use similar yarn colors to craft a light shawl, perfect for draping over your shoulders on breezy days.
  • Stitched Wall Art: Frame a collection of squares, including your lavender motif, to create a stunning gallery wall bursting with floral flair.
  • Charming Baby Blanket: Join multiple squares to form a whimsical blanket, providing warmth and comfort as fresh as a garden in bloom.

How to Wash and Care for Your Lavender Crochet Square

Machine Washing: Use a gentle cycle with cold water to maintain the integrity of your lavender crochet square while avoiding any agitation that could cause felting or pilling.

Hand Washing: If preferred, hand wash your square in cold water with a mild detergent, gently pressing it without wringing to remove excess water without damaging the fibers.

Drying/Blocking: Lay your lavender crochet square flat to dry on a clean, dry towel, reshaping it to its original dimensions before gently pinning it to maintain the defined stitches throughout.

Storage: Store your finished square in a cool, dry place, ideally wrapped in a cotton bag or placed in a breathable container to prevent moisture and dust.

Lavender Crochet Square Variations & Substitutions

Ready to add a personal touch to your crochet square? Explore these delightful ideas and let your creativity blossom!

  • Yarn Weight Swap:
    Use a lighter weight yarn (like DK) for a delicate and airy version, perfect for summer decorations.

  • Fiber Alternative:
    Try cotton instead of acrylic for a breathable, crisp finish that’s ideal for warmer weather.

  • Color-Blocking Fun:
    Experiment with a vibrant background using bold colors like turquoise or coral, making the lavender flowers pop even more!

  • Size Adjustment:
    For larger projects, increase the number of foundation chains and add rounds to create a statement piece for your home.

  • Textured Flowers:
    Incorporate puff stitches instead of cluster stitches in the flowers for added dimension and a fun, fluffy look.

  • Ombre Effect:
    Use gradient yarn for the flowers to achieve a stunning ombre that transitions from light to dark shades.

  • Elegant Fringe:
    Add a light fringe along two edges for a boho twist that enhances the whimsical charm of your lavender square.

  • Decorative Border:
    Instead of a scalloped border, try a contrasting picot edge for a more intricate, lace-like finish.

Blooming Lavender Motif Square FAQs

Can I use different yarn weights for the lavender crochet square?
Absolutely! While worsted weight yarn (weight category 4) is recommended for the best results, you can use a different weight. Just keep in mind that your final dimensions and the overall drape will change. If you decide to go lighter, like a DK weight, you may want to adjust your hook size and do a few test squares to ensure you achieve the desired outcome.

How do I adjust the size of my lavender crochet square?
It's quite easy! To make your square larger, simply add more rounds after the initial square is formed. Each round can consist of additional single crochets or cluster stitches, depending on your design preferences. Conversely, to make it smaller, you can reduce the number of rows or stitches in each round. I recommend checking your gauge frequently to keep track of size adjustments!

Why is my lavender crochet square curling at the edges?
Don't panic! Curling edges often happen when the tension is too tight or if the stitch count is off. Make sure you're keeping your stitches loose enough, especially around cluster stitches. If you've ensured your stitches are loose and it's still curling, you might try blocking the square to help flatten and shape it.

What hook size should I use for this project?
For the Blooming Lavender Motif Square, a 4.5 mm (US 7) crochet hook is recommended. This size works well with worsted weight yarn, helping you achieve that perfect balance of tension and stitch definition. If you prefer a looser or tighter fit, you can experiment with a different hook size, just remember to adjust your tension accordingly!

How do I fix dropped stitches in my lavender crochet square?
It’s an easy fix! Simply yarn over with your hook and pull through with a slip stitch to reintroduce your missing stitch. Then, continue working as normal. If you notice a gap, you may want to tighten up your surrounding stitches or use a needle to weave in a tail for extra security. Remember, it happens to the best of us, so take your time!

Can I substitute colors in my lavender crochet square?
Absolutely! This pattern is all about creativity. Don’t hesitate to swap out the colors for something that inspires you—think pastel pinks or blues instead of purples for the flowers, or even a vibrant background. The beauty of crafting lies in your personal touch, so let your imagination flourish!

Filed Under: Uncategorized

Charming Floral Granny Square: A Whimsical Crochet Project

September 1, 2026 by Publisher Leave a Comment

Charming Floral Granny Square: A Whimsical Crochet Project

There’s something magical about the intricate details of a floral granny square that makes my heart flutter with creativity. This Charming Floral Motif Granny Square combines vibrant floral motifs with a classic design, creating a delightful crochet piece that's sure to brighten up your next project. Perfect for those who are ready to take on an intermediate challenge, this pattern not only promises the satisfaction of mastering new techniques but also invites you to play with color and style. Whether you’re envisioning a cozy blanket, a whimsical tote, or a statement home accessory, each square can be tailored to fit your unique vision. Ready to immerse yourself in a world of stitches and florals? Let’s get started on this enchanting crochet journey!

Charming Floral Motif Granny Square Materials & Tools

  • Medium Weight Yarn – Use a cotton or acrylic blend, with approximately 150 to 200 yards estimated for each square.
  • 4.5mm (US 7) Hook – This size is recommended for achieving the right stitch density in your floral granny square.
  • Stitch Markers – Handy for keeping track of rounds or significant changes in the pattern to maintain your progress.
  • Tapestry Needle – Essential for weaving in ends and finishing your project neatly.

Why is this floral granny square special?

Versatile Design: The eye-catching floral motifs offer a stunning touch that can elevate any project, from bags to home decor. Intermediate Challenge: Perfect for those looking to enhance their skills, this pattern provides a rewarding experience as you learn new techniques. Color Customization: You have the freedom to choose shades that match your personal style, making each square uniquely yours. Stunning Texture: The combination of various stitches ensures a captivating texture that is both visually appealing and practical. Classic Appeal: This granny square style blends seamlessly with various design aesthetics, making it an enduring favorite among crafters. Get ready to fall in love with this charming floral journey!

How to Check Your Gauge for Charming Floral Granny Square

Don't skip the gauge swatch! Checking your tension is essential for the Charming Floral Granny Square to ensure your finished piece maintains its beautiful shape and size. A general guideline is to aim for a gauge of 4×4 inches (10×10 cm) to achieve the right stitch density. If you're looking to scale your square larger or smaller, simply adjust your starting chain in multiples of 6 + 2 to maintain the floral design's integrity. If your tension swatch is too small, try using a larger hook size, while crocheting too loosely may require you to switch to a smaller hook. Remember, a little gauge check today can lead to a perfect floral square tomorrow!

Step-by-Step Pattern for Charming Floral Granny Square

Row 1: Magic Ring and Center Flower
Start by creating a magic ring. Ch 3 (counts as your first dc) and then work 11 dc into the ring. Pull the ring tight, then join with a sl st to the top of the beginning ch-3. Your work should form a nice circle with a total of 12 stitches (12 sts).

Row 2: Petals Creation
Ch 3 (counts as your first dc) and do 2 dc, ch 2, sl st into the next stitch; repeat from * around the circle until you have 6 petals formed. Join with a sl st to the top of the beginning ch-3. Your work should now display flower-like shapes around the center (6 petals).

Row 3: Expanding the Square
Ch 1, then sc in the ch-2 space of each petal. After reaching the last petal, make 3 sc in the same space to create a corner. Repeat this for each petal while working 3 sc in each corner space. Sl st to join, resulting in 18 stitches total plus the corners (24 sts).

Row 4: Clusters for Texture
Ch 3 (counts as your first dc), work 2 dc in the next sc, then 3 dc in the corner sc, repeat around the square. Join with a sl st to the top of the beginning ch-3. The texture should be prominent, and you will have 36 stitches around (36 sts).

Row 5: Adding Chains and More Edging
Ch 1, then in each dc, work 1 sc. For each corner, make 1 sc, ch 2, and 1 sc. This will add space between your corners and enhance the square's shape. Join with a sl st to the first sc, leading to a more defined structure (48 sts total).

Step 6: Final Decorative Border
Ch 3 (counts as dc) and work 2 dc, ch 2, 3 dc in each corner (the same as the previous round). For the sides, work 1 dc in each sc, evenly distributing the stitches. Join with a sl st to the first ch-3, providing a beautiful finishing touch and a total of 72 stitches (72 sts).

Step 7: Weaving in Ends
Carefully weave in all ends using a tapestry needle. Block the finished floral granny square to enhance the design's structure and texture, ensuring that your piece lies flat and the colors pop vibrantly. Your charming floral granny square is now ready for use in your next creative project!

How to Wash and Care for Your Floral Granny Square

  • Machine Washing: Use a delicate cycle with cold water to gently clean your floral granny square, ensuring to place it in a mesh bag to prevent snagging.

  • Hand Washing: If you prefer a more gentle approach, hand wash your square in cold water with mild detergent, carefully swishing it without agitation to avoid felting or pilling.

  • Drying/Blocking: Lay your finished floral granny square flat on a clean, dry surface to reshape and block it, allowing it to retain its defined stitches and vibrant colors while preventing any curling.

  • Storage: Store your square in a cool, dry place away from direct sunlight to protect its colors and preserve the intricate details that you’ve lovingly crafted.

What to Pair with Charming Floral Motif Granny Square

As you venture into the delightful world of crochet, consider creating a matching ensemble that enhances your intricate floral masterpiece.

  • Vibrant Throw Pillow: Make a cozy pillow cover featuring the same floral pattern for a pop of color in your living space. This project allows you to play with textures and cozy up your home aesthetic.

  • Floral Bag: Craft a chic tote using your squares, perfect for showcasing your crochet skills wherever you go. It’s a practical way to flaunt your love for floral designs while carrying essentials.

  • Charming Blanket: Combine several floral granny squares to create a snug throw blanket, ideal for chilly evenings or a lovely picnic. With various color combinations, your blanket can be a true reflection of your style.

  • Ornate Coasters: Use a smaller version of your floral granny square to whip up charming coasters. These colorful accents bring warmth and creativity to your coffee table while protecting surfaces.

  • Delicate Headband: Create a stylish headband or hair accessory that features a simplified floral motif, perfect for adding a whimsical touch to your outfit. It’s a delightful way to take the floral theme off your hook and into your wardrobe.

Expert Tips for Floral Granny Squares

  • Even Tension: Maintain consistent tension while crocheting to ensure your floral granny square retains its shape without distortion, making your work look polished.

  • Count Carefully: Don't lose track of your stitches! Regularly count your stitches after each round to ensure you're on the right track and avoid major mistakes.

  • Stitch Markers: Use stitch markers at the beginning of each round or at crucial transitions in your pattern. This helps keep your place, especially in intricate floral designs.

  • Blocking Matters: Always block your finished square to define the shapes and prevent curling at the corners. This simple step enhances the overall appearance.

  • Avoid Curling: When joining rounds, be mindful of tight slip stitches, as they can lead to curling edges. Loose joins can create a more even edge for your floral granny square.

  • Weave Ends Neatly: Use a tapestry needle to weave in all ends securely. This gives your square a clean finish, contributing to a delightful overall look.

Floral Granny Square Variations

There’s no limit to the creativity you can unleash with your floral granny square! Embrace the joy of customizing this pattern to suit your unique style.

  • Yarn Weight Switch: Experiment with bulky yarn for a cozier look, resulting in a more substantial square that’s perfect for blankets.

  • Fiber Alternative: Try using a soft cotton yarn instead of acrylic to add a breathable feel, ideal for summer accessories.

  • Color-Blocking Fun: Combine several colors in each square, creating a patchwork effect that will make your blanket truly one-of-a-kind.

  • Size Adjustment: Opt for a larger hook or thicker yarn to craft oversized squares, perfect for making stunning cushion covers.

  • Texture Twist: Add a delightful pom-pom to each corner for a playful vibe. This small detail can bring extra whimsy and texture.

  • Fringe Finish: Incorporate fringe along the edges of your square for a modern touch. This softens the overall design while offering visual interest.

  • Contrasting Borders: Select a bold color for the border that contrasts with the center motif, creating an eye-catching frame around your square.

  • Multiple Motifs: Combine two or three different floral designs to create a varied tapestry of squares, reflecting your crafting journey. This approach adds depth and dimension to your project.

Let your imagination roam, and each floral granny square you create will tell a story of warmth and creativity!

Charming Floral Motif Granny Square FAQs

Can I substitute the yarn type in my floral granny square?
Absolutely! While a medium-weight cotton or acrylic blend is recommended for this project, you can certainly swap it out for different yarns based on your preferences. If you want a soft and cozy feel, consider using a baby or soft wool blend. Just be sure to adjust your tension and check your gauge for the best results!

How can I make my floral granny square larger or smaller?
It's an easy fix! To increase the size of your granny square, simply use a thicker yarn and an appropriate hook size, or add more rounds to your pattern. For smaller squares, you can use a lighter weight yarn and a smaller hook. Remember to keep an eye on your stitch count if you’re altering the pattern!

Why is my work curling at the edges?
Don't panic! Curling edges can happen for a few reasons. Often, it’s due to tight tension or not enough stitches in the corners. Ensure you're keeping your tension even, and try making the corner stitches a bit looser. Blocking your finished square can also help smooth things out!

What hook size should I use for this floral granny square?
The recommended hook size for this project is a 4.5 mm (US 7). This size helps create the right stitch density for the intricate details of the floral motifs. If you find your work too tight or loose, feel free to experiment with a hook size up or down!

I dropped a stitch while working on my granny square. What should I do?
Don't worry, it happens to the best of us! Quickly locate the dropped stitch, and use a crochet hook to bring it back up through the work. If it’s too far down, you might need to unravel a few rows or use a tapestry needle to weave it back in carefully. With a little patience, you’ll have it fixed in no time!

How can I avoid losing my place in the pattern?
Using stitch markers can be a real lifesaver! Place a stitch marker at the end of each round or at significant pattern changes. This way, you’ll always know where you are in your project, and it will help you maintain a consistent stitch count. Happy crocheting!

Filed Under: Uncategorized

Whimsical Lavender Crochet Square for Cozy Spaces

September 1, 2026 by Publisher Leave a Comment

Whimsical Lavender Crochet Square for Cozy Spaces

As I flipped through my yarn stash, the inviting hues of lavender and sunshine immediately sparked joy, urging me to create something delightful. Introducing the Blooming Lavender Motif Square—a charming piece that perfectly captures the whimsy of springtime blooms. This lavender crochet square not only enchants with its floral design but also allows you to level up your skills with various stitch techniques. It’s adaptable, whether you envision it as a standalone decorative square or as part of a larger, cozy blanket. Beyond its aesthetic appeal, working on this project is a fantastic opportunity to dive into your stash and experiment with color combinations—imagine using gradient yarns or playing with contrasting shades! This project is not only a joy to create but also a way to brighten any space. Are you ready to bring these lovely lavender flowers to life with just your hook and yarn? Let’s get started!

Blooming Lavender Motif Square Materials & Tools

  • Yarn:

    • Worsted Weight Yarn – Use a pastel yellow for the background, several shades of purple for the flowers, and green for the stems, totaling around 100 yards for this lavender crochet square.
  • Tools & Notions:

    • 4.5 mm (US 7) Crochet Hook – This size is perfect for achieving the right tension while creating your square.
    • Yarn Needle – Essential for weaving in ends to keep your project neat and tidy.
    • Stitch Markers – Helpful for tracking rounds, especially when working with clusters.

Why Choose the Lavender Crochet Square?

Charming Design: The whimsical floral motifs of this square bring a delightful touch of spring to your crochet projects, ensuring they stand out beautifully.
Skill Builder: Perfect for intermediate crocheters, this pattern encourages the practice of various stitch techniques, helping you enhance your skills along the way.
Versatile Use: Ideal as a standalone piece or part of a cozy blanket, its adaptability allows for endless creative possibilities.
Color Exploration: Dive into your stash and experiment! Play with gradient yarns or contrasting shades for a unique twist that reflects your personal style.
Soft Texture: Anticipate a lovely drape and medium density, making this square not just beautiful but also functional and enjoyable to work with.

Gauge & Sizing Notes

Don't skip the gauge swatch! Checking your tension is crucial for ensuring that your lavender crochet square turns out just right, both in size and appearance. Aim for a general guideline of 4×4 inch (10×10 cm) tension swatch that typically uses a worsted weight yarn with about 14 double crochets by 8 rows. If you want to adjust your square's size, simply increase your starting chain in multiples of 2 for width or add rounds for height. If you find your swatch is too small, don't fret—just go up a hook size to achieve a looser stitch. Happy crocheting!

Step-by-Step Pattern for Blooming Lavender Motif Square

Row 1: Foundation Chain
Begin by chaining 26. This foundation chain will serve as the starting point for your lavender crochet square. Ensure that each chain is made with a comfortable tension; it shouldn't be too tight. Once you've completed your chain, your work should lay flat and ready for the next step.

Row 2: First Row of Sc
In the second chain from the hook, make a single crochet (sc) in each stitch across the chain. You should have 25 sc by the end of this row. As you work, keep your tension consistent to maintain an even texture. Your initial rectangle will begin to take shape, and it should feel solid yet flexible at this stage.

Row 3: Forming the Square
Ch 1 and turn your work. In this row, sc in the first stitch and each subsequent stitch across, for a total of 25 sc again. The square is taking form, and as you finish, ensure your edges are rounded slightly, showing the foundation of your lavender crochet square starting to come together.

Row 4: Increase Row for Width
Ch 1 and turn. Now, sc in the first stitch, then place 2 sc in the second stitch to start increasing. Continue with 1 sc in the next 22 stitches, and 2 sc in the last stitch. You should have 27 stitches at the end of this row, which helps widen the square while adding dimension to your work.

Row 5: Lavender Flower Base
Ch 1 and turn. For this row, sc in the first 3 stitches, then place 5 cluster stitches (T) in the next stitch for the floral effect. To create a cluster stitch, yarn over, insert into the stitch, yarn over, pull through, yarn over, pull through two loops twice. Finish the row with 1 sc in each of the last few stitches, totaling 29 stitches.

Row 6: Creating the Flowers
Ch 1 and turn. Start by making 3 sc in the first stitch, then create 5 cluster stitches (T) in the same stitch as the previous row to deepen the floral texture. Make sure your clusters are plush and evenly spaced. At the end of this row, you should have a lovely buildup of lavender flowers.

Row 7: Adding Details
Ch 1 and turn. This time, sc in the first 4 stitches followed by 1 sc in each cluster from the previous row. For detail, sc in each flower cluster to help highlight the shape of the flowers. After this row, you should count 31 stitches, with a clear floral design prominently showing.

Row 8: Stems and Leaves
Ch 1 and turn. Sc in the first 3 stitches, then introduce green yarn for the lavender stems. Work 1 sc in the next 2 stitches to represent the stems. Your work will start to blend the flower design with greenery, creating a lovely pop against the lavender crochet square.

Row 9: Final Edge Preparation
Ch 1 and turn. This is your last main row before the border. Sc in the first 5 stitches, then place 3 sc in one stitch to create a peak effect. Continue sc across to the end of the row. You are setting the stage for your scalloped border, ensuring all edges are neat and tidy.

Step 10: Scalloped Border
For the final round, switch to a scalloped edging. Start with a sl st into the first sc of the previous row, then ch 3, skip the next stitch, and in the next stitch, work 5 dc (double crochet). Repeat this pattern to the corners, and then join with a sl st. Your lavender crochet square is beautifully framed with a charming scalloped edge now!

Step 11: Finishing Touches
To complete your lavender crochet square, weave in all loose ends with a yarn needle. Gently block your square to shape and define the stitches. Your final piece should measure approximately 6 inches square, showcasing the delightful lavender blooms and soft texture.

Expert Tips for the Lavender Crochet Square

  • Consistent Tension: Keep your stitches loose enough, especially with clusters, to avoid tightness that can make them difficult to work with.

  • Track Your Counting: Use stitch markers to prevent accidental increases or decreases in your rounds. This helps keep your lavender crochet square symmetrical and neat.

  • Block for Definition: After finishing, lightly block your square to define the stitch work and ensure it maintains its shape, resulting in a polished final look.

  • Mind the Edges: When creating the scalloped border, be mindful of your starting and ending stitches to ensure the border is evenly spaced and beautifully finished.

  • Practice Makes Perfect: Don’t hesitate to practice the cluster stitches separately until you feel confident. Mastery of this will enrich the floral details in your lavender crochet square.

What to Pair with the Blooming Lavender Motif Square?

As you embrace the charm of your lavender crochet square, envision pieces that can harmoniously surround it in cozy elegance.

  • Floral Coasters: A delightful addition to your home that captures the essence of spring while protecting surfaces from moisture.
  • Lavender Pillow: Create a plush accent pillow featuring the same floral motif for a cohesive look in your decor.
  • Matching Shawl: Use similar yarn colors to craft a light shawl, perfect for draping over your shoulders on breezy days.
  • Stitched Wall Art: Frame a collection of squares, including your lavender motif, to create a stunning gallery wall bursting with floral flair.
  • Charming Baby Blanket: Join multiple squares to form a whimsical blanket, providing warmth and comfort as fresh as a garden in bloom.

How to Wash and Care for Your Lavender Crochet Square

Machine Washing: Use a gentle cycle with cold water to maintain the integrity of your lavender crochet square while avoiding any agitation that could cause felting or pilling.

Hand Washing: If preferred, hand wash your square in cold water with a mild detergent, gently pressing it without wringing to remove excess water without damaging the fibers.

Drying/Blocking: Lay your lavender crochet square flat to dry on a clean, dry towel, reshaping it to its original dimensions before gently pinning it to maintain the defined stitches throughout.

Storage: Store your finished square in a cool, dry place, ideally wrapped in a cotton bag or placed in a breathable container to prevent moisture and dust.

Lavender Crochet Square Variations & Substitutions

Ready to add a personal touch to your crochet square? Explore these delightful ideas and let your creativity blossom!

  • Yarn Weight Swap:
    Use a lighter weight yarn (like DK) for a delicate and airy version, perfect for summer decorations.

  • Fiber Alternative:
    Try cotton instead of acrylic for a breathable, crisp finish that’s ideal for warmer weather.

  • Color-Blocking Fun:
    Experiment with a vibrant background using bold colors like turquoise or coral, making the lavender flowers pop even more!

  • Size Adjustment:
    For larger projects, increase the number of foundation chains and add rounds to create a statement piece for your home.

  • Textured Flowers:
    Incorporate puff stitches instead of cluster stitches in the flowers for added dimension and a fun, fluffy look.

  • Ombre Effect:
    Use gradient yarn for the flowers to achieve a stunning ombre that transitions from light to dark shades.

  • Elegant Fringe:
    Add a light fringe along two edges for a boho twist that enhances the whimsical charm of your lavender square.

  • Decorative Border:
    Instead of a scalloped border, try a contrasting picot edge for a more intricate, lace-like finish.

Blooming Lavender Motif Square FAQs

Can I use different yarn weights for the lavender crochet square?
Absolutely! While worsted weight yarn (weight category 4) is recommended for the best results, you can use a different weight. Just keep in mind that your final dimensions and the overall drape will change. If you decide to go lighter, like a DK weight, you may want to adjust your hook size and do a few test squares to ensure you achieve the desired outcome.

How do I adjust the size of my lavender crochet square?
It's quite easy! To make your square larger, simply add more rounds after the initial square is formed. Each round can consist of additional single crochets or cluster stitches, depending on your design preferences. Conversely, to make it smaller, you can reduce the number of rows or stitches in each round. I recommend checking your gauge frequently to keep track of size adjustments!

Why is my lavender crochet square curling at the edges?
Don't panic! Curling edges often happen when the tension is too tight or if the stitch count is off. Make sure you're keeping your stitches loose enough, especially around cluster stitches. If you've ensured your stitches are loose and it's still curling, you might try blocking the square to help flatten and shape it.

What hook size should I use for this project?
For the Blooming Lavender Motif Square, a 4.5 mm (US 7) crochet hook is recommended. This size works well with worsted weight yarn, helping you achieve that perfect balance of tension and stitch definition. If you prefer a looser or tighter fit, you can experiment with a different hook size, just remember to adjust your tension accordingly!

How do I fix dropped stitches in my lavender crochet square?
It’s an easy fix! Simply yarn over with your hook and pull through with a slip stitch to reintroduce your missing stitch. Then, continue working as normal. If you notice a gap, you may want to tighten up your surrounding stitches or use a needle to weave in a tail for extra security. Remember, it happens to the best of us, so take your time!

Can I substitute colors in my lavender crochet square?
Absolutely! This pattern is all about creativity. Don’t hesitate to swap out the colors for something that inspires you—think pastel pinks or blues instead of purples for the flowers, or even a vibrant background. The beauty of crafting lies in your personal touch, so let your imagination flourish!

Filed Under: Uncategorized

Charming Floral Crochet Granny Square for Cozy Decor

September 1, 2026 by Publisher Leave a Comment

Charming Floral Crochet Granny Square for Cozy Decor

As I sat on a cozy afternoon, the soft squish of yarn transformed into a blooming pink flower before my eyes, bringing a little garden indoors. The Pink Flower Granny Square is not just a delightful crochet granny square; it's a charming piece bursting with character that captures the joy of crafting. This project is perfect for intermediate crocheters looking to refine their skills while creating something truly beautiful. With its customizable colors and versatile applications—from stunning blankets to chic accessories—this square offers the satisfaction of both artistry and function. Imagine how it will add a whimsical yet elegant touch to your home décor. So let’s gather our supplies and embrace our creativity as we start stitching this floral masterpiece!

Pink Flower Granny Square Materials & Tools

Yarn

  • Cotton/Acrylic Blend Yarn – A medium (worsted) weight is perfect for softness and durability; you'll need approximately 150-200 yards in total.
  • Dusty Pink, Blush Pink, Cream, Sage Green, Rose Pink – Choose these shades for a charming floral design or opt for your favorite colors for customization.

Tools & Notions

  • 5.0mm (H-8) Crochet Hook – This size is recommended for comfortable stitching through the granny square.
  • Yarn Needle – A must-have for weaving in ends and giving your square a polished finish.
  • Stitch Markers – Helpful for keeping track of rounds, especially when working on the intricate floral details.

Embrace the joy of creating this lovely crochet granny square with these essentials!

Why Love This Crochet Granny Square?

Versatile Design: The Pink Flower Granny Square can transition beautifully between projects, allowing you to create everything from blankets to bags, sparking endless inspiration.

Skill Enhancement: With its combination of stitches, this pattern offers the perfect chance for intermediate crocheters to refine techniques and build confidence.

Charming Aesthetic: The whimsical floral design infuses any space with cheerful vibes, making it an ideal decorative piece for your home.

Color Customization: Experiment with different color palettes or embellishments to make each square uniquely yours, turning it into a stunning focal point.

Soft Yet Structured: Enjoy working with a lovely blend of cotton and acrylic fibers, ensuring a cozy feel and a durable finish that holds its shape beautifully.

Gauge & Sizing Notes

Don't skip the gauge swatch! Ensuring your crochet granny square measures correctly is crucial for achieving the intended size and drape. A standard crochet gauge guideline for most granny squares is 4×4 inches (10×10 cm), but your specific tension will guide the final outcome. If you're aiming to make your granny square larger, simply increase your starting chain in multiples of 6. Conversely, if your swatch is too small, consider switching to a larger hook size to loosen your tension. This careful attention to gauge and sizing will enhance the beauty and fit of your Pink Flower Granny Square, creating a charming piece you'll love!

Step-by-Step Pattern for Pink Flower Granny Square

Row 1: Create the Foundation
Start with a magic ring and work 6 single crochets (sc) into the ring. Pull the ring tight to close the center. Join with a slip stitch (sl st) into the first sc to form a circle. Your work should be tightly gathered at the center, setting the stage for the rest of the crochet granny square (6 sts).

Round 1: Build the Petals
Chain 3 (counts as 1 double crochet, dc), then work 2 dc into the same stitch for the first corner. Next, work 3 dc into each of the next 2 stitches, then 3 dc in the next for the corner. Repeat from * to * twice more, making sure to end with a slip stitch in the top of the initial chain 3. Your round should show four distinct corners and a total of 24 stitches (24 sts).

Round 2: Form the Flower Shape
Slip stitch into the next dc, chain 2 (counts as a hdc), and then work 1 hdc in the next 2 stitches. Now, in the next corner, work 2 dc, 1 hdc, and 1 sc in the same stitch for a petal. Follow this by chaining 2 and slipping stitch into the same corner. Repeat from * to * creating four identical petals around the square, ending with a sl st in the first hdc you made. Your work should exhibit a floral style with defined petals (8 petals total).

Round 3: Add the Leaves
Slip stitch into the corner space, then chain 3 (counts as a dc). In this corner space, work 1 dc, 1 hdc, and 1 sl st. In the next petal space, work 3 hdc into the space. Repeat this for each petal, and don't forget to return to the corner with the same leaf stitch pattern. Finish with a sl st in the third chain of the initial slip stitch. This round will introduce lovely leaf shapes surrounding your flower (24 sts).

Round 4: Final Border
Begin by slip stitching into any corner space and chain 1. Work 2 sc in the same space followed by 3 sc in each leaf space. In corners, work 3 sc in each corner space to keep your square nice and balanced. Continue around until you reach your starting point, joining with a sl st. This round enforces structure and completes the look of your crochet granny square with a neat edge (total stitches will vary).

What to Pair with Pink Flower Granny Square?

As you indulge in the delightful creation of your floral masterpiece, consider embarking on a journey to make a matching set that brings harmony to your crafting space.

  • Charming Tote Bag: Create a stylish tote using the same floral motifs; it’s both functional and a joy to carry.

  • Cozy Pillow Cover: Whip up a pillow cover to complement your granny square with added texture and floral beauty.

  • Matching Coasters: Use scraps to craft coasters that echo the pink hues, perfect for adding a touch of elegance to your coffee table.

  • Delicate Blanket: Combine multiple squares into a cozy blanket, each square radiating warmth and whimsy, transforming your spaces into a garden of comfort.

  • Floral Headband: Craft a chic headband with mini versions of your granny square; it’s a lovely accessory that showcases your crochet granny square skills.

Care Instructions for Pink Flower Granny Square

Machine Washing: Use cold water on a gentle cycle to prevent agitation, which could cause felting or pilling in your crochet granny square.

Hand Washing: For a more delicate approach, gently immerse your square in cold water with a mild detergent, avoiding vigorous rubbing.

Drying/Blocking: Lay your crochet granny square flat on a clean towel to dry, reshaping as necessary to maintain the beautiful floral design and crisp edges.

Storage: Store your granny square in a cool, dry place to protect it from dust and moisture, ensuring it stays lovely until you're ready to use it!

Expert Tips for Crochet Granny Square

Tension Matters: Maintain consistent tension throughout your work to ensure your crochet granny square has an even and beautiful drape.

Count Carefully: Regularly count your stitches, especially when forming the flower petals. This helps avoid misalignment and keeps your design intact.

Block for Shape: After finishing, consider blocking your square to enhance its shape and stitch definition. This step is vital for a polished look.

Check Your Foundation: Ensure the magic ring is tight, as this will affect the overall neatness of your crochet granny square’s center.

Utilize Stitch Markers: Use stitch markers to keep track of your rounds and petals, especially in more intricate sections where misplacement can occur easily.

Crochet Granny Square Variations

Embrace your creativity and personalize your crochet project with delightful twists that truly make it your own!

  • Yarn Substitutions: Swap medium worsted yarn for light worsted for a delicate, airy version of this granny square.
  • Color Experimentation: Try using deep purples or vibrant yellows for a bold floral statement, refreshing its look.
  • Larger Hook Fun: Opt for a larger hook to create a softer, drapier square ideal for wearable accessories.
  • Smaller Hook Precision: Use a smaller hook for a tighter fabric, perfect for coasters or intricate patchwork pieces.
  • Embellished Center: Add beads or embellishments to the flower's center for a shimmering focal point that captures the light.
  • Fringe Trim: Adorn the edges with a playful fringe for a fun, bohemian twist that adds texture and movement.
  • Color-Blocked Design: Alternate color blocks instead of floral motifs for a contemporary spin on this classic square.
  • Larger Size Option: Join more squares together to create a cozy throw blanket, expanding functionality while showcasing your artistry.

Pink Flower Granny Square FAQs

Can I use a different yarn for the Pink Flower Granny Square?
Absolutely! While I recommend a cotton and acrylic blend for its softness and durability, you can easily substitute with other yarn types. Just keep in mind that differing fibers may affect the drape and overall appearance of your crochet granny square. If you opt for a thicker yarn, consider adjusting your hook size accordingly.

How can I adjust the size of my granny square?
Don't panic! If you want a larger or smaller square, you can simply change your hook size. Using a larger hook will create a more drapey effect, while a smaller hook will tighten your stitches. Additionally, you can add more rounds to increase the size, or skip a round if you prefer it smaller.

Why is my crochet granny square curling at the edges?
This is a common issue that many crafters face. Don't worry! It usually happens when your tension is too tight or if you're using a hook that’s too small. I recommend re-checking your tension and experimenting with a larger hook to see if it helps minimize the curl.

What do I do if I accidentally drop a stitch?
It's an easy fix! If you notice a dropped stitch, simply use your crochet hook to carefully pick the yarn from the row below and pull it back through to catch up with the rest. Just make sure to keep track of your stitches to avoid this in the future!

What hook size should I use for this pattern?
The pattern recommends a 5 mm (H-8) crochet hook. This size works well for achieving the beautiful flower design. However, feel free to experiment with different hook sizes if you want to alter the texture of your crochet granny square! Just remember to check your gauge to maintain consistency.

Filed Under: Uncategorized

Charming Lotus Granny Square: A Unique Crochet Delight

September 1, 2026 by Publisher Leave a Comment

Charming Lotus Granny Square: A Unique Crochet Delight

As I settled down with my favorite yarn, the bustling world outside faded away, replaced by the rhythmic dance of my hook creating the mesmerizing Lotus Granny Square. This enchanting pattern is a perfect blend of floral beauty and traditional granny square charm, making it an ideal project for those looking to elevate their crochet skills. Not only will you craft a stunning focal point for your blankets or home decor, but you’ll also enjoy the satisfaction of mastering intricate techniques along the way. With its vibrant colors and cozy texture, this intermediate-level project invites you to forge a connection with nature through your art. Ready to dive in and start stitching your own Lotus Blossom Granny Square? Your crochet adventure awaits!

Lotus Granny Square Materials & Tools

Yarn

  • Worsted Weight Yarn – Choose cotton or a cotton-blend for softness and durability, using approximately 150-200 yards for your project.

Tools & Notions

  • 4.0 to 5.0 mm (G/6 or H/8) Hook – This size is perfect for achieving the correct tension and stitch definition for the lotus granny square.
  • Stitch Markers – Use these to keep track of rounds and clusters while crafting your square.
  • Tapestry Needle – Handy for weaving in ends and finishing off your projects neatly.

Why Choose the Lotus Granny Square?

Unique Design: The combination of floral motifs and a traditional granny square creates a stunning visual centerpiece for your projects.
Skill-Building: This pattern is perfect for intermediate crocheters looking to refine their skills while enjoying a rewarding crafting experience.
Versatile Use: Whether as part of a blanket or as wall decor, the Lotus Granny Square adds a touch of beauty to any space.
Colorful Possibilities: Experiment with different yarn colors to express your style, from soft pastels to bold hues.
Comforting Texture: The medium-density fabric offers just the right drape while maintaining its shape for various applications.
Creative Variations: The project's nature allows for endless customization, making each square uniquely yours!

Gauge & Sizing Notes

Don't skip the gauge swatch! Ensuring the correct tension is crucial for the Lotus Granny Square, as it directly impacts the final size and overall appearance of your project. A general guideline for crochet gauge is to aim for a tension swatch that measures 4×4 inches (10×10 cm), resulting in approximately 14 double crochets by 8 rows. If you find your gauge is off, you can adjust the size accordingly: for a larger square, increase your starting chain in multiples of 3 for the petals. Conversely, if your tension is tighter than desired, consider moving up to a larger hook size to achieve that beautiful drape and stitch definition in your Lotus Granny Square. Happy crocheting!

Step-by-Step Pattern for Lotus Blossom Granny Square

Round 1: Foundation Circle
Begin by making a slipknot, then ch 4. Join with a sl st to the first ch to form a circle. Inside the circle, work 12 dc, ensuring they are evenly spaced. This will create the center of your lotus granny square. At this point, your round should have 12 dc stitches (12 sts total), and the base should lay flat.

Round 2: Petal Formation
Ch 3 (counts as first dc), then make 1 dc in the same stitch. Now make 2 dc in each of the next 6 stitches, giving you a total of 12 dc (12 sts). To form petals, in the next stitch, work a (2 dc, ch 2, 2 dc) into the same stitch. Repeat this from * to * around, joining with a sl st to the top of the starting ch 3. You should see defined petals beginning to form.

Round 3: Completing the Petals
Slip stitch to the ch-2 space of the first petal. In this space, work (ch 3, 2 tr, ch 2, 2 tr) and sl st to the next ch-2 space of the following petal. Repeat from * to * around. This will round out your lotus petals, making them more pronounced. You should now have 3 sets of petals, which creates a beautiful layered look.

Round 4: Square Base
To create the body of the lotus granny square, slip stitch to the next ch-2 space, then ch 1. Work 3 sc in the same space. Now, in the next ch-2 space, work 3 sc. Repeat around to form the corners, placing 3 sc in each ch-2 space. You should end up with a total of 36 sc (36 sts). Your square should begin to take shape.

Round 5: Adding Texture
Ch 1 and work 1 sc in each of the 3 sc from the previous round. In the next sc, make a popcorn stitch (5 dc in the same stitch, then remove the hook and insert it into the first dc of the popcorn, pulling the last loop through). Continue placing a popcorn stitch in each subsequent group of 3 sc around the square. End with 12 popcorns total. Your lotus granny square will start to pop with texture!

Round 6: Finishing Edging
For the final round, slip stitch to a popcorn stitch and ch 1. Work a round of sc around the square, making sure to place 3 sc in each corner. This will help maintain the square shape and give it a polished finish. You should complete a total of 60 sc around, and your lotus granny square should look beautiful and well-defined at this stage.

Finishing Touch: Weaving in Ends
To finish your lotus granny square, cut the yarn, leaving a long tail for weaving. Use a tapestry needle to weave in all ends neatly, following the direction of the stitches. This final step ensures that your piece is tidy and ready for use in your next crochet project. Block your square if necessary to enhance its shape and texture.

Lotus Granny Square Variations & Substitutions

Dive into the delightful world of crochet customization, where your creativity can truly bloom!

  • Yarn Weight Swap: Try using a lighter weight, like DK (3) yarn, for a delicate version of your granny square.
  • Fiber Alternatives: Experiment with bamboo or wool blends for a luxurious finish and unique texture that stands out.
  • Color-Blocking: Create a playful design by alternating colors every few rounds, making your square an eclectic masterpiece.
  • Sizing Adjustments: Increase the hook size or opt for bulky yarn to make a larger granny square as a dramatic statement piece.
  • Textured Borders: Add a playful touch by incorporating a ruffled edge or a contrasting bobble stitch border for added visual interest.
  • Pom-Pom Addition: Attach a colorful pom-pom to each corner for a whimsical flair that brings a sense of fun and playfulness.
  • Fringe Detail: Incorporate fringe along the edges for a bohemian twist, transforming your square into a standout decor piece.
  • Decorative Stitches: Enhance the floral motif by adding surface crochet in contrasting colors to highlight the lotus petals further.

Let your imagination take flight as you explore these variations, creating a truly unique Lotus Granny Square that reflects your personal style!

Expert Tips for the Lotus Granny Square

  • Consistent Tension: Maintain even tension throughout your project; this ensures uniformity in the finished square and beautiful flower details.
  • Count Your Stitches: Keep a close eye on your stitch count, especially when transitioning from the flower to the square body, to prevent discrepancies.
  • Block Your Square: After finishing, consider blocking your lotus granny square to help set its shape and smooth out any irregularities for a polished look.
  • Use Stitch Markers: To stay organized, use stitch markers at the beginning of rounds and key transitions to avoid losing your place.
  • Check for Twists: When starting your foundation chain, ensure the chain isn’t twisted; this will lead to a more symmetrical and pleasing square.

How to Wash and Care for Your Lotus Granny Square

Washing: Gently hand wash your lotus granny square in cold water with mild detergent. Avoid agitating the piece to prevent felting or pilling; treat it with love!

Drying: Lay your finished square flat on a clean towel or blocking mat to dry. This helps maintain its shape and texture, ensuring your crochet creation looks stunning for years to come.

Storage: Store your lotus granny square in a cool, dry place away from direct sunlight. Consider using a breathable cloth bag to protect it from dust while allowing airflow.

Blocking: If needed, block your square after washing to help define its shape and smooth out any imperfections. This step elevates your finished piece, making it truly shine!

What to Pair with Lotus Blossom Granny Square?

Imagine crafting a cozy collection that gracefully dances together, seamlessly blending aesthetics and function in your space.

  • Charming Coasters: These small squares can feature the same floral motifs, perfect for protecting your surfaces while bringing unity to your decor.
  • Delicate Pillow Covers: Elevate your living room with matching pillows that echo the lotus design, adding both comfort and flair.
  • Vibrant Throw Blanket: Use multiple lotus granny squares to create a inviting blanket, perfect for snuggling up on chilly evenings.
  • Lovely Wall Hanging: Frame your completed squares in a dowel hanger, transforming your crochet work into captivating wall art.
  • Matching Shawl or Scarf: Use the same yarn and stitch patterns to create a lightweight covering that complements your square's charm.

Lotus Blossom Granny Square FAQs

Can I substitute cotton yarn with acrylic for the Lotus Granny Square?
Absolutely! While cotton yields a softer and more durable finished piece, you can use acrylic yarn. Just keep in mind that the texture and drape may differ slightly, so choose vibrant colors that resonate with your design.

How do I make the Lotus Granny Square bigger or smaller?
To adjust the size of your square, consider using a larger or smaller hook size. For a bigger square, move up to a 6.0 mm hook or use a bulkier yarn. Conversely, for a smaller square, select a finer yarn or downsize your hook to 3.5 mm to maintain the intricate design.

Why is my lotus granny square curling up at the edges?
Don't panic! Curling can often occur due to tension issues. Make sure you're keeping a consistent tension throughout your project. If that doesn’t help, try blocking your work after finishing; this is an easy fix that can smooth out irregularities and set your square shape.

What hook size should I use for the Lotus Granny Square?
The recommended hook size for this project is between 4.0 to 5.0 mm (G/6 or H/8). This range will help achieve the right stitch definition, ensuring your lotus flower and square body look beautiful.

How can I fix dropped stitches in my Lotus Granny Square?
If you’ve dropped a stitch, don’t worry; it's simple to fix! Use your tapestry needle to carefully insert it back into its correct position. For double or treble crochets, you might need to unpick a few stitches to ensure everything aligns properly. Take your time, and your square will be as good as new!

What if my finished square doesn’t look like the example?
Remember, crafting is all about personal expression! If your Lotus Granny Square looks different, check your stitch count and blocking technique. Variations in yarn type can also yield lovely, unexpected results. Embrace your unique creation—it’s part of your artistic journey!

Filed Under: Uncategorized

Charming Floral Crochet Granny Square for Cozy Decor

September 1, 2026 by Publisher Leave a Comment

Charming Floral Crochet Granny Square for Cozy Decor

As I sat on a cozy afternoon, the soft squish of yarn transformed into a blooming pink flower before my eyes, bringing a little garden indoors. The Pink Flower Granny Square is not just a delightful crochet granny square; it's a charming piece bursting with character that captures the joy of crafting. This project is perfect for intermediate crocheters looking to refine their skills while creating something truly beautiful. With its customizable colors and versatile applications—from stunning blankets to chic accessories—this square offers the satisfaction of both artistry and function. Imagine how it will add a whimsical yet elegant touch to your home décor. So let’s gather our supplies and embrace our creativity as we start stitching this floral masterpiece!

Pink Flower Granny Square Materials & Tools

Yarn

  • Cotton/Acrylic Blend Yarn – A medium (worsted) weight is perfect for softness and durability; you'll need approximately 150-200 yards in total.
  • Dusty Pink, Blush Pink, Cream, Sage Green, Rose Pink – Choose these shades for a charming floral design or opt for your favorite colors for customization.

Tools & Notions

  • 5.0mm (H-8) Crochet Hook – This size is recommended for comfortable stitching through the granny square.
  • Yarn Needle – A must-have for weaving in ends and giving your square a polished finish.
  • Stitch Markers – Helpful for keeping track of rounds, especially when working on the intricate floral details.

Embrace the joy of creating this lovely crochet granny square with these essentials!

Why Love This Crochet Granny Square?

Versatile Design: The Pink Flower Granny Square can transition beautifully between projects, allowing you to create everything from blankets to bags, sparking endless inspiration.

Skill Enhancement: With its combination of stitches, this pattern offers the perfect chance for intermediate crocheters to refine techniques and build confidence.

Charming Aesthetic: The whimsical floral design infuses any space with cheerful vibes, making it an ideal decorative piece for your home.

Color Customization: Experiment with different color palettes or embellishments to make each square uniquely yours, turning it into a stunning focal point.

Soft Yet Structured: Enjoy working with a lovely blend of cotton and acrylic fibers, ensuring a cozy feel and a durable finish that holds its shape beautifully.

Gauge & Sizing Notes

Don't skip the gauge swatch! Ensuring your crochet granny square measures correctly is crucial for achieving the intended size and drape. A standard crochet gauge guideline for most granny squares is 4×4 inches (10×10 cm), but your specific tension will guide the final outcome. If you're aiming to make your granny square larger, simply increase your starting chain in multiples of 6. Conversely, if your swatch is too small, consider switching to a larger hook size to loosen your tension. This careful attention to gauge and sizing will enhance the beauty and fit of your Pink Flower Granny Square, creating a charming piece you'll love!

Step-by-Step Pattern for Pink Flower Granny Square

Row 1: Create the Foundation
Start with a magic ring and work 6 single crochets (sc) into the ring. Pull the ring tight to close the center. Join with a slip stitch (sl st) into the first sc to form a circle. Your work should be tightly gathered at the center, setting the stage for the rest of the crochet granny square (6 sts).

Round 1: Build the Petals
Chain 3 (counts as 1 double crochet, dc), then work 2 dc into the same stitch for the first corner. Next, work 3 dc into each of the next 2 stitches, then 3 dc in the next for the corner. Repeat from * to * twice more, making sure to end with a slip stitch in the top of the initial chain 3. Your round should show four distinct corners and a total of 24 stitches (24 sts).

Round 2: Form the Flower Shape
Slip stitch into the next dc, chain 2 (counts as a hdc), and then work 1 hdc in the next 2 stitches. Now, in the next corner, work 2 dc, 1 hdc, and 1 sc in the same stitch for a petal. Follow this by chaining 2 and slipping stitch into the same corner. Repeat from * to * creating four identical petals around the square, ending with a sl st in the first hdc you made. Your work should exhibit a floral style with defined petals (8 petals total).

Round 3: Add the Leaves
Slip stitch into the corner space, then chain 3 (counts as a dc). In this corner space, work 1 dc, 1 hdc, and 1 sl st. In the next petal space, work 3 hdc into the space. Repeat this for each petal, and don't forget to return to the corner with the same leaf stitch pattern. Finish with a sl st in the third chain of the initial slip stitch. This round will introduce lovely leaf shapes surrounding your flower (24 sts).

Round 4: Final Border
Begin by slip stitching into any corner space and chain 1. Work 2 sc in the same space followed by 3 sc in each leaf space. In corners, work 3 sc in each corner space to keep your square nice and balanced. Continue around until you reach your starting point, joining with a sl st. This round enforces structure and completes the look of your crochet granny square with a neat edge (total stitches will vary).

What to Pair with Pink Flower Granny Square?

As you indulge in the delightful creation of your floral masterpiece, consider embarking on a journey to make a matching set that brings harmony to your crafting space.

  • Charming Tote Bag: Create a stylish tote using the same floral motifs; it’s both functional and a joy to carry.

  • Cozy Pillow Cover: Whip up a pillow cover to complement your granny square with added texture and floral beauty.

  • Matching Coasters: Use scraps to craft coasters that echo the pink hues, perfect for adding a touch of elegance to your coffee table.

  • Delicate Blanket: Combine multiple squares into a cozy blanket, each square radiating warmth and whimsy, transforming your spaces into a garden of comfort.

  • Floral Headband: Craft a chic headband with mini versions of your granny square; it’s a lovely accessory that showcases your crochet granny square skills.

Care Instructions for Pink Flower Granny Square

Machine Washing: Use cold water on a gentle cycle to prevent agitation, which could cause felting or pilling in your crochet granny square.

Hand Washing: For a more delicate approach, gently immerse your square in cold water with a mild detergent, avoiding vigorous rubbing.

Drying/Blocking: Lay your crochet granny square flat on a clean towel to dry, reshaping as necessary to maintain the beautiful floral design and crisp edges.

Storage: Store your granny square in a cool, dry place to protect it from dust and moisture, ensuring it stays lovely until you're ready to use it!

Expert Tips for Crochet Granny Square

Tension Matters: Maintain consistent tension throughout your work to ensure your crochet granny square has an even and beautiful drape.

Count Carefully: Regularly count your stitches, especially when forming the flower petals. This helps avoid misalignment and keeps your design intact.

Block for Shape: After finishing, consider blocking your square to enhance its shape and stitch definition. This step is vital for a polished look.

Check Your Foundation: Ensure the magic ring is tight, as this will affect the overall neatness of your crochet granny square’s center.

Utilize Stitch Markers: Use stitch markers to keep track of your rounds and petals, especially in more intricate sections where misplacement can occur easily.

Crochet Granny Square Variations

Embrace your creativity and personalize your crochet project with delightful twists that truly make it your own!

  • Yarn Substitutions: Swap medium worsted yarn for light worsted for a delicate, airy version of this granny square.
  • Color Experimentation: Try using deep purples or vibrant yellows for a bold floral statement, refreshing its look.
  • Larger Hook Fun: Opt for a larger hook to create a softer, drapier square ideal for wearable accessories.
  • Smaller Hook Precision: Use a smaller hook for a tighter fabric, perfect for coasters or intricate patchwork pieces.
  • Embellished Center: Add beads or embellishments to the flower's center for a shimmering focal point that captures the light.
  • Fringe Trim: Adorn the edges with a playful fringe for a fun, bohemian twist that adds texture and movement.
  • Color-Blocked Design: Alternate color blocks instead of floral motifs for a contemporary spin on this classic square.
  • Larger Size Option: Join more squares together to create a cozy throw blanket, expanding functionality while showcasing your artistry.

Pink Flower Granny Square FAQs

Can I use a different yarn for the Pink Flower Granny Square?
Absolutely! While I recommend a cotton and acrylic blend for its softness and durability, you can easily substitute with other yarn types. Just keep in mind that differing fibers may affect the drape and overall appearance of your crochet granny square. If you opt for a thicker yarn, consider adjusting your hook size accordingly.

How can I adjust the size of my granny square?
Don't panic! If you want a larger or smaller square, you can simply change your hook size. Using a larger hook will create a more drapey effect, while a smaller hook will tighten your stitches. Additionally, you can add more rounds to increase the size, or skip a round if you prefer it smaller.

Why is my crochet granny square curling at the edges?
This is a common issue that many crafters face. Don't worry! It usually happens when your tension is too tight or if you're using a hook that’s too small. I recommend re-checking your tension and experimenting with a larger hook to see if it helps minimize the curl.

What do I do if I accidentally drop a stitch?
It's an easy fix! If you notice a dropped stitch, simply use your crochet hook to carefully pick the yarn from the row below and pull it back through to catch up with the rest. Just make sure to keep track of your stitches to avoid this in the future!

What hook size should I use for this pattern?
The pattern recommends a 5 mm (H-8) crochet hook. This size works well for achieving the beautiful flower design. However, feel free to experiment with different hook sizes if you want to alter the texture of your crochet granny square! Just remember to check your gauge to maintain consistency.

Filed Under: Uncategorized

  • « Previous Page
  • 1
  • …
  • 9
  • 10
  • 11
  • 12
  • 13
  • …
  • 41
  • Next Page »

Recent Posts

  • Chic Crochet Watch Band Pattern: Scalloped Elegance
  • Vibrant Crochet Granny Square: A Floral Delight to Create
  • Pocket Otter Crochet: Your Adorable Amigurumi Companion
  • Cozy Up with This Festive Crochet Tree Cozy Pattern
  • Chic Crochet Babydoll Dress: A Timeless Pattern for Spring

Recent Comments

No comments to show.
Fast Crochet Patterns Logo

Welcome to Fast Crochet Patterns, your curated editorial blog for modern, handmade aesthetics. Discover an elegant collection of contemporary designs and carefully crafted tutorials—where every beautiful pattern is completely free to inspire your next creation.

Join the Studio

Subscribe for our latest free patterns and warm, minimal crochet inspiration delivered to your inbox.


Collections

  • Accessories
  • Amigurumi
  • Baby
  • Bags

More Patterns

  • Cardigan
  • Dress
  • Flowers
  • Granny Square

Information

  • About
  • Contact
  • Privacy Policy
  • Terms Of Use
  • Disclaimer

© 2026 Fast Crochet Patterns. All rights reserved.