
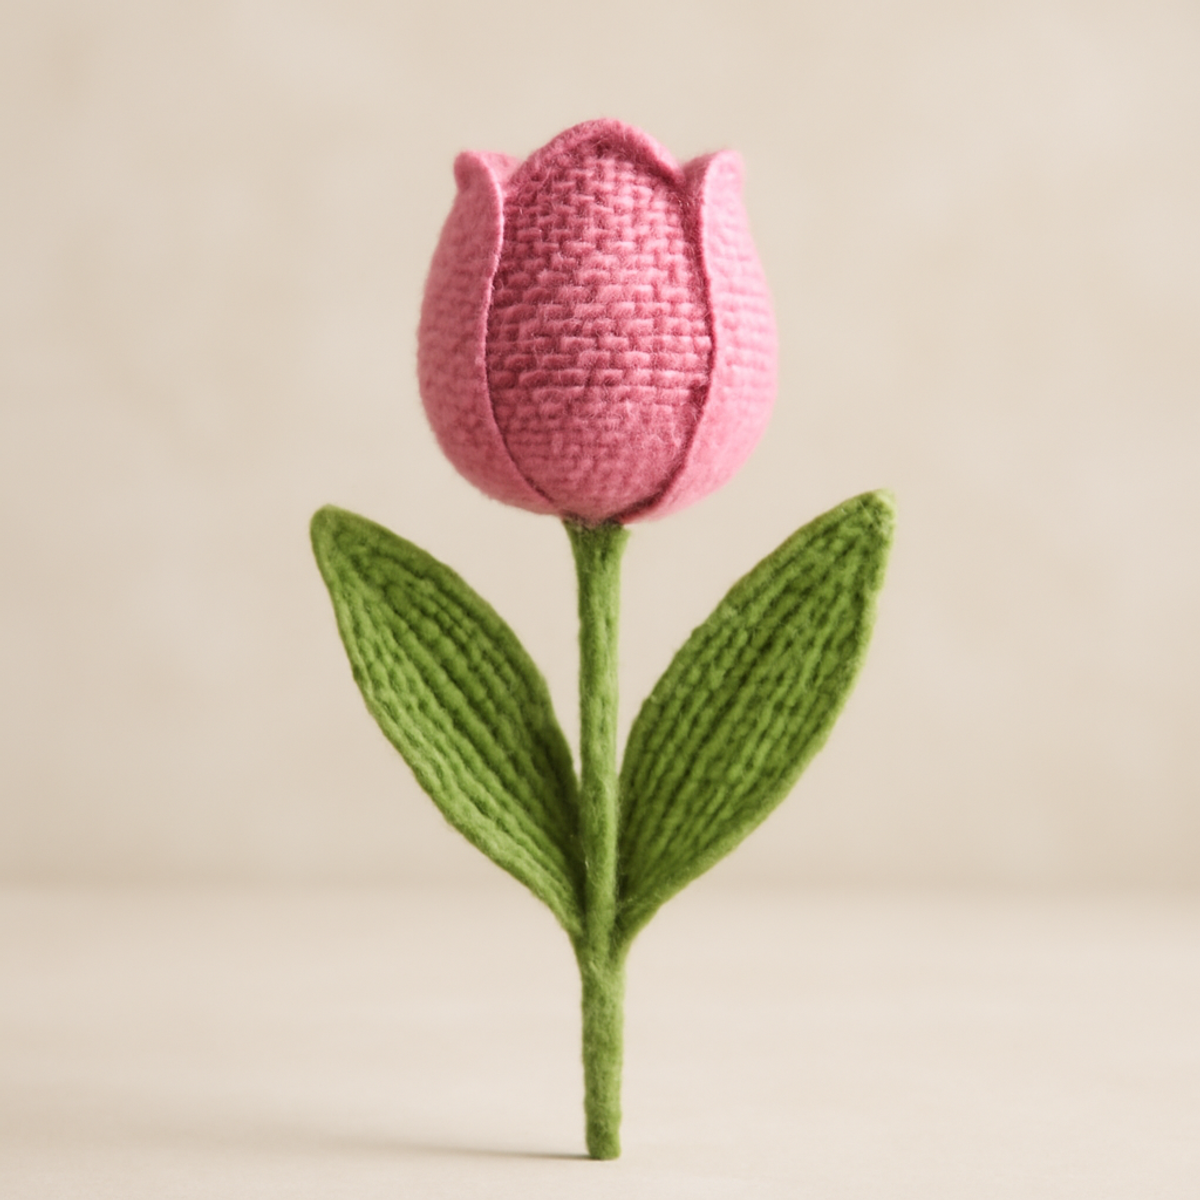
As I sat on my cozy couch, yarn in hand, I found joy in transforming simple strands into something captivating. The crochet tulip pattern beckons, inviting crafters to indulge in the art of floral creation while learning essential skills along the way. This project isn’t just another flower; it’s a playful yet elegant way to brighten up your decor with personalized touches. One of the highlights is how easy it is to customize; you can mix and match your favorite colors for the petals, resulting in a unique tulip that reflects your style. Plus, this pattern is perfect for all skill levels, making it a delightful blend of creativity and learning. Grab your hook, and let’s dive into crafting a charming crochet tulip that will bring a touch of beauty to any setting!
Charming Crochet Tulip Materials & Tools
-
Yarn
- Worsted Weight Yarn – Approximately 100-150 yards of pink yarn for petals and 50-75 yards of green yarn for leaves and stem; suitable for your vibrant crochet tulip pattern.
- Fiber Type – Acrylic or cotton yarn works beautifully for a soft, structured finish.
-
Tools & Notions
- 2.5mm (B-1) Crochet Hook – Ideal for achieving the fine stitches required for this project.
- Yarn Needle – Essential for assembly and securely fastening ends.
- Scissors – For trimming yarn as needed during your crafting journey.
- Floral Wire or Pipe Cleaner – Provides structure to your tulip, enhancing its shape.
- Stitch Markers – Helpful for tracking rows as you create your lovely flower.
- Optional Fiberfill – If you choose to make a plush version of your crochet tulip, this will add a delightful softness.
Why Choose This Crochet Tulip Pattern?
Vibrant Aesthetic: The charming design of this crochet tulip adds a touch of elegance to any home decor, making it a perfect centerpiece or accent piece.
Easy Customization: With options for various colors, you can tailor your tulip to match personal style or seasonal themes, ensuring each flower is uniquely yours.
Skill Development: This pattern is great for beginners and intermediate crafters alike, enhancing important skills like stitch management and assembly.
Quick & Rewarding: Spend a few hours transforming yarn into a delightful flower, providing instant satisfaction as your creation comes to life.
Cozy Texture: The use of worsted weight yarn results in soft yet sturdy petals that hold their shape beautifully, making your crochet tulip both inviting and durable.
Gauge & Sizing Notes
Don't skip your tension swatch! Checking your gauge is crucial when working on the crochet tulip pattern, as it ensures your blooms come out beautifully shaped and proportional. A general guideline for this project is to aim for a gauge of 4×4 inches (10×10 cm), which usually translates to about 14 double crochets by 8 rows. To adjust the size of your tulip, you can increase your starting chain in multiples of 2 if you wish to make a larger flower; conversely, to reduce size, simply decrease your chain. If your tension doesn't match, don't worry! If your swatch is too small, try using a larger hook size for a better fit. Happy crocheting!
Step-by-Step Pattern for Charming Crochet Tulip
Row 1: Creating the Petal Base
Chain 15 plus 1 turning chain. In the second chain from the hook, work 1 sc, then 1 hdc in the next chain. In the next chain, work 3 dc for the petal shape, followed by 1 hdc and 1 sc in the last chain. Turn your work and repeat the above stitches on the second side (12 sts).
Row 2: Shaping the Petal
For the second side of the petal, start with 1 sc, then 1 hdc in the next stitch. Work 3 dc to create the curve, followed by 1 hdc and 1 sc before connecting both ends. Use a sl st in the top chain to close the petal, then fasten off and weave in the ends. (Total: 2 petals).
Row 3: Make More Petals
Repeat Rows 1 and 2 until you have a total of 6 petals for your crochet tulip pattern. Each petal should have a gentle curve, feeling smooth and somewhat structured. Arrange the petals to ensure they are symmetrical and create a lovely shape.
Step 4: Assembling the Flower
Take all 6 petals and overlap them slightly to form the tulip's bloom. Using a yarn needle and working from the base, stitch the petals together securely, making sure the tops are gathered closely for a rounded finish. (Your flower will start to take shape at this point.)
Step 5: Closing the Petal Top
Once the petals are securely stitched together, close the top edges by sewing in and out of the stitches on the top row. This will help stabilize the flower. If you desire a plush look, add a small amount of fiberfill now, gently stuffing the petals to create a fuller bloom.
Step 6: Creating the Leaves
To make the leaves, chain 10. In the third chain from the hook, work 1 hdc, 1 dc in the next chain, then 1 hdc. For the remaining chains, work 1 sc and fasten off. Shape the leaf by folding the ends slightly toward the center, securing the shape as you go.
Step 7: Attaching Leaves
Position the leaves around the base of your assembled flower, slightly overlapping them for a natural appearance. Stitch them in place securely using your yarn needle to give your crochet tulip pattern a cohesive and complete look. The leaves should spread out elegantly, framing the bloom beautifully.
Step 8: Final Touches
Trim any visible yarn ends, ensuring a tidy finish for your crochet tulip. Use a floral wire or pipe cleaner as a stem to enhance the flower's structure. Insert the wire into the base of the flower, and your charming crochet tulip is now ready to brighten any space!
What to Pair with Charming Crochet Tulip
As you delight in crafting your vibrant tulip, consider enhancing your space with a matching project that beautifully complements these blossoms.
-
Crochet Leaf Coasters: Create charming coasters that echo the tulip’s leaves, adding a cohesive and playful touch to your decor. These coasters can be in varying shades of green, mirroring the leaves of your tulips while also protecting your surfaces.
-
Colorful Flower Pot Cover: Whip up a cozy, colorful cover for your favorite plant pot, harmonizing with the vibrant petals of your tulips. This project allows for delightful customization, letting your personality shine through in a flawless garden display.
-
Floral Wall Hanging: Design a stunning wall hanging using your crochet tulip pattern alongside additional blooms or greenery. This artistic flair will bring warmth and whimsy to any room, creating an enchanting focal point for your space.
-
Crochet Spring Headband: Use leftover yarn to create a playful headband that features a tulip-inspired design. This accessory not only compliments your floral theme but also brings a touch of whimsy to your outfit.
-
Matching Crochet Baskets: Craft lovely baskets to store your yarn or craft supplies. By choosing colors that reflect your tulip petals and leaves, you'll keep your crafting space organized while keeping the floral aesthetic alive.
Crochet Tulip Pattern Variations
Embrace the joy of personalization with these delightful variations for your crochet tulip pattern!
-
Color Combinations: Mix contrasting colors for petals like bright yellow and deep purple to create a vibrant garden feel. Play around with seasonal palettes—think pastel hues for spring or warm tones for autumn!
-
Glossy Yarns: Opt for metallic or glossy yarn to give your tulip a sophisticated shimmer. This twist adds elegance, perfect for special occasions or decorative pieces.
-
Yarn Weight Swap: Use a bulkier yarn to make a larger tulip, enhancing its presence as a statement piece. A thicker yarn offers a cozy, plush look, turning your flower into an eye-catching focal point.
-
Variegated Leaves: Try variegated yarn for your leaves to lend a whimsical vibe. The subtle color transitions will create an enchanting contrast against the solid petals.
-
Textured Edges: Add a playful edge by incorporating a scalloped stitch around the top of the petals. This modification introduces a lovely texture and visual interest, perfect for those who adore unique details.
-
Add a Pom-Pom: Finish with a charming pom-pom at the center of the tulip to add a fun touch. This playful embellishment can echo the colors of the petals, creating a delightful pop!
-
Fringed Leaves: For an adventurous twist, create fringes along the edges of the leaves. This technique adds a bohemian flair, setting your tulip apart in any floral display.
-
Size Adjustments: Play with hook sizes to adjust the tulip's overall height—create mini versions for table centerpieces or grander blooms for floor arrangements. Let your crochet tulip journey reflect your imagination!
Expert Tips for Your Crochet Tulip
-
Manage Your Tension: Consistent tension is key for even petals. If they feel too loose, consider switching to a smaller hook size for a tighter finish.
-
Count Carefully: Losing count while crocheting petals can lead to asymmetry. Keep a stitch marker handy or count out loud to maintain uniformity.
-
Block Your Petals: Lightly block your finished petals to set their shape. This helps them maintain their beautiful curves and adds a polished look to your crochet tulip pattern.
-
Secure Finishes: When assembling, ensure your yarn ends are fastened tightly. This prevents unraveling and maintains the integrity of your delicate flower structure.
-
Practice Patience: Take your time with each petal and leaf. Rushing may lead to mistakes; enjoy the process and let your creativity blossom!
How to Wash and Care for Your Crochet Tulip
Hand Washing: Gently hand wash your crochet tulip in cold water with mild detergent to prevent damage and maintain its shape. Avoid wringing to keep the petals from stretching.
Drying/Blocking: Lay the crochet tulip flat on a clean, dry towel to air dry. For optimal shape, lightly block the petals by adjusting their curves while damp.
Storage: Store your finished crochet tulip in a cool, dry place, away from direct sunlight, to preserve its vibrant colors and prevent fading.
Avoiding Agitation: Never machine wash or agitate your crochet tulip; this could lead to felting or pilling, which detracts from its charming appearance.
Charming Crochet Tulip FAQs
Can I substitute different yarn types for my crochet tulip pattern?
Absolutely! While the pattern suggests worsted weight yarn, you can experiment with other types. If you opt for cotton instead of acrylic, you’ll get a different texture—smoother and a bit more structured. Just be sure to check your gauge, as this will impact the final size of your tulip.
How can I make my crochet tulip pattern larger or smaller?
If you'd like to adjust the size, consider using a thicker yarn and a larger hook for a more substantial tulip. Alternatively, using a finer yarn and a smaller hook will give you a daintier version. Remember to maintain the same stitch count for the petals to keep the design consistent!
Why is my crochet tulip curling at the edges?
Don’t panic! Curling edges often happen when the tension is too loose. If this is the case, switching to a smaller hook size can help create a tighter fabric. You might also try lightly blocking your petals by adjusting their shape while damp to help flatten them.
How do I fix dropped stitches in my crochet tulip?
It’s an easy fix! Just pull the working yarn back to the dropped stitch, lift it quickly to make sure all loops are picked up again. Use your crochet hook to ensure each stitch is secure, and if you're unsure, don’t hesitate to give it another go—practice makes perfect!
What hook size should I use for my crochet tulip pattern?
For best results, a 2.5mm (B-1) crochet hook is recommended to achieve the defined stitches needed for your tulip's delicate petals. If you find your stitches too tight or too loose, adjust your hook size accordingly for a better fit.
How do I keep my crochet tulip looking neat and structured?
Maintaining even tension while crocheting is key! Carefully count your stitches for each petal to ensure uniformity. When assembling, make sure to fasten all ends securely. These small details create a well-structured, beautifully crafted flower!

Leave a Reply